
Chocolate Pie Recipe
This post may contain affiliate links. As an Amazon Associate I earn from qualifying purchases. Please read my disclosure policy.

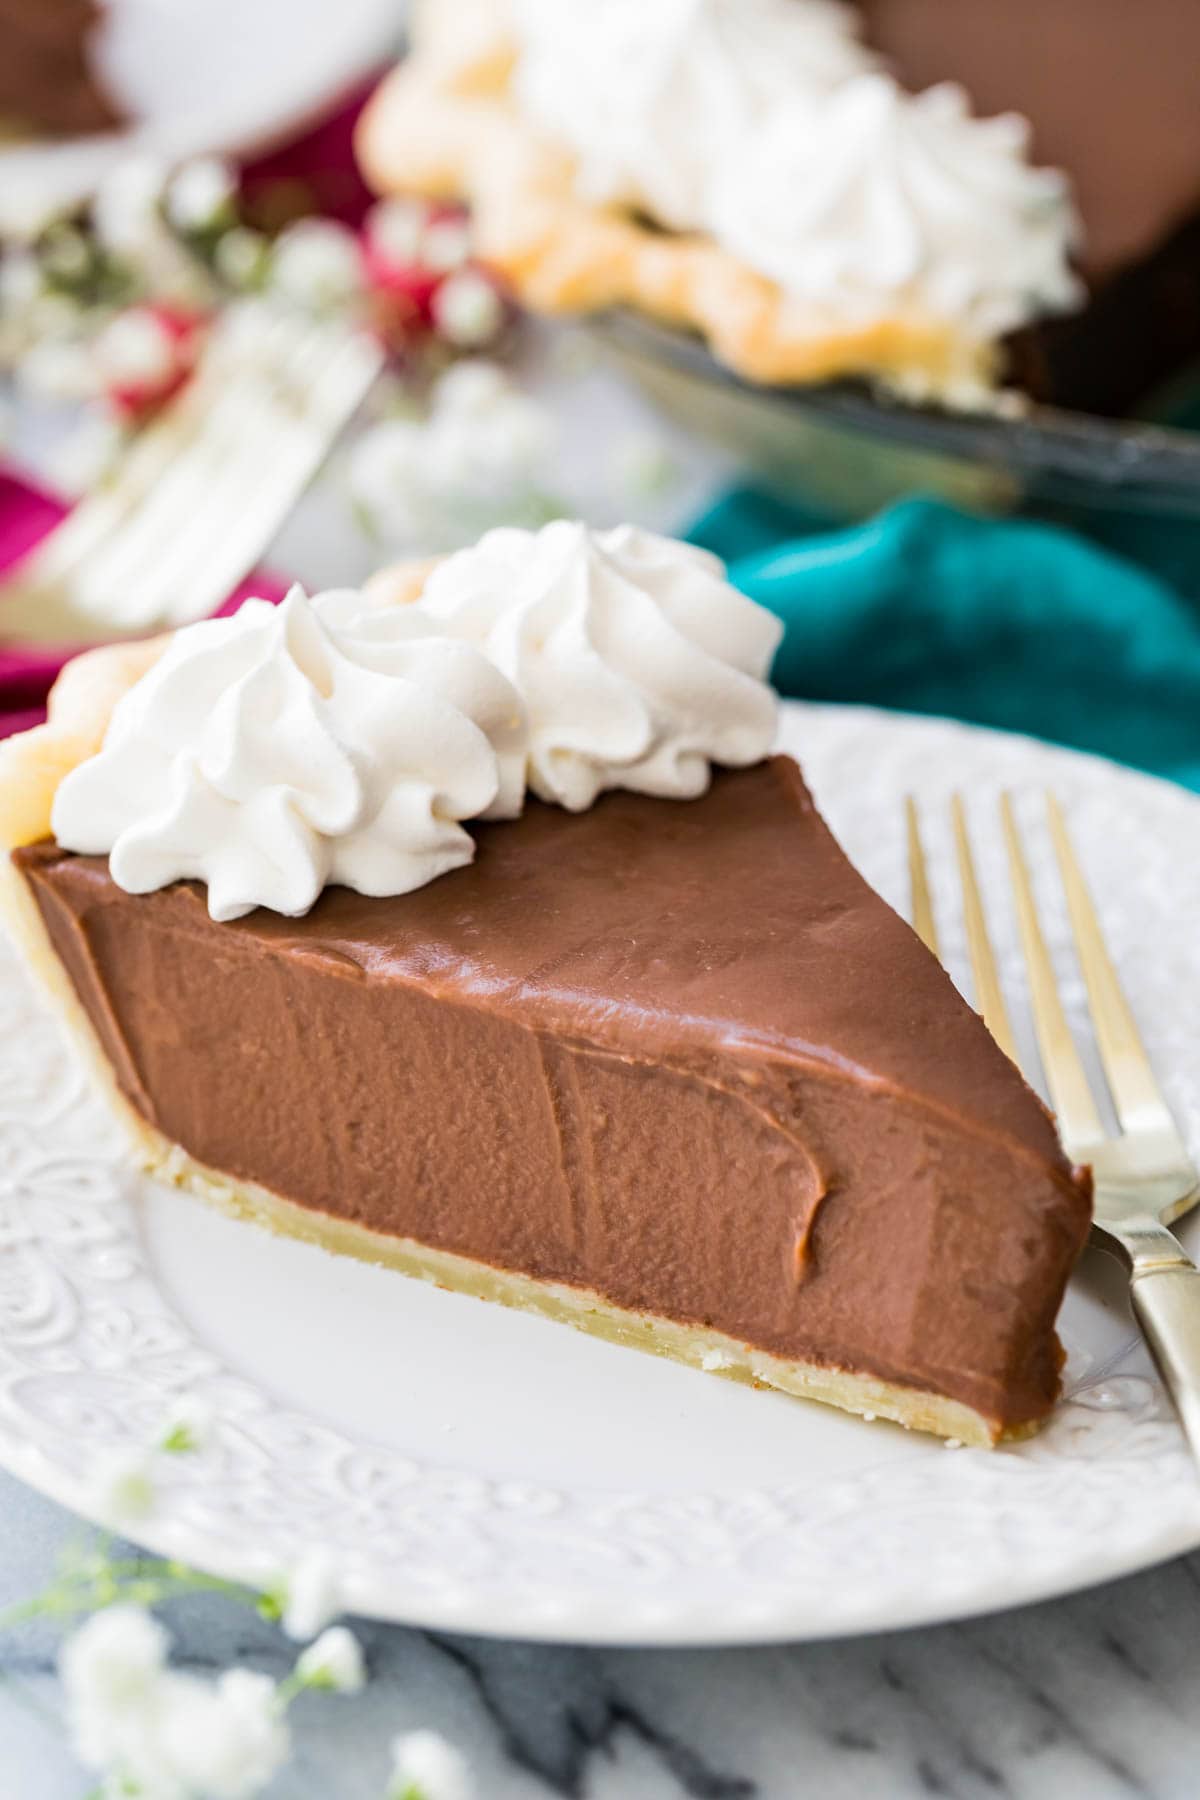
If you’re looking for a homemade chocolate pie recipe that’s rich, silky, and made completely from scratch, well this one’s for you. No box-mixes or shortcuts, I’ll show you how to make a smooth, homemade chocolate pudding topped with a cloud of fresh whipped cream. It’s also a great make-ahead option that’s even better the next day. Recipe includes a how-to video!
Classic Chocolate Pie (From Scratch, No Box Mix!)
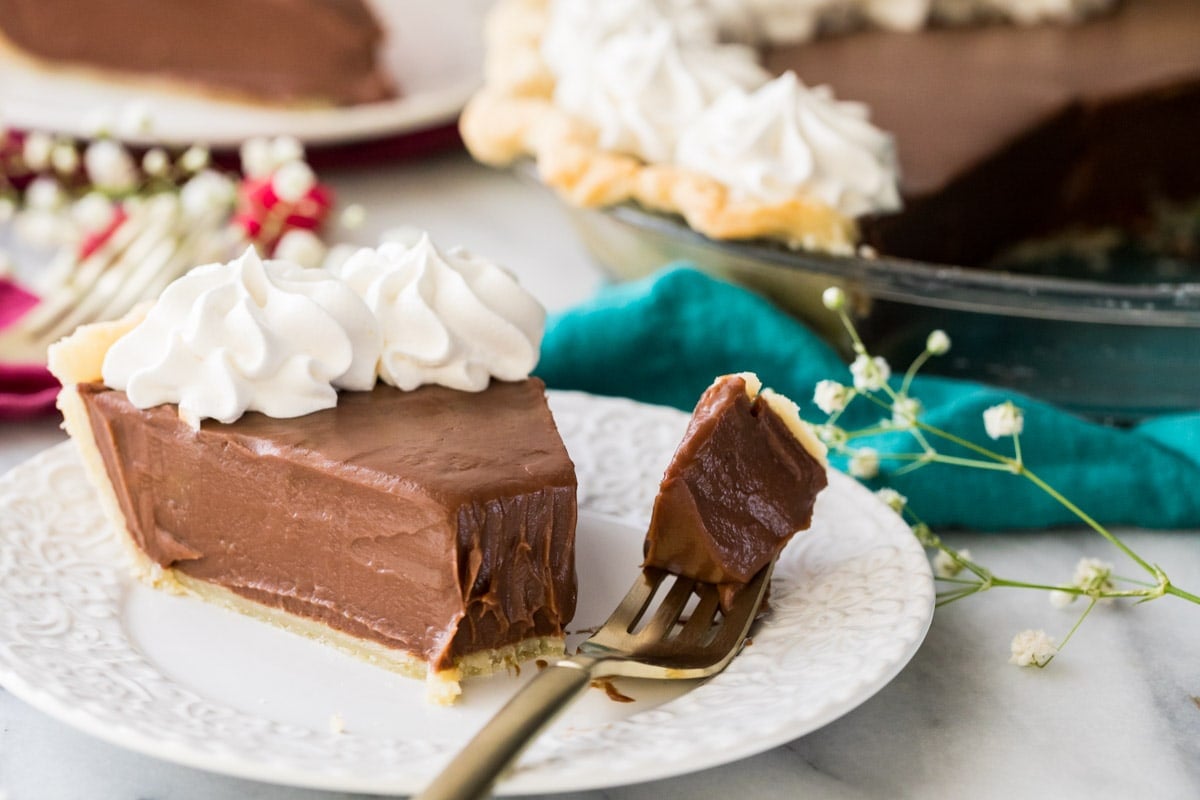
A true classic, I feel a good chocolate pie recipe is often overshadowed by holiday heavy-hitters like my pumpkin pie and my pecan pie recipe. But one bite, and you’ll wonder how anyone could overlook this masterpiece. It’s everything a great pie should be: rich, silky, decadent with a sliceable texture somewhere between a custard and a pudding.
Why This Chocolate Pie Recipe WORKS
- No box mixes or shortcuts. I’m sharing all my tips and tricks to make a real, indulgent and homemade chocolate pudding filling from scratch, and also link to my (favorite) flaky, buttery and homemade pie crust. When it’s done chilling, I suggest you take it a step further and serve with a dollop of homemade whipped cream!
- Sets perfectly so it’s sliceable (not scoopable!). The secret’s in just the right ratio of cream to milk, cooking low and slow until the filling til perfectly thickened, and chilling the pie for several hours to overnight.
- Real chocolate, not just cocoa. Melted chocolate adds body, stability, depth, and silky, melt-in-your-mouth finish that you just can’t get from cocoa powder.
- Perfect for making in advance. The pie will need to chill in the refrigerator for at least 6 hours before serving, making this an ideal dessert to prep a day ahead of time (I love doing this for Thanksgiving!).
Ingredients
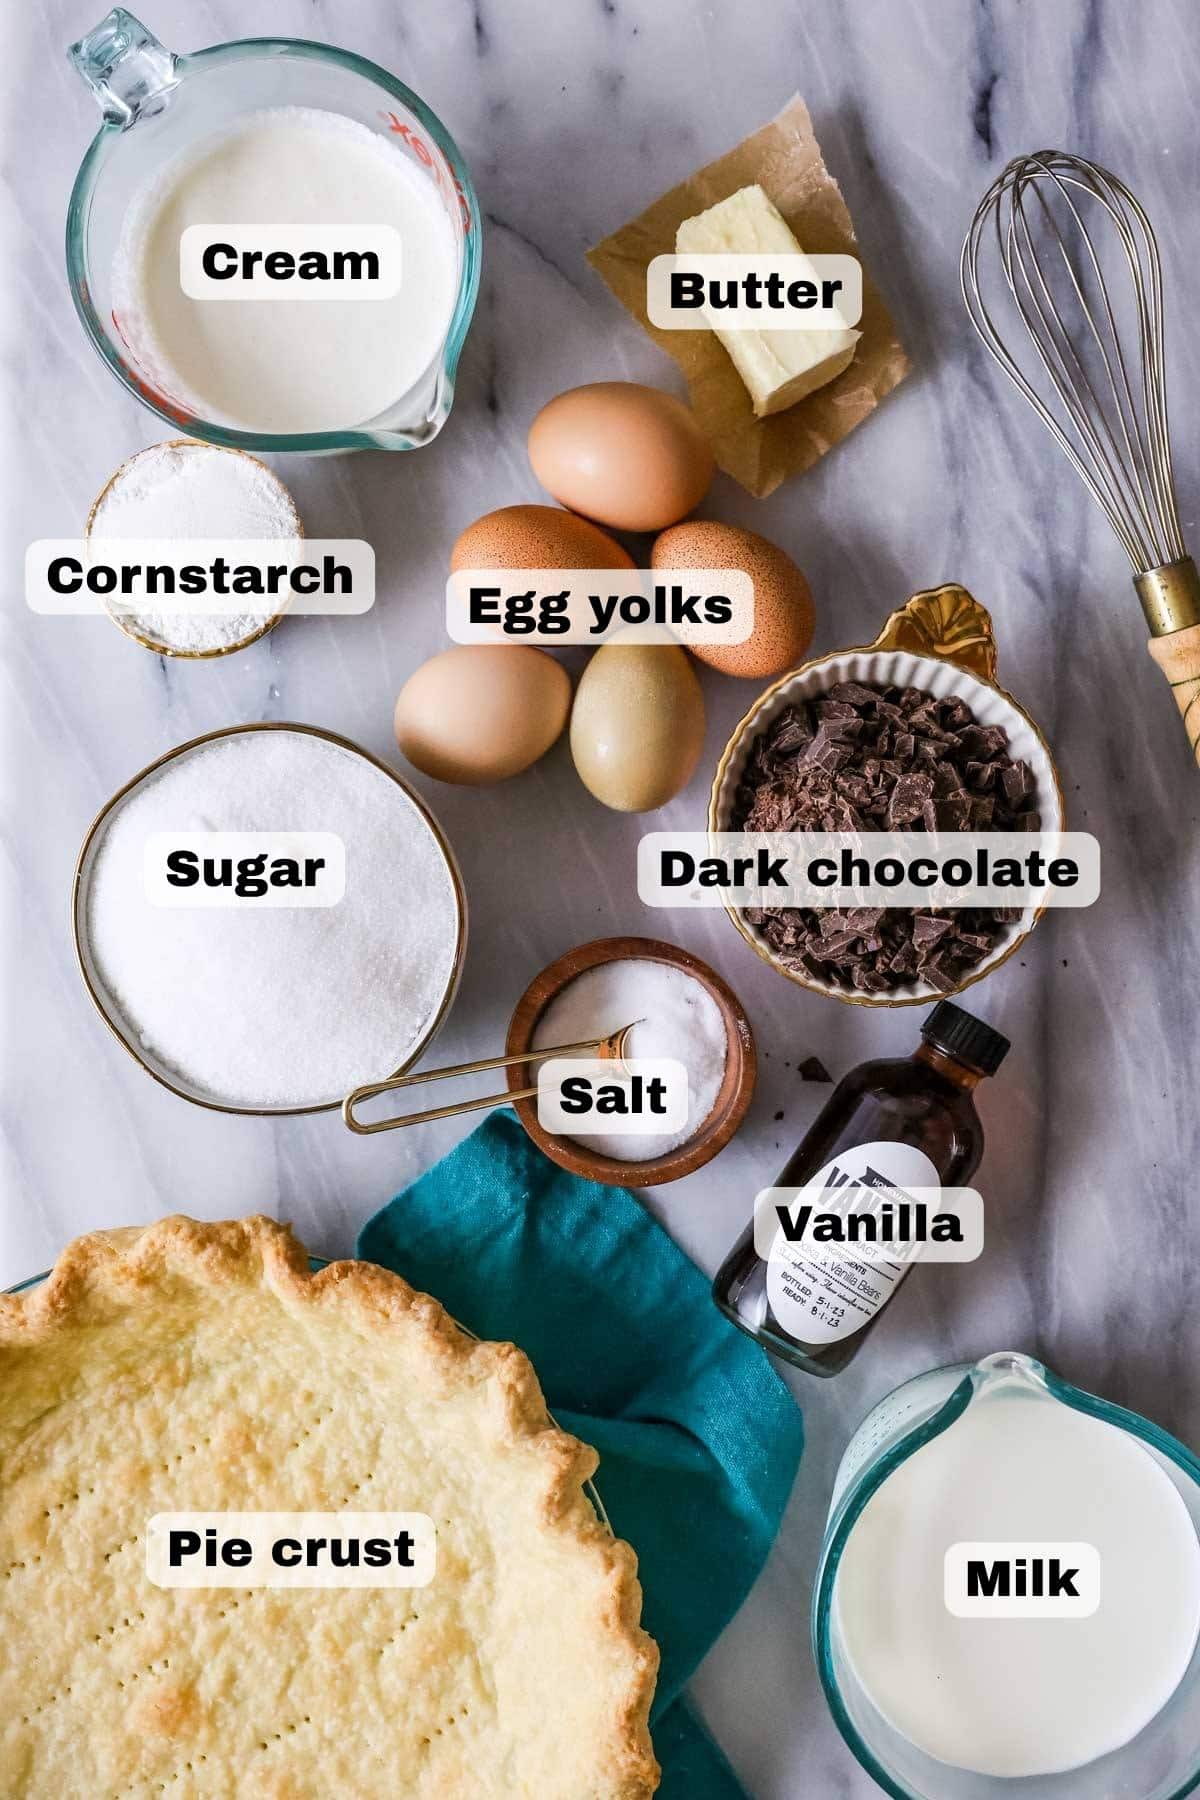
- Chocolate. Opt for dark chocolate (my favorite, I love the slightly more bitter notes of a 60% or even 72% bar) or semisweet (for a sweeter pie). While chocolate chips will work in a pinch, for best flavor and texture I recommend using a quality chopped chocolate bar.
- Granulated sugar. This not only serves as a sweetener, but it also melts as the pudding filling cooks, ultimately thickening the pie and contributing to its silky smooth and sliceable texture.
- Cornstarch. While many chocolate pie recipes use flour as a thickener, cornstarch thickens without the pasty heaviness you can sometimes get from flour.
- Eggs. You’ll need five egg yolks for this recipe. Save the whites to make meringues, Oreo cake, a few batches of candied pecans, or put them towards an angel food cake!
- Milk & heavy cream. A blend of whole milk and richer, thicker cream is another contributor to a silky smooth, yet sturdy pie. Stick with whole milk and heavy cream, double cream, or heavy whipping cream for this recipe.
- Butter. I use unsalted butter and add salt separately. We’ll add this along with the chocolate after cooking; it adds the final finishing touch and contributes to a glossy consistency and smooth texture.
This is just an overview of the ingredients I used and why. For the full chocolate pie recipe please scroll down to the bottom of the post!
How to Make Chocolate Pie
I recommend prepping all of your ingredients before you move over to the stovetop–things move pretty quickly after cooking! Chop your chocolate and butter, measure your vanilla, and place your strainer in your heatproof bowl before you even turn on the stove.

- Step 1: Cook the filling. Add the dry ingredients to a heavy-bottomed saucepan and whisk until combined. Whisk together the egg yolks, milk, and cream in a separate liquid measuring cup, then slowly pour into your cornstarch mixture. Whisk again until you have a smooth, lump-free consistency. Cook over medium heat, whisking frequently, until thickened.
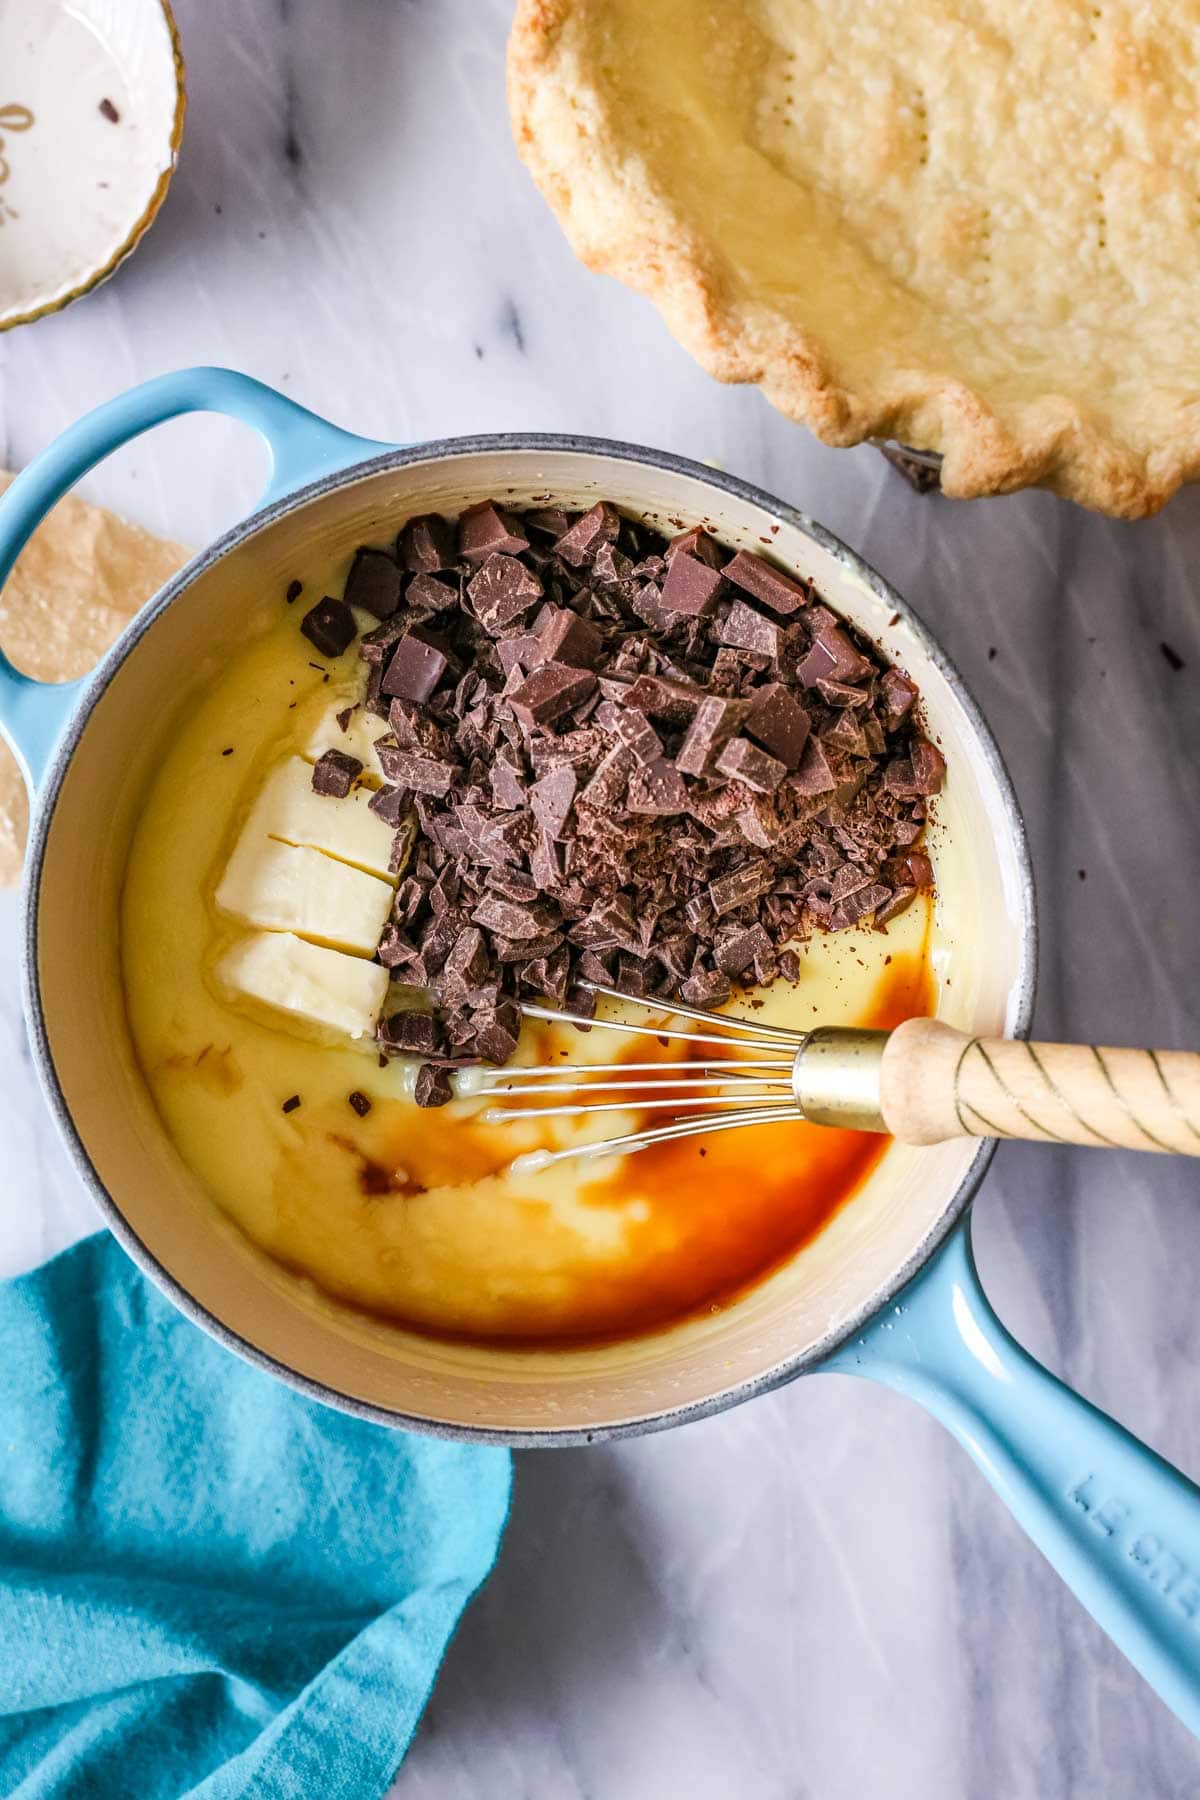
- Step 2: Add the butter, chocolate, and vanilla. Remove from heat and whisk in the chocolate, butter, and vanilla until you have a smooth, glossy chocolate mixture.

- Step 3: Pour into the (cooled) crust. Pour the custard through a fine mesh strainer into a heatproof bowl. This will catch any lumps or any tiny bits of egg, ensuring your chocolate pie is smooth! After straining, pour the filling into your prepared crust.
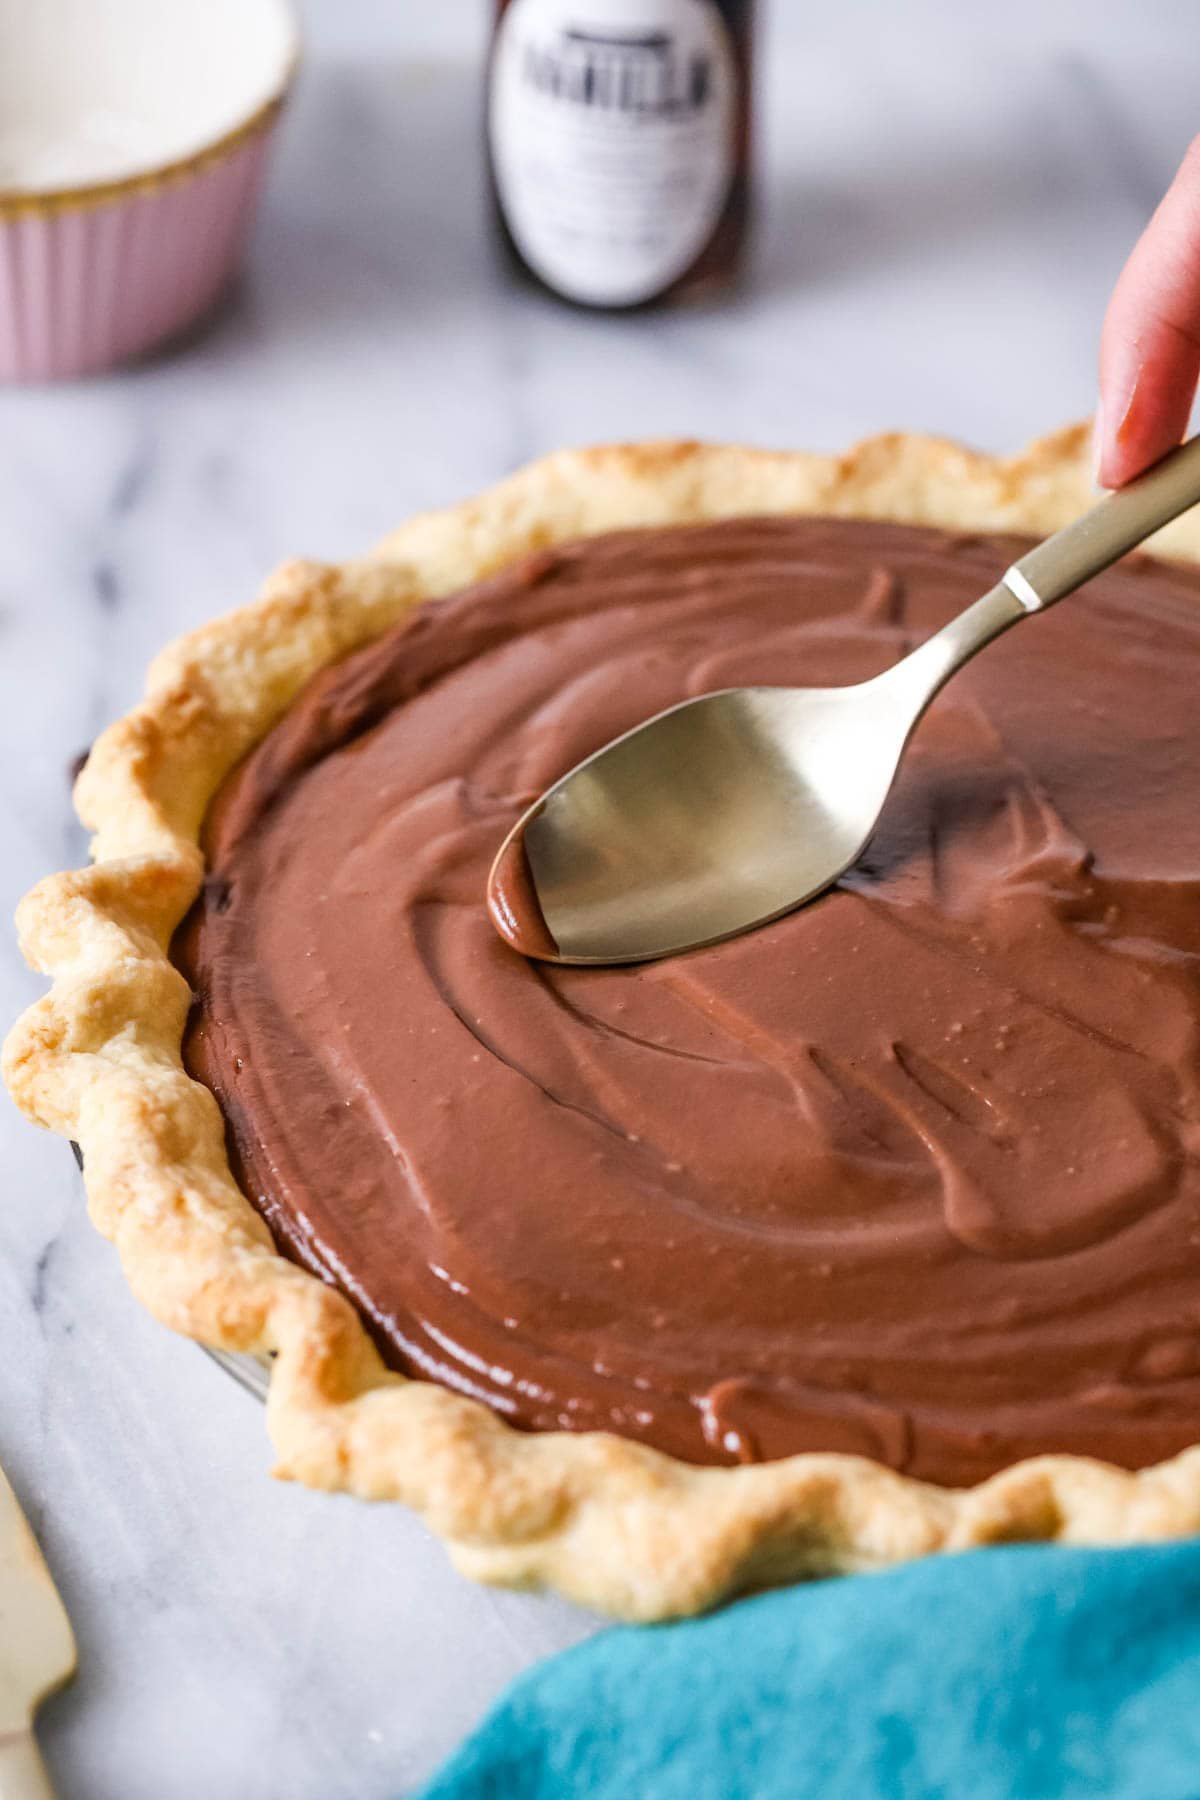
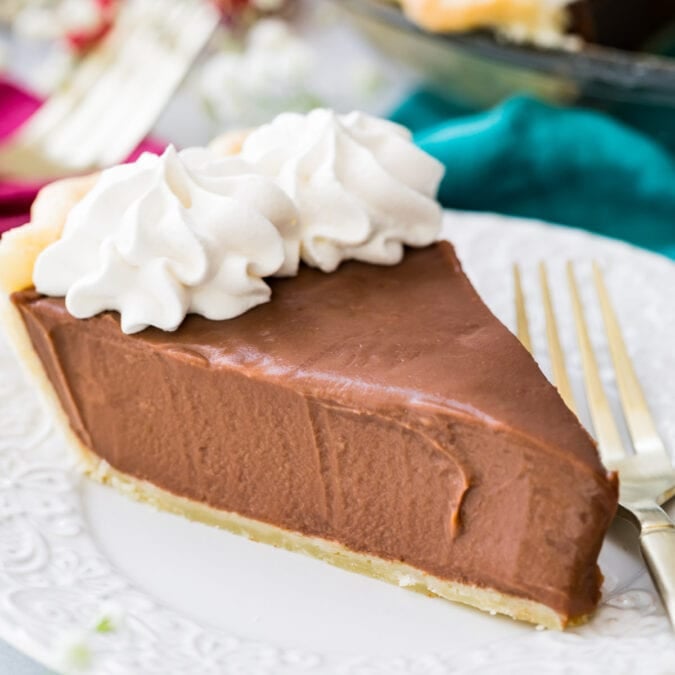
- Step 4: Cover and chill. Smooth the top of your pie with the back of a spoon or spatula, then press a piece of plastic wrap against the surface (this prevents a skin from forming). Place in the fridge to chill for at least 6 hours before topping with whipped cream and serving.

Frequently Asked Questions
This can happen for several reasons: if the cooking process was rushed, if the filling wasn’t carefully watched and stirred frequently, the filling was overcooked, the stovetop heat was too high, or if the pie isn’t given enough time to chill. Any ingredient substitutions could also result in a runny chocolate pie.
To prevent this, make sure you go slow, stir often, keep a watchful eye, and always chill for at least six hours before serving.
While both are incredibly rich and chocolatey (and even use similar ingredients), they’re actually quite different desserts. Traditional chocolate pie is thickened on the stovetop with egg yolks and cornstarch (or, sometimes, flour) and the resulting custard has a dense but creamy pudding-like texture. Alternatively, French silk pie has a lighter, silkier texture thanks to the fact it’s made with heavy cream that’s been whipped to stiff peaks. French silk pie is also often made with raw eggs, but in my French silk pie recipe I cook them so you can enjoy without worry.
Unfortunately I don’t recommend it. The chocolate pudding filling doesn’t always thaw nicely and can end up watery or grainy. I recommend keeping the pie refrigerated and enjoying within 3 days of preparing.
Tips & Troubleshooting
- Don’t rush it. Cooking the filling takes time. Do not crank up your heat to speed up the cooking process! The sugar needs to melt slowly so that the pie sets properly, and cooking it too fast will end up cooking your eggs (similar to what can happen to pastry cream or banana pudding). Have patience!
- Do use a heavy-bottomed saucepan. Or at least don’t use a thin, flimsy one. The thicker bottom helps keep the filling from over-heating and allows you to gently cook the eggs for a perfectly thick, silky, chocolate pie filling. I linked to one of the pans I often use in the recipe card, or an enameled cast iron saucepan is another good choice.
- Mise en place. Prepare/measure all of your ingredients before you begin. Have your heatproof bowl and fine mesh strainer ready to go. Once the chocolate pie filling thickens, you need to move quickly so the filling doesn’t overcook, so be ready!
- If your filling is too runny. It just needs more time to cook! Keep whisking until the mixture is thickened and starts to bubble. Exactly how long this takes will vary from kitchen to kitchen, but if it’s been over 15 minutes and nothing is happening, it’s OK and even advisable to turn up your heat a little bit!
- If your filling turned grainy or is too thick. Unfortunately the filling was likely cooked too much or on a heat that was too high, causing the eggs to cook. Next time keep the heat lower and stir frequently to keep the chocolate pie filling from getting too hot.
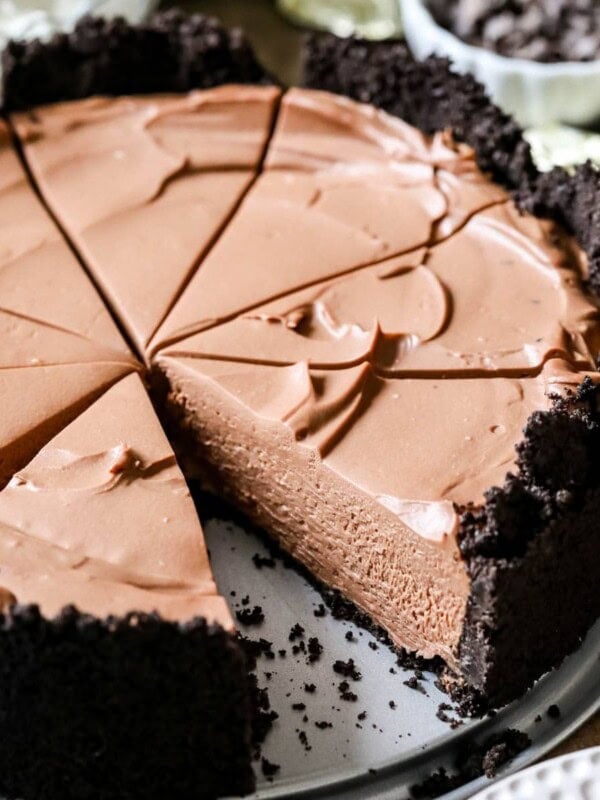
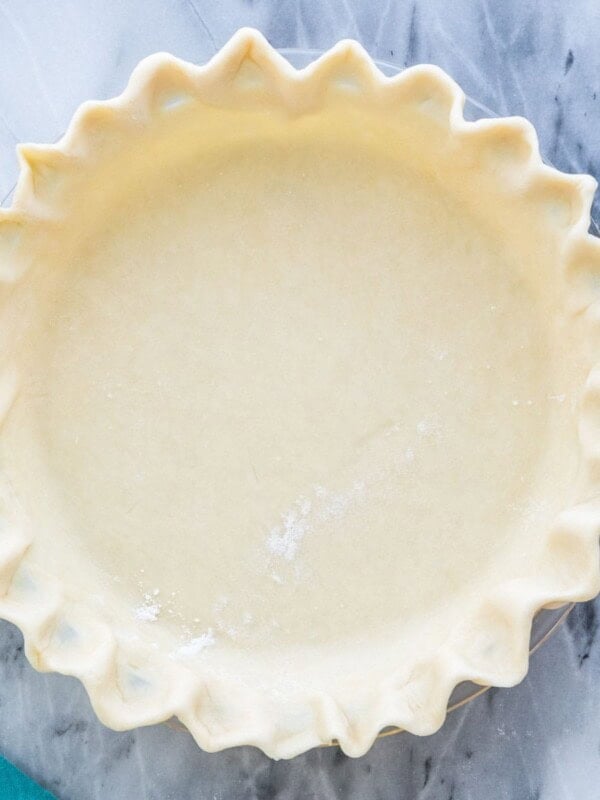
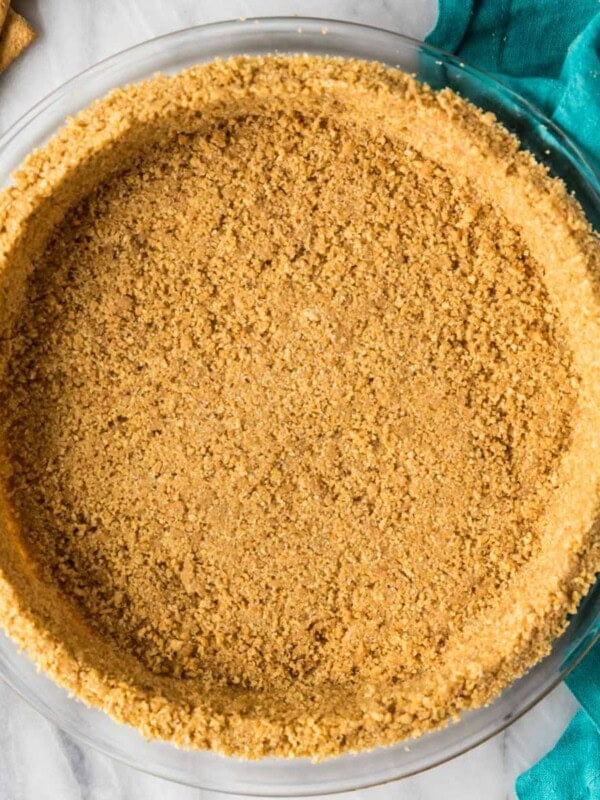
- Crust options. I love my classic pie crust, but you can swap this for a sourdough pie crust or make things easier with a graham cracker crust or an Oreo crust. Note that if you are using a store-bought crust, the filling may not all fit in and you may have some filling left over. Just enjoy it with a spoon!
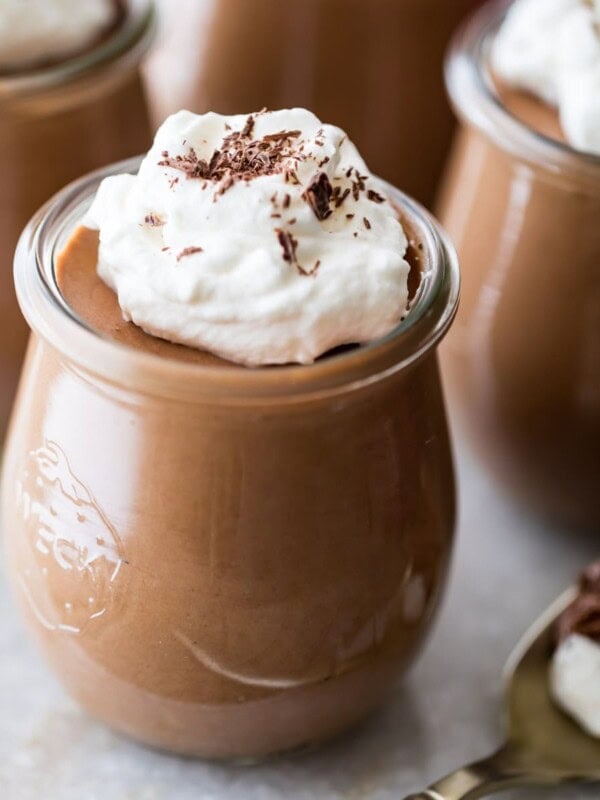
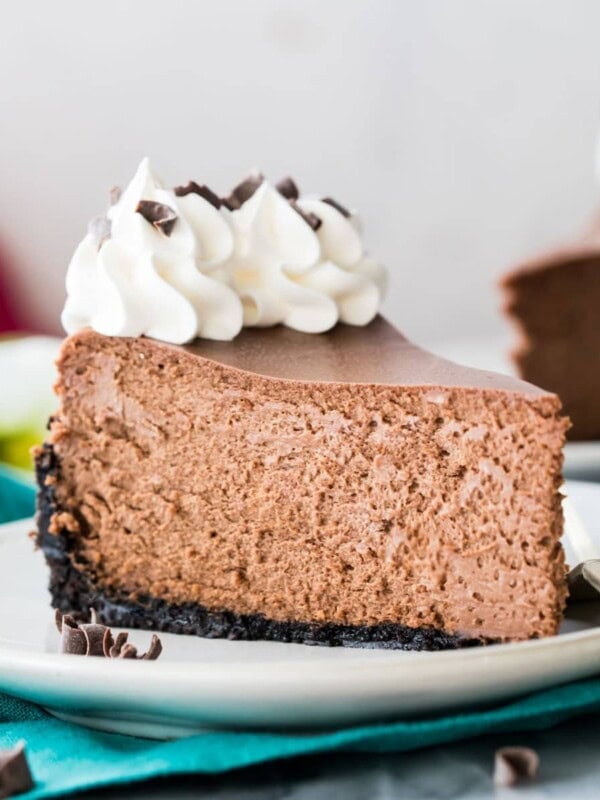
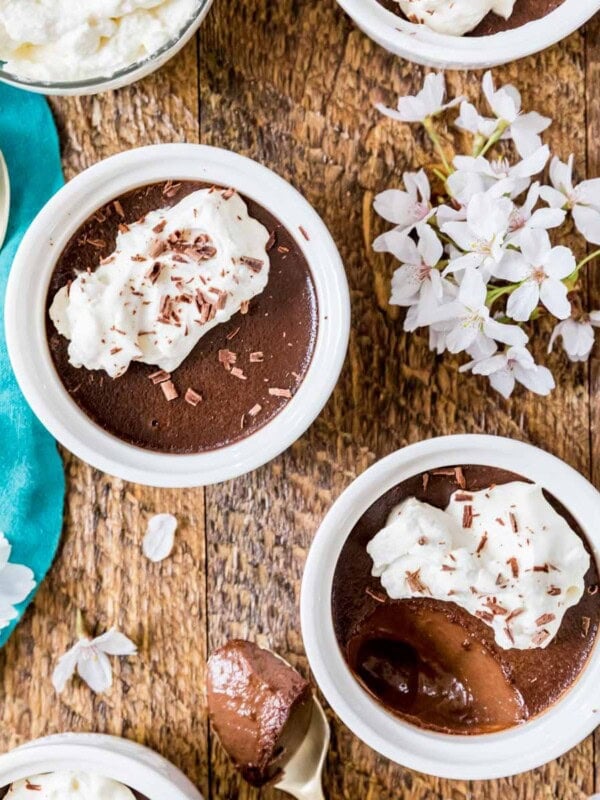
More Indulgent Chocolate Recipes
Check out my full collection of pie recipes for more incredible slices!
Enjoy!
Let’s bake together! Watch my step-by-step pie recipe below 💜
Chocolate Pie Recipe (Blue Ribbon Winner!)
Equipment
Ingredients
- 1 prepared (baked) 9" pie crust, click the link for my homemade recipe, see note 1
- 1 ½ cups (300 g) granulated sugar
- 5 Tablespoons (40 g) cornstarch
- ¼ teaspoon salt
- 5 large egg yolks², (see note 2 for recipes that you can make with your leftover egg whites)
- 2 cups (473 ml) whole milk
- 1 cup (236 ml) heavy cream
- 6 oz (170 g) dark chocolate bar³, finely chopped
- 4 Tablespoons (56.5 g) unsalted butter, cut into pieces
- 1 ½ teaspoon vanilla extract
- 1 batch homemade whipped cream, for topping. Optional but recommended. click the link for my recipe
Instructions
- In a medium-sized, heavy-bottomed saucepan, whisk together sugar, cornstarch and salt.1 ½ cups (300 g) granulated sugar , 5 Tablespoons (40 g) cornstarch , ¼ teaspoon salt
- In a separate bowl or large measuring cup, whisk together egg yolks, milk, and heavy cream until well-combined and egg yolks are well broken up.5 large egg yolks², 2 cups (473 ml) whole milk, 1 cup (236 ml) heavy cream
- While whisking the dry ingredients, drizzle the egg yolk mixture into the dry ingredients until completely combined.
- Transfer saucepan to stovetop over medium heat and whisk frequently until ingredients begin to thicken⁴ (see note 4, this will take several minutes, do not crank up the heat or your filling may not thicken properly).
- Once mixture has thickened (it should have a pudding-like consistency) whisk constantly, remove from heat and immediately add chopped chocolate, butter, and vanilla extract. Stir until chocolate and butter are completely melted and mixture is smooth.6 oz (170 g) dark chocolate bar³, 4 Tablespoons (56.5 g) unsalted butter, 1 ½ teaspoon vanilla extract
- Pour pie filling through a fine mesh strainer into a medium-sized heatproof bowl.
- Pour filling over prepared pie crust and place a piece of clear wrap or parchment paper directly against the surface of the chocolate to prevent a skin from forming on the surface of the pie as it cools. Allow to chill in the refrigerator at least 6 hours or overnight before slicing and serving.1 prepared (baked) 9" pie crust
- Top with whipped cream just before serving. I like to use an Ateco 848 or Wilton 2D tip to decorate the pie slices in the photo, but a big mound of whipped cream right on top of the pie works just as well!1 batch homemade whipped cream
Notes
¹Pie crust
This recipe was written to be made with my prepared (blind-baked) homemade pie crust in a 9 or 9.5″ pie plate. You may instead make this recipe using my graham cracker crust or Oreo crust or use a store-bought crust but keep in mind they are often smaller and may not fit all of the filling. You can pour the excess into mini tart shells or just enjoy as a pudding.²Recommendations for leftover egg whites
If you don’t want to waste your egg whites, store them in a clean, completely dry and grease-free container and use them to make meringue cookies, white cake, or coconut macaroons!³Chocolate
A 60 or 70% cacao bar works great and is my preference, I often use Ghirardelli which is available right next to the cocoa powder in the baking section. While chocolate chips will work in a pinch, I really recommend using a quality chocolate bar that you enjoy the taste of. Semisweet chocolate will yield a pie that’s sweeter and not as richly chocolate. I don’t recommend using unsweetened chocolate, which could make the pie too bitter. This recipe has not been tested using cocoa powder instead of chocolate.⁴Thickening the pie filling
It’s important that you have patience for this step, slowly thickening over medium heat is key to allow the sugars to melt properly and the filling to thicken properly. The filling should be clearly thickened before moving on to the next step and should be thick enough to coat the back of a spoon or spatula. I demonstrate this above in the post and in my video.Storing
Cover with plastic wrap and store in the refrigerator for up to 4 days. I don’t recommend freezing, as the filling can turn grainy or watery once it thaws.Gluten-free note
I have not tried it myself, but others have successfully made this recipe with Cup4Cup gluten-free flour.Nutrition
Nutrition information is automatically calculated, so should only be used as an approximation.
Like this? Leave a comment below!


I put coconut on top of the pie crust and then poured the chocolate pie filling on top. Then I put toasted coconut shavings on top of the homemade whipped cream. It makes a wonderful toasted coconut chocolate pie
I used approx 1/3c cocoa powder instead of a candy bar , added a couple drops of stevia glycerine (instead of extra sugar) and it worked out wonderfully
Good
First time I’ve ever made a chocolate cream pie! Hands down slayed and impressed everyone who said it was the best chocolate cream pie that they ever had!!!⭐️⭐️⭐️⭐️⭐️
Hello! Could I use a blind baked pate sucree crust done in a 9” tart pan for this? Instead of using a pie crust… thanks!
Hi Alison! I haven’t personally tried it, but I think it could work. Be sure not to overfill your crust as this recipe will likely need more batter than you need for a tart size crust. Enjoy! 🙂
Could I use this pie filling for a filling with chocolate cake instead? My plan was to make 2 8″ chocolate cakes and put the pudding between them. Thank you!
Hi Erin! While this pie does set and is slice-able, I’m not sure it would hold the weight of another cake on top of it. 🙁
I made this for pi day and it turned out so good! I shopped at Trader Joe’s so I was worried about getting good enough chocolate but I bought the Belgian dark bars and it was great. I read your warnings in the comments about the thickening and had a podcast going to not rush it. I used the rest of the cream that I bought for whipped cream and served with fresh berries. A big hit!
Yay! We’re so happy it was a success, Sophie. Happy Pi day! 😊
I spent HOURS on Christmas dinner and made this pie the night before. Everyone said that the pie was the best part!
It was so delicious!! Will definitely be making this any chance I get! I didn’t have plastic wrap so I put a sheet of tin foil on top and it worked just as well.
Thank you for sharing!
So glad it was such a hit, Kara! Thanks for using our recipe 🩷
I’ve been making your recipe for thanksgiving and Christmas for years. My nieces always ask if auntie is making her chocolate pie. This year I will also be making it for the fire station as my husband recently made a career change and has to work this Christmas. Thank you so much for creating and sharing this recipe! Happy Holidays.
I just wanna start off by saying I’ve tried over 30 of your recipes and each one that I’ve made has given me amazing amazing results from everybody that’s tried them and then there’s this recipe. I love a good chocolate pie. I’ve made them since I was a child with my grandmother and I wanted to try a different recipe and I seen that you had one and to put it lightly, this was not it, and it was so upsetting. I feel like I did something wrong, but I followed every step of the way, but the taste was just off in a little bit too dense even with the whipped cream.
Hi Philip! I’m so glad you have been enjoying the recipes and really appreciate you trusting them, that means a lot to me! I’m sorry this one missed the mark for you, especially when it’s tied to a special memory with your grandmother.
My version is meant to be a classic, old-fashioned chocolate pie with a pudding-style filling: dense in the sense that it’s sliceable and silky, but not heavy, fudgy, or difficult to cut. If yours leaned more toward dense/thick than creamy, let me know and I’m happy to help troubleshoot what might’ve happened.
It may also be that the style you grew up with was a bit different. Could you tell me a little about the pie you and your grandmother made? Was it fluffier or lighter? Did it include cream cheese or whipped cream/Cool whip? I’m wondering if maybe I can point you in the direction of something that may be a bit closer to what you are looking for 😊
Followed the instructions to the letter. Stirred constantly over medium (4) heat until it thickened. Let sit overnight before cutting. It holds its form for a couple minutes, then falls out of the crust onto the plate.
I’m so sorry to hear this! You may have just needed it to thicken a little bit more when cooking it if it was that soft. 🙁
I made this for Thanksgiving using half 85% and half 60% chocolate bars (so, basically, 72%) and a homemade Oreo crust. My MIL took 80% of the pie home and my husband never even got a piece 🤣 She texted me for the following two days telling me how good it was. It was surprisingly easy to make and man it was delicious. Thank you so much for the recipe.
I made this pie filling, followed it to a t and all was going well.It set up beautifully , I pulled it out , took the plastic off in the fat gobules in my pie filling. taste good, but looks terrible.
any ideas why this happened. I mixed very well& waited until it cooled about 15 min. rrrrggh.
Oh no! I’m so sorry to hear this happened, Darcie! It sounds like it may have been over-heated and broken. 🙁 Did you run it through a fine mesh strainer?
this is my new go-to chocolate pudding recipe! Thanks!