
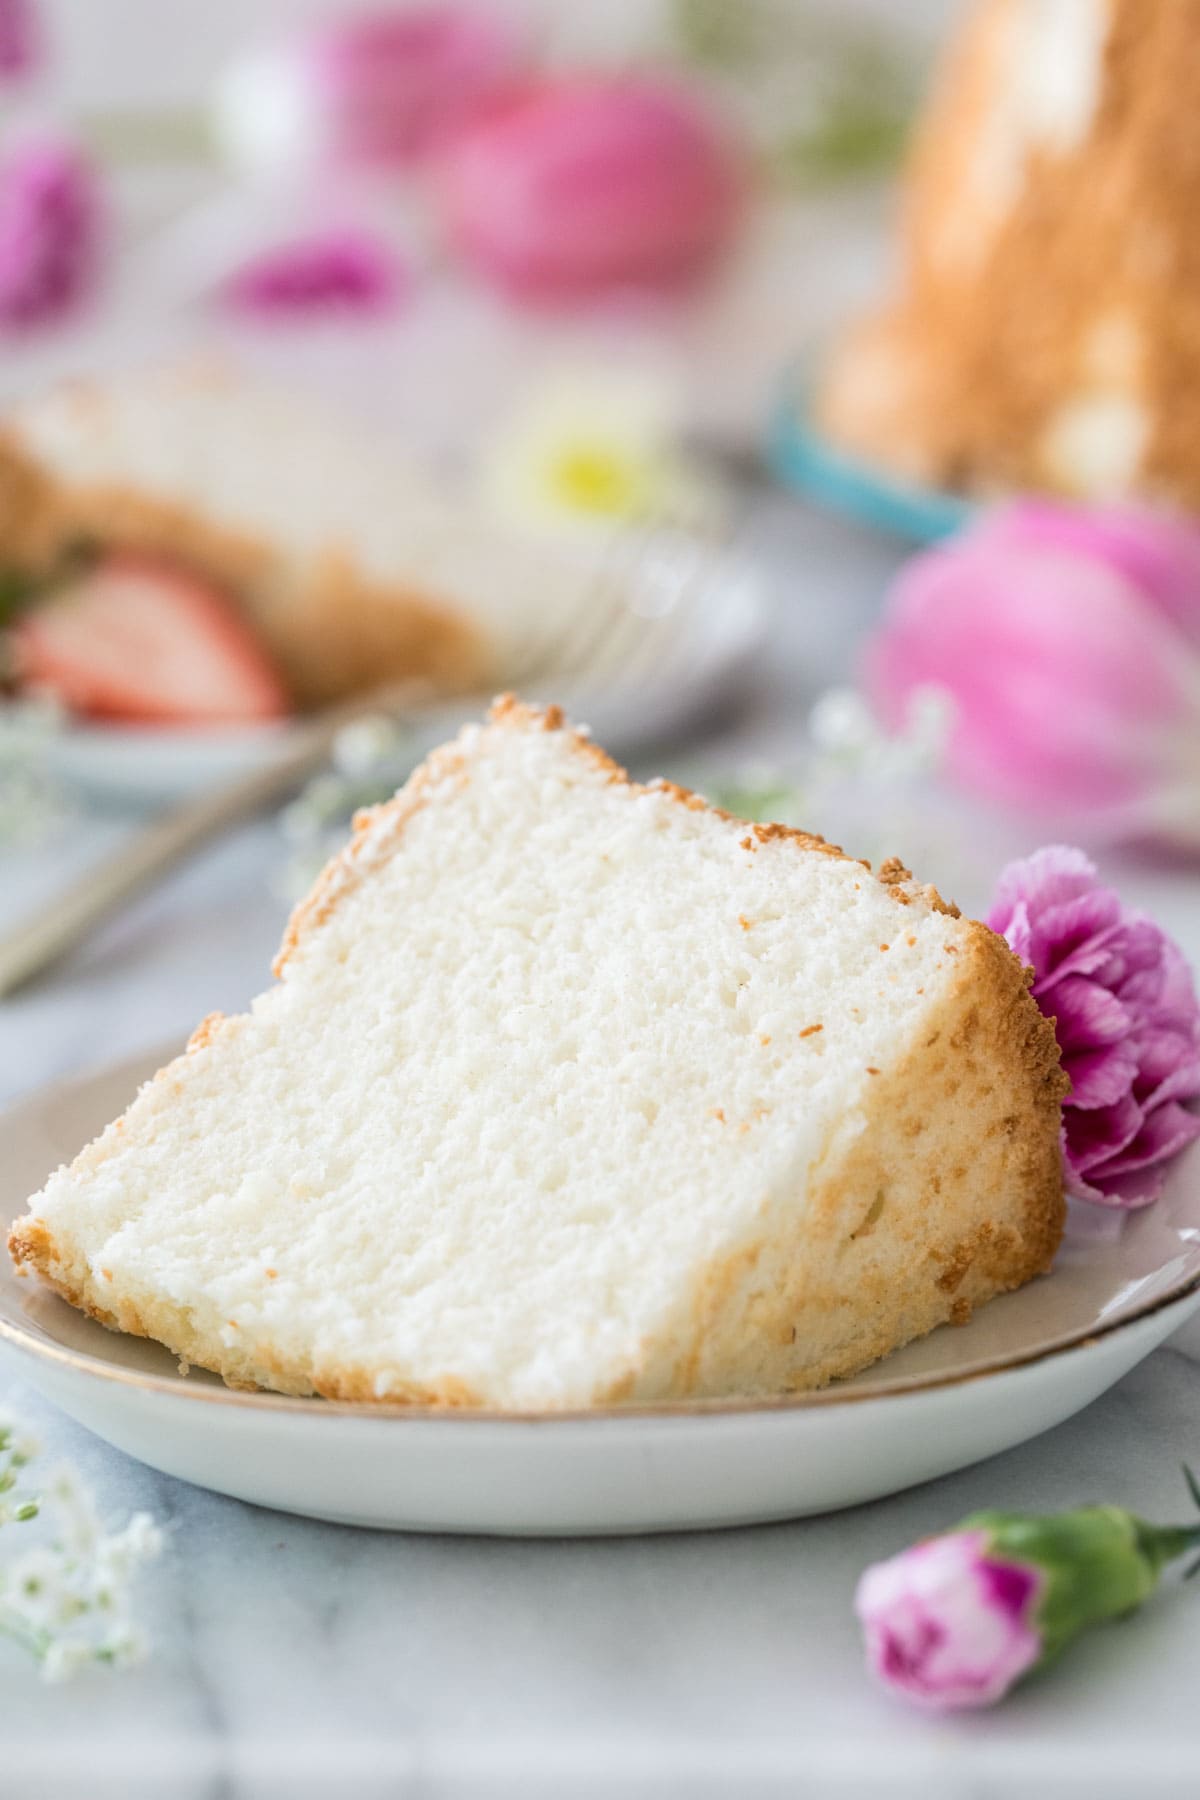
Angel Food Cake
This post may contain affiliate links. As an Amazon Associate I earn from qualifying purchases. Please read my disclosure policy.
My favorite recipe on the blog! This Angel Food Cake recipe uses all-purpose flour (but does includes tips to use cake flour, if you choose). I’m walking you through all the tips and tricks and even include a how-to video so yours comes out perfectly every time!
Angel Food Cake
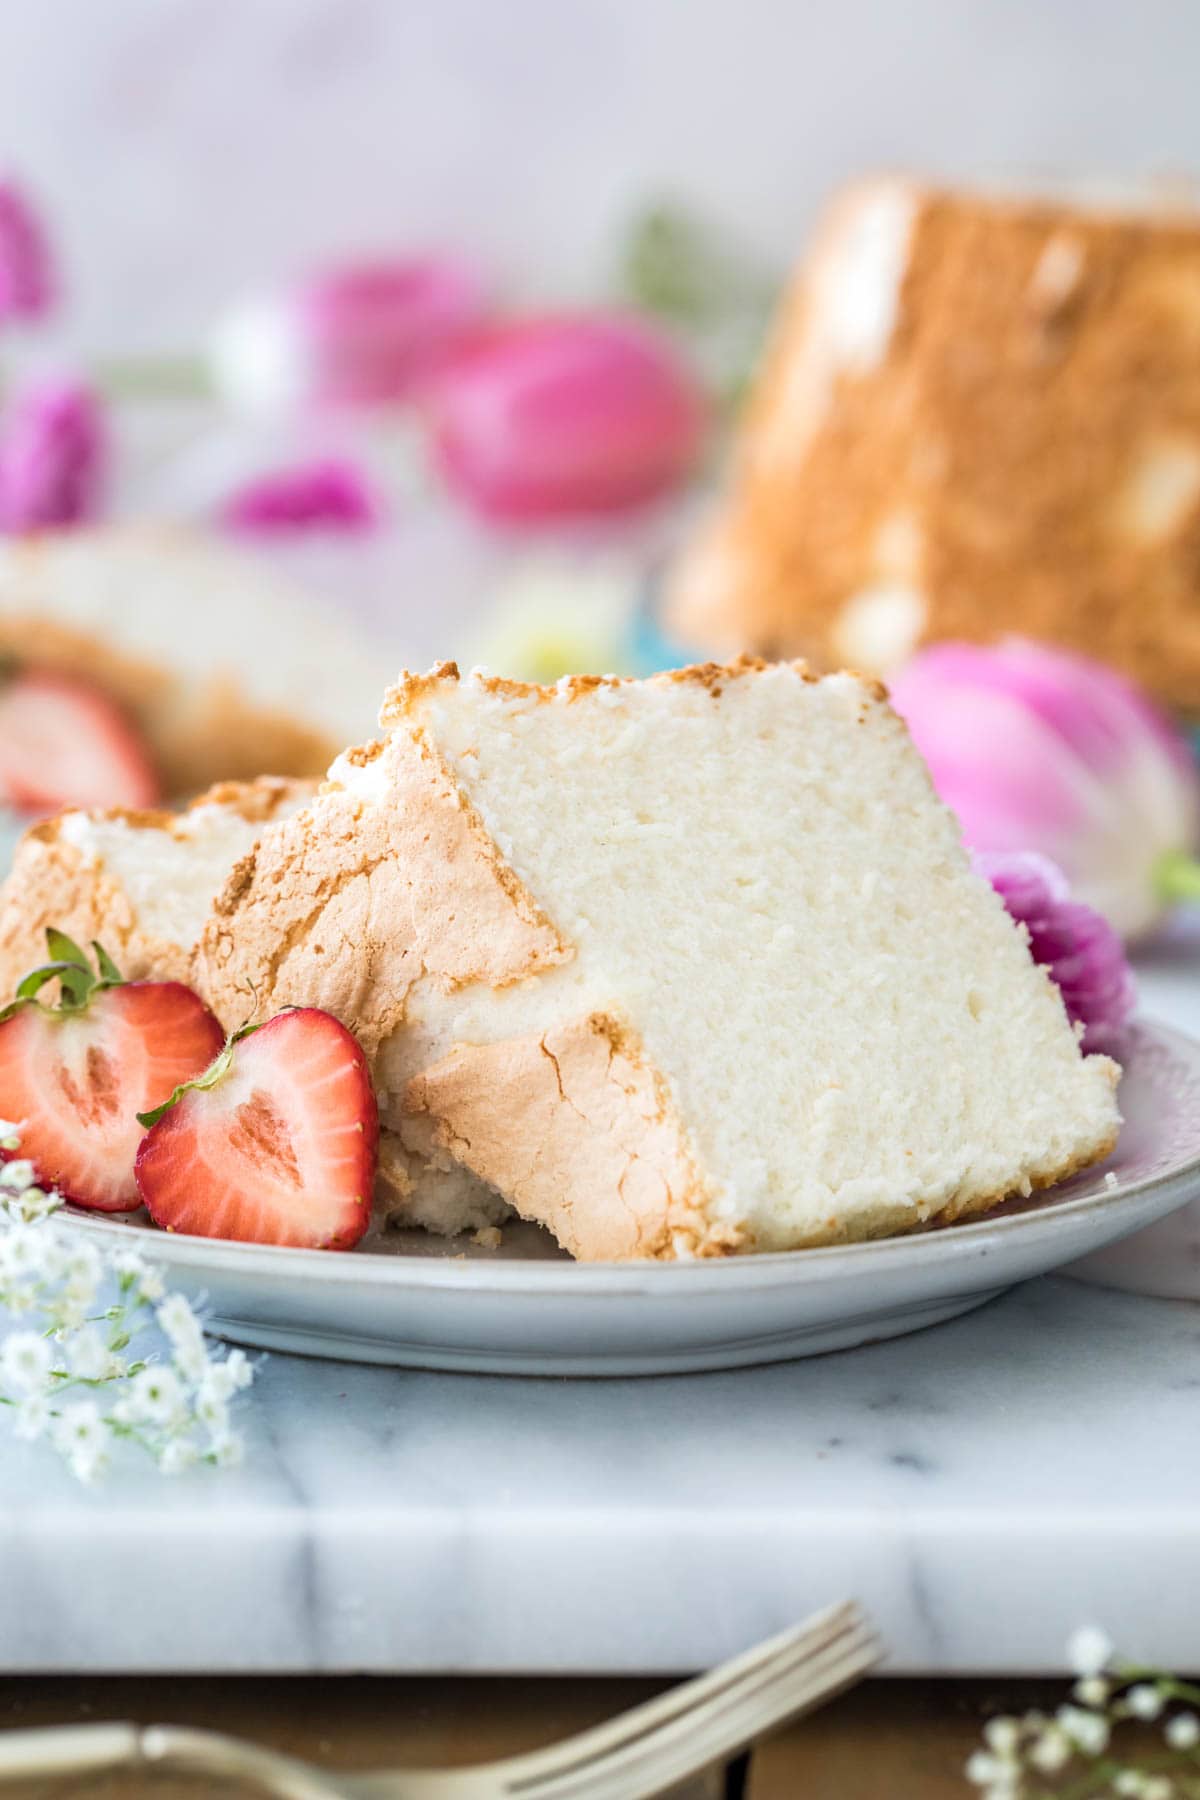
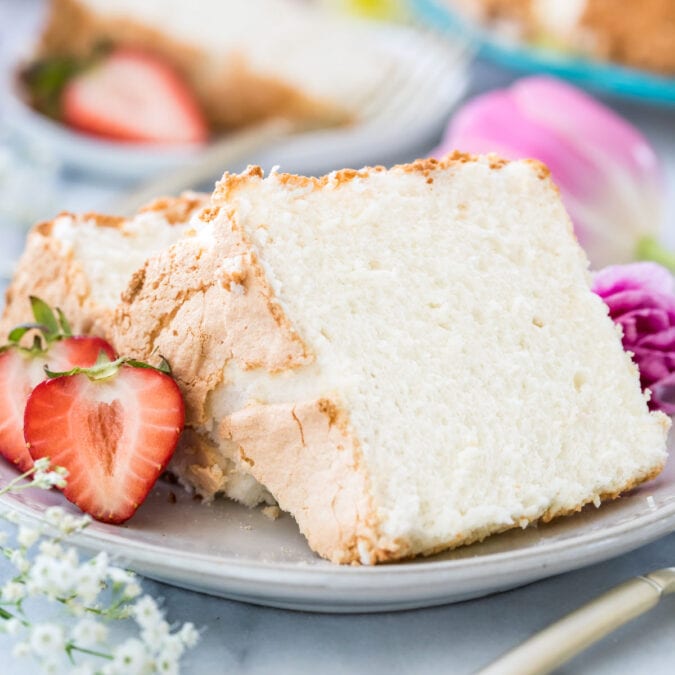
The sweet, snow-white nemesis to my Devil’s food cake, this meringue-based beauty of an angel food cake is everything that dark and decadent cake isn’t. It’s light, fluffy, so airy and delicately vanilla flavored (with a hint of almond!).
It’s also my favorite recipe on the blog, and while it does require a bit of technique, I’m confident you can tackle this one. Once you do, you’ll never go back to store-bought or the kind that comes from a box!
Today I’m walking you through all the steps and spilling all my tips and secrets. I’ve also included a how-to video in the recipe card. Let’s get to it (and make sure you have some homemade whipped cream and strawberries at the ready, they pair perfectly with angel food cake!)!
What You Need (and Why!)

The ingredients used are each important in their own way to give the cake structure and perfect flavor.
- Egg Whites. This recipe uses a lot of egg whites (approximately 10-12). Room temperature egg whites are easier to whip to the stiff peaks you need when making the delicate batter. Hint: To quickly bring eggs to room temperature, set them in a bowl of warm (not hot) water for 15-20 minutes. Dry them thoroughly before cracking.
- Cream Of Tartar. This is an acidic powder that helps to stabilize the structure of the meringue. Cream of tartar can typically be found in the spice section of your grocery store. Some people use a bit of lemon or lime juice or white vinegar to help stabilize the egg whites instead, but I recommend cream of tartar for best results.
- Flour. Growing up we never had cake flour in my house and so we were forced to improvise. My mom made minor tweaks so that this recipe can be made perfectly using standard all-purpose flour, but I include notes in the recipe on how to make it with cake flour.
- Salt. There’s very little salt in this recipe, but it plays an important role. It helps to bring out the other flavors of the cake and balances the sweetness without making the cake taste salty.
- Granulated Sugar. This is gradually whipped into the egg whites to develop and stabilize the meringue, then powdered sugar (which does not need to be whipped/beaten to be dissolved) is used for the remainder of the sweetness factor.
- Powdered Sugar. Powdered sugar (AKA “confectioner’s sugar”) has cornstarch which helps to further stabilize the cake
- Vanilla & Almond Extracts. Vanilla extract is a must for this cake. It provides a subtle depth of flavor for this vanilla & sugar cake. Almond extract is optional and adds a slight brightness to the taste, but it’s not required.
Remember, this is just an overview of the ingredients I used and why. For the full recipe please scroll down to the bottom of the post!
How to Make Angel Food Cake
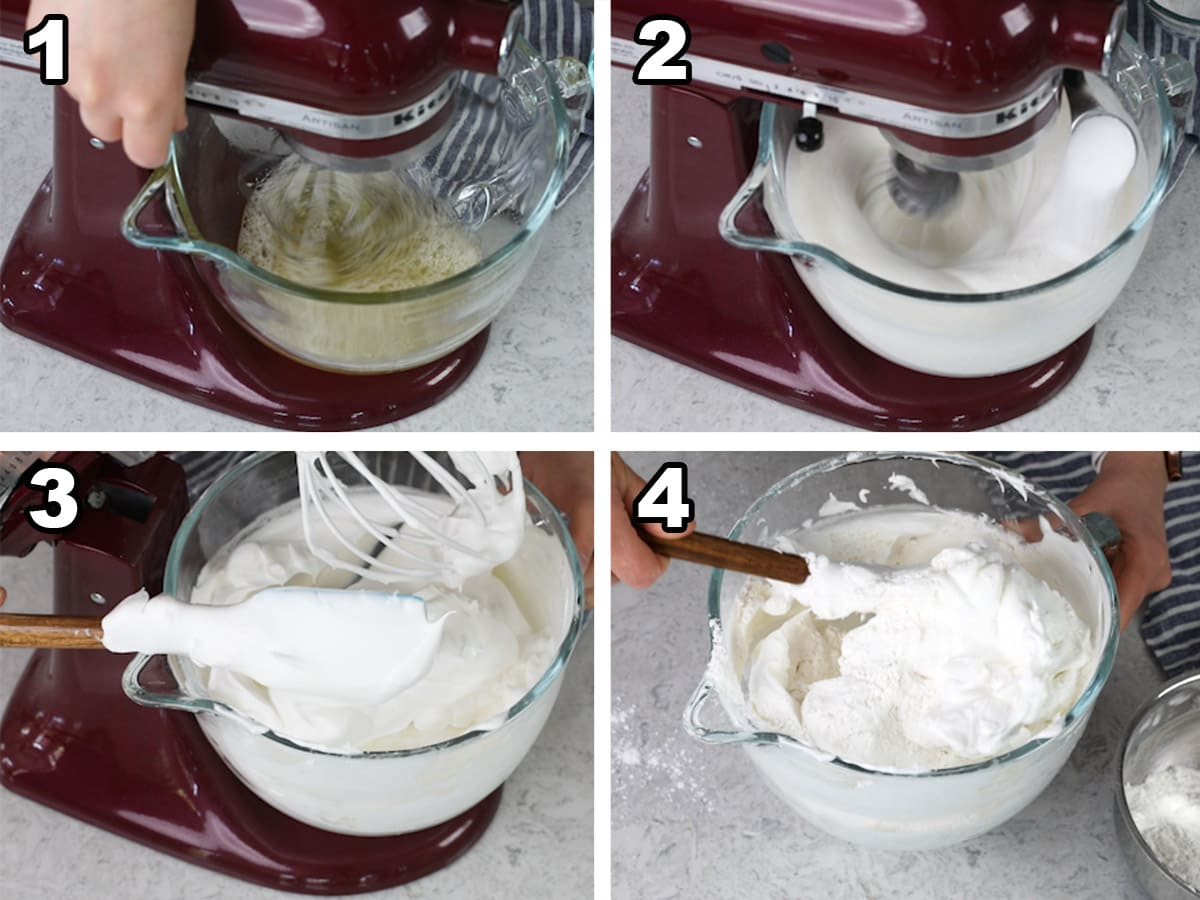
- In a clean bowl free of grease or moisture combine the egg whites, vanilla and almond extract, cream of tartar, and salt. Mix until combined.
- Turn the mixer to high speed and add the granulated sugar one tablespoon at a time, waiting approximately 15 seconds between each addition. This allows the sugar to dissolve, which is important for an angel food cake with a fluffy, airy texture that rises properly and doesn’t collapse.
- Whip all the way to stiff peaks (a process you may remember from my meringue cookies or funfetti cake)! This means that if you dip a knife or spatula (or even your beater) into the mixture, when you remove the utensil the peaks that form hold their shape firmly without the peak folding or receding back into the mixture. The peak must be very firm without a hint of drooping. The mixture will have greatly increased in volume and be extremely thick, sticky, and fluffy. I also feel that it tends to begin to appear slightly less glossy and more matte when the eggs are fully whipped, though the meringue has not totally lost its sheen.
- Using a spatula, very gently fold the egg white mixture with the powdered sugar and flour mixture. The mixture should be thoroughly combined, but don’t over-mix or your cake may not rise properly.
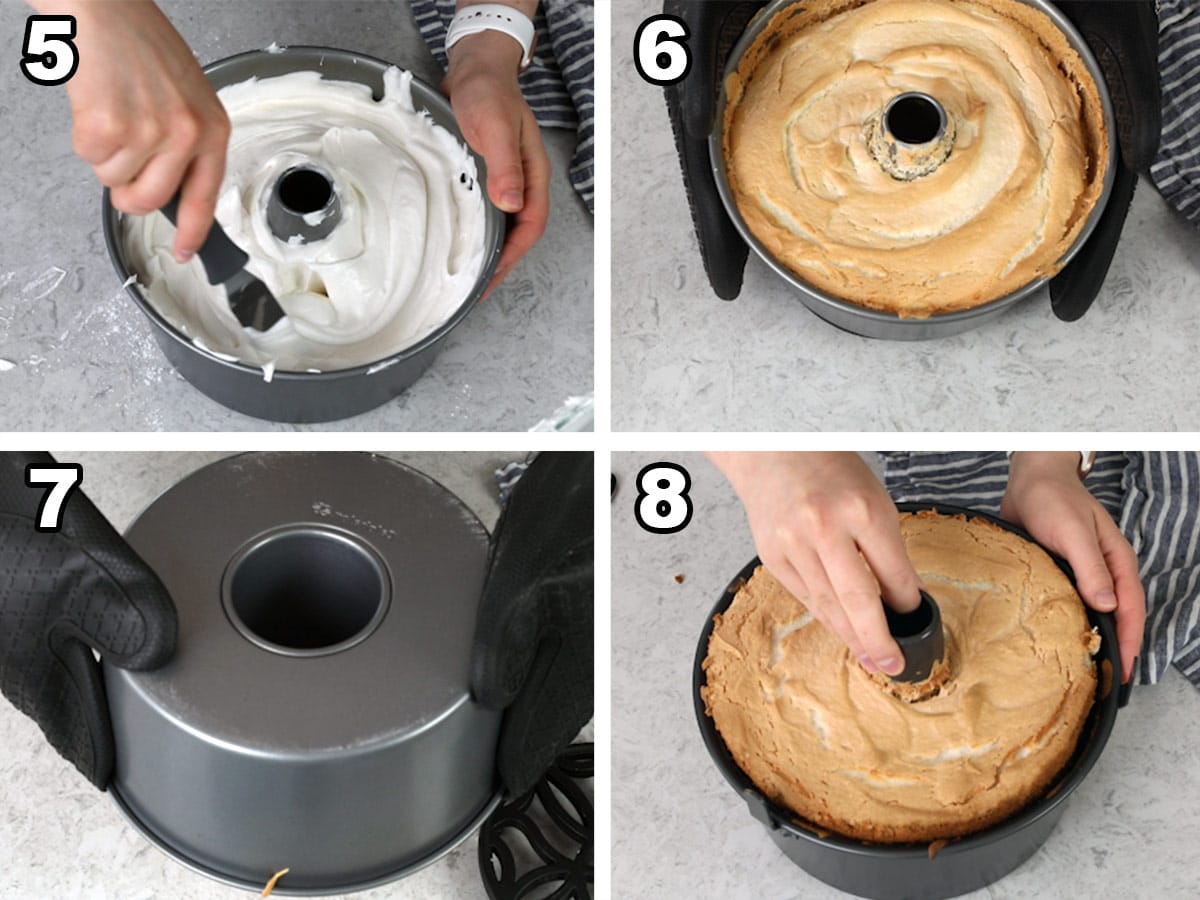
- Pour (or rather spread, it will be a stiff and sticky batter) the batter into a clean, dry, grease-free tube pan (do not grease it!). Make sure it is evenly distributed, and use a spatula or butter knife to cut through the mixture to eliminate any air bubbles. Bake!
- The cake is finished baking when it springs back if the surface is lightly touched and when any cracks on the surface appear dry and not wet.
- Immediately invert the cake onto a bottle or canand allow to cool completely.
- Gently run a knife along the edge of the pan to loosen the cake and invert onto serving platter. If your cake pan has a removable bottom you will loosen the cake then lift it from the tube pan and then invert.
Tips For a Perfect Angel Food Cake
- A clean and dry bowl is critical. Do not get any yolk into your egg white and make sure to crack into a completely grease and moisture-free bowl. Even the tiniest bit of yolk or grease can keep your eggs from whipping correctly… that’s a lot of eggs to waste!
- You must beat your egg whites to stiff peaks. While this is thoroughly described above and in the recipe, if you are a visual learner it would likely be helpful for you to watch how I do this in my video in the recipe card. This is where you are most likely to run into a problem, as many people whip their eggs but not truly all the way to fluffy, stiff peaks.
- The egg whites will increase in volume an incredible amount! Once your egg whites reach stiff peaks, they’ll likely fill up your whole mixing bowl: as you can see in the photo above the egg whites fill about 3/4 of my 5.5qt KitchenAid mixer bowl.

Frequently Asked Questions
Angel food cake requires technique, so don’t be hard on yourself if the first one turns out a bit deflated, collapses on itself, or even falls out of its pan! It took me several attempt to perfect my own technique. Typically, if the cake doesn’t rise, the egg whites were not beaten thoroughly enough (I really recommend watching the video if you are a visual learner), or possibly they were even over-whipped. A small bit of moisture or egg yolk mixed in with the egg whites, a particularly humid day, or repeatedly opening your oven can also cause the cake to not rise. Over-mixing the batter once you’ve added the flour is another likely culprit, mix until just combined.
Most often if it collapses, the egg whites were not beaten to stiff enough peaks or the cake was removed from the oven before it was truly baked all the way through. Different ovens bake differently, so make sure yours is running true to temperature and keep an oven thermometer or two in there!
Personally I do not recommend it. In order for the angel food cake to maintain its lofty height and airy texture, it is imperative that it be inverted immediately after baking and cooled upside down, and a tube pan is specifically designed for this cause. In any other type of pan such as a loaf pan, 9×13″ or other, you cannot suspend the cake upside down (it will simply fall out of the pan) and if you cool it right-side-up it will sink in on itself.
A special note on bundt pans: While it would be possible to cool your angel food cake upside down in a bundt pan, these pans usually have intricate designs that the cake must be carved away from. After carving the cake free, the appearance usually suffers.
I do not recommend it, as these egg whites often do not properly whip to stiff peaks (and sometimes even indicate so on the label).
Save them and use them to make one of my egg-yolk-heavy recipes like my pound cake, creme brûlée, lemon curd (great for topping angel food cake!) cream puffs, chocolate pie, or key lime pie!
Here is a brief guide explaining how to save egg yolks (cover them with a bit of water, store in a covered container in the fridge, and drain water before using).
More Recipes You Might Like
Enjoy!
Let’s bake together! Make sure to check out the how-to VIDEO in the recipe card!
Angel Food Cake
Equipment
- Stand mixer (see note ¹)
Ingredients
- 1 ¼ cup (156 g) powdered sugar
- ¾ cup + 2 Tablespoons (110 g) all-purpose flour, OR you can use 1 cup/110g of cake flour
- 1 ½ cups (375 ml) egg whites², room temperature preferred, 10-12 egg whites
- 1 ½ teaspoon cream of tartar
- 1 ½ teaspoon vanilla extract
- ¼ teaspoon almond extract, optional
- ¼ teaspoon salt
- 1 cup (200 g) granulated sugar
- strawberries and homemade whipped cream for topping, optional
Instructions
- Preheat oven to 375F (190C).
- In a medium sized bowl, whisk together powdered sugar and flour and set aside.1 ¼ cup (156 g) powdered sugar, ¾ cup + 2 Tablespoons (110 g) all-purpose flour
- In the bowl of a stand mixer (see note ³ for my success tips), combine egg whites, cream of tartar, vanilla and almond extracts and salt. Mix well.1 ½ cups (375 ml) egg whites², room temperature preferred, 1 ½ teaspoon cream of tartar, 1 ½ teaspoon vanilla extract, ¼ teaspoon almond extract, ¼ teaspoon salt
- With mixer on high, beat in sugar, about 1 Tablespoon at a time, adding more only once the previous tablespoon has been dissolved (About every 15 seconds; as you add the sugar, you may be able to hear the faint sound of the granules scraping against the metal bowl. Once you no longer hear this, the sugar has been dissolved). Do NOT scrape the sides of the bowl as you are doing this, just keep beating.1 cup (200 g) granulated sugar
- Beat until stiff peaks⁴ form; the mixture will be thickened, glossy, and sticky and will greatly have increased in volume.
- Using a rubber spatula, gently fold in sugar/flour mix, about ½ cup at a time. Do not over-mix; fold only until the flour mixture is combined with the egg whites mixture.
- Spread the mixture evenly into an ungreased 10 inch tube pan and use a knife or spatula to cut through the batter to break through any air bubbles that may exist.
- Bake the cake on the center rack of your 375F (190C) for 35 minutes or until the top of the cake springs back when lightly touched. Any cracks on the surface should look dry.
- Immediately upon removing from oven, invert the cake onto a bottle or can and allow it to cool completely.
- Once cake has cooled, place right-side-up and run a knife inside the rim of the cake pan. Invert cake onto serving platter.
- Slice carefully, Angel food cake is delicate so be sure to saw/slice each piece carefully with a serrated knife to avoid smashing it with a dull straight-blade. Serve with strawberries and homemade whipped cream, if desired.strawberries and homemade whipped cream for topping
Notes
¹If you don’t have a stand mixer:
You don’t have to use a KitchenAid/stand mixer, but I do recommend using at least an electric hand mixer (with a large bowl!), as whipping the egg whites by hand will be very difficult, time consuming, and exhausting! It will take much longer to whip egg whites with a hand mixer than with a stand mixer, so have patience!²Use fresh, not carton, egg whites
Use fresh egg whites and not the kind sold in a carton. Egg whites sold in a carton usually will not whip properly to stiff peaks, so use fresh!³Bowl for cracking egg whites
You want to be sure that you crack your eggs into a completely grease-free bowl and that there are absolutely NO pieces of yolk in with the whites. My suggestion is to crack each egg in a smaller bowl and then immediately transfer it to your measuring cup; don’t crack every egg directly into the measuring cup because if you accidentally get a bit of yolk in the cup near the end that you can’t scrape out, you will have to discard all of the whites and start over⁴Stiff peaks
Stiff peaks exist when you can dip a knife or spatula into the mixture and the peaks that form when you remove the utensil hold their shape firmly without the point of the peak folding or receding back into the mixture at all.Storing
Store in an airtight container at room temperature for up to 3-5 days. This cake may also be frozen. Cool completely, wrap tightly in plastic wrap, and freeze for up to 3 months.Nutrition
Nutrition information is automatically calculated, so should only be used as an approximation.
Like this? Leave a comment below!
This post was originally published 3/30/16


The first time I made this cake it was a bit rubbery, but the flavor was amazing. A lady that I work with made it and it was heavenly. I purchased a stand mixer and pulled out my scale to weigh the ingredients. The second one was fabulous, we are addicted. I have made one every weekend for the past month.
Angel food cake can be challenging if you are not already familiar with meringue. Given it has a lot of variables and the directions given in this recipe need to be followed very closely for success. I have 40 + years as a pastry chef and I back this recipe, I’ve made it and live in high altitude so only adjusting the temp down by 10 . This is the best recipe for this cake on the web
Thank you so much for trying my recipe, Steve! I’m so glad you enjoyed it so much! 🙂
Can u use round cake pans instead of bunt pan ?
Hi Joy! This cake needs a center piece to help it rise and hold up. I wouldn’t recommend a round cake pan. 🙁
Excellent recipe! Turned out perfect! I did use carton egg whites. (I use carton egg whites for macarons and have found one brand that’s whips up stiff). Will use this recipe again as Angel food cake is my husband’s favorite cake!
Way too much sugar- our cake fell out of the pan when we went to turn it upside down! We live in CO, so maybe an altitude thing, but cutting the sugar in half worked much much better. Sad to waste so many eggs and so much flour and sugar!
I’m so sorry to hear this happened, Sonja! The sugar in the cake will not make the cake fall out of the pan. Did you grease your pan? Did you use a non stick pan? These things will cause the cake to fall out of the pan when it’s inverted. 🙁
I’m so sad…the cake was looking absolutely perfect 2 minutes before I pulled it out of the oven. When the timer went off, I opened the oven to pull it out the cake had collapsed. I don’t what happened. I’ll have to do some trouble shooting to what the cause was. It smells amazing. I can’t wait to taste it after it cools. If anyone knows what happened, please share. Definitely going to try again but I don’t want to make the same mistake.
I’m so sorry to hear this happened, Debbie! Were your egg whites at stiff peaks? Did you fold them in gently? Over-mixing them can cause them to deflate and your cake to shrink like this. Did you open the oven door the 2 minutes before the timer went off? Did you grease your pan? You egg whites need something to hold onto as they rise and bake, if you grease your pan your cake can fall. I’m glad you were still able to enjoy it. 🙂
Even though the cake was only about 4 inches tall, it was delicious. Can’t wait to make it again. I did beat them very stiff, (maybe too stiff??). I was very careful about folding the flour in. I didn’t open the door, can’t speak to the husband though so that’s a possibility. No grease in the pan. I’ll figure out what happened. It’s too bad I just have to keep trying and eating my mistakes…
You can potentially over whip those egg whites so maybe stop a little shorter next time, or you can make more “mistakes” to keep trying! 😉 I hope it turns out better next time. 🙂
This angel food cake has the best flavor and everyone at a gathering I was at loved it! So light and airy! Thank you for sharing this recipe!
Thank you so much for trying my recipe, Dana! I’m so glad you enjoyed the cake so much! 🙂
Excellent instructions and tips! Easily followed! First ever angel food cake. I can’t wait to serve this!
We’re so happy it turned out so nicely for you, Chris! 💕
This is absolutely the BEST!! I have made 2 cakes in the last 48 hours, because everyone devoured it!!! I will be making this for many years to come!
Do you know how I can make this into a chocolate cake? Thank you!!!
Thank you so much for trying my recipe, Sally! I’m so glad it’s been such a hit! I haven’t tried making this chocolate so I wouldn’t be able to say for sure how to do it. 🙁
Truly the best ever perfect angel food cake. It is my husband’s favorite with orange extract for an extra special birthday cake. It is the lightest, fluffiest, festive cake. All our friends agreed it is my best attempt ever!
Thank you for a delightful treat. So easy to follow the recipe!
After having this recipe on lockdown for the past several years, I finally decided it’s time to leave a review. I have made this countless times for events and gatherings, as I live in AZ so a lot of people appreciate not having a heavy dessert during spring and summer time. Boy oh boy, did I make a mistake… I now have requests for this cake on a monthly basis for family dinners, birthdays, etc. Everyone wants me to make “that angel food cake with the whipped cream and berries”. Seriously, it is my identity now! Lol.
I follow the recipe exactly and I do in fact add in the almond extract! I typically split the cake into 3 layers and top each with homemade whipped cream, strawberries, blueberries, raspberries, etc.
Always a huge hit!
Thank you so much for taking the time to leave a review Madi! I’m so glad this has been such a hit for everyone. 🙂
I tried this recipe and it was amazing! Not only was it delicous, it was fairly simple to make and did not take much time at all. This will be my go to for angel food cake moving forward!
Hi, can you sub this recipe to be gluten free? If so , do you have any suggestions on what flour is best ? Thank you
Unfortunately I do not have much experience with gluten free baking. I would think a 1:1 gluten free flour could work here, but I just don’t know for sure. If you do try it I would love to know how it turns out. 🙂
This very frustrating trying to print the recipes. You’re my favorite one to go to for my recipes and make your homemade cakes for my family’s birthdays.
I have been for years without any problems. It’s much easier for me to have it printed out.
I tried to sign up to be able to print but it doesn’t work.
Why do we have to give our e-mail again when I’m already receiving your recipes?
I’m so sorry to hear this is happening, Diana! I’m not really sure why you are having these issues. I have had a couple of people say the same thing. I am reaching out to my tech team. It’s odd. Do you have an ad blocker that could be causing an issue? I really don’t know why this is happening I am just trying to trouble shoot at this point. I truly appreciate your support and I am actively working on getting this resolved. 🙂
I made this cake by strictly following the recipe. It turned out a beautiful soft, fluffy texture and the taste is one of the best angel food cake that I’ve ever had. Thanks for sharing the recipe.
I love this recipe! I have made it countless times and everyone raves about it! Made it again tonight!
We’re so glad you love it, Lisa!