
Meringue Cookies
This post may contain affiliate links. As an Amazon Associate I earn from qualifying purchases. Please read my disclosure policy.
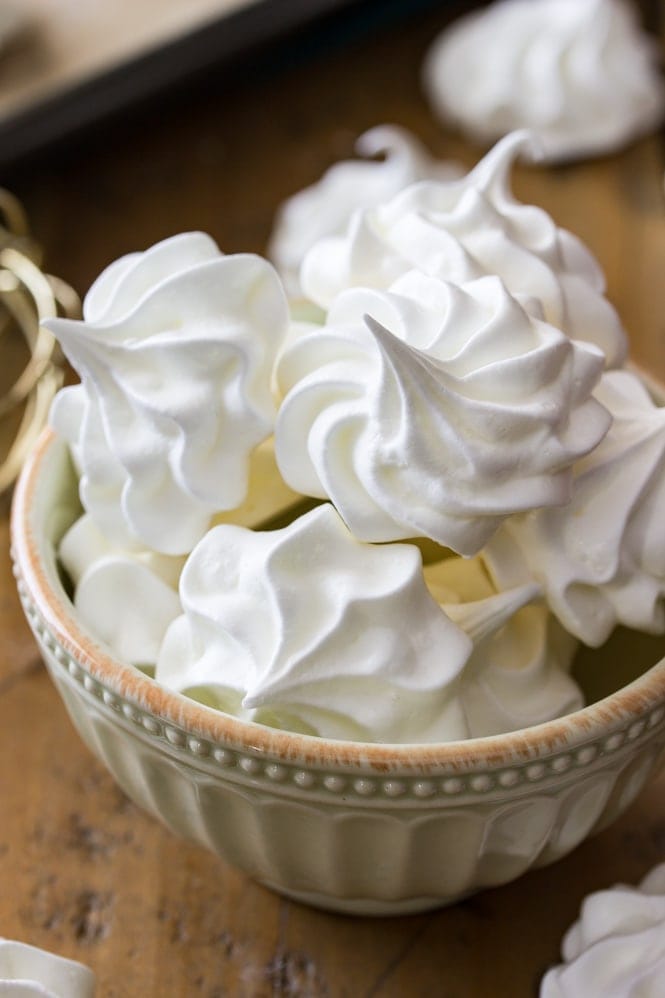
A classic recipe for meringue cookies! These little meringues only call for 5 ingredients, and at under 25 calories a pop they are easily the lightest recipe on my blog! The technique takes a little bit of practice, and a long time in the oven, but I’ll walk you through the steps in the recipe so that you can make your own perfect meringues!
Sweet & Simple Meringue Cookies
I have another recipe for your holiday cookie tray today — classic meringue cookies!
Meringues only require 5 ingredients to make, but they can be a little bit finicky — even the weather can affect them. Winter is a great time to try them out, as you’re much less likely to have a very humid day this time of year, and humidity is one of the greatest nemesis of meringue cookies.
I’ve been making this recipe over and over again the past few months to make sure that I understood all of the ins and outs of making perfect meringue cookies, and I’m finally ready to share what I’ve learned with you, so that you too can make these addictive little meringue cookies.
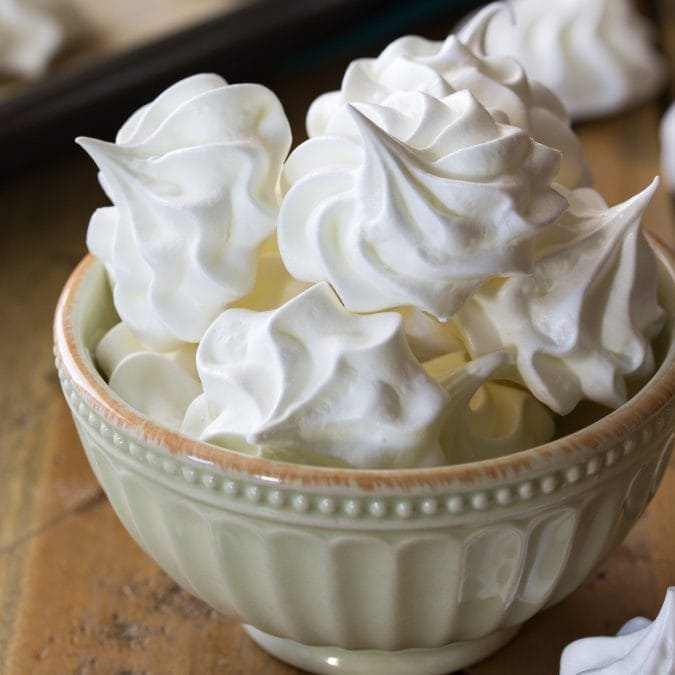
If you’ve never had one, meringues are light, airy cookies with crisp interiors. I’m sharing a classic vanilla meringue recipe today (with notes on how to add your own different flavors!). The taste always reminds me of marshmallow 😍.
Making Meringue: Stiff Peaks
This recipe calls for four egg whites and a single cup of sugar. That may not seem like it’s going to yield you very many meringues when you start, but you’ll be surprised by how much these ingredients increase in volume.
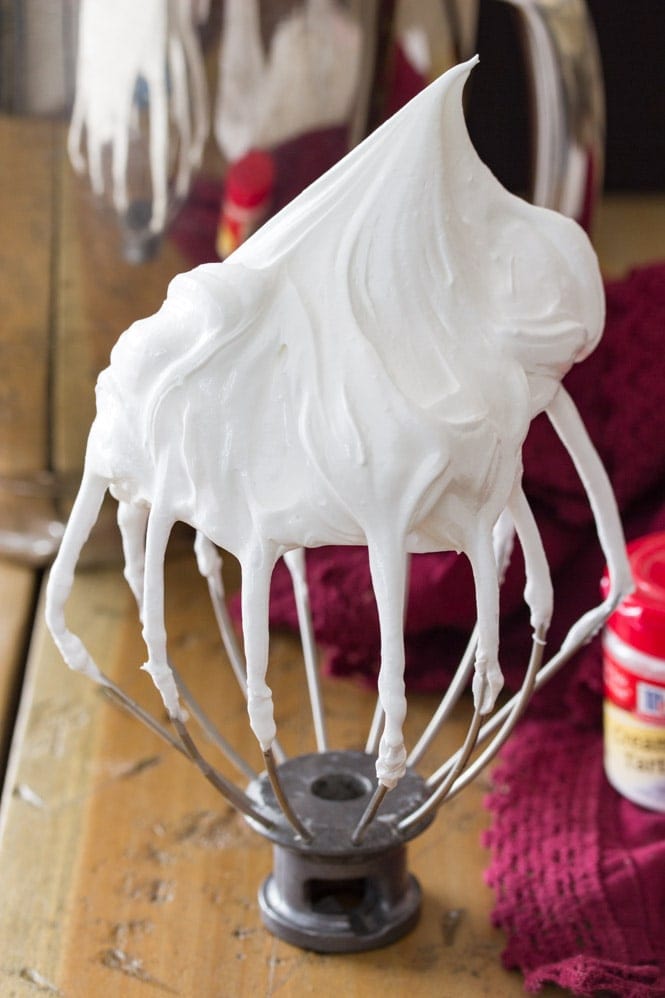
As you add the sugar, the mixture will become thick, glossy, and sticky, that’s exactly what you are looking for! You’ll also want the mixture to achieve stiff peaks — that’s how you’ll know that it’s done.
If you’ve made my angel food cake, whipped cream, or Swiss meringue buttercream before, then you’re already familiar with the concept of stiff peaks. It means that when you turn the batter over (like you can see in the image below with the meringue cookie batter), the peak that forms stands tall and does not fold back into itself. I’ve included a video in today’s post so you can see exactly how the meringue should look, in case you haven’t ever made meringue before.
Tips for No-Fail Meringue Cookies
- Make sure that the bowl and beater that you are using to beat your meringue is completely grease and moisture free. Any moisture can ruin your meringues.
- Crack your eggs in a separate bowl when separating the whites. Even a tiny bit of yolk can ruin your meringues, so crack each egg in a small bowl before adding it to the bowl that you will be mixing the meringue batter in.
- Add the sugar gradually, one Tablespoon at a time, and give it a chance to dissolve before adding more.
- You can test that the sugar is completely absorbed by taking a small bit of the batter and rubbing it between your fingers — if it’s not, it’ll feel gritty.
- Don’t stop until you get stiff peaks. The batter will take several minutes, at least, of beating to achieve stiff peaks, but keep going. It will increase in volume and be very thick and glossy — that’s what you’re looking for! See the photo above or the video for a visual.
- Don’t over-beat your batter, either! Once you hit stiff peaks, stop! You can stir in your extract and any food coloring at this point, but don’t push it because over-beating the batter is just as bad as not beating it enough.
- If you’ve found that your meringues have gotten soft after you finished baking them, you can actually pop them back in the oven at 225F for another 10-20 minutes (watch them, if they begin to turn golden brown around the edges turn off the heat immediately) and then let them cool in the oven for another hour, this has always worked for me with meringues that start to get chewy.

Adding Color and Other Flavoring
Once you get the hang of making meringues, feel free to play with lots of different flavors and colors — I made these Peppermint Bark Meringues by adding 1/4 teaspoon peppermint extract, striping the piping bag with red food coloring (I used a clean paintbrush that I only use for baking), and dipping the baked, cooled meringue cookies in dark chocolate and crushed peppermint pieces!
Enjoy!
More Christmas Treats You Might Like:
Meringue Cookies
Equipment
Ingredients
- 4 large egg whites, room temperature
- ½ teaspoon cream of tartar
- ⅛ teaspoon salt
- 1 cup (200 g) granulated sugar
- 1 teaspoon vanilla extract¹
Instructions
- Preheat oven to 225F (105C) and line a large cookie sheet (or two regular-sized cookie sheets -- make sure they will fit in your oven together) with parchment paper. Set aside.
- Combine egg whites, cream of tartar, and salt in a large, completely clean, completely grease-free bowl².4 large egg whites, ½ teaspoon cream of tartar, ⅛ teaspoon salt
- Using an electric mixer or a stand mixer (with either the whisk or paddle attachment), stir on low speed until mixture becomes foamy.
- Increase speed to high.
- With mixer on high, gradually add sugar, about 1 Tablespoon at a time, stirring after each addition until sugar is dissolved (about 15-20 seconds between each addition).1 cup (200 g) granulated sugar
- Beat until mixture is thick, shiny, and has increased in volume. Mixture should have stiff peaks and sugar should be completely dissolved (you can test this by rubbing a small bit of the mixture between your fingers, if it feels gritty, the sugar isn't dissolved).
- Stir in vanilla extract and any other extract you may like to use. If using food coloring, add the food coloring at this stage, too.1 teaspoon vanilla extract¹
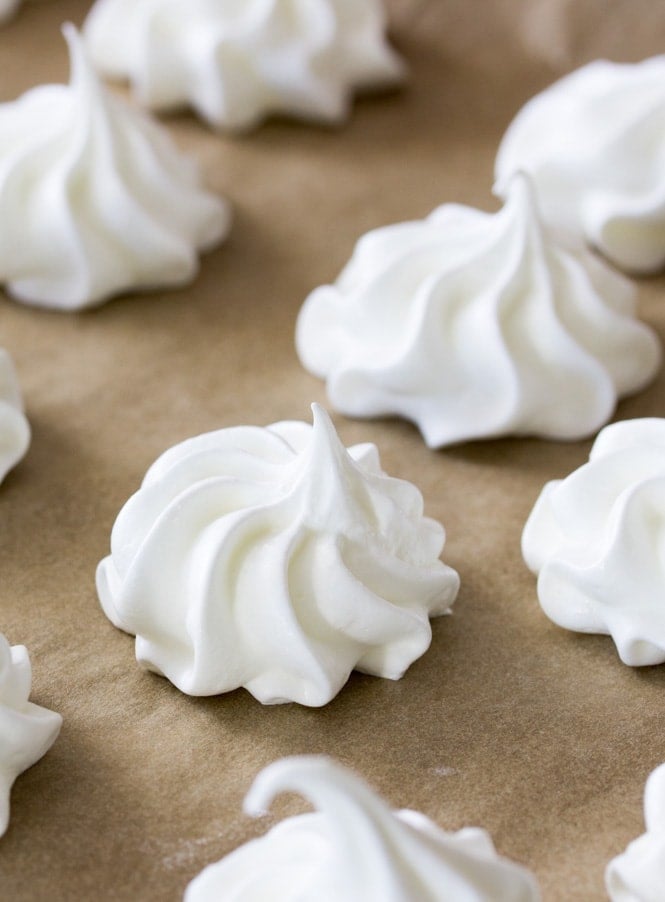
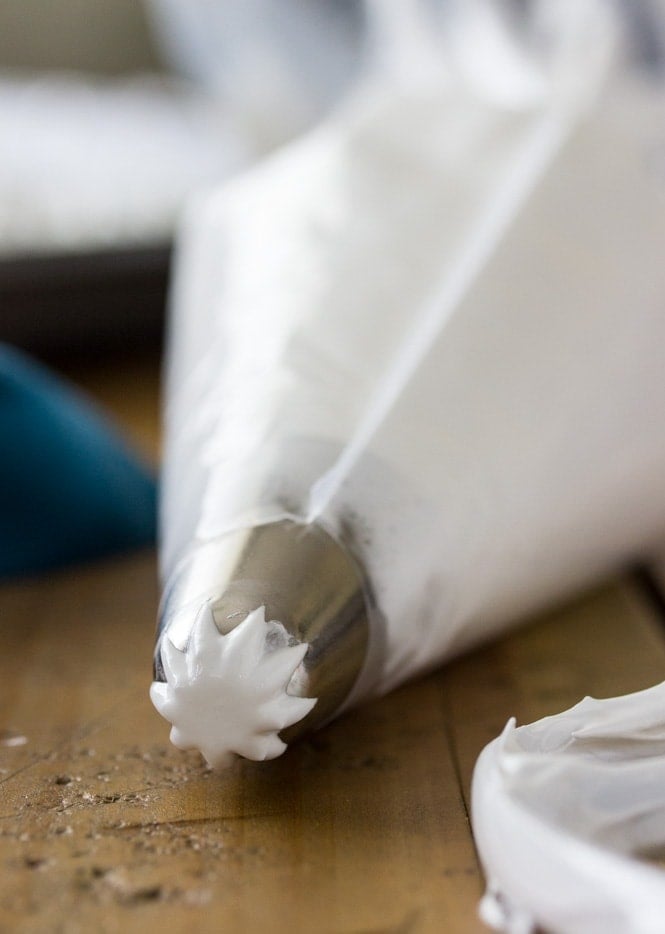
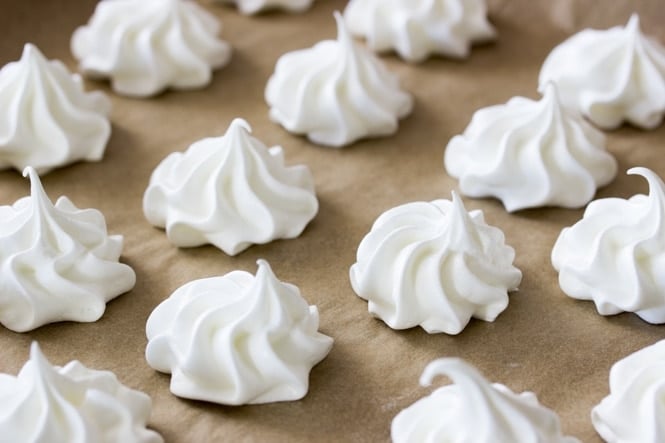
- Fit a large disposable piping bag with a large tip (I used Ateco 846, but any large star tip will work or you can just snip the edge of the piping bag for a “kiss” formation) and transfer meringue to prepared piping bag and pipe onto prepared cookie sheet. The meringue cookies can be pretty close to each other as they won’t spread, and you will want to bake all of the cookies at the same time, so make sure you make enough space.
- Bake on 225F (105C) for 1 hour. Turn off the oven once the baking time has passed, and do not open the oven. Leave the oven door closed and allow cookies to cool completely in the oven (1-2 hours) before removing.
- Meringue cookies should be crisp and can be stored in an airtight container. Keep away from heat and moisture as it can soften your meringues.
Notes
Recipes to use those leftover egg yolks:
Nutrition
Nutrition information is automatically calculated, so should only be used as an approximation.
Like this? Leave a comment below!


Super easy to make! My kids (12 year old and 9 years old) Made them all by themselves with my supervision, but they did not need any help. The meringues turned out amazing, thank you so much for creating this awesome recipe.
This recipe is awesome!
I LOVE vanilla meringue cookies. probably one of my fav cookies ever.
Keep up the absolute WONDERFUL work Sam!
🍪👍🫰🫰🫰🫰🫰
I have made this recipe twice and it has been amazing both times. I love the hack included in the recipe to tell if the sugar is fullly dissolved. Great recipe!
Hoping these will be tasty
If I make these with artificial sweetener how much sweetener should I use? Your help is greatly appreciated. I love merangue cookies and have used this recipe many many times.
Hi Cindy! I have not personally tried a sugar substitute, but others have reported using the same amount with success. Let me know how it goes if you try it. 🙂
What if I have beat it all the way but the sugar is still not dissolved? I don’t want to overbeat it.
I’m so sorry to hear this is happening! Is it possible the sugars were added too quickly? If it’s slightly gritty I would probably just bake it anyway. I hope you love them! 🙂
Try extra fine sugar.
I have made these 5 times now, and everybody loves it! they are so light, crisp, and full of yummy flavor! 🤤 I usually make mine about an inch or more in width, and they always turn out perfect! I also love how many cookies this recipe makes! In my last batch, I somehow made 121 cookies! It was amazing! Thank you so very much for these delicious treats! ☺️
Thanks so much for the review, Adah! So glad everyone loves the cookies so much 💕
What do you recommend for a commercial convection oven as far as temperature and time?
Unfortunately we don’t have experience with that kind of oven, so we can’t say for sure 🙁
I’ve tried this recipe twice already. The first time I obviously followed the recipe to a T and they ended up amazing, I didn’t have a piping bag so I just used a spoon and made them a bit bigger than you’d expect. They were still good just a bit chewy (which wasn’t a problem for me)
The second time I had some eggs that I had accidentally left out over night and wasn’t that sure they were still good to consume so I whipped up the recipe quick, only really looking at the ingredient measurements and doing the rest based off memory. I made them smaller this time and added food coloring and cinnamon. I figured if they went wrong it wouldn’t matter all that much. They came out good regardless of me heating the oven to 275 instead of 225. My mom tried them and said they tasted like lucky charm marshmallows.
I’m planning on making them a third time for Mothers day as meringue cookies are one of my moms favourites. This time I got a piping bag so it will be a bit more professional.
So glad our recipe has been such a hit for you! We hope your mom enjoys her mother’s day treat 💕
can I use Stevia instead of sugar?
Hi Sissy! I have not personally tried it with stevia, but I think it could work. 🙂
I have memories of my grandmother making some type of nut meringue cookie. Your recipe sparked those memories. That would have been 65 to 70 years ago, seriously..do you feel it is possible to fold in ground hazelnuts to your recipe and have ruining it? Thank you for the outstanding recipes.
Hi Nancy! I haven’t tried hazelnuts. I would make sure they are finely ground and I would use a small amount, like 1/4 cup. Nuts have oils in them and it can cause issues with the meringue setting up properly. I think I would make the meringues then dip them in chocolate and then into some finely ground hazelnuts. I hope that helps. If you try these I’d love to know how they turn out. 🙂