
Chocolate Pie Recipe
This post may contain affiliate links. As an Amazon Associate I earn from qualifying purchases. Please read my disclosure policy.

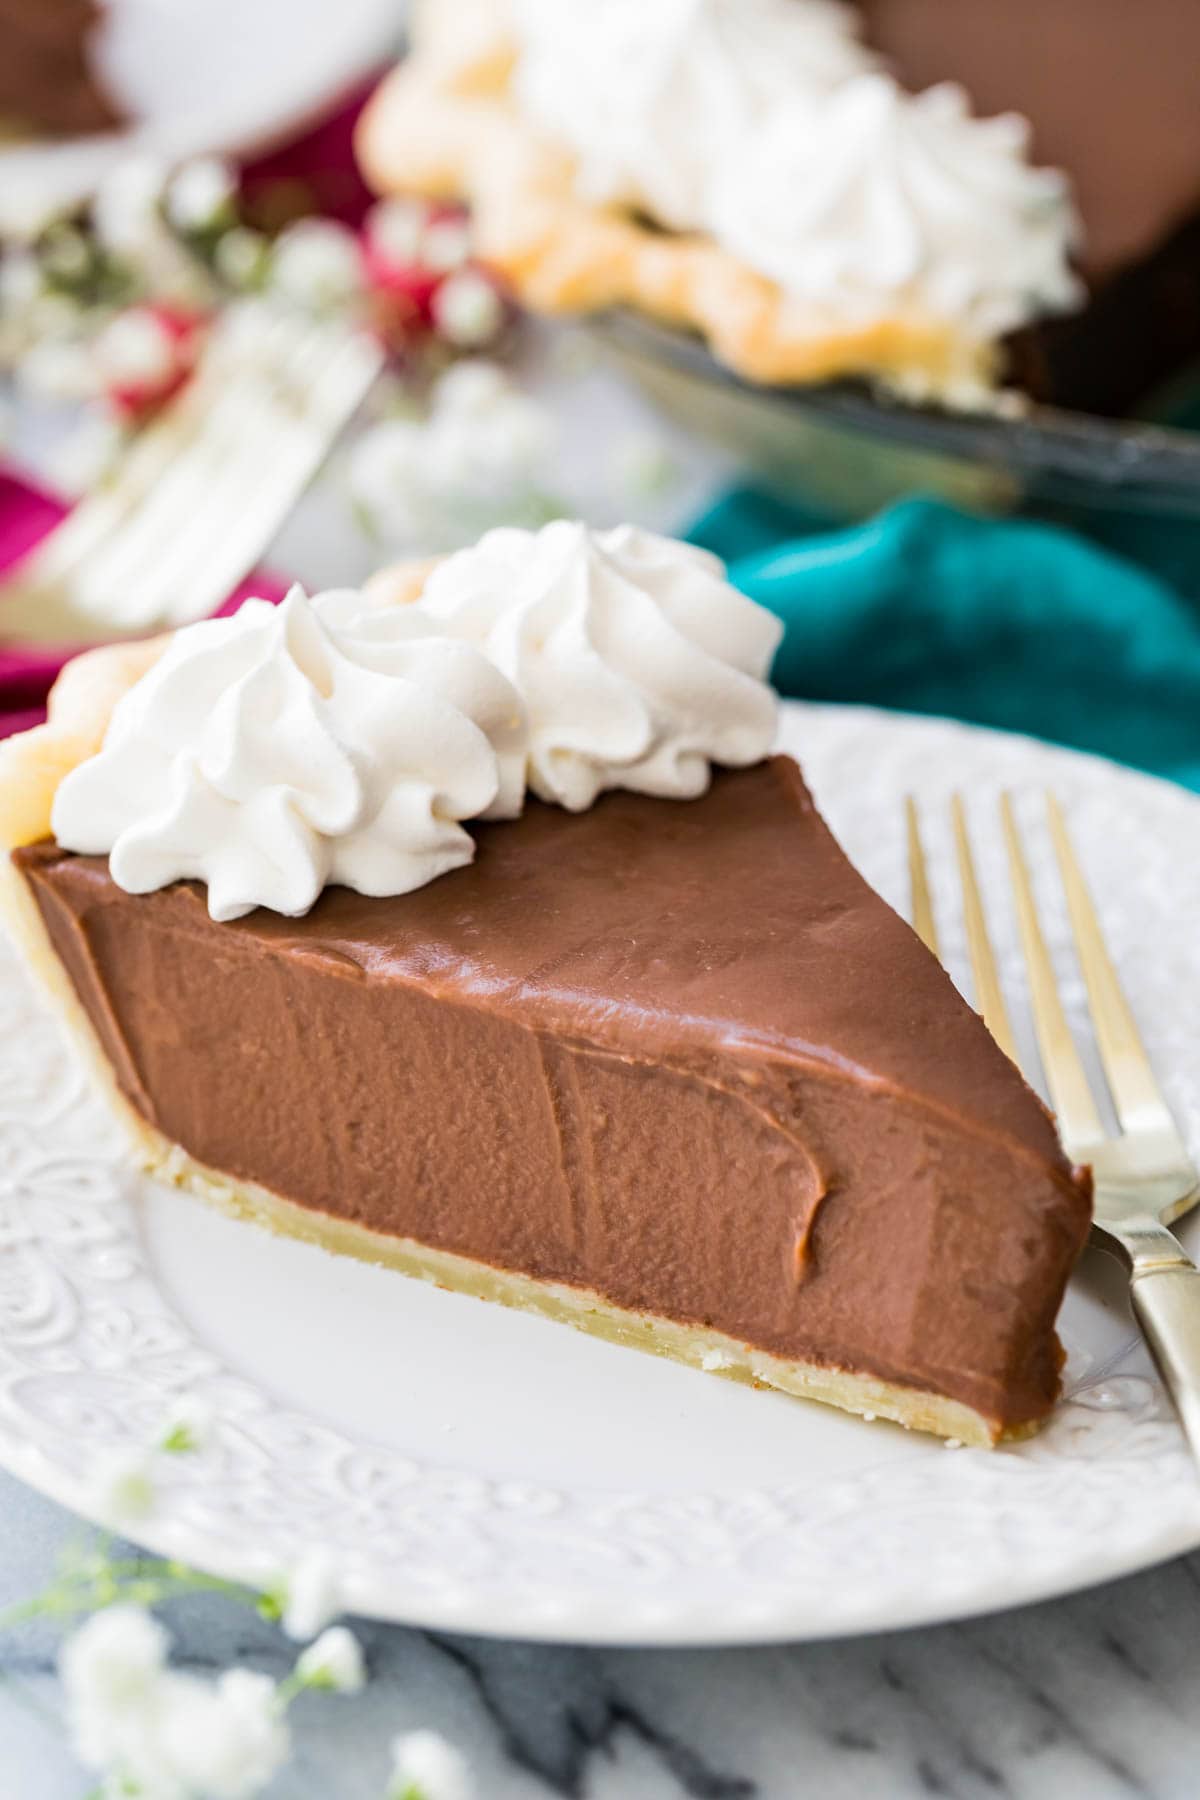
If you’re looking for a homemade chocolate pie recipe that’s rich, silky, and made completely from scratch, well this one’s for you. No box-mixes or shortcuts, I’ll show you how to make a smooth, homemade chocolate pudding topped with a cloud of fresh whipped cream. It’s also a great make-ahead option that’s even better the next day. Recipe includes a how-to video!
Classic Chocolate Pie (From Scratch, No Box Mix!)
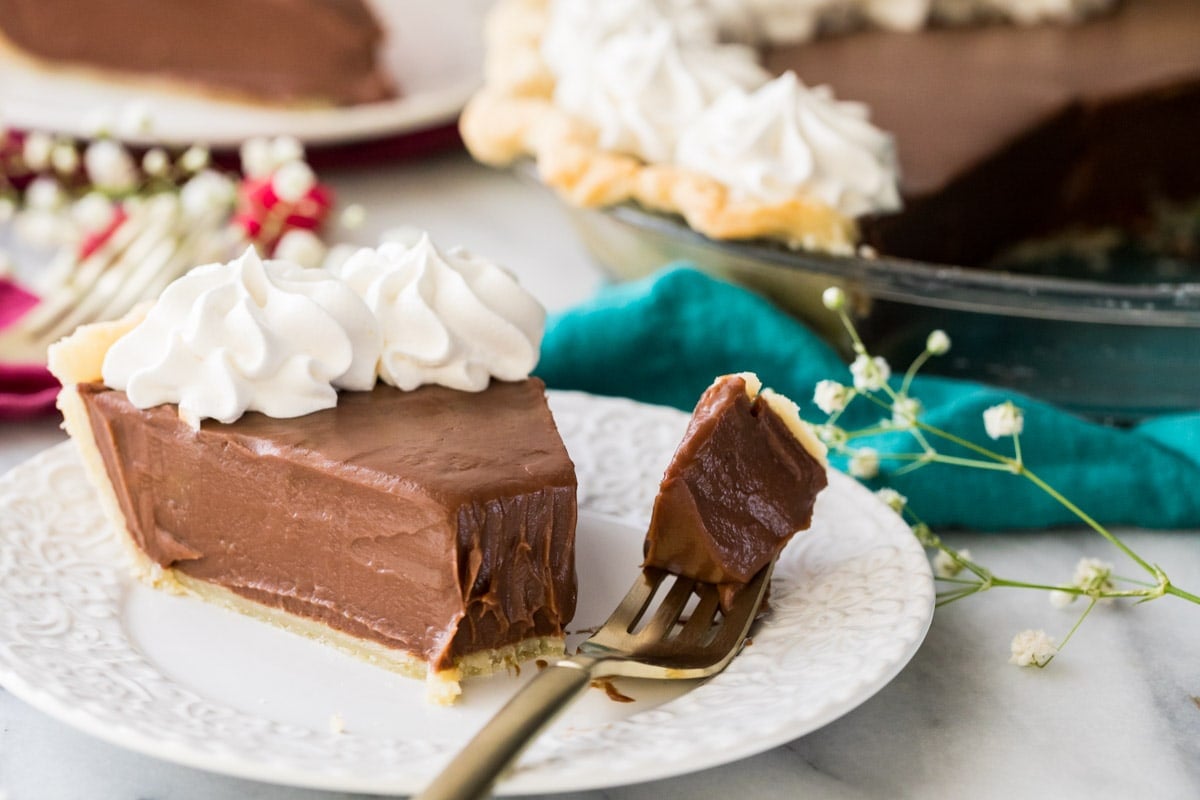
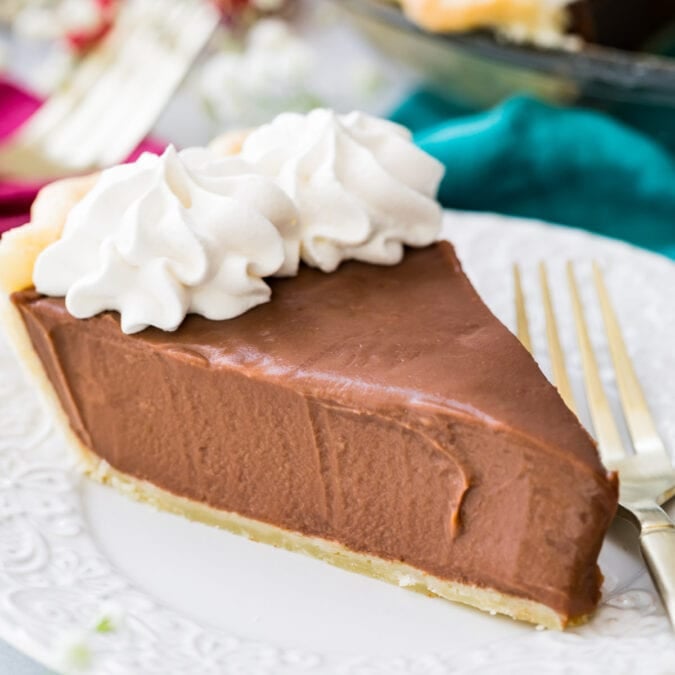
A true classic, I feel a good chocolate pie recipe is often overshadowed by holiday heavy-hitters like my pumpkin pie and my pecan pie recipe. But one bite, and you’ll wonder how anyone could overlook this masterpiece. It’s everything a great pie should be: rich, silky, decadent with a sliceable texture somewhere between a custard and a pudding.
Why This Chocolate Pie Recipe WORKS
- No box mixes or shortcuts. I’m sharing all my tips and tricks to make a real, indulgent and homemade chocolate pudding filling from scratch, and also link to my (favorite) flaky, buttery and homemade pie crust. When it’s done chilling, I suggest you take it a step further and serve with a dollop of homemade whipped cream!
- Sets perfectly so it’s sliceable (not scoopable!). The secret’s in just the right ratio of cream to milk, cooking low and slow until the filling til perfectly thickened, and chilling the pie for several hours to overnight.
- Real chocolate, not just cocoa. Melted chocolate adds body, stability, depth, and silky, melt-in-your-mouth finish that you just can’t get from cocoa powder.
- Perfect for making in advance. The pie will need to chill in the refrigerator for at least 6 hours before serving, making this an ideal dessert to prep a day ahead of time (I love doing this for Thanksgiving!).
Ingredients
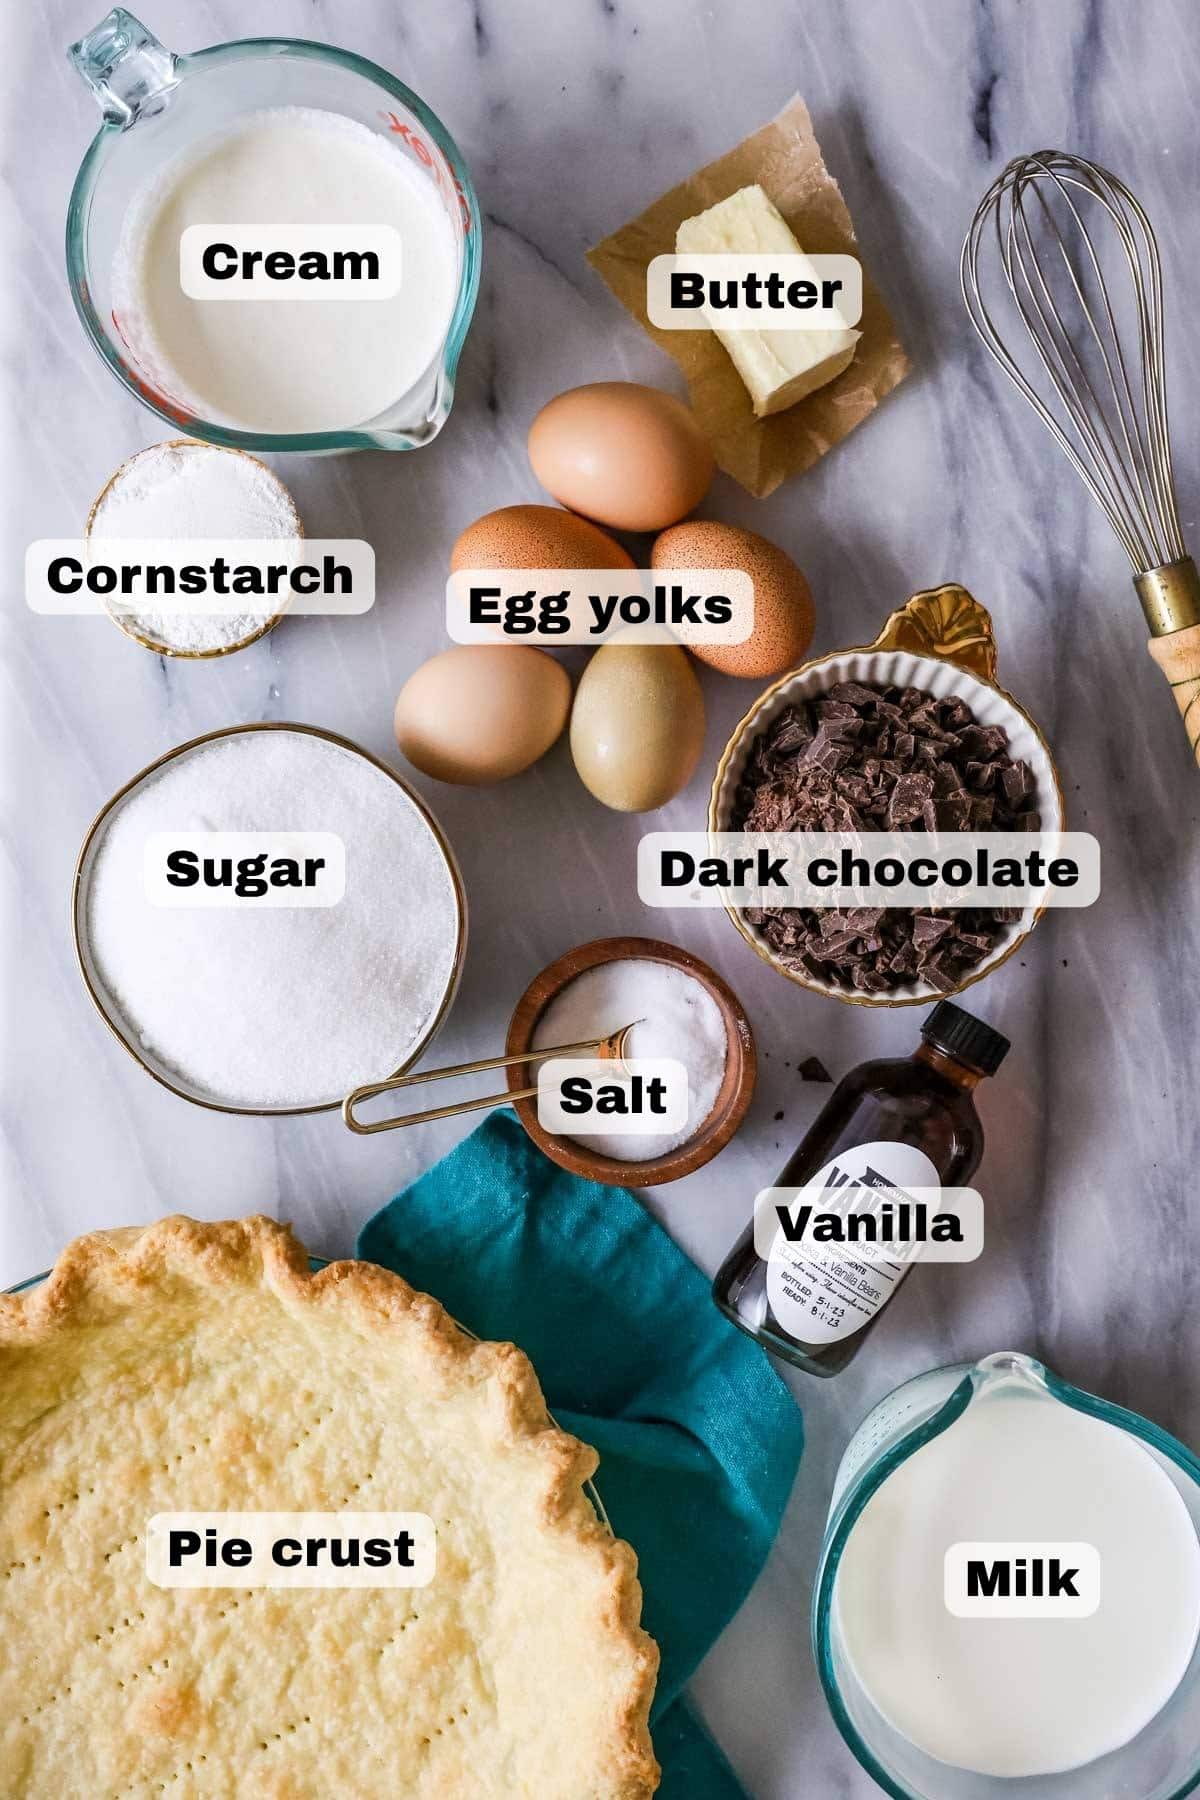
- Chocolate. Opt for dark chocolate (my favorite, I love the slightly more bitter notes of a 60% or even 72% bar) or semisweet (for a sweeter pie). While chocolate chips will work in a pinch, for best flavor and texture I recommend using a quality chopped chocolate bar.
- Granulated sugar. This not only serves as a sweetener, but it also melts as the pudding filling cooks, ultimately thickening the pie and contributing to its silky smooth and sliceable texture.
- Cornstarch. While many chocolate pie recipes use flour as a thickener, cornstarch thickens without the pasty heaviness you can sometimes get from flour.
- Eggs. You’ll need five egg yolks for this recipe. Save the whites to make meringues, Oreo cake, a few batches of candied pecans, or put them towards an angel food cake!
- Milk & heavy cream. A blend of whole milk and richer, thicker cream is another contributor to a silky smooth, yet sturdy pie. Stick with whole milk and heavy cream, double cream, or heavy whipping cream for this recipe.
- Butter. I use unsalted butter and add salt separately. We’ll add this along with the chocolate after cooking; it adds the final finishing touch and contributes to a glossy consistency and smooth texture.
This is just an overview of the ingredients I used and why. For the full chocolate pie recipe please scroll down to the bottom of the post!
How to Make Chocolate Pie
I recommend prepping all of your ingredients before you move over to the stovetop–things move pretty quickly after cooking! Chop your chocolate and butter, measure your vanilla, and place your strainer in your heatproof bowl before you even turn on the stove.

- Step 1: Cook the filling. Add the dry ingredients to a heavy-bottomed saucepan and whisk until combined. Whisk together the egg yolks, milk, and cream in a separate liquid measuring cup, then slowly pour into your cornstarch mixture. Whisk again until you have a smooth, lump-free consistency. Cook over medium heat, whisking frequently, until thickened.
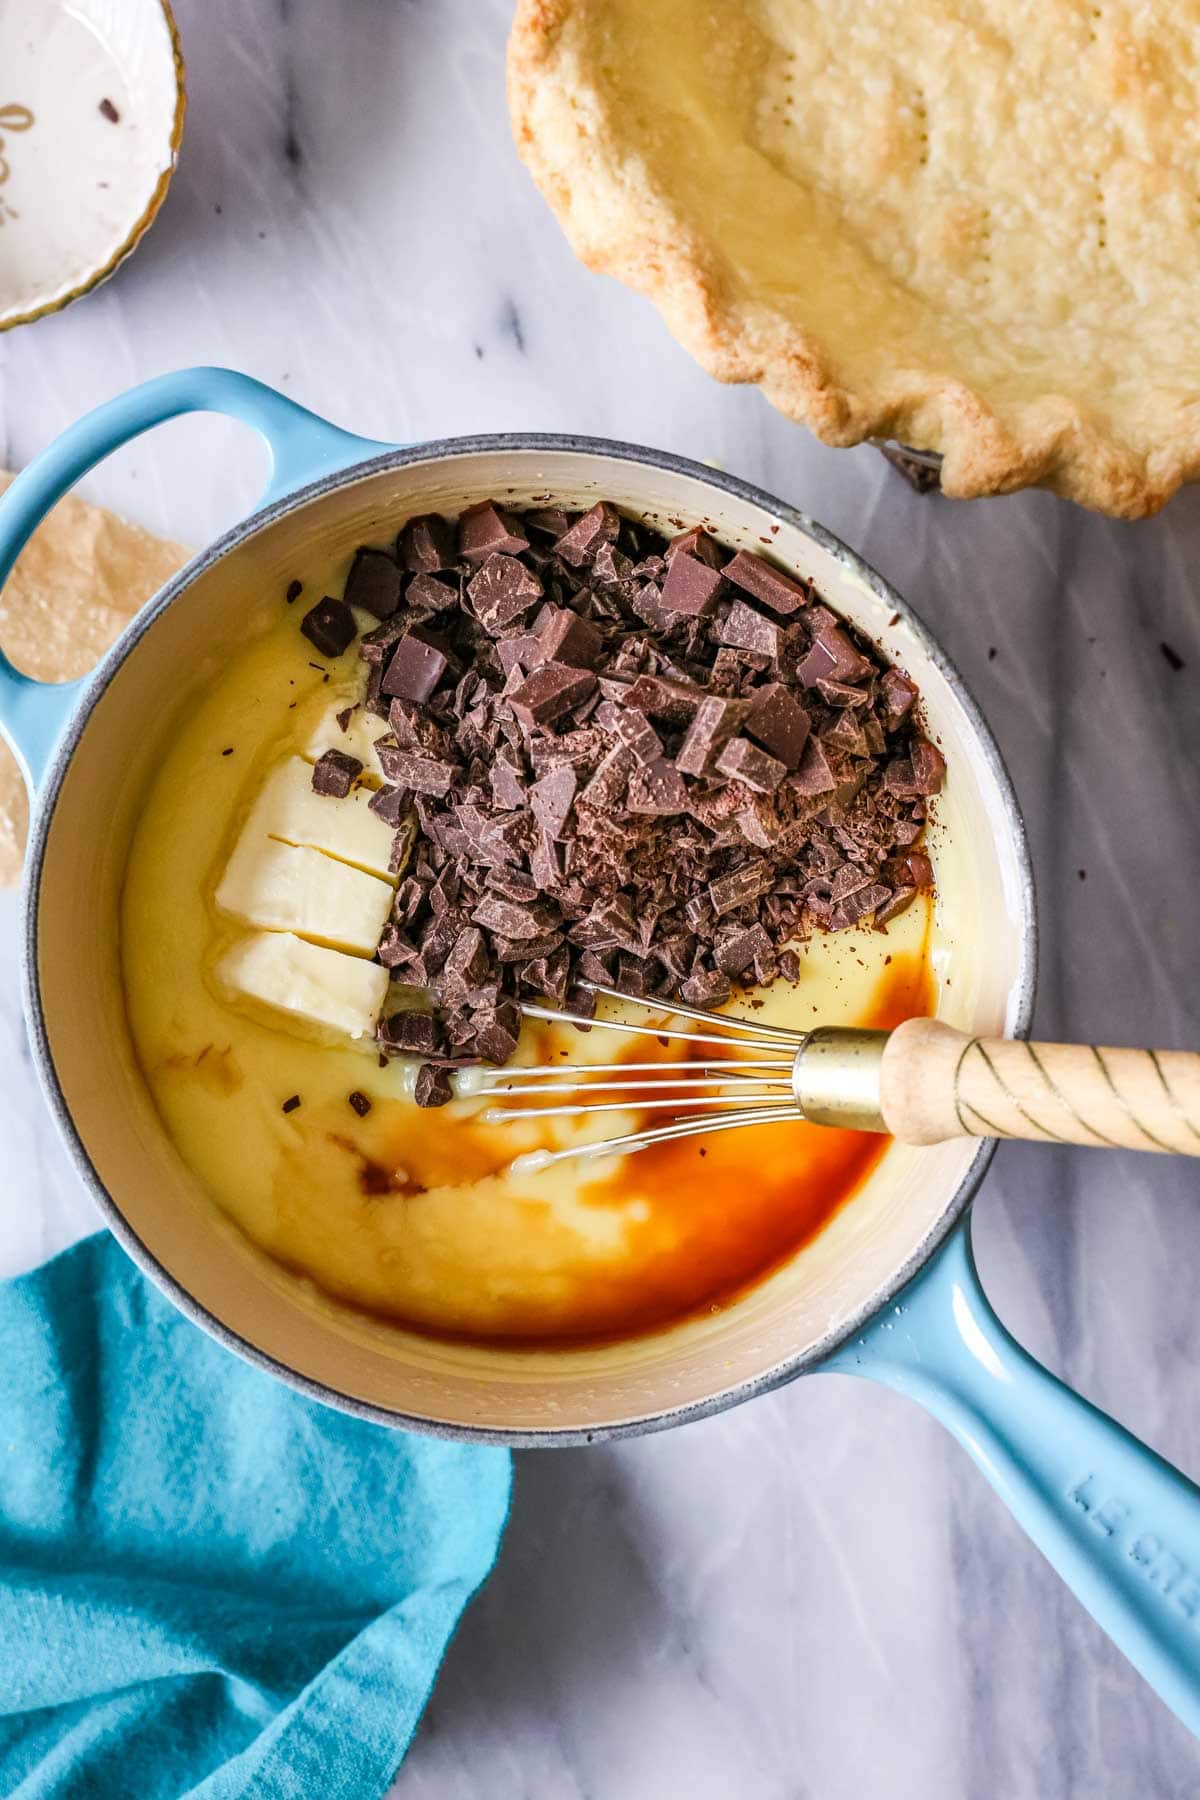
- Step 2: Add the butter, chocolate, and vanilla. Remove from heat and whisk in the chocolate, butter, and vanilla until you have a smooth, glossy chocolate mixture.

- Step 3: Pour into the (cooled) crust. Pour the custard through a fine mesh strainer into a heatproof bowl. This will catch any lumps or any tiny bits of egg, ensuring your chocolate pie is smooth! After straining, pour the filling into your prepared crust.
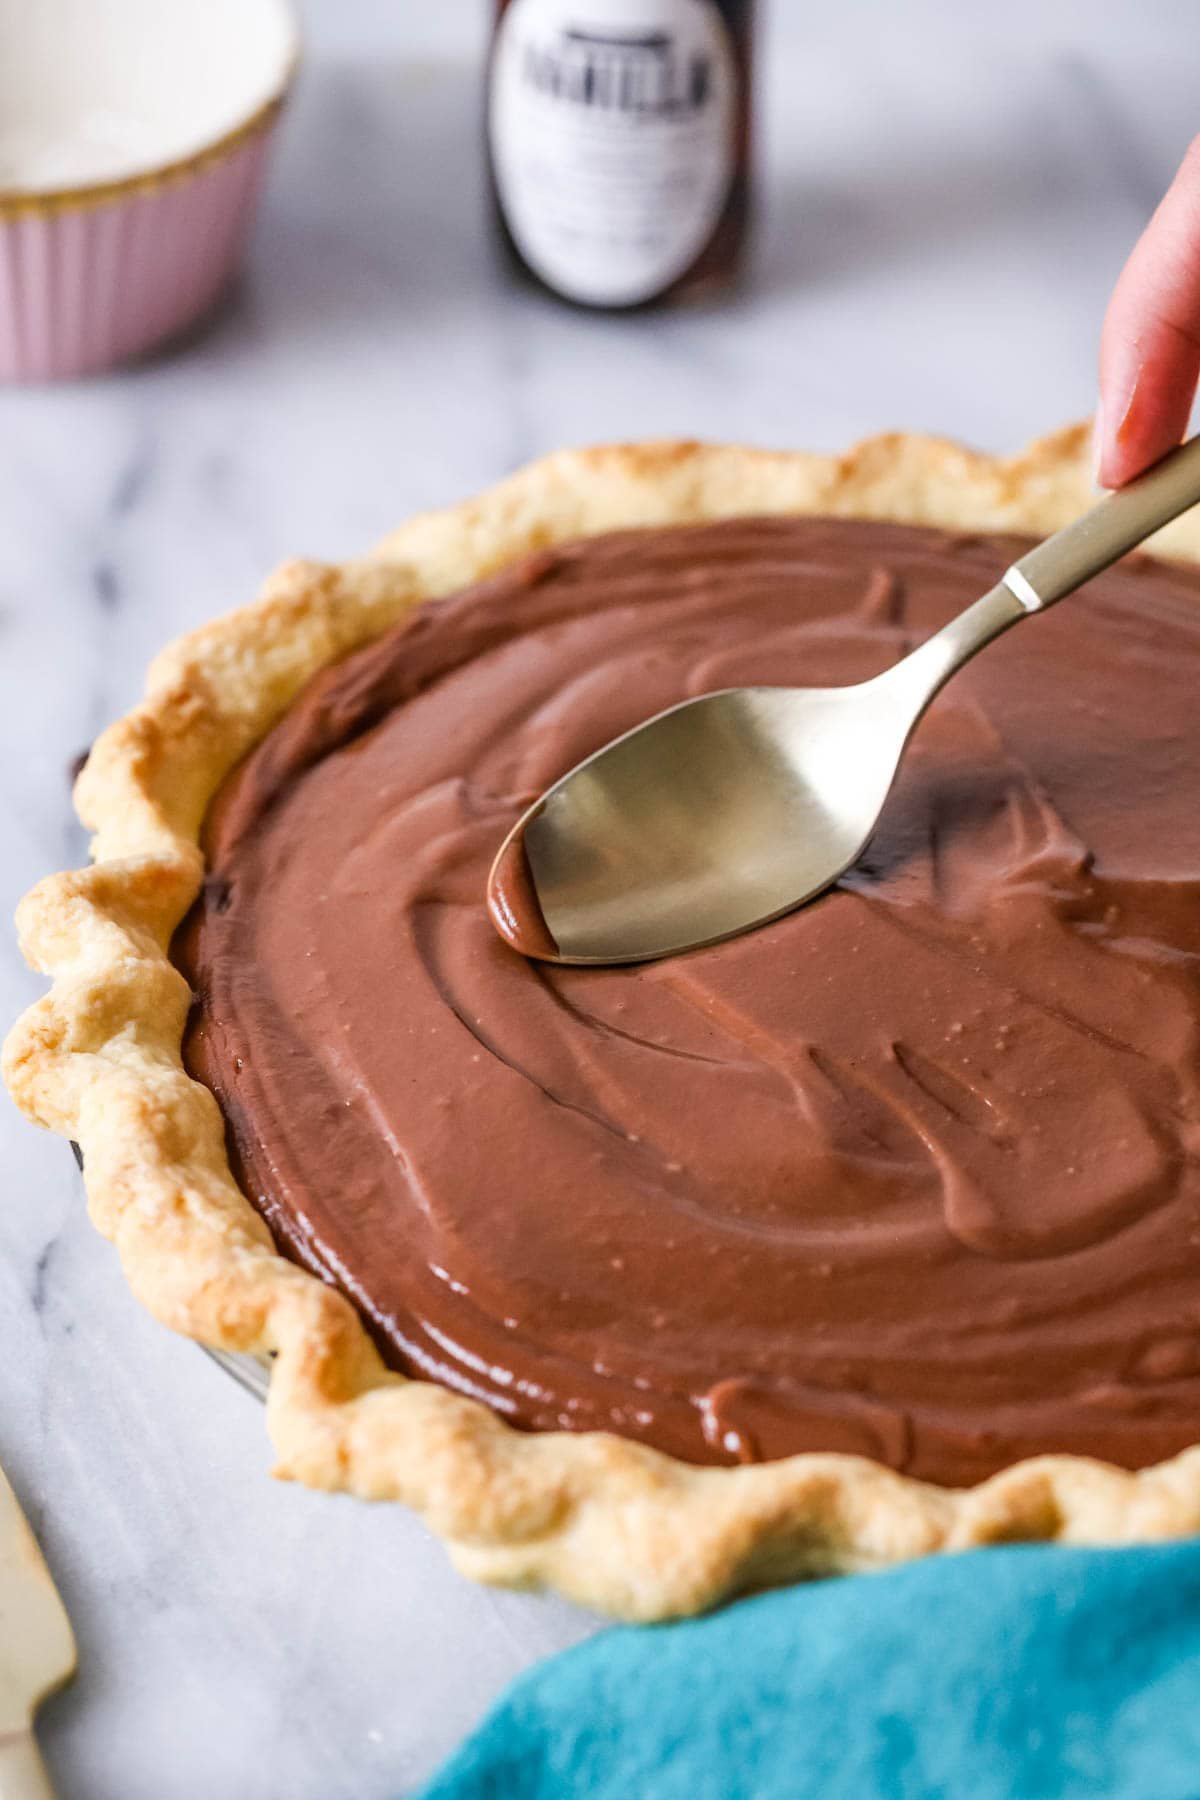
- Step 4: Cover and chill. Smooth the top of your pie with the back of a spoon or spatula, then press a piece of plastic wrap against the surface (this prevents a skin from forming). Place in the fridge to chill for at least 6 hours before topping with whipped cream and serving.

Frequently Asked Questions
This can happen for several reasons: if the cooking process was rushed, if the filling wasn’t carefully watched and stirred frequently, the filling was overcooked, the stovetop heat was too high, or if the pie isn’t given enough time to chill. Any ingredient substitutions could also result in a runny chocolate pie.
To prevent this, make sure you go slow, stir often, keep a watchful eye, and always chill for at least six hours before serving.
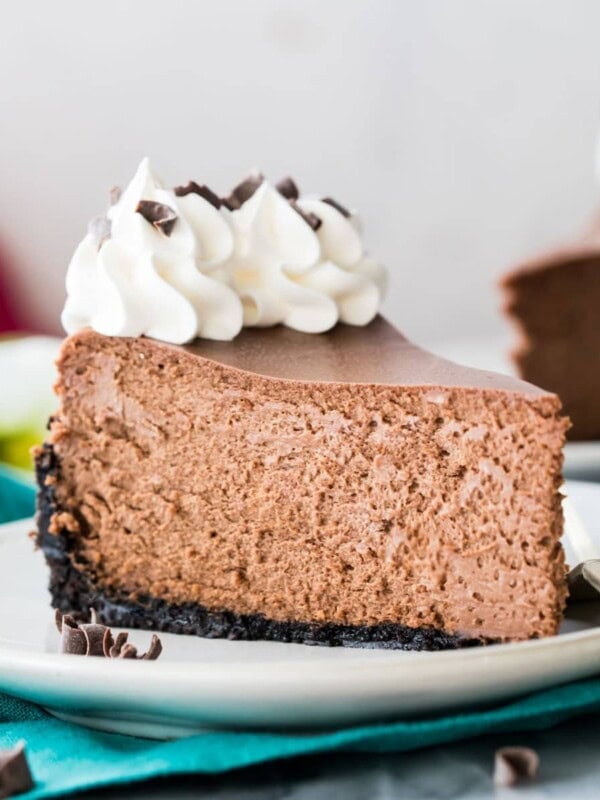
While both are incredibly rich and chocolatey (and even use similar ingredients), they’re actually quite different desserts. Traditional chocolate pie is thickened on the stovetop with egg yolks and cornstarch (or, sometimes, flour) and the resulting custard has a dense but creamy pudding-like texture. Alternatively, French silk pie has a lighter, silkier texture thanks to the fact it’s made with heavy cream that’s been whipped to stiff peaks. French silk pie is also often made with raw eggs, but in my French silk pie recipe I cook them so you can enjoy without worry.
Unfortunately I don’t recommend it. The chocolate pudding filling doesn’t always thaw nicely and can end up watery or grainy. I recommend keeping the pie refrigerated and enjoying within 3 days of preparing.
Tips & Troubleshooting
- Don’t rush it. Cooking the filling takes time. Do not crank up your heat to speed up the cooking process! The sugar needs to melt slowly so that the pie sets properly, and cooking it too fast will end up cooking your eggs (similar to what can happen to pastry cream or banana pudding). Have patience!
- Do use a heavy-bottomed saucepan. Or at least don’t use a thin, flimsy one. The thicker bottom helps keep the filling from over-heating and allows you to gently cook the eggs for a perfectly thick, silky, chocolate pie filling. I linked to one of the pans I often use in the recipe card, or an enameled cast iron saucepan is another good choice.
- Mise en place. Prepare/measure all of your ingredients before you begin. Have your heatproof bowl and fine mesh strainer ready to go. Once the chocolate pie filling thickens, you need to move quickly so the filling doesn’t overcook, so be ready!
- If your filling is too runny. It just needs more time to cook! Keep whisking until the mixture is thickened and starts to bubble. Exactly how long this takes will vary from kitchen to kitchen, but if it’s been over 15 minutes and nothing is happening, it’s OK and even advisable to turn up your heat a little bit!
- If your filling turned grainy or is too thick. Unfortunately the filling was likely cooked too much or on a heat that was too high, causing the eggs to cook. Next time keep the heat lower and stir frequently to keep the chocolate pie filling from getting too hot.
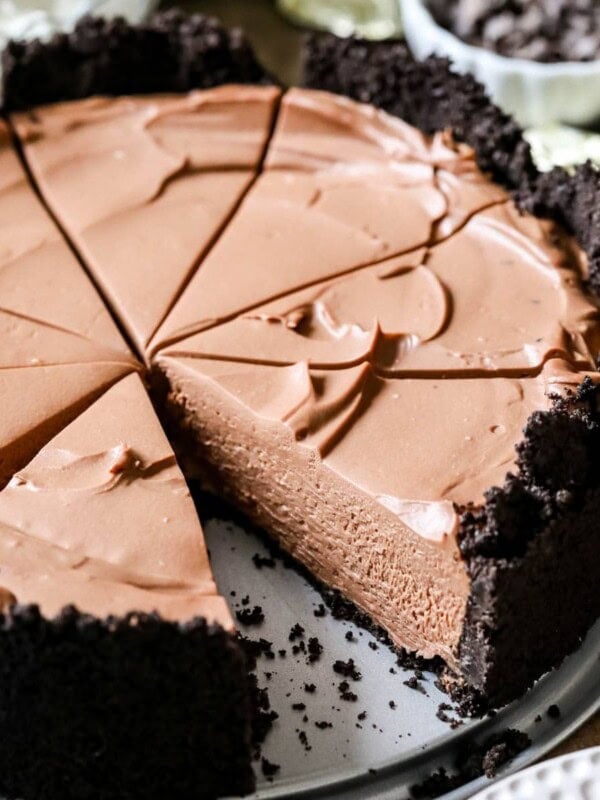
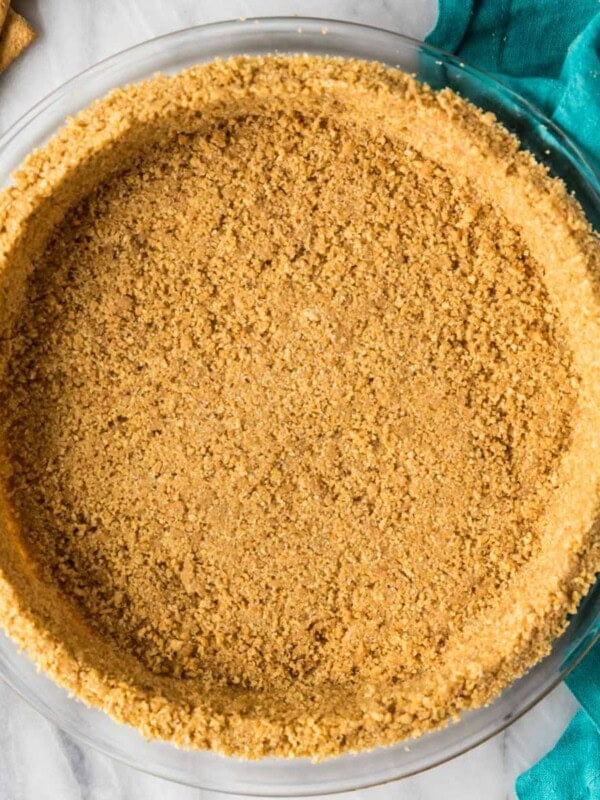
- Crust options. I love my classic pie crust, but you can swap this for a sourdough pie crust or make things easier with a graham cracker crust or an Oreo crust. Note that if you are using a store-bought crust, the filling may not all fit in and you may have some filling left over. Just enjoy it with a spoon!
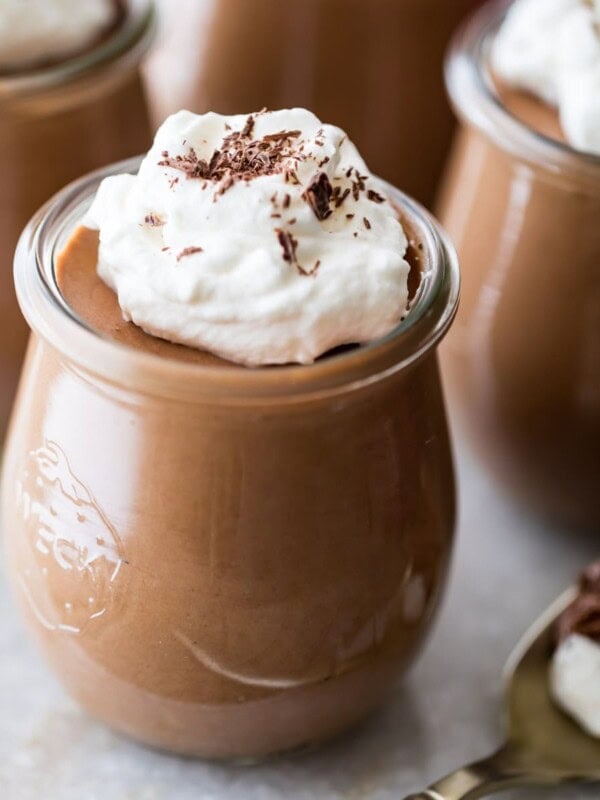
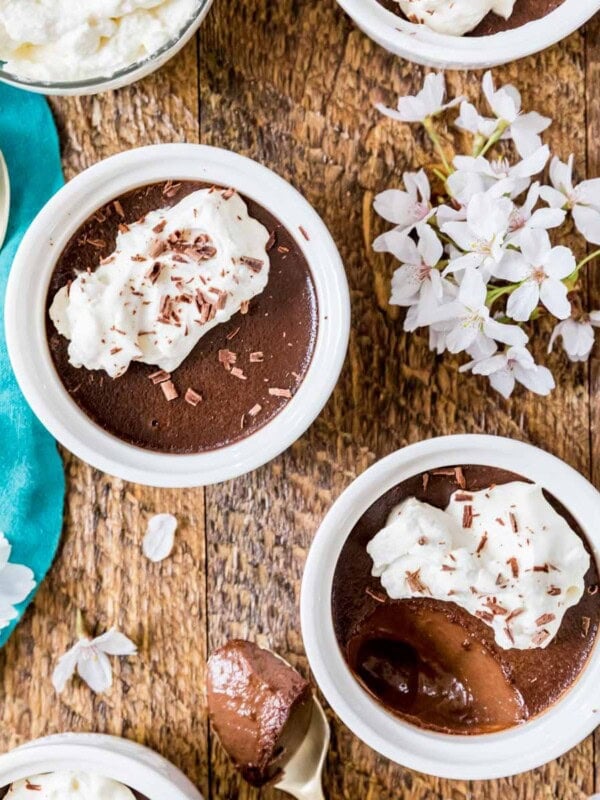
More Indulgent Chocolate Recipes
Check out my full collection of pie recipes for more incredible slices!
Enjoy!
Let’s bake together! Watch my step-by-step pie recipe below 💜
Chocolate Pie Recipe (Blue Ribbon Winner!)
Equipment
Ingredients
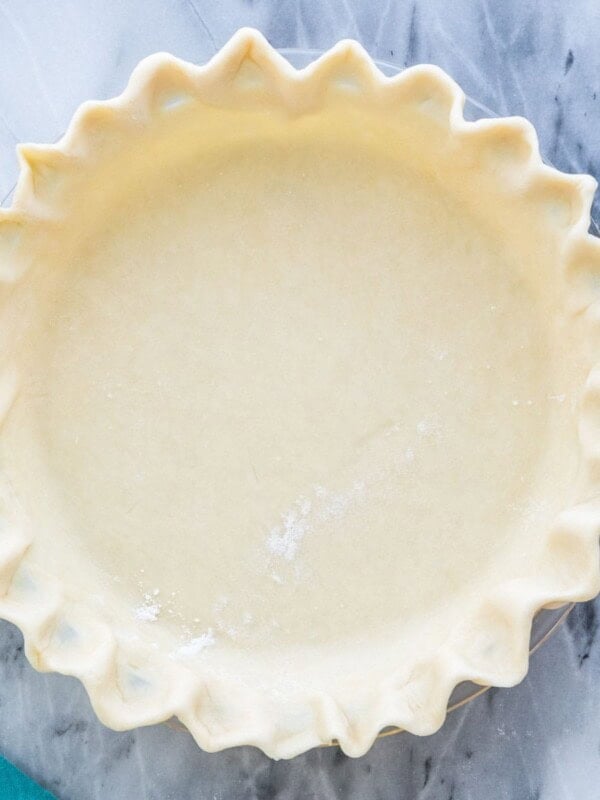
- 1 prepared (baked) 9" pie crust, click the link for my homemade recipe, see note 1
- 1 ½ cups (300 g) granulated sugar
- 5 Tablespoons (40 g) cornstarch
- ¼ teaspoon salt
- 5 large egg yolks², (see note 2 for recipes that you can make with your leftover egg whites)
- 2 cups (473 ml) whole milk
- 1 cup (236 ml) heavy cream
- 6 oz (170 g) dark chocolate bar³, finely chopped
- 4 Tablespoons (56.5 g) unsalted butter, cut into pieces
- 1 ½ teaspoon vanilla extract
- 1 batch homemade whipped cream, for topping. Optional but recommended. click the link for my recipe
Instructions
- In a medium-sized, heavy-bottomed saucepan, whisk together sugar, cornstarch and salt.1 ½ cups (300 g) granulated sugar, 5 Tablespoons (40 g) cornstarch, ¼ teaspoon salt
- In a separate bowl or large measuring cup, whisk together egg yolks, milk, and heavy cream until well-combined and egg yolks are well broken up.5 large egg yolks², 2 cups (473 ml) whole milk, 1 cup (236 ml) heavy cream
- While whisking the dry ingredients, drizzle the egg yolk mixture into the dry ingredients until completely combined.
- Transfer saucepan to stovetop over medium heat and whisk frequently until ingredients begin to thicken⁴ (see note 4, this will take several minutes, do not crank up the heat or your filling may not thicken properly).
- Once mixture has thickened (it should have a pudding-like consistency) whisk constantly, remove from heat and immediately add chopped chocolate, butter, and vanilla extract. Stir until chocolate and butter are completely melted and mixture is smooth.6 oz (170 g) dark chocolate bar³, 4 Tablespoons (56.5 g) unsalted butter, 1 ½ teaspoon vanilla extract
- Pour pie filling through a fine mesh strainer into a medium-sized heatproof bowl.
- Pour filling over prepared pie crust and place a piece of clear wrap or parchment paper directly against the surface of the chocolate to prevent a skin from forming on the surface of the pie as it cools. Allow to chill in the refrigerator at least 6 hours or overnight before slicing and serving.1 prepared (baked) 9" pie crust
- Top with whipped cream just before serving. I like to use an Ateco 848 or Wilton 2D tip to decorate the pie slices in the photo, but a big mound of whipped cream right on top of the pie works just as well!1 batch homemade whipped cream
Notes
¹Pie crust
This recipe was written to be made with my prepared (blind-baked) homemade pie crust in a 9 or 9.5″ pie plate. You may instead make this recipe using my graham cracker crust or Oreo crust or use a store-bought crust but keep in mind they are often smaller and may not fit all of the filling. You can pour the excess into mini tart shells or just enjoy as a pudding.²Recommendations for leftover egg whites
If you don’t want to waste your egg whites, store them in a clean, completely dry and grease-free container and use them to make meringue cookies, white cake, or coconut macaroons!³Chocolate
A 60 or 70% cacao bar works great and is my preference, I often use Ghirardelli which is available right next to the cocoa powder in the baking section. While chocolate chips will work in a pinch, I really recommend using a quality chocolate bar that you enjoy the taste of. Semisweet chocolate will yield a pie that’s sweeter and not as richly chocolate. I don’t recommend using unsweetened chocolate, which could make the pie too bitter. This recipe has not been tested using cocoa powder instead of chocolate.⁴Thickening the pie filling
It’s important that you have patience for this step, slowly thickening over medium heat is key to allow the sugars to melt properly and the filling to thicken properly. The filling should be clearly thickened before moving on to the next step and should be thick enough to coat the back of a spoon or spatula. I demonstrate this above in the post and in my video.Storing
Cover with plastic wrap and store in the refrigerator for up to 4 days. I don’t recommend freezing, as the filling can turn grainy or watery once it thaws.Nutrition
Nutrition information is automatically calculated, so should only be used as an approximation.
Like this? Leave a comment below!


I made this for a casual lunch dessert following our church service. I was so pleased how it came out. I followed the directions with the exception of using an immersion blender to blend the egg yolks to the sugar and milk mixture. It worked beautifully and the filling was as smooth as silk. I felt it unnecessary to strain through a sieve. Reviews were 5*’s. Excellent recipe. I’ll be making this one again. 😋🤩
I am so glad everyone enjoyed it so much! 🙂
Could you use the freezer to speed up the firming process?
Hi Samantha! I wouldn’t recommend it here, patience is key. 🙂
If I was going to use a frozen store bought crust, would I want to purchase the regular depth or deep dish size?
Hi, Kelly! Either crust will do. Enjoy! 🙂
Looks amazing and I’m with you on the homemade whip cream.
Just a quick question could one fold the whipping cream (using cream of tartar in the cream) into the batter for extra hmph?
Of course after the filling has cooled.
Hi Marlene! I think you could. I don’t think you would need the cream of tartar here. I would personally leave it out. It will make the pie a little fluffier much like my chocolate icebox pie. 🙂
I can’t believe I just made a chocolate pie from scratch! It always seemed too intimidating but this recipe was easy to follow & has become our new family favorite. My family will never let me make the old Jello pudding pie again!
I am so glad everyone enjoyed it so much, Missy! Homemade is always better than something from a box. 🙂
Good evening!
I have a whole lot of 2% milk on hand and wondering if I substitute that for the whole milk if it will make a big difference. I am not opposed to buying whole milk, but would prefer to use what I have on hand. Thank you!!
Hi Shaunna! You need the fat in the milk to help the pie thicken up. I would be concerned the pie wouldn’t thicken up enough but it may work. If you try it I’d love to know how it turns out. 🙂
I don’t think I’m willing to risk it! I’ll just go ahead and purchase whole milk. I’m making it for Father’s Day and want it to be perfect, and it sounds like this recipe is amazing and shouldn’t be altered. Thank you so much for the quick response!!
You definitely won’t regret it. I use whole milk in most of my recipes so if you have leftover I guess you can just make some more delicious treats. 😉
I too only had 2% milk, used that and it turned out great. I have never made this before and will most likely just continue to use 2%. Recipe was great and so easy. My 8 year old has recently found a love for cooking and baking and this was easy enough for him to mostly do on his own. (With some guidance)
I am so glad everyone enjoyed it so much! 🙂
I like chocolate pie very much yet my mother and sister-in-law LOVE chocolate pie. I decided to surprise them and make this chocolate pie to bring home to them over the weekend. They both said this was the best chocolate pie they ever tasted! I have to agree….it was delicious. This pie turned me into the “love chocolate pie” category. Follow it step-by-step and don’t add or subtract any ingredients. It will come out perfectly delicious.
I am so glad everyone enjoyed it so much, Lee! 🙂
What did you use for the chocolate drizzle shown in the picture?
Hi Grace! The easiest way for me to do it is to put it in a ziploc bag and snip one of the corners off. 🙂
is it made with just melted chocolate? i’m going to try this later this week!
I actually used my chocolate sauce here, but melted chocolate would be fine. 🙂
Can I use chocolate powder (mainly cocoa) instead of the actual chocolate?
Hi Maria! There would be too many other alterations that would need to be made if you used a cocoa powder. I haven’t tried it so I’m not sure what they would be. 🙂
I only had 1 oz of chocolate chips so for the rest of chocolate I substituted 2 T cocoa powder (unsweetened) and 1 T butter in place of every missing 1 oz of sweetened chocolate. Added this with the other chocolate after removed from heat. Stirred until incorporated. The sieve finished incorporating any remaining powder. The finished our was I credible. Rich and chocolatey, but not overly sweet. Great recipe!
Thank you so much for sharing, Olivia! I am so glad you enjoyed it. 🙂
Will the whipped cream ‘break down if I topped pie w/it the night before presenting?
Mine never has, but generally I recommend preparing the whipped cream the morning you intend to serve just to be safe.
I’ve made this a number of times – it never lasts long. It’s also my “thank you” gift to friends when they help me out. 😁
Lucky friends!! I’m so glad to hear it has been such a success for you, Amy! Thank you for commenting, I really appreciate it!
Hi, that pie is the best-looking chocolate pie I have ever seen. Can you substitute cocoa powder for the chocolate? Thank you
Hi Jude! I haven’t tried it. There are other adjustments that would need to be made if you were using cocoa powder and without having tried it I can’t say for sure what they would be. 🙁
Hi what’s the texture difference between this one and the icebox pie please? Is the other one more mousse-like?
Thanks
Hi, Amber! They are very similar in flavor, however, this chocolate pie requires baking and is more custard-like in texture. The chocolate icebox pie does not require baking is more like a fluffy mousse. I hope that helps. 🙂
Hi! Do you know if it is completely necessary to use a sieve? And also would it taste good if I used a graham cracker crust?
Hi Rebecca! You could make a graham cracker crust if you wish (although I think the Oreo does very well here with the chocolate). The reason for the sieve is to catch any egg pieces that may have formed when heating the mixture. I really don’t recommend skipping this step. 🙂
Do you know if the sugar be substituted with Splenda? I don’t want it to affect the consistency or anything. I’m so excited to make this!
Hi Danielle! Unfortunately I haven’t tried it here so I’m honestly not completely sure. Hopefully someone else that has tried it can chime in. If you try it out I’d love to know how it goes.
Mine took SO long to thicken is that normal? The instructions said it could take a few minutes it felt like I stood there for 45 minutes just whisking. Eventually it thickened to a pudding like consistency and is now cooling! The filling tasted yummy!
Hi Lena! I’m sorry that happened, but for this it is better for it to take too long than be done faster. You may have needed to turn up the heat just a little bit. I hope this helps. 🙂
Yes, just keep whisking. I also thought I was did something wrong with the filling recipe yet I never gave up and finally it started to thicken beautifully. Just when I thought this would never get thick, it did! Like magic. It does take a very long time. Sorry I did not time it. Next time I will.