This is my favorite, easy Pizzelle recipe! These thin, crisp, lightly sweetened Italian cookies are made with a special cookie iron. They’re perfect for making and gifting, especially around the holidays! Recipe includes a how-to video!
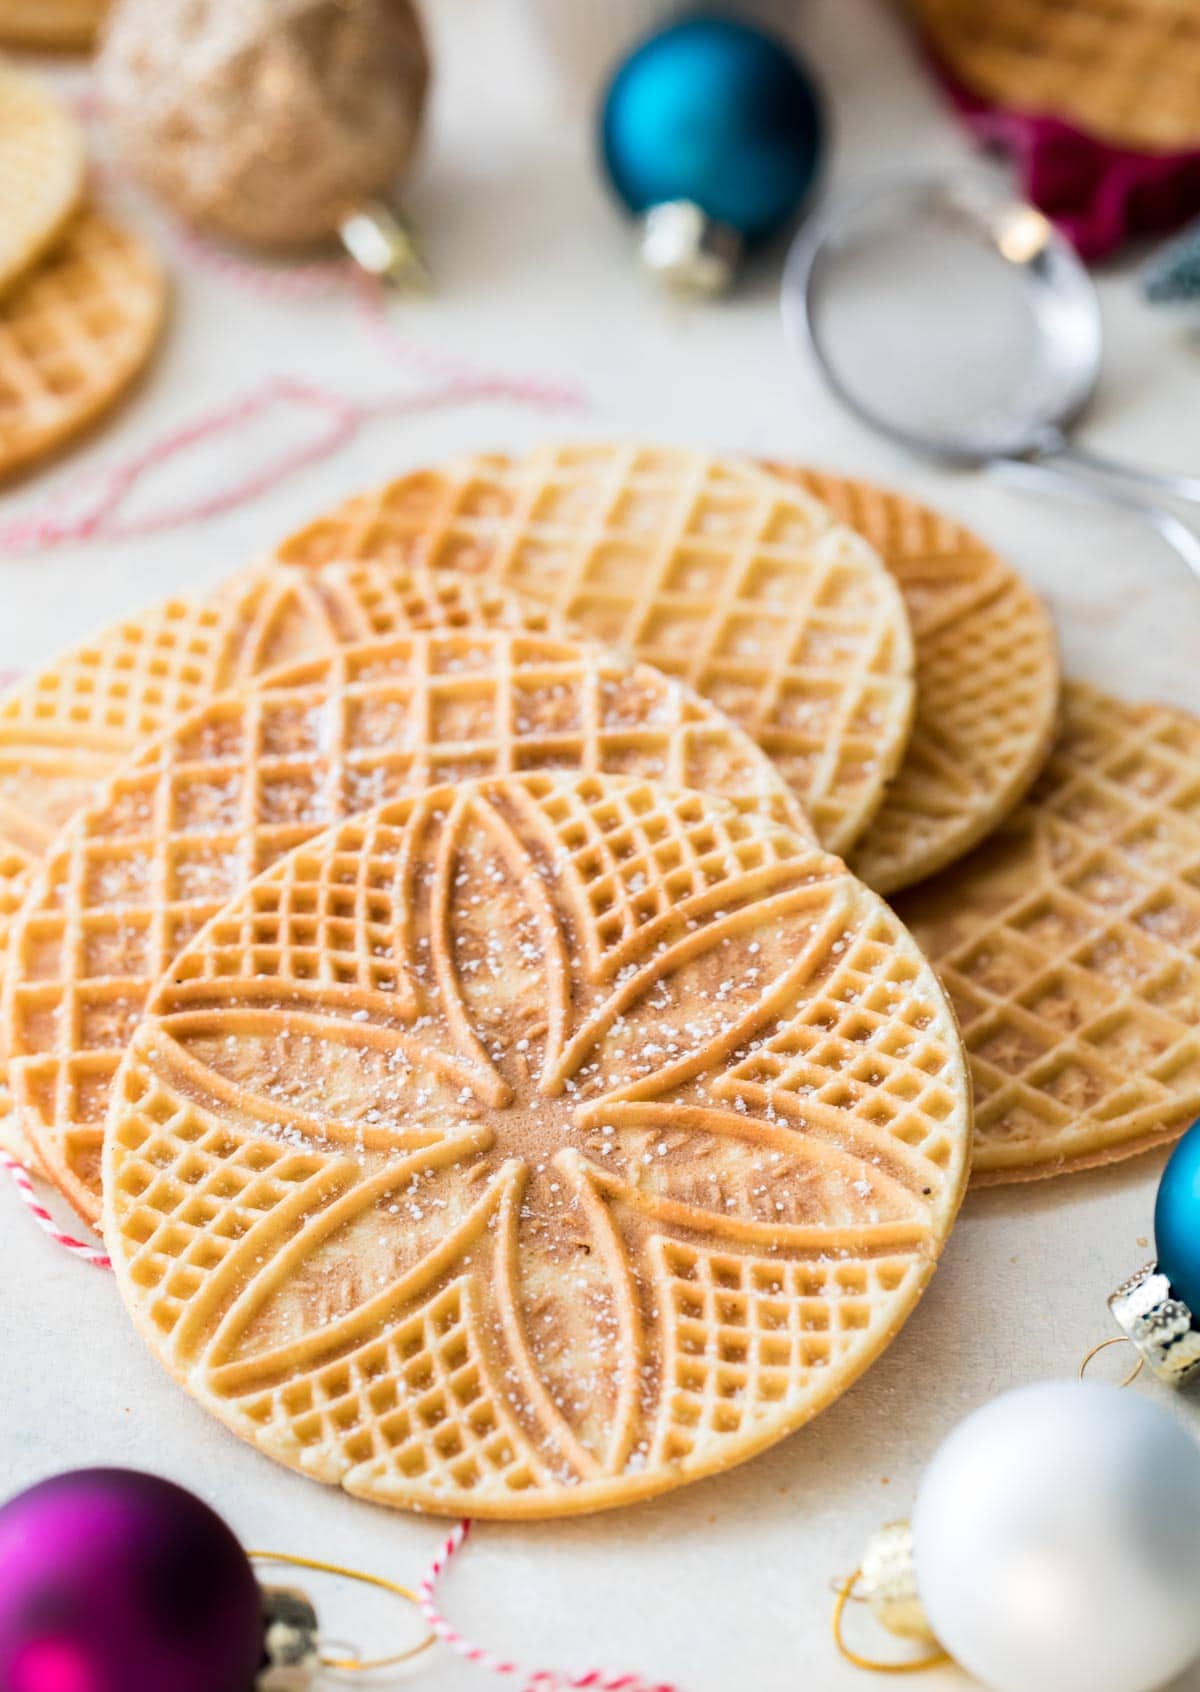
Easy, Beautiful Pizzelle Cookies
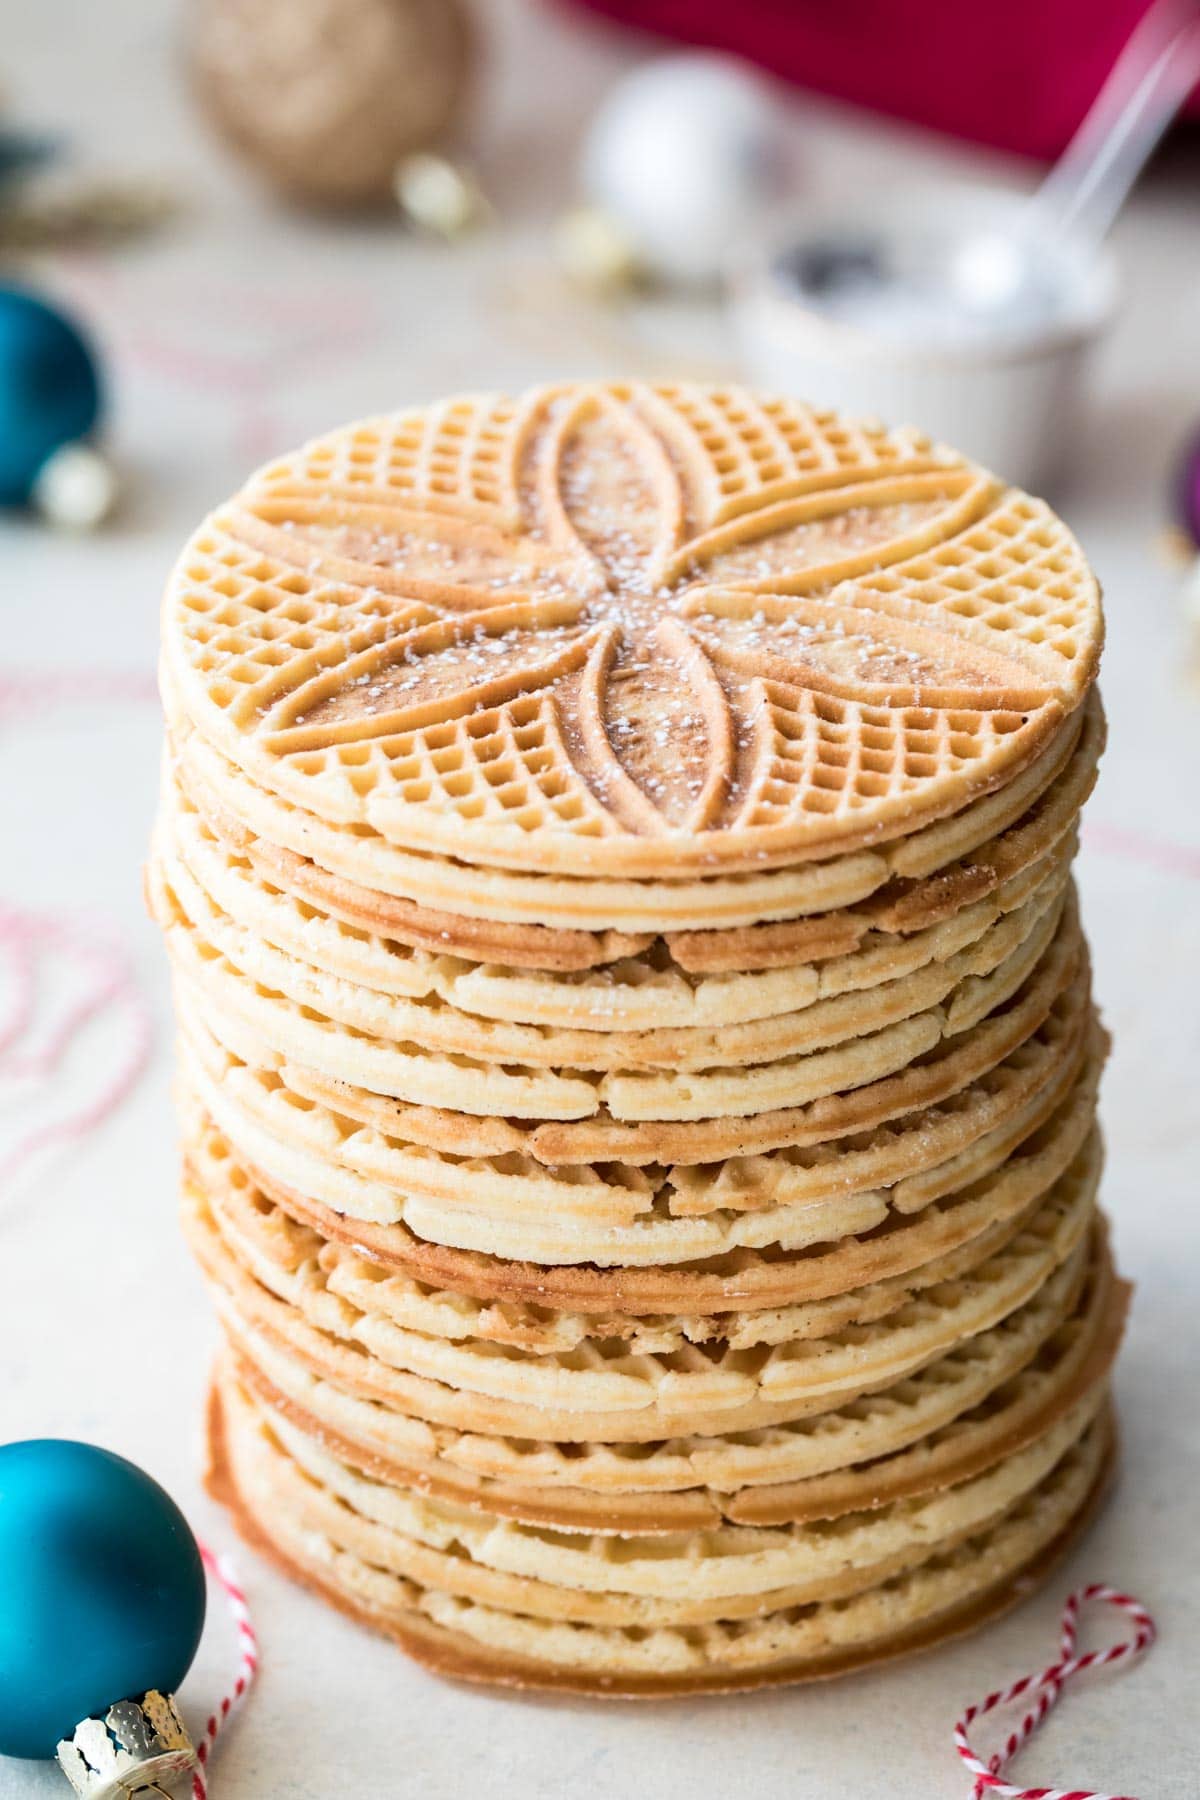
These cookies are a bit different from the drop sugar cookies I just shared, aren’t they!? Instead of thick, sweet, and super chewy, pizzelle are incredibly thin (rivaled in thinness only by my lace cookies), lightly sweetened, and entirely, irresistibly, crisp.
If you’re looking for something a little different for your Christmas cookie tray, this cookie is it. Their anise flavor is unique (at least, compared to many common American cookies!) and their pretty patterns are delicate and beautiful.
While standing over the iron making only two cookies at a time can be a bit time consuming, the batter comes together in a flash (and each set only needs about 45 seconds to bake… I did the math for you: that’s less than 10 minutes of ironing time!). So, without further ado, let’s get to making these Pizzelle cookies!
What You Need
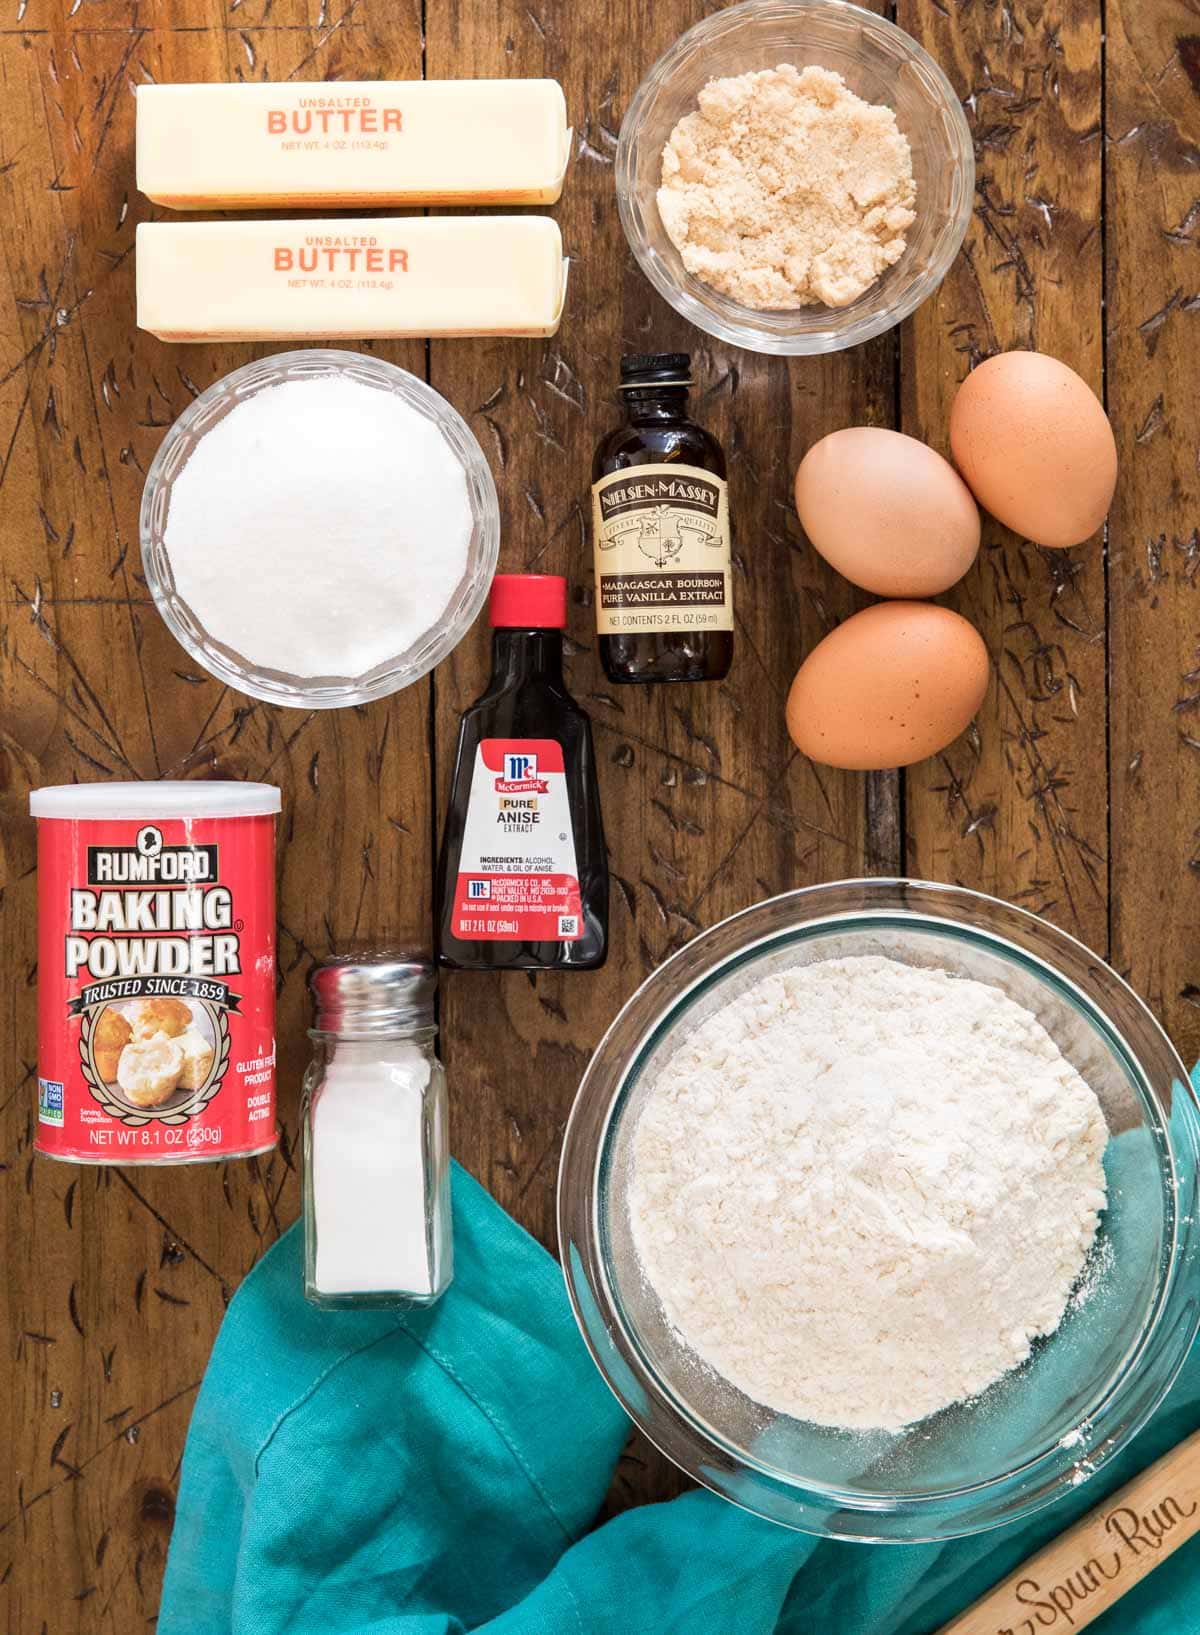
I just have a few notes on just a few of the ingredients!
- Brown sugar. This is not necessarily a traditional pizzelle ingredient… in fact pizzelle aren’t particularly sweet cookies. Of course, I like to amp up the sweetness factor just a bit (I do this with my madeleines as well!), and I love the flavor from the molasses in the brown sugar. If you’d like, you can leave this out without any other alterations to the recipe.
- Anise extract. This is the traditional flavor used (it’s black licorice flavor). It’s commonly used in Italian desserts, such as biscotti. You can substitute anise seeds if you’d like, or you can leave out this flavoring entirely or substitute another favorite.
- Vanilla extract. Even though I use anise extract in my pizzelle, I still include vanilla in my recipe, too, for a well-rounded flavor.
- Baking powder. Baking powder for a cookie that’s not rising (I mean, we’re pressing it in an iron) might seem odd, but this helps give the cookie its crisp but not break-your-teeth texture.
Fun Fact: Anise seeds are a commonly used ingredient in sausage as well. When Zach first smelled the sizzling pizzelle batter in the iron, he actually thought I was making sausage, not cookies!
How to Make Pizzelle
Your iron may look a bit different than mine and your pizzelle may need to cook for a bit more or less time, use the first two cookies as a gauge for the rest!
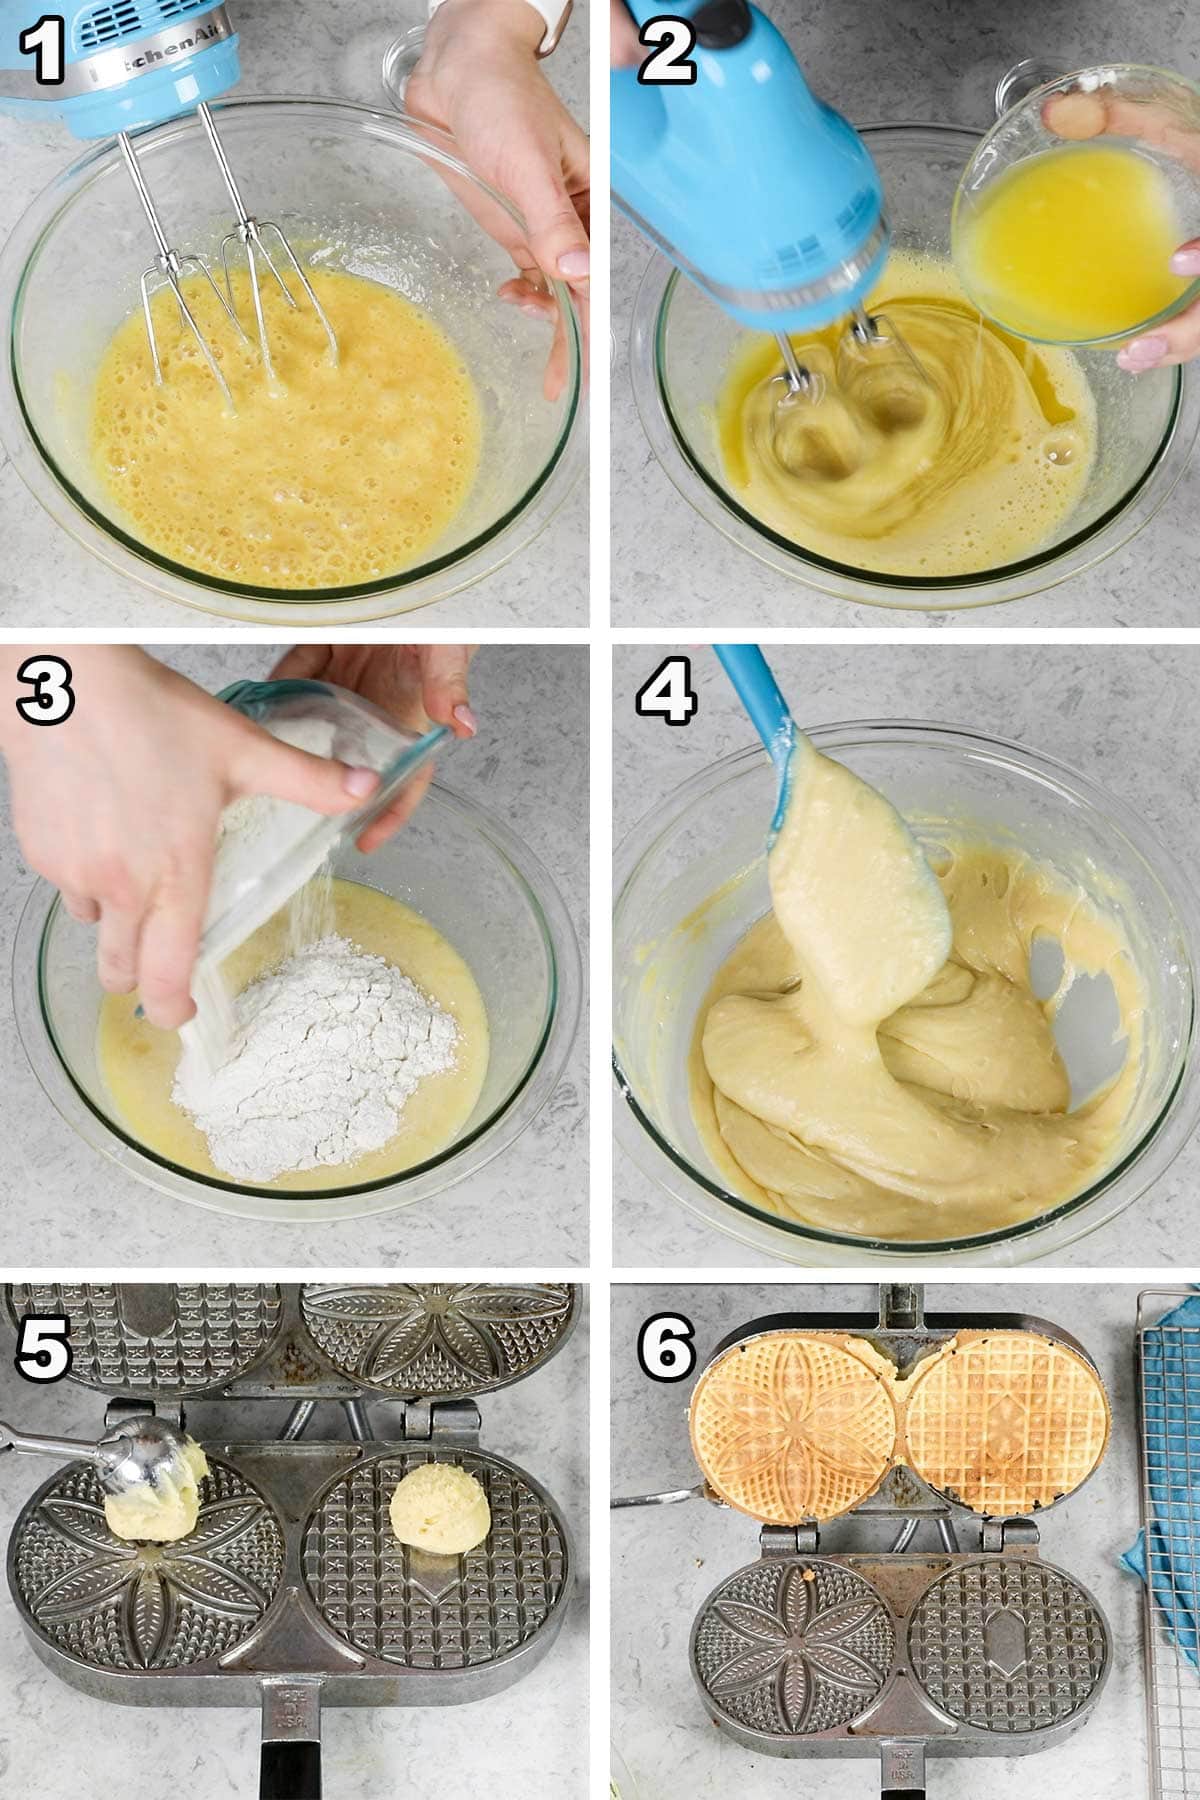
The numbered steps below correspond with the step-by-step pictures above.
- Beat together eggs and sugar until slightly lightened in color.
- While still stirring, drizzle melted butter into the mixture, then stir in your extracts.
- In a separate bowl whisk together flour, salt, and baking powder. Add this to your egg mixture.
- Stir wet and dry ingredients together until mixture is smooth and completely combined. Set this aside and let your iron preheat (the batter will thicken as it rests).
- Once your iron is heated, scoop batter into the iron and cook until golden brown.
- Carefully remove pizzelle from iron (I use a fork, but a nonstick spatula could also work, especially if you have a nonstick iron and don’t want to scratch it!) and transfer to a cooling rack to cool completely.
Tip: Pizzelle are fragile and flexible immediately after baking. They’ll become crisp as they cool, but can be shaped while they are still warm. Wrap them around a wooden cone to make pizzelle cones and fill with ice cream or homemade whipped cream!
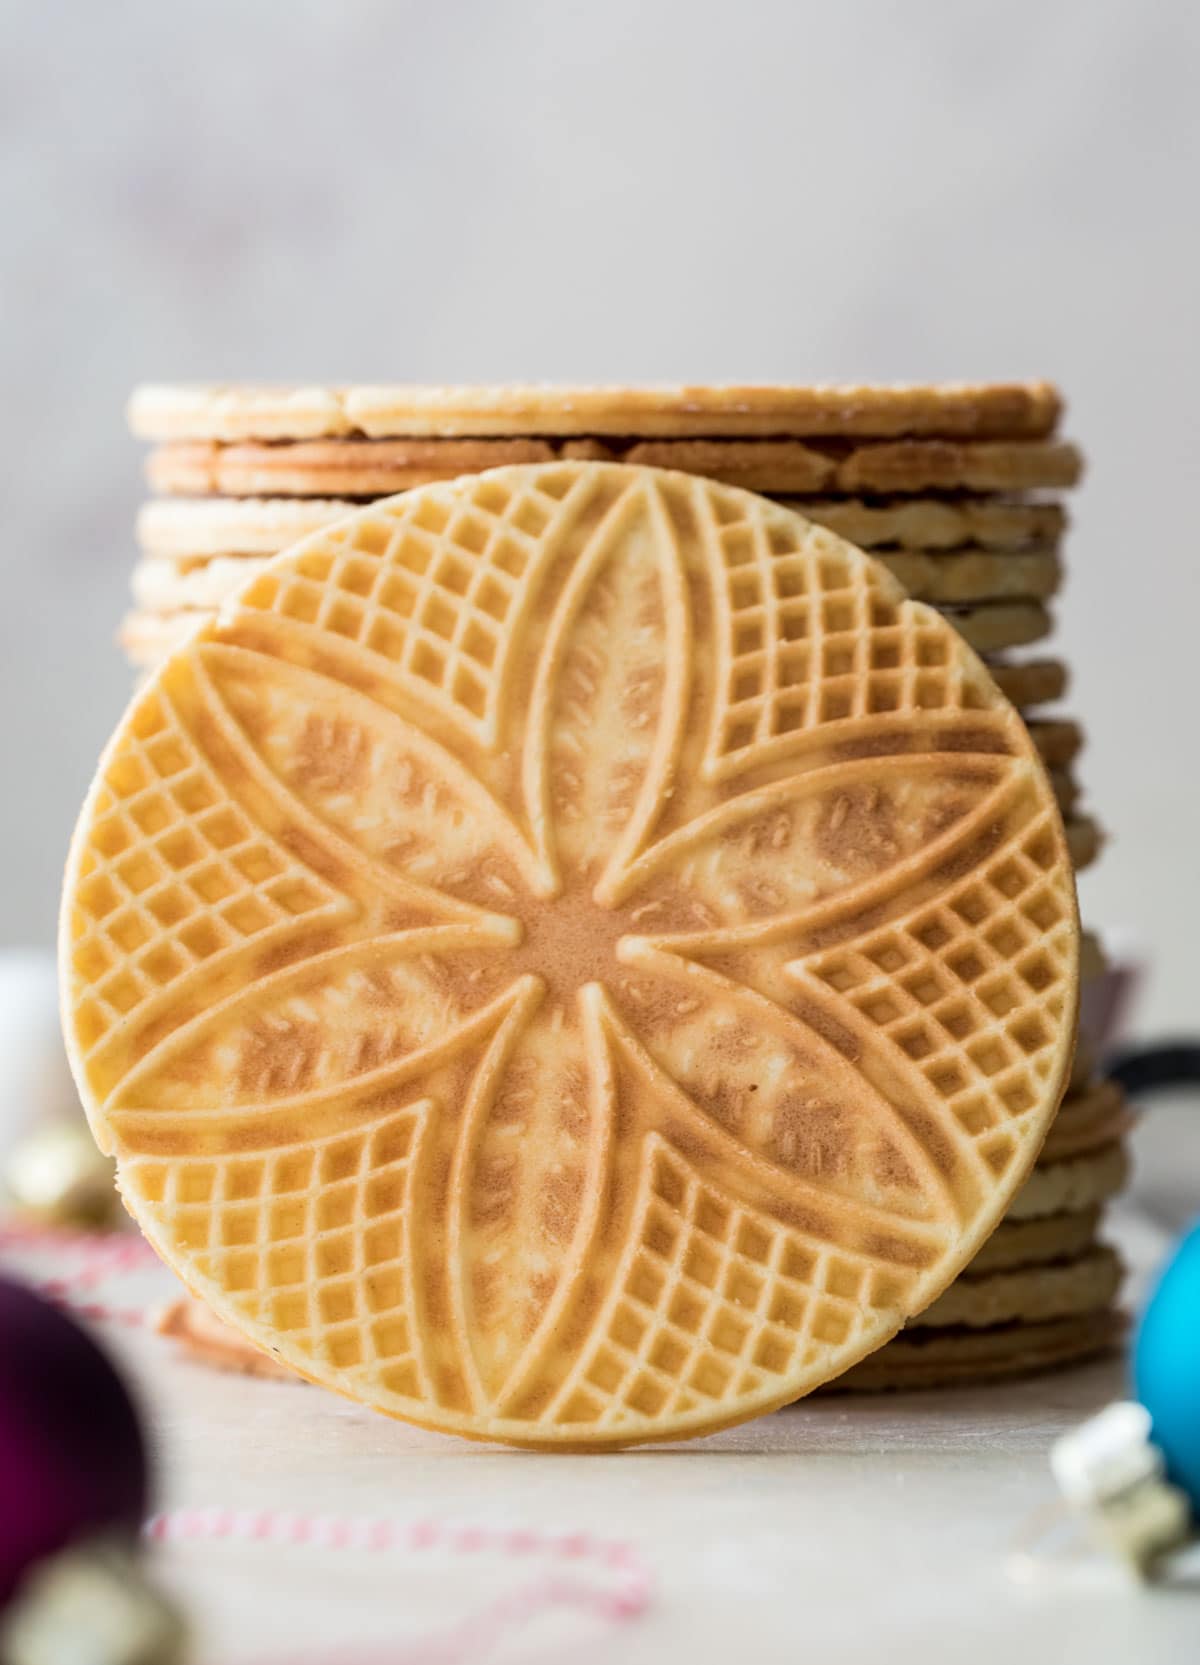
Frequently Asked Questions
Pizzelle is derived from Italian words meaning flat, round, and small. Pizzelle is actually the plural form (which is why you don’t see me saying “pizzelles“ even though I’m definitely inclined to, and probably slipped up somewhere!). The singular form is actually “pizzella”. Here’s some more info on the history of the pizzelle, if you’re interested!
Traditionally, pizzelle are flavored with anise extract or anise seeds, which is black licorice. Personally I don’t like licorice, but I do love pizzelle. If you don’t want to use anise or don’t happen to have any you can leave it out entirely or substitute another extract or flavor that you do like (almond, lemon, and orange are popular choices).
Here’s a secret (not a secret if you watch my video!), my pizzelle do not come out of the iron with those perfectly rounded edges. Nope! It’s nearly impossible to portion precisely the right amount of batter for pizzelle that are full but not overflowing at all. So, once they’ve cooled, I grab my kitchen shears and trim the rough pieces (it’s actually very easy).
Store them in an airtight container at room temperature for up to two weeks. They also freeze very well, just store in a sturdy container so they don’t get broken!
Tip: Your first two pizzelle are almost guaranteed to be fails. Even if you were light with your oil, there’s usually too much or the iron’s just not perfectly hot… just use these as your practice pizzelles and your next two should look much better!
More Recipes You Might Like
Enjoy!
Let’s bake together! Make sure to check out the how-to VIDEO in the recipe card!
Pizzelle Recipe
Ingredients
- 3 large eggs
- ¾ cup (150 g) granulated sugar
- ¼ cup (50) light brown sugar (optional, see note 1)
- 10 Tablespoons (141 g) melted butter
- ¾ teaspoon vanilla extract
- 1 ½ teaspoon anise extract, (optional, see note 2) you may substitute 1 ½ teaspoons of anise seeds instead
- 1 ¾ cups (218 g) all-purpose flour
- 1 ½ teaspoons baking powder
- ¼ teaspoon salt
- 1 teaspoon avocado, canola or vegetable oil for brushing iron
- powdered sugar for dusting, optional
Recommended Equipment
Instructions
- In a large bowl, whisk together eggs and sugars until lightened in color (about 15-30 seconds). While still stirring, drizzle in butter until combined and then stir in extracts. Set aside.3 large eggs, ¾ cup (150 g) granulated sugar, ¼ cup (50) light brown sugar, 10 Tablespoons (141 g) melted butter, ¾ teaspoon vanilla extract, 1 ½ teaspoon anise extract, (optional, see note 2)
- In a separate bowl, whisk together flour, baking powder, and salt.1 ¾ cups (218 g) all-purpose flour, 1 ½ teaspoons baking powder, ¼ teaspoon salt
- Stir flour mixture into butter mixture until smooth.
- Set mixture aside. Plug in/turn on iron and use a pastry brush to very lightly coat the inside of the iron with a small amount of oil (you won’t use all of the oil). Let iron heat until hot, typically around 5-10 minutes. The batter for the pizzelles will thicken a bit as it sits.1 teaspoon avocado, canola or vegetable oil
- Drop a heaping 1 ½ Tablespoon (see note 3) of batter into each iron pattern, keeping the dough centered but toward the back/hinges of the iron.
- Slowly and carefully close the iron, clipping it shut (if yours has a clip!). Be careful, there is usually steam! Keep in mind the first pizzelle is usually a messy dud, use this as a gauge for how much batter to use and how long it takes to make the cookies golden brown, your second set is almost guaranteed to come out much better!
- Bake until golden brown. For my iron this is usually 45 seconds (your manual may indicate how long it will take if you have a different iron). Carefully use a fork or nonstick spatula to remove pizzelle to cooling rack to cool completely (pizzelle will be fragile and flexible while warm).
- If desired, sift powdered sugar over the pizzelle after they've cooled.powdered sugar
Notes
1) Brown sugar:
I prefer my pizzelles to be a bit sweeter than traditional ones, so I like to add brown sugar. However, you can omit it for slightly less sweet results without any other changes to the recipe.2) Anise:
Anise is the traditional flavor used for pizzelle. It tastes like black licorice (though I don’t find it to be over-bearing, I don’t personally like black licorice but I do love pizzelle). You can leave this out entirely or you can substitute your favorite flavor. You may not need as much extract if using a different flavor! For example, almond and peppermint extracts are very potent and ¼-1/2 teaspoon would most likely be plenty for this recipe!3) Batter scoop size:
This is the amount of batter that I need for my Palmer pizzelle iron (linked to in the “Equipment” section above. Your iron may be larger or smaller so you may need more or less batter, use the first two cookies as a test!Storing:
Store in an airtight container at room temperature for up to two weeks. They can also be frozen for several months.Making Batter in Advance:
The batter can be made and stored (covered) in the fridge for 2-3 days before using.Nutrition
Nutritional information is based on third-party calculations and should be considered an estimate only. Actual nutritional content will vary based upon brands used, measuring methods, cooking method, portion sizes, and more.




Kimberle Muck
Hi Sam! Your recipes are a go to for me! I made a batch of these this morning and the added brown sugar gives them a delicious waffle cone smell. I used all vanilla extract for the flavoring and they were a huge hit with my kids in their twenties! Thank you so much for your cooking passion and recipe sharing!
Sam
I’m so glad everyone enjoyed them so much, Kimberle! 🙂
Barbra-Anne
I just made pizzelle! What! It was very simple and they taste so great – definitely a fan of them dusted with icing sugar. Thank you for another great recipe Sam! Oh also – I didn’t use anise – I used vanilla and almond , SO good!
Emily @ Sugar Spun Run
We’re SO happy you enjoyed them, Barbra-Anne! Thanks for the review 🥰
Bernie
These were delicious and perfect! I’ve tried many pizzelle recipes and I finally found the one I will always use! These are perfectly sweet (no powered sugar needed) and very thin and crispy (the way a pizzelle should be). Thank you so much for coming up with the PERFECT recipe! Btw….you’ll definitely want to double the recipe as we couldn’t stop eating them and finished them ALL the first day. I’m making a double batch right now!
Sam
Thank you so much for letting me know how they turned out for you, Bernie! I really appreciate it and I’m glad they were such a hit! 🙂
Denise Martin
I tried these over this Christmas season and they came out fantastic! Unfortunately, they did not last a day! My question is if you wanted to make them chocolate flavoured (my husbands favourite) how much cocoa would you use? Would you also add some instant coffee dissolved to amp up the chocolate flavour? If so, how much? And, lastly, would you still add the vanilla? Your advise would be appreciated.
Sam
Hi, Denise! Ooh, honestly this is tricky for me to say without trying it myself first. I’d probably reduce the flour in the recipe by a Tablespoon or two and replace that with an equal amount of cocoa powder. A sprinkle of instant coffee would probably be delicious as well (I’d probably start with a half teaspoon, but if you like a stronger coffee flavor you could do more). I would keep in the vanilla extract. It won’t detract from the chocolate flavor and will actually enhance it, giving you a more well-rounded flavor. All this to say I can’t guarantee results without having tried it myself, but this is where I would start. I hope that helps and if you try it please let me know how it turns out for you!
Pam
Excellent recipe! These turned out great!
Sam
I am so glad you enjoyed them so much, Pam! 🙂
Glenda Hofacre
Hi Sam,
Im interested in your iron . I cant see the link. I own one but its rinky dink, ha!
Thanks and have a great holiday w your boys.
Glenda
Sam
Hi Glenda! Did you click on the words “Pizzelle Iron” in the recommended equipment section? It appears to be working for me. If that doesn’t work, it is a Palmer Pizzelle Maker Classic. 🙂
Malak
I want to ask what is the toils you want it on Christmas because I want to know what I can find on amazon and also a handy tools
Cheryl
I’ve been making these for years. To make fancy cut in quarters when soft. Cool until crisp. Take each quarter and dip partially into white or chocolate, then sprinkle with Christmas sprinkles. Very pretty.
Sam
Love that idea, thank you Cheryl! 🙂
Ruth
Love that hint. Thanks
I made pizzelle years ago. this post and the comments make me want to take it out of the box again.
I’m also looking for hints for a non-soggy filling for the little cone cookies.
Did you know you can make these non-sweet, use savory seasonings instead of the vanilla etc. turn them into a cone for dip scooping?? Yum!