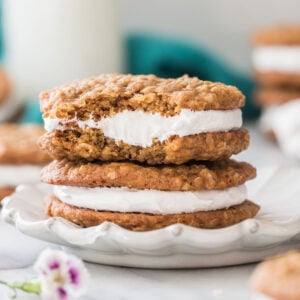
Soft, chewy cookies meet fluffy, homemade marshmallow filling in these Oatmeal Cream Pies! This recipe makes 20 sandwich cookies in under 2 hours. Don’t forget to watch the how-to video!
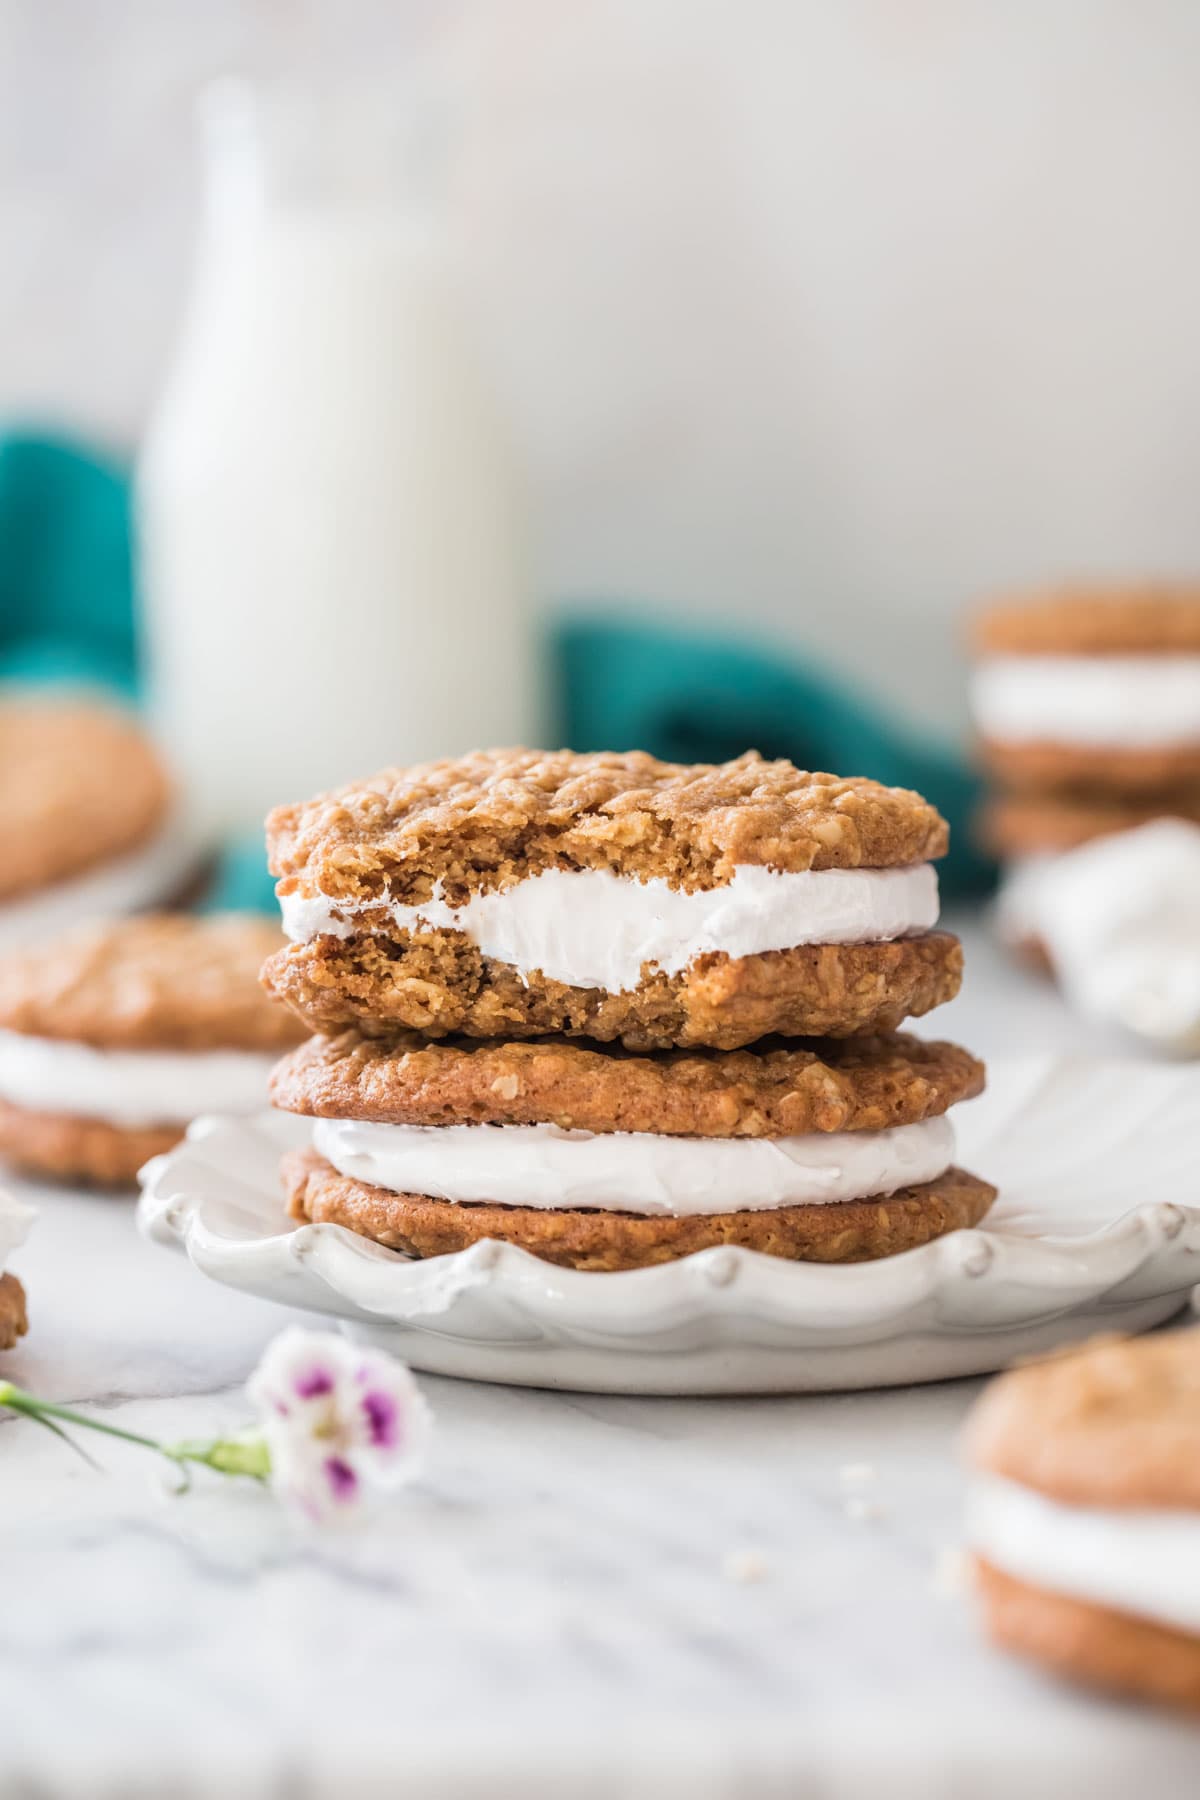
If you grew up eating Little Debbie’s oatmeal cream pies, you’re going to love today’s homemade copycat version!
While I’ve always been a bigger fan of fudge rounds (hello, chocolate!), these oatmeal cream pies have quickly become one of my favorite desserts. Today’s recipe features a chewier, flatter, softer, less oat-y, and more richly flavored adaptation of my oatmeal cookies sandwiched with a homemade marshmallow cream that’s similar in preparation to Swiss meringue buttercream. It’s so much better than the store-bought version, and it even makes more than the standard Little Debbie box carries, so you’ll have plenty to share.
This recipe took a ton of trial and error to get just right, but after lots of tweaks and many so-so pies, a clear winner emerged. The most difficult and perhaps longest step is whipping the marshmallow cream filling to stiff peaks, but if you’ve ever made my meringue cookies before, you shouldn’t have any issues. I made sure to include a troubleshooting section with today’s recipe, so be sure to read that thoroughly before you get started.
Let’s dive in!
What You Need
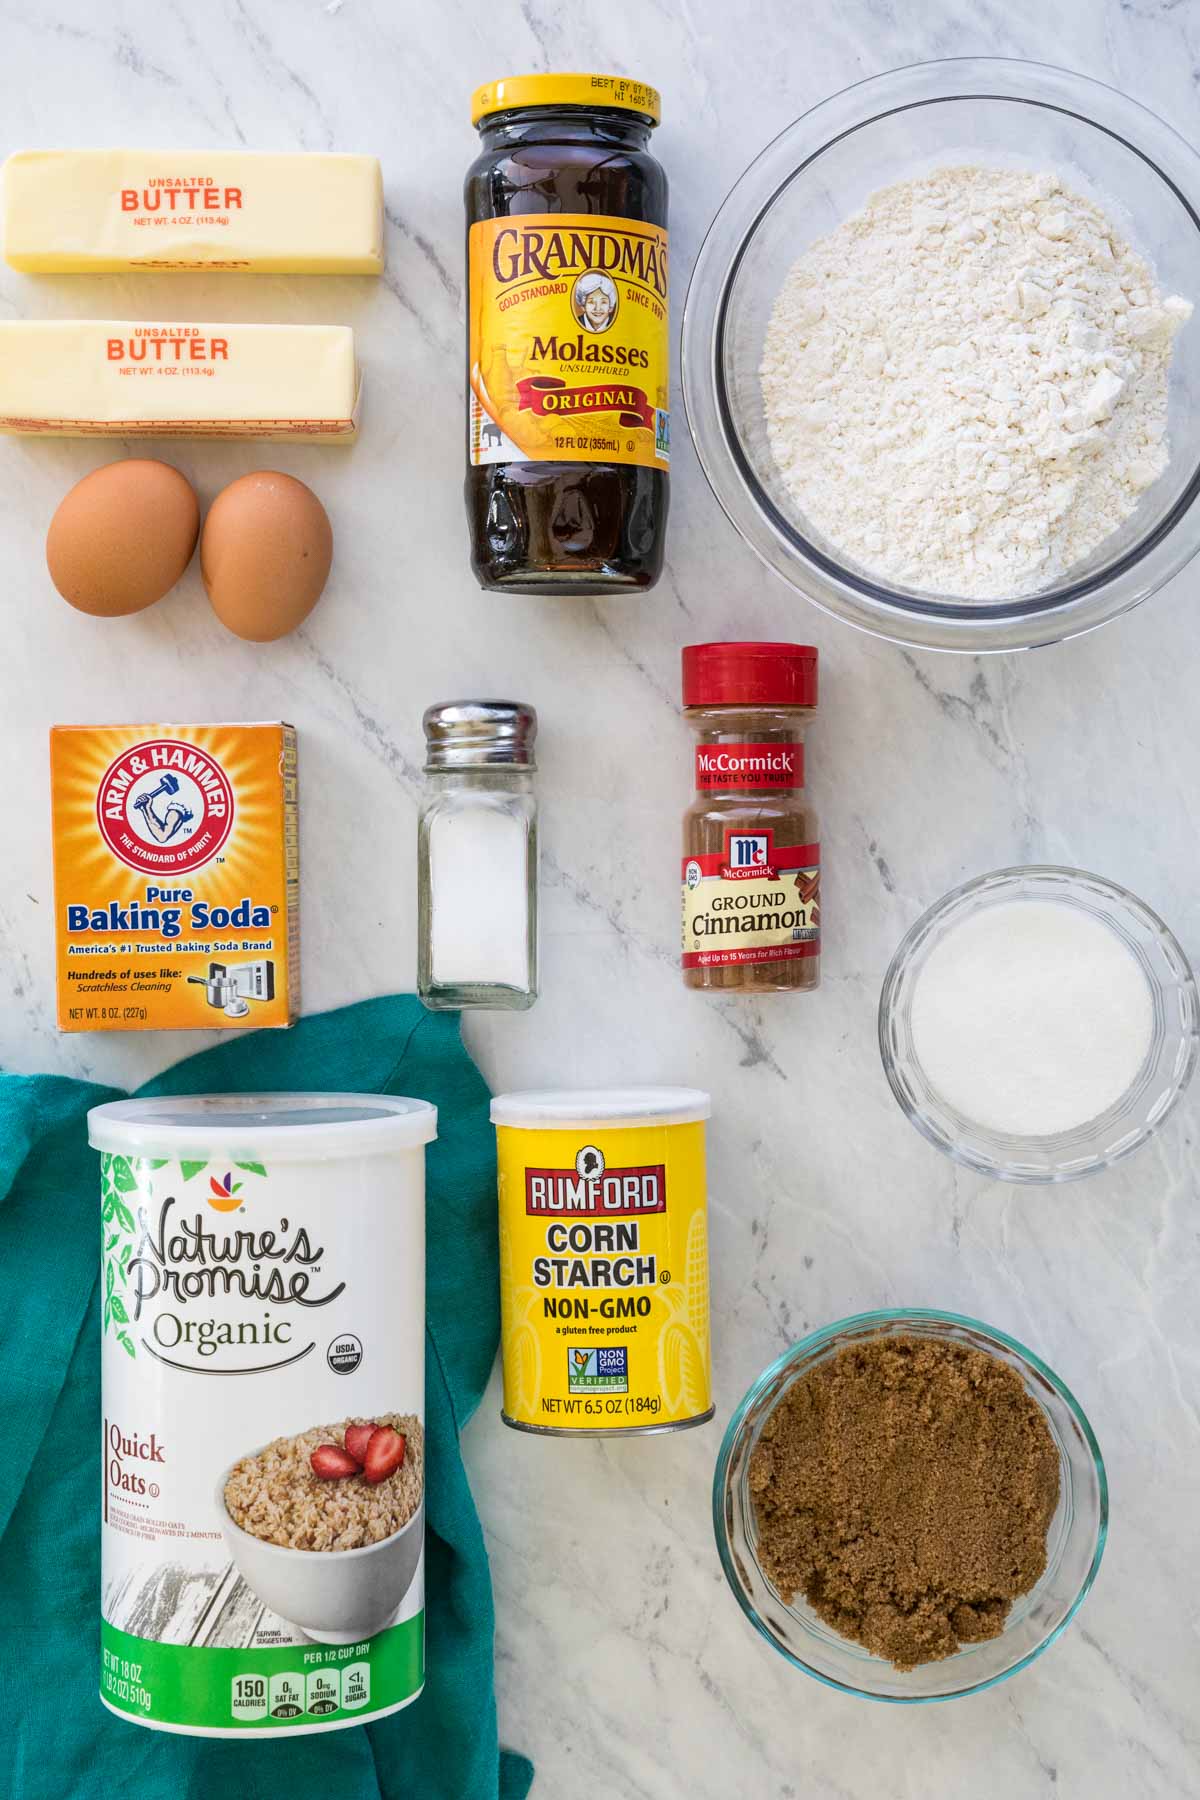
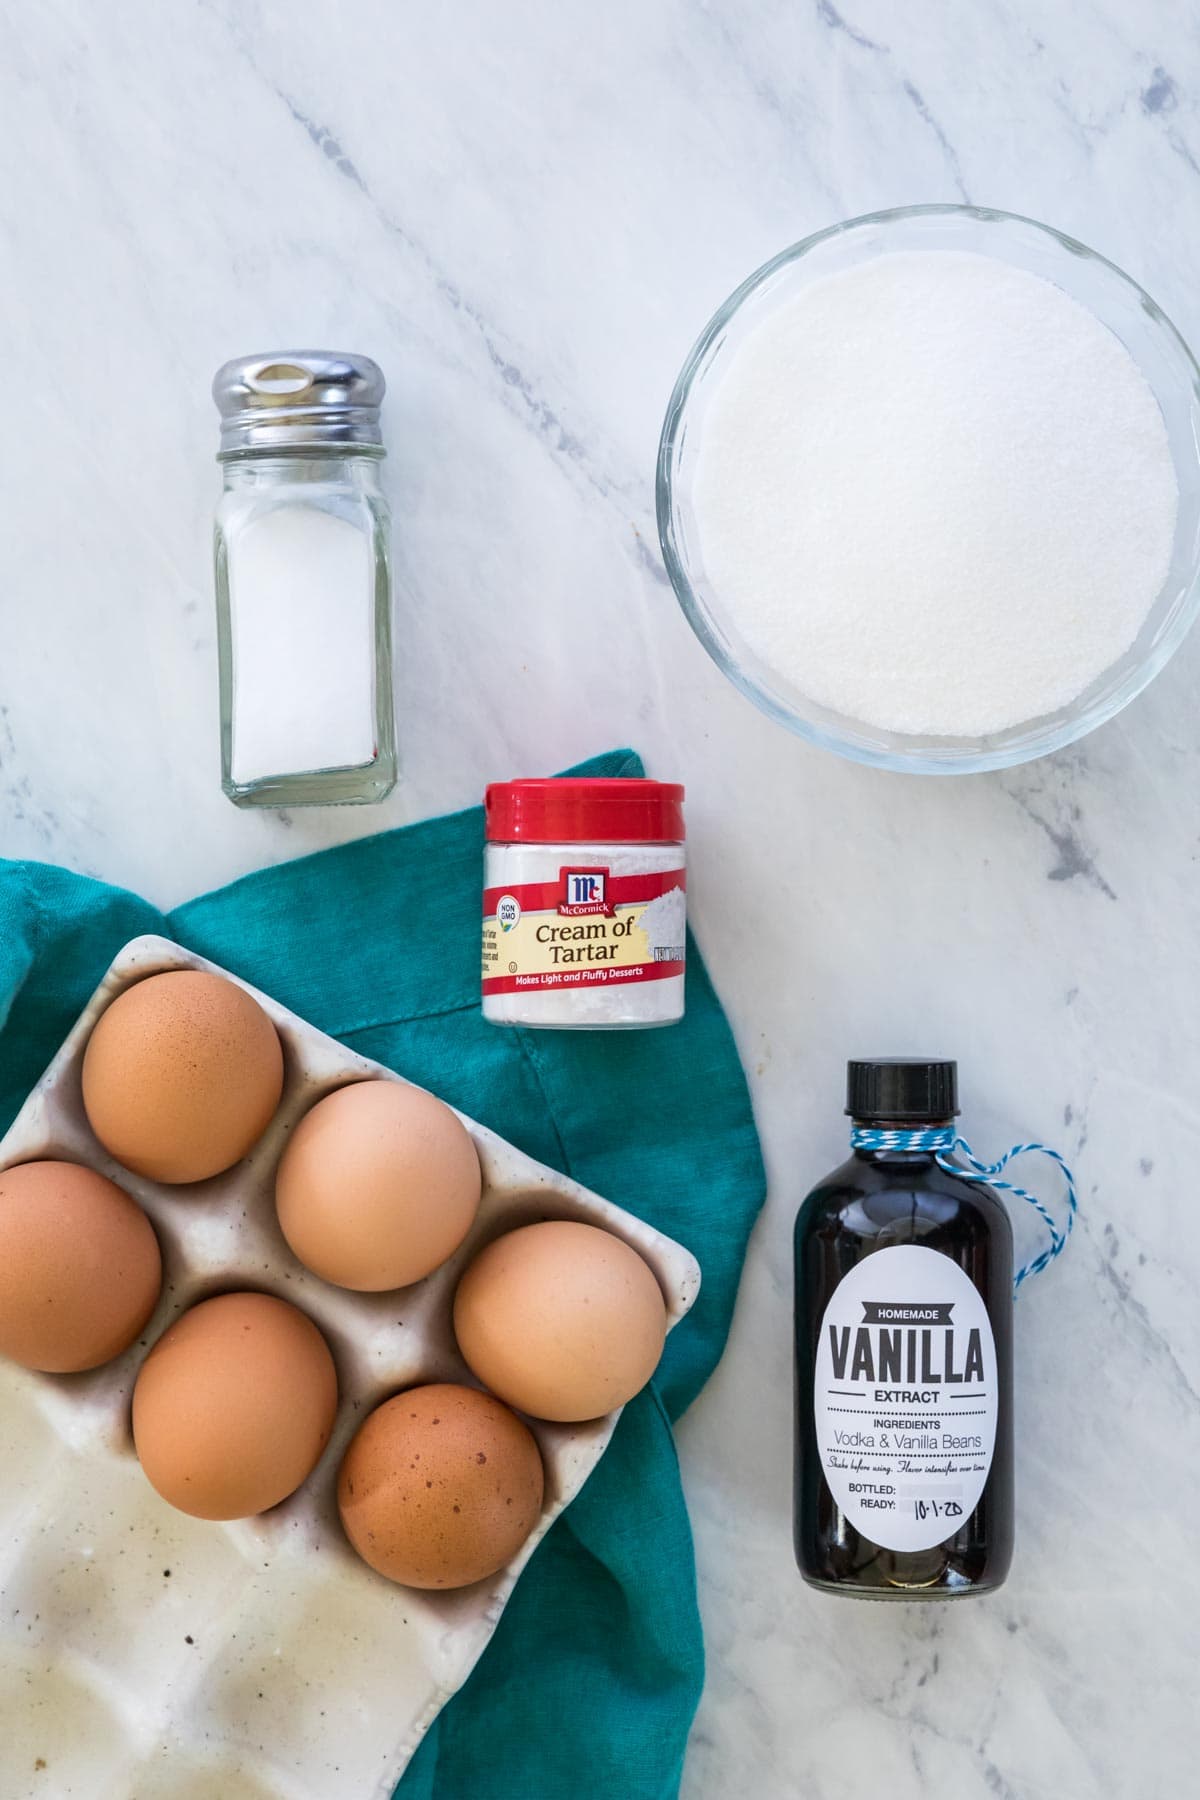
Homemade oatmeal cream pies have none of the preservatives or artificial colors/flavors that their store-bought counterparts have. Here are some of the key ingredients that keep them tasting great:
- Unsalted butter. We’ll melt this first to give our cookies the proper (and flatter, softer) texture. You want to make sure your butter has cooled completely after melting–it shouldn’t feel warm at all when you touch it!
- Sugar. We’ll use both dark brown and granulated sugar.
- Molasses. This makes the cookies chewy and soft, and it also adds to that signature oatmeal cream pie flavor.
- Flour. All-purpose is recommended. I have not tried this recipe with any alternative flours.
- Cornstarch. This encourages soft and chewy cookies. I love to use it in my chocolate chip cookies for the same reason.
- Cinnamon. An essential ingredient for oatmeal cream pies!
- Instant/quick oats. These are NOT the same thing as rolled or old fashioned oats! Instant oats are smaller and incorporate much more easily and will give you the proper texture (reminiscent of their store-bought counterparts). Note that we are also using less than a traditional oatmeal cookie would have.
- Egg whites. Egg whites from a carton may work, but they will not always whip to stiff peaks, so I don’t recommend them.
- Cream of tartar. Like in my pavlova and chocolate meringues, cream of tartar stabilizes the egg whites and helps them whip to stiff peaks.
- Vanilla extract. This gives the filling its lovely marshmallow flavor, so don’t skip it!
RECIPES THAT USE LEFTOVER EGG YOLKS: My pound cake, crème brȗlée, lemon curd, and tiramisu all use six egg yolks, which is exactly how many you’ll have left over after making this recipe!
Remember, this is just an overview of the ingredients I used and why. For the full recipe please scroll down to the bottom of the post!
How to Make Oatmeal Cream Pies
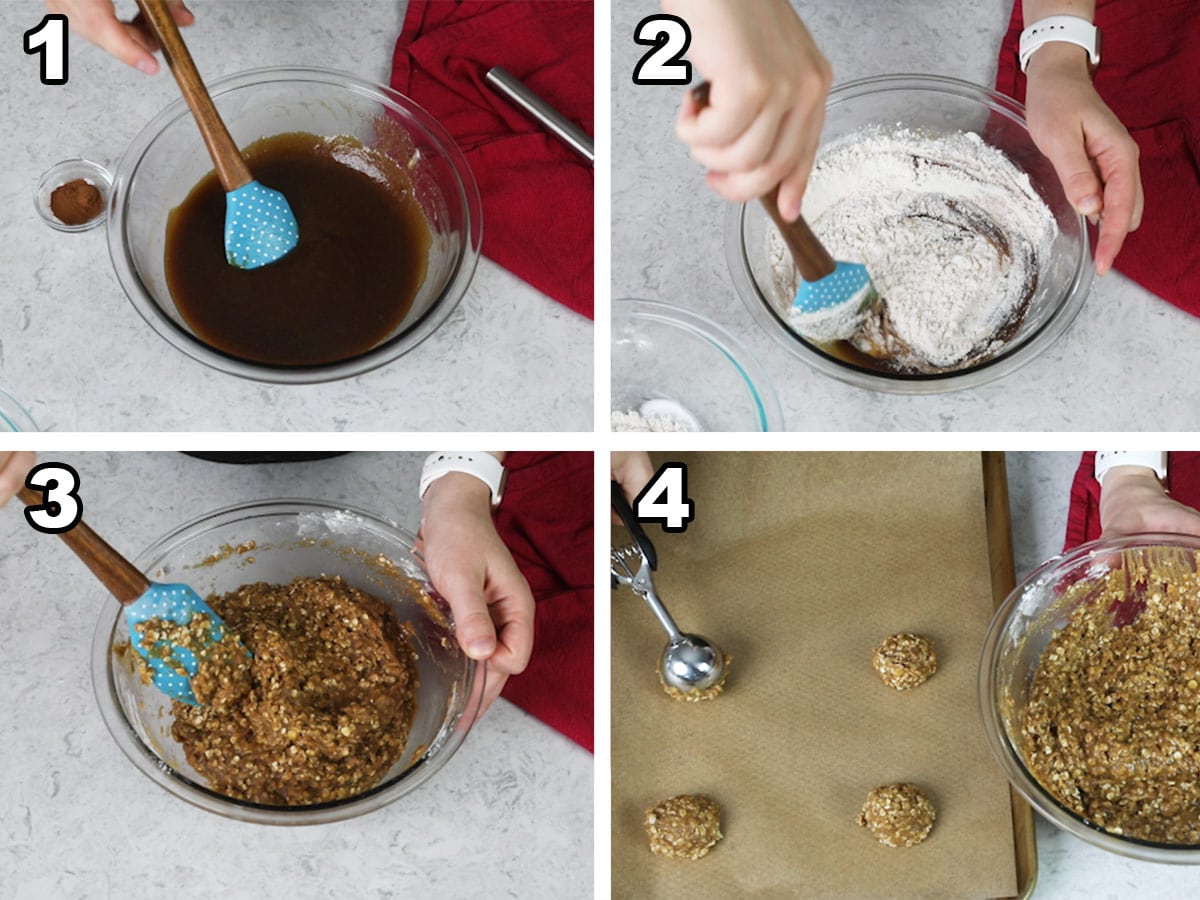
- Combine the butter, sugars, and molasses. Add your egg and vanilla and stir well.
- Whisk together the dry ingredients in a separate bowl, then gradually add them to the wet ingredients until everything is combined.
- Add the oats and stir until fully incorporated.
- Drop cookie dough by 1 ½ tablespoon scoops on a parchment lined baking sheet, spacing cookies 2″ apart. Bake for 10 minutes, then allow the cookies to cool completely on the baking sheet.
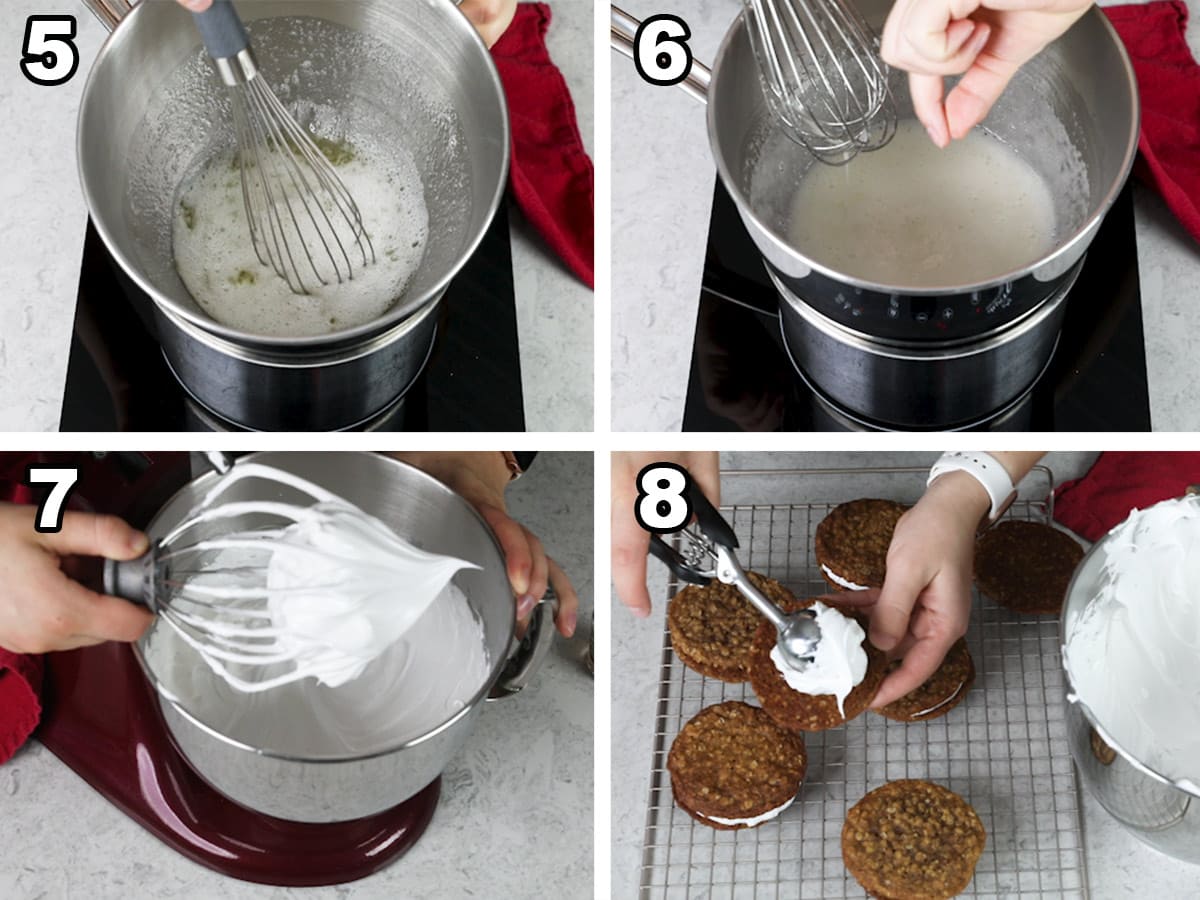
- Make sure your bowl is completely clean, dry, and grease free. Add the egg whites, sugar, salt, and cream of tartar and whisk until combined.
- Fill a medium saucepan with 1 ½-2” of water and bring to a simmer over medium-low heat. Place your bowl over the pot and whisk constantly until the sugar is dissolved. To check this, rub a small amount of the mixture between your fingertips–be careful!–and make sure no grit remains. Use a thermometer to check that the mixture reaches 160F before removing it from the heat.
- Place the bowl on the base of your stand mixer and gradually increase the speed to medium-high, whipping until you’ve achieved thick, glossy peaks before stirring in vanilla extract.
- Scoop about 2 tablespoons of marshmallow cream onto a cookie, then press another cookie on top to make a sandwich.
SAM’S TIP: Since the filling mixture will ultimately need to be whipped for 5-10 minutes, I like to keep things easy and just use the bowl of my stand mixer for my double boiler. This way, you can take the bowl directly from the double boiler over to your mixer. If you don’t have a stand mixer, you can mix the filling with a hand mixer, but it will be quite an arm workout and will likely take 10 or more minutes. If you go this route, definitely make sure whatever bowl you use is heatproof and can sit on your pot without touching the bottom.
Troubleshooting
It’s easier to stop problems before they start, so make sure you read these tips before you begin:
- Make sure your butter has cooled enough before adding the sugars! If it’s too warm, it can melt the sugars and leave you with a sticky, greasy dough that spreads too much.
- Make sure your mixing bowl and whisk are completely clean, dry, and grease free before adding your egg whites! Even the tiniest bit of grease can prevent your egg whites from whipping properly. Also, make sure you don’t get ANY yolk in with your whites, as this will also keep the egg whites from whipping properly.
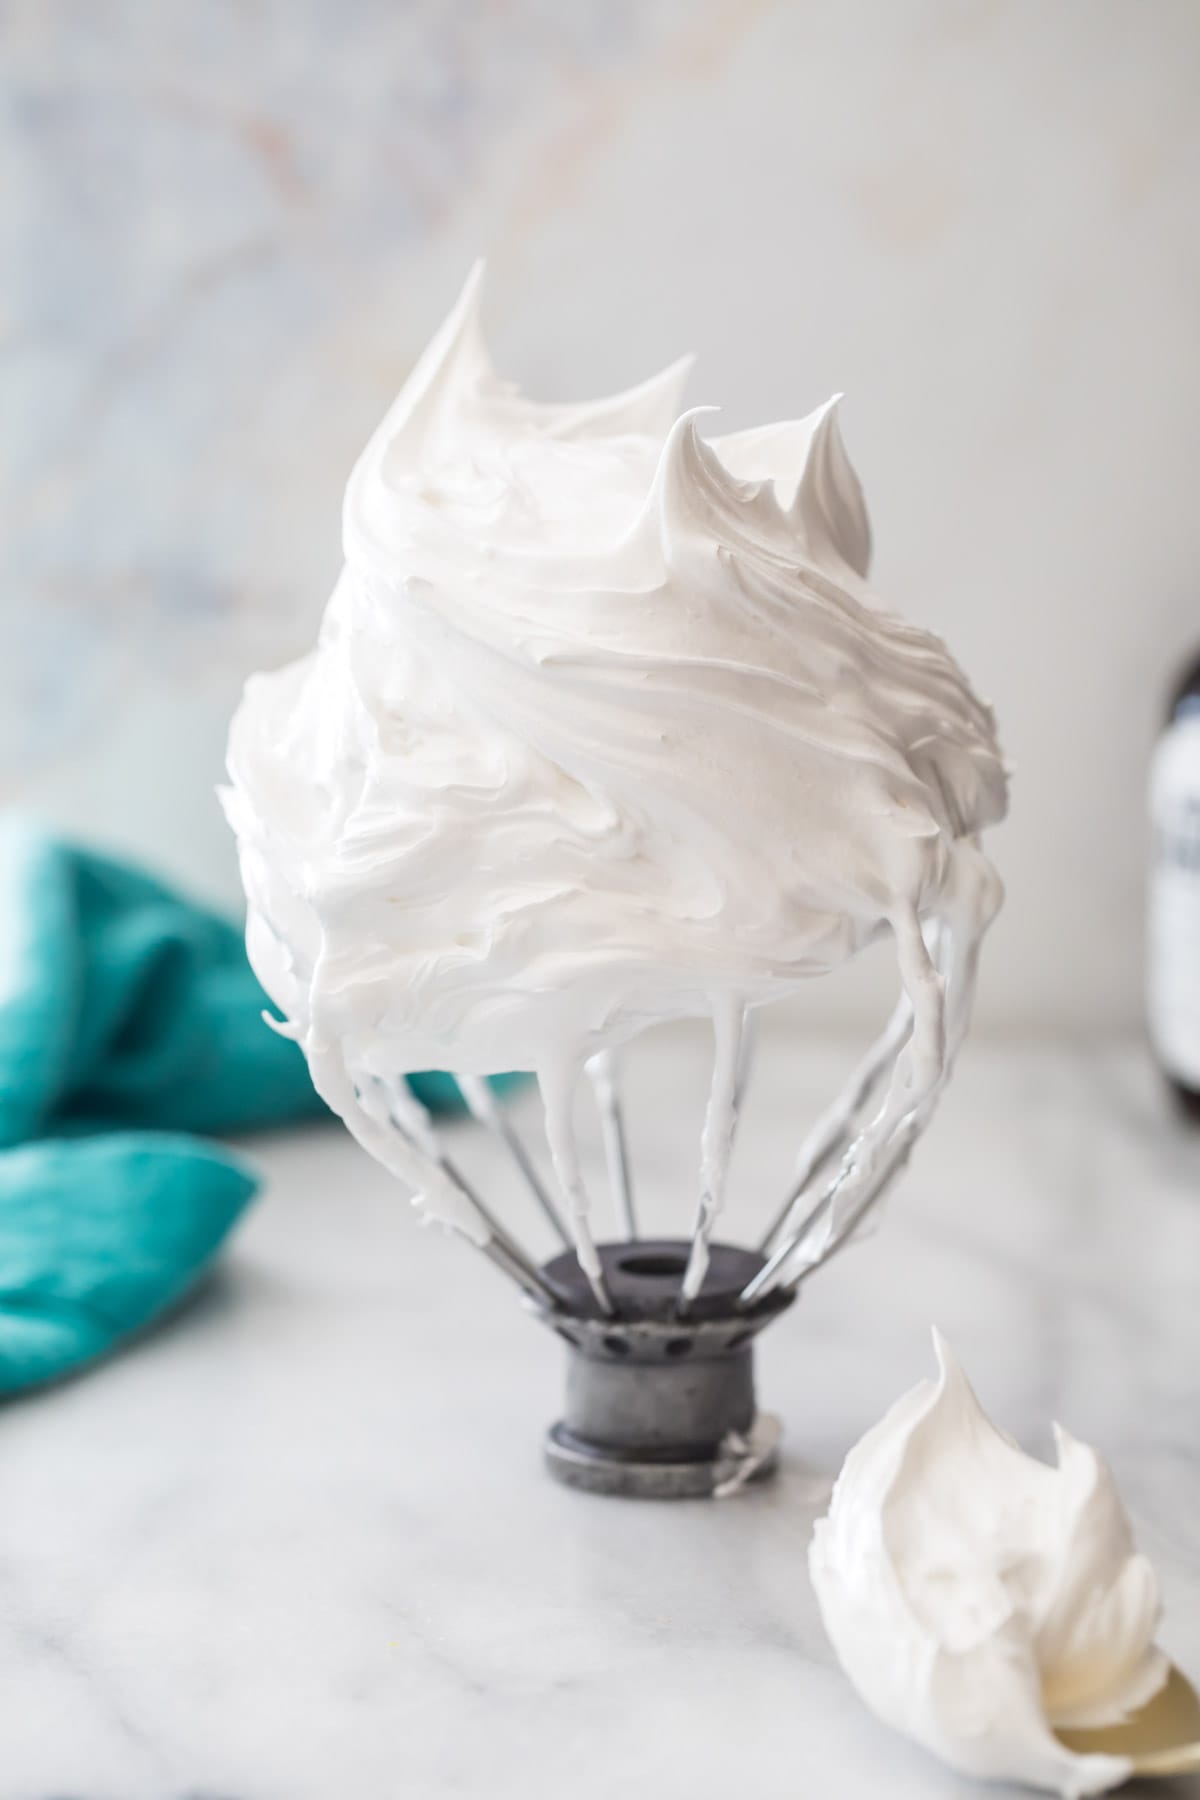
- Make sure you whip the marshmallow cream long enough! You want to beat until it is thick, stiff, and glossy. The peaks that form when you pull the beater out of the mixture should hold their shape and not fall back in on themselves or fold over–if they’re still doing this, keep beating! Exactly how long this takes can vary, but it will likely take more than 5 minutes. If you’re a visual learner, check out the photo above or the video in the recipe card to help you determine what stiff peaks look like.
Frequently Asked Questions
If you don’t devour them all right after making them, these will last for about three days stored in an airtight container at room temperature. You do not need to refrigerate them.
Side note: if you like a soft cookies, you’re in luck! These soften even more the next day–though you don’t have to wait to enjoy them!
Unfortunately, your butter may have been too warm when you combined it with your sugars. You need to make sure your butter is not at all warm to the touch when you combine everything; otherwise, you’ll end up with very flat cookies. Next time, let it cool completely!
Store-bought oatmeal cream pies have a “vanilla creme” filling. Today, we’re making a fluffy, vanilla marshmallow filling that is similar in texture and flavor, but even better. Many recipes use pre-made marshmallow fluff as the base of their filling, but we’re making ours entirely from scratch (surprising, I know 😉).
If you’re not a fan of marshmallow cream or want a less labor intensive filling, I’ve included alternative options in the recipe notes!
Enjoy!
Let’s bake together! I’ll be walking you through all the steps in my written recipe and video below! If you try this recipe, be sure to tag me on Instagram, and you can also find me on YouTube and Facebook
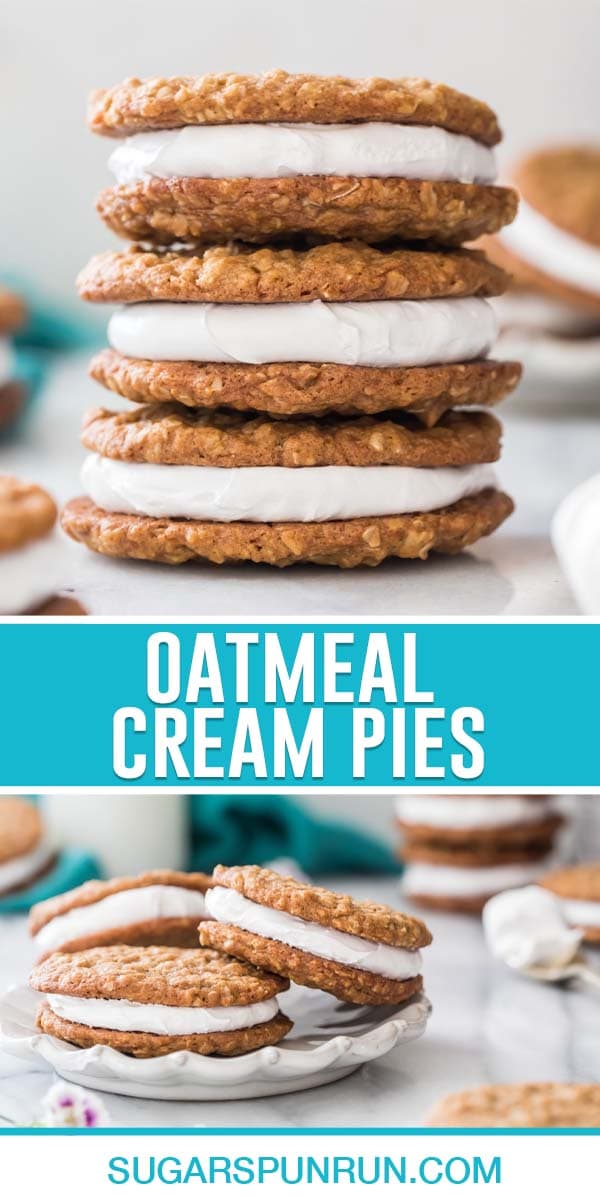
Oatmeal Cream Pies
Ingredients
For Cookies
- 1 cup (226 g) unsalted butter melted and cooled until no longer warm to the touch
- 1 cup (200 g) dark brown sugar firmly packed
- ½ cup (100 g) granulated sugar
- 2 Tablespoons unsulphured molasses
- 2 large eggs room temperature preferred
- 1 ½ teaspoons vanilla extract
- 2 cups (250 g) all-purpose flour
- 2 teaspoons cornstarch
- 1 ¼ teaspoon baking soda
- ¾ teaspoon ground cinnamon
- ¾ teaspoon table salt
- 2 cups (180 g) instant/quick oats
For Marshmallow Cream Filling
- 6 (210 g) large egg whites (I do not recommend using egg whites from a carton, as people have reported mixed results with these)
- 1 ½ cups (300 g) granulated sugar
- ½ teaspoon cream of tartar
- ¼ teaspoon salt
- 1 ½ teaspoons vanilla extract
Recommended Equipment
Instructions
For Cookies
- Preheat oven to 350F (175C) and line a baking sheet with parchment paper. Set aside.
- Combine butter, sugars, and molasses and stir well (I do not use an electric mixer for this recipe and just stir everything by hand).1 cup (226 g) unsalted butter, 1 cup (200 g) dark brown sugar, ½ cup (100 g) granulated sugar, 2 Tablespoons unsulphured molasses
- Add egg and vanilla extract and stir to combine.2 large eggs, 1 ½ teaspoons vanilla extract
- In a separate bowl, whisk together flour, cornstarch, baking soda, cinnamon, and table salt until completely combined.2 cups (250 g) all-purpose flour, 2 teaspoons cornstarch, 1 ¼ teaspoon baking soda, ¾ teaspoon ground cinnamon, ¾ teaspoon table salt
- Gradually stir dry ingredients into butter mixture until thoroughly combined.
- Stir in oats until well-distributed.2 cups (180 g) instant/quick oats
- Drop batter by level 1 ½-Tablespoon-sized scoop onto prepared baking sheet and bake on 350F (175C) for 10 minutes or until edges are beginning to turn golden brown. Allow cookies to cool completely on baking sheet before filling.
For Marshmallow Cream Filling (see note for alternative filling options)
- Before you begin: You will need a double boiler for this recipe. I recommend using the metal bowl of a stand mixer and a saucepan that is large enough to support the bowl without it touching the bottom of the pan. While this recipe can be prepped with an electric hand mixer, please note that it will be quite an arm workout and will take a long time and I recommend using a stand mixer if you have one).
- In the completely clean, dry and grease-free bowl of a stand mixer, combine egg whites, sugar, cream of tartar and salt and whisk to combine.6 (210 g) large egg whites, 1 ½ cups (300 g) granulated sugar, ½ teaspoon cream of tartar, ¼ teaspoon salt
- Bring 1 ½-2” (4-5cm) of water to a simmer over medium-low in a medium-sized saucepan (use a saucepan that your mixing bowl will fit in without touching the bottom of the pan).
- Place mixing bowl over simmering water and whisk constantly until the sugar is dissolved (if you rub a small bit of the syrup between your fingers (be careful, it’s hot!) it should no longer feel gritty at all) and the mixture reaches at least 160F (70C).
- Remove mixing bowl from heat and fit it into your mixer. Using a whisk attachment, beat the egg whites on medium-high speed until mixture becomes thick and glossy and you have billowy stiff peaks. This typically takes approximately 5-10 minutes with a stand mixer but will take longer if you are using a hand mixer with beaters.
- Stir in vanilla extract.1 ½ teaspoons vanilla extract
Assembly
- Once cookies have cooled, scoop a generous portion (I use about 2 Tablespoons) of marshmallow cream filling onto the bottom of one cookie. Top with another cookie to make a sandwich/marshmallow cream pie. Serve and enjoy!
Notes
Other filling options
The marshmallow cream in this recipe is the closest to authentic oatmeal cream pies and is what I recommend for best taste. However, if you’re looking for something faster/simpler you can use one of my other frosting recipes instead, such as my cream cheese frosting, classic buttercream frosting, ermine frosting, etc.Storing
Store assembled cookies at room temperature in an airtight container for up to 3 days.Making in advance
The cookies may be prepared up to 3 days in advance of assembly. I personally prefer to use the marshmallow cream immediately but it may be prepared up to 24 hours in advance. To store, place in an airtight container and refrigerate. You will need to let it sit at room temperature and then most likely re-whip with a whisk attachment for several minutes to restore to original fluffy consistency before using. Note that the cream does not need to be refrigerated once the cookies are assembled, but doing so extends its life which is why I recommend refrigerating when making in advance.Nutrition
Nutritional information is based on third-party calculations and should be considered an estimate only. Actual nutritional content will vary based upon brands used, measuring methods, cooking method, portion sizes, and more.




Beth Stewart
Could you use Old Fashion Oats?
Sam
Hi Beth! I haven’t tried it, but I think it could work. It will certainly change the texture. 🙂
Dad Baker
These are “Show stoppers”!! You show up with these and every other cookie takes a back seat. The cookie is very easy to make. The filling requires some attention, but is really satisfying to create correctly. We have found that the 6 egg whites create way more than enough filling – lots of leftover marshmallow for peanut butter fluff sandwiches!!!
Here’s a variation: We made the cookie batter and added Raisins & Chocolate chips to make (what we called) “Raisinette cookies”. We used roughly 1 1/2 cups of raisins, and 2 cups of chocolate chips. *Make sure your raisins are rehydrated before adding them into the batter.
This website is just incredible! Thank you for all the work you’ve done!
Sam
I’m so glad everyone enjoyed them so much! I love the sound of your alterations. Thank you so much for your support. I’m happy to hear everything has been such a hit! 🙂
Anonymous
Can this be made with GF flour? P.S., I love your recipes, Sam!
Sam
I haven’t personally tried it with a gluten free flour, but if you do, I would love to know how it turns out. 🙂
april
Thank you for making me a potluck hero yet again 🙂 These are great. My husband brings the only desserts that get eaten!
Sam
I’m so glad everyone enjoyed them so much, April! 🙂
Kyn
Absolutely love these. Husband says they are the best cookies he has had because he loves the original Little Debbie’s but these are better! Your recipes never fail, thank you!
Sam
I’m so glad everyone enjoys them so much, Kyn! 🙂