
Homemade Chocolate Pop Tarts
This post may contain affiliate links. As an Amazon Associate I earn from qualifying purchases. Please read my disclosure policy.
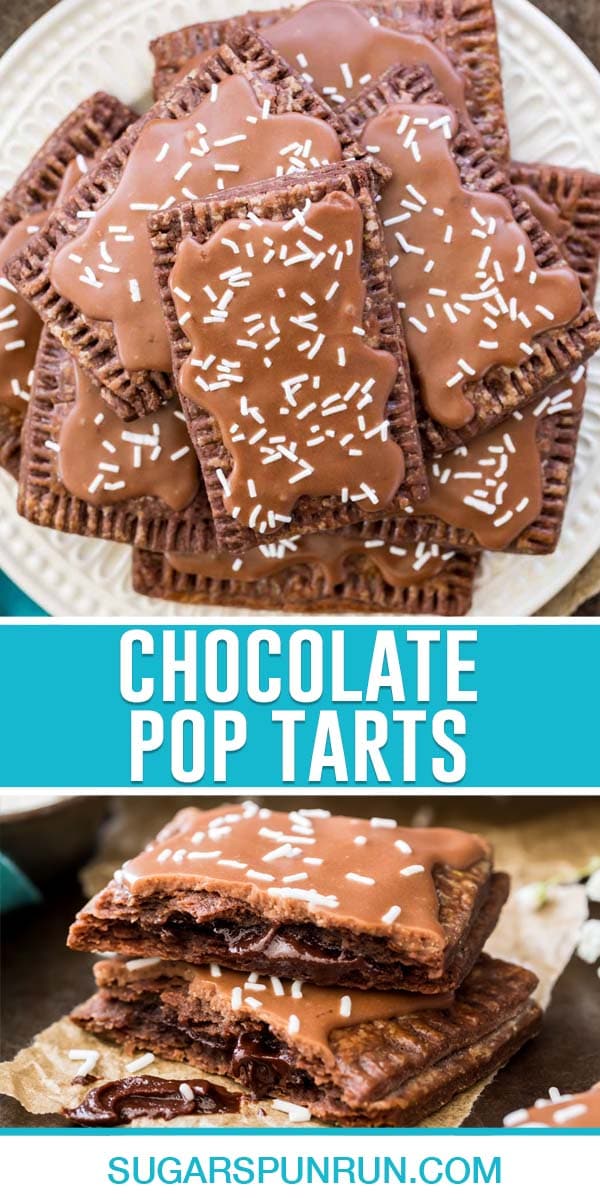
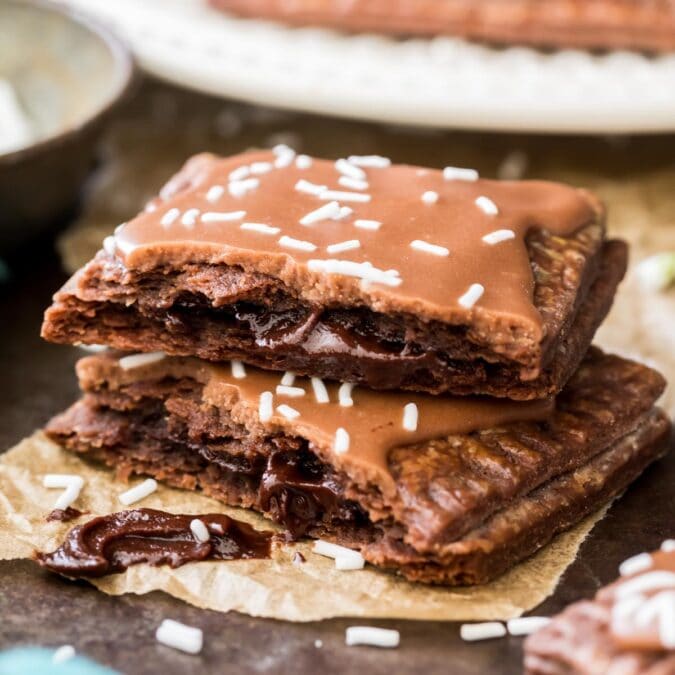
Homemade Chocolate Pop Tarts are surprisingly easy to make and taste so much better than store-bought! Filled with a decadent chocolate filling, they bake for just 15 minutes in the oven before being topped with a glossy chocolate frosting. Recipe includes a how-to video!
The Ultimate Snack for the Chocolate Lover
Whether you enjoy them for breakfast, dessert, or a mid-day snack (all three, anyone? 🙋🏼♀️), these chocolate pop tarts are guaranteed to satisfy even the strongest chocolate cravings. Surprisingly, all that chocolate flavor comes from just a handful of ingredients, which means making these homemade pop tarts is almost as easy as ripping open a foil package from the store.
As with my homemade strawberry pop tarts and so many of my other pastry recipes, I knew I wanted to start with my foolproof pie crust as the base. A few changes were in order to turn it into a chocolate crust, so I added cocoa powder and reduced the flour. Because cocoa powder can be bitter and I didn’t want the crust to be too dark in flavor, I also increased the sugar.
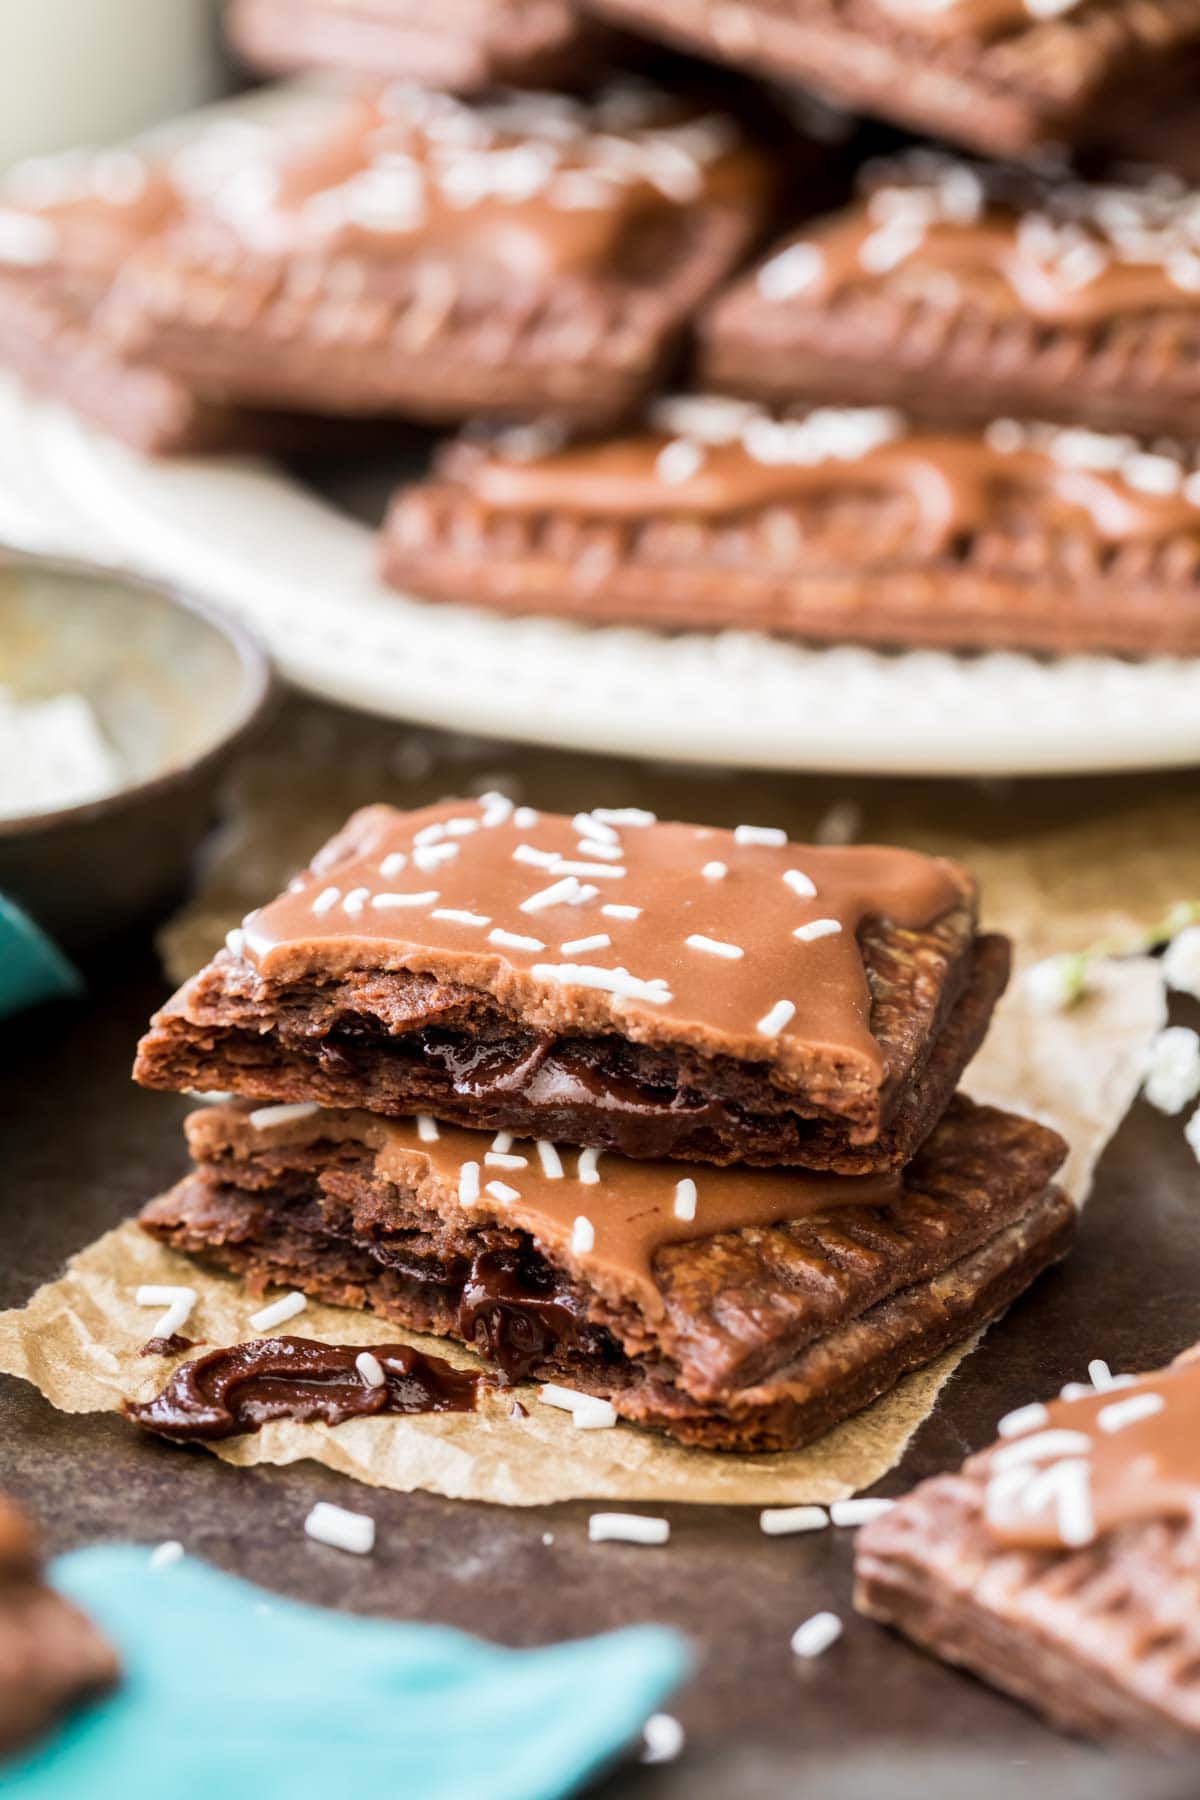
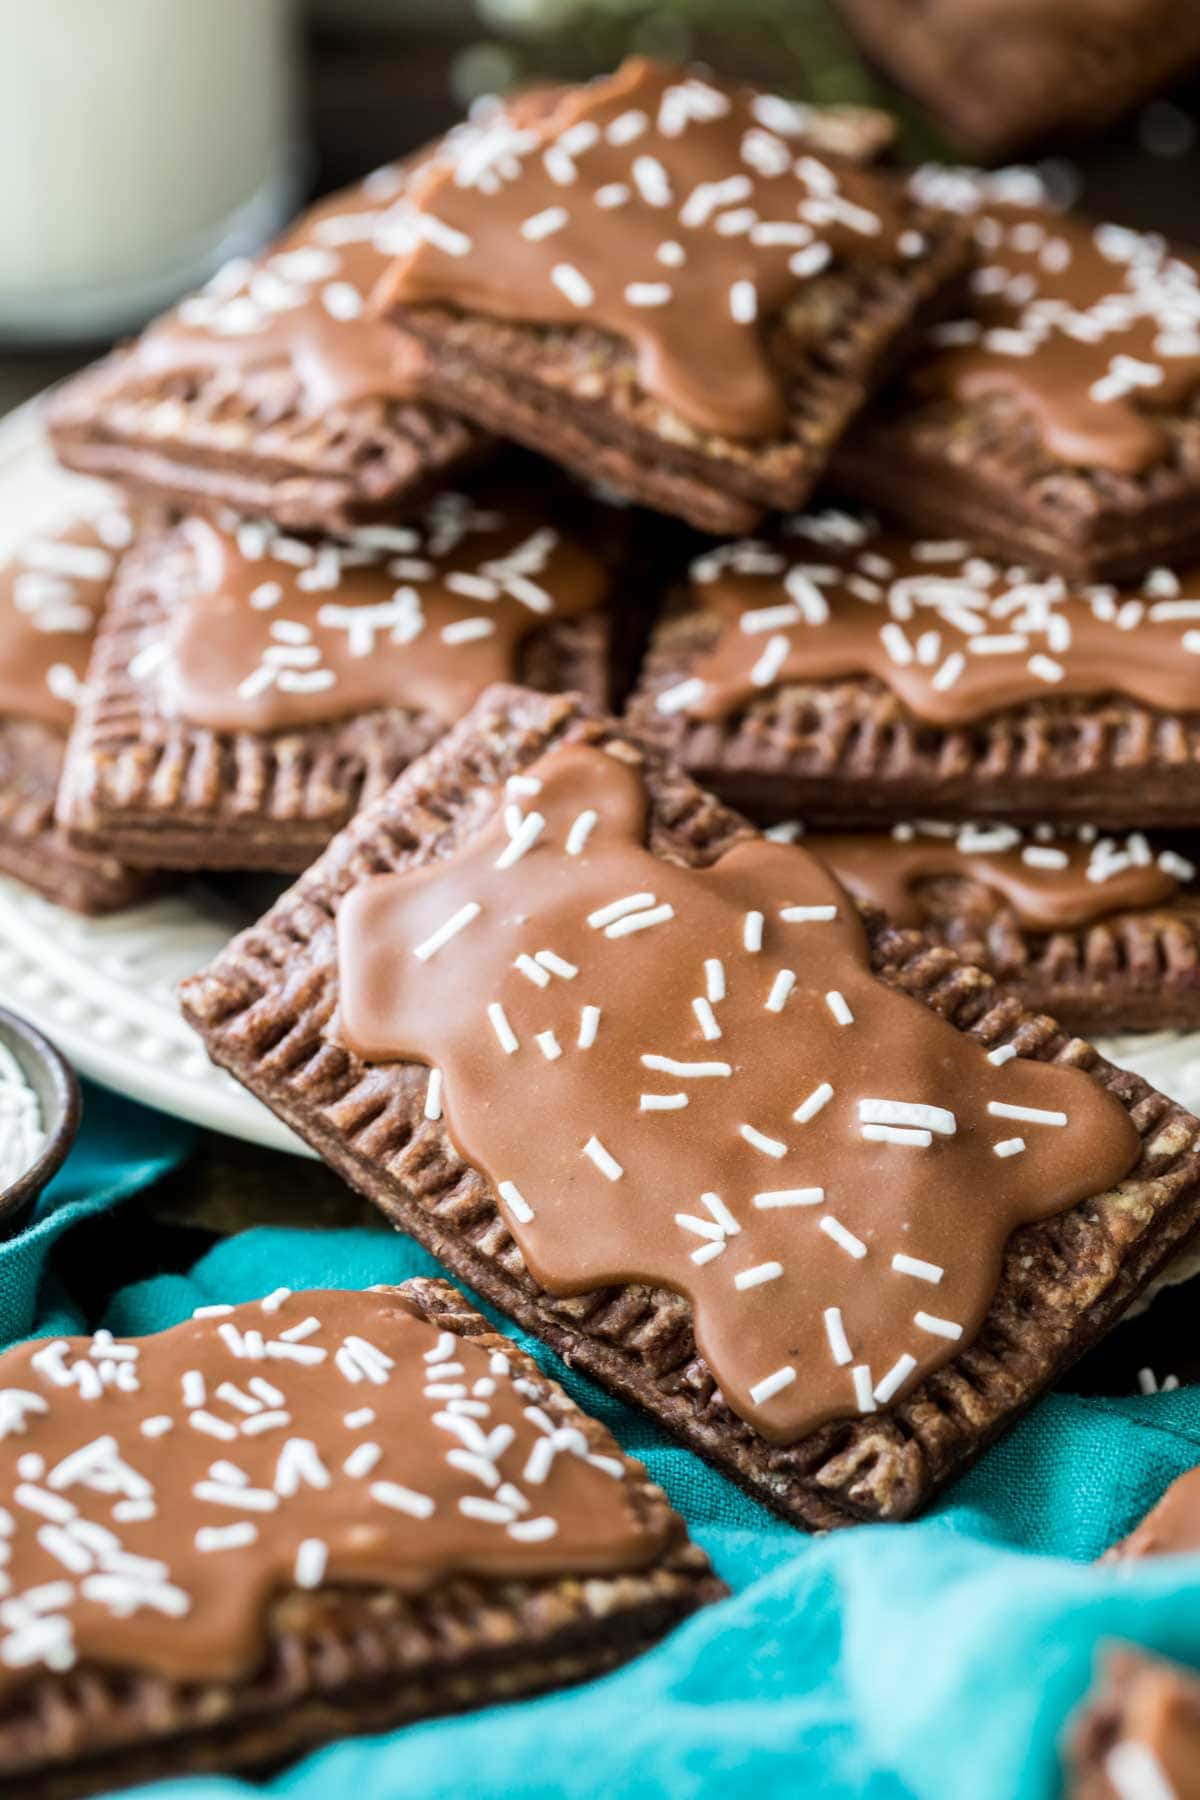
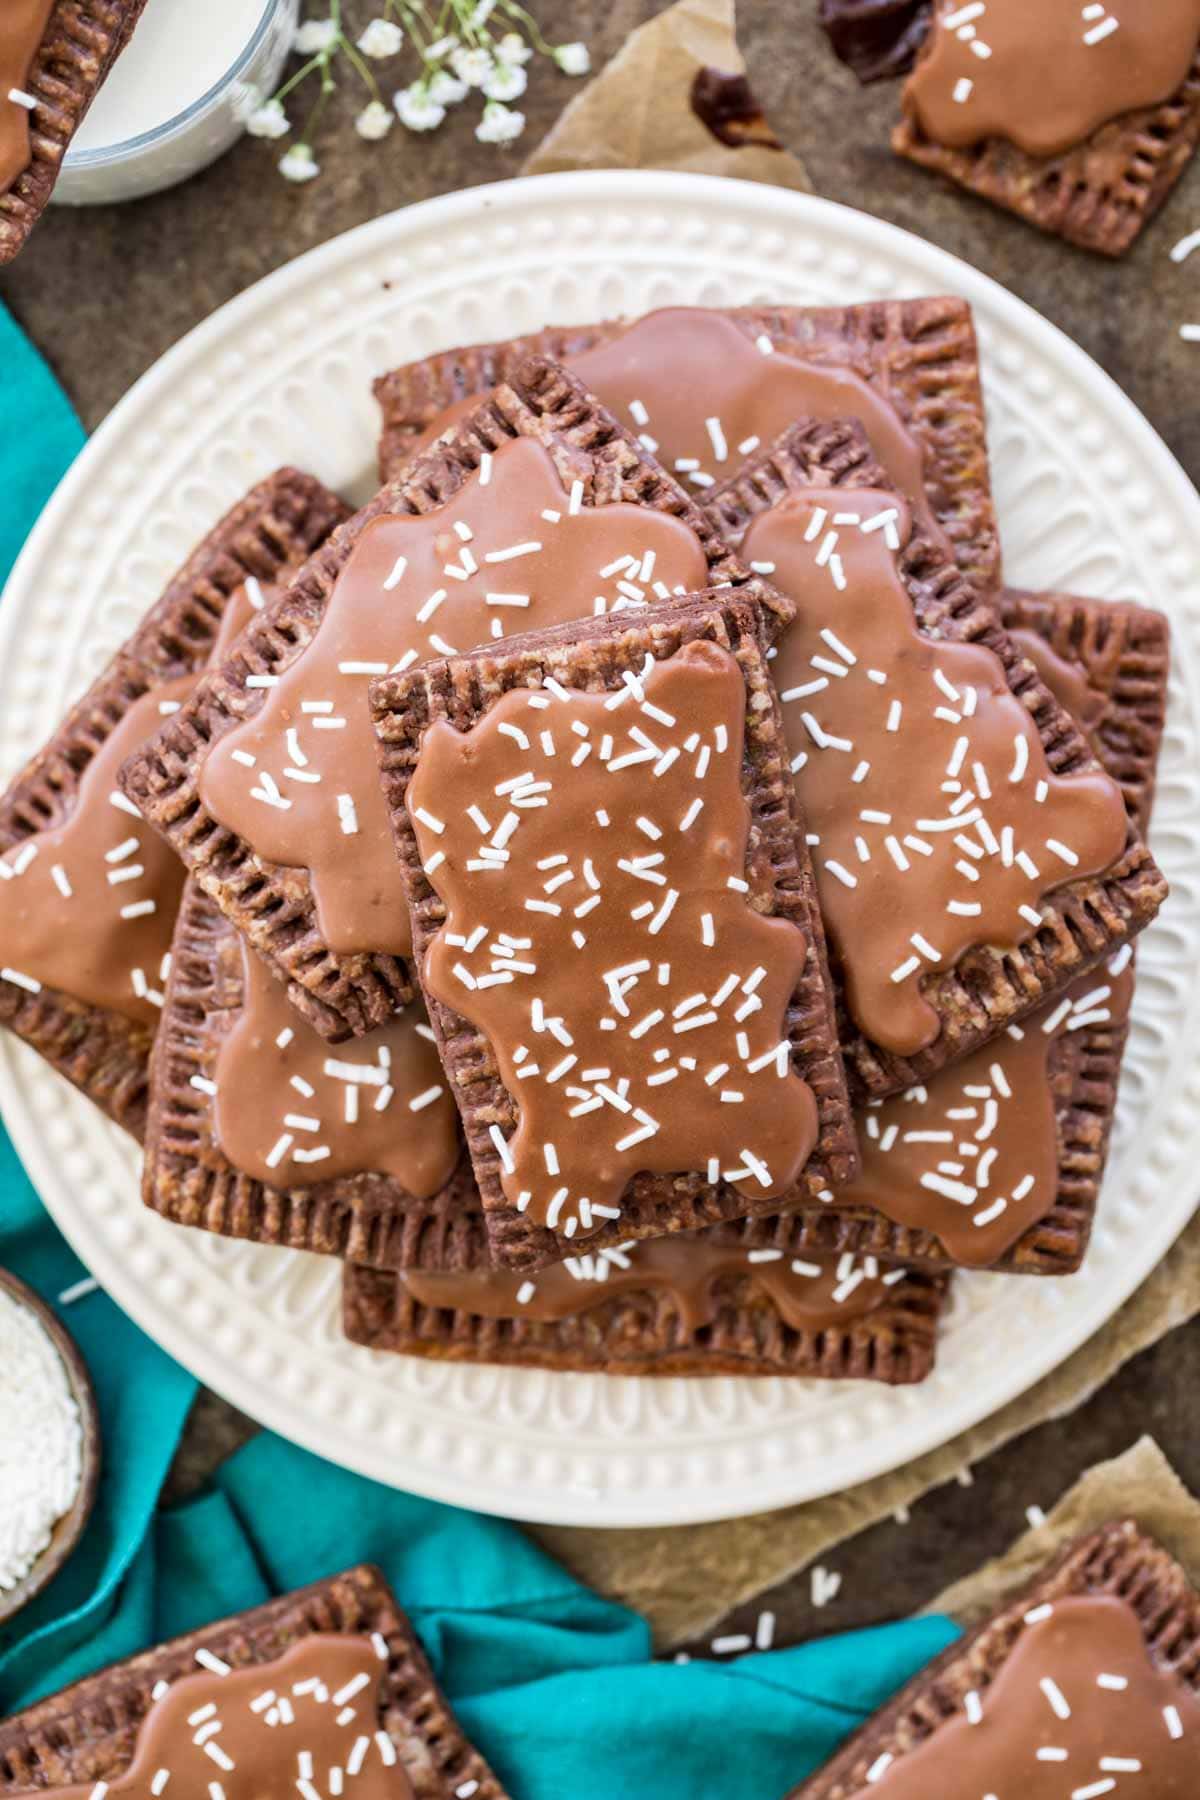
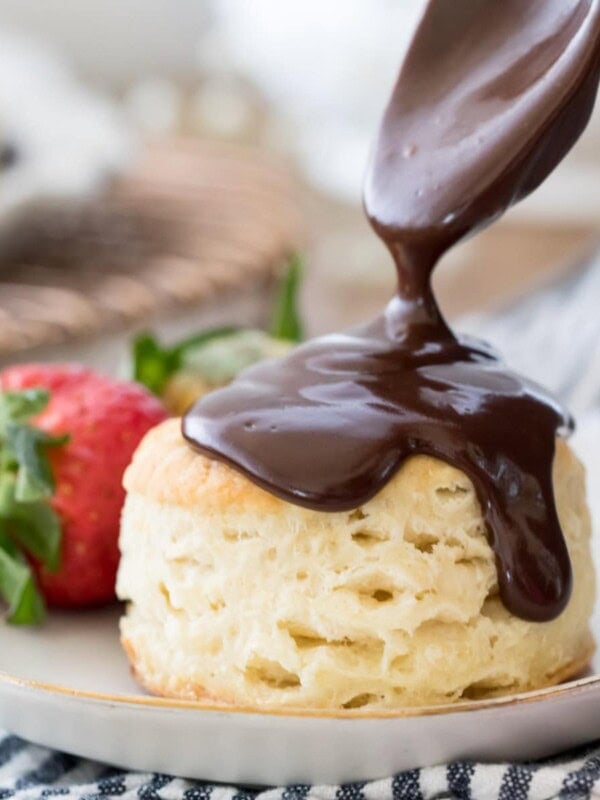
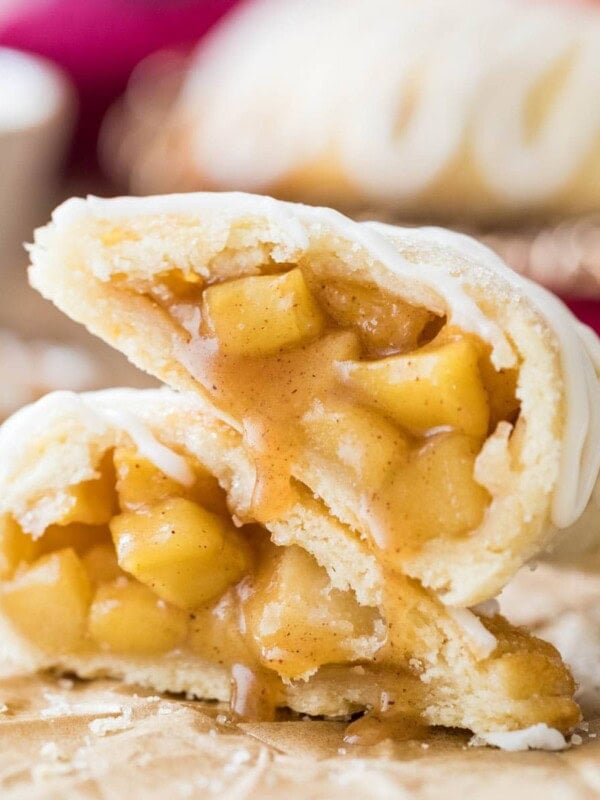
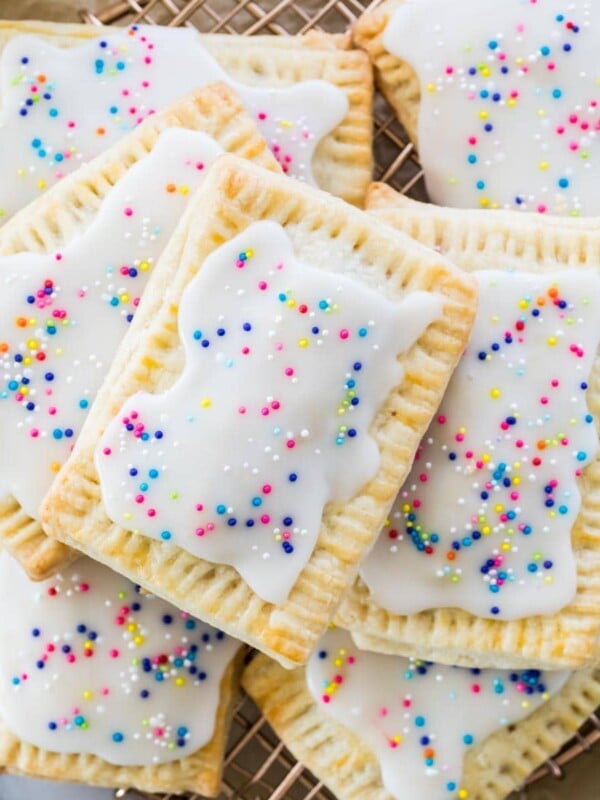
The filling is essentially a chocolate truffle filling; it’s rich and gooey with a semi-molten consistency that’s absolutely irresistible. To finish it all off, I add a shiny, firm-set chocolate frosting and some sprinkles for flair. The end result is cute, but dangerously good!
Let’s get started!
What You Need
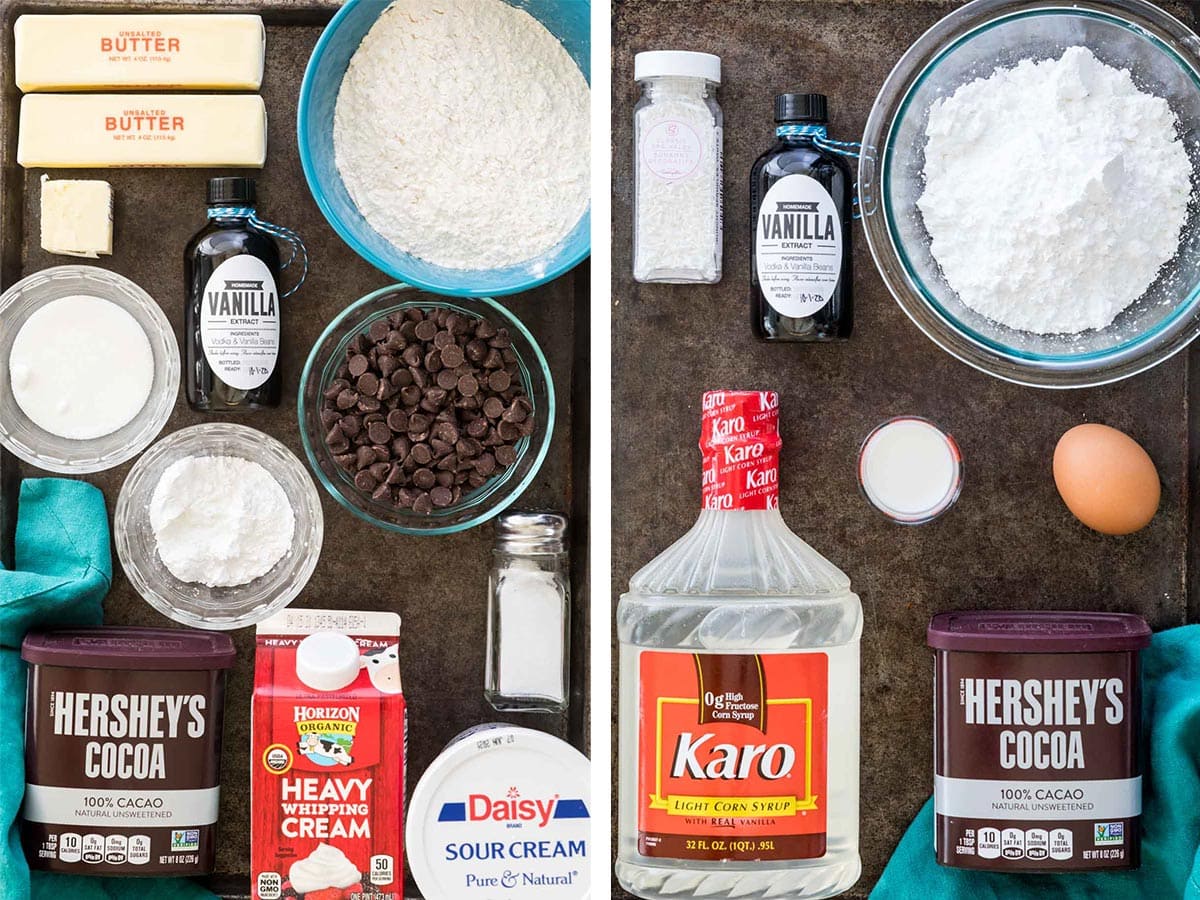
Here are a few of the key ingredients you’ll need to make these chocolate pop tarts:
- Flour. All-purpose flour will work just fine for these chocolate pop tarts.
- Cocoa powder. I use natural cocoa powder for a smooth chocolate flavor. Dutch-process cocoa will also work, but keep in mind the result will be e a more intense flavor.
- Sugar. You’ll need granulated sugar for the crust and powdered sugar for the filling and frosting.
- Butter. Use unsalted butter for the crust and salted butter for the filling. Your butter should be very cold before you add it to your crust to achieve a perfectly flaky texture.
- Sour cream. Since our pastry base is my classic pie dough, we’ll be adding sour cream (my secret ingredient) to the crust of these chocolate pop tarts. It won’t make the crust taste like sour cream, but it will impart a lovely flavor and keep the dough super simple to make. Full-fat Greek yogurt will also work in a pinch.
- Chocolate chips. I prefer to use semi-sweet chocolate chips for the filling, though milk chocolate or dark chocolate would work fine. A baking bar would also work as an alternative.
- Heavy cream. We’ll melt our chocolate with a few tablespoons of heavy cream to give the filling its classic, molten-esque consistency. The filling is not a far cry from my chocolate ganache, though tempered with butter to keep it from being too intense or cloying.
- Vanilla. A splash of vanilla extract in the filling rounds out the rich chocolate flavor.
- Egg. We’ll brush egg wash on both the interior and exterior of our homemade pop tarts for a crisp (not soggy!) texture.
- Corn syrup. This is NOT the same as high fructose corn syrup! Corn syrup makes the frosting nice and glossy and helps it harden perfectly. I know some of you are still hesitant about using this ingredient, so if you really want to, you can skip it. Keep in mind if you do skip it, your icing won’t firm up the same or be as shiny, and you may need more milk.
- Milk. Add just a splash milk to the frosting to make it nice and spreadable. I use whole milk, but you can use whatever you have on hand, just keep in mind you’ll need a bit less if you’re using a thinner (lower fat) milk like 2% or skim.
- Sprinkles. These are optional, but not really.
SAM’S TIP: Make sure you use light corn syrup, not dark. Dark has a stronger flavor that will likely overpower or compete with the chocolate in the frosting.
Remember, this is just an overview of the ingredients I used and why. For the full recipe please scroll down to the bottom of the post!
How to Make Chocolate Pop Tarts
Crust
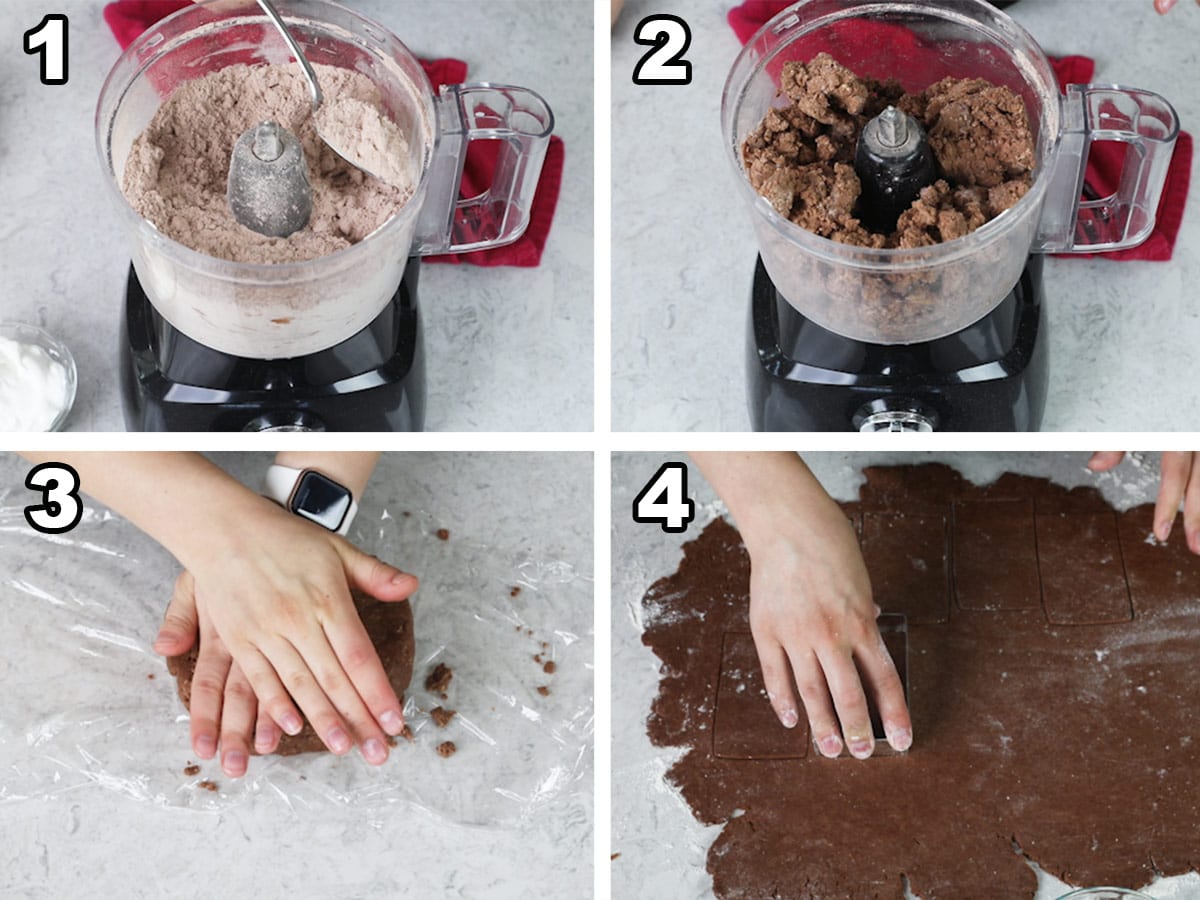
- Pulse the flour, cocoa powder, sugar, and salt in a food processor. Add the cubed butter and pulse again until the mixture resembles coarse crumbs.
- Add sour cream and pulse the mixture until your dough begins to cling together. It should stick together when you pinch it between your fingertips.
- Transfer dough to a piece of plastic wrap and flatten it into a disk. Place the dough in the fridge for 30-60 minutes while you prepare your filling.
- After your filling is prepared and cooled, roll your dough out on a lightly floured surface. When dough is 1/8″-1/4″ thick, begin cutting it into 2.5″x4″ rectangles.
Filling
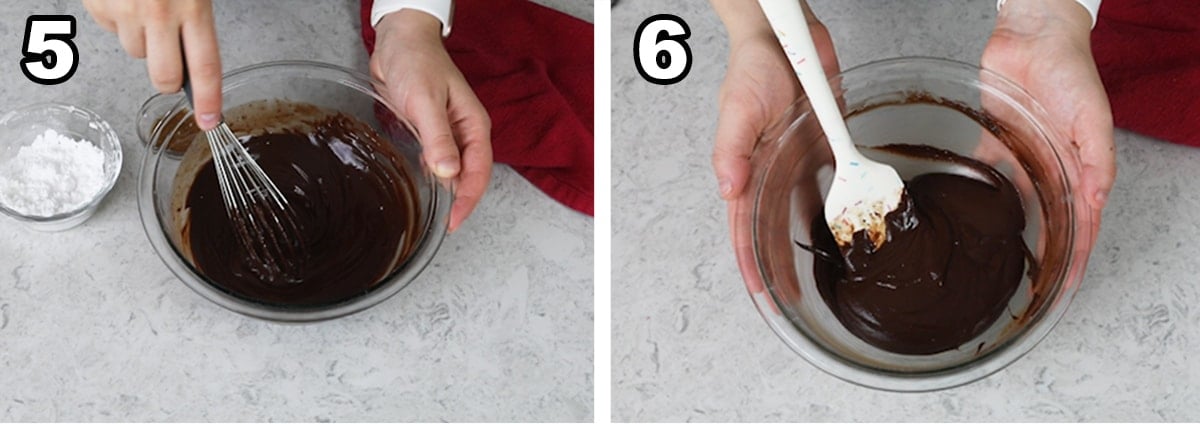
- Microwave your chocolate, butter, and cream in 25-second intervals until melted and smooth.
- Add vanilla and sugar; stir until fully incorporated. Set your filling aside and allow it to cool and thicken before using (this makes it easier to manage and less likely to run all over your crust while you’re trying to fill your pop tarts).
Assembly
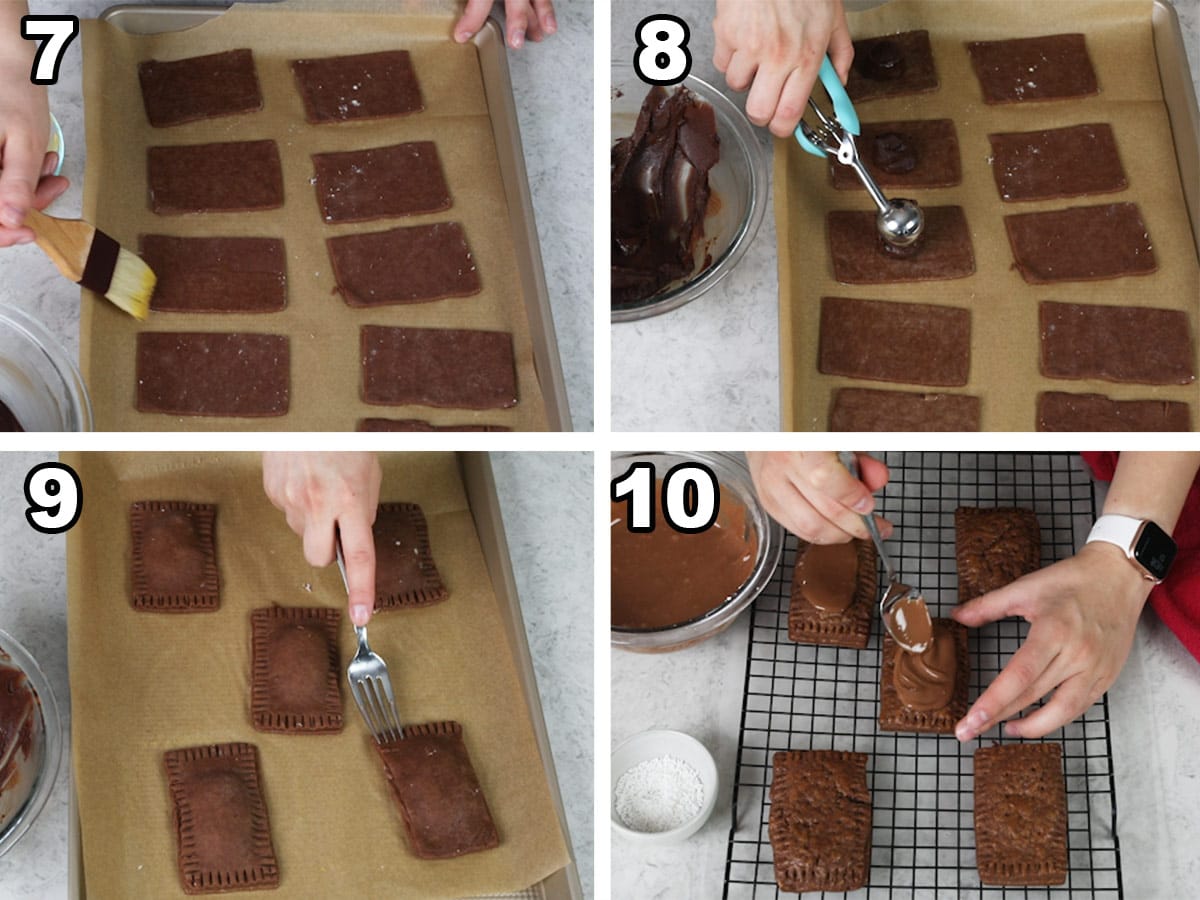
- Place one dough rectangle on a parchment-lined baking sheet and lightly brush the surface with egg wash.
- Add a rounded teaspoon of your chocolate filling to the center of the rectangle, then top it with another rectangle.
- Crimp the sides of the pop tart together with a fork, then seal it with more egg wash. Poke 6-8 holes in the surface with a toothpick to allow steam to escape.
- Repeat with your remaining pop tarts, then bake for 15-17 minutes. Let the pop tarts cool on your baking sheet before icing and topping with sprinkles.
SAM’S TIP: This icing is nearly impossible to mess up! If it gets too thin, add some more powdered sugar. If it’s too thick, add some more milk. For those who struggle with this, I talk more about the ideal consistency in the recipe and show you exactly how it should look in the video below.
Frequently Asked Questions
Unfortunately I don’t really recommend it because the frosting may melt off in your toaster. Instead, I recommend warming them for a few seconds in the microwave.
Yes! Wrap them tightly in plastic or foil and store them in an airtight bag or container. They’ll keep for several months that way.
Yes! I’ve included instructions for how to make these chocolate pop tarts without a food processor in the recipe notes. It will be more labor intensive, but it can be done.
Enjoy!
More Recipes You Might Like
Let’s bake together! I’ll be walking you through all the steps in my written recipe and video below! If you try this recipe, be sure to tag me on Instagram, and you can also find me on YouTube and Facebook
Homemade Chocolate Pop Tarts
Equipment
- Cookie cutter (for even rectangles, optional)
Ingredients
For Chocolate Pastry Crust
- 2 ¼ cups (280 g) all-purpose flour
- ¼ cup (25 g) natural cocoa powder
- ¼ cup (50 g) granulated sugar
- ½ teaspoon table salt
- 1 cup (226 g) unsalted butter, cubed and very cold
- ½ cup (120 g) sour cream
For Chocolate Filling
- 6 oz semisweet chocolate chips
- 2 Tablespoons salted butter
- 2 Tablespoons heavy cream
- ½ teaspoon vanilla extract
- 3 Tablespoons powdered sugar
Egg Wash
- 1 large egg
- 1 teaspoon water
For Chocolate Glaze
- 1 ½ cups (190 g) powdered sugar
- 1 Tablespoon natural cocoa powder
- 2 Tablespoons milk
- 1 Tablespoon light corn syrup, see note
- ¼ teaspoon vanilla extract
- Nonpareils, sprinkles, or coarse sanding sugar for decorating, optional
Instructions
For Chocolate Pastry Crust
- Combine flour, cocoa powder, granulated sugar and salt in the basin of a food processor and pulse briefly to combine.2 ¼ cups (280 g) all-purpose flour, ¼ cup (25 g) natural cocoa powder, ¼ cup (50 g) granulated sugar, ½ teaspoon table salt
- Scatter cubed butter evenly over the surface of the flour mixture and pulse until the butter is cut into the mixture and mixture resembles coarse crumbs. Discernible pieces of butter may remain in the mixture, this is fine!1 cup (226 g) unsalted butter
- Add sour cream and pulse until dough is beginning to cling together. It may still be a bit crumbly but the flour and cocoa should be absorbed and if you press the dough between your thumb and forefinger it should stick together.½ cup (120 g) sour cream
- Remove from food processor and transfer to a piece of plastic wrap. Flatten into a disk and chill for at least 30-60 minutes before rolling out. In the meantime, prepare your filling.
For Filling
- Combine chocolate, butter, and cream in a heatproof bowl and heat in 25-second increments until melted and smooth.6 oz semisweet chocolate chips, 2 Tablespoons salted butter, 2 Tablespoons heavy cream
- Stir in vanilla extract and powdered sugar until smooth.½ teaspoon vanilla extract, 3 Tablespoons powdered sugar
- Set aside, filling should cool (and will thicken some) before being used to fill pastry.
Assembly
- Once pastry dough has chilled, preheat your oven to 400F (205C) and line a baking sheet with parchment paper.
- Prepare egg wash by thoroughly whisking together egg and water.1 large egg, 1 teaspoon water
- Transfer pie crust to a clean, lightly floured surface and dust with additional flour as needed. Roll dough into a rectangle about ⅛-¼” thick and cut into 2.5”x4” (6x10cm) rectangles.
- Place one rectangle on the prepared baking sheet and lightly brush the surface with egg wash.
- Drop a rounded Tablespoon of chocolate filling into the center, then top with another rectangle of dough. Use a fork to crimp the sides to seal and brush the surface of the dough with egg wash. Use a toothpick or wooden skewer to poke 6-8 holes in the surface of the pop tart to allow it to vent.
- Repeat the steps above until you have formed all of your chocolate pop tarts, then transfer to 400F (205C) oven and bake for 15-17 minutes. Allow to cool on baking sheet before decorating with icing.
Icing
- Combine sugar, cocoa powder, milk, corn syrup, and vanilla extract and whisk until combined. If mixture is too thick, add additional milk as needed until smooth, and if icing becomes too thin, you can always thicken it with a bit more powdered sugar. Look for a consistency where, when you lift the spoon out of the icing, the ribbon of icing that drizzles back into the bowl holds its shape for several seconds before dissolving back in the icing.1 ½ cups (190 g) powdered sugar, 1 Tablespoon natural cocoa powder, 2 Tablespoons milk, 1 Tablespoon light corn syrup, ¼ teaspoon vanilla extract
- Spoon icing over the center of the pop tarts and top with sprinkles, if using. Allow frosting to harden before serving and enjoying.Nonpareils
Notes
Food processor
A food processor will make the process of preparation much simpler. If you do not have one, you can instead use a pastry cutter to cut the butter into the flour mixture and then stir in the sour cream by hand. The mixture will be dry so this will require more effort.Cocoa powder
I use natural cocoa powder. Dutch-process cocoa will work here, but keep in mind that the flavor will be more intense this way.Corn syrup
You may omit the corn syrup if needed. The finished glaze will not be as shiny/glossy and will not dry as firm and you may need a bit more milk.Storing
Chocolate pop tarts may be stored in an airtight container at room temperature for 2-3 days, or tightly wrapped and frozen for several months.Making in advance
The pie dough may be prepped up to 3 days in advance of using. I recommend preparing the filling and glaze just before using.Nutrition
Nutrition information is automatically calculated, so should only be used as an approximation.
Like this? Leave a comment below!


I don’t know what we did wrong they just tasted bad
I’m so sorry to hear this, Jonah! Did you make any substitutions? What did it taste like that was bad? Are all of your ingredients fresh?
My girls and I made these today and oh boy! A chocolate lovers dream. Basically a ganache filled Poptart! Took all day to make, but delicious and not full of all the gross stuff the store bought kinds are. Definitely recommend!
We’re so happy you enjoyed them, Colleen! They are a labor of love, but so worth the effort ☺️
I’m sitting here in complete awe because these homemade pop tarts are literally identical to the real deal. They are incredible. I like to add a couple of tablespoons of maple syrup (real stuff only) to the filling and glaze, which creates a beautiful flavor. I’m obsessed!
I’m so glad you enjoyed them so much, Annie! 🙂
This recipe is just what I was looking for!! Can we use honey in place of the corn syrup in the icing?
Hi Regina! I would probably just leave the corn syrup out. I’d be worried that the frosting wouldn’t set up quite the same if you used honey.
My granddaughter and I are chocolate lovers. She made these for my surprise birthday party. These pop tarts, like my granddaughter, are a delight not to miss!
Dick G
I’m so glad everyone enjoyed them so much, Richard! Happy Birthday! 🙂
Hello! I’ve made these tonight, they are beautiful! I can’t wait to try them. I am wondering though how do I go about reheating them after freezing them? Thank you so much for the recipe!
You could reheat them in the microwave or toaster. If you are going to reheat them in the toaster, I would recommend not putting the frosting on before freezing. It may not be a bad idea to thaw in the refrigerator overnight. 🙂
LOVE, LOVE, LOVE this recipe,
I used instead homemade fig jam, cherry filling & Nutella…
possibilities are endless…
Yes!! So many options! So glad you enjoyed, Robert! 🙂
Oh my!! I’m going to make some of these bad chickens really soon! I am going to do gluten free (well no choice!) but they look awesome! Thanks!
I hope you LOVE them, Michelle! 🙂