
Crème Brûlée Recipe
This post may contain affiliate links. As an Amazon Associate I earn from qualifying purchases. Please read my disclosure policy.
My homemade crème brûlée recipe uses just 5 ingredients! It’s surprisingly simple to make despite its sophisticated name and appearance. Recipe includes a how-to video to guide you through every step!
My Favorite Crème Brûlée Recipe
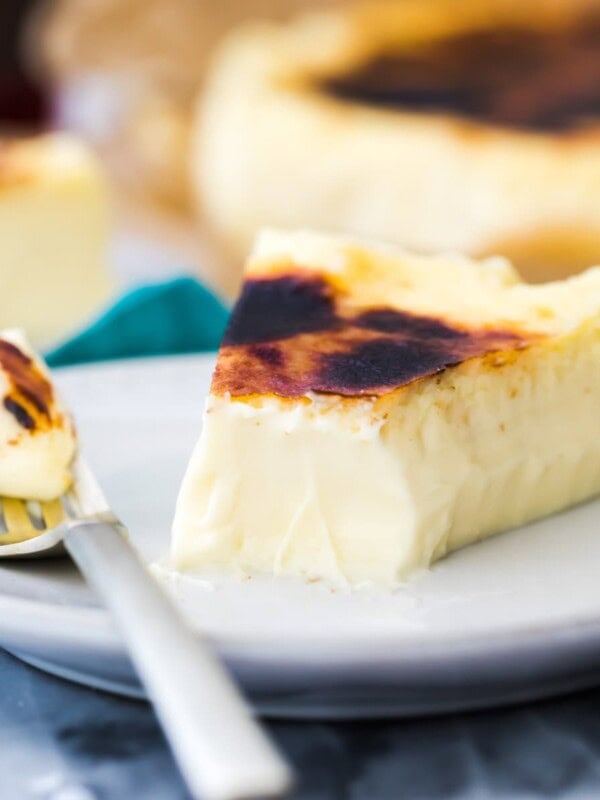
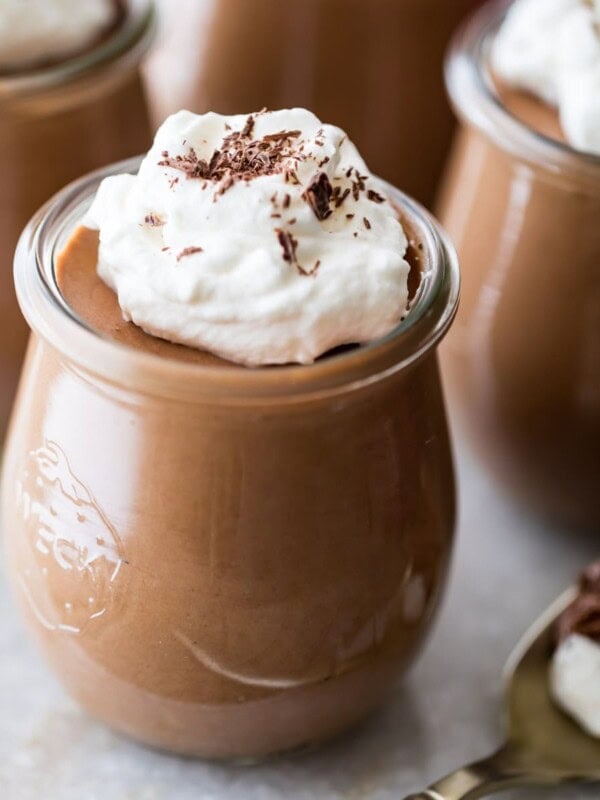
I’m adding creme brulee to my list of recipes that look fancy and complicated (that caramelized sugar topping! Those elegant accents over the letters!), but are really quite simple to make. In fact, this recipe is going straight to the top, right next to my chocolate lava cakes (another must-try this Valentine’s Day!).
While it may appear elite and intimidating, creme brulee really isn’t that difficult to make. Making the custard is similar to making pastry cream, and the brulee top takes seconds to accomplish. There is some technique involved and a few tools you will need (ramekins and a kitchen torch, both linked in the recipe), but I’ll walk you through every easy step.
Note: unlike my cheesecake recipes, we unfortunately have to use a water bath today. A water bath guarantees smooth, creamy, crack-free custard-which is exactly what we want! Don’t worry though, I’m sharing plenty of tips on what type of pan to use, how much to fill, and how to prevent leaks.
Let’s get started!
What You Need
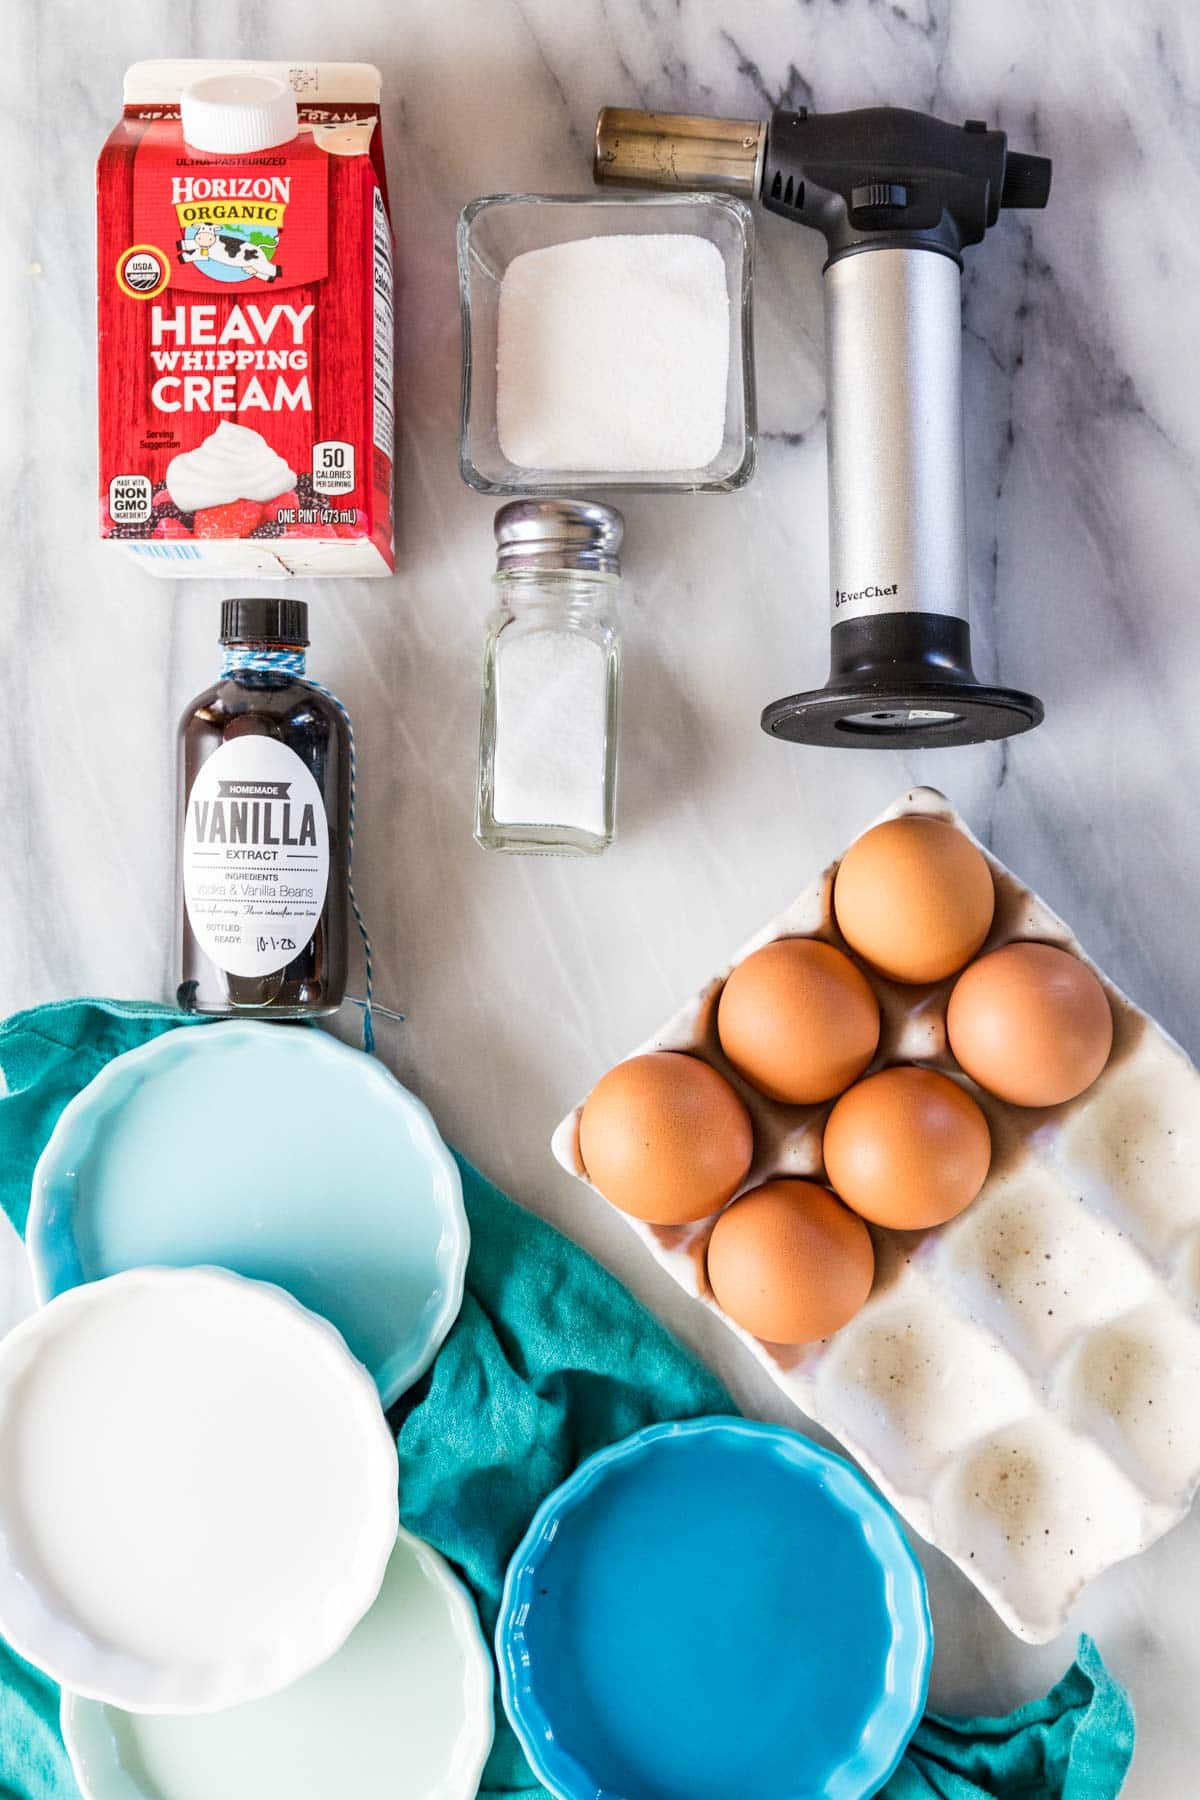
Just 5 basic ingredients make this easy and impressive creme brulee recipe:
- Eggs. We’ll just be using the egg yolks today (scroll down for recipes that will use up the whites!), and we want them to be room temperature before we get started. Forgot to set yours out? Use my quick and easy trick for quickly bringing eggs to room temperature!
- Vanilla. I like using a vanilla bean, but I also include instructions for using vanilla extract if that’s what you have on hand.
- Heavy cream. Whipping cream or double cream will also work.
- Salt. For flavor!
- Sugar. I’ve tried topping this creme brulee recipe with everything from superfine (caster) sugar to coarse turbinado sugar, and honestly all of them have worked for me. My preference for the most even sugar coating is just regular granulated sugar though.
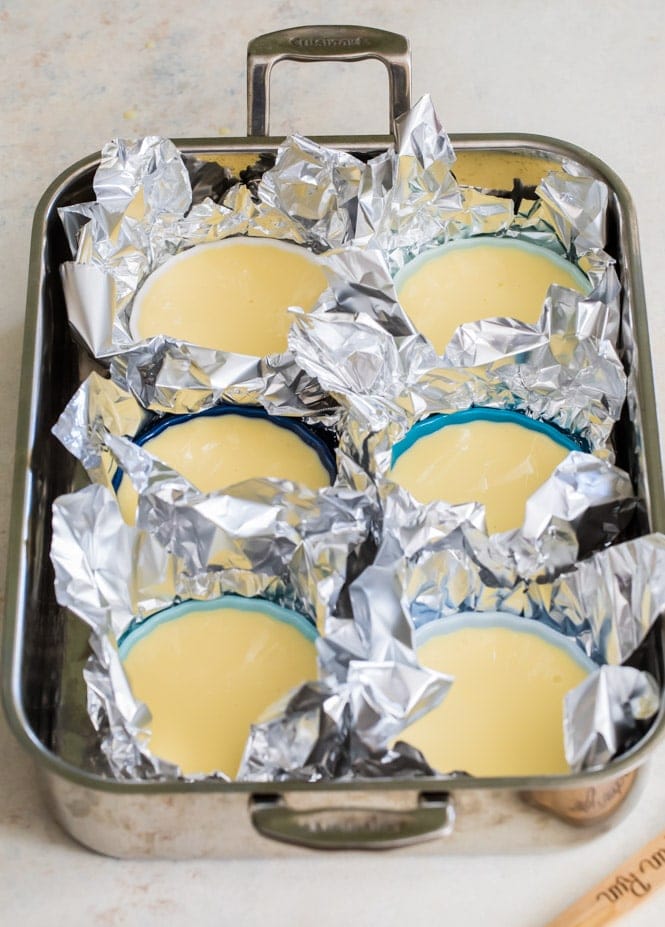
SAM’S TIP: I recommend lining the exterior of your ramekins with squares of aluminum foil to protect from any splashes from the water bath. Make sure the foil covers all sides of the ramekin and extends at least 2″ above the top of each ramekin. Not only does this protect your custard from water splashes, but it also makes removing the ramekins from the hot water a lot easier!
Remember, this is just an overview of the ingredients I used and why. For the full recipe please scroll down to the bottom of the post!
How to Make Creme Brulee
- Start the custard – Bring 1 ½ cups of cream, sugar, salt, and a vanilla bean to a boil, then remove from heat. Let cool for 15 minutes, then remove the vanilla bean and pour in the remaining heavy cream.
- Temper the eggs – Whisk together the egg yolks in a separate bowl, then gradually drizzle small amounts of the cream into the egg mixture while whisking. Continue to slowly add all cream, whisking nonstop until combined.
- Strain and fill – Pour the mixture through a strainer before pouring into your ramekins. Fill each ramekin 2/3 of the way full.
- Water bath – Fill your roasting pan with enough water that it reaches about 2/3 of the way up each ramekin (not the foil, the foil should be much higher).
- Bake for 25-35 minutes at 300F, then remove from water bath at let sit on a cooling rack for about 20 minutes. Remove the foil and place in the fridge to chill for 4-6 hours.
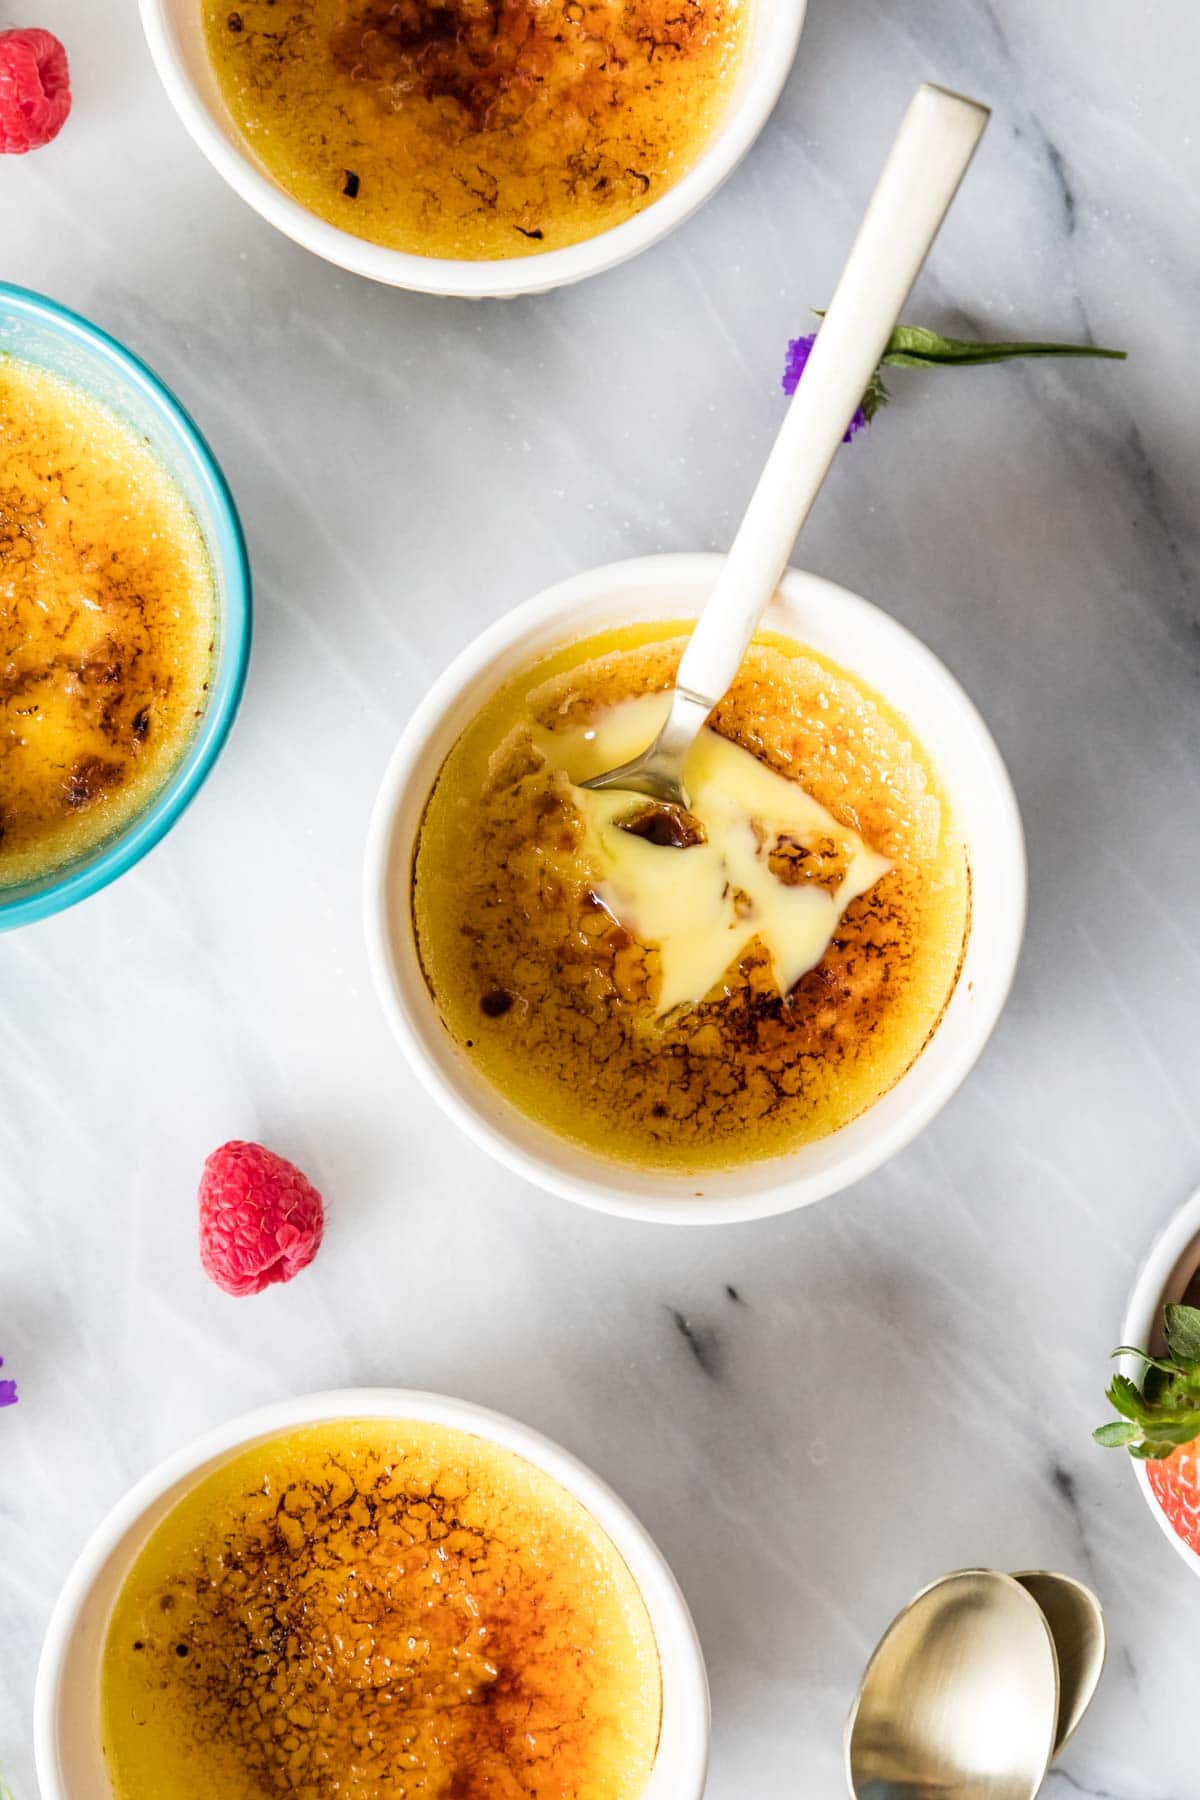
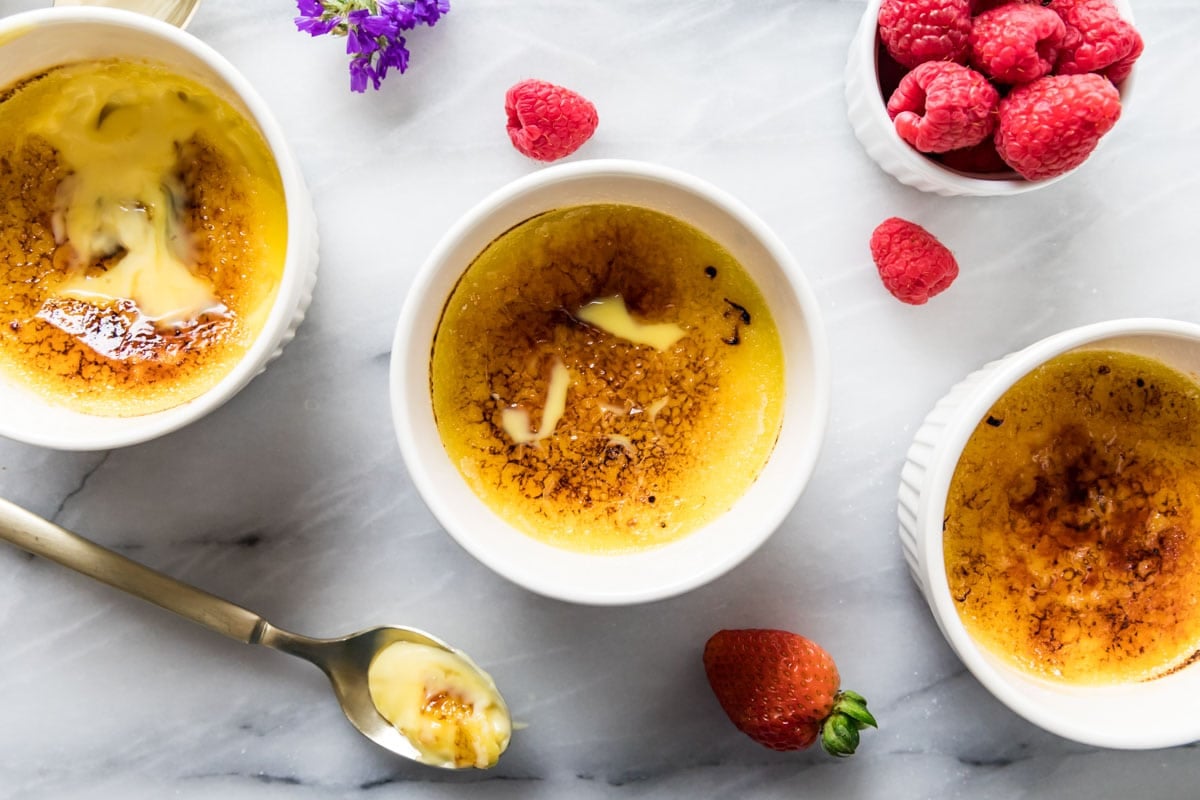
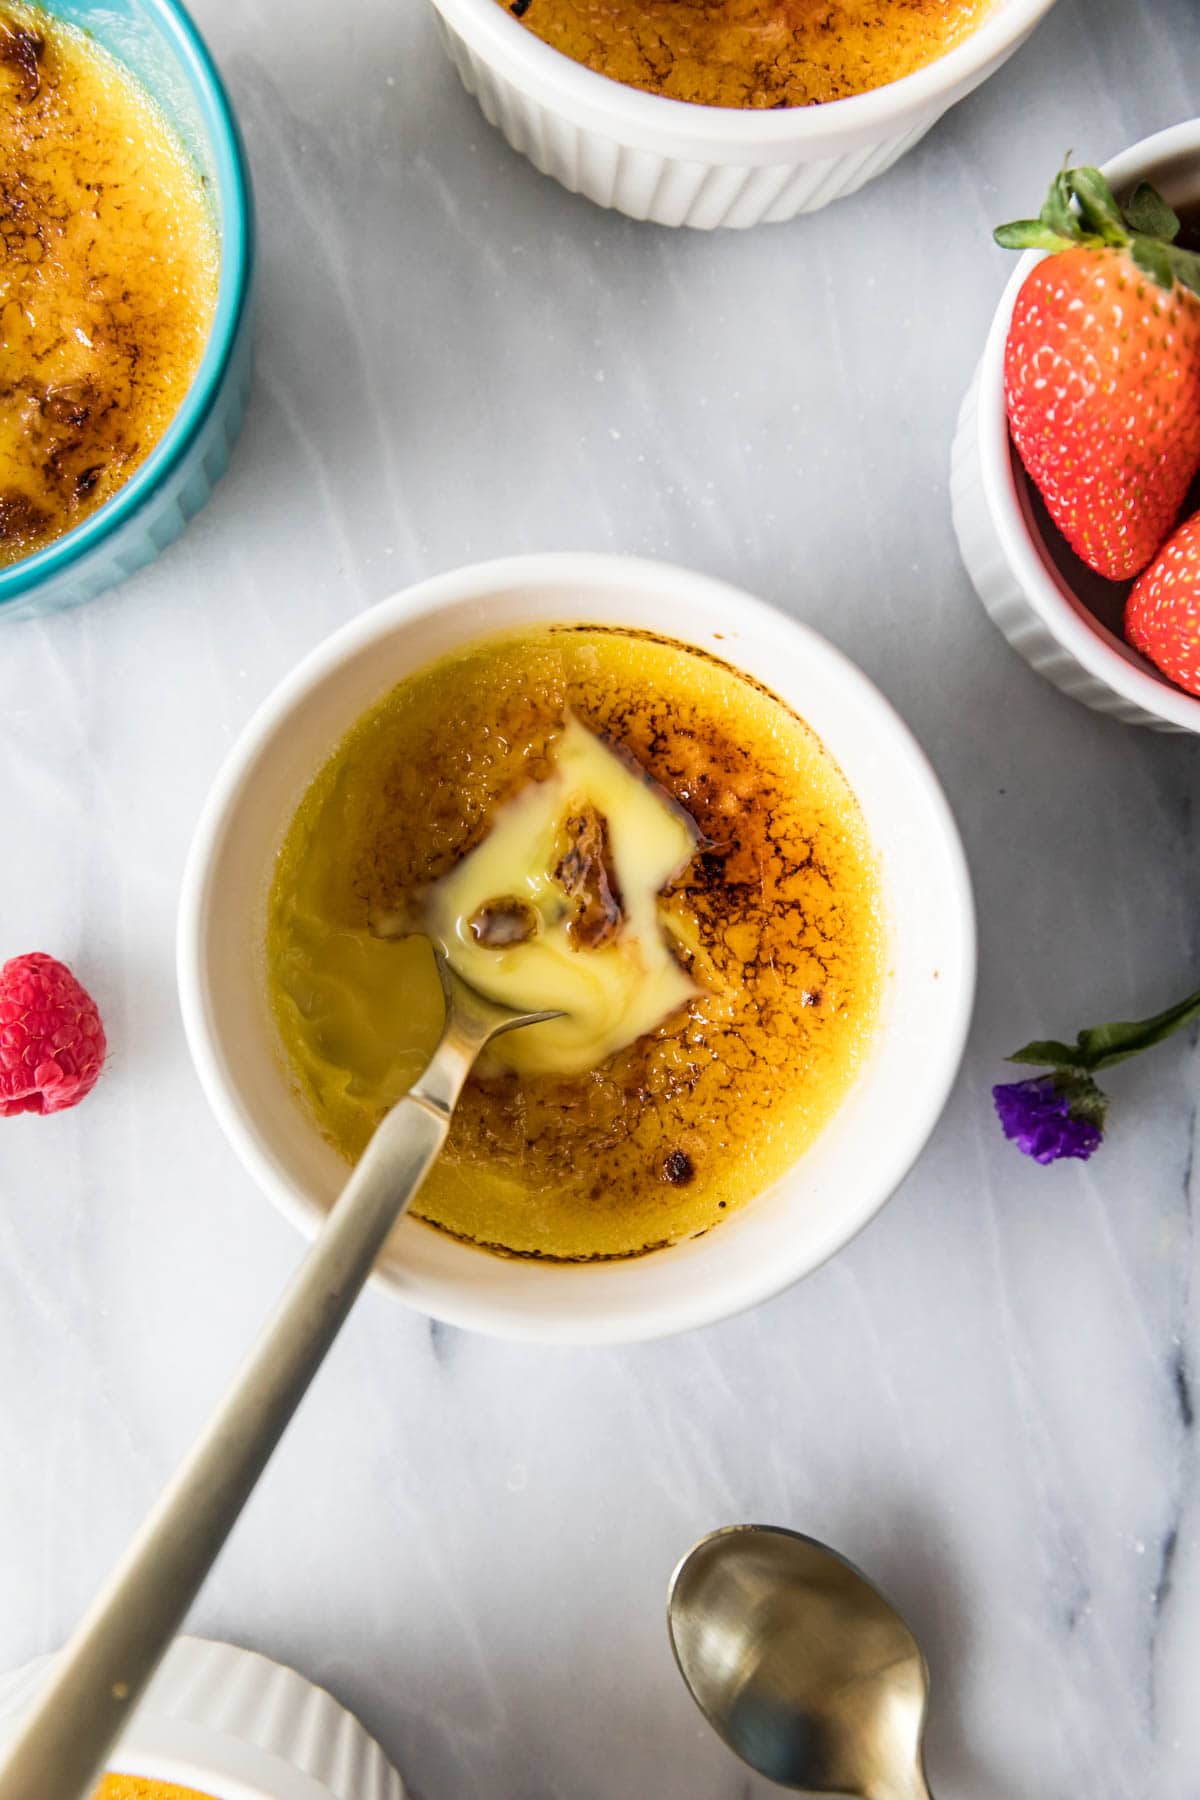
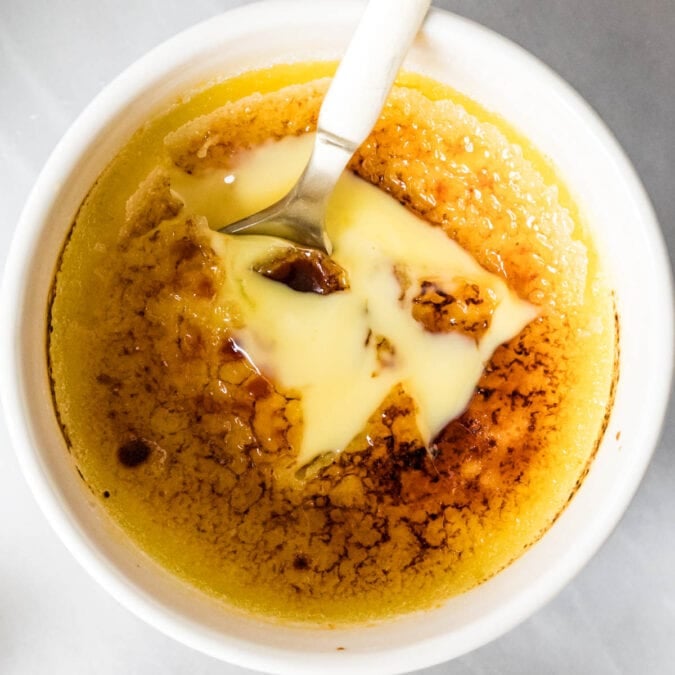
- Brulee and serve! When ready to serve, sprinkle sugar on the tops of each custard and use a kitchen torch to brûlée the tops.
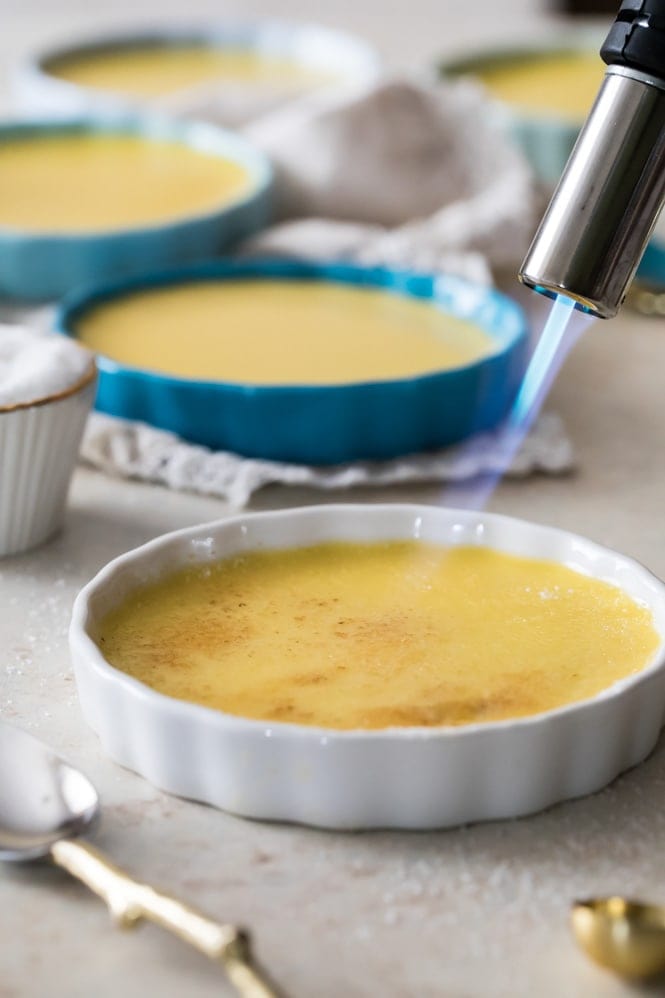
SAM’S TIP: Shake the ramekin from side to side gently to evenly distribute the sugar — you want an even coating. Once distributed, turn on your torch and barely touch the tip of the flame to the sugar, moving constantly in a circular motion until all of the sugar is melted and caramelized. Make sure you keep that torch moving to avoid burning your sugar and cooking your custard!
Frequently Asked Questions
My creme brulee recipe will keep in the refrigerator for up to 3 days. I recommend storing in an airtight container to keep the custard from absorbing any odors that might be in your fridge. Don’t add the sugar topping until you are ready to serve, as it will soften and dissolve in the refrigerator.
I haven’t tried this myself, but placing your ramekins on a sheet pan directly under your oven broiler should do the trick. If you do this, make sure to let your ramekins sit out on the counter for a few minutes to warm up from the fridge before placing them in the oven (even oven-safe glass can crack with sudden temperature changes!).
Yes! This dessert is naturally gluten free, just like my flourless chocolate cake and basque cheesecake.
I love my roasting pan (affiliate) and highly recommend it if you’re in the market for one (I use it for dulce de leche too!). Two 9×13 pans will work just as well for this creme brulee recipe.
Looking for another fancy but easy French dessert? Try my madeleines next!
Enjoy!
Let’s bake together! I’ll be walking you through all the steps in my written recipe and video below! If you try this recipe, be sure to tag me on Instagram, and you can also find me on YouTube and Facebook
Creme Brulee
Ingredients
Creme Brulee
- 2 cups (475 ml) heavy cream, divided
- ⅓ cup (66 g) granulated sugar
- ⅛ teaspoon finely ground sea salt
- 1 vanilla bean³
- 6 large egg yolks, room temperature
- Hot water
- Additional granulated sugar for bruleeing
Instructions
- Preheat oven to 300F (150C). Prepare 6 ramekins by wrapping the bottom and sides with foil (see video below or images in post for a visual, the foil should be reaching at least 2” up the sides of each ramekin to protect the creme brulee from the water bath). Set prepared ramekins inside a large roasting pan⁴ and set aside.
- Combine 1 ½ cups (355ml) heavy cream cream, sugar, and sea salt in a medium-sized saucepan. Split vanilla bean, scrape out seeds and add to saucepan and then toss in the vanilla bean as well. Stir mixture well and bring to boil over medium heat, stirring occasionally.2 cups (475 ml) heavy cream, ⅓ cup (66 g) granulated sugar, ⅛ teaspoon finely ground sea salt, 1 vanilla bean³
- Once mixture comes to a boil, remove from heat and allow it to cool for 15 minutes.
- Meanwhile, combine your egg yolks in a separate medium-sized bowl and whisk well.6 large egg yolks
- Once cream has cooled, retrieve vanilla bean and discard. Pour remaining ½ cup (115ml) heavy cream into warm cream mixture and stir well.
- Take approximately ⅓ cup of the cream mixture and slowly drizzle it into egg mixture while whisking yolks constantly (this gradual addition while whisking will keep the hot cream mixture from cooking your eggs)
- While whisking, drizzle remaining cream mixture into egg yolks until mixture is combined.
- Pour mixture through a strainer into a separate bowl.
- Divide mixture evenly into prepared ramekins, filling each ⅔-¾ full (do not overfill, if you have any extra mixture discard).
- Carefully, making sure to not get get any water into the ramekins, pour hot water into the roasting pan, using enough so that the water height is about ⅔-¾ as high as the top of the ramekins (not the foil!).Hot water
- Carefully transfer to oven and bake on 300F (150C) for 25-35 minutes or until center is set on top but still jiggling, I recommend using an instant read thermometer to check that the temperature is at 175F (80C).
- Gripping the foil, carefully lift each creme brulee out of the roasting pan and set on a cooling rack to cool for at least 20 minutes. Discard foil, transfer to refrigerator and allow to chill for at least 4-6 hours.
- When ready to serve, generously sprinkle the top of each creme brulee with about 1 teaspoon of granulated sugar. Holding a culinary torch several inches from the sugar, cook the sugar (moving the torch constantly) until sugar is melted and golden browned (about 90 seconds).Additional granulated sugar for bruleeing
- Serve and enjoy! Hint: Creme Brulee is great topped with fresh fruit!
Notes
¹Ramekins
(these are the ones I use, affiliate link). You can use ramekins of a different size, measure a little over 1/3 cup of liquid per ramekin and note that the baking time will likely vary (be longer) for smaller ramekins, so keep an eye on them!²Culinary Torch
(this is the one I use, the one in the video is no longer available and this is the one I use now, affiliate link)³Vanilla
If you don’t have a vanilla bean, you can substitute vanilla extract. You would use 1 1/2 teaspoons of vanilla extract and stir this into your cream mixture in step 5.⁴Roasting pan
If you don’t have a roasting pan, you can use two 9×13 pans instead.Here are a few ideas for your leftover egg whites!
Nutrition
Nutrition information is automatically calculated, so should only be used as an approximation.
Like this? Leave a comment below!


Thank you for the recipe! I used 8 packs of Splenda instead of sugar but otherwise followed your instructions. Turned out beautifully! So yummy!
I’m so glad it turned out for you, Paula! 🙂
Hi Sam,
Another great recipe I cannot wait to try. May I ask rather than six ramekin dishes, could I make one large one?
Thank you for your continued expertly explained and full proof recipes.
Maria
I’m not quite sure what that would look like. If you do try it, let me know how it goes. 🙂
This happens to be the recipe I have been using since Christmas Eve, so I know it is excellent. However, now they will be easier to make, because of Sam’s genius use of foil. If you don’t want to get a culinary torch, a regular propane torch works just fine – just don’t burn the house down.
I kept looking in the bakeware section of Meijer to find the shallow ramekins that are traditional for this, and I finally looked one aisle over, with the dishes, and there they were!
I love the way you teach, you make it seems very easy!!
Thank you so much! 🙂
Cecilia, Baking is easy, if you pay attention to what you are doing, and follow the recipe. What Sam does so expertly is tell and show what to do, while explaining the importance of various aspects. Of course, the fact that she painstakingly tests (MANY times) each recipe, so that she knows the results will be as good as possible gives her a head start.
Delicious!
So glad you loved it, Alexandria! ❤️
Of course another recipe I love!!
I am so glad you enjoyed it, Rosey! 🙂
I tried this! It turned out perfect ❤ thank you so much for sharing this recipe! Did not expect making creme brulee to be this simple!
I am so glad you enjoyed it so much, Maria! 🙂
I tried and it’s excellent thank u
I’m so glad you enjoyed, Fifi!
I was very interested on your cream brulee
I am glad that you found the recipe, Mathias! I hope that you enjoy it. You can find more of my recipes by searching on my site: sugarspunrun.com
🙂
Turbo sugar works the best, regular sugar is horrible.
Hmm, I haven’t had any issue with regular granulated.
I made this for Valentines Day and served with fresh blueberries and strawberries. Everyone loves watching the table side torching if the sugar. Deliciousness! The recipe was easy to follow. I watched the video twice before starting. I’m going to invest in some ramekins like yours! Thank you for a terrific recipe-it was a crowd pleaser!
I’m so happy to hear this, Suzanne! Thank you so much for letting me know how it turned out for you, I appreciate it. Sounds like everyone had a great Valentine’s Day! <3
The links for the culinary torch and ramekins are reversed. Besides that, I made this and it was amazing! Didn’t torch it, but it sure looks delicious! Well I’ll chill it overnight and see what happens!
They should be fixed now, thank you for letting me know, Maram! I think you’re going to LOVE it! 🙂
Ooops! Both links go to the torch.
Whoops! Fixed! Thanks for pointing that out 🙂