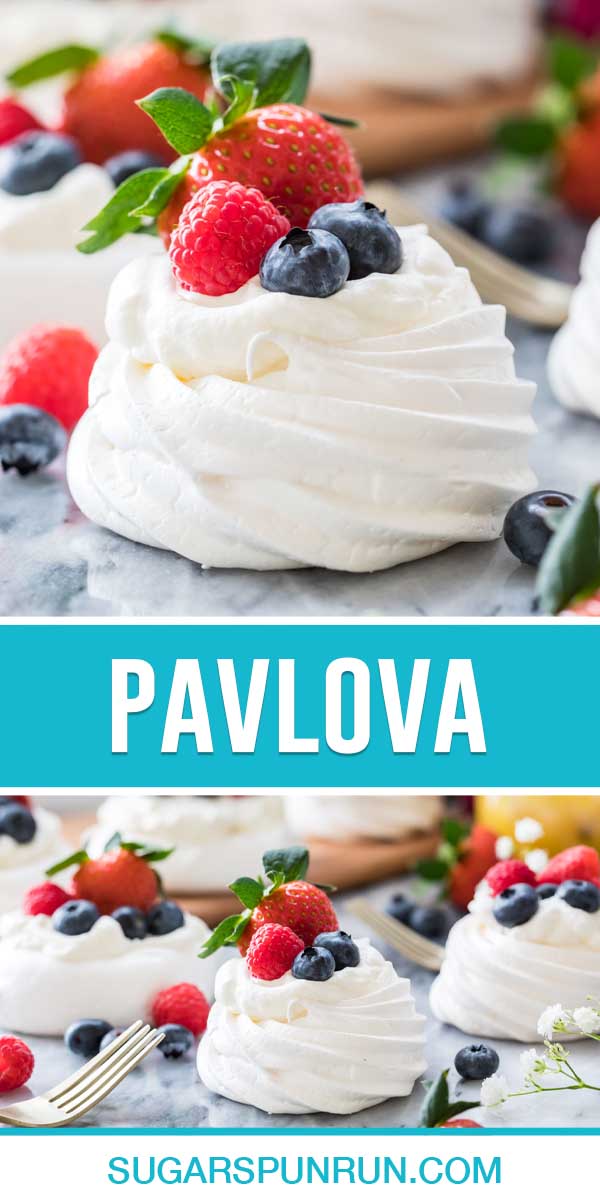
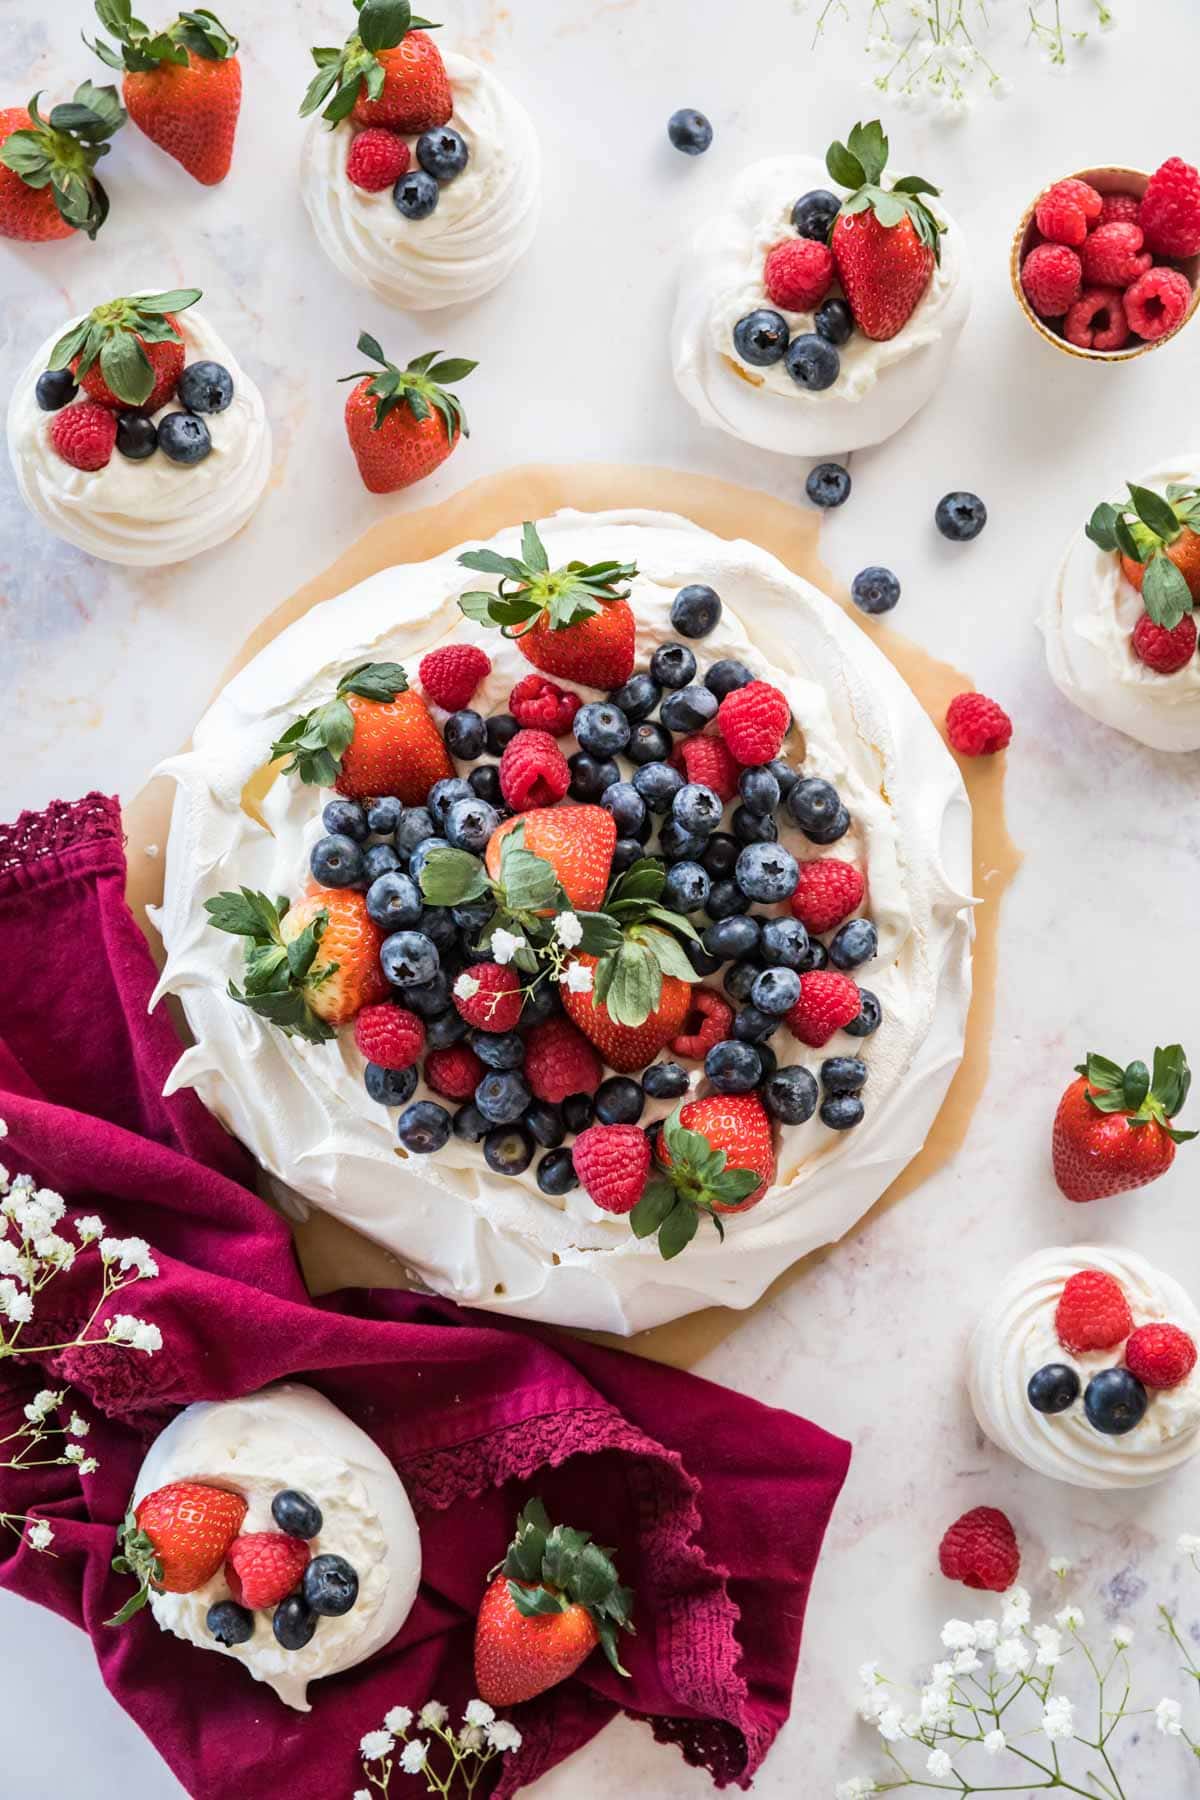
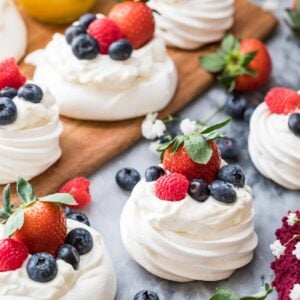
Pavlova has a crisp exterior with a marshmallowy-soft interior. It’s a gorgeous, sophisticated, but approachable treat that’s perfect topped with sunny lemon curd and fresh fruit. I’ll be showing you how to make both classic pavlova and mini pavlovas (my favorite) and have included a how-to video!
All About Pavlova
If you can make meringue, you can make pavlova. If you can’t or haven’t made meringue before, then pavlova is one of the best, easiest places to start.
A good meringue is the foundation for many recipes so it’s a good technique for any baker to have up their sleeve. Once you can master whipping egg whites to stiff peaks, you can conquer recipes like angel food cake, meringue cookies, Swiss meringue buttercream, and more (and if you’ve already made any of these, you’ll find today’s recipe surprisingly simple!).
Like so many recipes (tres leches cake, anyone?) Pavlova has contested origins. Depending on who you ask, they’ll tell you pavlova was first made in either New Zealand or Australia, but they’ll agree that it was named after Russian prima ballerina Anna Pavlova.
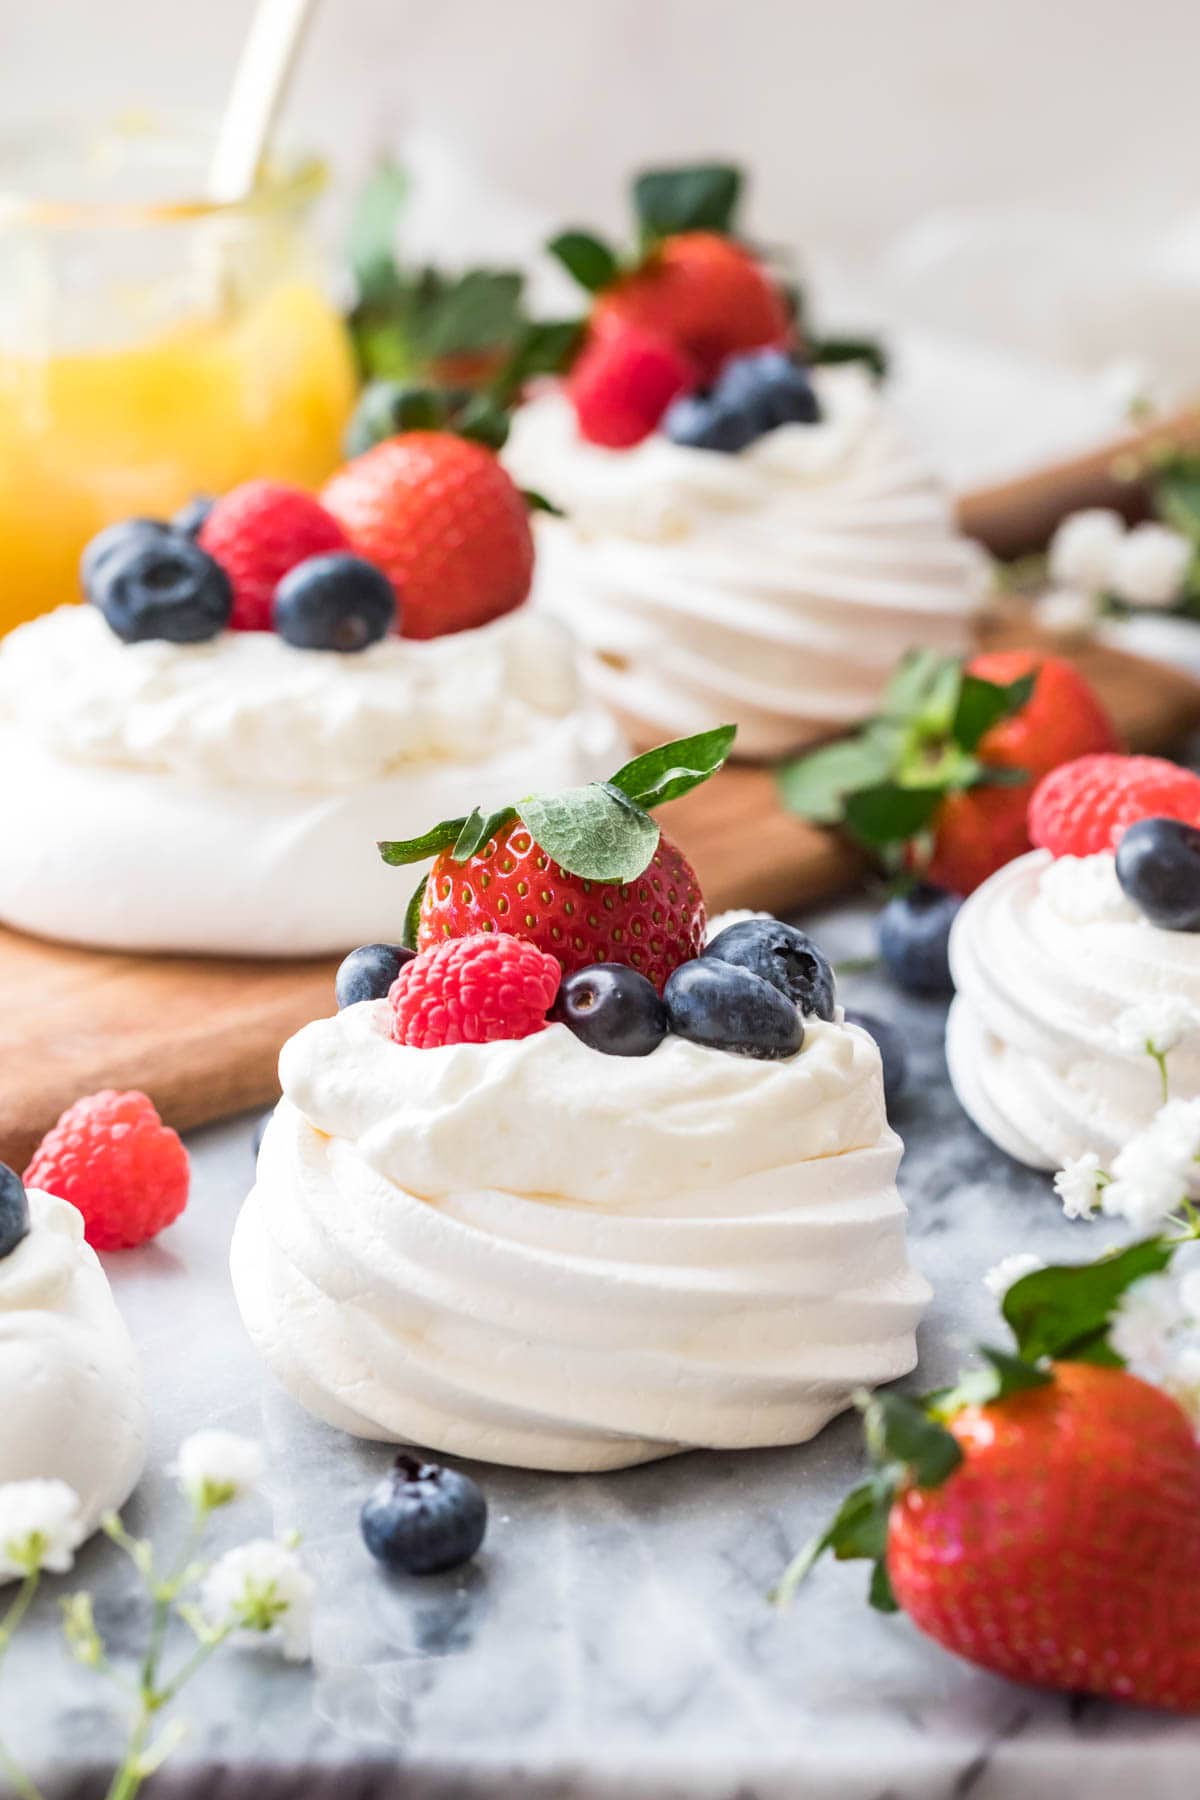
No matter the exact place of origin, pavlova (or mini pavlova!) is a light and airy, sophisticated and delectable invention that you’re going to love. It’s perfect year round but especially on a warm spring day. Its sweetness is tempered by juicy, tart fruits, its sticky but light interior is uniquely delicious and soft. Its flavor is extraordinary. Let’s get started.
What You Need (and Why!)
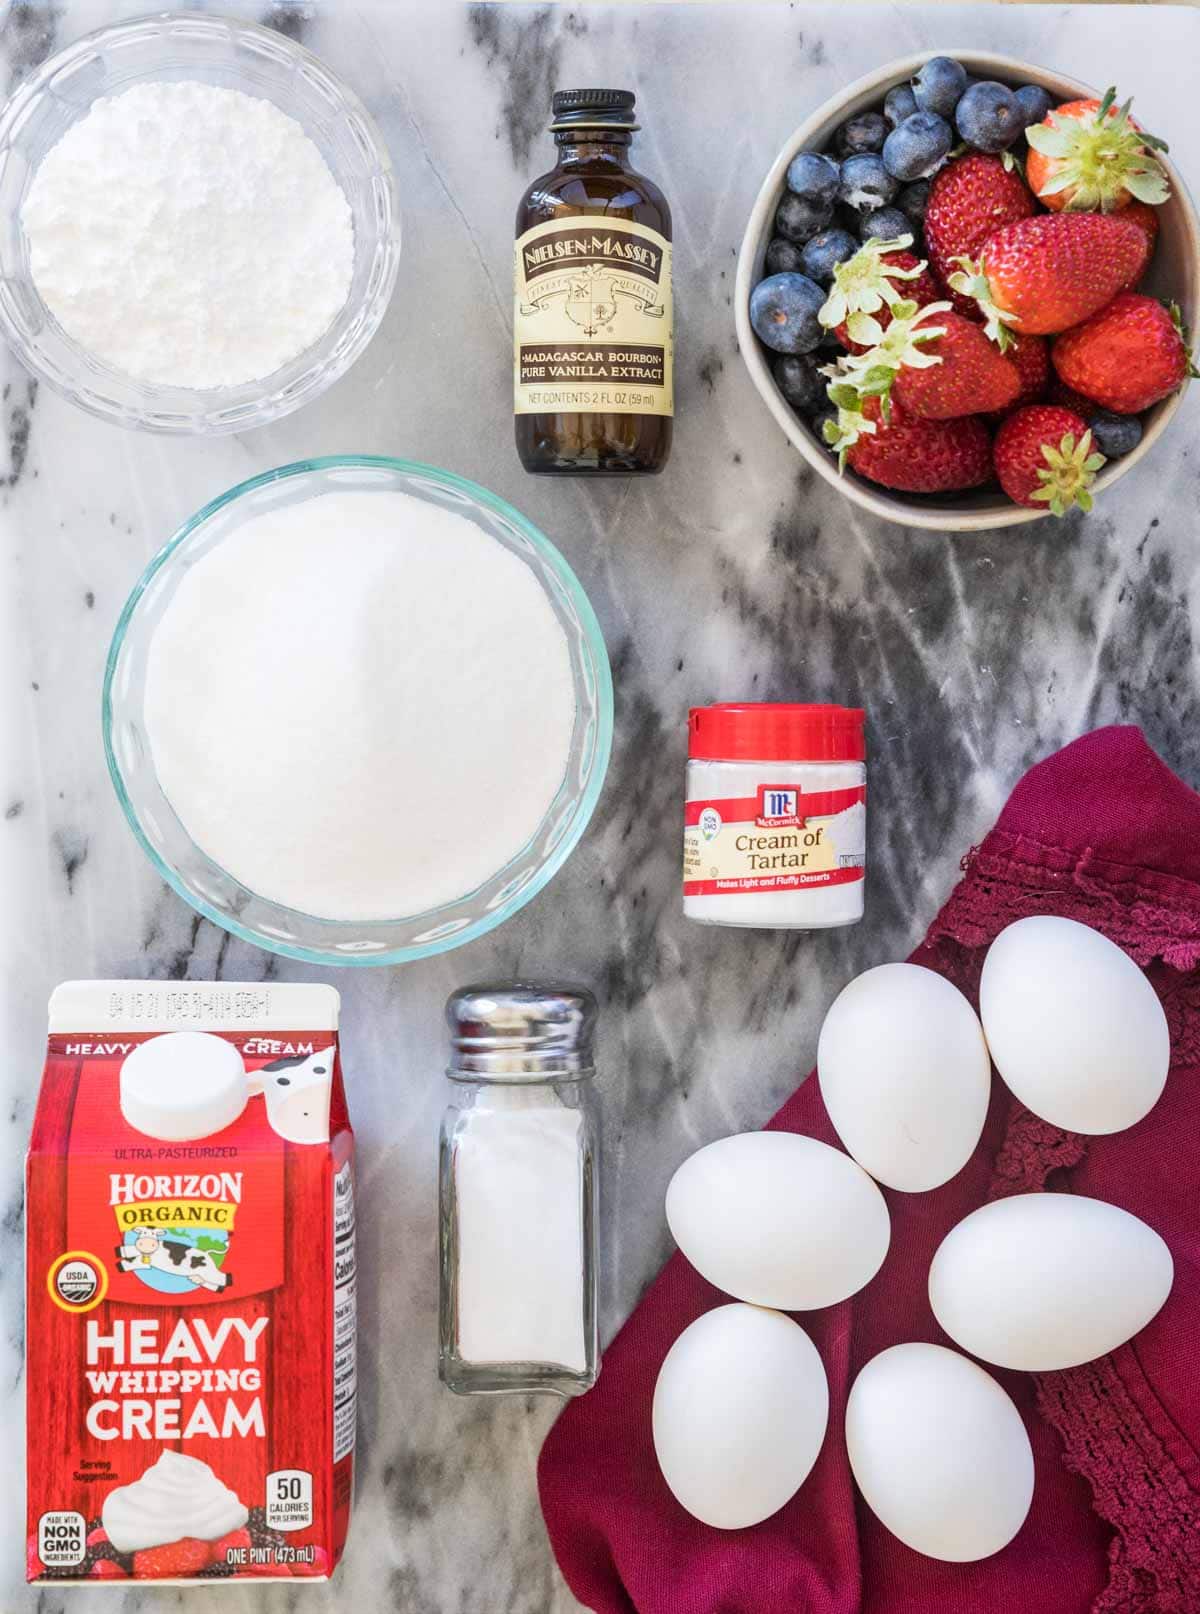
Classic and mini pavlovas are simple and sweet, and your mixer does most of the work. Here’s what you need:
- Egg Whites. Room temperature egg whites are easier to whip and make it easier to achieve the stiff peaks that are needed to properly make the meringue.
- Cream of Tartar. This keeps the meringue stable and prevents pavlova from becoming weepy (just like it does in the topping of lemon meringue pie) after it’s baked. Many pavlova recipes use cornstarch, but thanks to the cream of tartar don’t find it to be necessary in my pavlova recipe.
- Salt. Added for flavor, but it also lends stability to the meringue (a recurring trend in our ingredients, you’ll see).
- Granulated Sugar. Sugar sweetens the pavlova and stabilizes the egg whites. Caster sugar/superfine sugar will work, but powdered will not. Unfortunately I am not familiar with sugar substitutes in this recipe and I don’t recommend reducing the sugar, since it’s so important for the structure.
- Vanilla Extract. This gives the pavlova a nice marshmallow-like flavor. I include notes in the recipe card if you’d like to use a different flavor, but take care that you never use one that contains oil, which can ruin the meringue. Classic vanilla that is brown in color will add a slight off-white tint to your meringue, so if you want to keep things snow-white use imitation clear vanilla extract.
SAM’S TIP: Quickly bring eggs to room temperature by placing in a bowl of warm (not hot!) water. Dry the eggs well before cracking them. If you get any water into the egg whites you will ruin your meringue!
These ingredients comprise the meringue, but you’ll also need heavy cream and powdered sugar (with a splash of vanilla extract) to make homemade whipped cream, and fresh fruit for the topping. Lemon curd is another wonderful addition to layer over the pavlova and beneath the whipped cream (or take a dark and decadent route and use ganache).
Making The Pavlova
SAM’S TIP BEFORE YOU BEGIN: Make sure your equipment is completely free from grease or moisture, otherwise the eggs will not whip properly and the mini pavlovas will be flat or collapse.
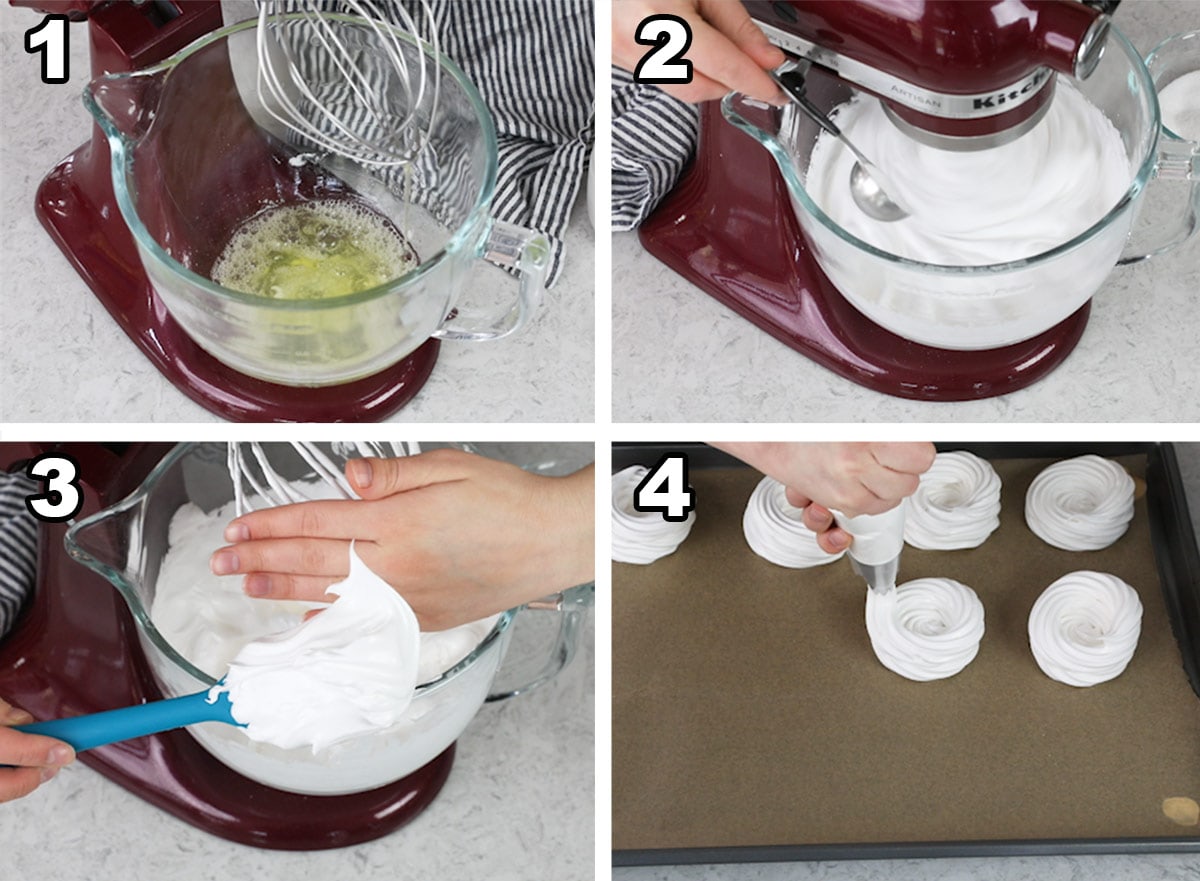
- Combine the egg whites, cream of tartar, and salt and beat until foamy. Save yourself a lot of time and sore muscles and use an electric mixer (or better, a stand mixer) for this!
- Gradually increase mixer speed to high, adding a tablespoon of sugar at a time, beating for 15 seconds between additions.
- Keep beating at high speed until stiff peaks have formed. This takes time, be patient and don’t try to rush it. Stiff peaks mean the mixture has greatly increased in volume. It will be sticky but fluffy and thick (and if you rub a bit of it between your fingers you shouldn’t feel any/much grit from the sugar). When you pull a beater or spatula out of the meringue, it should hold a stiff peak and not recede back into itself, even if you turn the beater upside-down. At this point you can fold in your vanilla extract, the meringue may deflate ever-so-slightly.
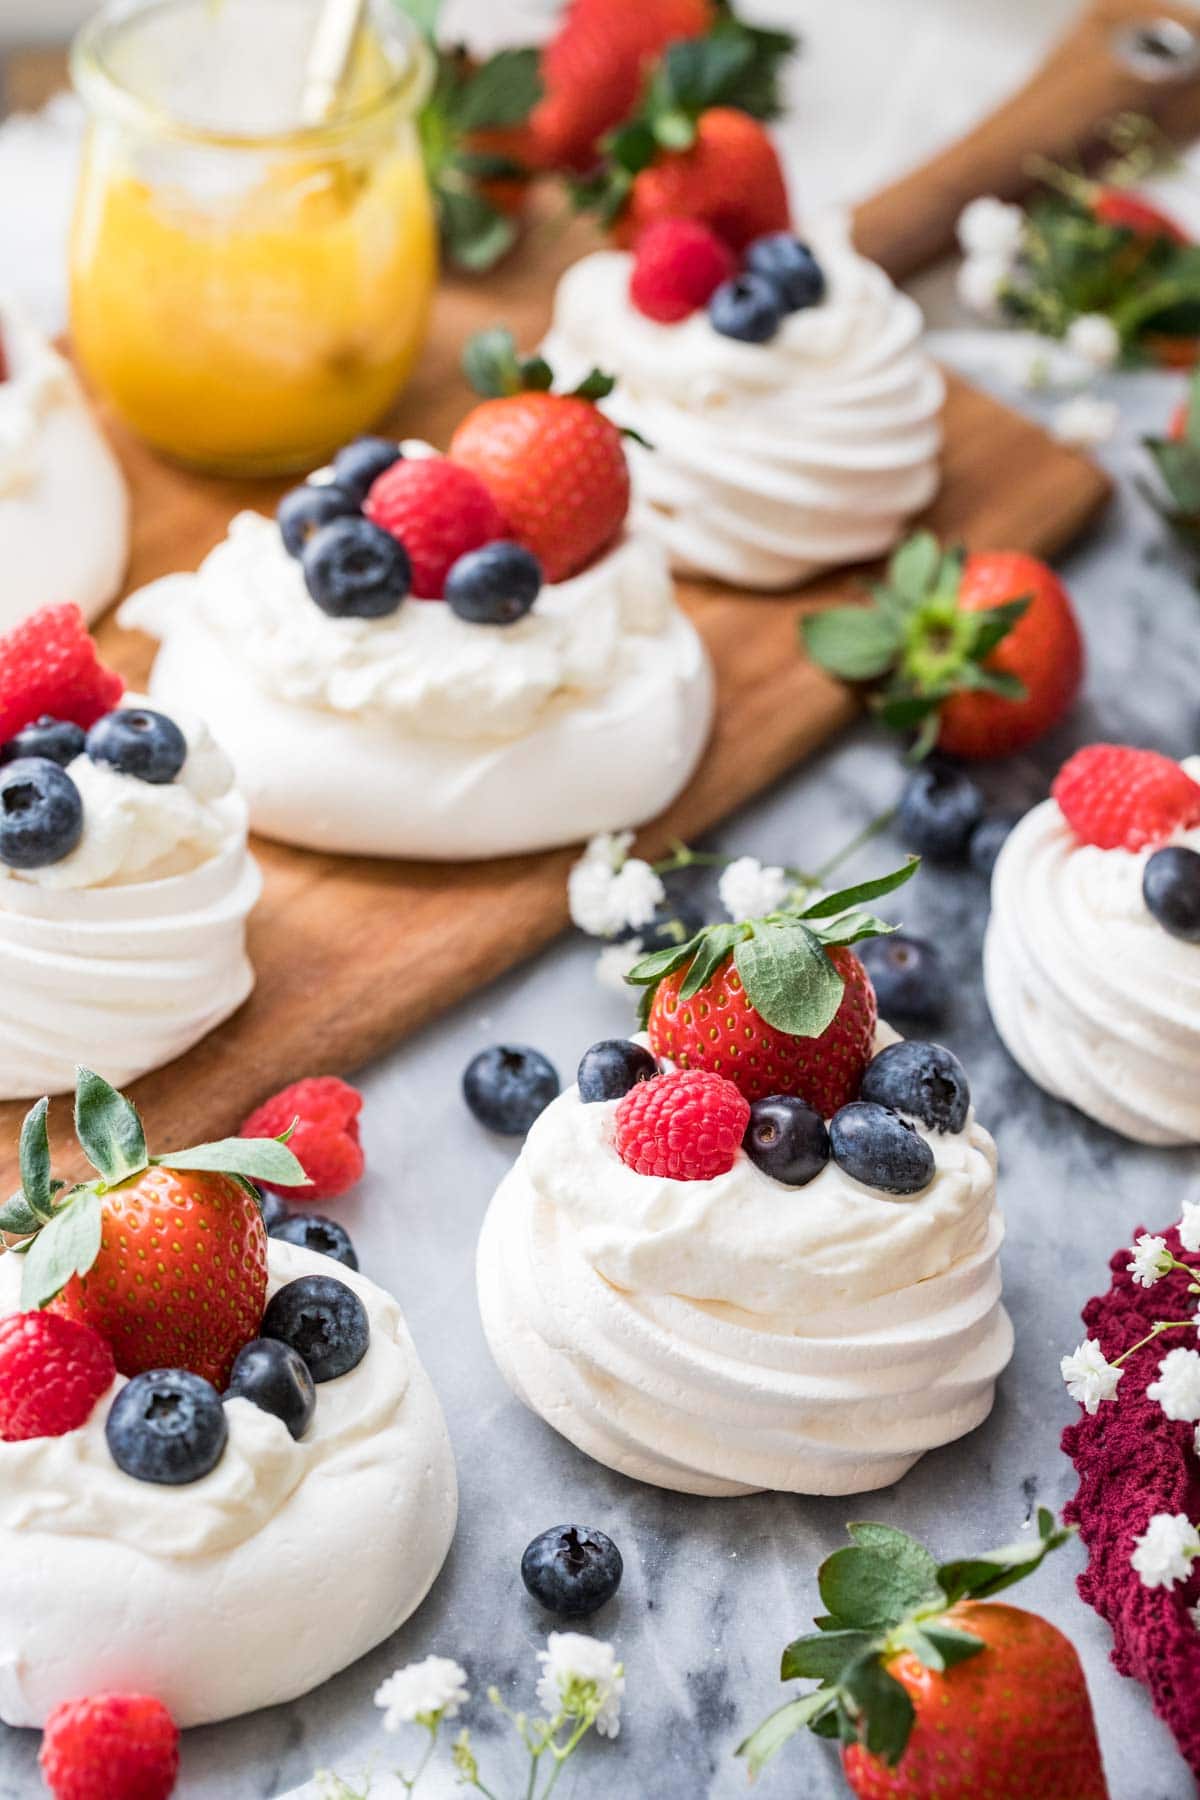
- If you are making a single pavlova: scoop the meringue into a 12″ round circle on a baking tray and make a divot (like a nest!) on top. To make mini pavlovas as I did here: I like to pipe the meringue into nests that are about 3″ (7.6cm) in diameter using a piping bag fitted with an Ateco 827 tip. Alternatively you can dollop meringue onto the baking tray and shape it into a nest shape with the back of a spoon.
Assembling Mini Pavlovas
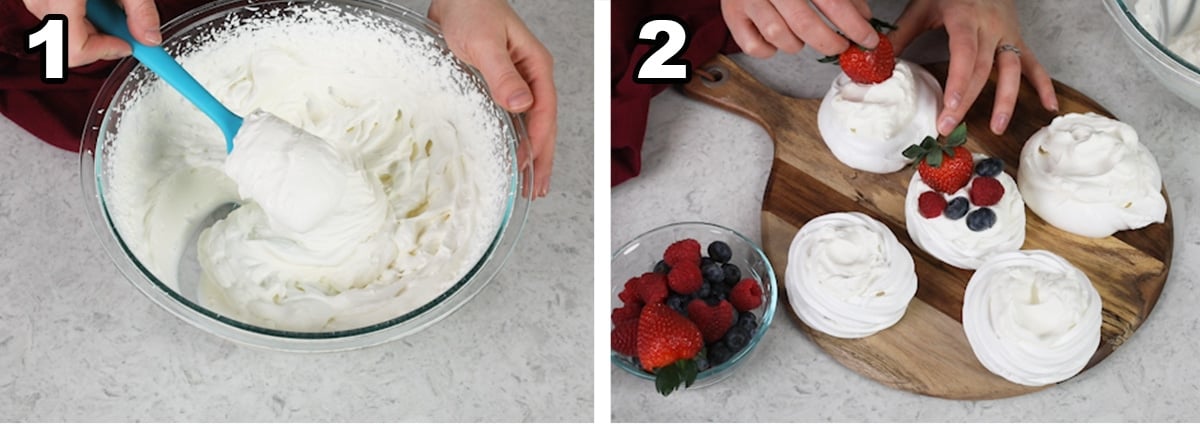
- Make whipped cream by combing cream, powdered sugar, and vanilla extract in a large bowl and beat with an electric hand mixer or stand mixer until the whipped cream is thick and fluffy with stiff peaks. Lots of practice making stiff peaks today!
- Scoop the lemon curd (if using) into the nest on top of the pavlova(s), top with your newly whipped cream and fresh fruit, and enjoy immediately!
Frequently Asked Questions
While meringue cookies ought to be dry and crisp, the interior of a pavlova should instead be soft, sticky, and nearly marshmallow-y (but softer) when you bite (or cut) into it. If it is too soft, you can return to the oven on its lowest heat for 20 minutes, and if it is too crisp let the whipped cream topping sit on it a bit before serving.
After baking, slight collapsing and cracking is normal, but if the pavlova collapses significantly it may have not been baked long enough or external factors could be softening it too much outside of the oven (like humidity… is it a rainy day?). You can return the pavlova to the oven in 20 minute increments to help dry it a bit if needed.
Your oven is too hot or you are baking too close to the heating element. Bake in the center rack, and be aware that many home ovens vary in temperature. Use an oven thermometer to ensure that your oven is the correct temperature.
To prevent weeping it’s very important that the sugar is dissolved properly in the meringue, so don’t add it too quickly and check that it has all been dissolved by rubbing a bit between your fingers and checking for any grit from undissolved sugar. High humidity can also cause the pavlova to weep, so this is not a dessert that’s ideal for making on a rainy day or while you’re simultaneously washing dishes or boiling pasta.
More Recipes You Might Like

Enjoy!
Let’s bake together! Make sure to check out the how-to VIDEO in the recipe card!
Pavlova
Ingredients
For Pavlova
- 6 (210 g) large egg whites room temperature this is just under 1 cup (7.5 oz)
- ¾ teaspoon cream of tartar
- ⅛ heaping teaspoon salt
- 1 ½ cup (300 g) granulated sugar caster sugar or superfine sugar would also work
- 1 ½ teaspoon vanilla extract
For Whipped Cream & Assembly
- 2 cups (473 ml) heavy whipping cream
- ⅔ cup (83 g) powdered sugar
- 1 teaspoon vanilla extract
- lemon or other fruit curd optional
- fresh fruit strawberries, blueberries, blackberries, sliced kiwi, and raspberries are all great options!
Recommended Equipment
Instructions
- Preheat your oven to 225F (105C) and line a large baking sheet with parchment paper. Set aside.
- You’ll be making the pavlova in either the bowl of a stand mixer with a whisk attachment (paddle attachment will work if you don’t have a whisk) or a large bowl with an electric mixer. Before beginning, make sure that the bowl and beaters you are using are completely clean, dry, and grease free.
- Combine egg whites, cream of tartar, and salt in prepared bowl and use an electric or stand mixer to stir on low speed until the mixture begins to foam.6 (210 g) large egg whites, ¾ teaspoon cream of tartar, ⅛ heaping teaspoon salt
- Gradually increase speed to high.
- Add sugar 1 Tablespoon at a time, continuing to stir on high speed after each addition until sugar is dissolved (about 15 seconds after each addition).1 ½ cup (300 g) granulated sugar
- Continue to beat on high speed until the meringue has reached stiff peaks (see note, it is critical you achieve stiff peaks). The meringue will be thick, opaque white, glossy, almost fluffy in consistency, sticky, and have greatly increased in volume. If you take a small bit of the meringue and rub it between your fingers, you shouldn’t feel any grit (a very minimal amount of grit is OK as it should dissolve in the oven, but it should be barely noticeable).
- Add vanilla extract and stir on low speed until combined (meringue may deflate a small bit).1 ½ teaspoon vanilla extract
- If making regular/single pavlova: Spoon the mixture in a mound onto prepared baking sheet. Use a spoon or spatula to form meringue into approximately 12” (30cm) round circle and smooth a divot in the center so the pavlova is shaped like a nest. Neaten up the edges with a back of a spoon so they are somewhat smooth (if you’d like, swirl the spoon along the edges to form peaks. Transfer to 225F (105C) oven and bake for 90 minutes, then turn off the oven and let pavlova sit in the closed oven for another 60-90 minutes or until cooled completely and then remove and assemble.
- If making mini pavlova: Scoop (by about ⅓ cup) batter into 8 mounds onto prepared baking sheet and use a spoon to smooth into 8 nest shapes, spacing about 2” apart or pipe batter into 3"wide "nests" using a piping bag fitted with an Ateco 827 tip. Transfer to 225F (105C) oven and bake for 1 hour. Turn off oven and let mini pavlovas sit in the closed oven for at least another hour or until cooled completely before removing and assembling.
Whipped Cream & Assembly
- Prepare whipped cream by combining heavy whipping cream, powdered sugar, and vanilla extract in a large bowl and use an electric mixer (or stand mixer) to beat until cream is billowy and thick and stiff peaks form.2 cups (473 ml) heavy whipping cream, ⅔ cup (83 g) powdered sugar, 1 teaspoon vanilla extract
- Assemble by spooning lemon or other curd in an even layer into the “nest” of the pavlova, if using. Top with whipped cream and then top with fresh fruit.lemon or other fruit curd, fresh fruit
- Serve immediately (a large pavlova should be sliced similar to a pie, while mini pavlovas should of course be served individually. Enjoy!
Notes
Baking Sheet
If making mini pavlova, all 12 will be a little cramped on your average cookie sheet. You can use two baking sheets, but make sure they fit in your oven the same time.Extract
Vanilla extract is my preference and gives the pavlova a subtle, marshmallow-y flavor that complements the toppings beautifully. Classic vanilla that is brown in color will add a slight off-white tint to your meringue, so if you want to keep things snow-white use imitation clear vanilla extract. Feel free to experiment with other flavors! I would recommend still using the vanilla, but reduce it to ½ teaspoon and use your judgement when adding your extract of choice but ¼-½ teaspoon will likely be plenty. Extracts like peppermint and almond are very strong, so take care to not use too much. Extracts made with oil (the ingredient list will indicate if it’s included) are not recommended as they can break down the meringue.Mixing Bowl
If there’s even a teeny tiny bit of grease or moisture in your bowl or egg yolk in your whites they may not whip properly.Store Bought Egg Whites
As a rule I generally don’t recommend using store-bought egg whites sold in a carton, though people have reported mixed results. Generally these egg whites say on the label that they won’t whip, so I recommend using fresh egg whites.Egg Yolks
Save your egg yolks! Use them to make a batch of lemon curd to use in the pavlova, or make créme brûlée, pound cake, cream puffs, or chocolate pie!Cream of Tartar (and possible substitutions)
This stabilizes the meringue and also helps to keep it from weeping. I recommend using it for best results. However, some people have reported success substituting vinegar or lemon juice for the cream of tartar in my meringue cookies. That should work here, too, though your meringue may not be as stable, and I’d recommend using 1 ½ teaspoons.Stiff Peaks
This means that when you pull the beater straight out of the mixture and turn it upright, the peak that forms holds its shape without folding over or receding back into itself. The mixture will feel almost fluffy in consistency.Making in Advance
Pavlova (regular or mini pavlova) can be made 1-2 days in advance of serving (do not assemble until just before serving). Store the “nests” in an airtight container at room temperature. If you are in a particularly humid environment, the pavlova may soften more than is ideal. You can always pop it in a 225F (105C) oven for another 15-30 minutes to help make the exterior crisp again (the center should have a marshmallow-y consistency). The whipped cream should be made the day of serving, but can be stored in an airtight container in the refrigerator until ready to use.Nutrition
Nutritional information is based on third-party calculations and should be considered an estimate only. Actual nutritional content will vary based upon brands used, measuring methods, cooking method, portion sizes, and more.
Amy B
Can this recipe be doubled or do you recommend making 2 separate batches?
Sam
Hi Amy! It increases in volume quite a bit, but as long as your mixer is big enough you should be fine to double it. 🙂
Stella
This was simply delicious with passionfruit curd!
Sam
I’m so glad you enjoyed it so much, Stella! 🙂
Brenda palmer
I don’t usually write reviews, but this pavlova was perfect! And easier than it looks
Sam
I’m so glad you enjoyed it so much, Brenda! 🙂
Maggie
Perfect
maggie
super good super sweet and balanced
Sam
I’m so glad you enjoyed it so much, Maggie! 🙂
Calvin gloor
Amazing
Sam
I’m so glad you enjoyed it so much, Calvin! 🙂
Jan
Turned out beautifully even though I took the risk of making it on a summer day when the humidity was about 90%. Crisp surface and soft interior. Loved the suggestion to rub a bit between fingers to check if all the sugar was dissolved. Thanks!
Sam
I’m so glad you enjoyed it so much, Jan! 🙂
Joji
Hi. I’m making these for a client for pick up on Sunday. I plan to make them the day before and assemble Sunday right before pick up. Would that hold for a few hours? How should they be stored once they’re assembled? Thank you!
Sam
Hi Joji! Once assembled they should be refrigerated. They will begin to deteriorate after assembly so hopefully they will be consumed shortly after pickup. A few hours should be OK, but depends on humidity, toppings chosen, etc.
Joji
Thank you for getting back to me! Sounds good. I’ll make sure to let her know. Made some just now to test and they look good (so far). Currently in the oven so here’s hoping. I make your merengue cookies all the time so I think these should be ok! I wish I could attach a pic. I made bunny ones
Kally
Delightful!
I also loved how the ingredients for each step are listed within the step as well! I’ve not seen that before, but appreciated not having to scroll back up to see measurements very much.
Thank you!
Sam
I’m so glad you enjoyed it so much, Kally! Thank you for the feedback. 🙂
Beverley M
Hi! Just a note that in the purple part at the top it says “Servings: 12 mini pavlovas” but then in the recipe it says to make 8 mounds. I’ll assume that you meant 8, and go from there, but thought you might want to fix the purple bit!
Beverley M
Actually, the recipe seems to go back and forth a few times between 8 and 12… confused! I only want 4 so am planning to halve the recipe but if the cooking time is actually for 12 and I only divide my half-recipe into 4 (larger) ones the cooking time will be off.
Sam
Hi Beverly! You will have enough for 12 mini pavlovas, but it’s a little tight to put all 12 of them on one cookie sheet which is why I have you just put 8 on the sheet. 🙂
Sharon Hellum
I zealously ate a dessert in France called ile Flotant Floating Island. I knew it was Pavlova but no idea what sauce it was floating in. Do you have any ideas.
Sam
Hi Sharon! Unfortunately I am not familiar with this dessert.
Heather
Looking forward to making this! However I want to make it chocolate Pavlova. Have you tried this? I was thinking of using 1/4 c of cocoa powder, but just not sure when I would add it. Do you have any thoughts or tried this before?
Thanks!
Sam
Hi Heather! I would probably use 1/2c of cocoa powder and follow the technique I use in my chocolate meringues. 🙂
Valerie
Hey Sam,
I’m going to make this tomorrow and I am SOOOOOO excited! I made meringue before and became a HUGE hit for my mum LOVES it! Since it’s almost mother’s day, I want to make a bigger pavlova so my mum will enjoy it in a much bigger piece but the problem is I don’t know how to store it, can you put it in a box in the fridge? Or you have to put the meringue part to store it in the fridge and make the cream when you need to serve it?
(Plus: I told all my baking friends about your website and she said that the desserts are VERY good!)
Sam
Hi Valerie! I actually have notes below the recipe on how to make this in advance. You won’t want to assemble them until it’s time to serve. Keep the cream in the refrigerator and the meringue in an air tight container. 🙂
Savvy
I’m confused! the video said 3/4 cup sugar but the recipe says 1 and 1/2 cups, which is it? can’t wait to try them, they look delicious!
Sam
Oh my! I’m so sorry for the confusion! I must have said the wrong thing in video! You should use 1 1/2 cup of sugar. 🙂
Liz Montello
These sounds delish! How long and what temp are they baked? (That part of the recipe isn’t showing on your post)
Sam
Hi Liz! See steps 8 & 9 of the recipe, it discusses baking temp and time. I hope that helps, and I hope you love the pavlova! 🙂
Valerie
Your recipe calls for 1 and 1/2 cup of sugar but in the video you say 3/4 cup which is it
Sam
1 1/2 cups! Sorry about that!