
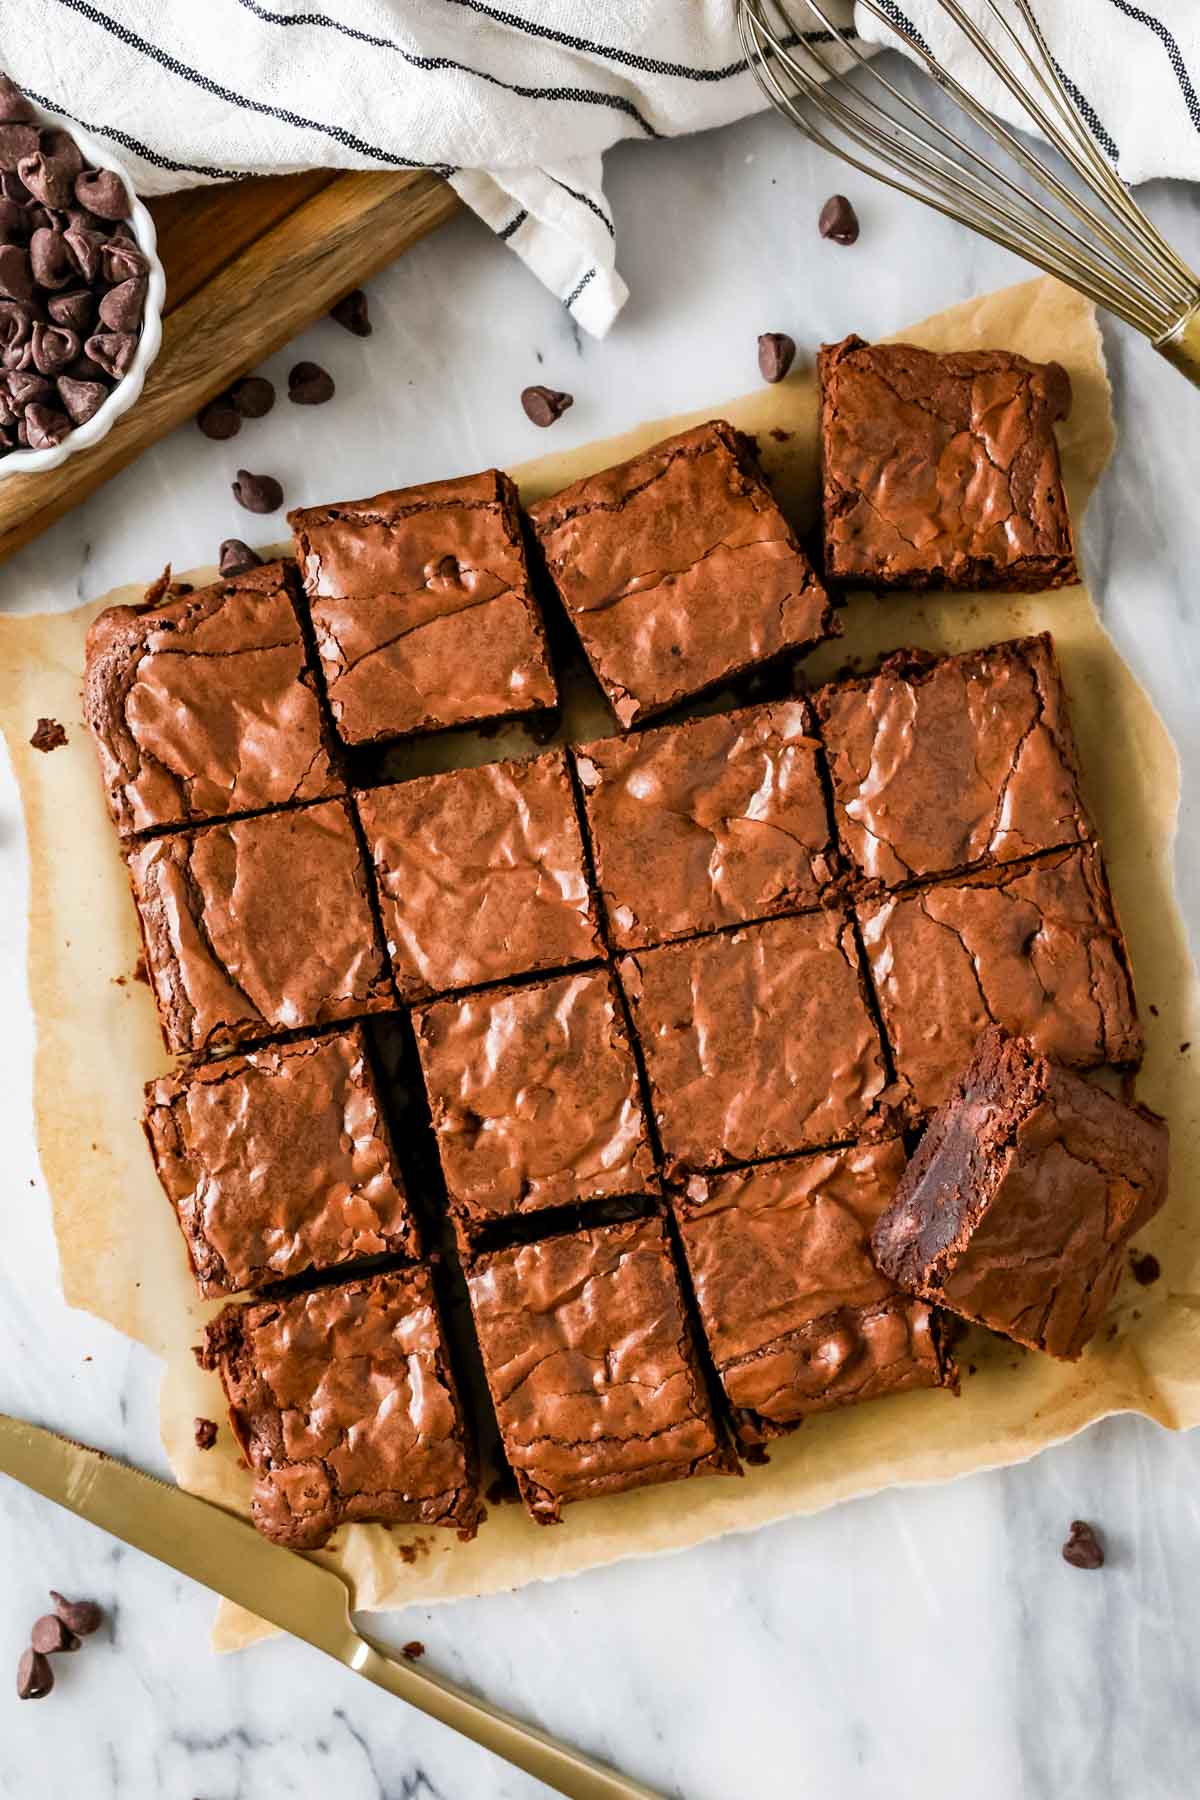
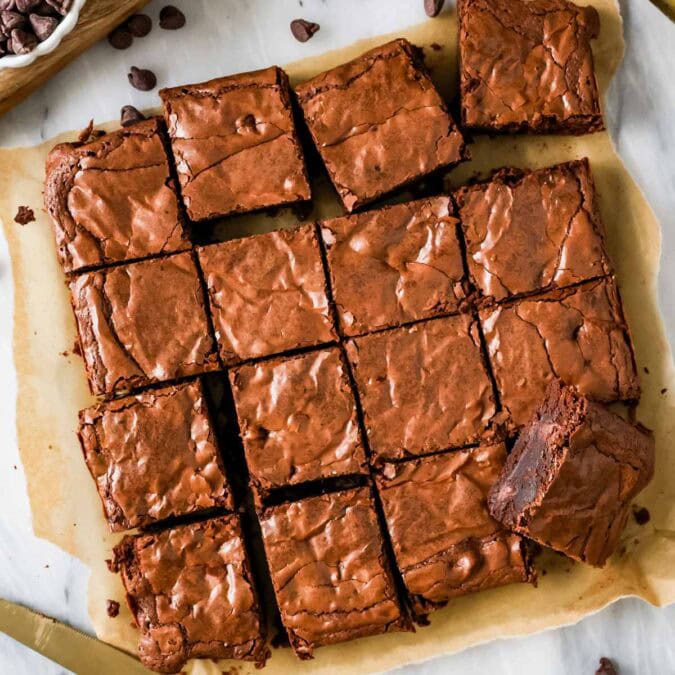
Fudgy Homemade Brownies from Scratch
This post may contain affiliate links. As an Amazon Associate I earn from qualifying purchases. Please read my disclosure policy.
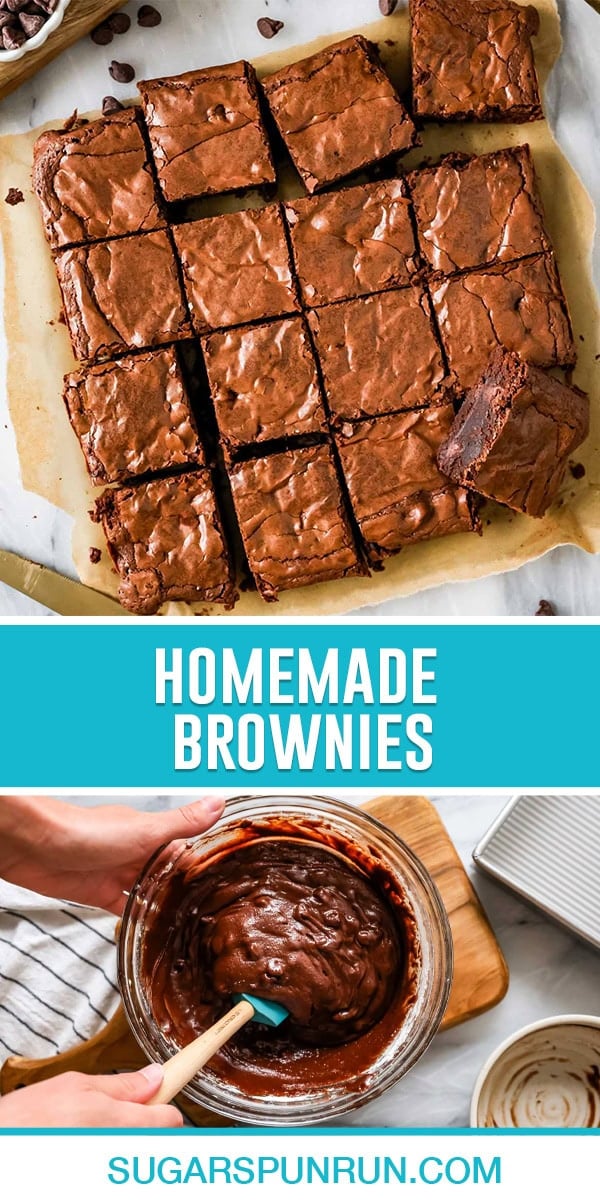
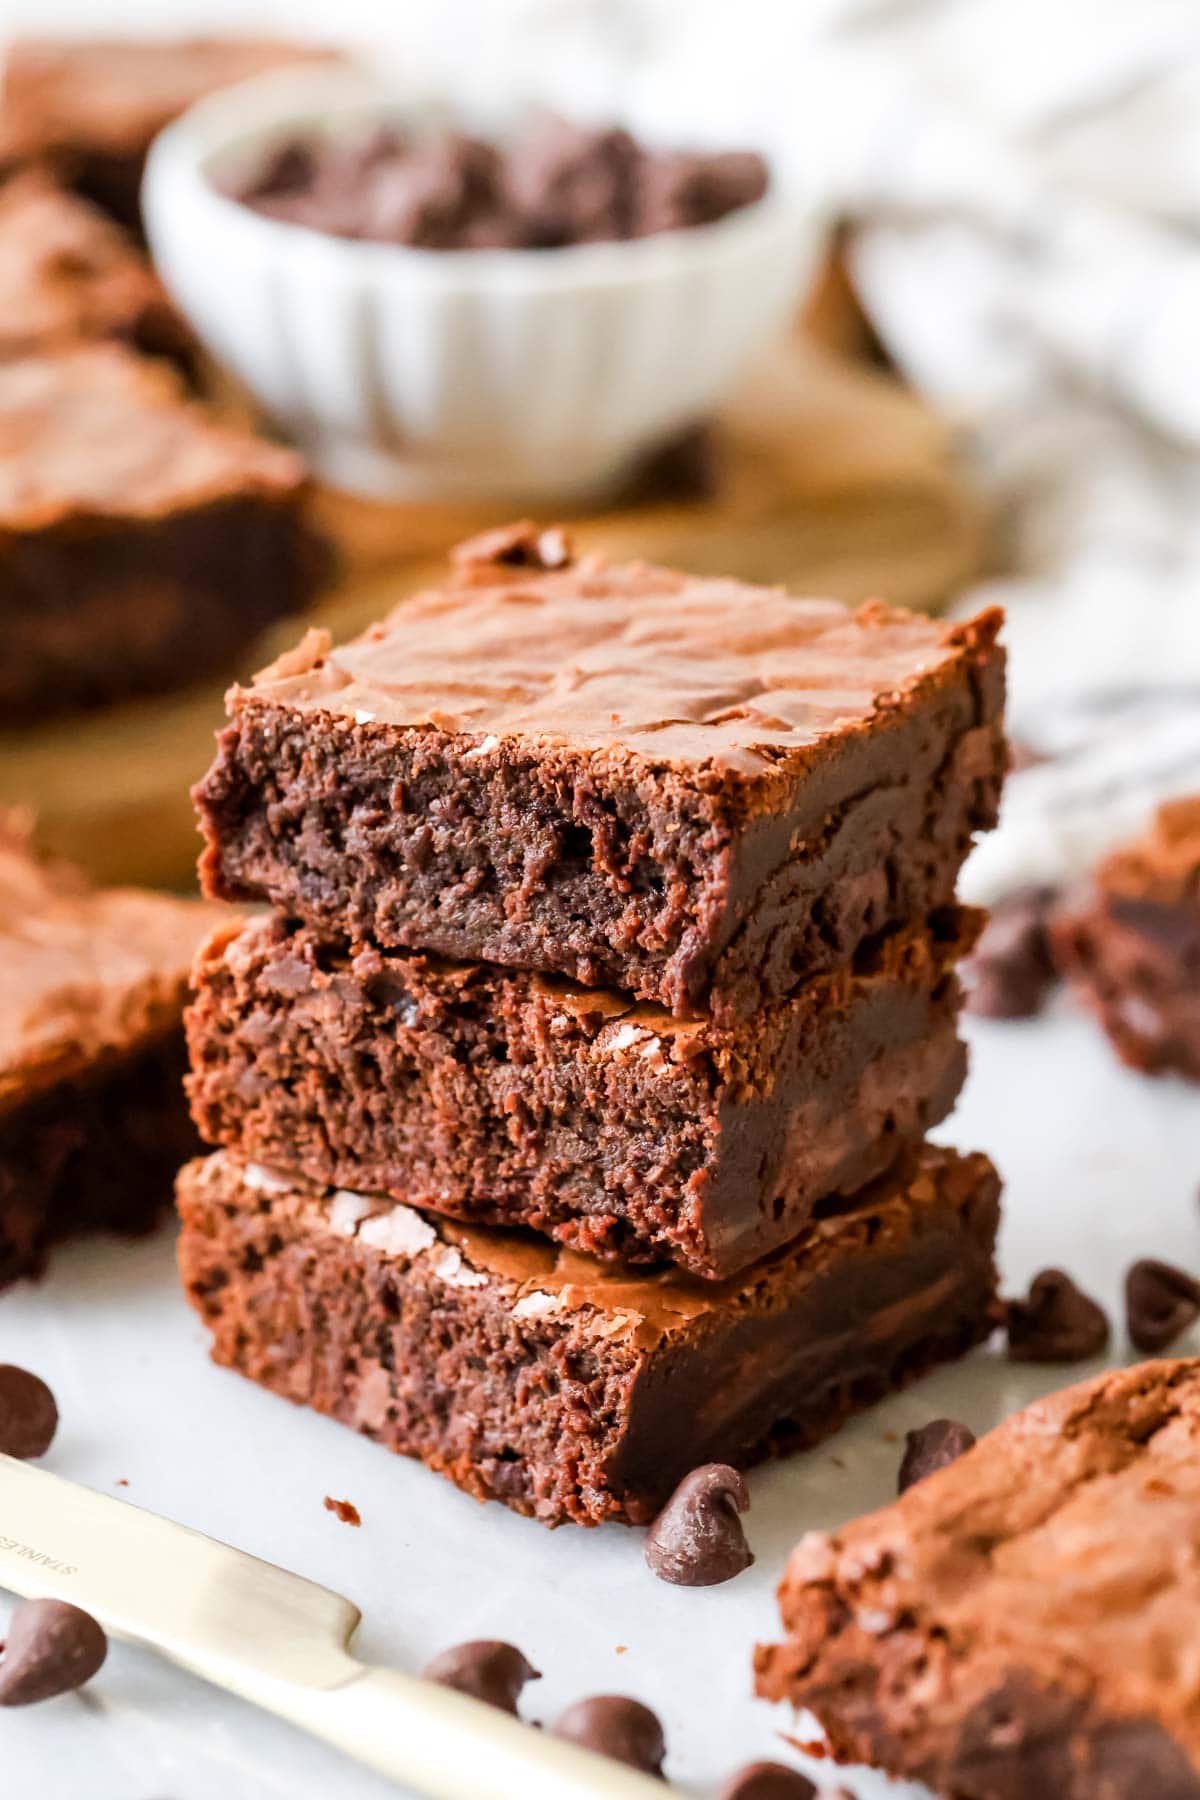
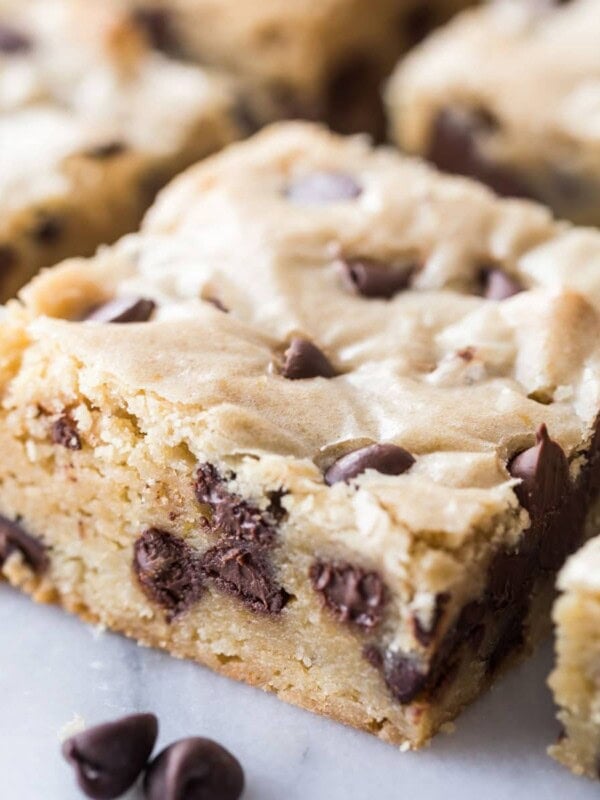
My homemade brownies from scratch are fudgy, decadent, so chocolatey and the batter can be made in just minutes! This has been a fan-favorite for over 8 years and will have you ditching the box-mixes for good. Recipe includes a how-to video and lots of tips for shiny, crackly brownie tops!
Brownies From Scratch
I first shared this homemade brownie recipe years ago and it’s remained one of my personal favorites ever since, a classic right up there with my chocolate chip cookies and easy apple pie. It’s served as the base of many of my other brownie recipes on my site (perhaps most deliciously, my cheesecake brownies) and is perfect for beginners and advanced bakers alike.
At its core, this is really a no-frills, easy brownie recipe that really needs little introduction, but if you’re like me and love nerding out about nitty gritty recipe details, please read on (otherwise, hit that big “Jump to Recipe” button overhead)!
Why You Should Try THIS Brownie Recipe:
- Intense chocolate flavor. Melted chocolate, cocoa powder, and added chocolate chips put these brownies over the top. Add a pinch of instant coffee or espresso powder to the batter for an even more decadent chocolate experience.
- Shiny, crackly tops. While it may seem like just aesthetics, shiny and crackly tops are something that I personally love about brownies and that I wanted my own version to have. I spent years cracking the code on this and am very happy to share what I’ve found with you (it’s all about mixing the eggs and sugar… more on this below!).
- Easy, for when you need a chocolate fix in a hurry! My homemade brownies come together in just 10 minutes. Minimal mess & no mixer needed.
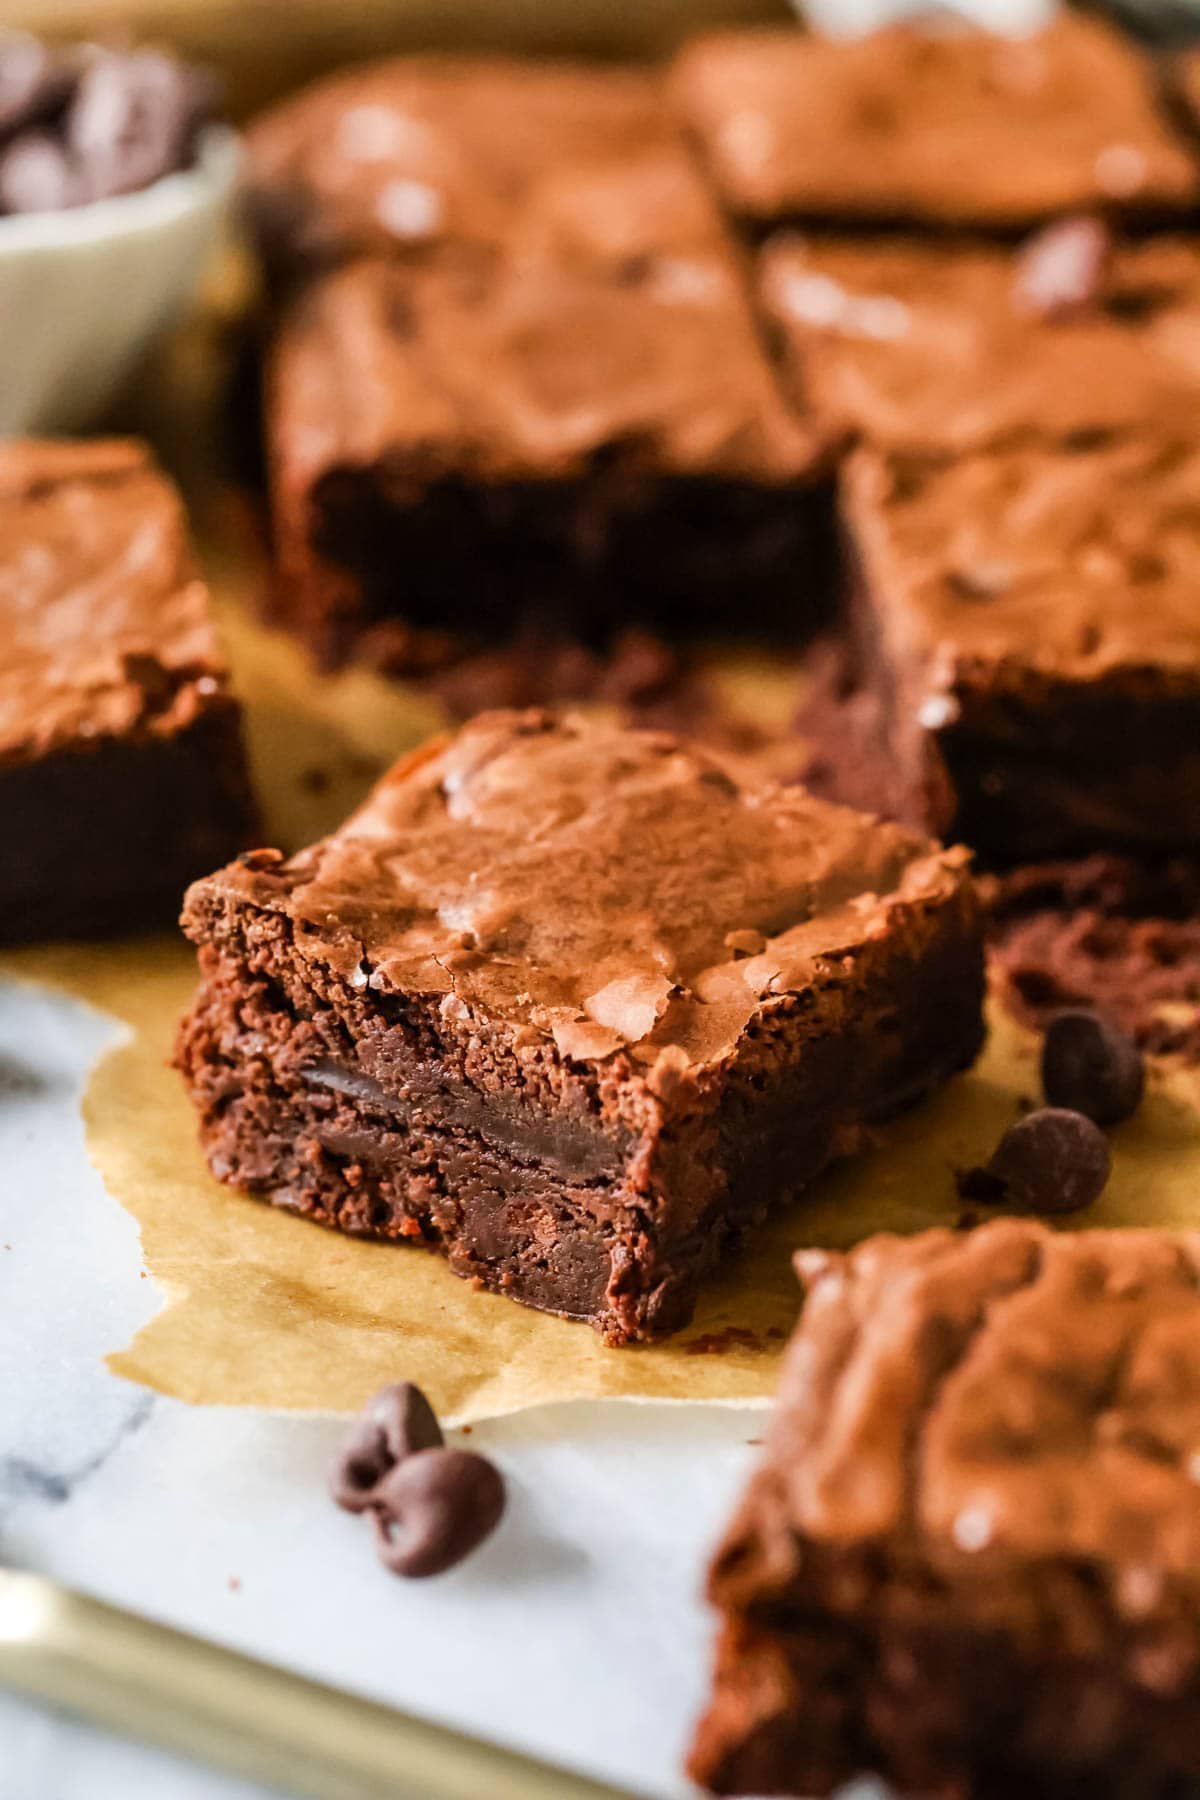
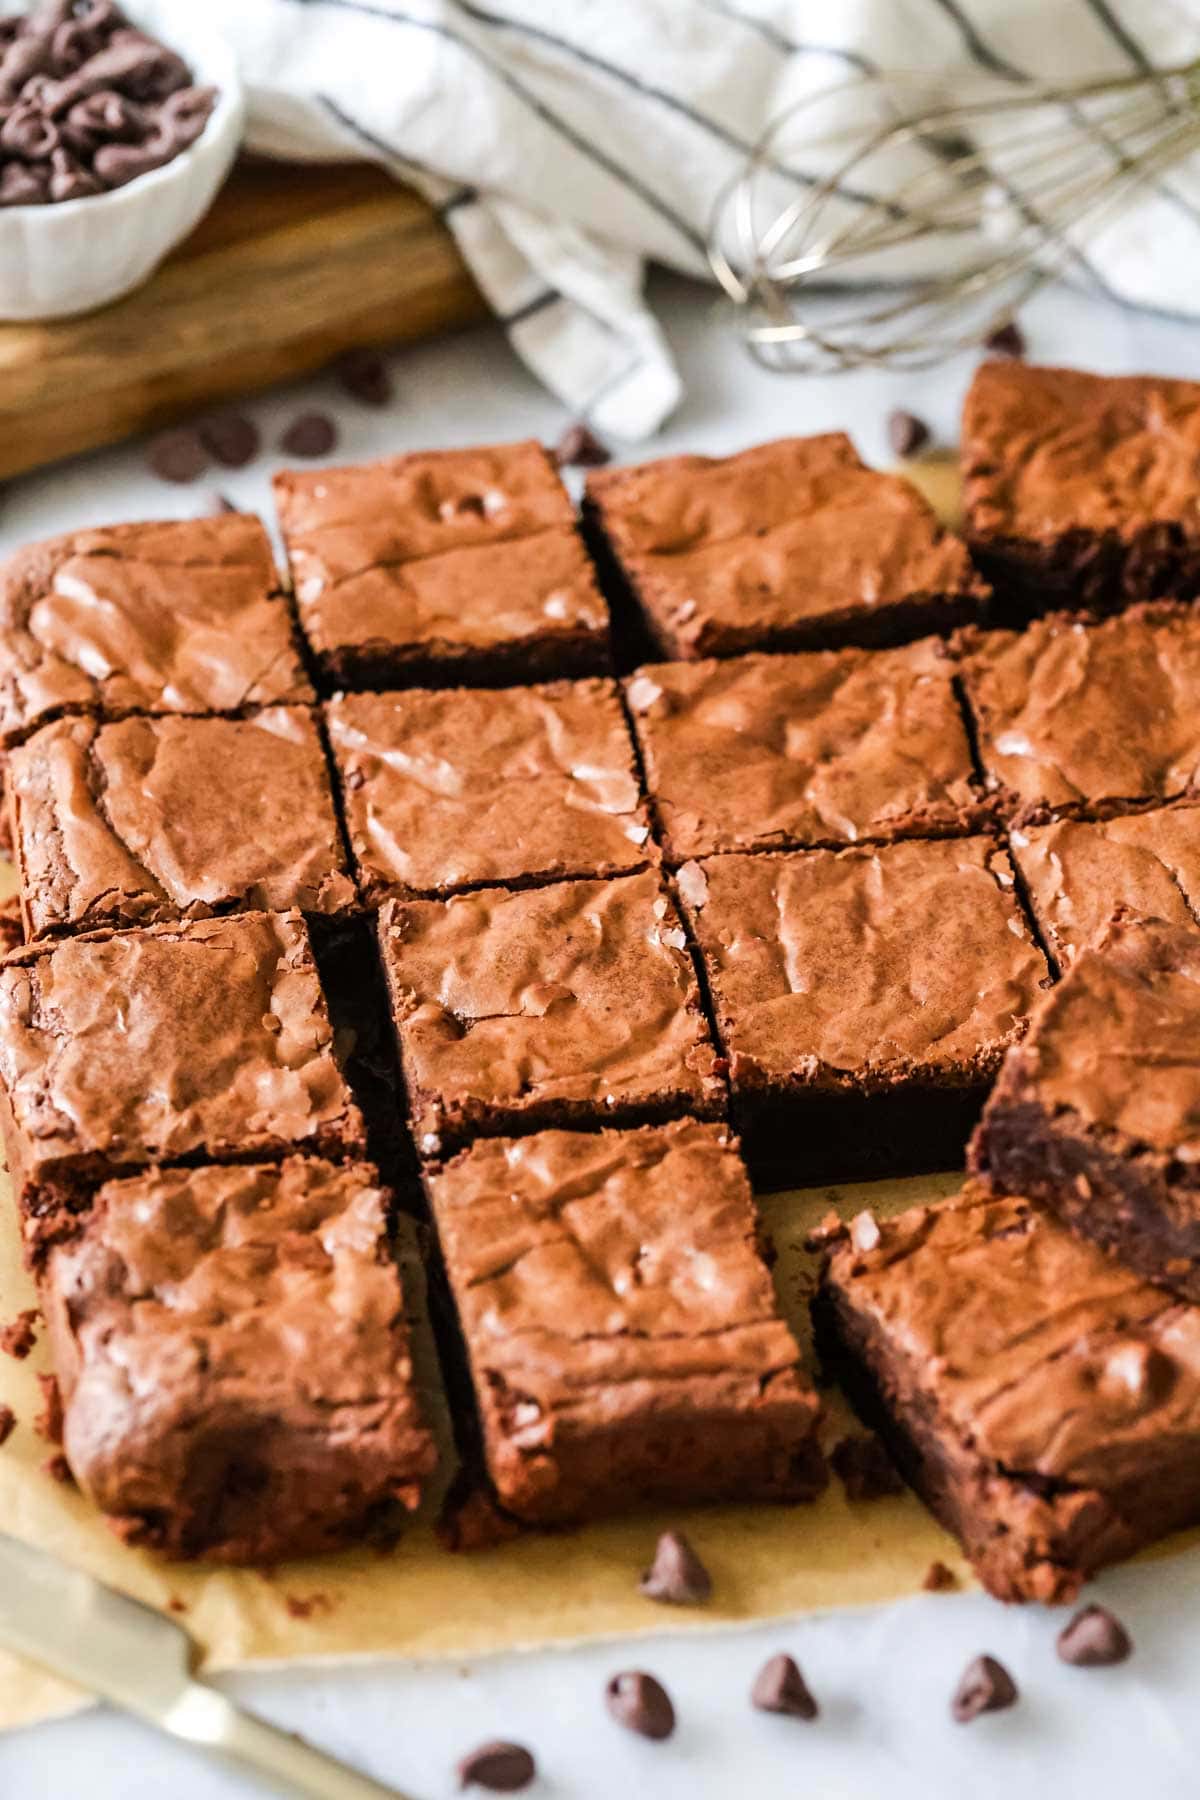
- Perfected recipe (true brownie texture!). This recipe was carefully (and repeatedly) tested to yield brownies that are dense, fudgy, and super chocolatey with the aforementioned shiny, crackly tops. I must’ve baked 100 different batches before landing on this version.
Ingredients for Homemade Brownies
We won’t go over every ingredient in detail (who has the time when there are brownies to be made!), but I think you should know what it is that truly makes these the best brownie recipe. The ingredients are common enough, but there are a few extras mixed in, along with a bit of technique… (more on that later).
Let’s dig in.
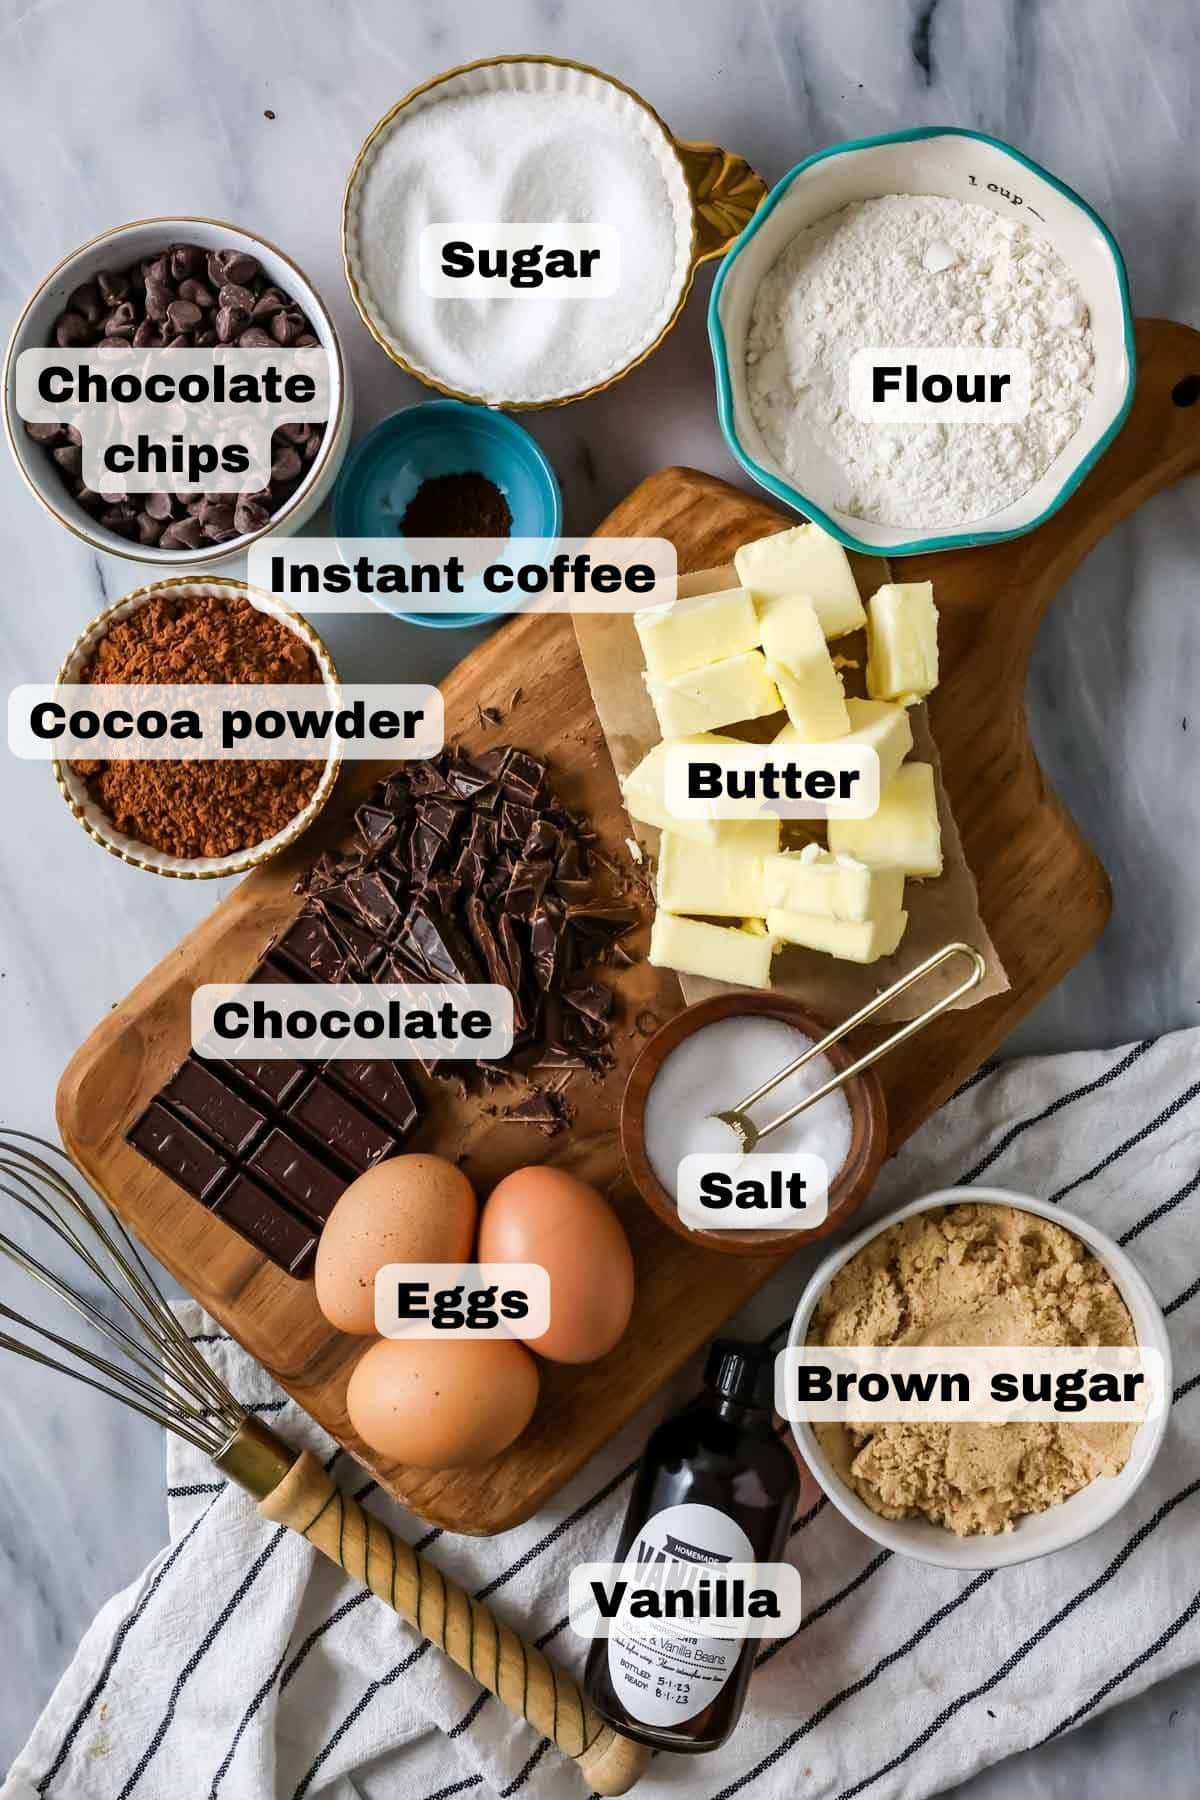
- Sugar. A blend of granulated and brown sugar is the way to go in almost every recipe, honestly, but especially here. The subtle molasses-ness of the brown sugar rounds out the flavor of the chocolate and adds extra chew to our brownies!
- Eggs… plus an extra yolk! The egg whites play a critical role in giving you brownies with a shiny, crackly top. When coupled with the sugar and whipped, you’ll be able to achieve exactly that boxed-brownie look. An extra yolk enriches the batter and makes the brownies even more tender and fudgy.
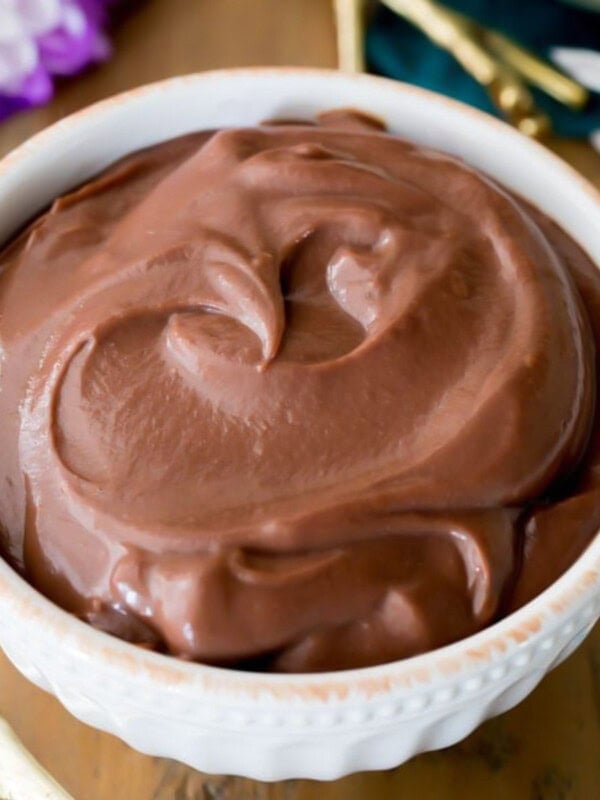
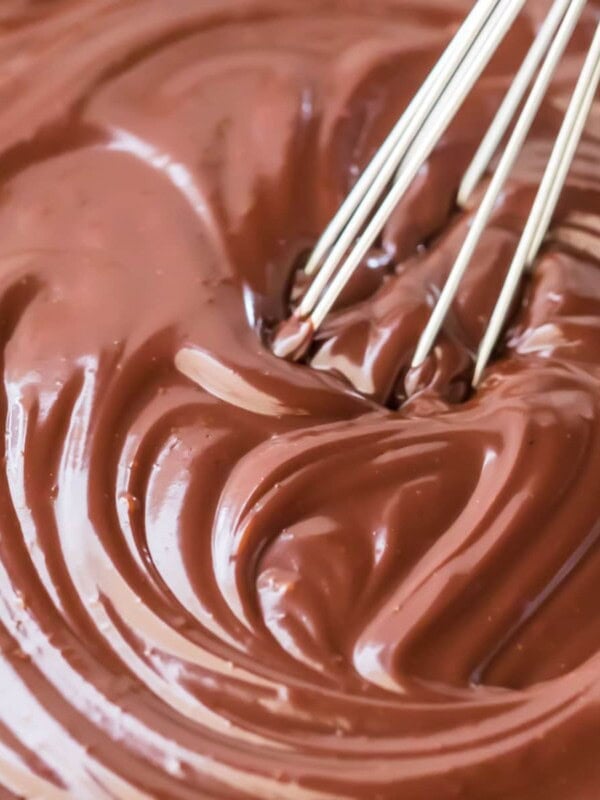
- Chocolate. For intensely chocolatey homemade brownies we build the batter on a base of melted chocolate and butter and then toss in some cocoa powder while the mixture is still warm (to help bloom it, as we do in my chocolate cake). Chocolate chips work in a pinch, but baking bars are best. Use semisweet baking bars, or, if you like a darker chocolate, use 60% cacao instead! Then, at the end, I do recommend mixing in some chocolate chips for an extra punch of chocolate.
- Instant coffee. If you’re someone who prefers dark chocolate, you’ll want to add this. It adds depth and enhances the chocolate flavor, particularly the more bitter flavors that you’ll find in dark chocolate. You can make things even more intense by swapping this with espresso powder, or if you’re not a fan feel free to omit it.
Sam’s Tip: These brownies were specifically and carefully designed to be dense and fudgy, and not cakey. However, if you like a lighter brownie you can stir in a quarter teaspoon of baking powder with the flour.
How to Make Brownies from Scratch
Whisk the eggs and sugar
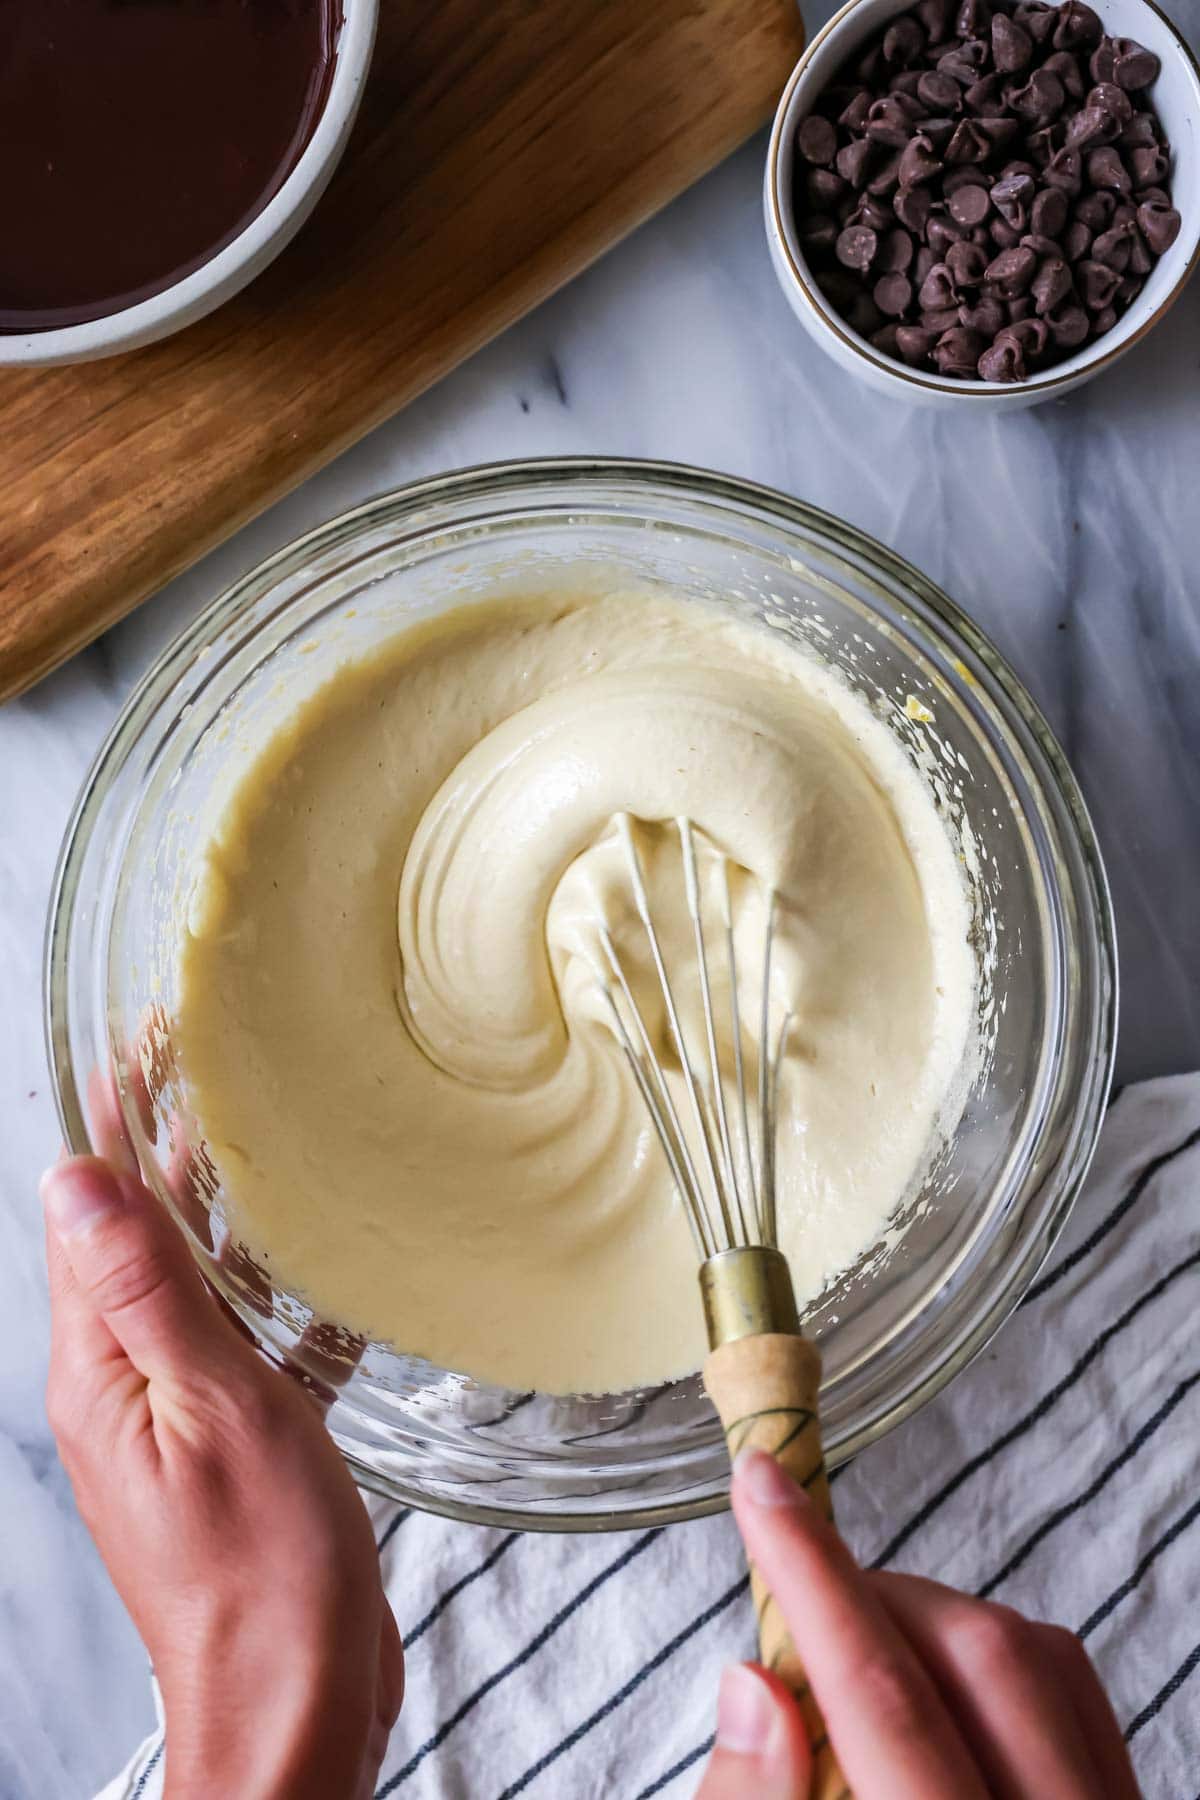
I’ll usually melt my chocolate and butter together first (do this in intervals, stirring in between, just like when melting chocolate in the microwave). Then set this aside and combine your eggs and sugar and stir vigorously. Whisking together the eggs and sugar almost as if you were making meringue is critical to creating those shiny, crackly tops that you’ll see at the end!
The vigorous whisking can be an arm workout, but can absolutely be done by hand (usually takes me 60 seconds or so). You could alternatively use an electric mixer for this step!
Once the eggs are well-mixed, stir in your vanilla extract and salt.
Add the melted chocolate
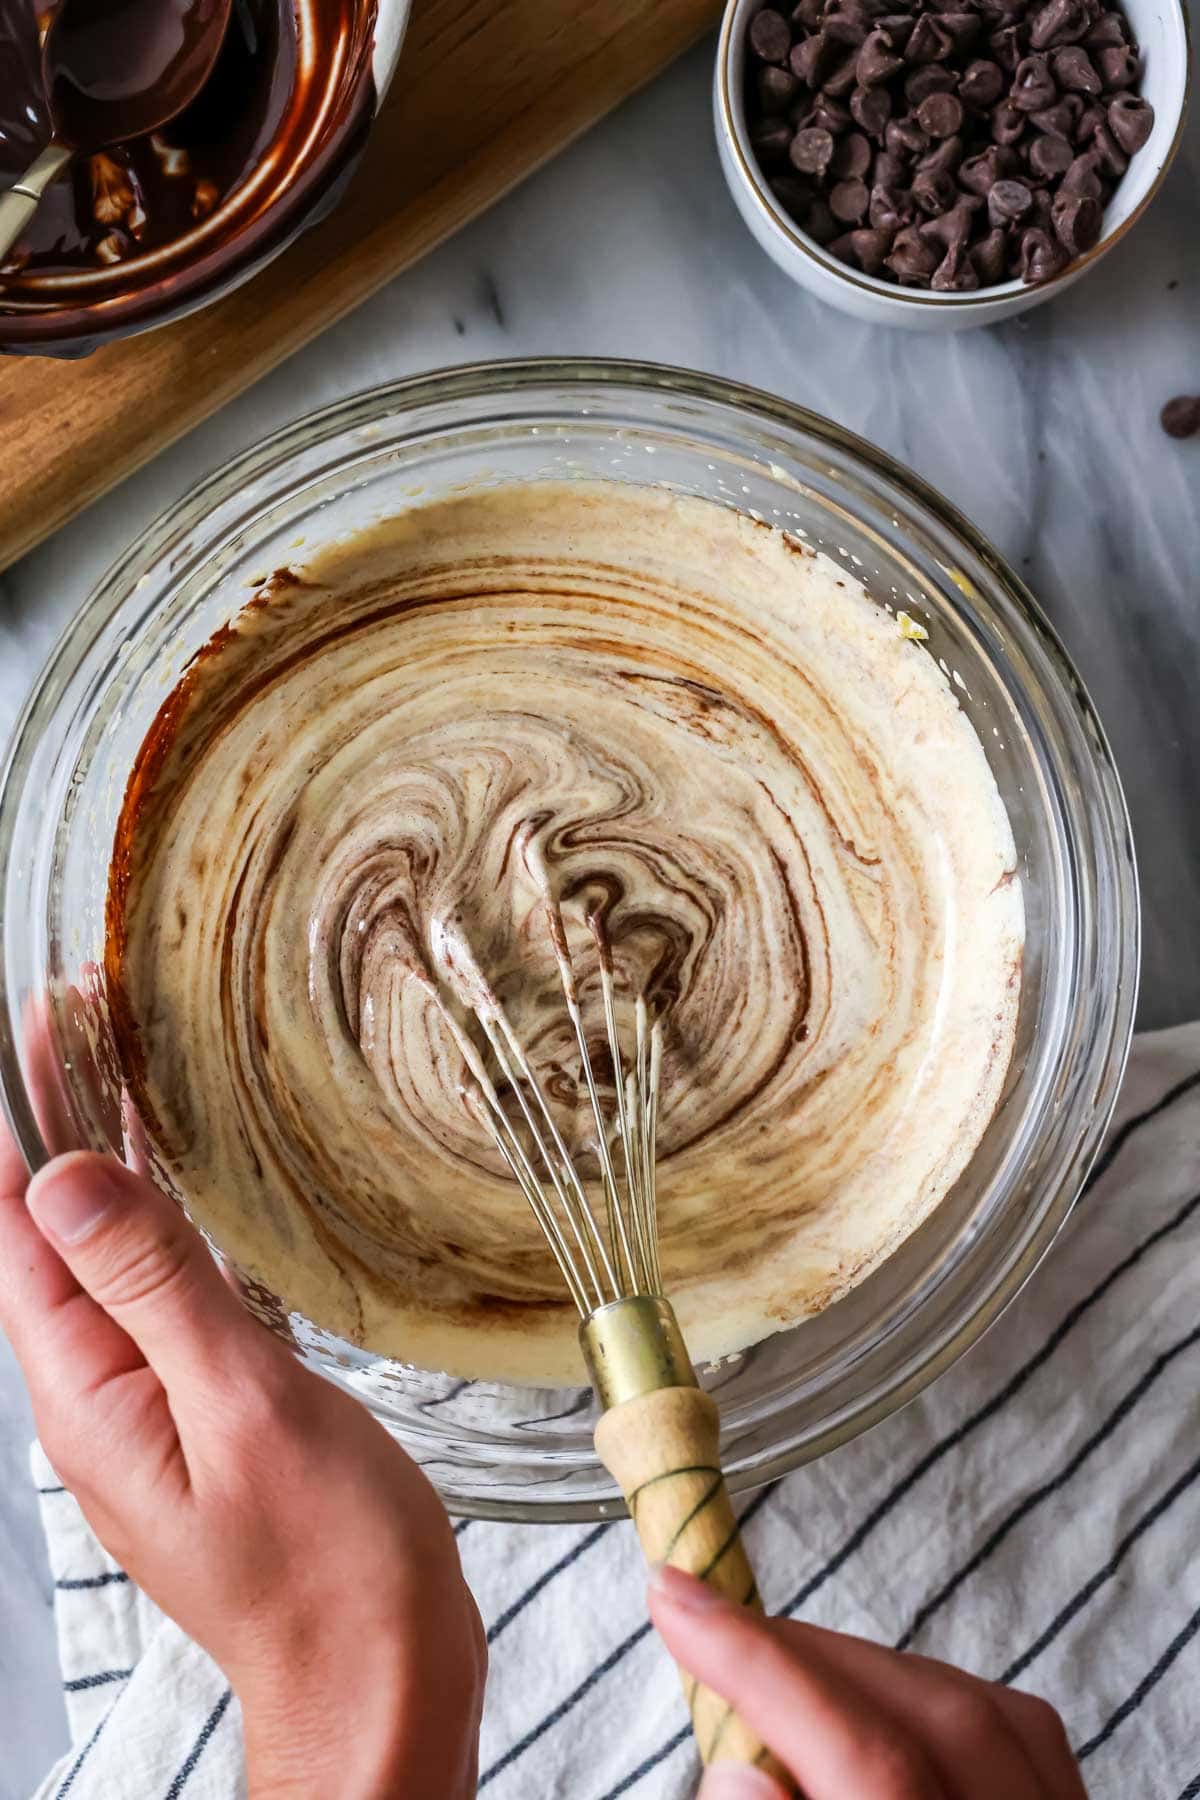
Stir the melted chocolate into the batter. Everything should be thoroughly combined, but you don’t have to worry about whisking aggressively or vigorously, like you did with the eggs and sugar.
Finish the brownie batter & bake
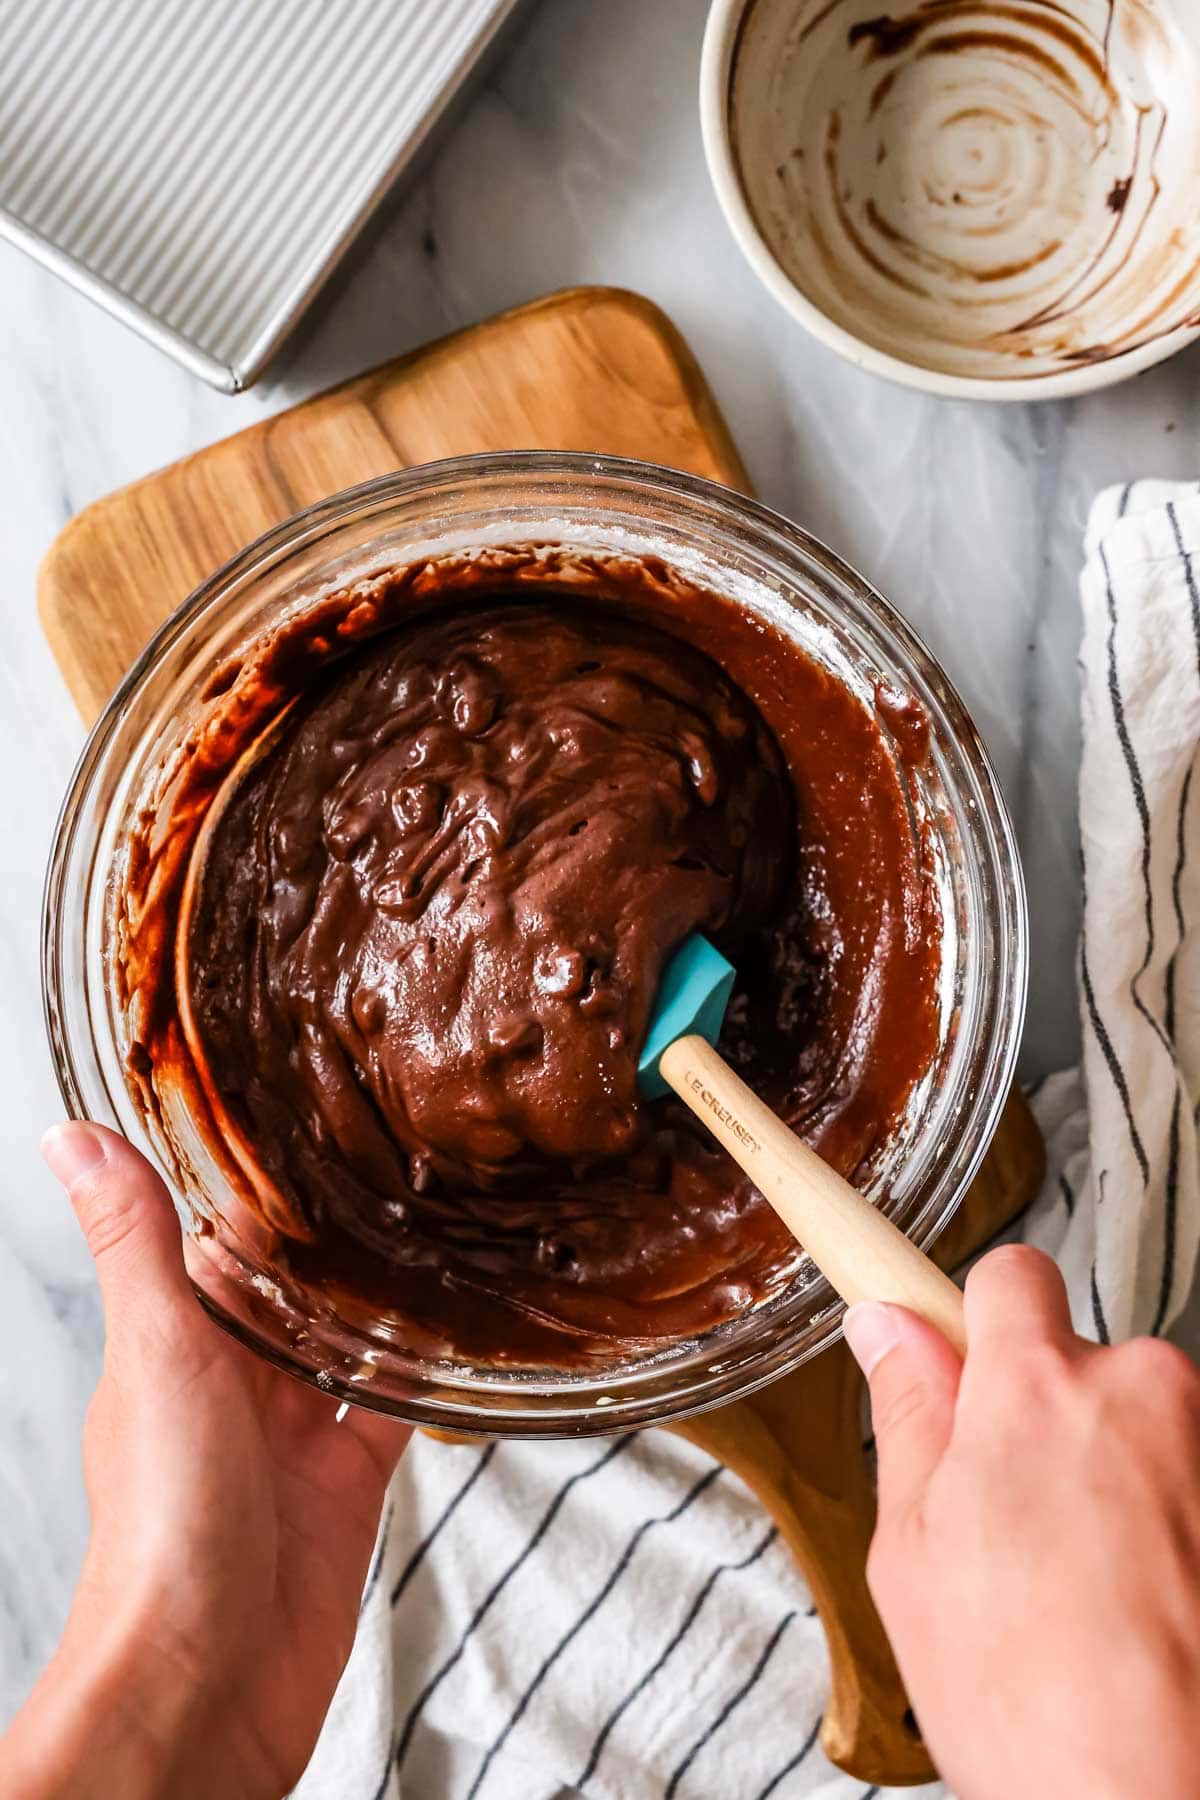
Add the flour, followed by the chocolate chips. Once again, the batter just needs to be uniformly combined, no need to go crazy with mixing here! Once everything is combined, scrape your brownie batter into a 9×9″ baking pan, smooth it into an even layer (add a few more chocolate chips on top if you’d like, for good measure!) and bake!
SAM’S TIP: I recommend baking your brownies in a metal pan, as glass pans can take longer.
Frequently Asked Questions
An extra egg yolk, a bit of brown sugar, real melted chocolate, a bit less flour than you might expect, and no baking powder or baking soda all contribute to the rich fudginess of these brownies. If your brownies turn out cakey after following my recipe, it may be that your flour was accidentally over-measured.
After years of making homemade brownies from scratch, I can tell you with confidence the secret is following a good recipe. Use one that recommends vigorously whisking the eggs and sugar, enriches the batter with melted chocolate, and for good measure adds a pinch of instant coffee or espresso. Obviously I’m biased, but my recipe really does crack the code for perfect brownies, and I’m excited for you to try it.
Unfortunately, a straight substitution of the chocolate called for with white chocolate yields results that are too sweet and a bit oily. However, I do have a white chocolate brownie recipe that I recommend you try instead, or for a chocolate-less version try my blondies!
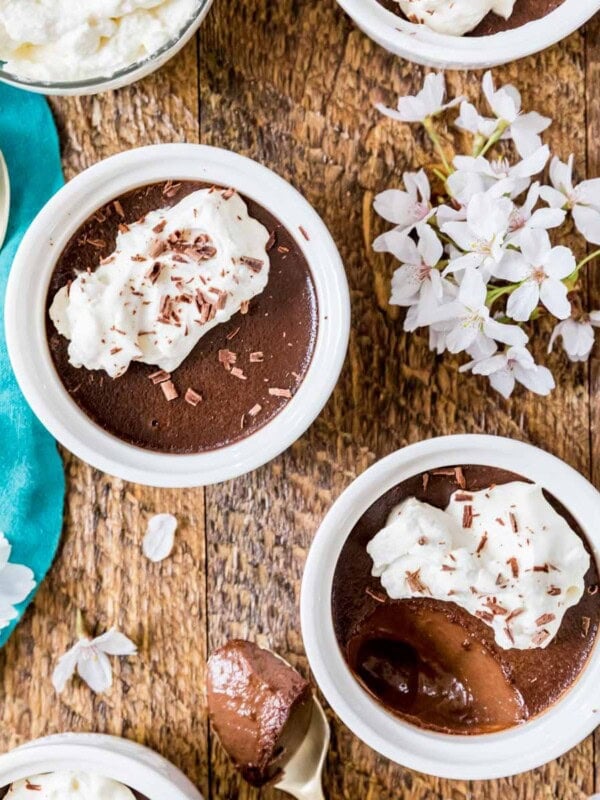
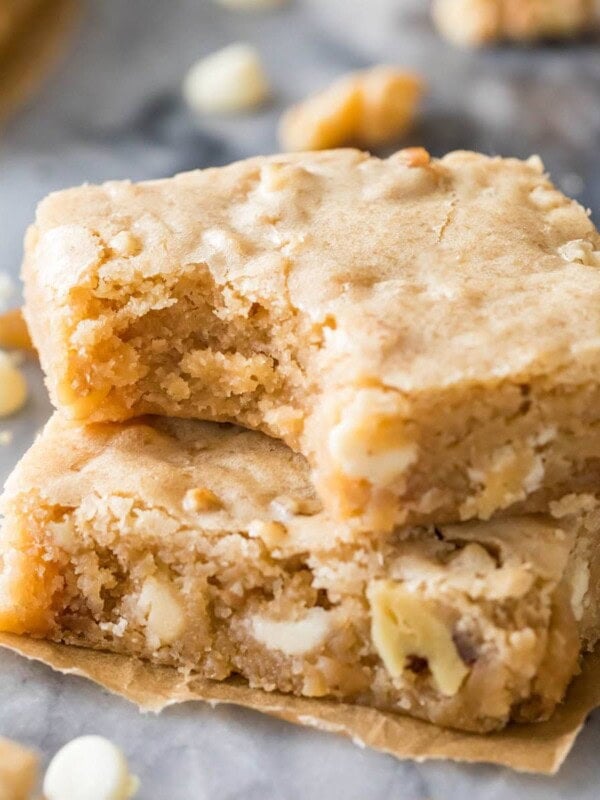
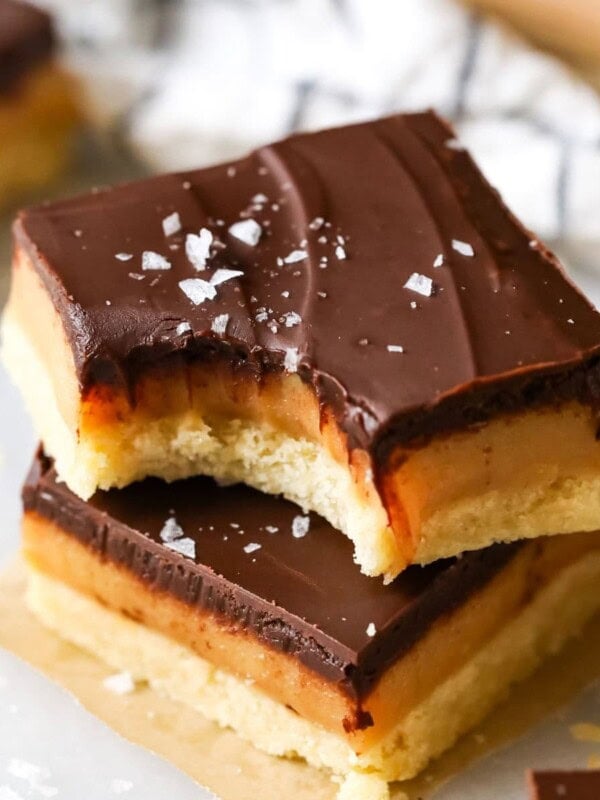
More Chocolate Desserts
This is truly the easiest, ultimate, best homemade brownie recipe. And I really think you are going to love it.
Enjoy!
Let’s bake together! I’ll be walking you through all the steps in my written recipe and video below! If you try this recipe, be sure to tag me on Instagram, and you can also find me on YouTube and Facebook
Fudgy Homemade Brownies from Scratch
Equipment
Ingredients
- 12 Tablespoons (170 g) unsalted butter, cut into Tablespoon-sized pieces
- 4 oz (113 g) semisweet chocolate bar, chopped into small pieces (or 2/3 cup semisweet chocolate chips)
- ½ cup (50 g) natural cocoa powder (unsweetened)
- ½ teaspoon instant coffee grounds, optional
- ¾ cup (150 g) granulated sugar
- ¾ cup (150 g) light brown sugar, firmly packed
- 2 large eggs + 1 large egg yolk
- 1 teaspoon vanilla extract
- ½ teaspoon salt
- 1 cup (125 g) all-purpose flour
- ¾ cup (127 g) semisweet chocolate chips
Instructions
- Preheat oven to 350F (175C) and line a 9×9 baking pan¹ with parchment paper²
- Combine butter and chopped chocolate in a large, microwave-safe bowl.12 Tablespoons (170 g) unsalted butter, 4 oz (113 g) semisweet chocolate bar
- Microwave in 25-second intervals, stirring well in between, until completely melted and smooth.
- Immediately add cocoa powder and instant coffee (if using), stir well.½ cup (50 g) natural cocoa powder (unsweetened), ½ teaspoon instant coffee grounds
- In a separate, medium-sized mixing bowl, combine sugars and eggs. Whisk vigorously, until well combined and lightened in color (at least 60 seconds of vigorous whisking, this ensures shiny, crackly tops! Feel free to use an electric mixer!).¾ cup (150 g) granulated sugar, ¾ cup (150 g) light brown sugar, 2 large eggs + 1 large egg yolk
- Stir in vanilla extract and salt.1 teaspoon vanilla extract, ½ teaspoon salt
- Drizzle chocolate mixture into egg mixture and stir until completely combined.
- Add flour, stir until completely combined.1 cup (125 g) all-purpose flour
- Stir in chocolate chips.¾ cup (127 g) semisweet chocolate chips
- Spread into prepared 9×9 pan.
- Bake in center rack of 350F (175C) oven for 30-35 minutes or until a toothpick inserted in center comes out slightly fudgy, but not wet with batter.
- Allow to cool before cutting and serving (they'll be messy and seem underdone otherwise).
Notes
Nutrition
Nutrition information is automatically calculated, so should only be used as an approximation.
Like this? Leave a comment below!
I originally shared this brownie recipe on 02/01/2017. I’ve made small changes to the recipe to make the tops crackly (changed the step for beating the eggs well instead of mixing the batter well as a whole), and I’ve updated some of the photos and added a video and tried to make the post itself more informative.


Okay so I was up late last night by choice making these brownies. These came out AMAZING. There’s a brownie contest that is going on at my job and after some reseach, your recipe sounded the best. I’m going to make a 2nd batch today just to have at home(: I made a few changes just because its all I had in my kitchen.
Instead of unsalted butter I did salted.
I didnt use the coffe grounds.
I also ADDED chocolate frosting into the mix. It’s a way my brother has always did his brownies so I tried it with this recipe. It makes them even more gooey.
Only problem I had was baking it. I used a 13X9 pan and it took about 40 minutes before it was officially done. Not sure if it was beause of the slighty different ingredients or my oven, but the end result still came out GREAT. Maybe because I used an aluminum pan (those disposable ones)? I did the trick with putting it in the refrigerator for about 30 minutes and then baked it. They came out fudgy in the middle, with the crispy tops. I love them. I will definitely be keeping this recipe handy. Way better than the boxed brownies!
I never thought to add chocolate frosting, now I’m intrigued!! I am glad they turned out well for you, Reese!! 🙂
Try it! It’s amazing 😊 Your brownie recipe got me 1st place btw. I will be making these again soon!
Really!! That is awesome!! Thank you for letting me know, Reese!! 🙂
Can I add nuts?
Yes, that wouldn’t be a problem 🙂
I have made these brownies twice and they are the BEST! The recipe is easy, with ingredients already in the pantry and the brownie comes out perfect. Crunchy top and moist inside. My pan is 8X8 and I baked for 30 minutes. Very Best Brownie recipe ever. I have been baking for over 50 years and can’t say enough good about this recipe. I can’t wait to try more of your recipes. Thanks!
I’m so happy to hear you enjoyed them so much, Cathy! Thank you for your kind comment!! 🙂
My husband is a HUGE fan of brownies while I am more a blondie (literally). I’ve made several brownie recipes for him over the years but this one is by far, THE BEST! This is such an easy recipe & though I didn’t have a 9×9 pan (I am buying one just for this recipe!) I poured most of the batter into a parchment lined 8×8 glass dish & baked for 33 minutes (28, checked, added 5 more minutes). AMAZING outcome here! If you are reading this & wondering if this recipe is any good, as a non-brownie lover, I absolutely give this recipe 5 stars. I didn’t substitute any of the ingredients & followed the directions aside from the pan only because I didn’t have what was called for & my husband is not a fan of thin brownies. Adding a little over 3/4 batter to an 8×8 pan is perfect, just like this recipe. I indulged on a bit & will be glad to save the recipe & make many more batches in the future. Thank you for sharing your truly delicious, non gritty/grainy, rich but not overly rich brownie recipe with the world. We appreciate your generosity! <3
Woohoo I am so happy to hear it was such a hit!! 🙂
I made these brownies today just as directed and placed in the refrigerator for 15 minutes before baking. They were DELICIOUS!!! I don’t think I will ever make box brownies again! Thanks Sam for sharing. 🙂
I’m so glad to hear you enjoyed them!! 🙂
Hi! These felt very thick and hard to spread my first try. Maybe I overdid it on the sugar? I thought I followed the recipe exactly. Any thoughts?
Thanks!!
The batter is pretty thick so that shouldn’t be too concerning. How did they bake up for you?
Hi Sam,
Today was my 2nd try. First one was quite good, so I thought today would be better.. But this time it was more fudgy in the center and I couldnt really cut it into pieces too. It tastes great but I dont know why it was more sticky this time.. any hints??
The top looked really beautiful. Cracked up nicely. But definitely stickier.
Thanks for all the pointers.
My best guess would be to check all of your ingredient measurements again as well as the temperature of your oven. I’m sorry they didn’t turn out the second time. 😟
Let me start by saying, I dislike most chocolate. That said, after trying one, these Brownies are wayyy better than Mom’s when I was a youngling. Shhh🤫 I used a 13×9 pan, greased and floured. Chilled for about 30 minutes and topped with some additional mini chocolate chips. It did take a little over 20 minutes to cook but I blame my oven for that.. This recipe is definitely a keeper and super easy! Thank you for another great desert! 😁
Made these today without refrigerating. Fantastic, chewy, add definetly cures a chocolate craving. Thanks Sam!
I am so glad to hear you enjoyed them, Susan!! 🙂
I made this recipe just last week (May 6) and my wife loved them so much that she changed her preferred MD’s dessert from her awesome homemade lemon bars to your BFS. In half the pan we mixed in some chopped nuts (walnuts??) and it was wonderful – nice little crunch with a subtle nuttiness. nom nom! Thanks again for the recipe. I’m printing it at my wife’s request, which means it’s going in her ‘special’ cookbook where she puts her favorite and most used recipes. Well done! Oh, and we refrigerated the batter for at least an hour before baking, maybe even 2 hrs. (side note: for our Choc chip cookies we let our dough chill overnight)
Hi Sam, I’m going to give your recipe a try for a picnic this weekend. Have you made this version with nuts at all? I”ll probably add crushed walnuts to one batch, just curious if you have any tips there.
I haven’t added nuts but I really don’t think it would be a problem at all 🙂
I’d probably start with 2/3 cup, and then just use your best judgement to decide how much you want to add. I hope that helps!
Thanks! 🙂
We’ve done it recently – added nuts to half a pan (7×11 I think), and it turned out great.
I made these and followed the directions to a T. 9×13 pan and half an hour later, still EXTREMELY squishy in the middle. Not just like a fudgey brownie, but like a brownie that needs a fork.
Weird! Is your oven temp accurate?
I think I know what went wrong, how long did you refrigerate the batter? I made this recipe twice following the directions exactly except the first time I kept the batter in the fridge overnight. I was hoping for that thin, crinkled tips Sam mentioned! This particular recipe might not be right for that, the taste was really good but too fudgy in the middle. The second time I put the batter in the fridge for about 15 minutes. Came out perfect! This recipe is definitely a keeper.
*top. I hate the iPhone sometimes lol
Hands down, the best brownie recipe! I avoided the coffee grounds,
and threw in 3 eggs instead of separating them. Baked in a parchment-lined 1/4 sheet pan, I didn’t adjust the time or temp and they turned out great! Thanks for a yummy recipe!
P. S. Now baking a batch for my coworkers! 😉
Ooh, they look delicious! I’m thirteen and have only baked twice (cookies both times) so I’m pretty excited to try these out. Can I use vanilla be used instead of the vanilla extract?
Hi Eeman! I really hope you love them! Are you asking if you can use vanilla bean instead of vanilla extract? Just want to make sure I answer your question correctly 🙂
I just tried making these and they just came out of the oven. I’m not sure how good they will be because the batter was kind of bitter and I maybe under mixed it but it was an easy recipe to follow.
I made these awhile back. Want to make again. They seemed to dry out quickly. How do I prevent this?
How did you store them? Usually mine don’t dry out if I keep them in an airtight container at room temperature.