My detailed French macaron recipe has been carefully developed for anyone, from beginner to advanced bakers, to have success making their own flawless, beautiful macarons! I’m breaking down all the steps and sharing tons of tips to have you well on your way to perfect, full, envy-worthy macarons. Recipe includes step-by-step photos and a detailed video tutorial.
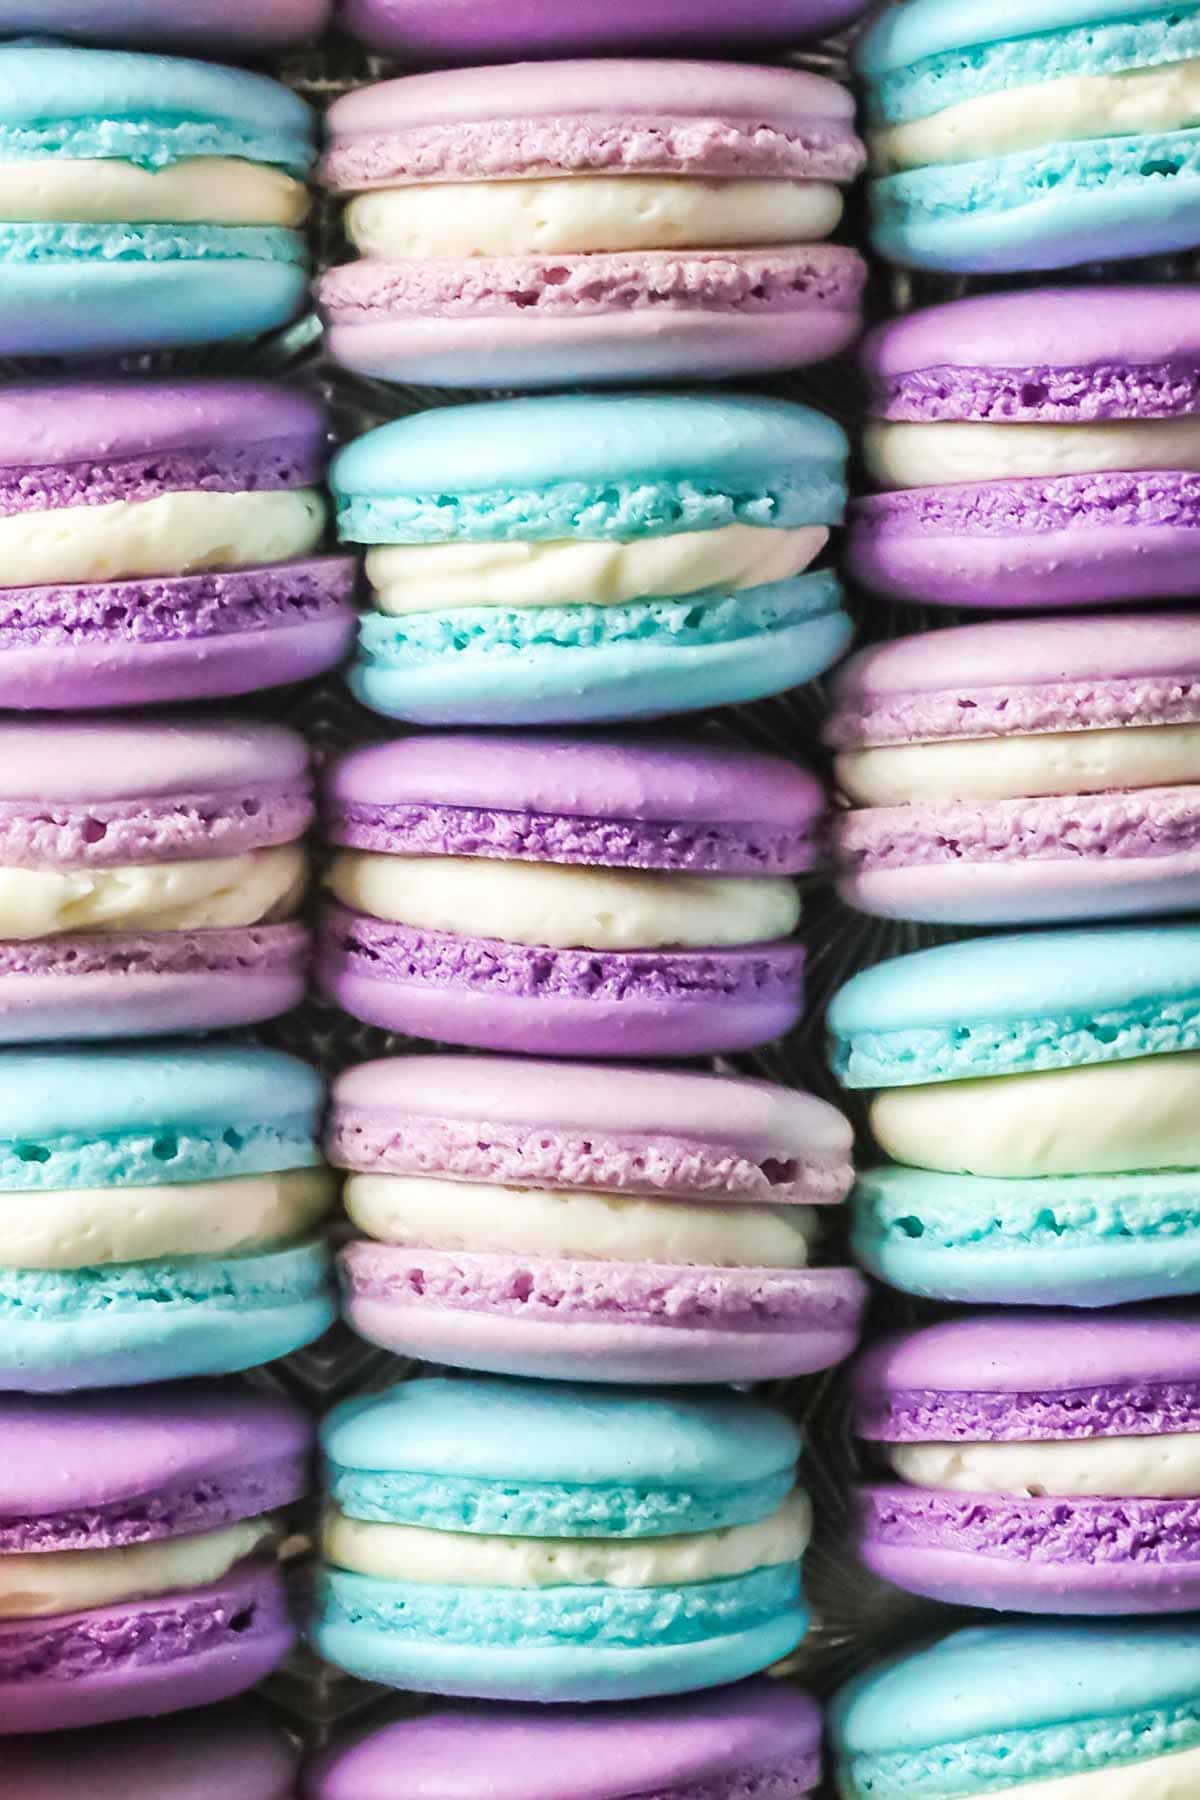
My Favorite French Macaron Recipe
Whew. Developing this French macaron recipe was an experiment unlike any other and really took me back to my research roots.
I tested over 35 variations, tweaked and re-tested each multiple times, went through over 12 dozen eggs and 15 lbs of almond flour. Over 2000 macaron shells made their way through my kitchen. I spent sleepless nights troubled by hollow shells and spent hours reading, researching, and, sometimes, pulling my hair out.
All this to say, a heck of a lot of work went into getting this recipe just right. And while no macaron recipe is truly “foolproof” (what a myth!), I really developed and wrote mine with you in mind. This (very detailed) recipe has been perfected to set you up for success in your own home.

Not to be confused with macaroons (a hearty, snowball-looking coconut cookie that comes together in a mere 15 minutes), macarons are light and delicate and a bit diva-esque in nature. They can trace their origins back hundreds of years, but the sandwich cookies as we know them have only made an appearance as of the 1930s.
There are several methods for making macarons, but today I’m sharing a French macaron recipe. It’s possibly the most popular of the methods and is, in my opinion, the easiest one to master and the best for beginners (I think the meringue is easiest to manage).
I’ve packed in tons of tips, tricks, and troubleshooting notes as well as a detailed video tutorial, so let’s get to it!
What You Need
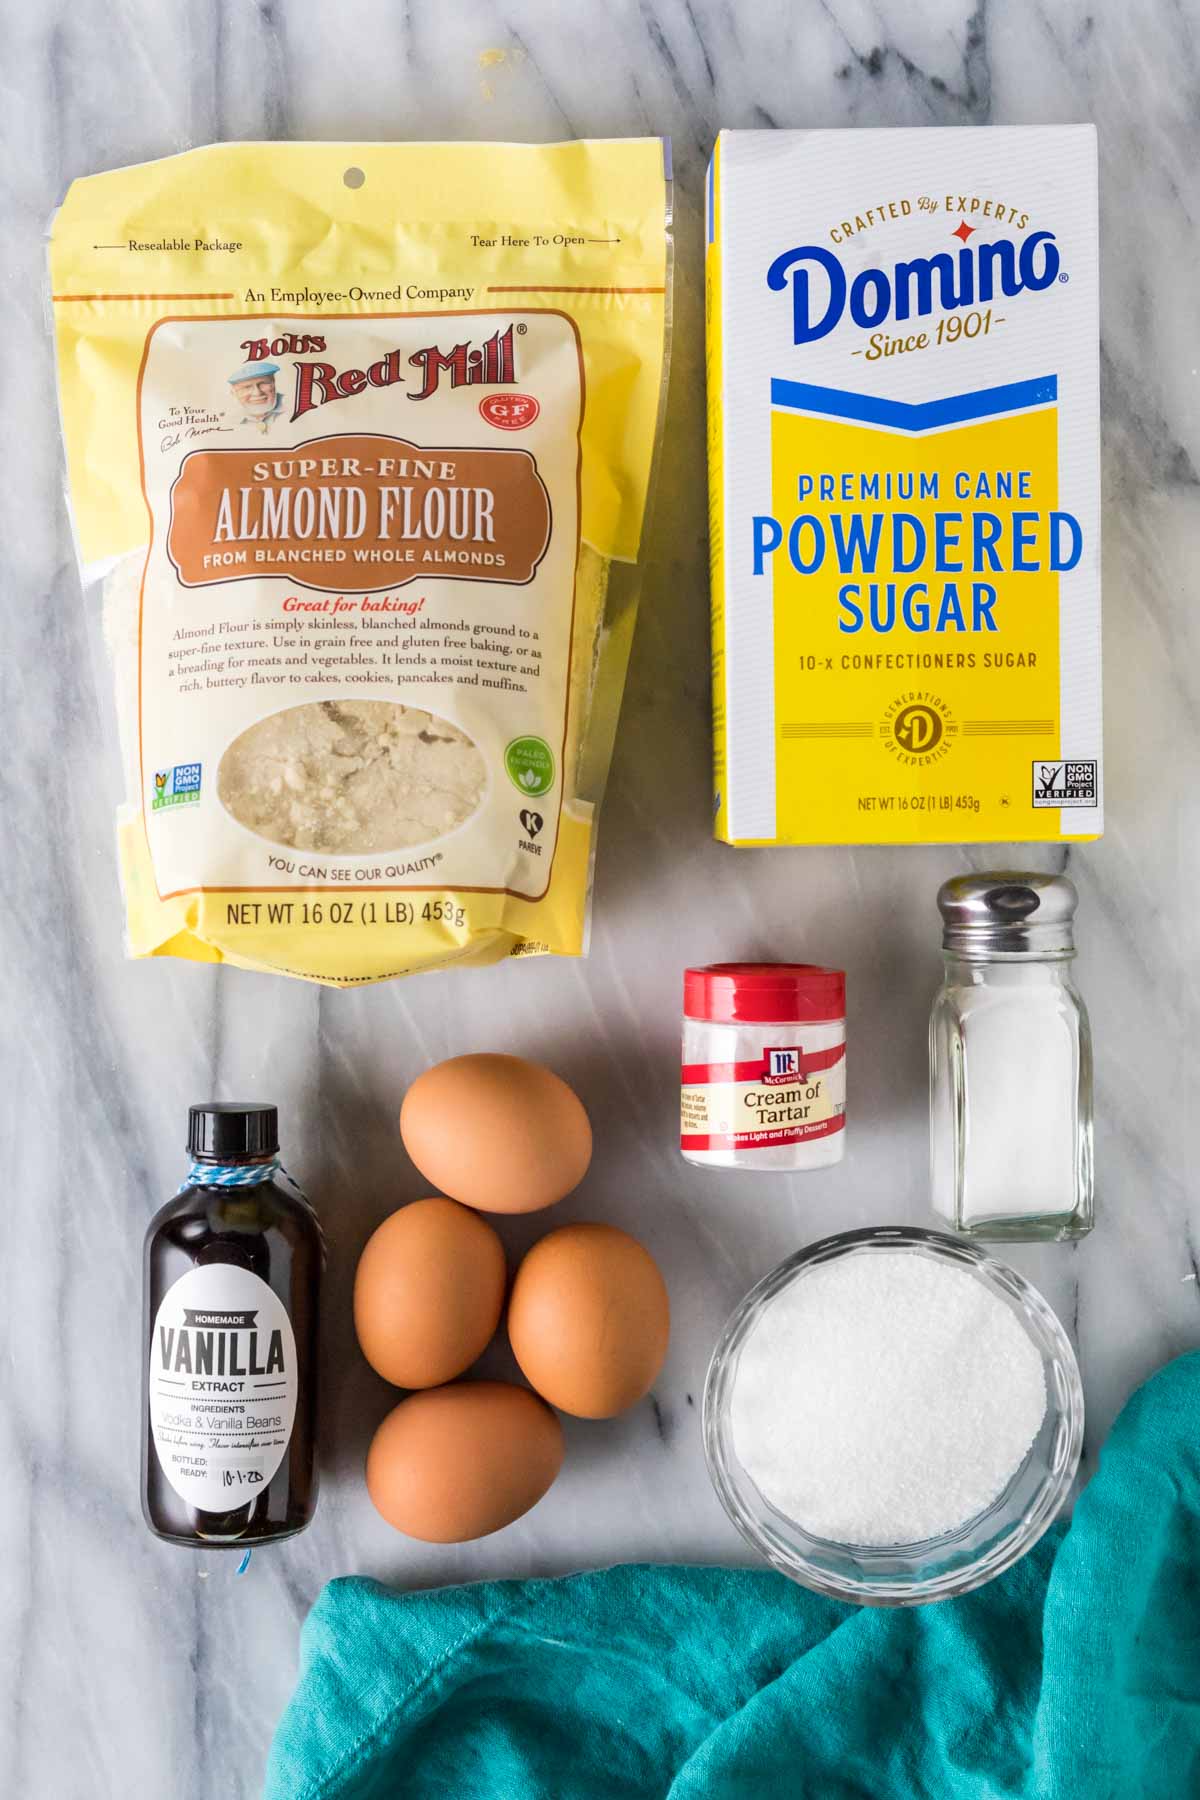
Nearly every French macaron recipe you encounter will use the same ingredients you’ll find below, often with differing ratios and sometimes with a wild-card ingredient thrown in. While cornstarch and egg white powder have made had a presence on the scene, I’ve found both to be unnecessary (though if you persistently struggle with hollow shells, you can try one or the other or both). Let’s go over the ingredients I use.
Ingredients
- Almond flour. A must in this (and any) French macaron recipe (and a key ingredient in my Linzer cookies), I recommend a “super fine”, blanched almond flour. As the name suggests, it’s very fine and yields smooth, bump-free macaron tops.
- Powdered sugar. Also known as “confectioner’s sugar” or “icing sugar” this ingredient is simply made of finely ground granulated sugar and cornstarch and is essential in flawless French macarons. It lends sweetness and stability to the cookies.
- Granulated sugar. If you can get your hands on superfine or caster sugar, that’s great and will work here wonderfully, but if not regular granulated sugar will work. This sweetens the macarons and is essential for stabilizing our egg whites (meringue).
- Egg Whites. It’s essential that when you separate your egg whites you do not get any egg yolk mixed in with the white, or your whites will not whip properly. I recommend using egg whites from eggs you’ve cracked yourself; while some people may find success with pasteurized egg whites sold in cartons, those yield mixed results and may not work for you.
- Cream of tartar. Cream of tartar is an acid and a stabilizer that helps strengthen your meringue. Is it strictly necessary? No, many people make macarons without it, but I consider it to be the training wheels of my meringue and recommend using it for best results. Half a teaspoon of white vinegar or lemon juice could also be substituted.
- Flavor. I use vanilla extract and a pinch of salt. If you’d like to try different flavors you certainly can.
- Food coloring. Entirely optional, but I wanted to touch on this as most people do choose to color their macarons. I personally recommend using gel food coloring (I like and use Americolor gels), as liquid coloring can add too much moisture to the meringue and a little gel goes a long way in giving you a vibrant color. Some people also use powder food coloring, I have never used this and so can’t advise.
SAM’S TIP: If you cannot find “superfine “almond flour, simply combine the almond flour and powdered sugar in a food processor and pulse 15 1-second pulses, stir, and repeat before using. Don’t overdo it or you’ll over-process the almond flour and end up with almond butter!
At this point I do not have any recommendations for other substitutions for any of these ingredients.
Equipment
In addition to the ingredients, I also have a few equipment recommendations.
- Glass or metal mixing bowls. Avoid rubber, plastic, or silicone bowls, which may be harboring hidden grease and can hinder your meringue
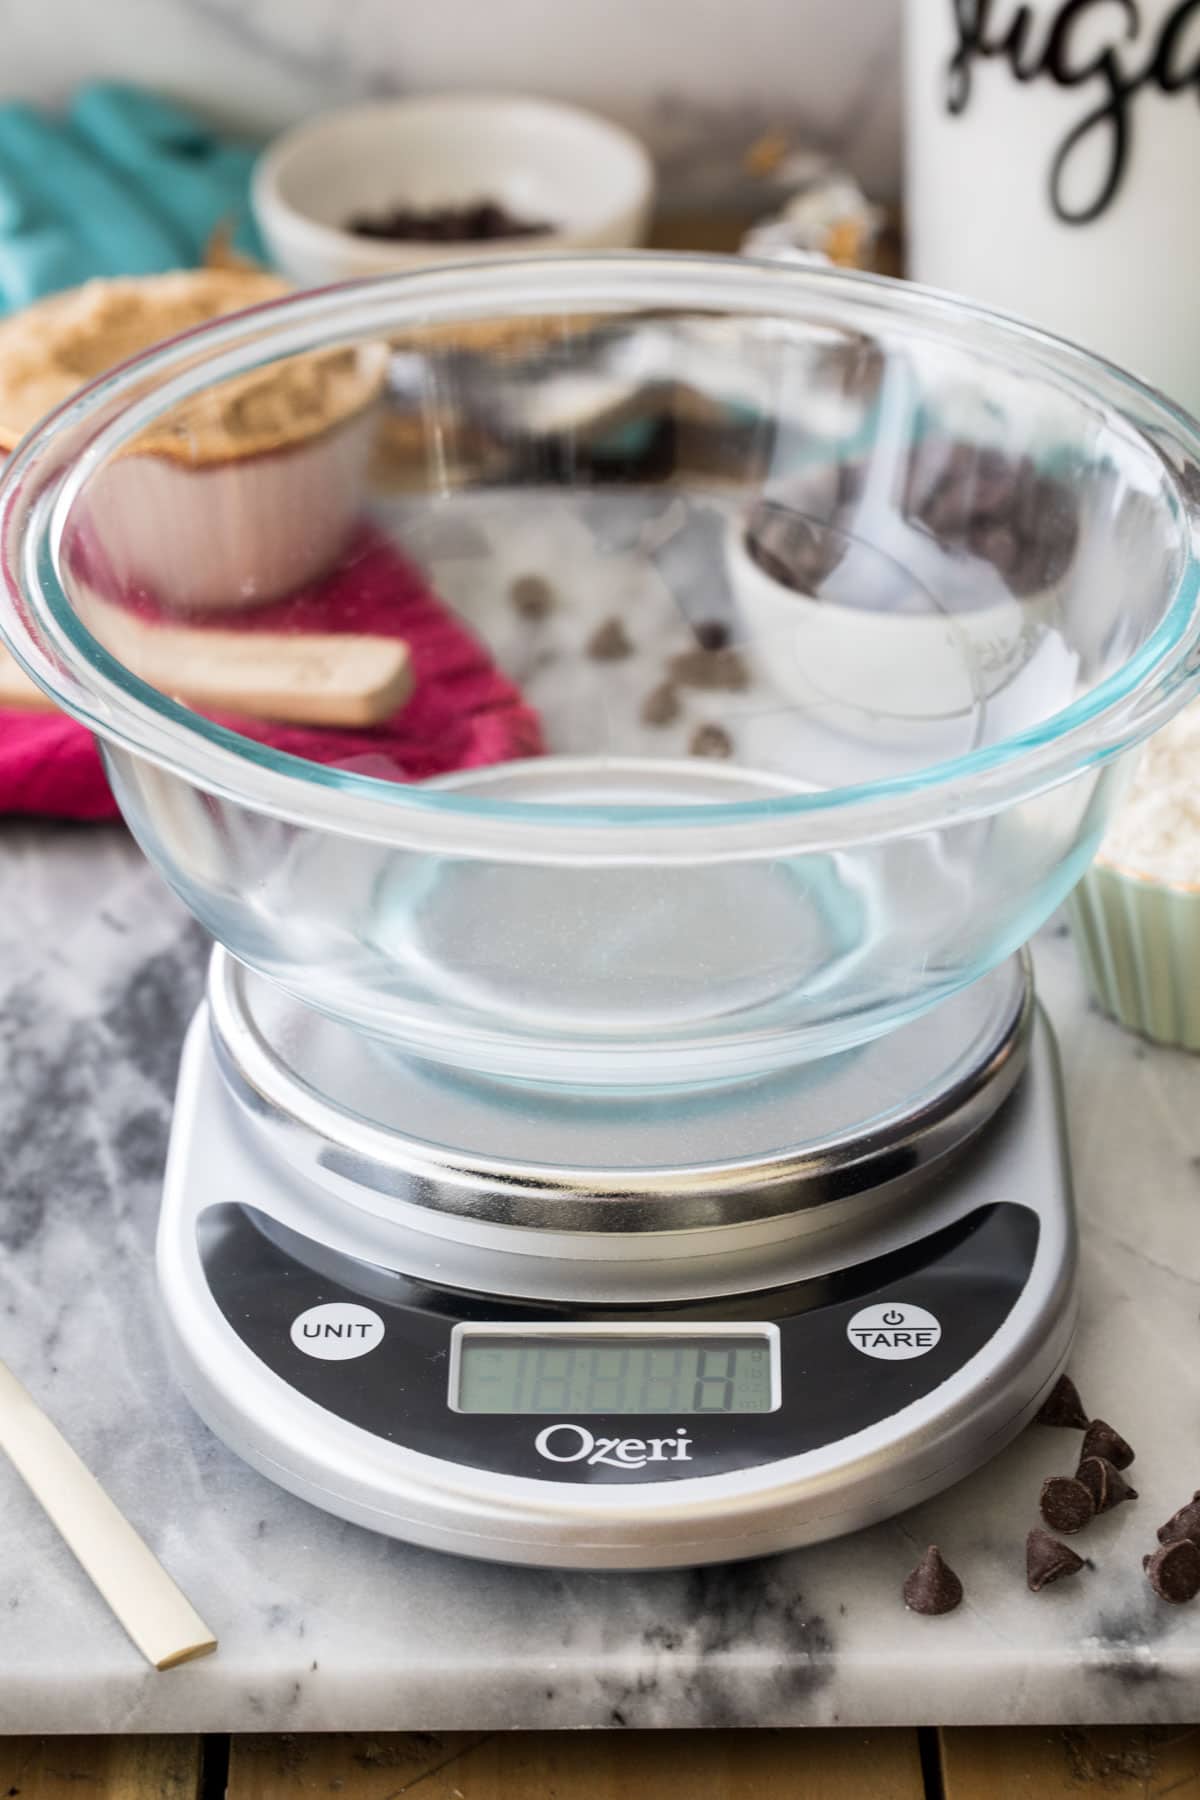
- Kitchen scale. Important for ensuring your ingredients are weighed properly. A kitchen scale is inexpensive and will improve all of your baking, here is a link to the scale I use at home and a guide on how to use a kitchen scale.
- Electric mixer. A must for the meringue. I typically use my hand-held mixer because I feel I can keep a better eye on the meringue, but a stand mixer would work just fine, too. Don’t try to hand-whip this one.
- Sifter or fine mesh sieve. Helpful to sift out any lumps in the almond flour or powdered sugar. I use an old-fashioned crank sifter.
- Piping bag with piping tip. I use large disposable piping bags fitted with an Ateco 804 tip (though a similar-sized tip would work as well!). I used to use the Wilton 12 tip but feel the larger Ateco tip makes the job a bit easier.
- Parchment paper. Use this for lining your baking sheets, be sure to trim it if needed so it fits neatly into the tray. Silpat may alternatively be used, but I personally prefer parchment.
- Baking sheets. I use standard cookie sheets.
Another note on the kitchen scale: Every French macaron recipe I’ve read has stressed the importance of using weights rather than cups and insisted your macarons won’t turn out otherwise.
While I absolutely agree that weights are the preferred way to prepare this recipe, that’s really the case with any baking recipe, and I haven’t found it to be more true with macarons than with, say, Oreo cake or Madeleines. I’ve included measurements in both weights and cups, but, as with every recipe I’ve shared, weights are preferred and if you are using cups and find yourself struggling, this is the first change you should make.

How to Make French Macarons
I’ve broken down the process into several steps, let’s go over each of them in detail (a lot of detail, I know, but I want to be thorough!). Gather all of your ingredients and materials in advance and read through the steps carefully, that way you can move smoothly and efficiently through the steps.
Preparation
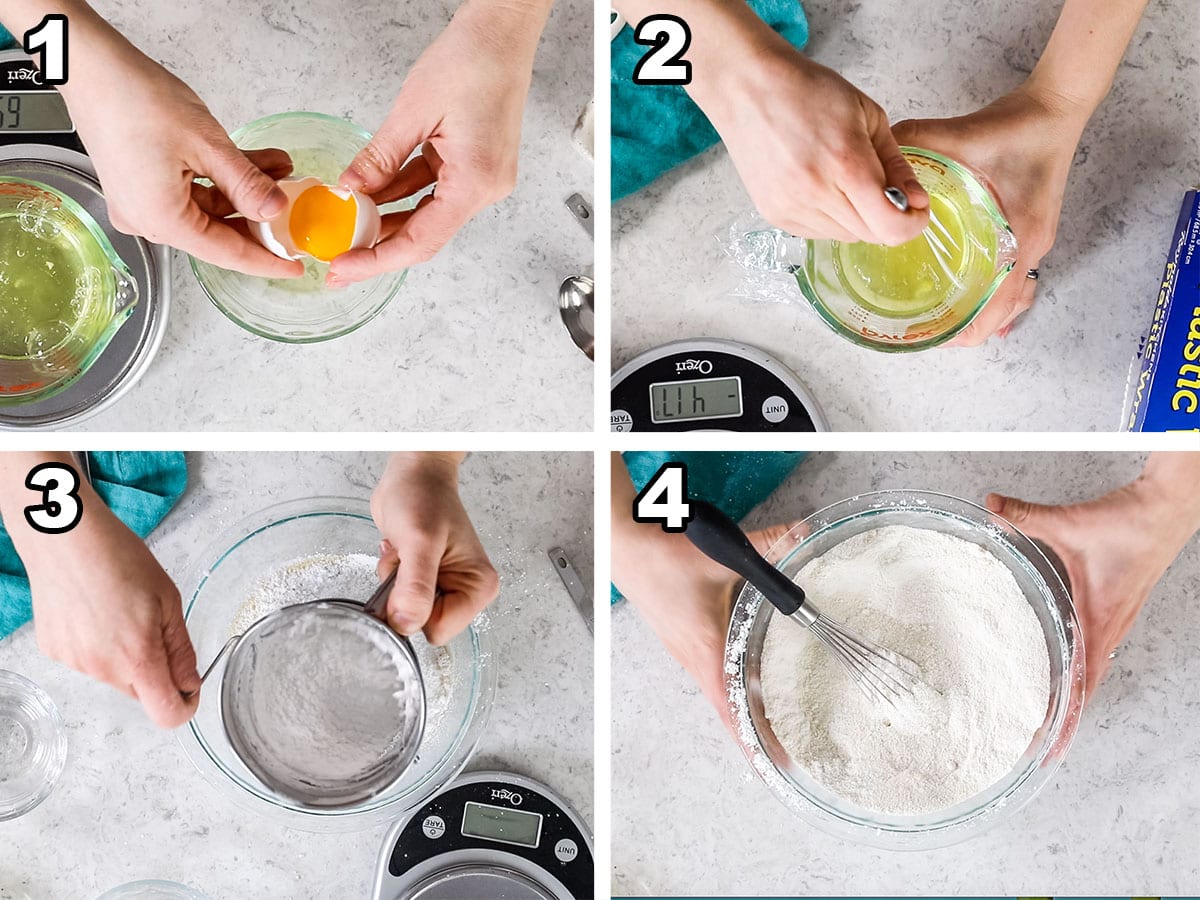
- Separate the egg whites. If you’re fancy, use an egg separater, but I just crack the egg in half and pass the yolk back and forth between the shell halves until the white has dropped into a bowl. Pour that white into your clean, dry measuring cup and repeat until you have enough! Always crack and separate your eggs over a different bowl than your measuring cup — it would be a shame for a drop of yolk to fall through and contaminate all of your whites!
- Age the egg whites. Cover your egg whites with plastic wrap and poke holes in the plastic wrap, then let the egg whites sit for at least 24 hours before using. This allows some of the water to evaporate, it dries the whites a bit and can lend itself to a sturdier meringue. This step isn’t strictly mandatory and I don’t always do it at home, but it’s a little bit of extra insurance, especially if you’re a beginner.
- Sift. Sift the powdered sugar and almond flour and discard any lumps that won’t fit through the sieve. This combines and aerates the ingredients, and importantly it helps keep you from having rough and bumpy shells. If you have a great deal of lumps that won’t fit through the sifter, you’ll have to discard and replace them with more almond flour or powdered sugar.
- Whisk. Whisk together the almond flour and powdered sugar until well-combined.
SAM’S TIP: It is essential that your equipment be clean, dry, and grease free, or your meringue may never reach the stiff peaks needed for this recipe. If you struggle with your meringue, take a splash of vinegar or lemon juice and wipe down the bowl and the beaters that you’ll be using before beginning. This will remove any hidden grease that could thwart your meringue.
Prepare the Meringue
This step will be familiar to those of you who have dabbled with my meringue cookies or angel food cake. Meringue can be fussy and even rainy weather can interfere with stiff peaks, but you’ve set yourself up for success in the preparation step and you have all of your ingredients and equipment ready. You’ve got this!
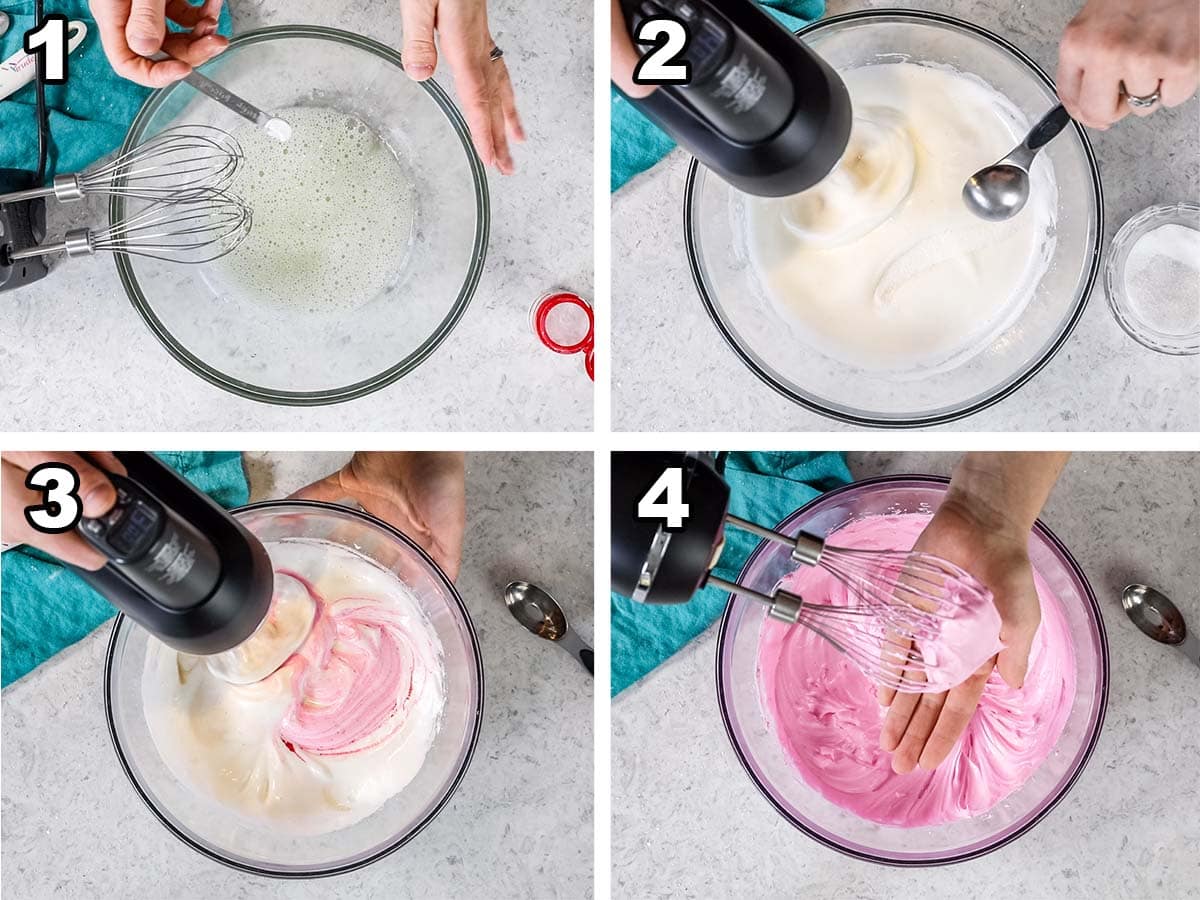
- Add a stabilizer. Beat the egg whites until foamy (about 30 seconds or so) then add the cream of tartar and salt and beat for about 30 seconds longer. Don’t panic if the cream of tartar isn’t completely dissolved and you see bits of it — it’ll break up completely once we start adding the sugar.
- Dissolve the sugar. Add the sugar gradually. I recommend keeping your mixer on medium-speed and adding granulated sugar just a tablespoon at a time, whisking it into the egg whites for 30 seconds before adding the next tablespoon. Once you’ve added all your sugar, your whites will likely be opaque and approaching soft peaks, however if yours is not don’t stress it, if you followed the recipe and the timing your meringue can still reach stiff peaks and be fine!
- Add flavor & color. Once you’ve added all your sugar and the whites are opaque and beginning to thicken, add vanilla (or your preferred flavor) extract and food coloring (if desired).
- Stiff peaks. Continue to beat until you’ve reached stiff peaks. At this stage, the meringue will be thick, glossy, and smooth and the beater will leave sharply defined trails in its wake. Lift the beater out of the bowl. The peak that forms (both in the bowl and at the end of the whisk) should be sturdy and straight and not fold over on itself.
SAM’S TIP: I used my hand mixer when filming the video for this macaron recipe, but you can absolutely use a stand mixer (and I have, many times!) to make your meringue. Once you reach stiff peaks, you will stop using the mixer and switch to mixing by hand with a spatula.
You’ll read different things about how far to take your peaks when making the meringue. Some recipes go to super-stiff peaks where the meringue balls in the whisk and some barely go beyond soft peaks. I go to stiff peaks, but once I reach this point, I stop. In the next step of the recipe, we’ll be deliberately deflating our meringue, so I don’t like to go much past the point of my peaks just being stiff when I lift the beaters out of the meringue. Going further just means more mixing, and I find it also makes my macarons more likely to be hollow!
Macaronage
So what is “macaronage”? This fancy French word is simply referring to the process of mixing our batter until it is homogenous and ready to be piped, and the way in which we do it. It’s critical that this step be done properly and to just the right point in order for any macaron recipe to turn out properly. Don’t worry, I’ll show you how below.
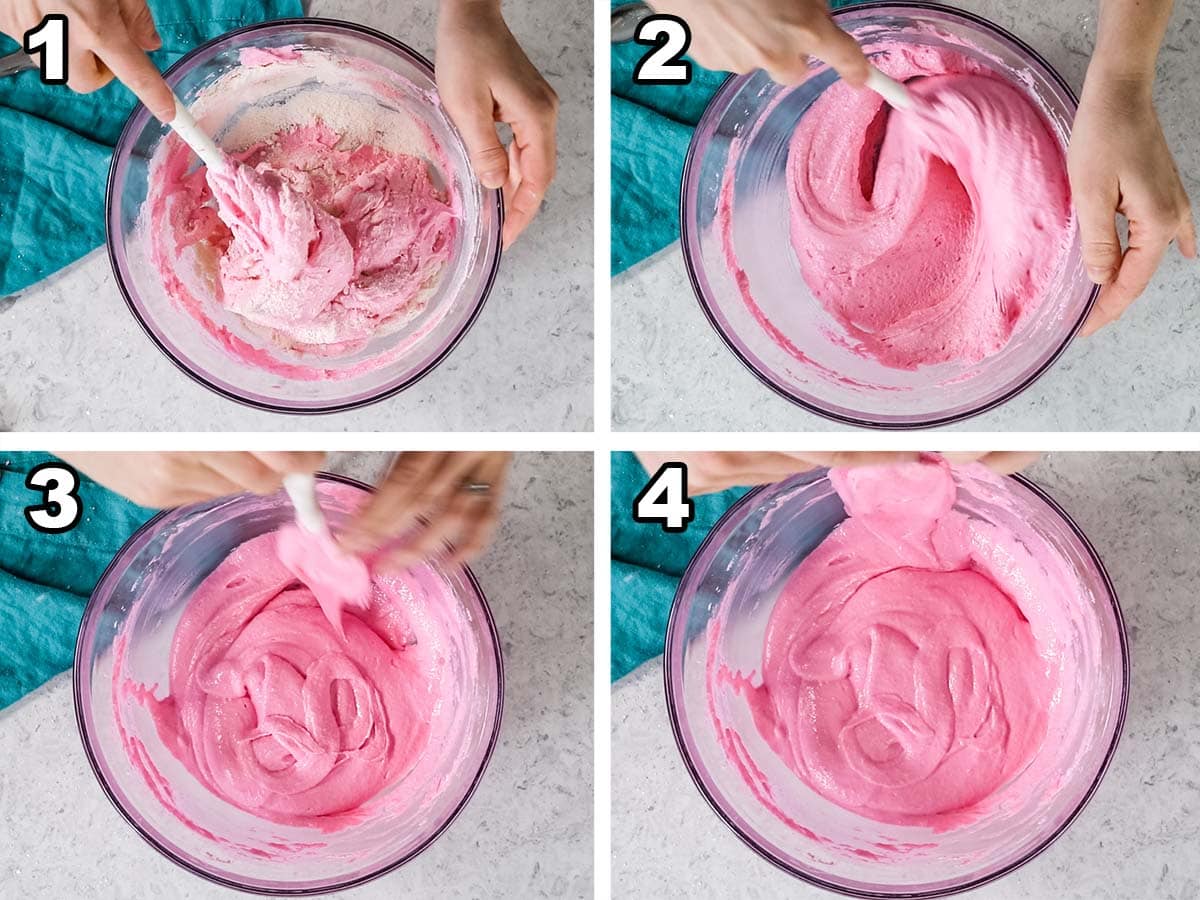
- Add the almond flour and powdered sugar to the meringue. I do this in three parts, folding with my spatula just until incorporated after each addition.
- Macaronage. Essentially, what we’re doing here is deflating our batter and working out some of the air we just created in our meringue stage. To do this, scrape the sides and bottom of the bowl with your spatula, but also smoosh the batter against the side of the bowl to help with deflating. It’s important to note that there is a balance; we don’t want to deflate too much air, or we’ll run into issues because of this. Fussy, I know!
- Test the batter. Lift your spatula out of the batter and see if you can make a figure 8 with the batter that ribbons from the spatula (if the batter doesn’t flow nicely from the spatula, it’s not ready, keep mixing). Count off 15 seconds, if the 8 hasn’t budged, keep mixing.
- Batter is ready. If the 8 does budge and begins to fade back into the batter but doesn’t completely lose its definition after 15 seconds (illustrated in photo 4 above), you’re good to proceed! Once your batter meets all the above criteria, it’s ready to go and you can pour it into your piping bag.
SAM’S TIP: You may notice I don’t give a suggested time for how long it takes to whip the meringue or do the macaronage. This is because this will vary greatly from kitchen to kitchen depending on your exact equipment and environment. It’s best to go by consistency of the batter rather than by a specific set amount of time.
The more you make French macarons, the more comfortable you’ll become with this process and you’ll ultimately just know when your batter feels right. Some cues that I like to look for are that my batter appears smoother and shinier. When I lift my spatula out of the batter, it ribbons off of it smoothly without breaking. Some people like to say that the batter “flows like lava”, but as someone who has spent very little time studying active volcanoes I’ve found that advice to be particularly unhelpful.
Instead, I check that I can smoothly make a figure “8” with the batter and that it holds it shape for 15 seconds or so, but by 15 seconds the edges have lost their sharpness and the ribbon is flowing back into the batter. If the edges remain rigid without moving, I go another 5-10 folds then check again. If the “8” ever disappears within 15 seconds, I’ve gone too far (the worst because there’s nothing to do here but start over — check your batter often!).
Piping & Baking French Macarons
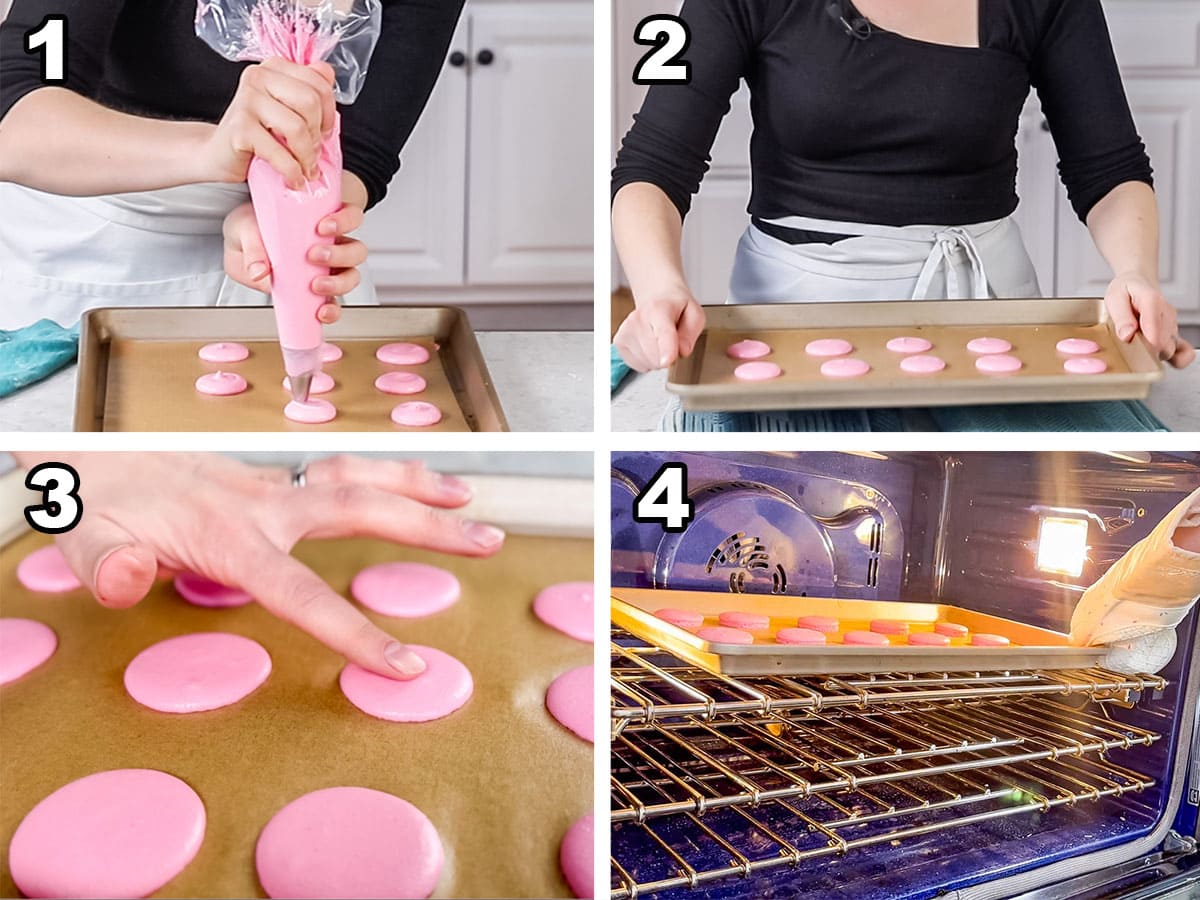
- Pipe the batter. Pour your batter into a large piping bag fitted with an open tip and pipe 1 ½″ circles, spacing them about 2″ apart. Hold the bag straight up and down, perpendicular to the baking sheet. Squeeze the bag firmly and to finish the macaron, flick your wrist in a “C” motion to minimize any peaks.
- Eliminate any air bubbles. Very firmly bang the pan against your counter 4 or 5 times (I bang mine on towels because it’s loud, and I always seem to be making macarons during Rhett’s nap time!). You should see tiny air bubbles rise to the surface and burst and any peaks should settle.
- Rest. The surface of the macarons must dry to a smooth skin before you can bake them (otherwise they may volcano, or you could run into other issues!). Let them rest about 30-60 minutes while your oven preheats and make sure you can lightly run your finger over the surface of a macaron (it should feel dry!) before baking.
- Bake. All ovens vary, but I find my macarons need to bake for about 10-11 minutes. Bake in the center rack, and since most ovens do not bake evenly I recommend turning the tray halfway through baking. Let the macarons cool completely on the baking sheet before proceeding.
Filling Macaron Shells
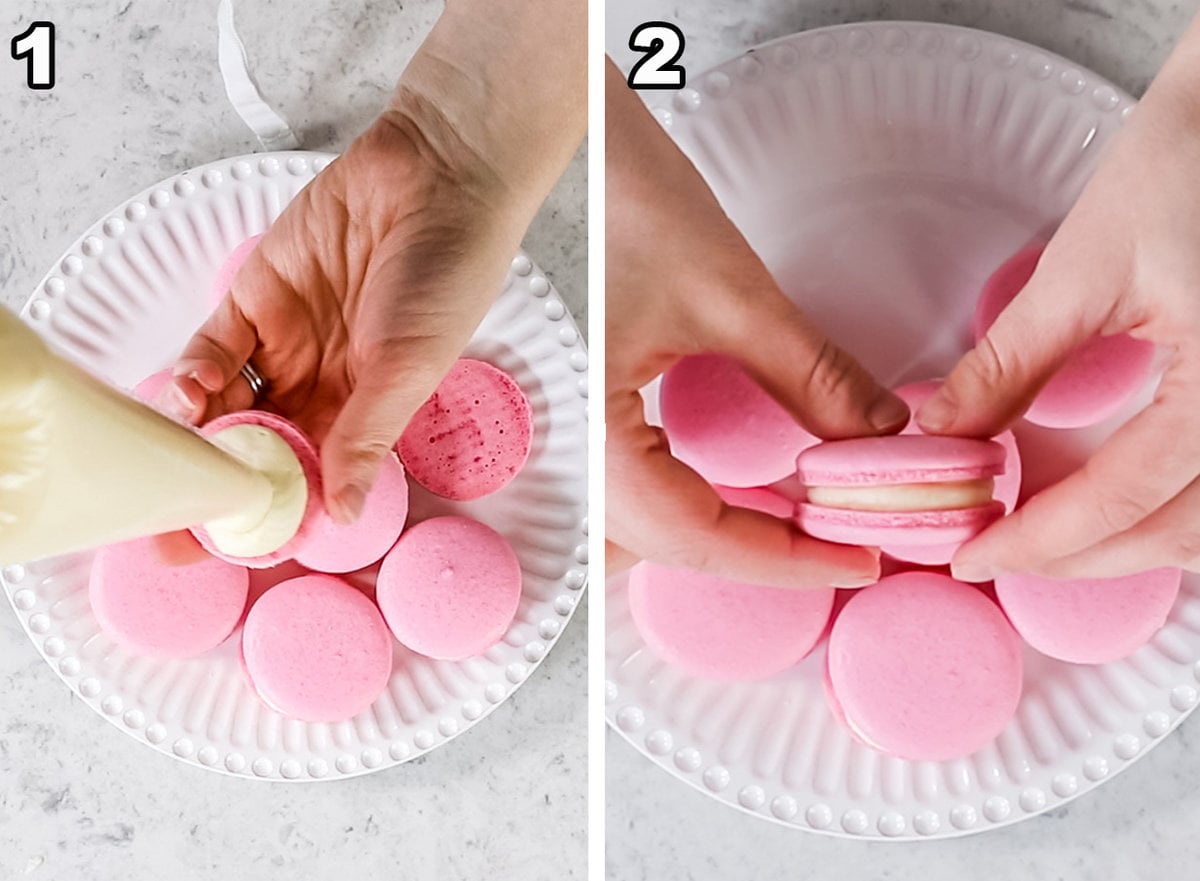
- Pair & fill. Pair your macaron shells, making sure you match up shells that are the same size. Pipe your filling of choice onto the bottom of one shell.
- Sandwich the filling with another macaron of the same size. Lightly press the shells together to make your macarons.
You’ve done it! You’ve made beautiful French macarons! Congratulations! Or, if yours turned out not-so beautiful, just eat the evidence and try again. No one needs to know.
Frequently Asked Questions
Not to be confused with the troubleshooting section further down in the post, please see that for specific issues you may be running into!
Aging egg whites is the process of allowing your egg whites to sit partially uncovered for 24 hours or longer to allow some of the liquid to evaporate out, therefore drying the egg whites. This is meant to help you achieve a sturdier meringue. Most of the time I do not age mine, but I do recommend it in my macaron recipe just to be safe. If you’re a beginner, if you’ve struggled with your meringue in the past, or if you’re in a more humid environment, I would recommend aging.
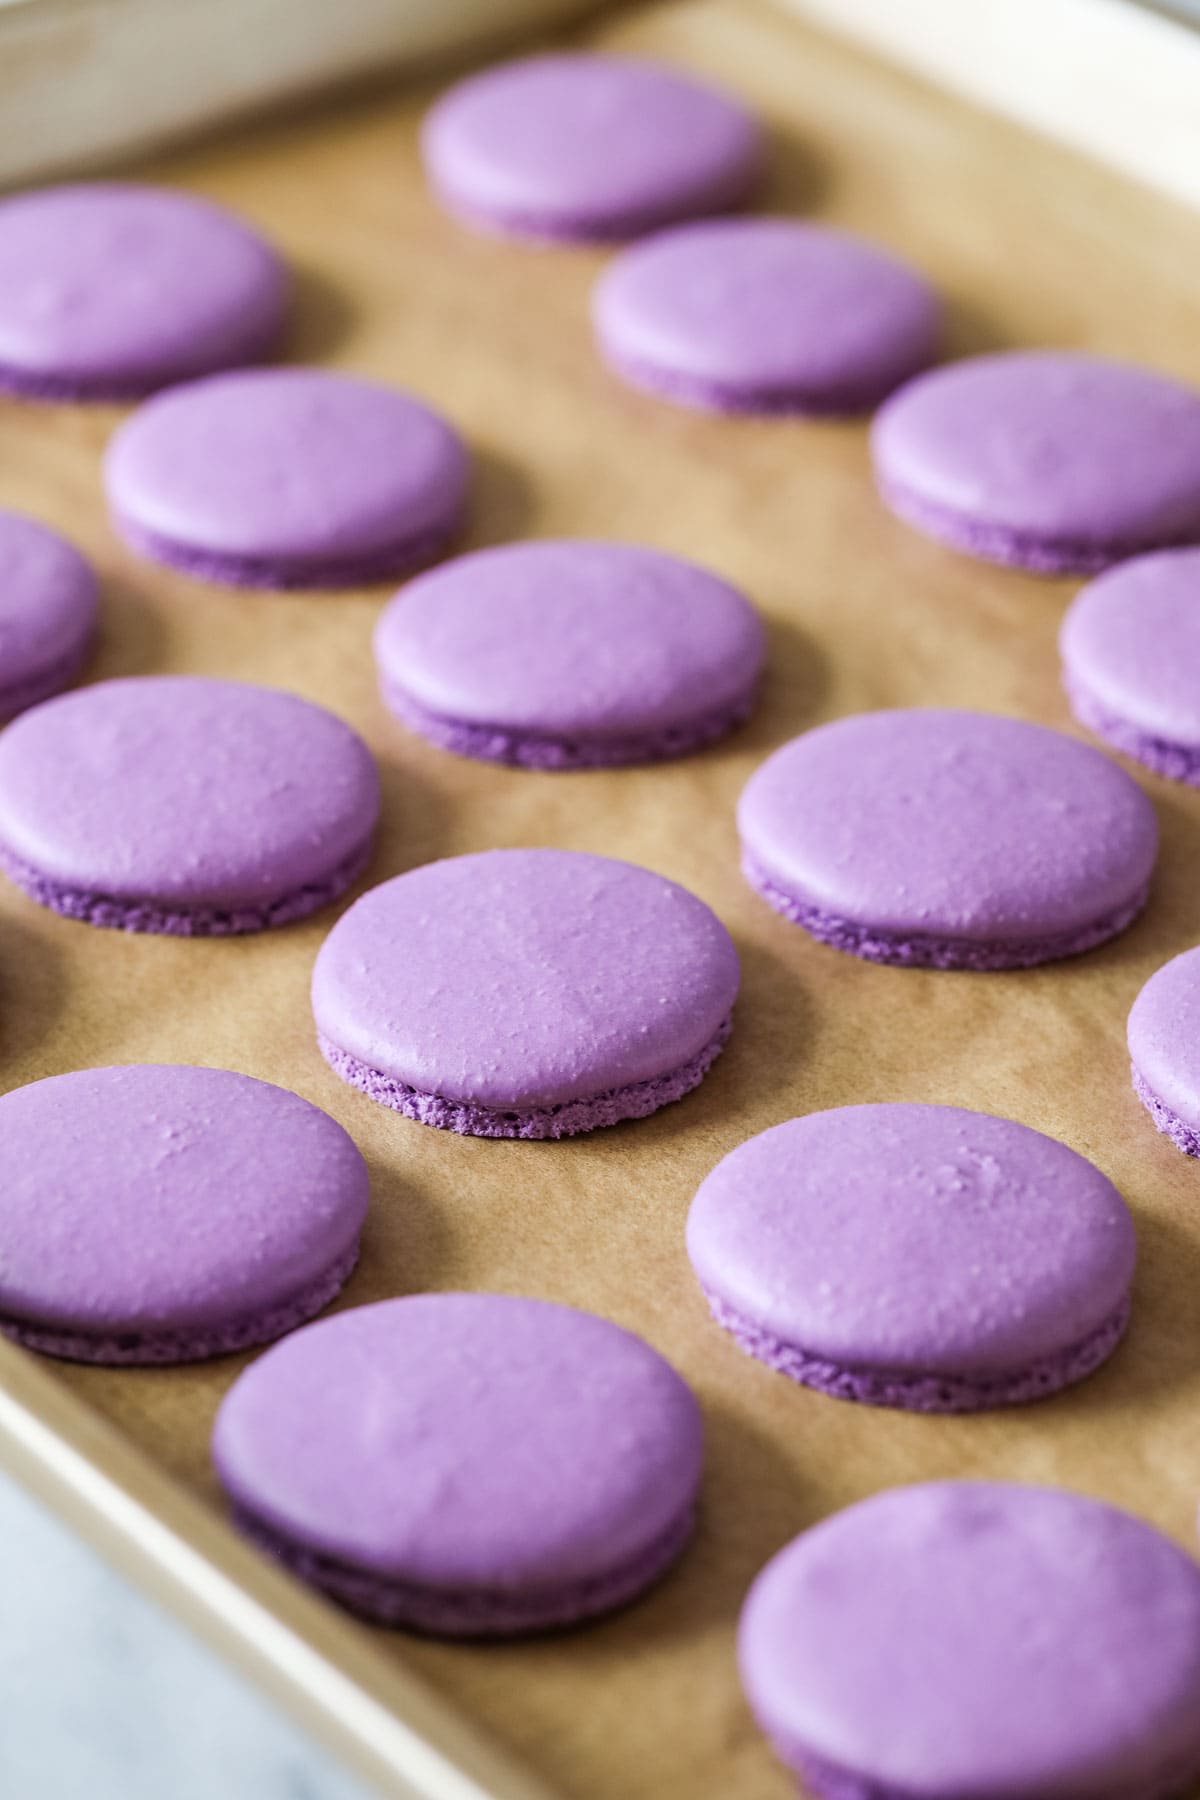
The ruffles beneath the smooth surface of the macaron shell is referred to as “feet”. They should appear as your macarons bake in the oven and should be neither too tall and bubbly or too small. They should not flare out or shrink under the macaron. Good feet are a sign of well-made macarons.
My personal favorite (and the filling used in my photos here) is my white chocolate buttercream; it’s surprisingly not too sweet and pairs nicely with my French macaron recipe. Other good choices include my favorite chocolate frosting, chocolate ganache (let it get firm before using), Swiss meringue buttercream, or save your yolks and make lemon frosting. I also have a raspberry frosting coming soon that will be a wonderful filling!
I personally find classic American buttercream frosting to be too sweet for this recipe.
The top should be crisp, delicate, but not fragile (it shouldn’t collapse beneath your fingertips). The feet should be prominent and neither flared or tucked beneath the top like a mushroom stem. The inside should be mostly full, but not thick or fluffy like a biscuit, the shiny tops should delicately crackle beneath your teeth and give way to a soft and chewy center (which in turn gives way to a typically-creamy filling). My macaron recipe yields macarons with the proper texture, and I’d be lying if I said I wasn’t darn proud of that 😜
As for taste, they are sweet, and they’re supposed to be!

Troubleshooting
This section could be a post in and of itself and I may write a separate troubleshooting post (let me know if that’s something you’d like to see!). The truth is there are so many ways a macaron recipe can go wrong and so many factors to consider. I’ll briefly address a few main issues and some of the most common fixes.
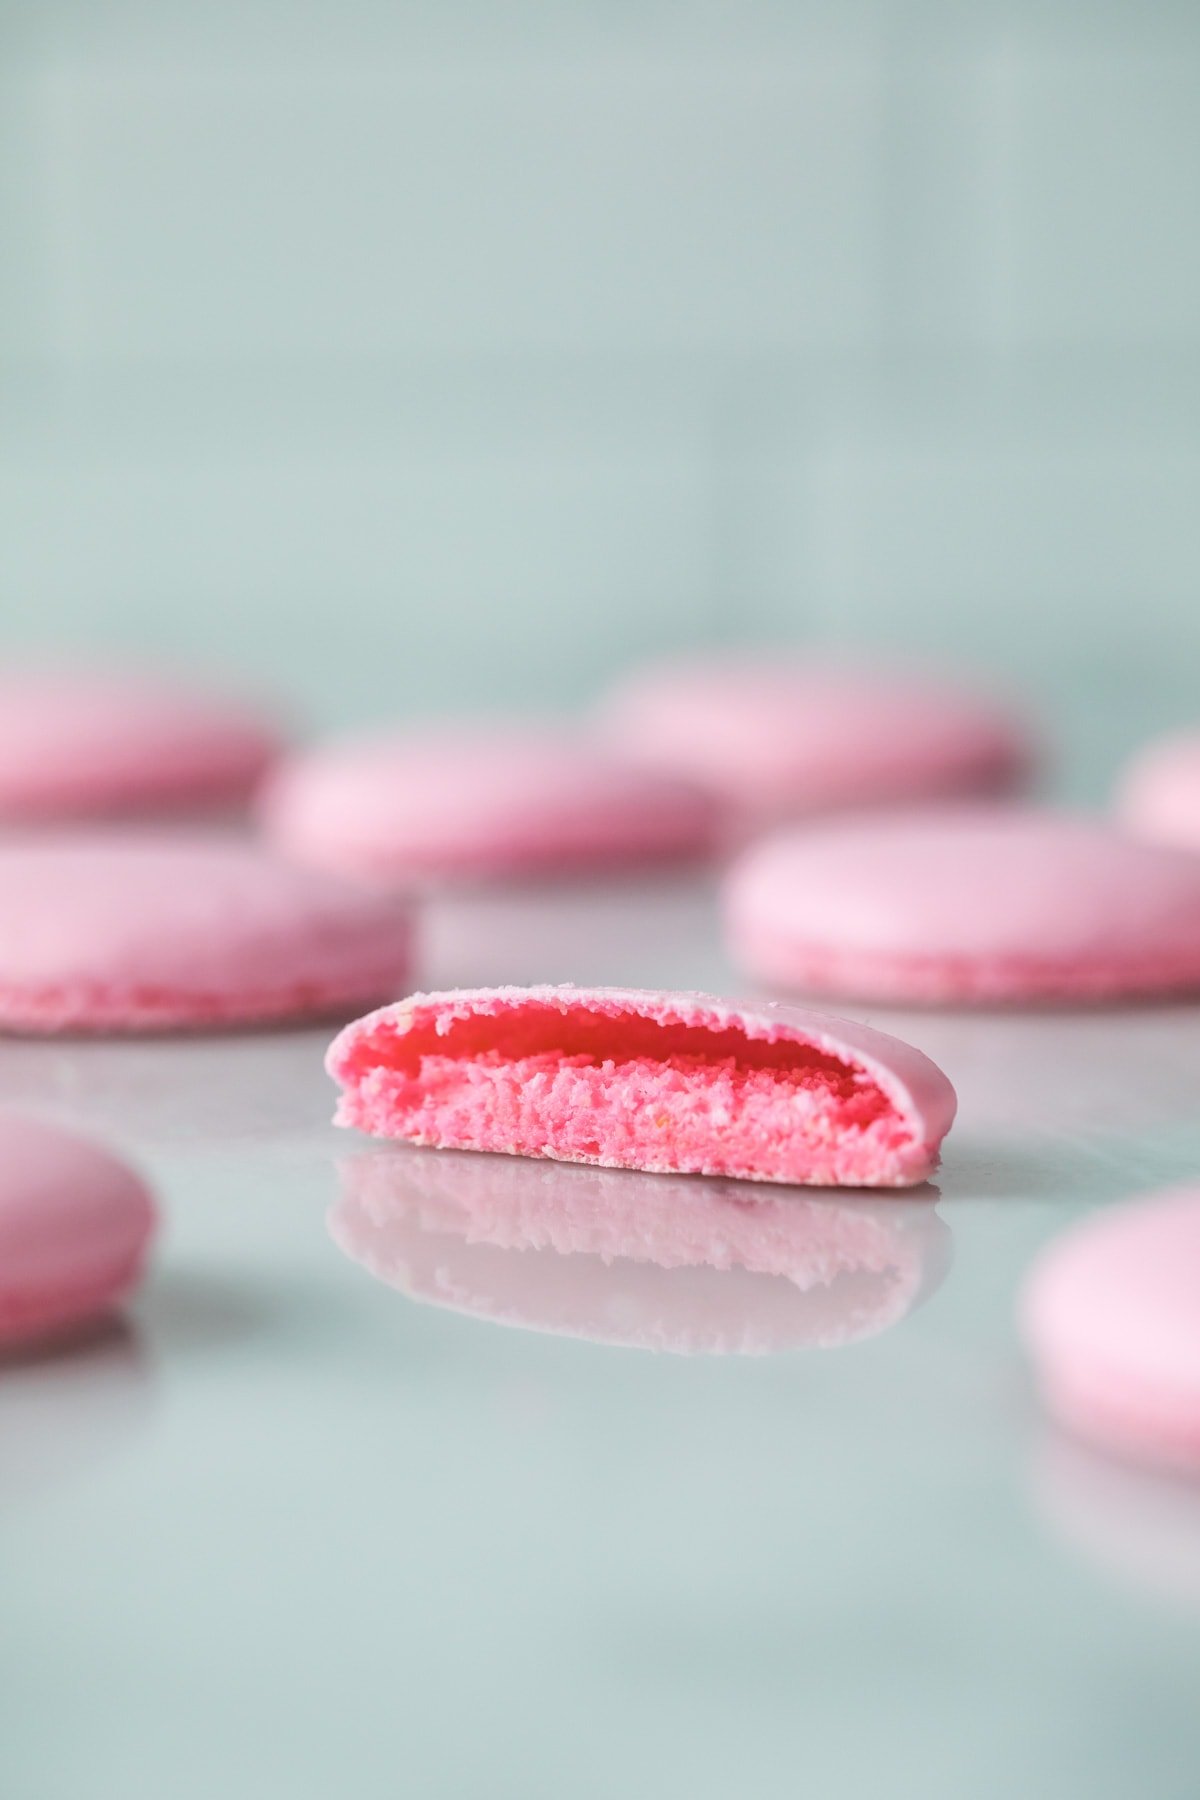
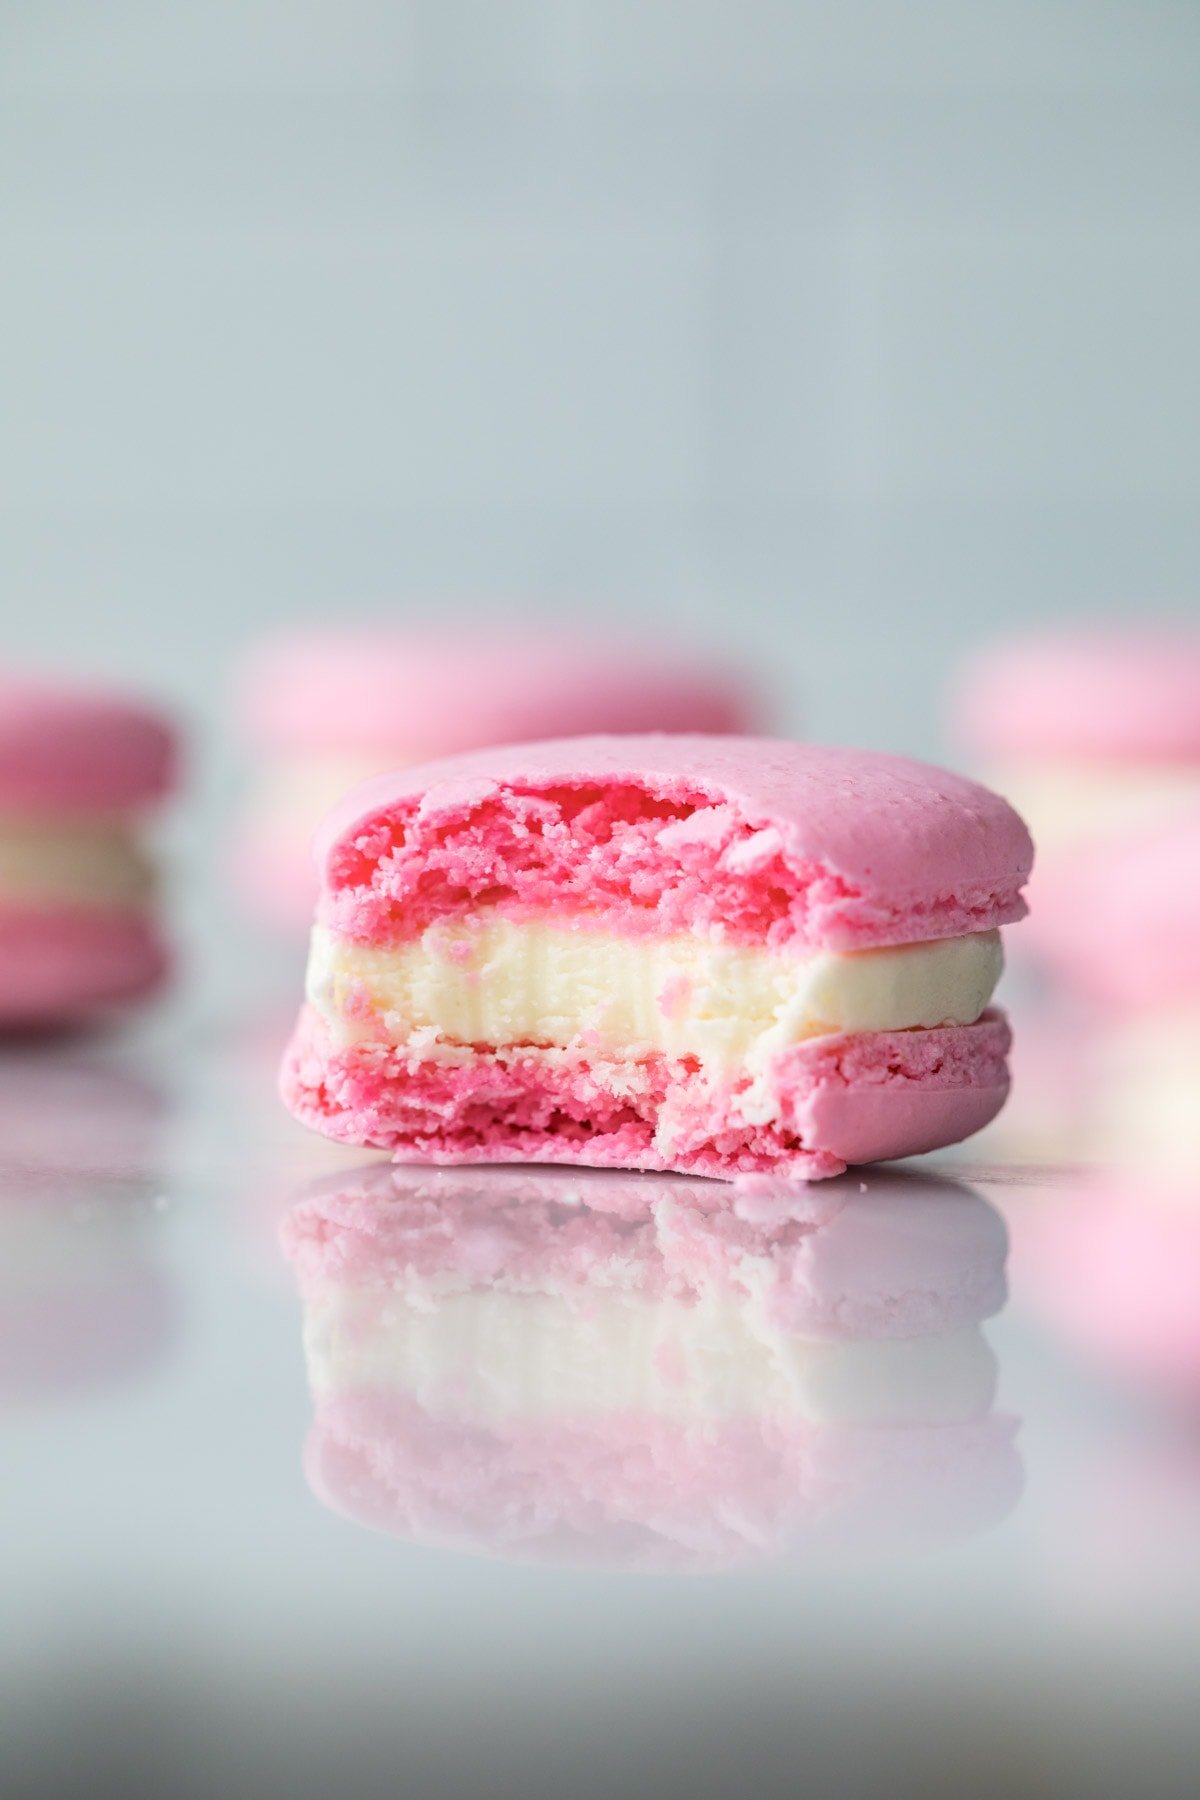
- Why are my macarons hollow? This is a common issue and there are unfortunately many things that can cause this — from over-mixing your batter, to under-mixing it, to your oven running too hot, or too cold, or even the weather. Unfortunately, figuring it out usually requires experimenting and I recommend you try lowering your oven temperature first to see if that does the trick, then raising it if it doesn’t. Watch the video and make sure you are doing the macaronage step properly. Whatever you do, don’t toss your hollow shells! Just fill them and refrigerate in an airtight container for 24 hours (this is often known as “maturing”). After maturing, you’ll likely find your macarons full and perfectly delicious, no need to waste them!
- Why are my macarons cracked/look like volcanos? Possibly the macarons did not rest long enough before going in the oven (did they have a dry surface?) or not banging the pans firmly enough before resting.
- Why do my macarons look wet/wrinkly on top? Possibly too much food coloring, under-baking, or over-mixing the batter. If your tops look speckled, this could also be due to an oily batch of almond flour.
- Why don’t my macarons have feet? Most often this is due to not resting the macarons long enough, however resting for too long can also cause the feet to be quite small. Check for your macarons to have a nice skin on top then pop them in the oven. If your macarons have feet when you remove them from the oven but the feet shrink as they cool, this could be caused by under-baking or a too-drastic change in temperature (is your kitchen very cold or drafty?).
- Why did my macaron feet spread so much? Over-mixing the batter or baking on an oven temperature that’s too high are your most likely culprits.
- Why did my macarons stick to the parchment paper? Typically due to under-mixing the batter or under-baking the macarons. Aging your egg whites can also help with this!
- Why did my macarons have points? Typically a result of batter that is under-mixed. Banging the pans and piping as indicated should settle any tips, if it doesn’t the batter needed to be deflated more.
This is not an exhaustive list and I’ve tried to condense the information as much as possible, as I could easily go on for thousands of words about this subject (and let’s face it, I’ve already written a novel, and how many grumpy comments have I gotten in the past from people saying they don’t want a novel from me 😅)!
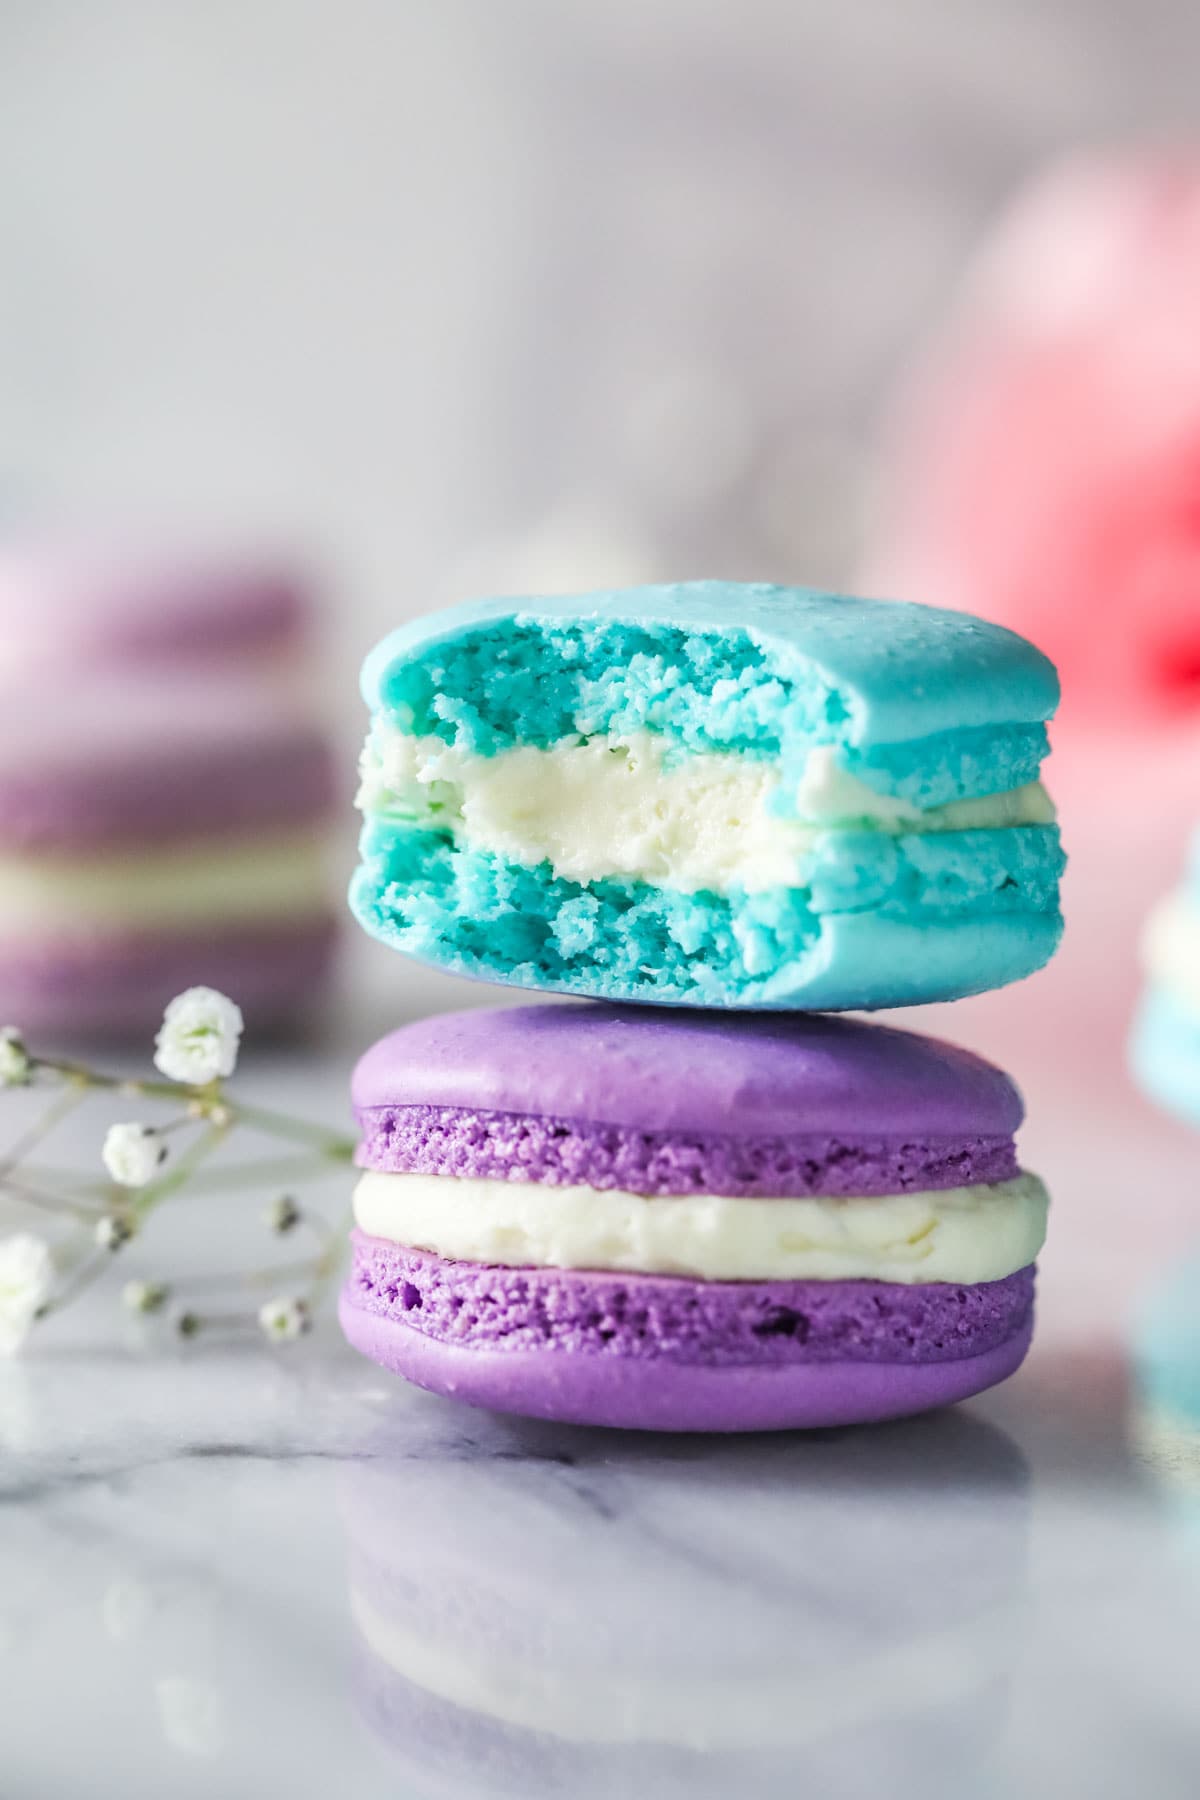
The truth is, there’s no such thing as a “foolproof” recipe, and what works in one kitchen simply may not in another. Chances are your journey will include some wonky looking macarons at one point or another and will require some fine-tuning.
I’m not saying this to intimidate you, but to encourage you if perhaps your first batch isn’t perfect. Macaron making is a worthy endeavor and a delicious skill! Be patient with yourself, be willing to experiment (raise or lower your oven temp, etc.), and take notes as you go so you know what to change next time!
You’ve got this, and I can’t wait for you to try this macaron recipe for yourself! Enjoy!
Let’s bake together! I’ll be walking you through all the steps in my written recipe and video below! If you try this recipe, be sure to tag me on Instagram, and you can also find me on YouTube and Facebook

French Macaron Recipe
Ingredients
- 150 grams super-fine almond flour (1 ⅓ cup) see note
- 150 grams powdered sugar 1 ¼ cups
- 110 grams egg whites room temperature (about 3 egg whites/110ml/just under ½ cup) see note
- ⅛ teaspoon table salt
- pinch cream of tartar optional (I typically use ⅛ teaspoon)
- 95 grams granulated sugar scant ½ cup
- 1 teaspoon vanilla extract
- Food coloring optional
- Your favorite frosting see note 3
Recommended Equipment
Instructions
- Before you begin: If you are a beginner, read through the post and watch the video first. Ensure that all of your equipment (bowls, spatulas, beaters, etc.) are completely clean, dry, and grease free. Rubber, silicone, and plastic are not ideal for whipping meringue, so I recommend avoiding these materials and using glass or metal bowls when whipping the egg whites.
- Line 3 standard-sized cookie sheets with parchment paper and set aside.
- Sift almond flour and powdered sugar into a medium-sized mixing bowl150 grams super-fine almond flour, 150 grams powdered sugar
- Pour egg whites into a separate large, clean, dry mixing bowl. Use an electric mixer to beat on medium speed until foamy (about 30 seconds).110 grams egg whites
- Add salt and cream of tartar and stir on medium-speed for 30 seconds (it’s OK if the cream of tartar isn't totally broken up)pinch cream of tartar, ⅛ teaspoon table salt
- With mixer on medium-speed, add about 1 Tablespoon of granulated sugar and beat for about 30 seconds, then add the next Tablespoon. Repeat until all sugar has been added.95 grams granulated sugar
- Once all sugar has been added, add vanilla extract and food coloring (if using)1 teaspoon vanilla extract, Food coloring
- Continue to beat on medium to medium-high speed until mixture reaches thick, fluffy, stiff peaks. Meringue should be thick enough that the electric beaters leave tracks in their wake. When you lift the beaters straight out of the meringue, the peaks that form should not be soft or fold over on themselves, they should hold their shape firmly and stay straight without bending.
- Add about a third of the almond flour/powdered sugar mixture to the meringue and use a spatula to fold until combined. Repeat with the next third of the mixture, and then the last.
- Continue to fold the batter, moving your spatula in sweeping motions, scraping down the sides and bottom of the bowl and cutting through the middle of the batter and turning your bowl as you go. Use your spatula smoosh the mixture against the side of the bowl periodically to help deflate it. Continue to fold until the batter flows smoothly and falls from the spatula in a smooth ribbon. You should be able to make a figure-8 with the batter and it should hold its shape for about 10-15 seconds before the edges relax back into the batter.
- Pour the batter into a large pastry bag fitted with a round tip (I like the Ateco 804).
- Pipe batter onto prepared baking sheets, holding the piping bag straight up and down and squeezing until you have 1 ½" circles of batter. Flick your wrist in a "C" motion at the end of piping each shell to complete the macaron and minimize peaks. Space macarons at least 1 ½” apart on baking sheet.
- Rap each pan very firmly on your countertop 4-5 times to release any air bubbles and preheat oven to 325F (160C).
- Let macarons rest until a skin forms on the surface (if you run the pad of your finger over the top it should feel dry and not sticky or tacky). This is typically about 30-60 minutes but may take more or less time depending on individual kitchen conditions
- Bake one tray at a time in center rack of oven for 10 minutes, turning the pan around halfway through the baking time. When finished baking, the feet should look dry and if you lightly press down on the top of a macaron it shouldn’t give.
- Allow macaron shells to cool completely before pairing off the shells and sandwiching them around your favorite frosting. For best results, allow macarons to mature in the refrigerator in an airtight container for 24 hours (and then allowing to sit at room temperature for at least 15-30 minutes before serving) before enjoying.
Notes
Almond flour
I prefer to use superfine, blanched almond flour. I personally like Bob’s Red Mill brand. Unblanched almond flour will work but you will see bits of the almond in the end result.Egg whites
It’s recommend you age your egg whites before beginning. This means measure them into a measuring cup, cover the cup with a piece of plastic wrap, and poke holes in the surface. Allow the egg whites to sit in the refrigerator for at least 24 hours before bringing to room temperature and using them for this recipe. While aging isn’t strictly necessary, it can be helpful if you are struggling with your meringue or live in a very humid climate.Food coloring
I recommend gel food coloring, I use Americolor gel and typically add 4 drops per batch of macarons.Filling
½ batch of any of my frosting recipes will work nicely in these macarons. My go-to choices are white chocolate buttercream (it’s not too sweet!) chocolate ganache (let it cool until firm before piping onto the cookies) or my favorite chocolate frosting.Storing
Macaron shells will keep in an airtight container at room temperature for 5-7 days or freeze in an airtight container for up to several months. When thawing, allow shells to come completely to room temperature before opening the container or you’ll have moisture on the shells.Filled macarons will keep at room temperature in an airtight container for several days (assuming a shelf-stable filling) or in the refrigerator in an airtight container for up to 2 weeks. To freeze, first mature macarons (let them sit in the refrigerator in an airtight container for 24 hours) then transfer container to freezer and freeze for up to several months. Thaw in container in refrigerator or thaw at room temperature (do not open container until thawed or you’ll have condensation).
Nutrition
Nutritional information is based on third-party calculations and should be considered an estimate only. Actual nutritional content will vary based upon brands used, measuring methods, cooking method, portion sizes, and more.







Pam J
Hi Sam! My macarons turned out beautiful!!
I ended up aging the eggs for 48 hours, you know, life lol
but they still turned out great. I’ve always been a little intimidated about making these, following your video and instructions made me feel confident.
I’d rather read a novel written by you than try to wing it through parts that I’m unsure of. Grumpy people need to keep their comments to themselves instead of complaining that the recipe didn’t turn out because they didn’t know specifics.
Thank you for another great tutorial and recipe! I love these little cookies 🍪 😍
Sam Merritt
I’m so glad they turned out so well, Pam! Thank you so much for your kind words. 🙂 I truly appreciate your support. 🙂 🙂
chester
I never got stiff peaks 🙁
Sam Merritt
I’m so sorry to hear this happened! Were your tools completely dry and grease free? Did you use egg whites from a carton? I have lots of tips and tricks to help prevent issues.
Elaine Cole
Hello Sam I am trying your recipe once again the first batch was a success thank you for sharing the Macaron recipe.
I would like to ask please what would be your advice as how to do two separate colours from one Macaron mixture. Should I divide mixture then add colour of choice any guidance would be of great help.
Maybe one day you could do one of your videos which is so helpful to watch whilst making Macarons in the kitchen.
Look forward to hearing from you many thanks Elaine
Sam Merritt
Hi Elaine! I’m so sorry I am just seeing this! I’m glad you enjoyed the macarons. Unfortunately I don’t know of a great way to make 1 batch into 2 colors. I would probably recommend just making 2 separate batches.
Cyy
My macarons rose but didn’t have the ruffled edge, like the shell moved up but the feet didn’t form, why?
Sam Merritt
Hmm that’s interesting. Most often this is due to not resting the macarons long enough, however resting for too long can also cause the feet to be quite small. Check for your macarons to have a nice skin on top then pop them in the oven. If your macarons have feet when you remove them from the oven but the feet shrink as they cool, this could be caused by under-baking or a too-drastic change in temperature (is your kitchen very cold or drafty?).
Barbara
Making for my neice for her 33 bday!
Sam Merritt
Happy birthday to your niece! 🙂
Anonymous
The macaron shells were too sweet, is there any way to make them less sweet?
Sam Merritt
Macarons can be quite finicky and unfortunately I haven’t tried reducing the sugar so I can’t say for sure how it would turn out.
Andrea
If I bake one sheet at a time, is it ok to leave other piped sheet out exposed to air? Will it get too dry?
Sam Merritt
Hi Andrea! While there is potential for them to dry out, I think the second pan will be perfectly fine to sit out while the first one bakes. 🙂
Estelle & Eric Crowley
Typically it is best to let them rest for 30-35 minutes or until the top is smooth not tacky. I recommend letting them rest while the first tray is baking and the times should coenside together to allow for consistent results
Charlotte
If I were to double the recipe, would you recommend doing it in one big batch, or two smaller ones?
Emily @ Sugar Spun Run
Hi Charlotte! We recommend two batches as macarons can be very finicky.
Calvin Kerscher
This is the only recipe that I have managed to make work multiple times! Thank you!
Emily @ Sugar Spun Run
We are so happy to hear that, Calvin! Thanks for the review 🩷
Lindy
Sam had great success with your French Macaron recipe. Thank you! Am wondering how it might be tweaked to make lemon macaron shells and still be such a success?!
Sam Merritt
Hi Lindy! I’m glad you enjoyed them! I have been working on one, but don’t have anything worth sharing at this point. My best suggestion is to dye the shells yellow and use a lemon frosting or lemon curd to fill them. 🙂
Peggy Thomas
I’m a custom cake decorator for over 30 years and I never was asked to make a macaron tower for a wedding. I searched for hours and watched so many videos, then I saw yours and was pleasantly surprised how they turned out. The only thing I hate is making colors, lol. So the wedding is in 2 weeks and I’ll be making these again. Thanks so much, love your channel and recipes.
Sam Merritt
I’m so glad they turned out so well, Peggy! I truly appreciate your support and trust in my recipes. 🙂
Suzanne Metzgar
The video and recipe are so detailed that I was able to make these reasonably well on my first try. I’m not a baker at all but I’m trying to get better now that I’m retired. Your website is always my first stop for sweets and breads. I love every recipe I’ve tried from your site.
Sam Merritt
Thank you so much for your support, Suzanne! I’m so glad you’ve enjoyed everything so much. 🙂
Allie
what would happen if you did use store bought eggs?
Sam Merritt
Hi Allie! You can absolutely use store bought eggs 🙂
Allie
Thank you so much
Emily
If I want to make 2 different colours, is that possible with this recipe? If so how would you recommend doing it?
Sam Merritt
Hi Emily! Once you’ve added all your sugar and the whites are opaque and beginning to thicken I would separate it, color, and continue mixing. 🙂
Emily
Okay thank you!!
Oh also generally are the macaroons meant to spread a bit once you have piped them? Because mine did and I was wondering if that was because I mixed it too much at the end?
Sam Merritt
Hi Emily! The batter will spread out a little bit after piping, but shouldn’t flatten out completely. You can see what it looks like in my video. 🙂
Sandra
Love this and mine turned out amazing! Thank you! Have to know what brand is your hand mixer with the timer? Ive been looking and cant find one with a timer and two whisks!! Thank you!!
Sam
Hi Sandra! I have a breville hand mixer that I love! 🙂