Today we’re skipping the frozen store-bought sheets and making our own homemade Puff Pastry recipe! This recipe is an easy “rough” puff pastry that yields flakey, buttery layers but doesn’t take hours upon hours to make.
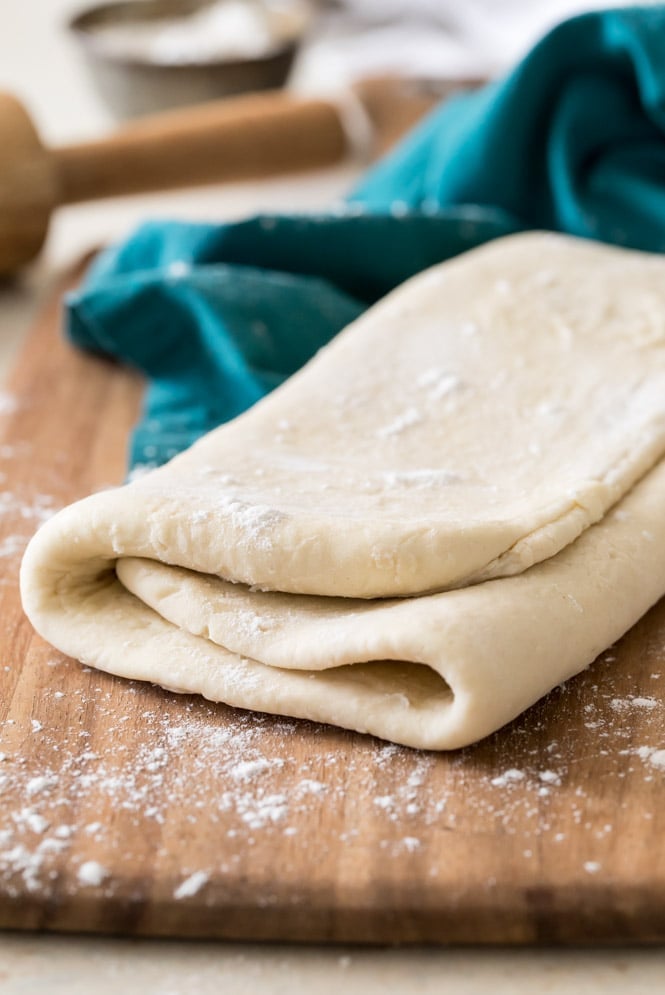
A Guide to Making Easy “Rough” Puff Pastry
As much as I love baking from scratch, homemade puff pastry was one of those recipes that I always thought was better left to the “professionals”.
It’s time consuming and a bit complicated to make, so I always either substituted my favorite easy pie crust recipe or grabbed the frozen sheets from the store. Well, it took some time (several months, actually) but I finally have an easy, “cheater’s” rough puff pastry recipe that can be made quickly and works perfectly in any recipe that calls for one or two sheets of puff pastry.
Traditional puff pastry recipes are time consuming and a fairly complicated (not that I’m never up for a challenge, it’s just sometimes I want a homemade apple turnover or flakey top crust for my turkey pot pie and I don’t have 4 hours to spare).
With classic recipes, long stretches of chilling time are required in between folds, making the recipe take several hours from start to finish. This puff pastry recipe is much easier and while there is mandatory chilling time, it’s much less than with classic puff pastry and the technique is much simpler (as you’ll see below). You’ll spend about 20 minutes actively making this dough, and a total of 60 minutes waiting for it to chill.
How to Make Puff Pastry at Home
The great thing about Puff Pastry is you only need a few ingredients: Flour, sugar, salt, butter, and ice water. I’d bet you have all of these in your pantry/fridge right now, don’t you? One quick word about the butter: regular butter will work just fine for this recipe, but if you can get your hands on it I highly recommend using European butter. Yes, it’s pricier, but for a recipe like this one with so few ingredients I do think the quality makes a difference.
Ok, you have your ingredients, maybe you just splurged on some fancy butter, so let’s get to our easy Puff Pastry recipe.
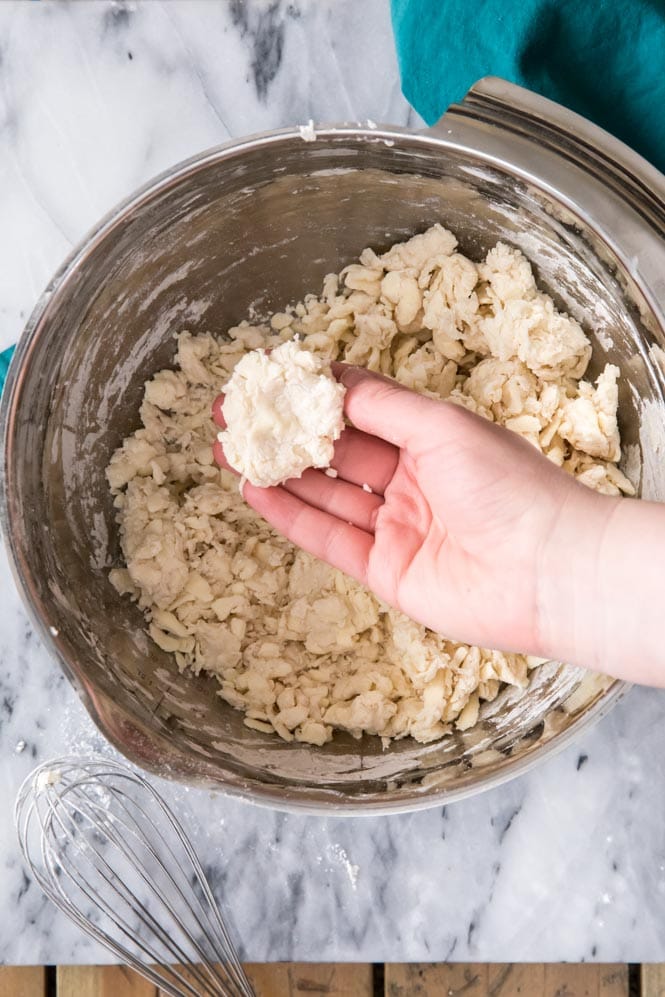
Step 1: Making a shaggy, buttery dough
Start by whisking together flour, sugar, and salt, and then cut in your butter. Make sure your butter is very cold! I like to stick mine in the freezer about 30 minutes before I know I’m going to be making puff pastry. It’s so important that our butter stay as cold as possible while we are making this puff pastry; if it starts to get melty at any point in the process you’ll want to move the dough to the refrigerator to chill until cold immediately. Cold butter is critical to getting that puff in your puff pastry!
I use the same technique that I use when making my biscuits and grate the butter into the dough (you can see me demonstrate this in the video below the recipe). I’ve tried working the butter into the dough by using a food processor instead of a grater, but didn’t feel that I got the same amount of puff, so I recommend a grater or pastry cutter. Toss the butter with the flour mixture as you grate so it doesn’t clump together.
Then, add your ice water and stir with a spoon The dough will be very shaggy with large clumps of butter, but the flour should be mostly absorbed (not all settled on the bottom of the bowl) and it shouldn’t be very dry or crumbly. You know you’re ready to move on to the next step if you pinch the dough and it stays together in your hand (like photo above).
Transfer this dough to a clean dry surface.
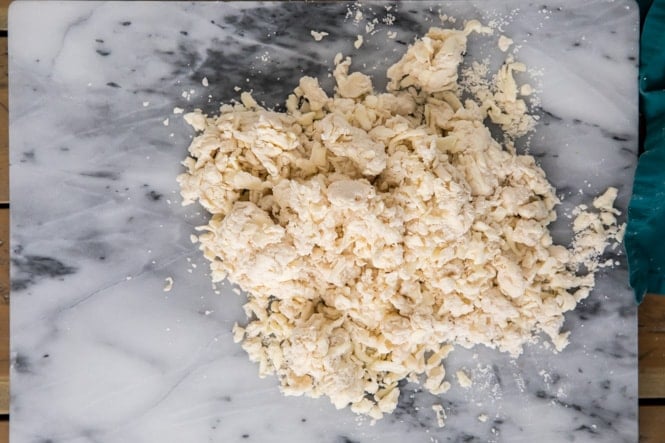
Step 2: Bring it all together
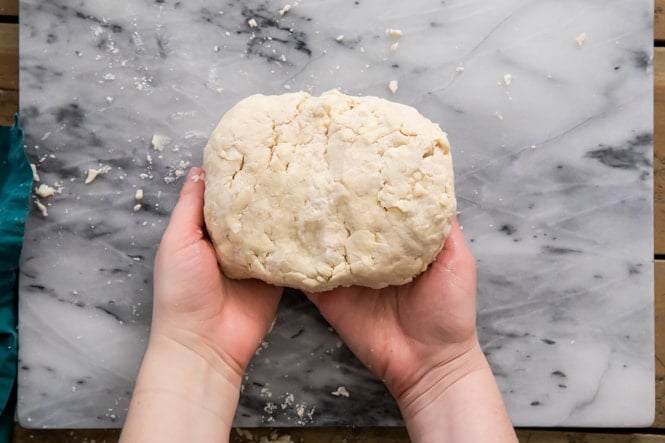
Work the dough with your hands until you are able to get it to clump together. Remember, the butter staying cold is key to having those big flaky layers in your puff pastry, so you don’t want to overwork the dough with your warm hands. Your goal is to quickly get the pastry to cling together and form it into a brick at this point.
Or, something at least sort of resembling a brick. Aim for a 6×3″ rectangle(ish) shape. Doesn’t have to be perfect or beautiful at this stage, a few cracks are OK and butter clumps are normal and desired. Just get it all worked together, and do it quickly.
Cover your puff pastry dough in plastic wrap and transfer it to your refrigerator where it will need to chill for 30 minutes. At the risk of sounding like a broken record, coldness is key, and this keeps your butter and other ingredients nicely chilled and gives them a break from your warm hands and the general room-temperatured-ness of your kitchen.
Step 3: How to Roll Out Puff Pastry
Once that not-so beautiful brick of puff pastry dough has had its time to chill, transfer it again to a clean surface. This time use a rolling pin to roll it out to an 8×12″ rectangle. If any cracks are forming as you’re rolling the dough, use your hands to lightly pat or pinch them together.
Use your hands to square off the edges a bit to encourage that rectangular shape, it’ll just make things easier for you in the long run.
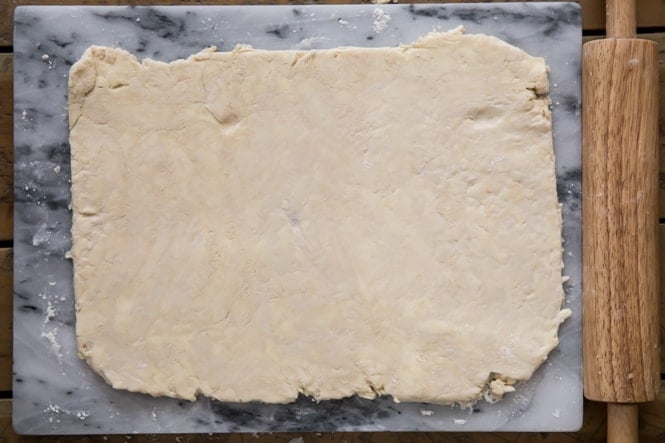
Step 4: Start Folding Your Puff Pastry
Beautiful, things are finally starting to look a little better here. You will likely see a lot of marbleized butter clumps and if you’re like me and always worried about having your ingredients nicely combined that might worry you. Don’t let it. This is exactly how things are supposed to look at this point.
Now we’re going to start neatly (well, as neatly as possible, anyway) folding the dough up into thirds like we’re folding a letter.
Take one end of the dough (a shorter end) and fold it over the center, like so (if the dough is sticking to your surface, use a spatula or scraper to help loosely encourage it up):
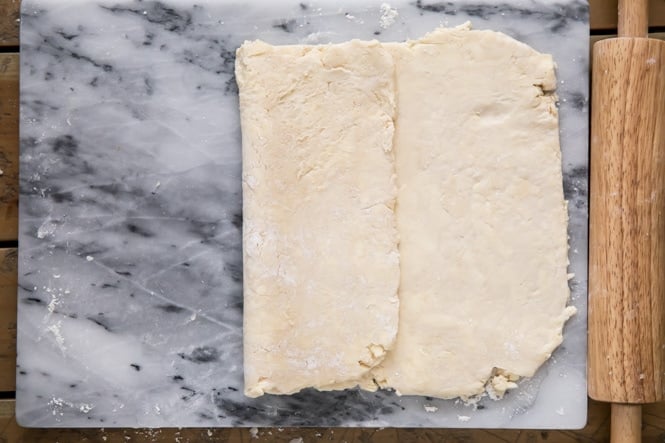
And then repeat with the other end of the puff pastry.
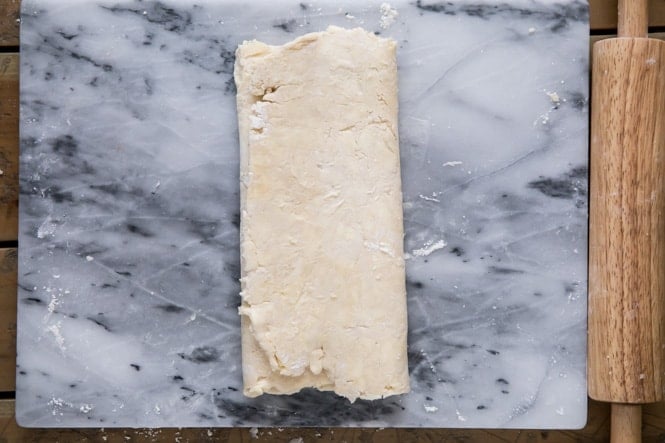
Look at that, just like a letter. We can stick this dough in an envelope and mail it at this point and call it a day.
Except not really, because we still have some more rolling to do. Quite a bit more, actually.
Step 5: Rolling, rolling, rolling Puff Pastry Dough
Rotate your puff pastry dough 90 degrees and we’re going to take this neatly folded dough and roll it out into an 8×12″ rectangle again.
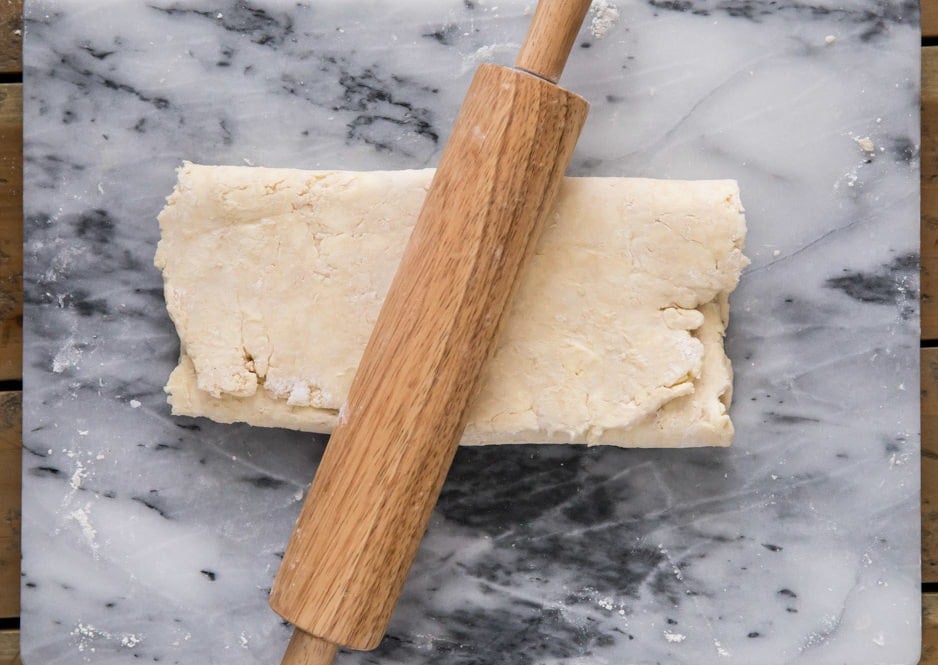
This folding and rolling is also known as laminating. We’re working those butter pieces throughout our dough, incorporating the butter into the pastry. Once we finally get our puff pastry into the oven that butter is going to puff up and give us all those beautiful, flaky, puffed layers.

Your dough will start to look a bit neater and smoother as you roll (/laminate) it, but evidently I forgot to take another picture after my first roll, so I’m using the same picture above that I used for our first rectangle-roll-out. I think you get the point, right?
Anyway, then you will repeat steps 3-5 again, and again, and then once more until you have done a total of 4 turns of your puff pastry dough.
At this point you can fold up your dough, wrap it tightly, and you will want to let it chill a bit longer before you use it. Place it in the refrigerator for at least another 30 minutes and then use as indicated in your recipe! Or hold onto it and on Wednesday I’ll be sharing a recipe for Palmiers that you’ll want a batch of this rough puff pastry recipe for!
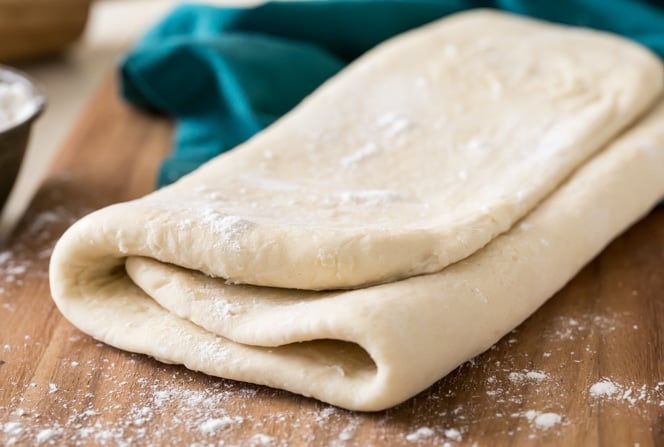
So, how are you going to use your homemade puff pastry?
More Kitchen Tips:
- Salted vs Unsalted Butter
- How to make Chocolate Ganache
- How to make Pastry Cream
- How to Make an Easy Buttermilk Substitute
- How to Make a Graham Cracker Crust
This recipe was adapted over time from a few sources, most notably from Baking Illustrated, Making Dough, and Epicurious!
Easy "Rough" Homemade Puff Pastry

Ingredients
- 2 ¼ cups (280 g) all-purpose flour
- 1 Tablespoon granulated sugar
- 1 teaspoon salt
- 1 cup (226 g) cold unsalted butter
- 7-8 Tablespoons ice water or more, as needed
Recommended Equipment
Instructions
- Whisk together flour, sugar, and salt in a large bowl.2 ¼ cups (280 g) all-purpose flour, 1 Tablespoon granulated sugar, 1 teaspoon salt
- Use a box grater to grate your butter into the flour mixture, briefly tossing the butter each time you’ve shredded about ½ stick so that it doesn’t clump together.1 cup (226 g) cold unsalted butter
- Once you’ve grated all of your butter, stir briefly with a wooden spoon so butter is not clumping together and all is coated in flour.
- While stirring (by hand with a wooden spoon -- do not use an electric mixer or over-mix this recipe) slowly drizzle ice water into the flour/butter mixture. Add just enough ice water so that if you pinch the dough it will hold its shape and not fall apart (see photos in post, the dough will otherwise be quite shaggy). If the mixture is still dry and crumbly and not sticking to itself when pressed after you have added 8 Tablespoons, add additional water one tablespoon at a time. Take care to not overwork the dough or it will be tough.7-8 Tablespoons ice water
- Once the dough is clinging together when pinched, it will still be quite shaggy. Transfer to a lightly floured surface and work the dough together with your palms to make dough cling together. Work (with your palm) into a 6x3” rectangle (it will almost look like a brick!).
- Wrap dough thoroughly with plastic wrap and transfer to the refrigerator to chill for at least 30 minutes.
- Once dough has chilled, remove from refrigerator and roll into an 8x12” rectangle.
- Fold dough into thirds (like you are folding a letter, see photos in post or see video below for visual for each step), rotate 90 degrees, and then roll dough into an 8x12” rectangle again.
- Fold into thirds again, and repeat this process of folding and rolling until you have done four turns of your dough.
- Wrap dough well with plastic wrap and return to refrigerator to chill for at least another 30 minutes before using as directed in your recipe.
- This puff pastry recipe makes the equivalent of two sheets of store-bought puff pastry. To use, divide into two, roll into a ⅛” thick rectangle, and use as indicated in your recipe.
Notes
Nutrition
Nutritional information is based on third-party calculations and should be considered an estimate only. Actual nutritional content will vary based upon brands used, measuring methods, cooking method, portion sizes, and more.




Phanny Thomas
Love ❤️ it good recipes, I made many time already, it turned out beautifully puff pastry.
Emily @ Sugar Spun Run
We’re so happy our recipe is a success for you, Phanny! 🥰
Barbra-Anne
I just made this and It went so smoothly! I’m excited to make palmiers in the morning 🙂 and to make this again to try out more recipes!
Cyn
This is a great recipe!! I accidentally rolled out the dough and folded it before letting it rest so I just let the dough rest an hour in the fridge before rolling out to make cherry turnovers and they were perfect!!
Bruce
That tablespoon of sugar in the dough adds just a touch of sweetness, which complements the buttery flakiness beautifully. I just finished a batch of this, rolled thin, baked, then cut into two 9″ squares to make Cremeschnitte tomorrow. That’s the Eastern European version of Napoleon pastry. The two layers will have a thick layer of special pastry cream (lightened with whipped egg white and whipped cream). The top layer of puff pastry is already cut into serving-sized pieces, to make it possible to get a piece of it without crushing the whole thing. If I remember, I’ll post a picture of it in the Facebook group.
Emily @ Sugar Spun Run
That sounds divine, Bruce! We’d love to see a picture 😍
Anthony
Can you add any ingredients to this like jalapeno or cheese or fruit just curious
Sam
Hi Anthony! I really wouldn’t recommend it here.
Tora
If by add you mean turning this into a Danish or other pastry, then I would check out her cheese Danish recipe. You could experiment with adding fruit or jalapenos to the filling. But I agree that trying to add something to the dough itself would probably not work well.
Steve
Thank you for this recipe. It’s a really nice dough that’s easy to work with and gives good results. Two things I did that I do when I make scones; one is to chill the flour and butter after I cut the butter in, and two is to wrap the whole thing in parchment when I’m forming the dough. I find it a lot easier to work the dough that way and it keeps my warm hands a little further away from it.
Margaret G.
These are the best visual instructions plus you took the time to include a video! I will be attempting this for the first time and have full confidence in my success! Lastly, I use a grater to shred my butter for scones. It works best when incorporating butter bits into pastry. Thanks so much!!!!!
Emily @ Sugar Spun Run
Please let us know how it turns out for you, Margaret! 😊
Annie
I was very happy with this recipe it made a nice pastry. The dough was workable, I rolled and folded a few more times than directed to make sure I got that flakiness and it turned out nicely. The pastries that were left over I simply placed in the oven for a few minutes the next morning and they were crunchy and flaky again. Thank you!
Sam
I’m so glad you enjoyed it, Annie! 🙂
Theresa
Can you freeze this doughy for later use?
Sam
Hi Theresa! Make sure to check out the notes section below the recipe for how to freeze it. 🙂
Susan
I learned to make scratch puff pastry in culinary school and swore I would never go to all of that trouble again!
But I find your recipe intriguing. Have you ever tried to make this with either pastry flour or even cake flour flour? It’s more expensive than AP flour but ai would think the dough just might puff even more or just be lighter.
Thanks for this and fir your cream cheese filling for homemade danish with puff pastry and showing us the pinwheel version. I would like to see a better shot of the pinwheel version after it is done. How badly does the cream cheese melt all over it?
I will likely try it for my own answer.
You are a very good baker for easier home recipes. That is much appreciated.
Sam
Hi Susan! I have not tried this with cake flour or pastry flour. I’d be interested to know how it turns out if you do try it. I don’t have too much of an issue with the cream cheese melting everywhere. It normally stays pretty contained. 🙂
Susan
👍 Thanks!
Bruce
Hi, Susan. Gluten is very important to the structure of laminated doughs, so cake or pastry flour would probably not be a good idea.
Julia
I have made so many of your recipes and they have all turned out amazing!!! With that in mind, I was wondering if you could possibly look into a homemade croissant recipe? It’s something I’ve been interested making, and I’ve looked at other recipes, but I’m hesitant to try new things since your blog has become my go to place, especially with breads.
Sam
Hi Julia! I’m so glad you have enjoyed everything so much! I have worked on a croissant, but I have not gotten it to the point I’m very happy with. It is on my list, but unfortunately I’m not as close to done with it as I’d like. 🙁
Bruce
Julia, while you’re waiting for Sam to perfect her croissant recipe, I really like Helen Fletcher’s blog at pastrieslikeapro.com. Like Sam, she loves the food processor. Unlike Sam, she doesn’t have videos. I’ve made her croissants a number of times. Her blog is my go-to, AFTER SAM’S, of course.
ANNA
Hi,
I’m from germany. So I’m totally curious why you think european butter is better quality.
I mean, butter is beaten fat that’s floating on fresh milk. How could someone lower the quality of an easy product like that? As I were a child we did make butter ourselfes, was quite fun for children.
Here in germany and in main of europe I think we never use salted butter. We put butter and then sprinkle salt. And we got two tipes of butter: butter make out of the sweet cream from milk and mild acidulated butter. I always use the last one, it seems tasting better in baking recipes. What type is your butter?
Yes, let’s talk about butter!
Sam
Hi Anna! The standards for European butter are different than the standards in America. European butter must contain 82% fat as opposed to just 80% in the US. That additional fat makes the butter richer and better tasting, making it my preference, even if it is pricier. American butter is usually sweet cream butter. I hope that helps! 🙂
Casie
This recipe was quick and easy and came out perfect for my king cake!
Marie
So easy and delicious! Thanks 😁
Fawn Houtz
Hi Sam, I am 69 years old and have cooked and baked all my married life. I love puff pastry and have been intimidated about learning to make it from scratch. You have taken the mystery out of it for me. I made the most amazing braided cherry cheese danish!! Not only once but twice and just finished making the dough to make two more braids for Christmas. One for us and one for a wonderful friend to has helped us through this trying time. I have made a number of your recipes and want to thank you for making the instructions easy and they are wonderful when finished and served. Thank you again and you certainly have my “thumbs up”! Happy Holidays.
Sam
That is so awesome! I’m so glad you can finally enjoy it homemade! It’s always so much better homemade. 🙂
Margaret
Simple and easy to follow! Thank you so much! ☺️
Sam
I am so glad you enjoyed it so much, Margaret! 🙂