
How to Make Puff Pastry (the easy way)
This post may contain affiliate links. As an Amazon Associate I earn from qualifying purchases. Please read my disclosure policy.
Today we’re skipping the frozen store-bought sheets and making our own homemade Puff Pastry recipe! This recipe is an easy “rough” puff pastry that yields flakey, buttery layers but doesn’t take hours upon hours to make.
A Guide to Making Easy “Rough” Puff Pastry
As much as I love baking from scratch, homemade puff pastry was one of those recipes that I always thought was better left to the “professionals”.
It’s time consuming and a bit complicated to make, so I always either substituted my favorite easy pie crust recipe or grabbed the frozen sheets from the store. Well, it took some time (several months, actually) but I finally have an easy, “cheater’s” rough puff pastry recipe that can be made quickly and works perfectly in any recipe that calls for one or two sheets of puff pastry.
Traditional puff pastry recipes are time consuming and a fairly complicated (not that I’m never up for a challenge, it’s just sometimes I want a homemade apple turnover or flakey top crust for my turkey pot pie and I don’t have 4 hours to spare).
With classic recipes, long stretches of chilling time are required in between folds, making the recipe take several hours from start to finish. This puff pastry recipe is much easier and while there is mandatory chilling time, it’s much less than with classic puff pastry and the technique is much simpler (as you’ll see below). You’ll spend about 20 minutes actively making this dough, and a total of 60 minutes waiting for it to chill.
How to Make Puff Pastry at Home
The great thing about Puff Pastry is you only need a few ingredients: Flour, sugar, salt, butter, and ice water. I’d bet you have all of these in your pantry/fridge right now, don’t you? One quick word about the butter: regular butter will work just fine for this recipe, but if you can get your hands on it I highly recommend using European butter. Yes, it’s pricier, but for a recipe like this one with so few ingredients I do think the quality makes a difference.
Ok, you have your ingredients, maybe you just splurged on some fancy butter, so let’s get to our easy Puff Pastry recipe.
Step 1: Making a shaggy, buttery dough
Start by whisking together flour, sugar, and salt, and then cut in your butter. Make sure your butter is very cold! I like to stick mine in the freezer about 30 minutes before I know I’m going to be making puff pastry. It’s so important that our butter stay as cold as possible while we are making this puff pastry; if it starts to get melty at any point in the process you’ll want to move the dough to the refrigerator to chill until cold immediately. Cold butter is critical to getting that puff in your puff pastry!
I use the same technique that I use when making my biscuits and grate the butter into the dough (you can see me demonstrate this in the video below the recipe). I’ve tried working the butter into the dough by using a food processor instead of a grater, but didn’t feel that I got the same amount of puff, so I recommend a grater or pastry cutter. Toss the butter with the flour mixture as you grate so it doesn’t clump together.
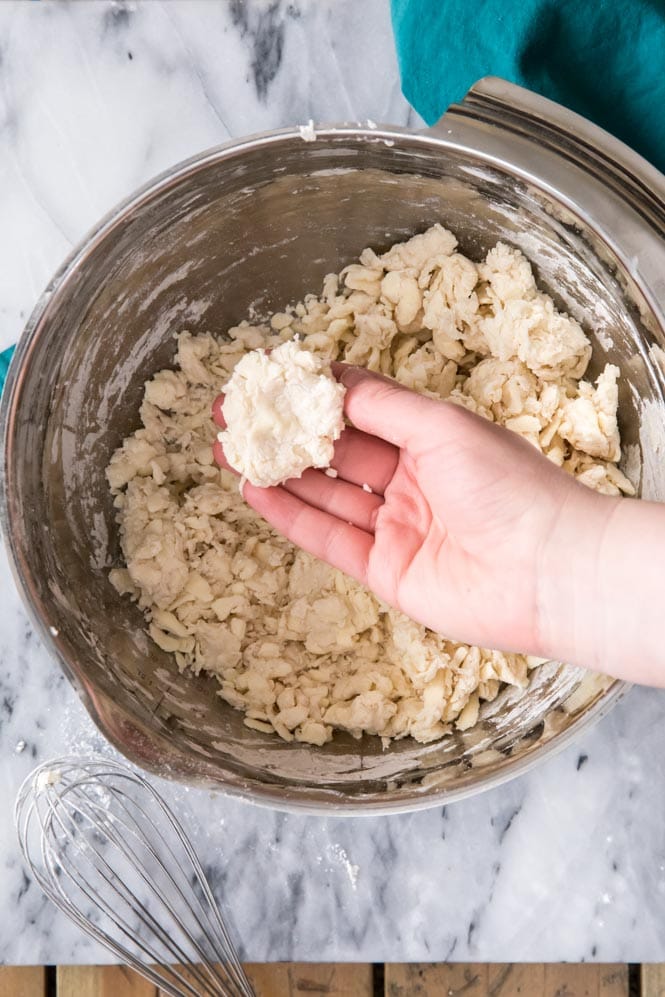
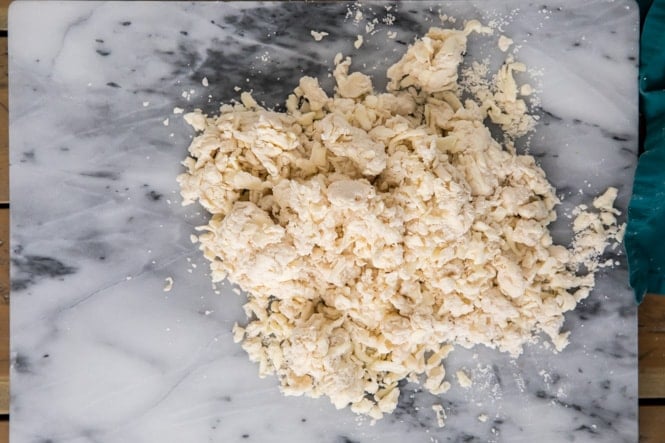
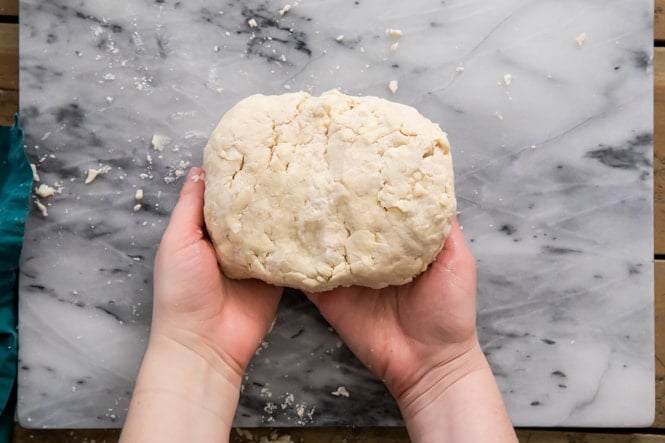
Then, add your ice water and stir with a spoon The dough will be very shaggy with large clumps of butter, but the flour should be mostly absorbed (not all settled on the bottom of the bowl) and it shouldn’t be very dry or crumbly. You know you’re ready to move on to the next step if you pinch the dough and it stays together in your hand (like photo above).
Transfer this dough to a clean dry surface.
Step 2: Bring it all together
Work the dough with your hands until you are able to get it to clump together. Remember, the butter staying cold is key to having those big flaky layers in your puff pastry, so you don’t want to overwork the dough with your warm hands. Your goal is to quickly get the pastry to cling together and form it into a brick at this point.
Or, something at least sort of resembling a brick. Aim for a 6×3″ rectangle(ish) shape. Doesn’t have to be perfect or beautiful at this stage, a few cracks are OK and butter clumps are normal and desired. Just get it all worked together, and do it quickly.
Cover your puff pastry dough in plastic wrap and transfer it to your refrigerator where it will need to chill for 30 minutes. At the risk of sounding like a broken record, coldness is key, and this keeps your butter and other ingredients nicely chilled and gives them a break from your warm hands and the general room-temperatured-ness of your kitchen.
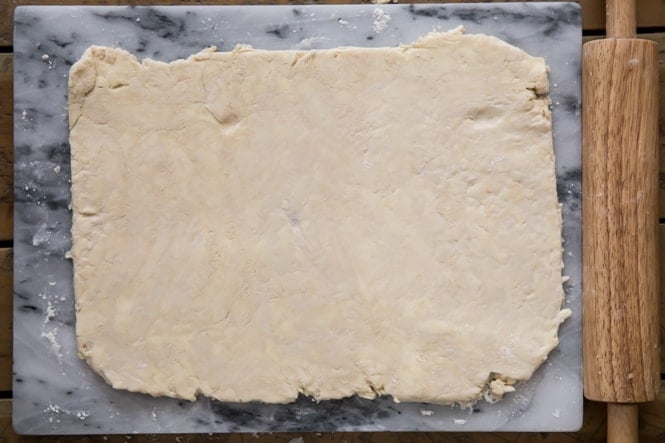
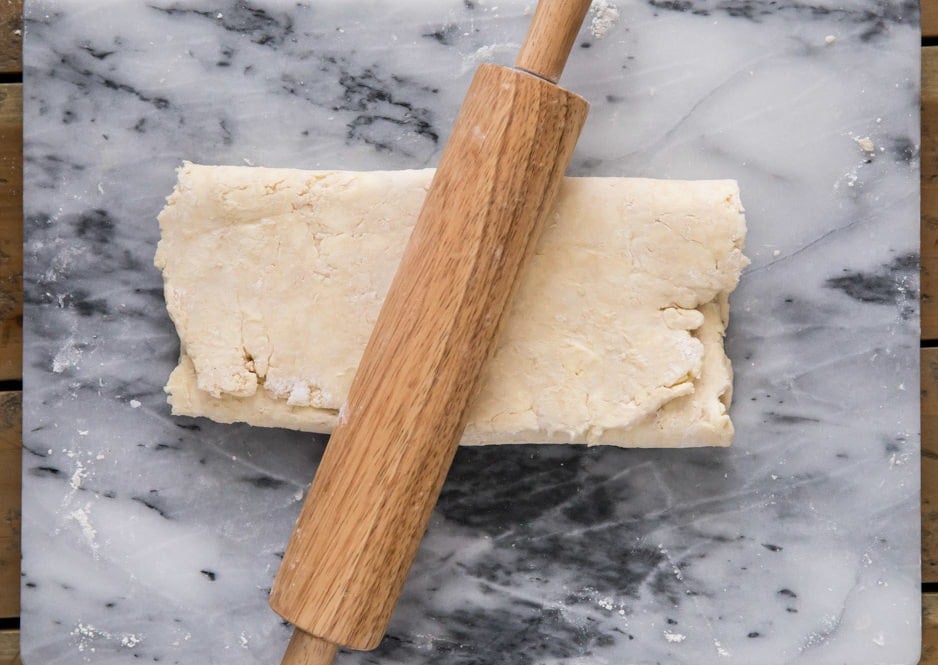
Step 3: How to Roll Out Puff Pastry
Once that not-so beautiful brick of puff pastry dough has had its time to chill, transfer it again to a clean surface. This time use a rolling pin to roll it out to an 8×12″ rectangle. If any cracks are forming as you’re rolling the dough, use your hands to lightly pat or pinch them together.
Use your hands to square off the edges a bit to encourage that rectangular shape, it’ll just make things easier for you in the long run.
Step 4: Start Folding Your Puff Pastry
Beautiful, things are finally starting to look a little better here. You will likely see a lot of marbleized butter clumps and if you’re like me and always worried about having your ingredients nicely combined that might worry you. Don’t let it. This is exactly how things are supposed to look at this point.
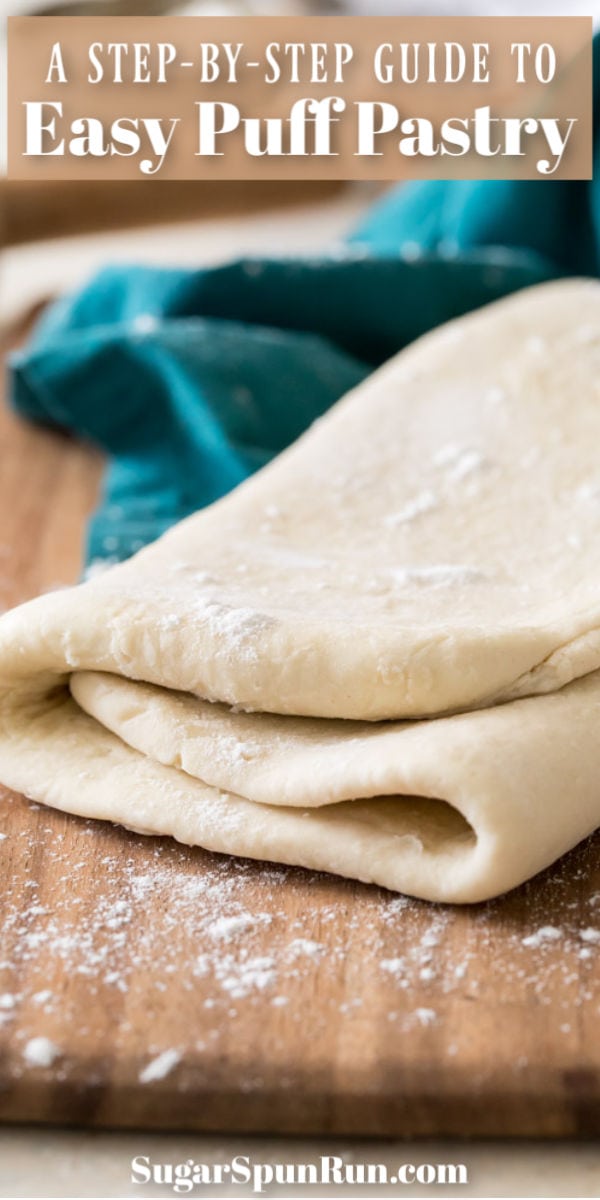
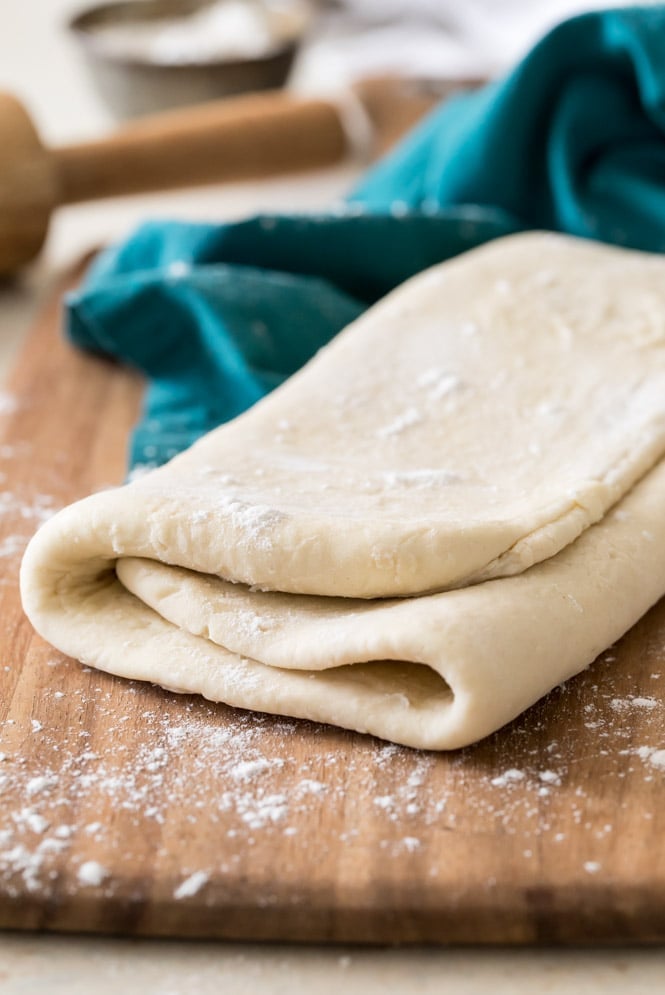
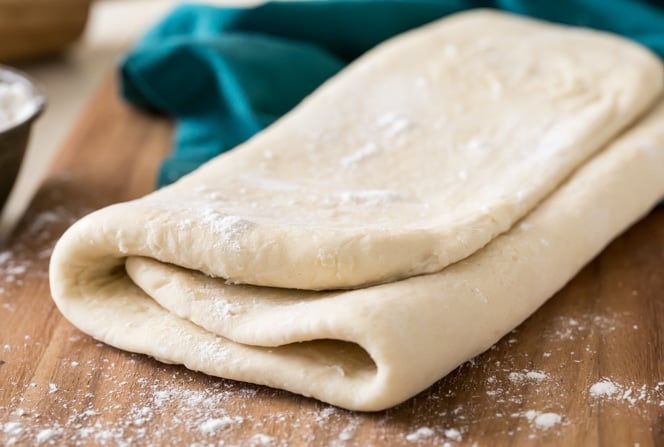
Now we’re going to start neatly (well, as neatly as possible, anyway) folding the dough up into thirds like we’re folding a letter.
Take one end of the dough (a shorter end) and fold it over the center, like so (if the dough is sticking to your surface, use a spatula or scraper to help loosely encourage it up):
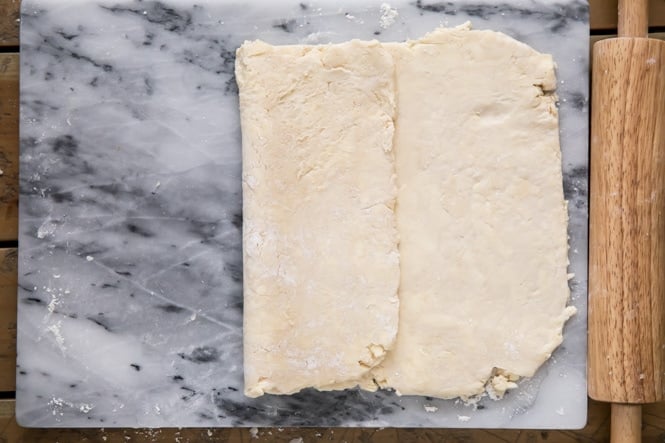
And then repeat with the other end of the puff pastry.
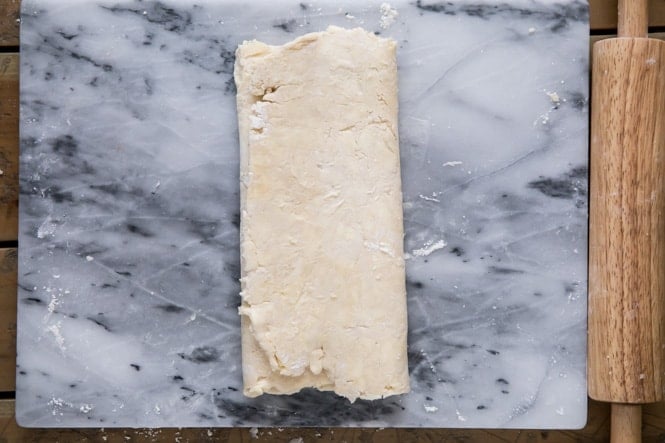
Look at that, just like a letter. We can stick this dough in an envelope and mail it at this point and call it a day.
Except not really, because we still have some more rolling to do. Quite a bit more, actually.
Step 5: Rolling, rolling, rolling Puff Pastry Dough
Rotate your puff pastry dough 90 degrees and we’re going to take this neatly folded dough and roll it out into an 8×12″ rectangle again.
This folding and rolling is also known as laminating. We’re working those butter pieces throughout our dough, incorporating the butter into the pastry. Once we finally get our puff pastry into the oven that butter is going to puff up and give us all those beautiful, flaky, puffed layers.
Your dough will start to look a bit neater and smoother as you roll (/laminate) it, but evidently I forgot to take another picture after my first roll, so I’m using the same picture above that I used for our first rectangle-roll-out. I think you get the point, right?
Anyway, then you will repeat steps 3-5 again, and again, and then once more until you have done a total of 4 turns of your puff pastry dough.
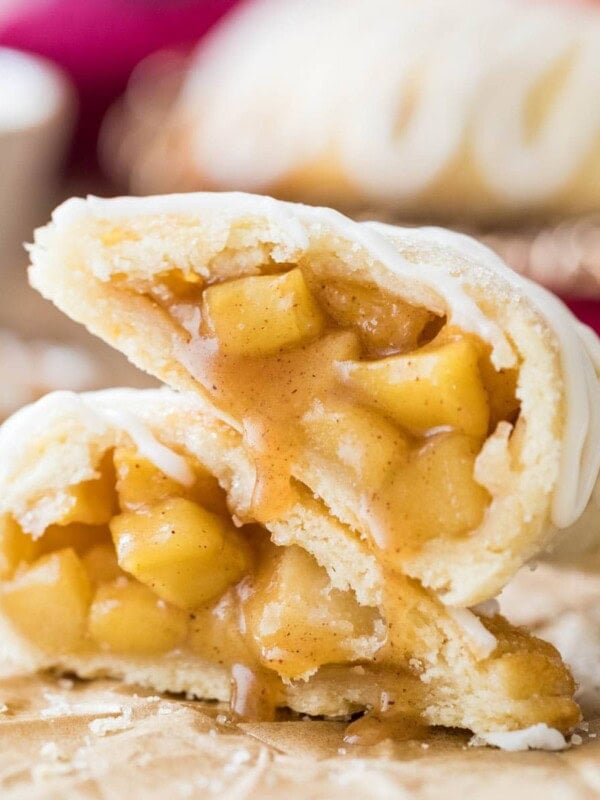
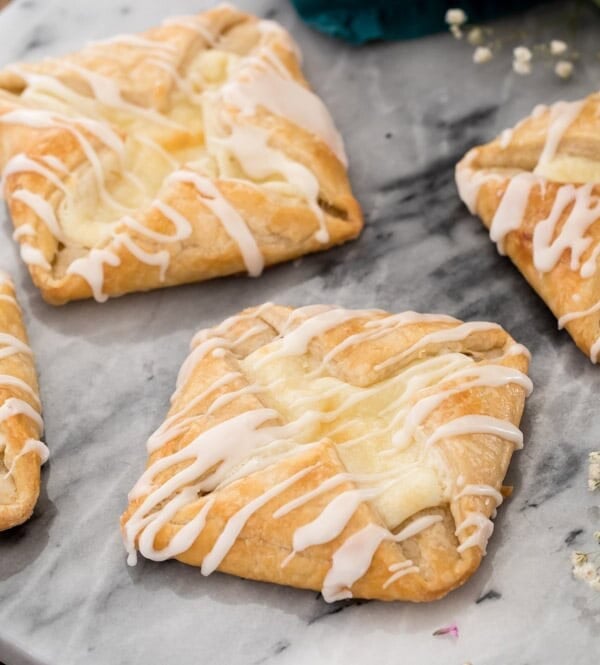
At this point you can fold up your dough, wrap it tightly, and you will want to let it chill a bit longer before you use it. Place it in the refrigerator for at least another 30 minutes and then use as indicated in your recipe! Or hold onto it and on Wednesday I’ll be sharing a recipe for Palmiers that you’ll want a batch of this rough puff pastry recipe for!
So, how are you going to use your homemade puff pastry?
More Kitchen Tips:
- Salted vs Unsalted Butter
- How to make Chocolate Ganache
- How to make Pastry Cream
- How to Make an Easy Buttermilk Substitute
- How to Make a Graham Cracker Crust
This recipe was adapted over time from a few sources, most notably from Baking Illustrated, Making Dough, and Epicurious!
Easy "Rough" Homemade Puff Pastry
Equipment
Ingredients
- 2 1/4 cups (280 g) all-purpose flour
- 1 Tablespoon granulated sugar
- 1 teaspoon salt
- 1 cup (226 g) cold unsalted butter
- 7-8 Tablespoons ice water, or more, as needed
Instructions
- Whisk together flour, sugar, and salt in a large bowl.2 1/4 cups (280 g) all-purpose flour, 1 Tablespoon granulated sugar, 1 teaspoon salt
- Use a box grater to grate your butter into the flour mixture, briefly tossing the butter each time you’ve shredded about ½ stick so that it doesn’t clump together.1 cup (226 g) cold unsalted butter
- Once you’ve grated all of your butter, stir briefly with a wooden spoon so butter is not clumping together and all is coated in flour.
- While stirring (by hand with a wooden spoon -- do not use an electric mixer or over-mix this recipe) slowly drizzle ice water into the flour/butter mixture. Add just enough ice water so that if you pinch the dough it will hold its shape and not fall apart (see photos in post, the dough will otherwise be quite shaggy). If the mixture is still dry and crumbly and not sticking to itself when pressed after you have added 8 Tablespoons, add additional water one tablespoon at a time. Take care to not overwork the dough or it will be tough.7-8 Tablespoons ice water
- Once the dough is clinging together when pinched, it will still be quite shaggy. Transfer to a lightly floured surface and work the dough together with your palms to make dough cling together. Work (with your palm) into a 6x3” rectangle (it will almost look like a brick!).
- Wrap dough thoroughly with plastic wrap and transfer to the refrigerator to chill for at least 30 minutes.
- Once dough has chilled, remove from refrigerator and roll into an 8x12” rectangle.
- Fold dough into thirds (like you are folding a letter, see photos in post or see video below for visual for each step), rotate 90 degrees, and then roll dough into an 8x12” rectangle again.
- Fold into thirds again, and repeat this process of folding and rolling until you have done four turns of your dough.
- Wrap dough well with plastic wrap and return to refrigerator to chill for at least another 30 minutes before using as directed in your recipe.
- This puff pastry recipe makes the equivalent of two sheets of store-bought puff pastry. To use, divide into two, roll into a ⅛” thick rectangle, and use as indicated in your recipe.
Notes
Nutrition
Nutrition information is automatically calculated, so should only be used as an approximation.
Like this? Leave a comment below!


All of Sam’s recipes are the best!
Thank you so much for the support, Bill! I’m so glad you’ve enjoyed it so much! 🙂