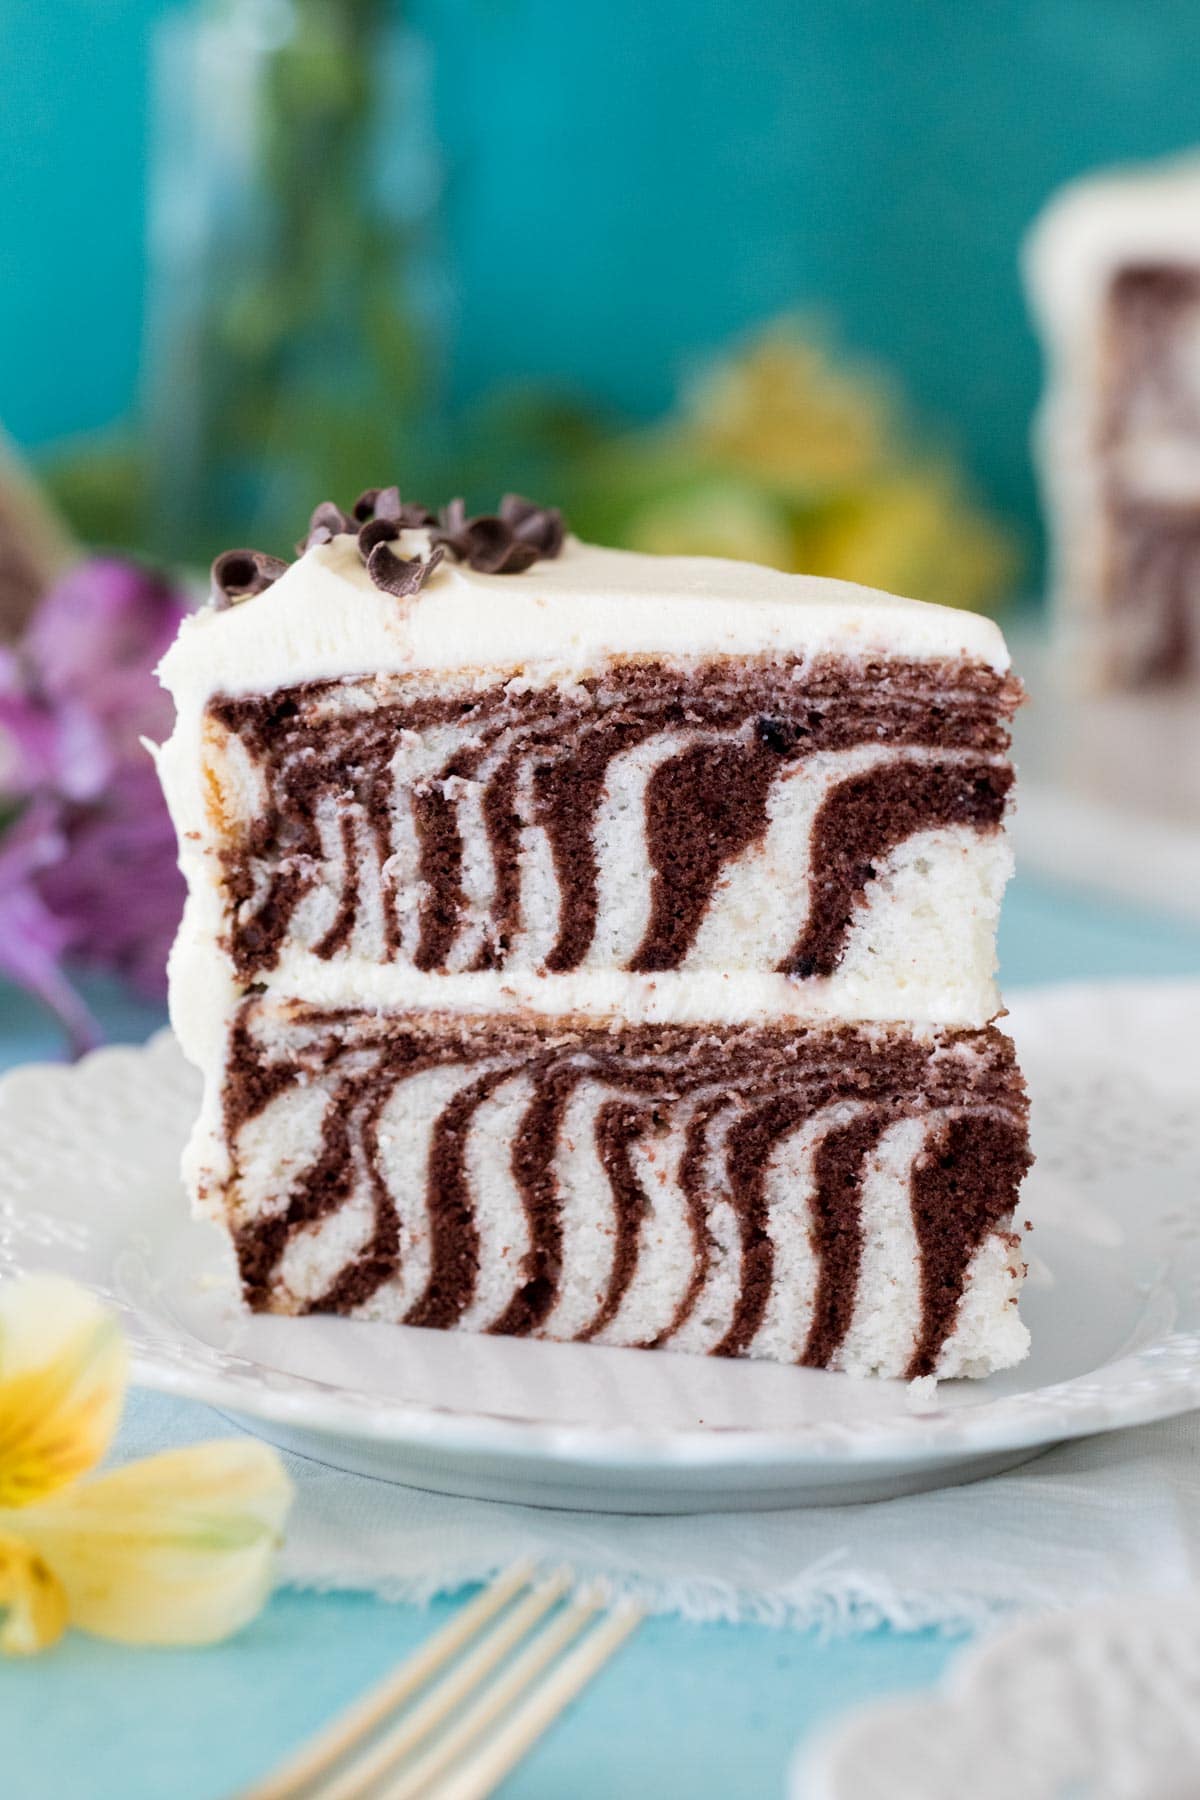
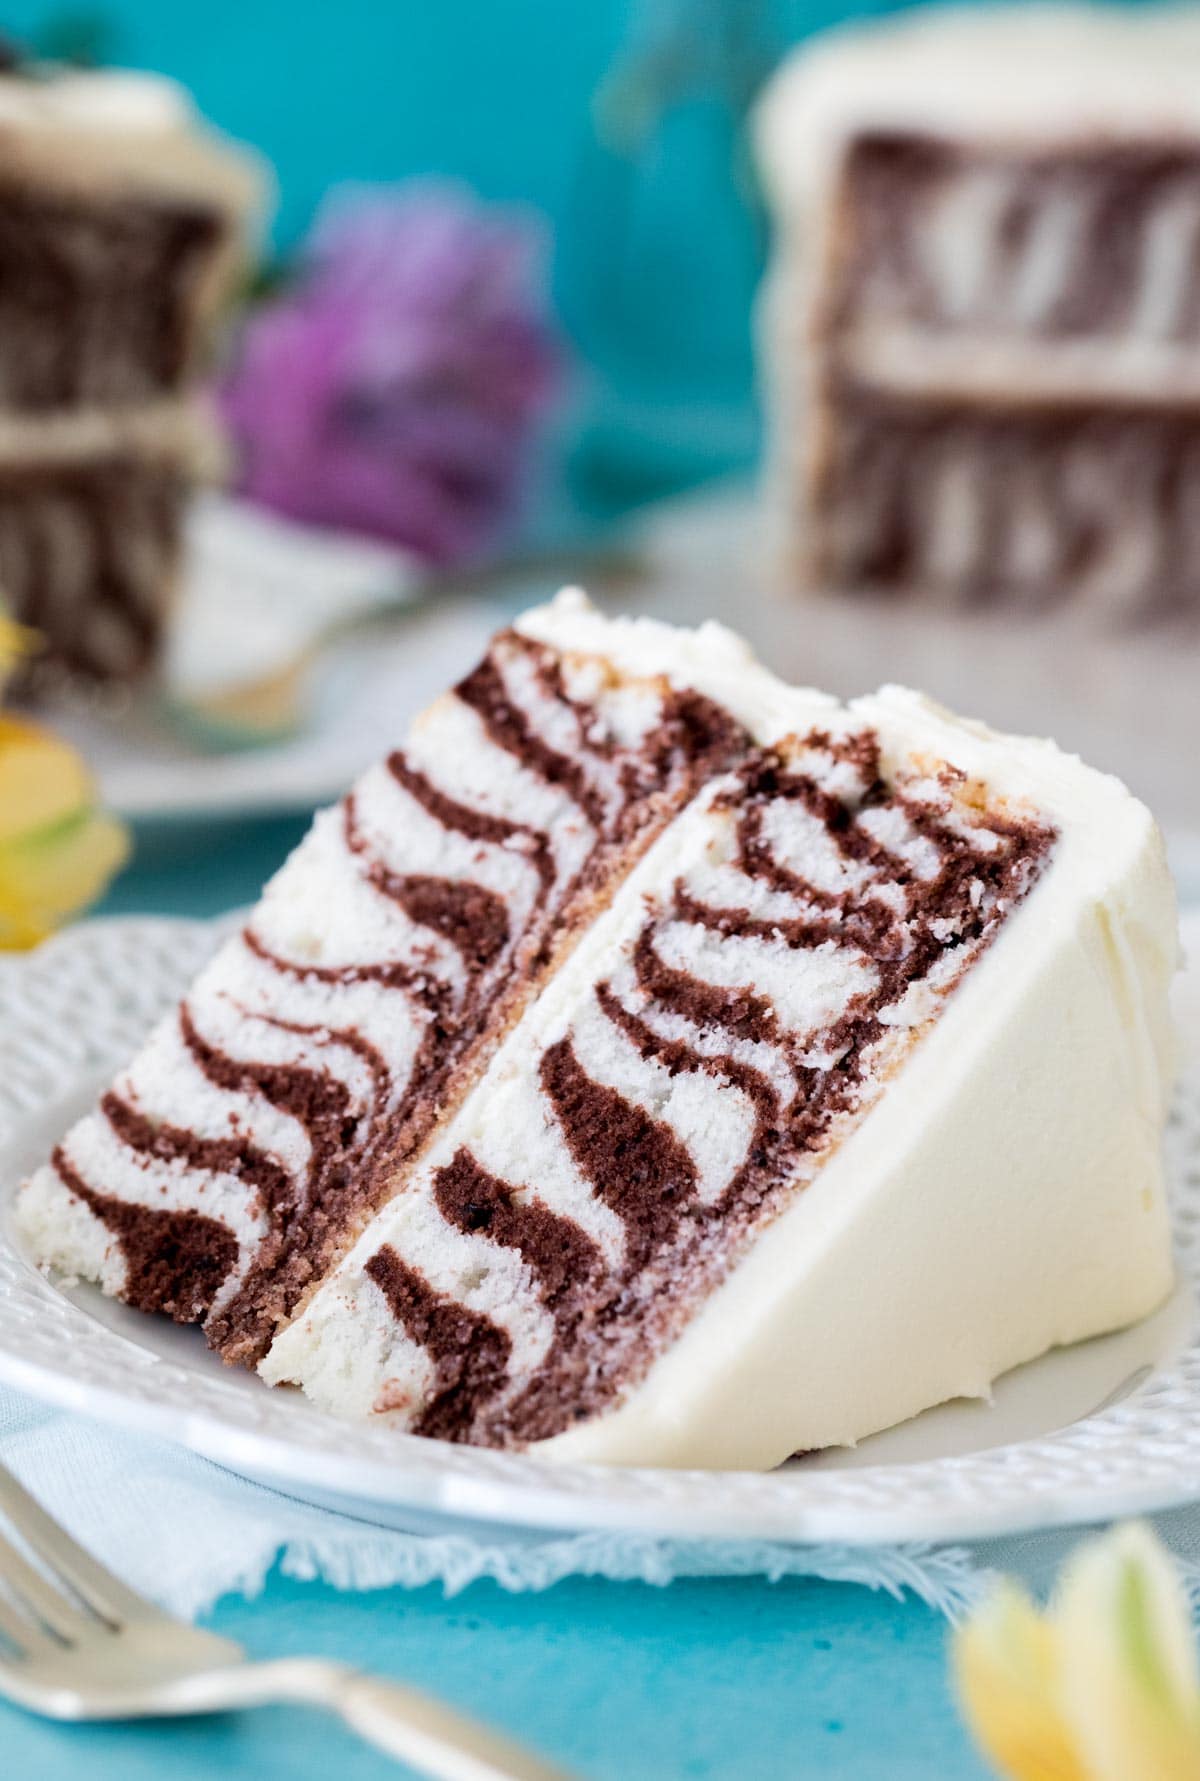
With beautiful, bold, black-and-white Zebra stripes, this cake is a showstopper! While making a Zebra Cake might seem like a daunting task, today I’m breaking down all of the steps to show you how to easily replicate this cake in your own kitchen (with just one base batter!). I think you’ll find it’s much simpler than you would’ve ever guessed, and I’ve even included a how-to video!
You Can Make a Beautiful Zebra Cake At Home
If today’s cake looks a little intimidating, let me just assure you that you’ve got this! If you’ve made my Funfetti cake or my marble cake (or even if you haven’t, really) you can handle a zebra cake.
It does require a few more dishes than your average one-color cake. It does require a little bit of technique as we’ll be whipping egg whites, and it does require a bit of attention to detail as you’re portioning out your batter, but it’s nothing you can’t handle, I’m certain of it.
I’ve included plenty of step-by-step photos in the post and there’s a how-to video in the recipe card as well, between the two you should have no problem making a bold, beautiful, perfectly striped zebra cake.
Reverse Creaming
We’re using the reverse creaming method here because I like the tighter crumb that it yields. It helps to make the black and white stripes of the zebra cake more pronounced. If you’ve made my caramel cake, you’ve already used this technique before.
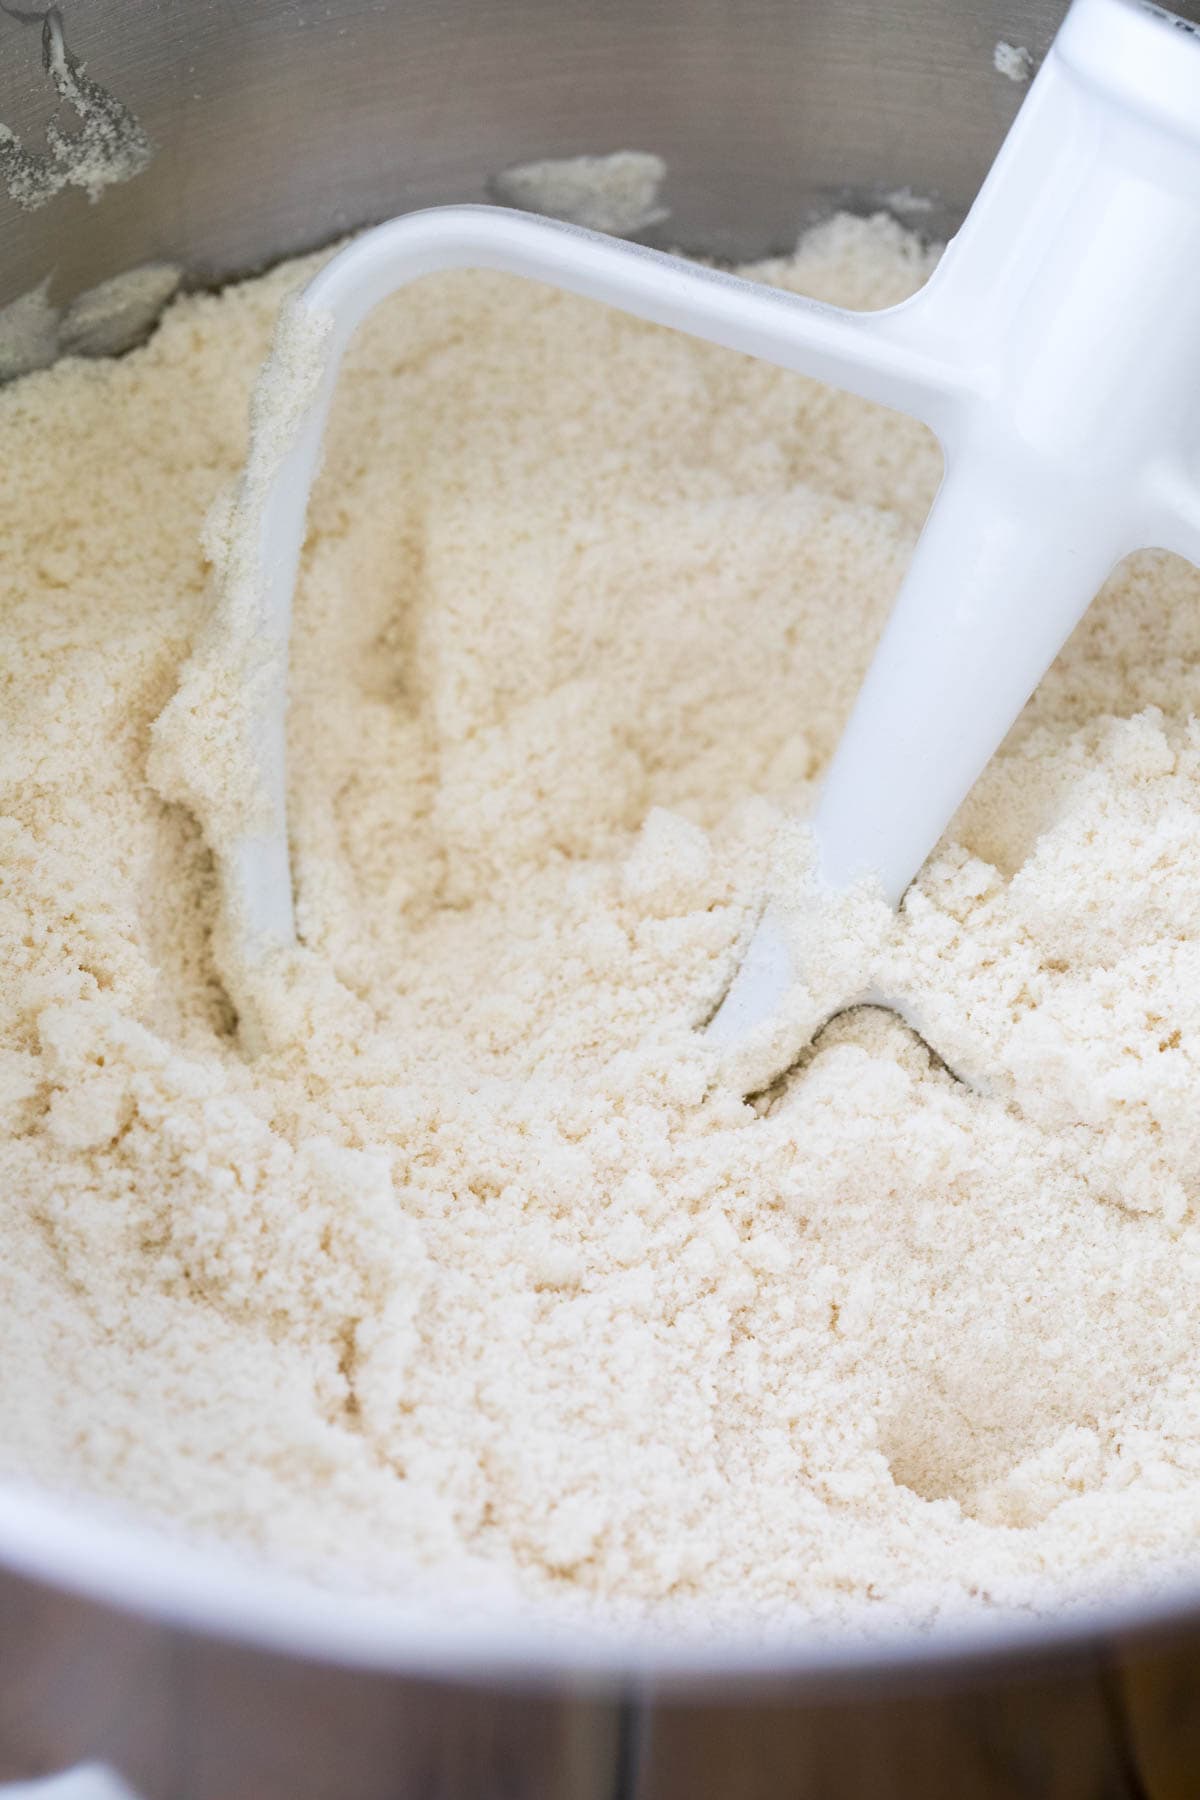
This method was popularized by Rose Levy Beranbaum and involves combining all of your dry ingredients (plus sugar, which technically is not considered “dry”) and then gradually mixing in your butter until you end up with a sandy consistency (see photo above). Once you’ve achieved this consistency, you’ll gradually stir in the remainder of your dry ingredients and finally your egg whites.
This method is great for producing a tight, plush crumb and, as a bonus, it makes it difficult to over-mix your batter. Accidentally over-mixing cake batter is one of the biggest culprits for dense, dry cake, so I love that reverse creaming makes it a lot less likely for this to happen (until the whipped egg whites come into play, anyway, always be gentle with those!).
Whipped Egg Whites (& Tips for Stiff Peaks)
I love using whipped egg whites in my cakes because not only do they make the cake moist and fluffy, but they also help the cake maintain a pure white color.
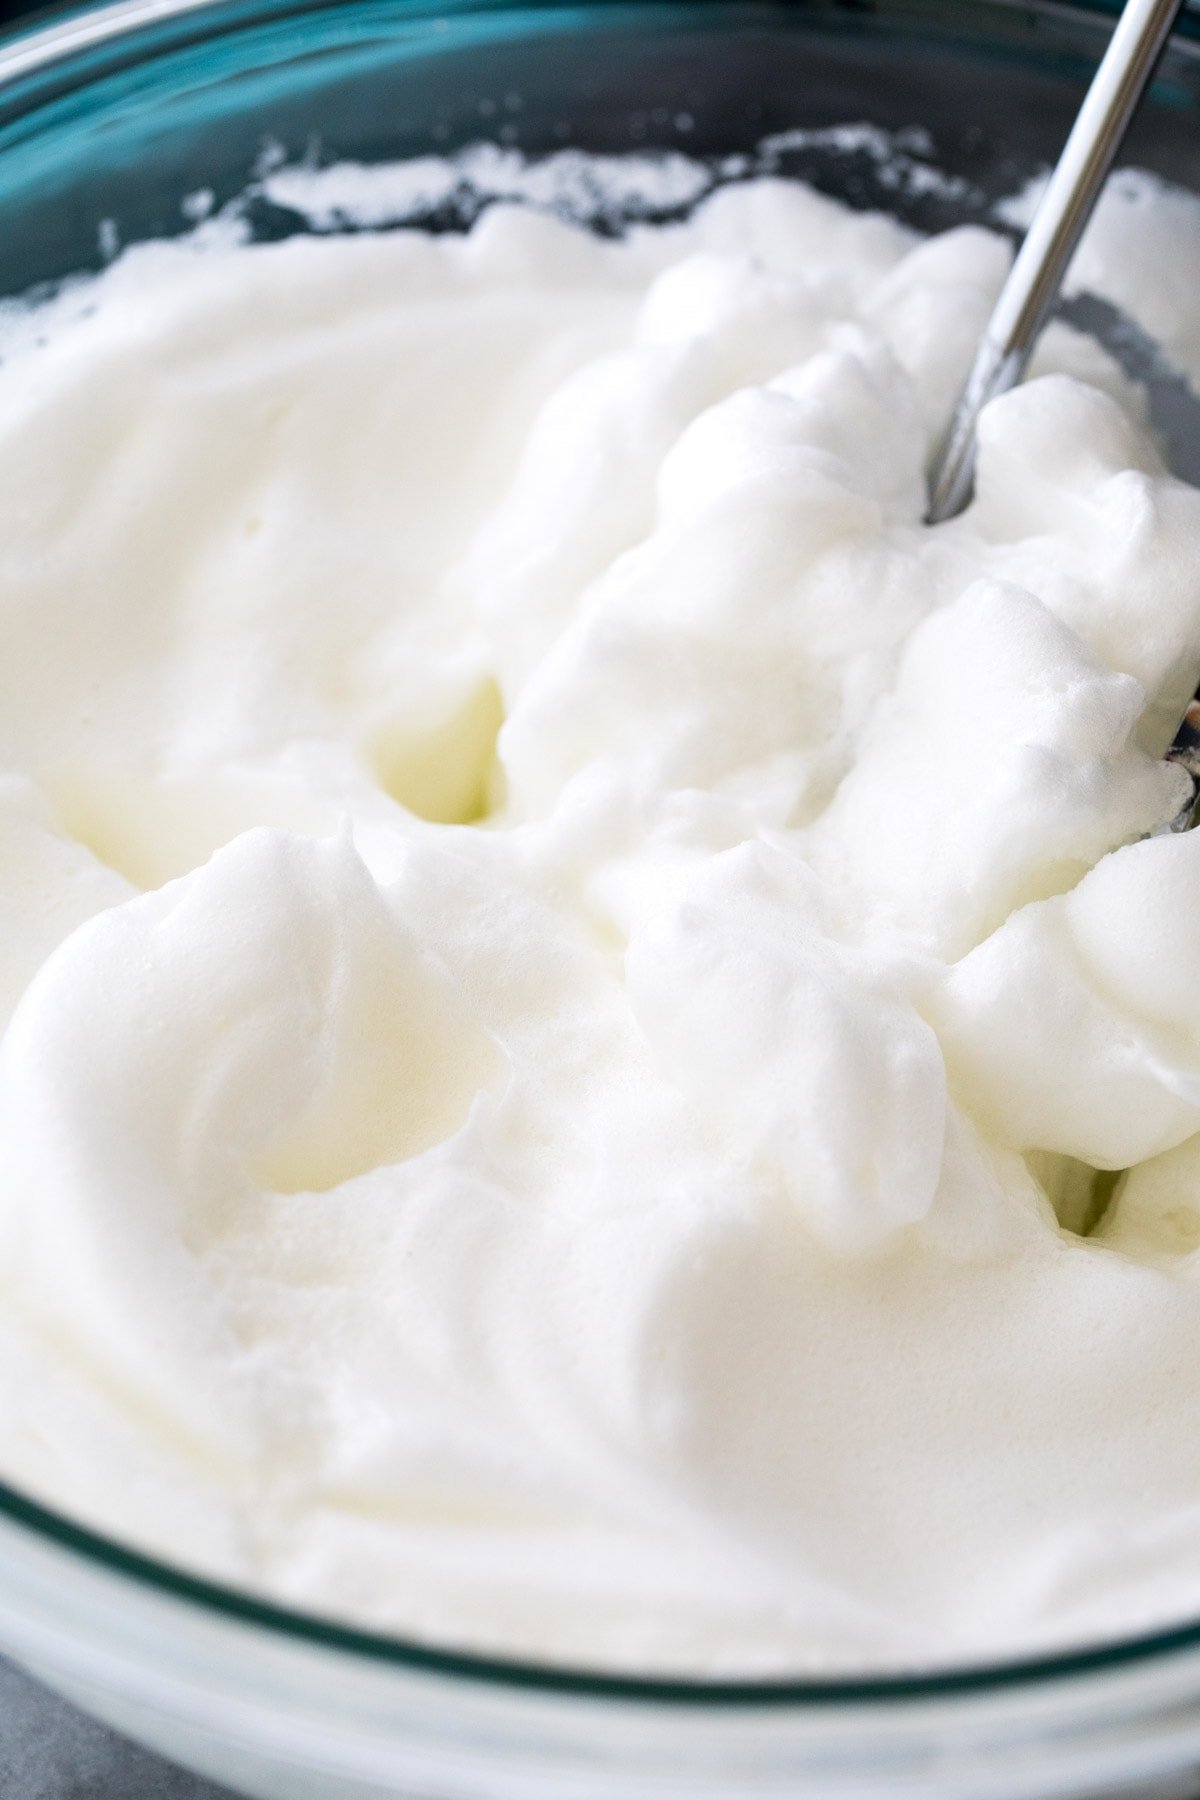
It’s why I use them in my white cake, and since a Zebra cake ought to be black and white (not black and yellow!), it works well here, too. The egg whites must be whipped to stiff peaks, which means they will have drastically increased in volume, taken on a fluffy consistency (see below) and when you pull your beaters out of them the peak that forms holds its shape and doesn’t fold over itself or dissolve.
While egg whites can be whipped to stiff peaks by hand, I don’t recommend it as it’s quite an arm workout. Use an electric mixer and make sure the beaters and the bowl are completely clean, dry, and grease free, or your eggs won’t ever reach stiff peaks, no matter how long you whisk them.
Can I Use Store-bought Egg Whites to Make Zebra Cake?
Unfortunately, many store-bought/pasteurized egg whites say right on the carton that they are not meant to be whipped. Some people have reported on my other recipes that they’ve tried with mixed results. If it’s all you have on hand, I say give it a try and see if they’ll whip for you, but I can’t guarantee that they will.
A few suggestions for your leftover egg yolks: If you don’t want to toss your egg yolks (or feed them to your dogs, like I usually do!), here are some of my favorite recipes to make with egg yolks:
- Creme Brûlée (easier than you probably think!)
- Pound Cake (you need 6 whole eggs and 6 egg yolks for this recipe, so you’re halfway there!)
- Cream Puffs
- Eclairs
- Chocolate Pie
One Batter, Two Colors
When developing this recipe, I did not want you to have to make two entirely different cake batters in order to make a Zebra cake. While it would have been nice to simply stir in some melted chocolate (like I did with my marble cake) that technique just didn’t work very well here and my chocolate stripes ended up much too dry.
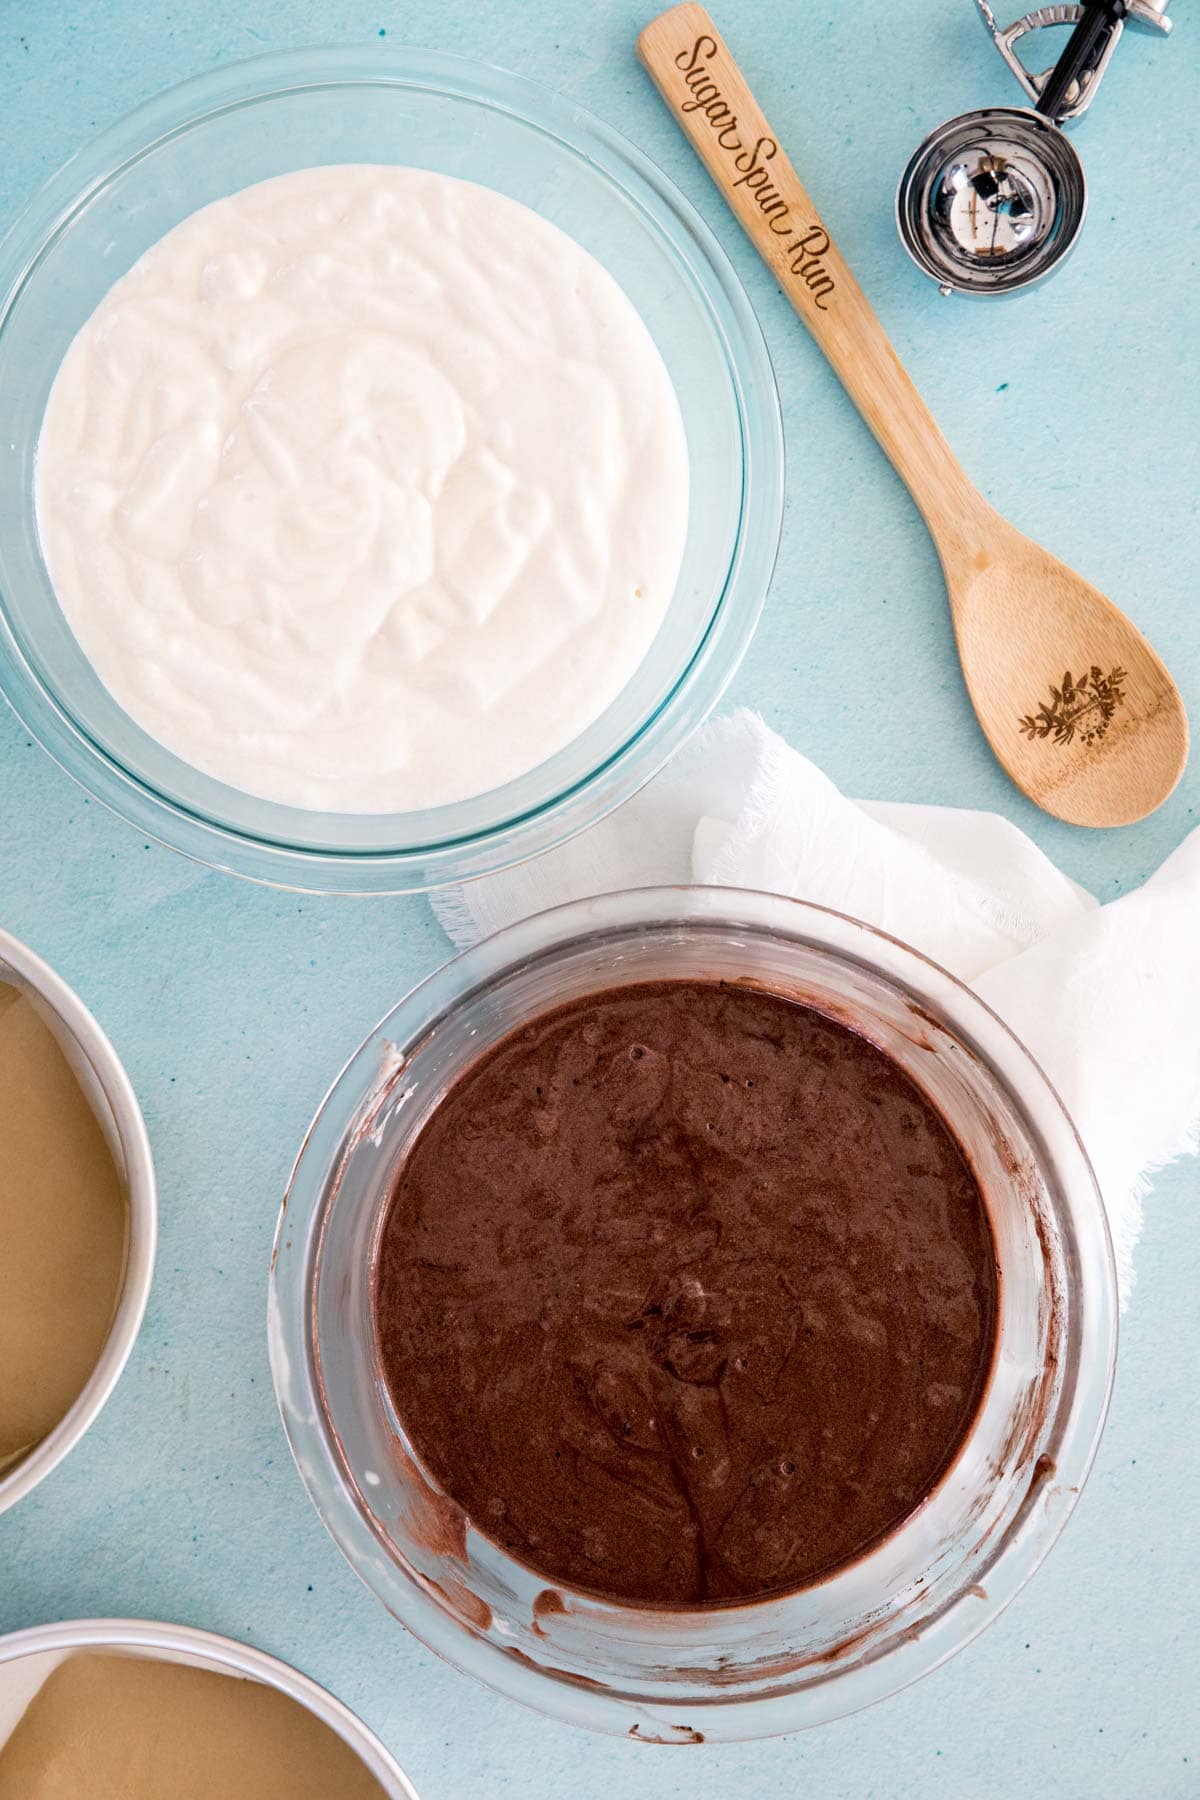
Creating a moist, delicious chocolate batter out of our white one requires a bit of work. First, divide the batter by portioning 3 cups of batter into a medium-sized bowl (this is less than half of the batter). We’ll be making this smaller (3-cup) portion into our chocolate version. To do this, bloom a bit of cocoa powder by mixing it with some very hot water (doing this helps develop the chocolate flavor, it’s why I add hot water to my chocolate cake batter!). Then, because cocoa powder has a terrible habit of drying out cake, we add some more sour cream and a pinch of sugar (cocoa powder is bitter, too!) and stir this into our lesser half of batter.
The result after baking is a moist white and chocolate crumb. Because I wanted the stripes to be as dark as possible (zebras are white and black, not white and brown, after all) I used special dark cocoa, which is darker in color and usually sold in the baking aisle right next to regular cocoa. If you don’t have that on hand or can’t find it, natural cocoa powder will work instead.
Zebra Cake: It’s All About the Technique!
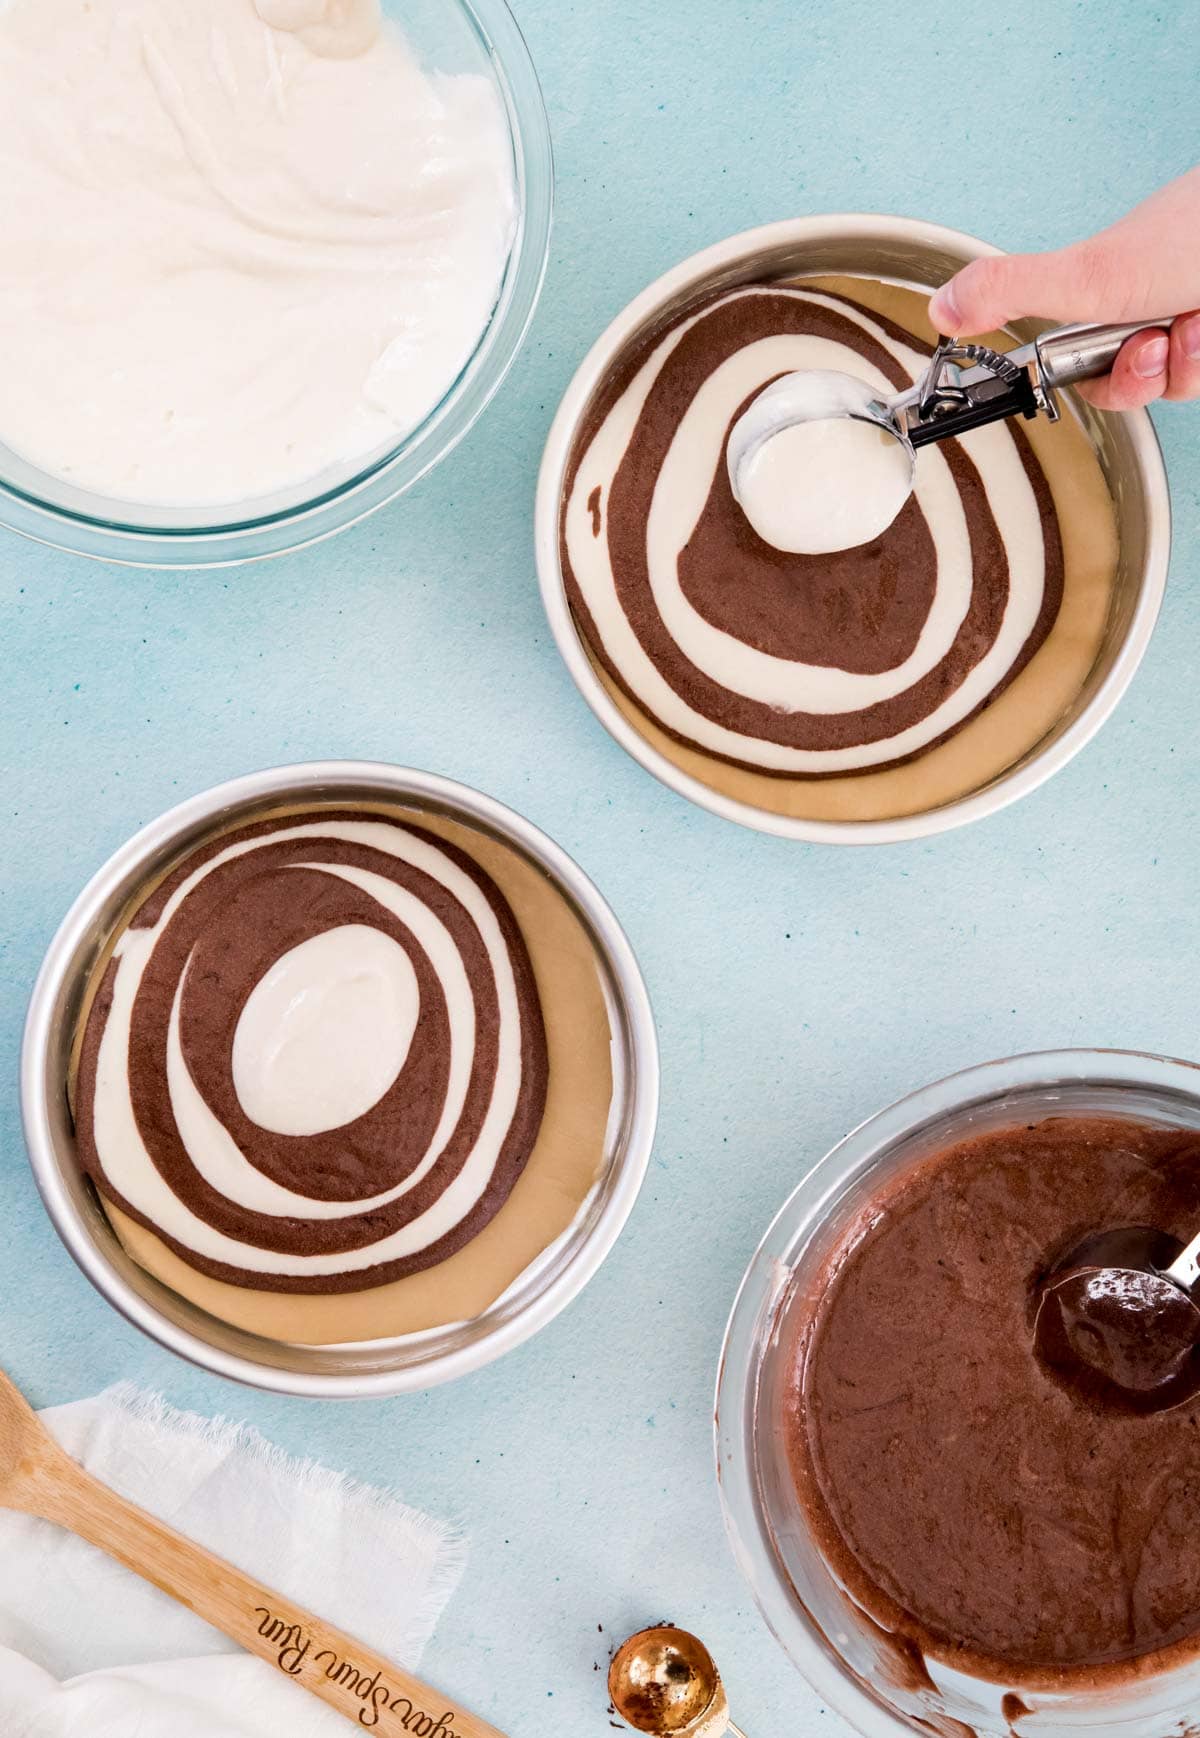
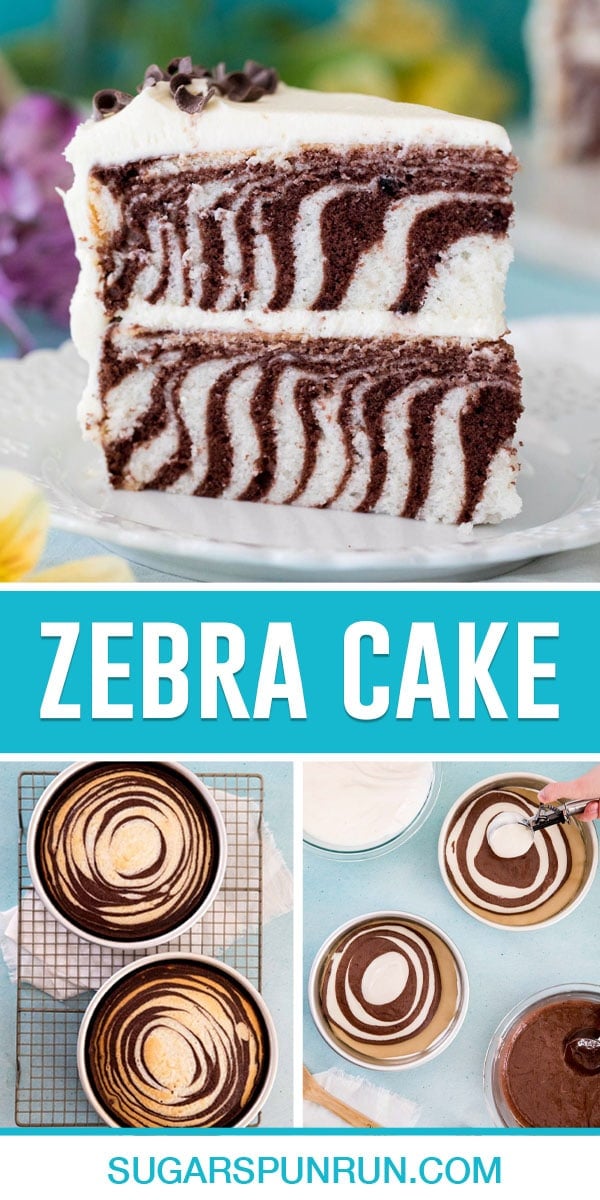
While it may seem like getting those beautiful black and white stripes might be impossible, the technique is surprisingly simple. After dividing your batter, Scoop about ⅓ cup of white batter into the center of your cake pan. Then, scoop slightly less chocolate batter and dollop that right in the center of your white batter. Repeat until you’ve used all of the batter.
Two important things to keep in mind when portioning zebra cake batter: For flawless stripes, it helps if one dollop/circle of white batter never touches another dollop of white batter. If it does, the cake takes on more of a marbled appearance. If your batter isn’t spreading enough for you, take a spoon and gently nudge it out, but you should not need to spread it across the whole cake pan. The batter should naturally spread a little bit from the weight of the next dollop of batter. Watching my video may be helpful before you begin.
I always start and end with the white batter, because you have slightly more of it.
Icing Options
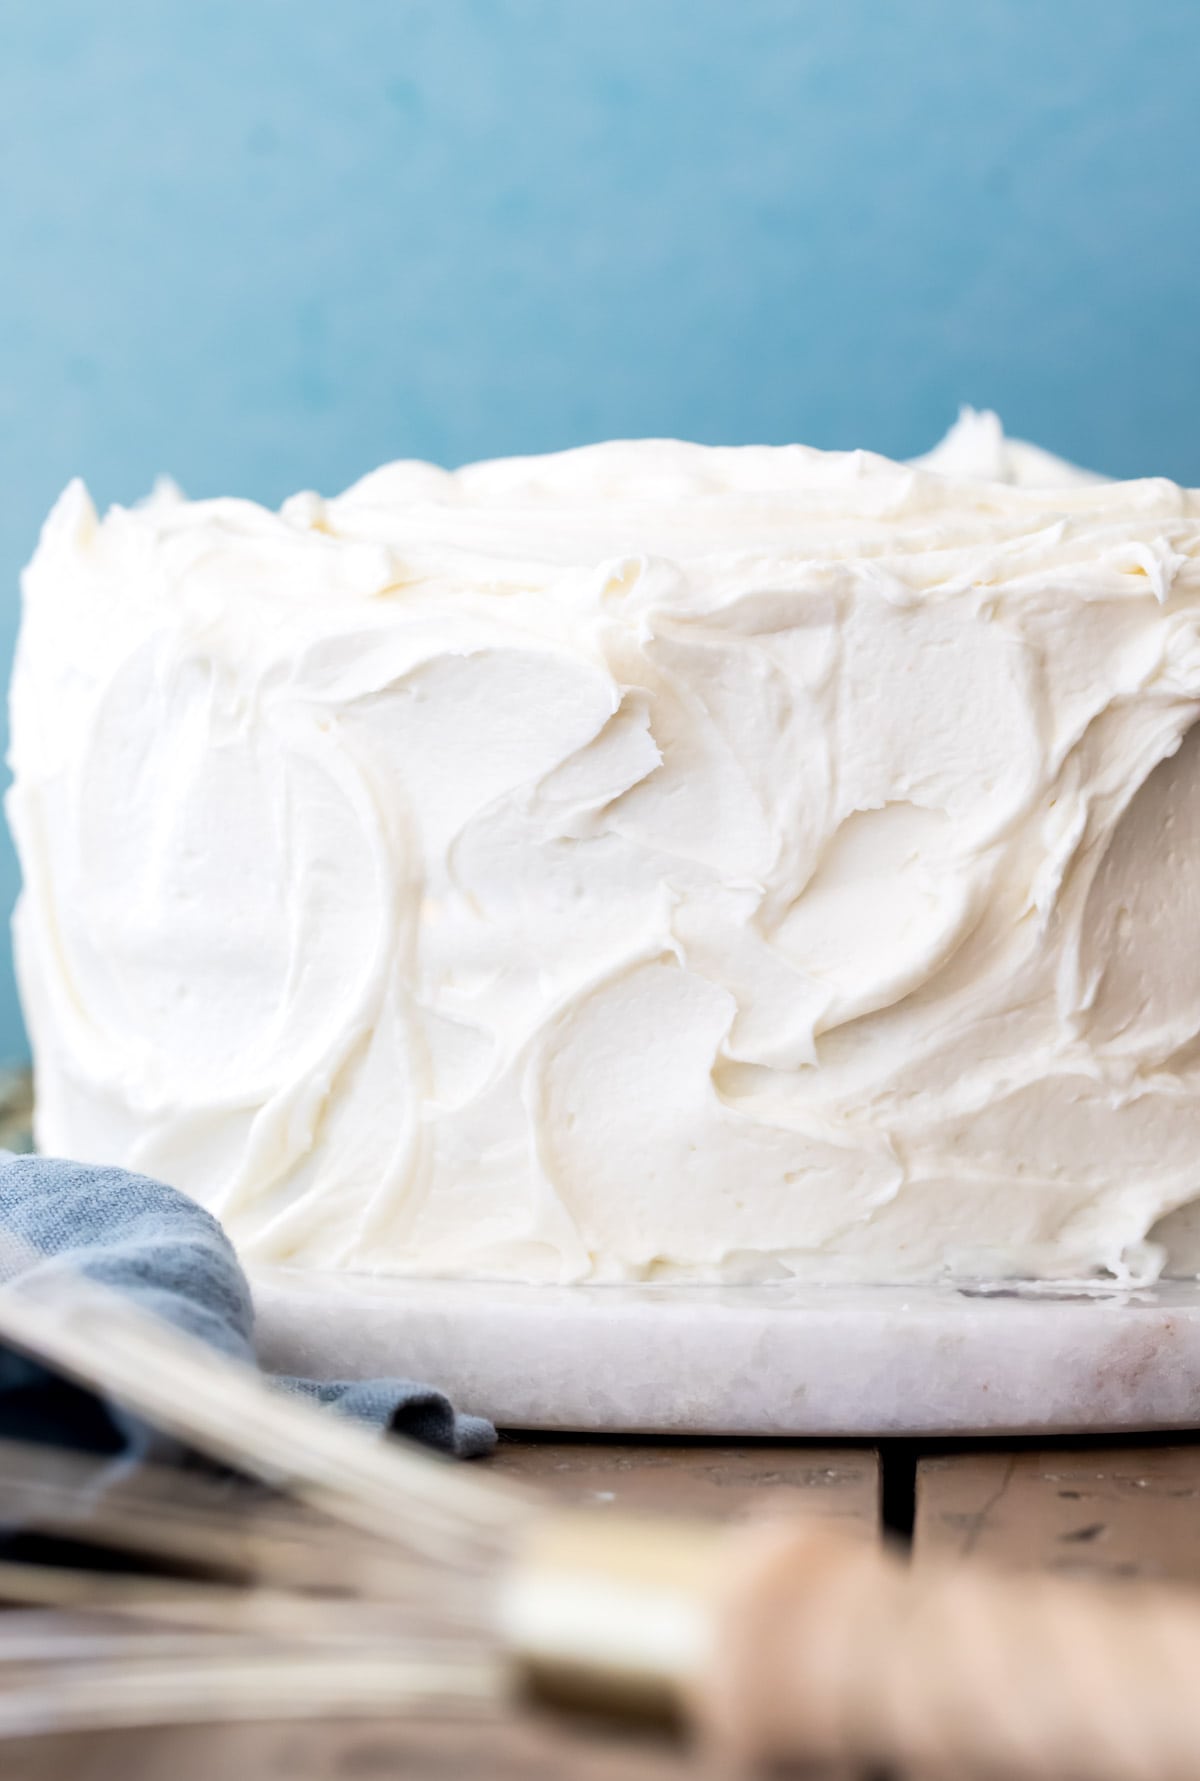
I recommend using my white chocolate buttercream that I just shared. It’s not overly sweet and it complements the zebra cake so nicely. If you don’t care for white chocolate (I actually don’t either but love it on this cake), you could use my favorite chocolate frosting instead. Here are a few other options that would work here:
- Cream cheese frosting or chocolate cream cheese frosting
- Swiss meringue buttercream
- Buttercream frosting or chocolate buttercream
Storing
Store in an airtight container. At room temperature it will keep for 1-2 days or it may be refrigerated for up to a week (just keep in mind the fridge is liable to dry out your cake). Zebra cake (frosted or unfrosted) may also be frozen and will keep for 2-3 months in the freezer.
Enjoy!
Let’s bake together! Be sure to check out my video in the recipe where I’ll show you exactly how I make this in my own kitchen!
Zebra Cake
Ingredients
- 2 ¾ cup (315 g) cake flour¹
- 2 cups (400 g) granulated sugar
- 1 Tablespoon baking powder
- 1 teaspoon salt
- 6 Tablespoons (85 g) unsalted butter softened to room temperature
- ⅔ cup avocado oil, canola oil or vegetable oil
- ¾ cup (175 ml) whole milk room temperature preferred
- ½ cup (120 g) sour cream
- 1 Tablespoon clear vanilla extract²
- 6 large or extra large egg whites room temperature preferred (see note for suggestions on recipes to try with leftover egg yolks)
For the Chocolate Layer
- ¼ cup (25 g) dark cocoa powder³
- 2 Tablespoons very hot or boiling water
- 2 Tablespoons sour cream this is additional from the sour cream listed above
- 2 Tablespoons granulated sugar this is additional from the sugar listed above
- 1 batch White Chocolate Frosting (or preferred frosting, see other great alternative icings listed in the post)
Recommended Equipment
Instructions
- Preheat your oven to 350F (175C) and prepare two 8-inch round cake pans (they must be at least 2” deep) by lining each of the bottoms with a round of parchment paper and generously spraying the sides with baking spray.
- In a stand mixer (or you may use a large bowl and an electric mixer) stir together flour, sugar, baking powder, and salt until thoroughly combined.2 ¾ cup (315 g) cake flour¹, 2 cups (400 g) granulated sugar, 1 Tablespoon baking powder, 1 teaspoon salt
- Turn your mixer to low speed and add butter, one tablespoon at a time, not adding the next tablespoon until the first is incorporated. When you’re finished, the mixture should resemble coarse sandy crumbs (see photo in post or video above for visual).6 Tablespoons (85 g) unsalted butter
- Add oil and stir until combined.⅔ cup avocado oil, canola oil or vegetable oil
- In a measuring cup, whisk together milk, sour cream, and vanilla extract and stir into batter until thoroughly incorporated.¾ cup (175 ml) whole milk, ½ cup (120 g) sour cream, 1 Tablespoon clear vanilla extract²
- In a separate clean, dry, and grease-free bowl use clean beaters to beat egg whites to stiff peaks (I show a visual of this in the post above and in the video).6 large or extra large egg whites
- Use a spatula to gently fold egg whites into batter (don’t overmix, but make sure there are no lumps of egg white remaining).
- Portion 3 cups (580 grams) of batter into a separate bowl (you’ll be left with 5 cups in your first bowl), we’ll be making this into chocolate batter.
To make chocolate batter
- In a large measuring cup, stir together hot water and cocoa powder (it will be thick!). Add sour cream and sugar and whisk until well combined, then stir into your smaller bowl of batter and use a spatula to carefully stir together until completely combined.¼ cup (25 g) dark cocoa powder³, 2 Tablespoons very hot or boiling water, 2 Tablespoons sour cream, 2 Tablespoons granulated sugar
- Dollop approximately ⅓ cup of white batter into the center of each of your prepared cake pans. Using a clean scoop, scoop just shy of ⅓ cup of chocolate batter and drop that directly onto the center of the white batter. Repeat, alternating batter flavors, until you have used all of the batter. Take a reasonable amount of care so that your white batter doesn’t touch another ring of white batter nor does a ring of chocolate overlap with any of the other chocolate batter, this will keep your stripes looking like stripes and not like marbled swirls (more about this in the post).
- Carefully transfer pans to 350F (175C) oven and bake for 35-40 minutes or until a toothpick inserted in the center comes out clean or with moist crumbs. Allow to cool in pans for 15 minutes then run a knife around the edges of the cake to loosen from the sides (if needed) and carefully invert onto a cooling rack to cool completely.
- If needed, carefully level the cakes with a sharp serrated knife once completely cooled.
- Decorate using my white chocolate icing linked to in the ingredients, or with your frosting of choice (see notes for some of my favorite recommendations for this cake).1 batch White Chocolate Frosting
Notes
Recipes to Make with Leftover Egg Yolks:
- Creme Brûlée (easier than you probably think!)
- Pound Cake (you need 6 whole eggs and 6 egg yolks for this recipe, so you’re halfway there!)
- Cream Puffs
- Eclairs
- Chocolate Pie
Nutrition
Nutritional information is based on third-party calculations and should be considered an estimate only. Actual nutritional content will vary based upon brands used, measuring methods, cooking method, portion sizes, and more.

Jill
Came out fantastic! The only think I slightly changed was the amount of chocolate. I didn’t have dark so I made the chocolate stronger by adding a third more. Plus, some diced up dark chocolate chips. I used cream cheese frosting. It was a big hit at my husbands work potluck.
Deborah
This cake turned out so well! It was a hit with everyone. Also made the white chocolate frosting to go with it, it was perfect!
Emily @ Sugar Spun Run
Yum! Enjoy, Deborah 😋
Carolina
Maybe it’s just me, but I don’t see the video link anywhere. Would you mind helping me find said video?
Emily @ Sugar Spun Run
Hi Carolina! Are you running ad blockers? Usually that will keep the video from showing. If that’s the case, it will show up if you disable them.
Carolina
that did the trick! thank you so much Emily!
Emily @ Sugar Spun Run
Yay! You’re welcome 🥰
Amy Wonder
Good evening, I was wondering if I could make this cake with a different type of milk such as 2% or 1%?
Sincerely,
Amy Wonder. (btw love your blog!)
Sam
Hi Amy! I’m so glad you’ve been enjoying the blog! 2% milk should work just fine. Enjoy 🙂
Jenni
I want to make this cake but my 8” cake pans are only 1” deep, not 2 inches. How do I adjust this recipe without buying new cake pans.
Sam
Hi Jenni! I would take care not to fill your cake pans more than 2/3-3/4 of the way full, max. You may be able to get three layers doing it this way, or you may just have a bit of extra batter to discard. The baking time will also be reduced, I would start checking the cakes at 28 minutes. I hope that helps!
Kim
Could you make cupcakes with this recipe?
Sam
Hi Kim! It will take a bit of time to do, but you certainly can. 🙂
Cindy Wall
Great recipe, very easy to follow with the video. I made this using gf flour and it was so good. Because I did not have clear vanilla, I used almond extract today and it was very tasty! I also did not have the extra dark cocoa and just used regular and still think it came out very pretty. Not as difficult or as intimidating as it looks. A fun showstopper. 🙂
Sam
I’m so glad you enjoyed it so much, Cindy! 🙂
Kim Wisner
This was absolutely fantastic! I made a 11×15 sheet cake and frosted with your white chocolate frosting. About 30 people had a piece and LOVED LOVED it. I took pictures of you’d like to see! Thank you!
Emily @ Sugar Spun Run
Wonderful! We’re so happy it was a hit. And we’d love to see the pictures! You can share them in our Facebook group or tag us on Instagram @sugarspun_sam 😊
Kathy Winkle
Best tasting cake as well as great looking!
Emily @ Sugar Spun Run
Thanks so much, Kathy! Enjoy 😊
Miriam Rose Blanar
To make this into a big sheet cake, would I need to double the recipe?
Emily @ Sugar Spun Run
Hi Miriam! Depending on how big your pan is, you may need to double it or just increase by 50%. A 12 x 18 would need a double batch, and an 11 x 15 would need just a 50% increase. Hope that helps!
Miriam Rose Blanar
Thank you so much! That does answer my question!
Julia
I liked making this cake with my daughter, twice! The first time we added the canola out only to realize it’s definitively green. At least the. Rand we had, which is a biological one. We decided to aim for something closer to zebra colors and it worked well with sunflower oil.
Both times we made the cake, the layers came out super thin. Like well below an inch high got each layer. Clearly I’m doing something wrong. Could it be because I’m using Wilton strips to keep the sides of the pan cooler than the bottom as the cake bales? Because I put both pans in the oven at the same time, touching each other?
Thanks for any tips!
Sam
Hi Julia! I’m glad you found a substitute that works. The cake strips may be causing an issue, but I’ve never used them as I never found them necessary so I can’t say for sure. Your baking powder could also be expired causing the cake to not rise. The other thing that could cause this, but is unlikely is the egg whites not quite being whipped enough. I hope this helps. 🙂
Steph
This was fun to make, thanks for sharing! I halved the recipe and reduced the sugar by 2 tbsp in the white cake batter. The sweetness level was just right for me and it looked so cool on the inside!
Emily @ Sugar Spun Run
We’re so happy you enjoyed the process and the final product, Steph! Thanks for your review 😊
Lacey
If I reduce the recipe by half can I avoid a two two layer and make it a single layer in my spring form pan? My husband isn’t a huge cake person so I feel two layers is too much for us, and Im just learning how to do this baking thing XD
Sam
Hi Lacey! If you cut the recipe in half you can certainly bake just a single layer cake. 🙂
Stephanie
Can I make this same cake in 3-6” pans?
Emily @ Sugar Spun Run
Hi Stephanie! Yes, you can bake this cake in your 6 inch pans. Just make sure not to overfill the pans, as you will likely have excess batter. We’re not sure on a bake time, so just keep an eye on them 😊
Heather
Thank you for the wonderful tutorial video! If I wanted to make a tiger cake (Cincinnati Bengals fan here), would adding orange gel coloring to the white batter affect the cake? As you mentioned, you don’t want to deflate the egg whites by over mixing but would gently stirring in the coloring be ok?
Sam
Hi Heather! I think that would be OK! Enjoy 🙂
Margareth Gutierrez
Hi!!! I’m totally in love with your recipe, but I have a question. Why do you recommend not use shallow cake pans?
I’ve tried another reverse method recipe and they always seems like the cake is not done in the center. That could be a reason? A shallow cake pan?
Emily @ Sugar Spun Run
Hi Margareth! Whipping the egg whites creates a voluminous batter that needs a good bit of room in the pan. Using too shallow of a pan can cause your cake to overflow and then sink, ultimately leading to a raw/underdone center. Hope that helps! 🙂