
Marble Cake
This post may contain affiliate links. As an Amazon Associate I earn from qualifying purchases. Please read my disclosure policy.
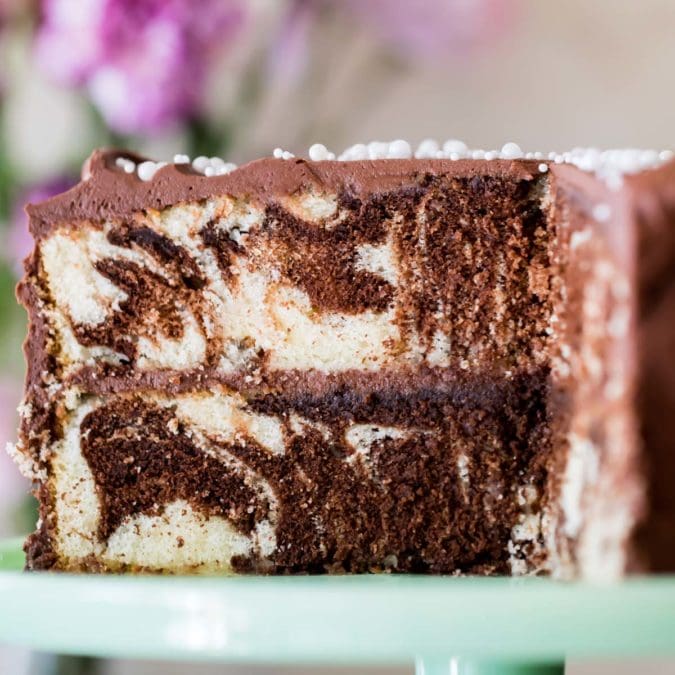
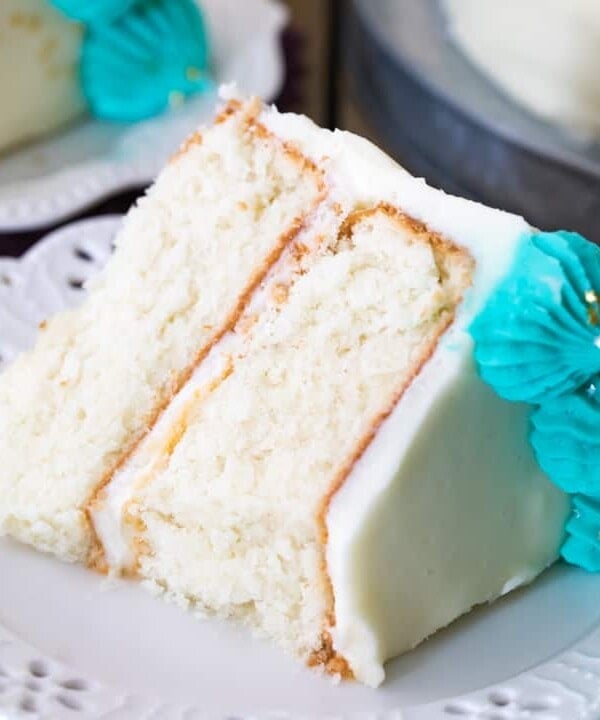
The ultimate people pleaser, this soft, fluffy, moist Marble Cake is a swirled masterpiece of vanilla and chocolate. This cake is shockingly easy to make and tastes as good as it looks! Recipe includes a how-to video.

Marble Cake (AKA: The People Pleaser)
Some people like chocolate cake, some people like vanilla cake–but everyone loves this marble cake!
It’s a beautiful, swirled combination that’s perfectly chocolatey with just the right amount of vanilla. If you’ve tried and enjoyed my zebra cake, you’ll love this richer, more elegant take, minus the whipped egg whites and special ingredients. It’s simple, gorgeous, and designed to please!
This recipe is a close cousin to my popular vanilla cake; it’s wonderfully soft, moist, and so flavorful. When developing this recipe, I originally toyed with the idea of making two separate batters, but ultimately decided it was too much of a hassle. That technique produced many more dishes and a much larger mess, and the cakes didn’t bake as evenly together as I would’ve liked. After a dozen more rounds of testing, I finally figured out a way to keep things simple with one batter for both flavors.
You’ll love my recipe because it’s:
- Perfect for parties–everyone is happy!
- Soft, fluffy, and moist.
- Simple to make with just one batter.
- Cloaked with a thick and fudgy chocolate frosting (just one of many options–more below!)
What You Need
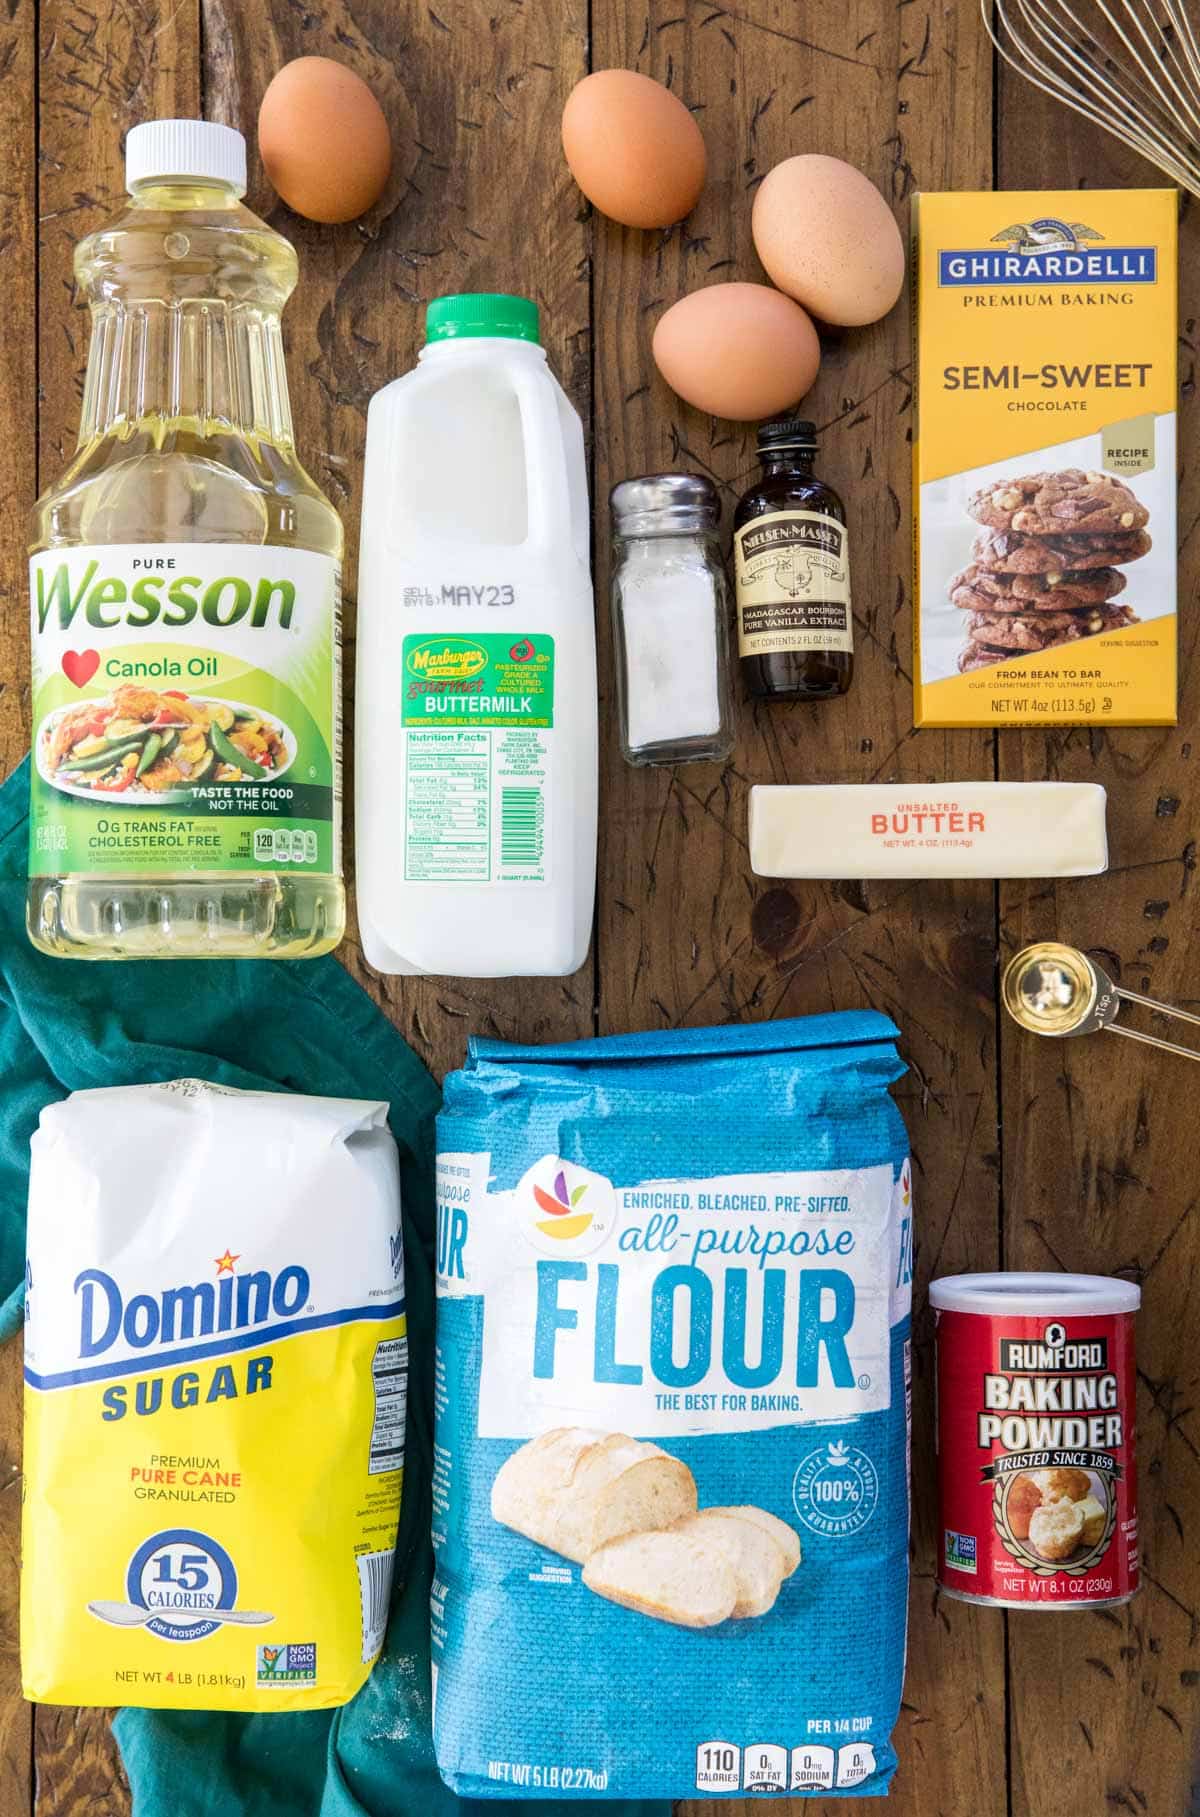
This marble cake uses basic ingredients you’ll already have on hand. Let’s go over a few of the key players:
- Butter and oil. Butter adds flavor that you would miss from using just oil, and oil adds moisture that you would miss if you only used butter.
- Flour. I use all-purpose, but cake flour may be substituted; see the notes below the recipe card.
- Baking powder. A tablespoon may seem like a lot. It’s not a typo, trust me on this one 😉.
- Buttermilk. Yes, even though we aren’t using baking soda (which is often used alongside buttermilk, if you recall my buttermilk substitute post), we are still using buttermilk. It adds flavor and moisture to the marble cake.
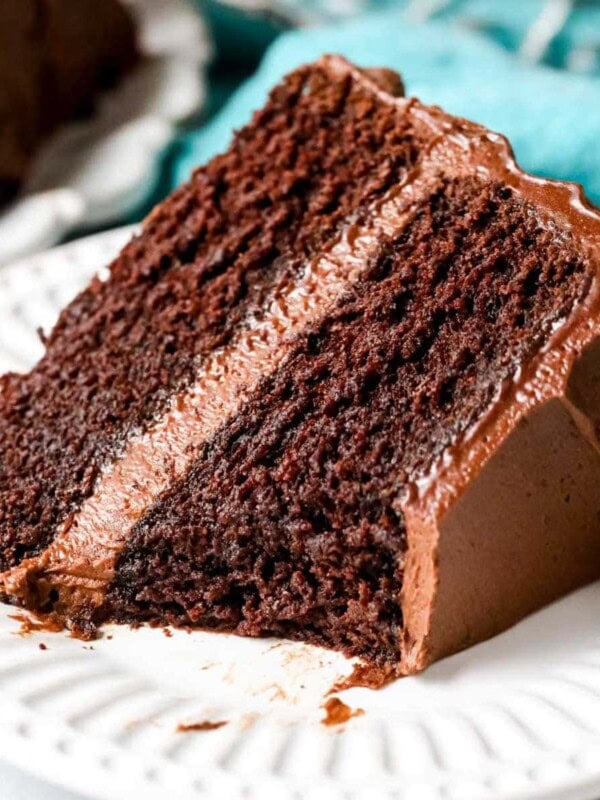
- Chocolate. Adding cocoa powder didn’t give me the deep, distinct chocolate flavor that I was looking for (largely because we aren’t adding any hot water to bloom it, like in my chocolate cake recipe), but adding melted semisweet chocolate did the trick. You can use semisweet or dark chocolate here depending on your preference.
SAM’S TIP: If you only have salted butter on hand, you can reduce the salt in the recipe to ½ teaspoon.
Remember, this is just an overview of the ingredients I used and why. For the full recipe please scroll down to the bottom of the post!
How to Make Marble Cake
- Heat your chopped chocolate in the microwave until it’s smooth and melted, then set aside.
- Cream the butter, oil, and sugar until fluffy, then stir in the eggs one at a time. Add the vanilla.
- Combine the dry ingredients in a separate bowl, then alternate adding this mixture and the buttermilk to the wet ingredients, starting and ending with the dry ingredients.
- Portion ⅓-½ of the batter into a separate bowl and add stir in the melted chocolate until uniform.
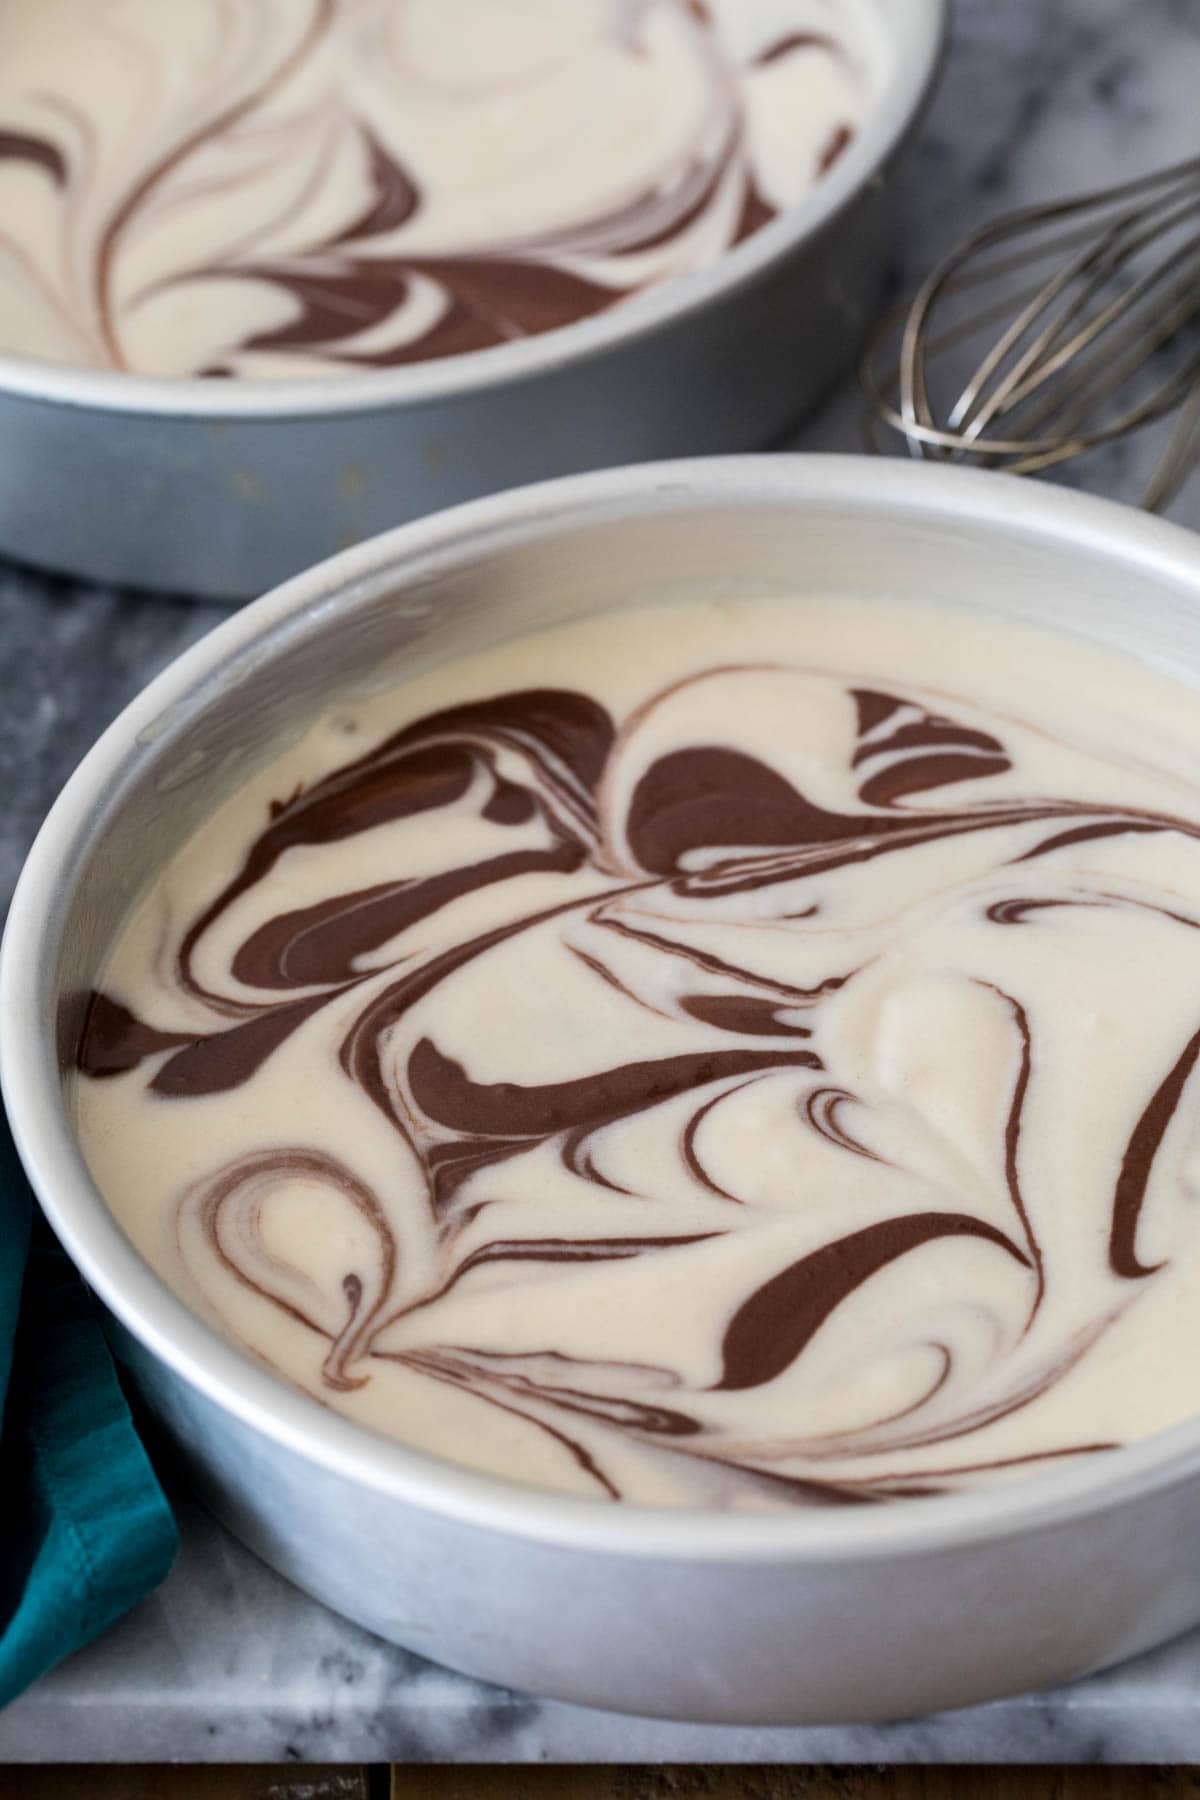
- Alternate adding the vanilla and chocolate batter into your pans, then swirl them with a knife for a marbled appearance.
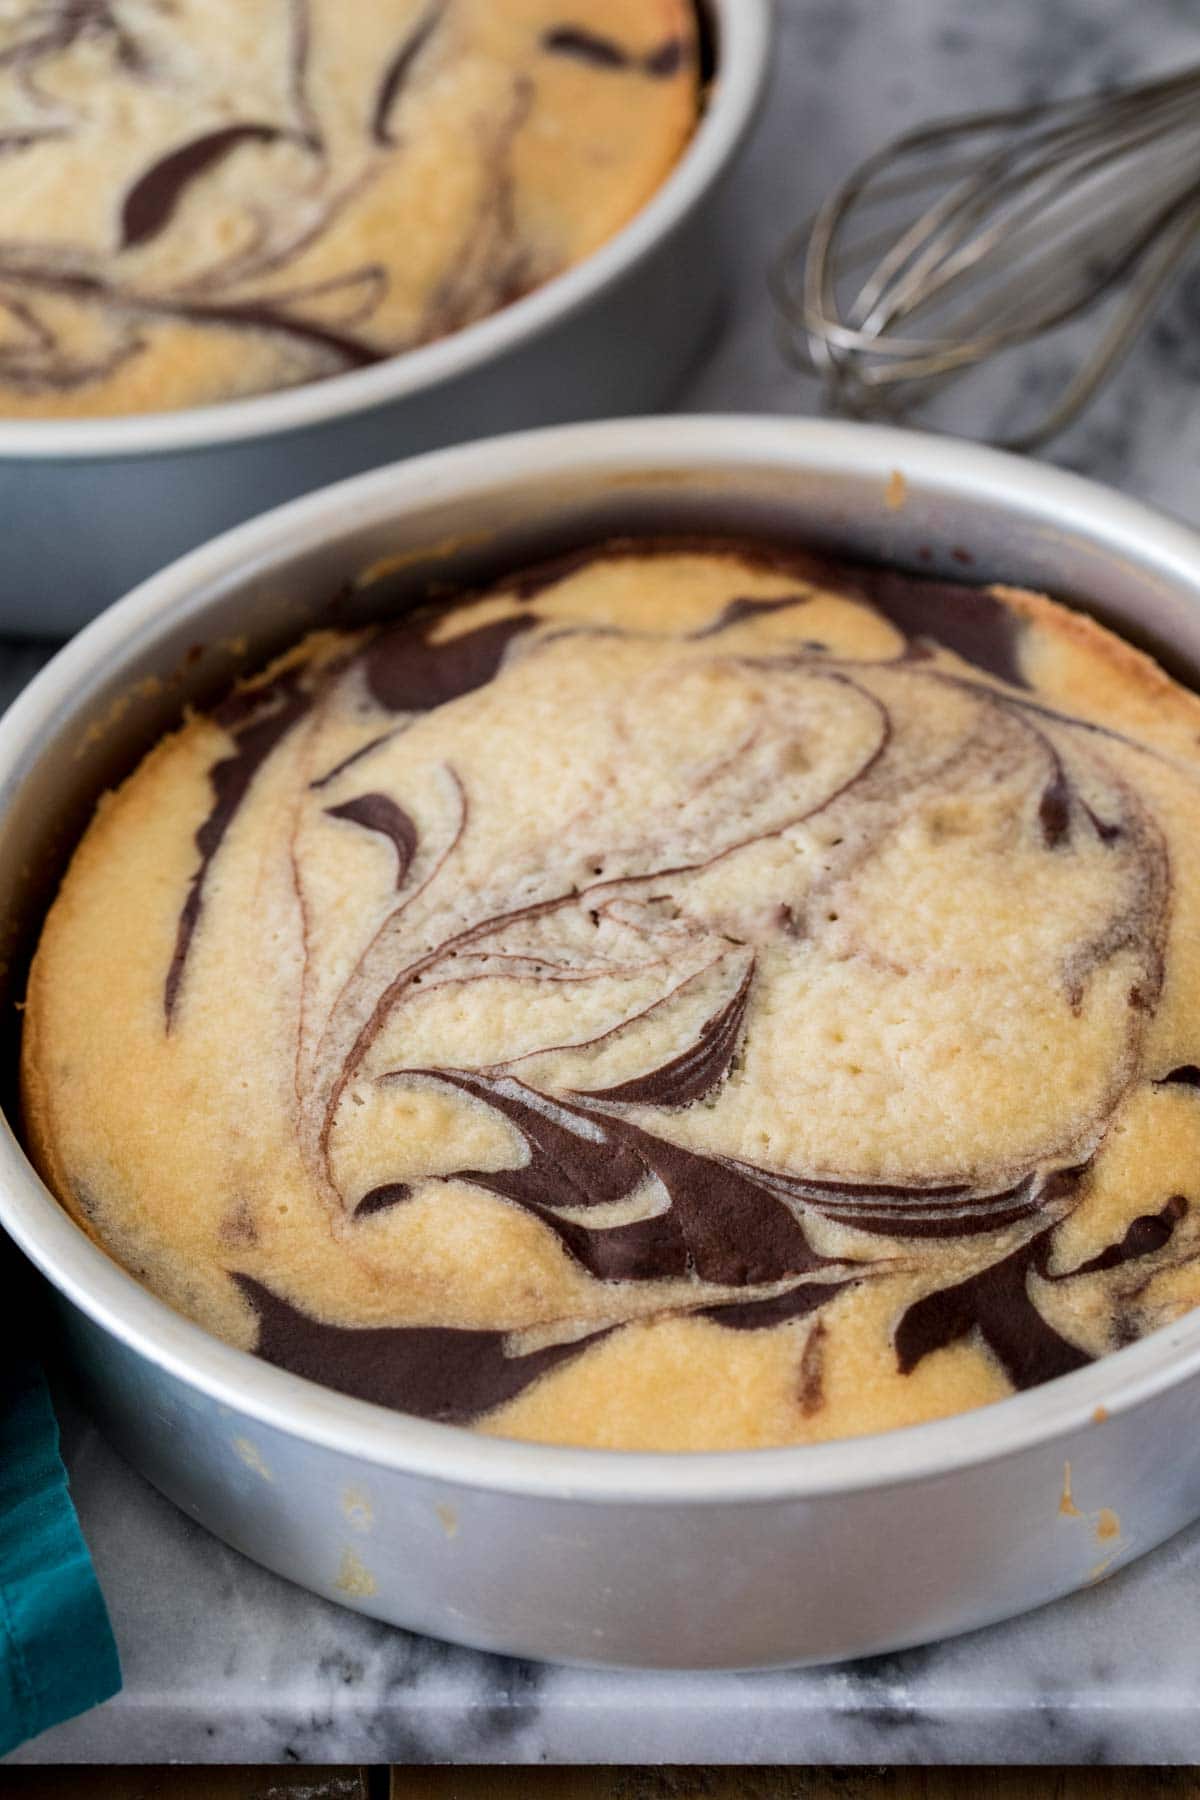
- Bake your cakes for 30 minutes, let them cool in their pans for 15 minutes, then invert them onto a cooling rack to cool completely before frosting.
SAM’S TIP: You can also reverse-cream this marble cake (the technique I used in my caramel cake) for a plush, dense crumb. If you often accidentally over-mix your cakes, it’s almost impossible to do so with the reverse-creaming method.
Frequently Asked Questions
I like using my favorite chocolate frosting (though in the video I used my chocolate buttercream; either will work!). If you’re looking for a vanilla option, my classic buttercream frosting, cream cheese frosting, Swiss meringue buttercream, or German buttercream would work well.
There are a few causes for a dry cake, but the main reasons are over-measuring your flour, overmixing, or overbaking.
I use a kitchen scale to measure my ingredients to avoid over-measuring my flour, as this is a very common mistake. I suggest you do the same! Once you begin combining the dry and wet ingredients, you want to be very careful to mix until just combined–and don’t use a mixer. Finally, you want to bake your marble cake until a toothpick comes out clean, or preferably, with a few moist crumbs; many ovens run hot though, so you’ll want to start checking your cake a few minutes before it should be done.
Follow these tips and your marble cake should turn out perfectly moist every time!
Store your marble cake in an airtight container. I recommend keeping it at room temperature, where it will keep for 2-3 days (so long as it isn’t a particularly humid environment). This cake may be refrigerated (again, in an airtight container) and will keep for about 5-7 days in the fridge–BUT, keep in mind that the refrigerator will dry out your cake, even in a container.
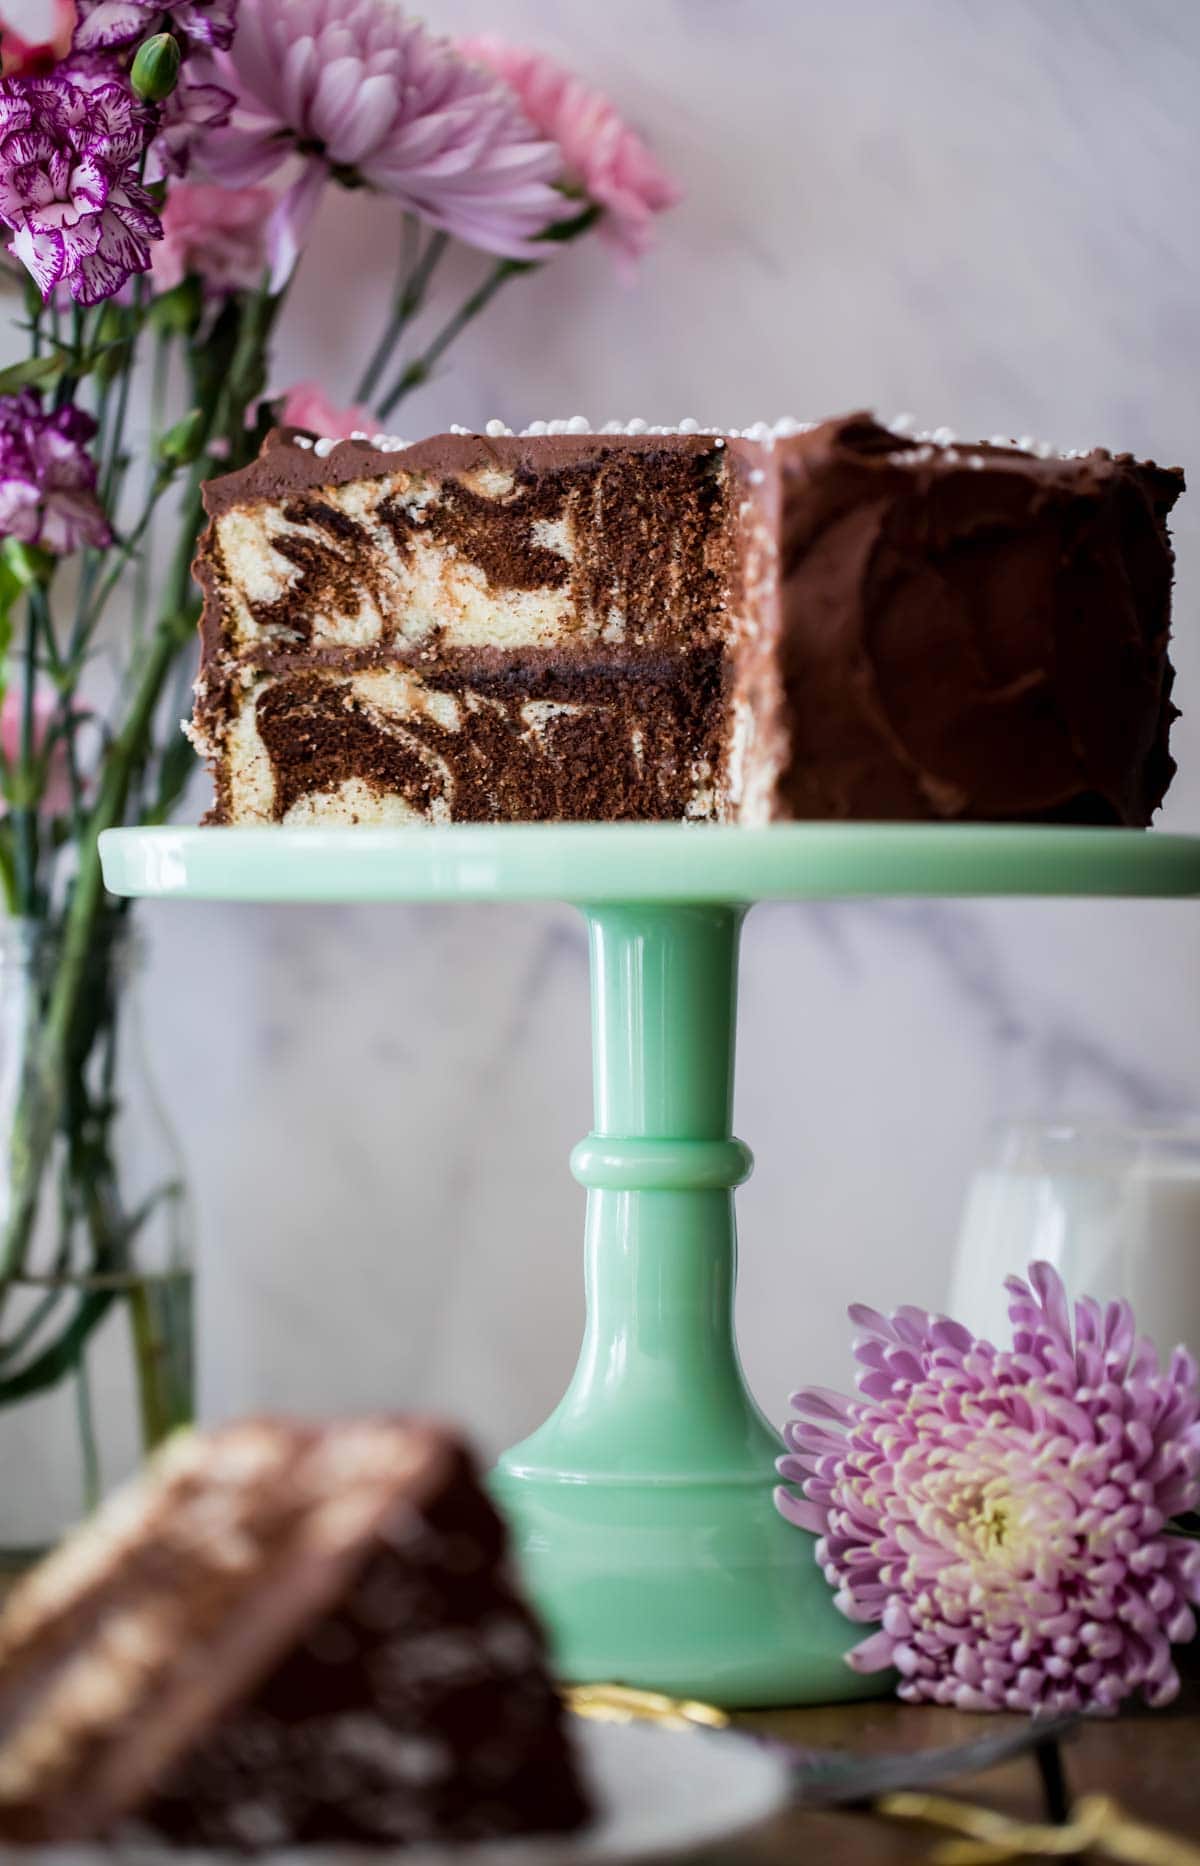
It’s always exciting to see the beautiful swirls when you cut into a marble cake!
Enjoy!
Let’s bake together! I’ll be walking you through all the steps in my written recipe and video below! If you try this recipe, be sure to tag me on Instagram, and you can also find me on YouTube and Facebook
Marble Cake
Equipment
Ingredients
- 4 oz semisweet chocolate bar, finely chopped
- ½ cup (113 g) unsalted butter, softened
- ½ cup (120 ml) avocado, vegetable, or canola oil
- 1 ¾ cup (350 g) granulated sugar
- 4 large eggs, room temperature preferred
- 2 teaspoons vanilla extract
- 3 cups (375 g) all-purpose flour
- 1 Tablespoon baking powder
- ¾ teaspoon salt
- 1 ¼ cup (300 ml) buttermilk, room temperature preferred
Chocolate Buttercream Frosting (see post for more frosting options)
- 1 cup (170 g) semisweet chocolate chips
- 1 cup (226 g) unsalted butter, softened to room temperature
- 2 cups (320 g) powdered sugar
- ½ teaspoon vanilla extract
- ½ teaspoon salt
- 2 Tablespoons heavy cream
Instructions
- Preheat oven to 350F and generously grease and flour two 8" round cake pans (you may instead use 9" pans, just keep in mind you will need to bake the cake for about 5 minutes less than indicated). Set aside.
- Place chopped chocolate in a microwave-safe bowl and microwave for 30 seconds. Stir well, and then return to microwave and heat in 15-second increments, stirring well in between, until chocolate is completely melted and smooth. Set aside.4 oz semisweet chocolate bar
- Using an electric or stand mixer, cream together butter, oil, and sugar until light and fluffy (about 30 seconds on high speed).½ cup (113 g) unsalted butter, ½ cup (120 ml) avocado, vegetable, or canola oil, 1 ¾ cup (350 g) granulated sugar
- Add eggs, one at a time, beating well after each addition. Pause as needed to scrape down sides and bottom of bowl.4 large eggs
- Stir in vanilla extract.2 teaspoons vanilla extract
- In a separate, medium-sized bowl, whisk together flour, baking powder, and salt.3 cups (375 g) all-purpose flour, 1 Tablespoon baking powder, ¾ teaspoon salt
- Using a spatula and gently hand-mixing, alternate adding flour mixture and buttermilk to the butter/oil batter, starting and ending with flour mixture and mixing until just combined after each addition. Do not overmix!1 ¼ cup (300 ml) buttermilk
- Pour ⅓-½ of the batter into a separate bowl and add chocolate mixture. Stir until completely combined and batter is evenly chocolate.
- Alternate adding vanilla and chocolate batter to each pan, evenly distributing batter into each pan. Use a knife to swirl for marbled appearance.
- Bake on 350F (175C) for 30 minutes, or until toothpick inserted in center comes out mostly clean but with a few moist crumbs (do not over-bake or the cake will be dry, you want there to be a few crumbs).
- Allow cake to cool for 15 minutes before carefully inverting onto cooling rack to cool completely before frosting.
Chocolate Frosting¹
- In a microwave-safe bowl, microwave chocolate chips at 15 second intervals, stirring between intervals, until chips are completely melted. Set aside and allow to cool slightly (about 10 minutes, stirring occasionally).1 cup (170 g) semisweet chocolate chips
- Cream room temperature butter with an electric mixer. Stir in slightly cooled chocolate and beat well.1 cup (226 g) unsalted butter
- Gradually add sugar, scraping down the sides and bottom of bowl occasionally.2 cups (320 g) powdered sugar
- Sprinkle in salt and vanilla extract, stir well.½ teaspoon vanilla extract, ½ teaspoon salt
- Gradually add heavy cream, increase speed to high and beat for 1 minute.2 Tablespoons heavy cream
- Spread a thick layer of frosting over the top of one cake round and sprinkle with mini chocolate chips. Top with second cake round and evenly frost cake. Slice and serve.
Notes
Cake Flour
Cake flour may be substituted. If using weights, use the same weight indicated in the recipe. If using cups you will need to use 3 cups + 6 Tablespoons of cake flour (cake flour is lighter than all purpose, which is why the weight is the same but the volume is different).Storing
Store cake in an airtight container at room temperature for up to 2 days or in the refrigerator for up to 5 days. Keep in mind the refrigerator tends to dry out cakes and make them a bit dry!Troubleshooting
A cake that turns out dense, dry, or crumbly (or tasting like cornbread) was most likely over-mixed, the flour was over-measured, or the cake was over-baked. When mixing wet and dry ingredients together, do not use an electric mixer, use a spatula and a gentle hand to stir ingredients together until combined. If you are not using a scale for this recipe, please see my tutorial on how to measure flour. When baking, always bake in the center rack. Make sure that your oven is not running hot, as many ovens run much hotter or cooler than indicated. Keep an oven thermometer near the center of your oven to monitor the temperature, as an oven that runs hot will cook a cake too fast and dry it out. Use the toothpick test to test if your cake is done. Ideally a toothpick inserted in the center of the cake should come out with a few moist crumbs (but not wet batter). If the toothpick comes out completely clean, the cake is definitely done baking and may be bordering on being over-baked.Nutrition
Nutrition information is automatically calculated, so should only be used as an approximation.
Like this? Leave a comment below!


Hello. Another question. I made a 1/2 recipe of this cake but I didn’t have buttermilk, so I subbed a combo of sour cream and whole milk. (I Googled the ratios of both for the 1/2 amt of buttermilk in the recipe). The flavors were very good, but the layers (I made 2 6″) only rose to about 1″ tall. Did the sub for the buttermilk cause the layers to not rise much or is the recipe written to make 1″ layers? Also, because I didn’t have a semi-sweet bar, I subbed cocoa, melted butter and sugar, again I Googled the ratios for the 1/2 recipe amount. I also added about 2 Tbsp of melted semi-sweet choc chips to the choc mixture for the cake. I got a really good chocolate color and flavor with these subs. I typically follow a recipe completely, but I really wanted to try your cake. Overall, very good flavors and colors and textures. I just want taller layers. Thoughts? Thank you.
Hi Paula! A 6 inch pan typically holds 2.25 cups of batter and half of this recipe would make about 4 cups so that could account for the thinner layers. The substitutions could have also contributed to the thinner cakes. I’m glad you ultimately enjoyed the cakes. 🙂
Thank you so much. Makes sense to me. Would this recipe work for marble cupcakes? Thank you!!
I think it would work just fine as cupcakes. While I haven’t personally done it I think they will probably bake for about 17 minutes. 🙂
Hello! If I don’t have the semi-sweet baking bar, can I use semi-sweet chocolate chips, which I always have.
Thank you. Looking forward to trying your recipe!
Hi Paula! Chocolate chips aren’t my preference for this cake, but they can work. Enjoy the cake! 🙂
Should I doulble the recipe for 9 x 13 pan?
Hi Siran! This will make enough batter to fill a 9 x 13. 🙂
love this recipe, using it for a friends wedding cake. i am curious if the batter is able to sit on the counter for 30-50 minutes before baking. i have multiple cakes to make but only one oven. i know the second the baking powder and buttermilk combine, they start activating as the leavening agent so i wanted to make sure if it were to sit, would it still rise?
Hi Emily! I think letting it sit for 50 minutes will work just fine. I’m so glad you’ve enjoyed the cake so much! Congratulations to your friend!
Can I substitute the flour for gluten free 1:1 flour?
Hi Katie! I haven’t personally tried it, but I think it could work. 🙂
Can this be baked in a 9×13 for a 1/4 sheet cake? What would the bake time be?
Hi Aubrey! This will fit in a 13 x 9 pan. I have not personally done it so I can’t verify a time, but I have had a couple of other readers say it took about 40 minutes to bake. I would be sure to check it so you don’t over or under-bake the cake. 🙂
Hi! I’m making this cake next saturday and I was wondering. Can I make this into only one 8″ springform pan? I don’t have much of a choice haha since all of the 8″ pans are out of stock in every store near me🤣
Hi Nella! The springform pan may not hold all of the batter and we’re not sure on a bake time, but it can be done. Make sure to not over-fill your pan and keep an eye on it as it bakes 🙂
I’ve made this three times now, and it’s been perfect every time! Thank you for the recipe!
Hi, I tried your recipe it is so good, delicious and fluffy and it is not so sweet , the only thing I will change it next time that I will add more melted chocolate to the brown part . It took 45 minutes in the oven . Thank you so much for sharing this good delicious recipe 💐♥️♥️♥️♥️♥️
It was okay but a bit too dense for our taste
I’m so sorry to hear this happened, Cheyanne! Is it possible the cake was over-mixed or over-baked? It shouldn’t come out dense. 🙁
I need to make a 1/2 sheet. Do I need to double or triple this recipe? Thank you
Hi Malinda! If you are making this in an 18 x 13 you will need to double the recipe. 🙂
I haven’t made the cake yet but was looking for the video but couldn’t find. Where should I look for the video? I will try this recipe but wanted to see your video.
Hi Georgia! The video is at the bottom of the post within the recipe card, but if you have ad blockers on, it will not appear. Fortunately you can always find it on our YouTube channel if need be 😊
This looks fantastic!
Can I bake this cake in a springform pan.
Hi Sara! The springform pan may not hold all of the batter and I’m not sure on a bake time, but it can be done. Make sure to not over-fill your pan and keep an eye on it as it bakes. 🙂
Same as other commenters: the baking time is wrong! I used 9” pans and checked at 20 mins…still liquid. 30 mins, better but still wet on the toothpick. Took them out at 40 minutes when “a few wet crumbs” came off onto the toothpick.
Hi Dani! I’m just curious why you checked it at 20 minutes? Opening the oven at 20 minutes will drop the temperature significantly and cause the bake time to be longer. 🙁
Because I was using 9″ pans and the instructions say to take off 10 minutes. So I did. But, in reality, I had to ADD 10. If I had been using 8″ pans I would have had to bake them even longer.
Hi Dani, that’s still a bit earlier than the recipe indicates and checking it early will still drop the oven temp, but I’m really not sure why it took that much longer. Did you use silicone, glass, or ceramic cake pans? Is your oven true to temperature? I calibrate my ovens and keep a pair of thermometers in them at all times to make sure my testing ovens are running true to temp so this is what my times are based off of. Were the cakes baked on the center rack and was your oven fully preheated? These would be my best guesses. How did the cake taste ultimately and was the texture correct?