
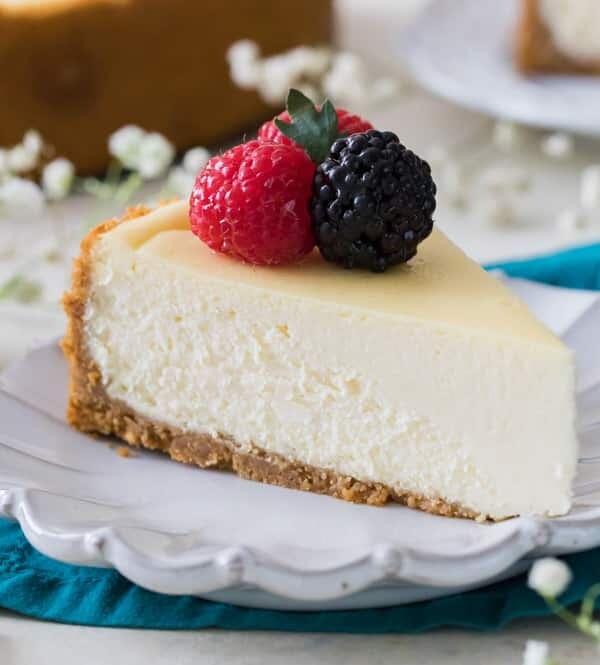
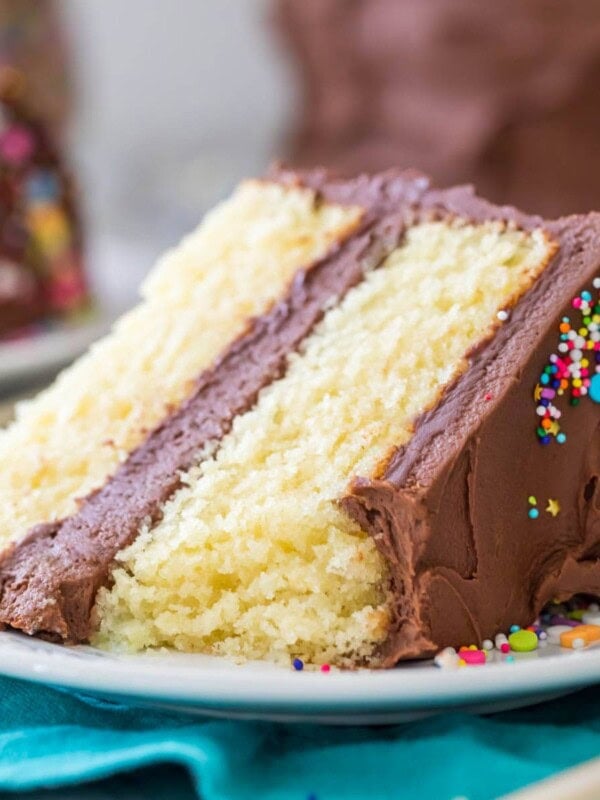
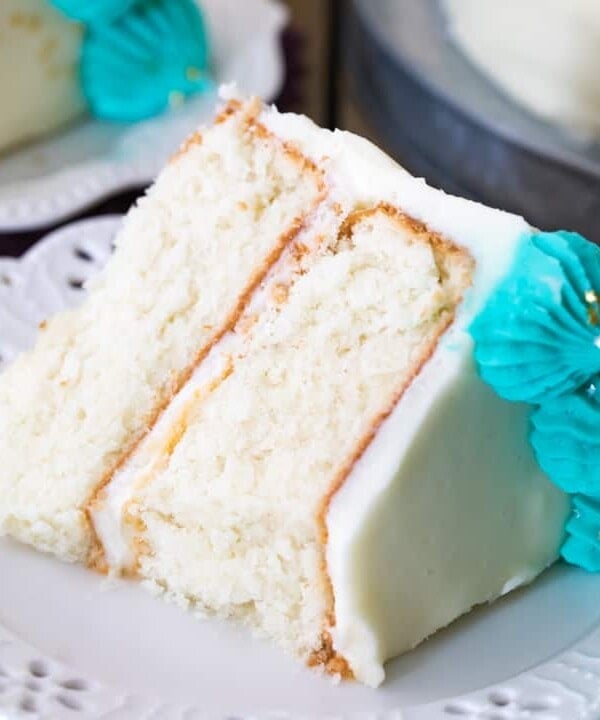
Caramel Cake
This post may contain affiliate links. As an Amazon Associate I earn from qualifying purchases. Please read my disclosure policy.
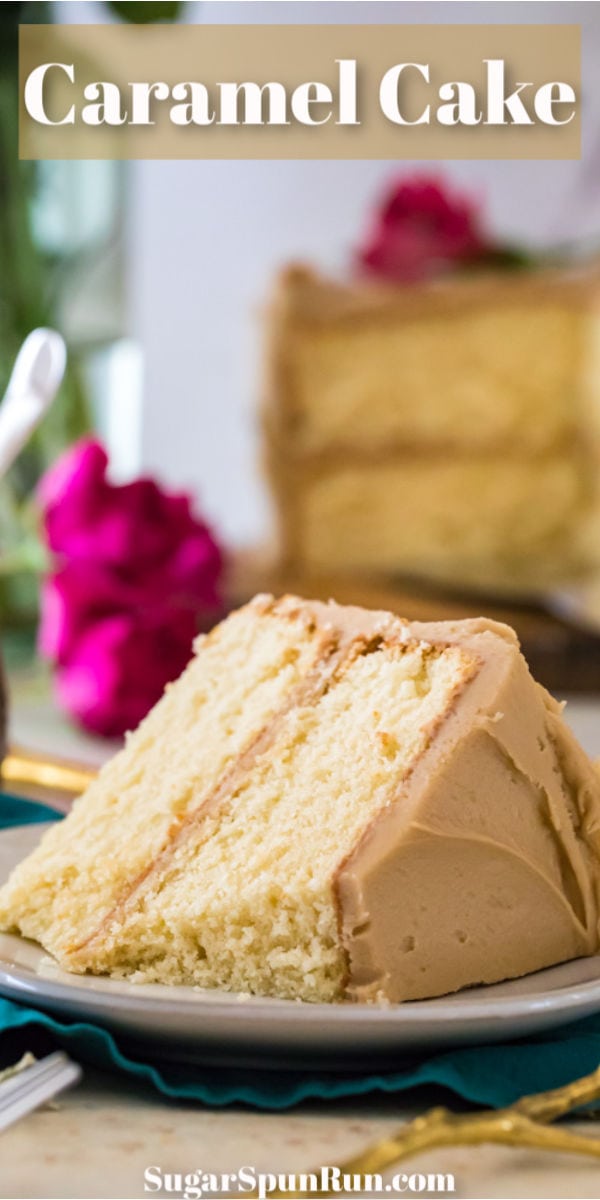
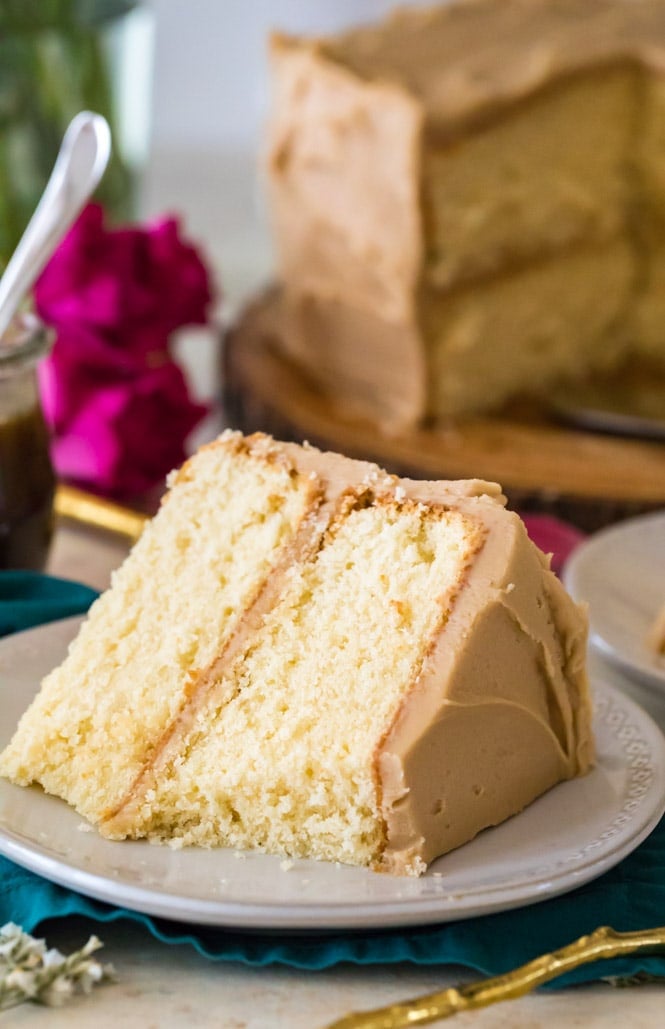
A buttery soft vanilla layer cake blanketed with a simple (no candy thermometer needed) caramel icing! This Caramel Cake is a sweet and simple old-fashioned cake recipe that I think you’re going to love. Recipe includes a how-to video!
Oooh, you are going to love this caramel cake. With its layers of tender, buttery vanilla cake that perfectly complements that rich, decadent caramel frosting…
I’m usually more of a chocolate cake person myself, but this recipe has made a convert out of me. Even Zach wanted a second slice, and he hardly has a sweet tooth at all. It’s sweet, but not overly sweet like you might expect. While the icing is definitely super rich, somehow it doesn’t seem overbearingly so when coupled with the cake, which is exactly the balance I was hoping to achieve when I started developing this recipe.
The actual cake layers that I used for this caramel cake recipe are actually adapted from my favorite vanilla cake, only made with the reverse creaming method. Let’s talk a little bit about that, in case you’ve never used this method before…

What is Reverse Creaming?
Reverse creaming simply means that instead of the traditional method of creaming our butter and sugar and other wet ingredients in one bowl and our dry ingredients and another and then combining the two (carefully, of course, so we don’t over-mix), we do things… a little backwards.
We start by combining all of our dry ingredients and sugar in our bowl, then gradually, one tablespoon at a time, beat in the butter until it is incorporated and you have a mixture that looks sandy (see first image, above). We then add our remaining wet ingredients and stir until everything is completely combined. You don’t really have to worry about over-beating our batter the same way we do with traditionally creamed cakes (like the layers in my coconut cake).This method yields a cake with a fine, plush crumb. It was the perfect choice for my caramel cake.
Reverse creaming is not by any stretch my own invention. It’s been around for years and its popularity is mostly attributed to Rose Levy Beranbaum, author of The Cake Bible. I’ve tried this reverse creaming method on many of my existing cake recipes and it works well. While I don’t prefer it for all cakes, it’s actually the only way I make my vanilla cupcakes anymore!
Caramel Frosting
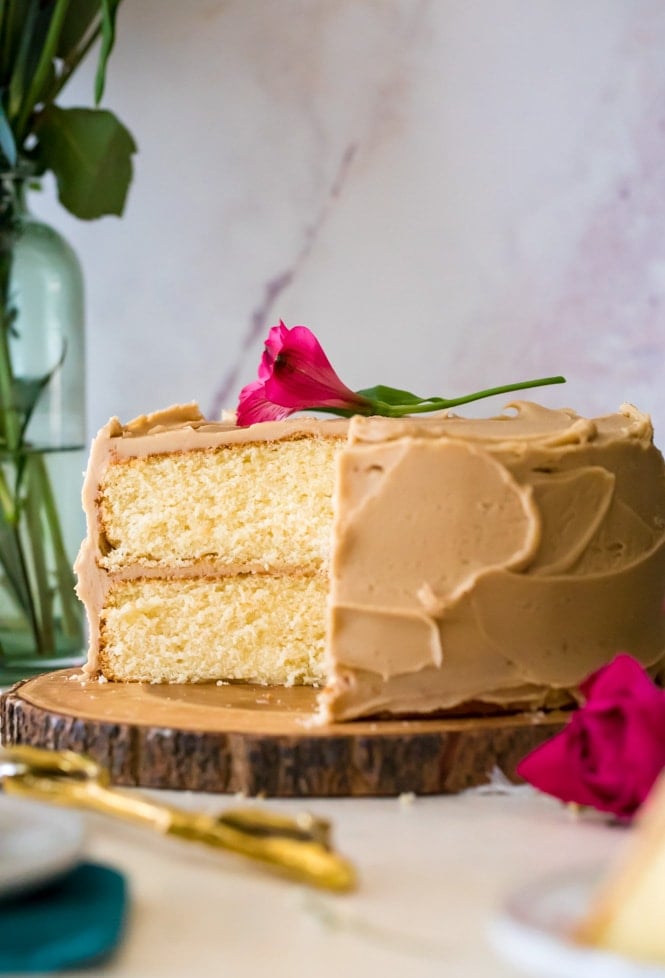
The cake layers are of course an important part of the caramel cake, but when all is said and done it’s really just vanilla cake. Soft, tender vanilla cake with a moist crumb and brown sugar in the batter for a hint of caramel taste, but still. What really makes this recipe a caramel cake is that glorious crown of caramel frosting.
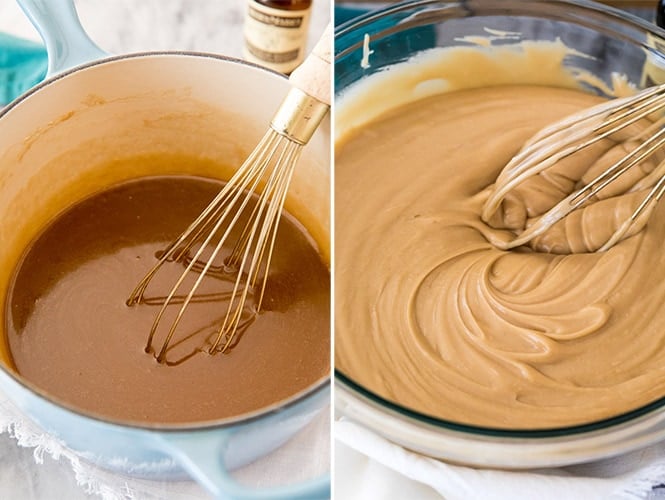
It’s rich, sweet (much sweeter than my stand-by favorite cream cheese frosting), and has true caramel flavor because we start on the stovetop with a real caramel base (it starts much the same way as my caramel sauce). Melt together brown sugar, butter, salt, milk, and cream. Cook until the sugar is dissolved and then bring it to a boil. Boil for 5 minutes. Now you have your caramel base (first photo, above).
Transfer this hot caramel to a large bowl, add powdered sugar and vanilla extract and beat until you have a spreadable icing consistency (second photo, above). If it’s too thin and dripping off of your cake, just beat it longer. In the video (below the recipe) I was a bit over-ambitious and tried to spread my frosting while it was still just a tad bit too warm, which caused my layers to start sliding a little bit. A little patience goes a long way!
Enjoy!
More Recipes You Might Like:
Are you more of a visual learner? Check out my YouTube channel where I show you exactly how I make this cake and frosting step-by-step in my own kitchen.

Caramel Cake
Equipment
Ingredients
CAKE
- 3 cups (375 g) all-purpose flour, (may substitute 3 ⅓ cups or 375g cake flour)
- 1 ½ cups (300 g) granulated sugar
- ½ cup (100 g) light brown sugar, firmly packed
- 1 Tablespoon baking powder
- ¾ teaspoon salt
- ¾ cup (170 g) unsalted butter, softened to room temperature, cut into Tablespoon-sized pieces
- ¼ cup (60 ml) avocado oil or vegetable oil or canola oil, may substitute vegetable oil or other neutral oil
- 1 ¼ cup (295 ml) whole milk, room temperature preferred
- 3 large eggs, room temperature preferred
- 1 Tablespoon vanilla extract
CARAMEL ICING
- 2 cups (400 g) brown sugar², firmly packed
- 1 cup (226 g) unsalted butter, cut into pieces
- ¼ teaspoon salt
- ⅓ cup (80 ml) whole milk
- ⅓ cup (80 ml) heavy cream
- 2 cups (250 g) powdered sugar
- 1 teaspoon vanilla extract
Instructions
CAKE
- Preheat oven to 350F (175C) and lightly grease and flour the sides and bottoms of two 8” round baking pans¹. Set aside.
- In the bowl of a stand mixer (or in a large bowl, using an electric mixer), stir together flour, sugars, baking powder, and salt until well-combined.3 cups (375 g) all-purpose flour, 1 ½ cups (300 g) granulated sugar, ½ cup (100 g) light brown sugar, 1 Tablespoon baking powder, ¾ teaspoon salt
- With mixer on low speed, add butter, one tablespoon at a time, until mixture resembles sandy coarse crumbs.¾ cup (170 g) unsalted butter, softened to room temperature
- Stir in oil until well-combined.¼ cup (60 ml) avocado oil or vegetable oil or canola oil
- In a separate bowl, whisk together milk, eggs, and vanilla extract.1 ¼ cup (295 ml) whole milk, 3 large eggs, 1 Tablespoon vanilla extract
- With mixer on low-speed, gradually pour milk mixture into flour mixture. Once combined, pause to scrape down the sides and bottom of the bowl, then gradually increase speed to high and beat for 30 seconds.
- Divide batter evenly into prepared pans and bake on 350F (175C) for 30-35 minutes or until a toothpick inserted in the center comes out clean or with a few moist crumbs.
- Allow cakes to cool for 15 minutes and then invert onto cooling rack to cool completely.
- Prepare caramel icing:
CARAMEL ICING
- Combine brown sugar, butter, salt, milk, and heavy cream in a medium-sized saucepan over medium-heat. Stir frequently until brown sugar is dissolved and mixture comes to a boil.2 cups (400 g) brown sugar², 1 cup (226 g) unsalted butter, ¼ teaspoon salt, ⅓ cup (80 ml) whole milk, ⅓ cup (80 ml) heavy cream
- Once boiling, cook for 5 minutes, stirring constantly.
- Remove from heat and pour into a large heat-proof bowl or the bowl of a stand mixer. Let sit for 5-10 minutes before proceeding.
- Add powdered sugar and vanilla extract and stir with stand mixer or an electric mixer until combined. Increase speed to high and stir until caramel mixture is almost completely cooled and icing reaches a spreadable consistency.2 cups (250 g) powdered sugar, 1 teaspoon vanilla extract
- Spread over cake. If icing is dripping off of cake (especially when icing the sides), let it cool a bit longer before proceeding.
- Allow icing to solidify completely before slicing cake and serving. Enjoy!
Notes
Nutrition
Nutrition information is automatically calculated, so should only be used as an approximation.
Like this? Leave a comment below!


Hi, can I use a 9×13 pan for this recipe?
Hi Carol! This batter will fit into a 9 x 13, but I’m not sure on a bake time. Enjoy! 🙂
I have made a caramel cake for my daughter’s birthday every year since she was 13. She is 30 years old today! I found your recipe a few years ago and have been making this one ever since! It’s delicious of course, however, what am I doing wrong that the frosting gets so thick! I can never get it as silky and smooth as yours is!
What a wonderful tradition! I’m so glad you’ve ultimately been enjoying it! You may have waited just a little too long to start using the frosting. It does need to sit, but if it sits too long it can get pretty thick.
Made Carmel cake recipe today for the first time, and it was amazing.
Thank you for sharing this.
Thank you so much for trying my recipe, Raymond! I’m so glad you enjoyed it so much! 🙂
Hi! I can’t wait to make this tomorrow for a girlfriend’s birthday! I prefer the look of 3 layers. Can the batter be divided into 3, 9″ pans with less bake time or do you suggest increasing the ingredients?
Hi Lolo! I hope you love this cake! You can split it into 3 layers, they will be much thinner and the bake time will be reduced. I’m not sure how long to bake them, but keep an eye on them. You could increase the recipe by 50% if you want 3 layers that are all as thick as you see here. Happy birthday to your girlfriend! 🙂
Can you use a 9×13 pan for this? Thanks.
Hi Jerry! The batter will fit in a 13 x 9 pan but I’m not sure what the bake time will be.
Could you sub the heavy cream in the frosting?
Hi Mariah! I haven’t personally tried it, but I would be worried the frosting may not get as thick as it’s supposed to. 🙁
Sooo easy!
Can I substitute plant based butter and almond or oat milk in the caramel cake recipe. I don’t need the caramel
Hi Maria! I can’t say for sure how those substitutions will work. I haven’t personally tried it. 🙁
I’ve come back to this recipe multiple years in a row and now my family thinks I’m some kind of amazing wizard of a baker. Reverse creaming the cake makes it into the softest, most delicious vanilla cake ever. This recipe is fool-proof, 10/10, thank you!!
please may I know the weight of this iced cake.
Hi Mamatha! Unfortunately, we haven’t weighed this entire iced cake so we’re not sure.
This cake is SO delicious, and has become my go-to whenever I need a quick recipe. My family always fights over the leftovers (if there are any). This is such a classic, and one of my favorites. I almost always had caramel cake for my birthday when I was a kid, and this is by far the best one I’ve ever eaten. Thank you so much! 😀
By the way, how long will this cake last on the counter or in the fridge?
Hi Stella! I am personally comfortable with it staying out on the counter for up to 2 days. 🙂