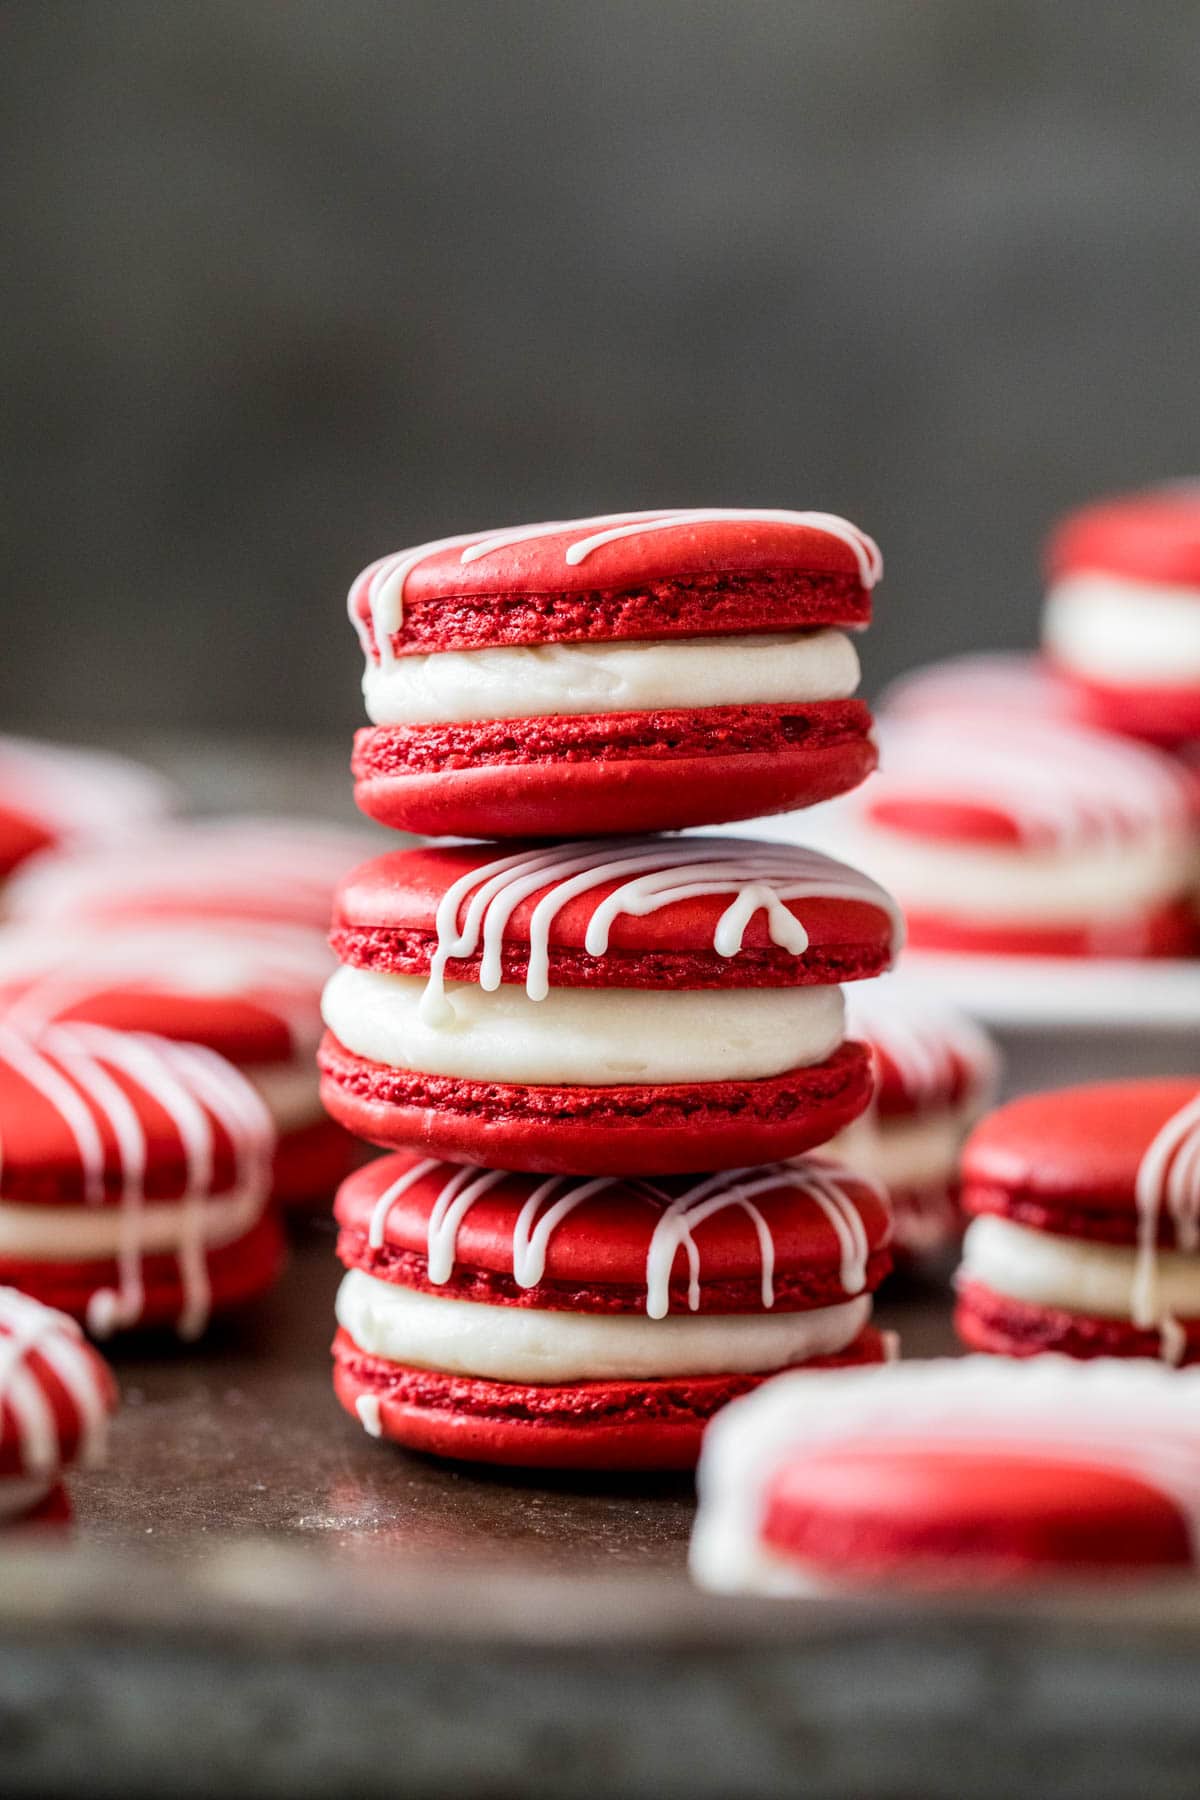
These red velvet macarons are made with a mildly cocoa flavored cookie base and cream cheese filling (though ermine works too!). Another fun and unique macaron recipe to try!
Red Velvet Cake Macarons
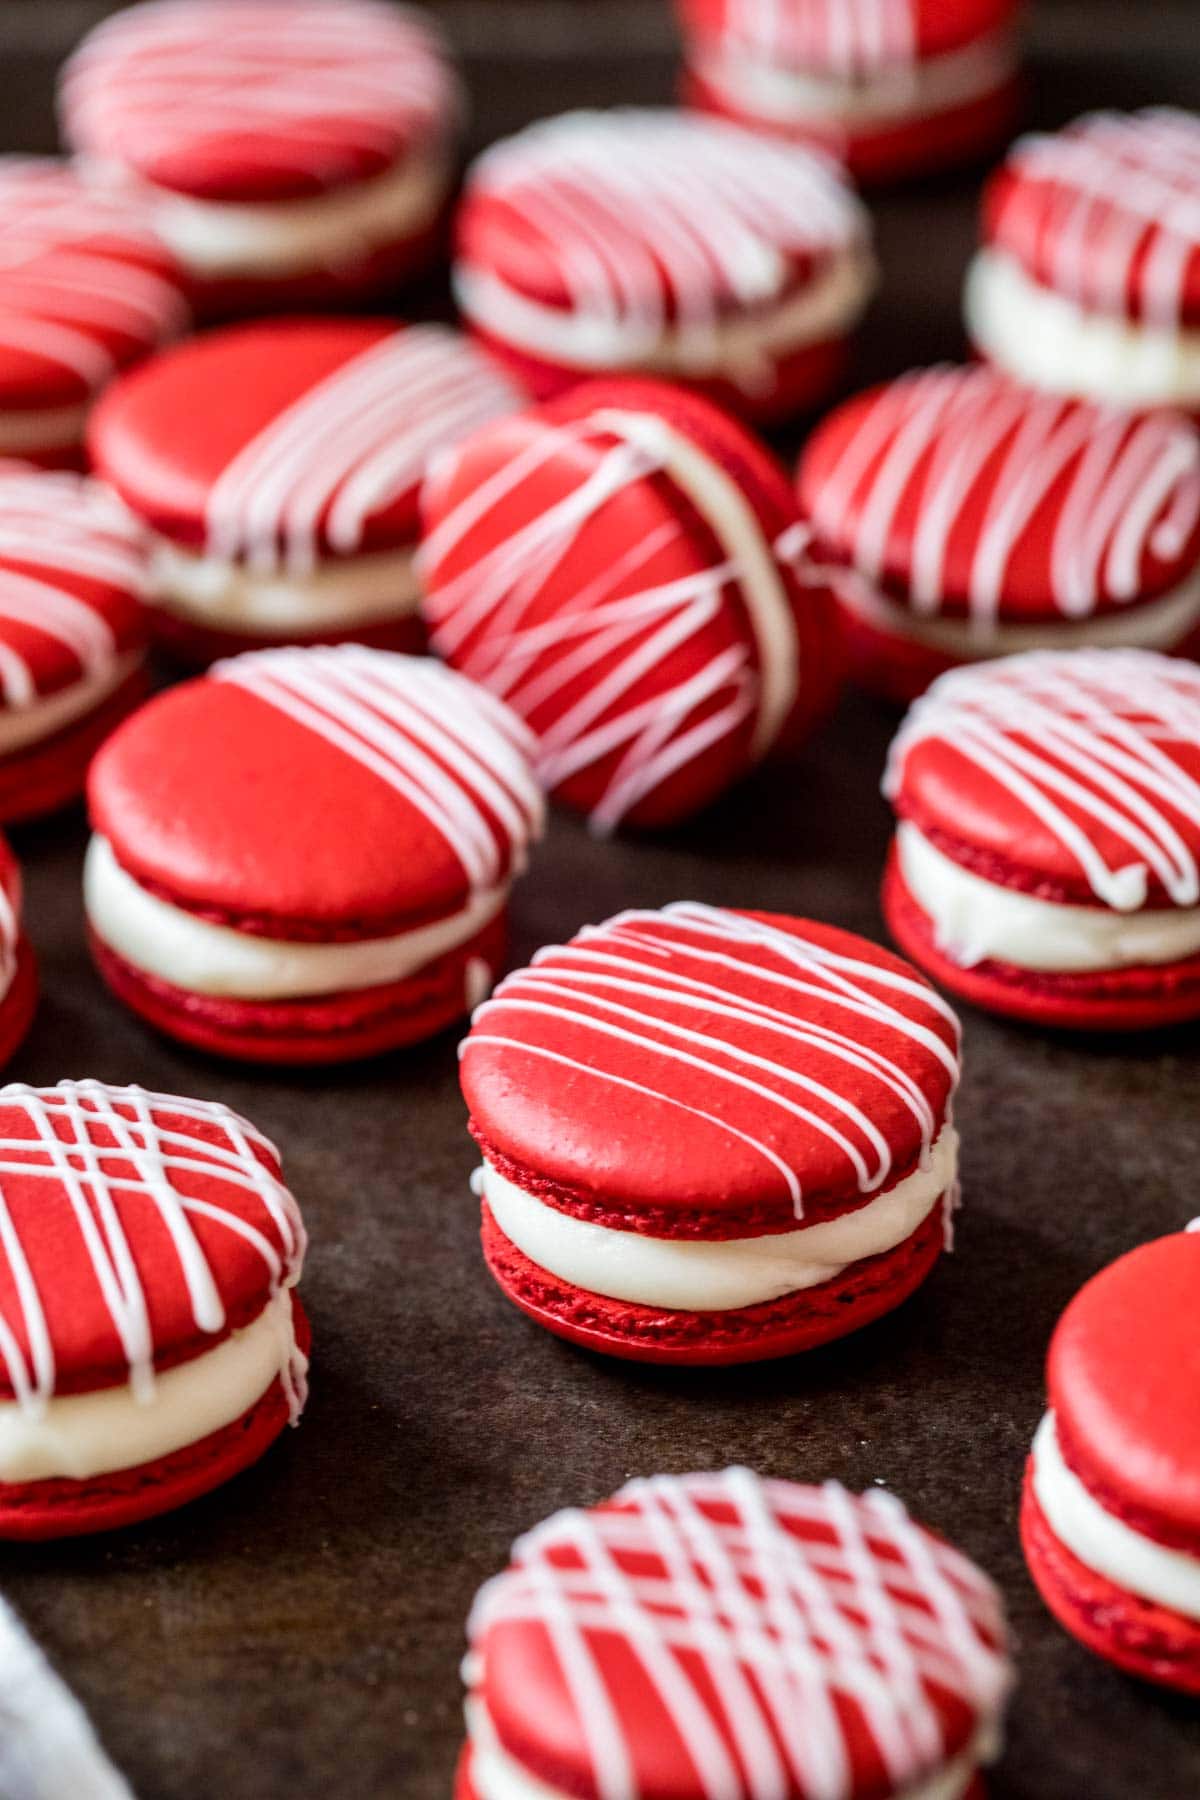
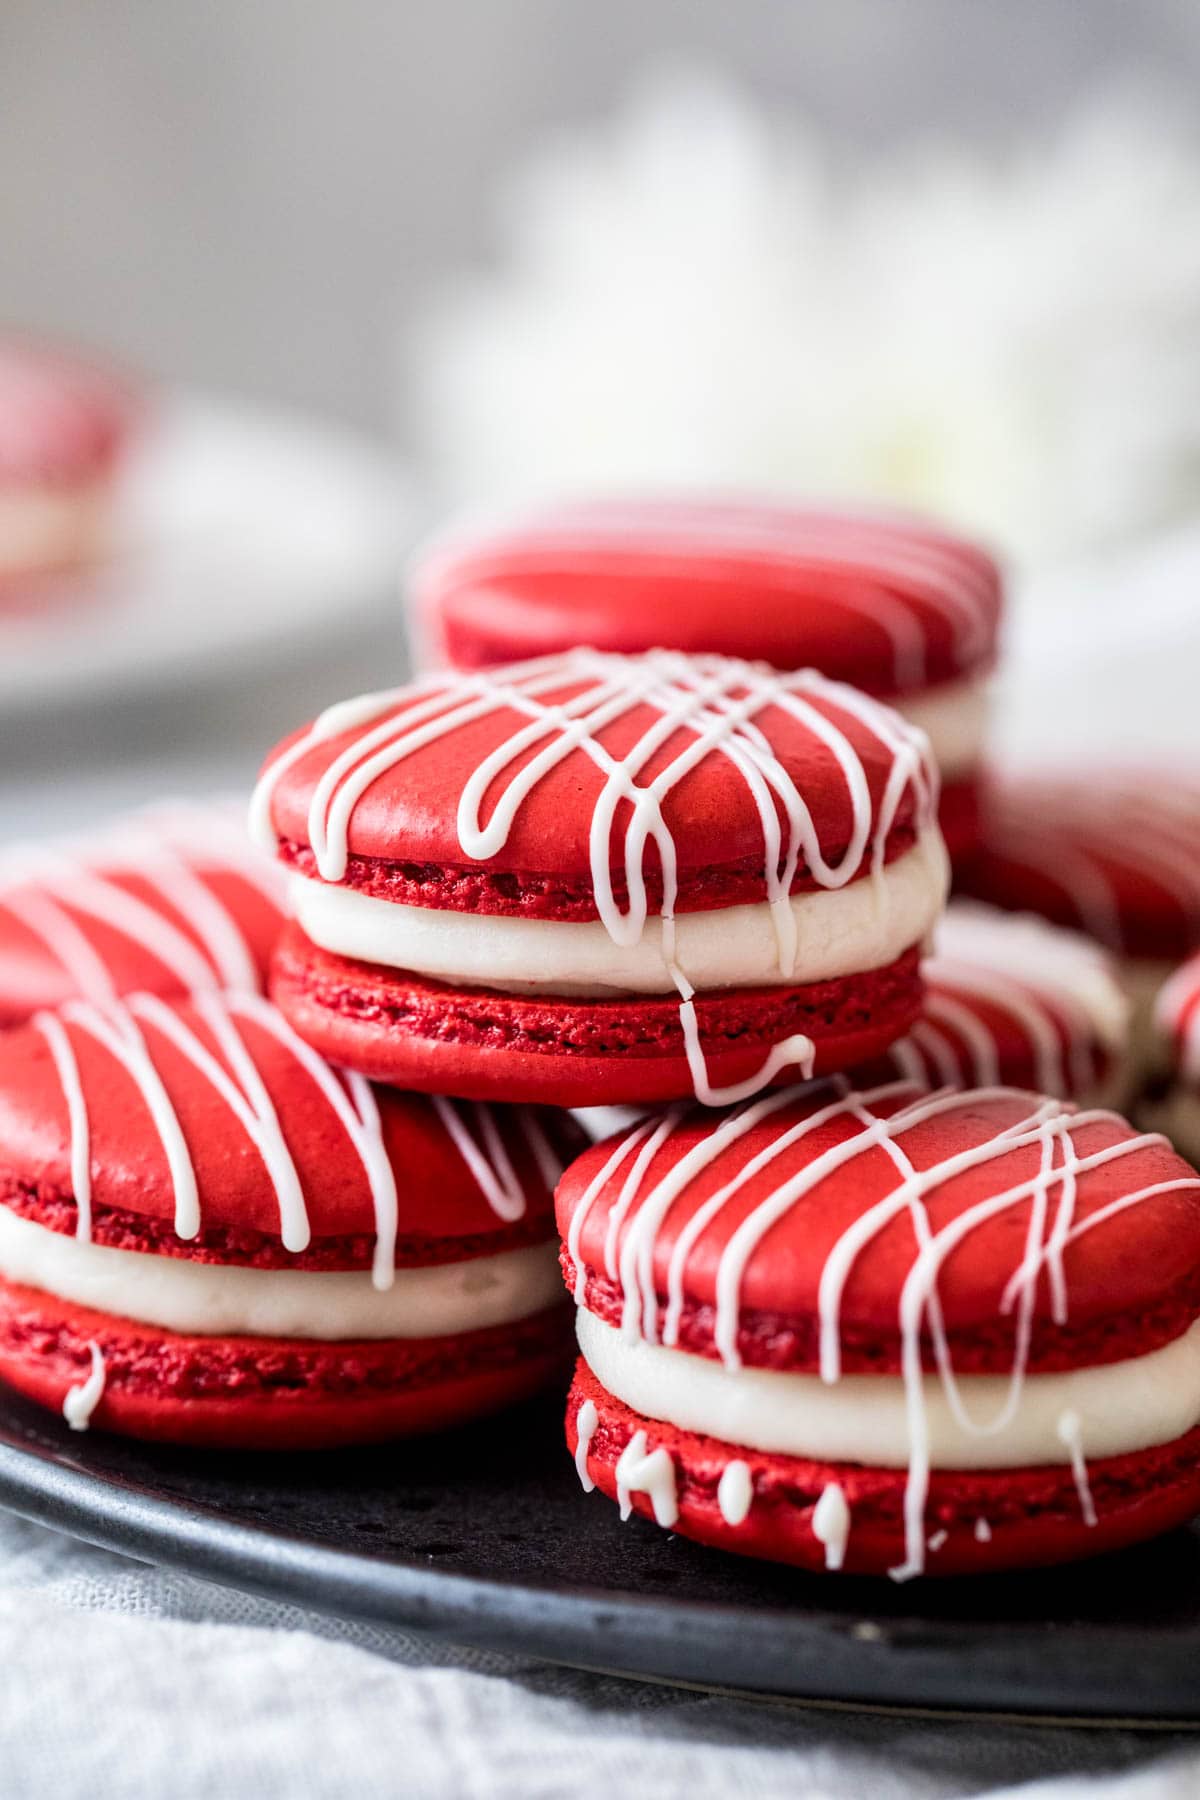
Where fruity pebbles macarons are adorable and fun, my new red velvet macarons are so pretty and elegant. With that classic bright red color, smooth cream cheese filling, and optional white chocolate drizzle on top, these sweet sandwich cookies are a petite and poppable version of your favorite red velvet cake!
This recipe is very similar to my classic macarons, but there were a few details that were different enough that I felt they warranted their own post (such as reducing almond flour/powdered sugar and not macaronage-ing quite as much). If you are totally new to making macarons, I recommend you read through that post in its entirety before starting this one.
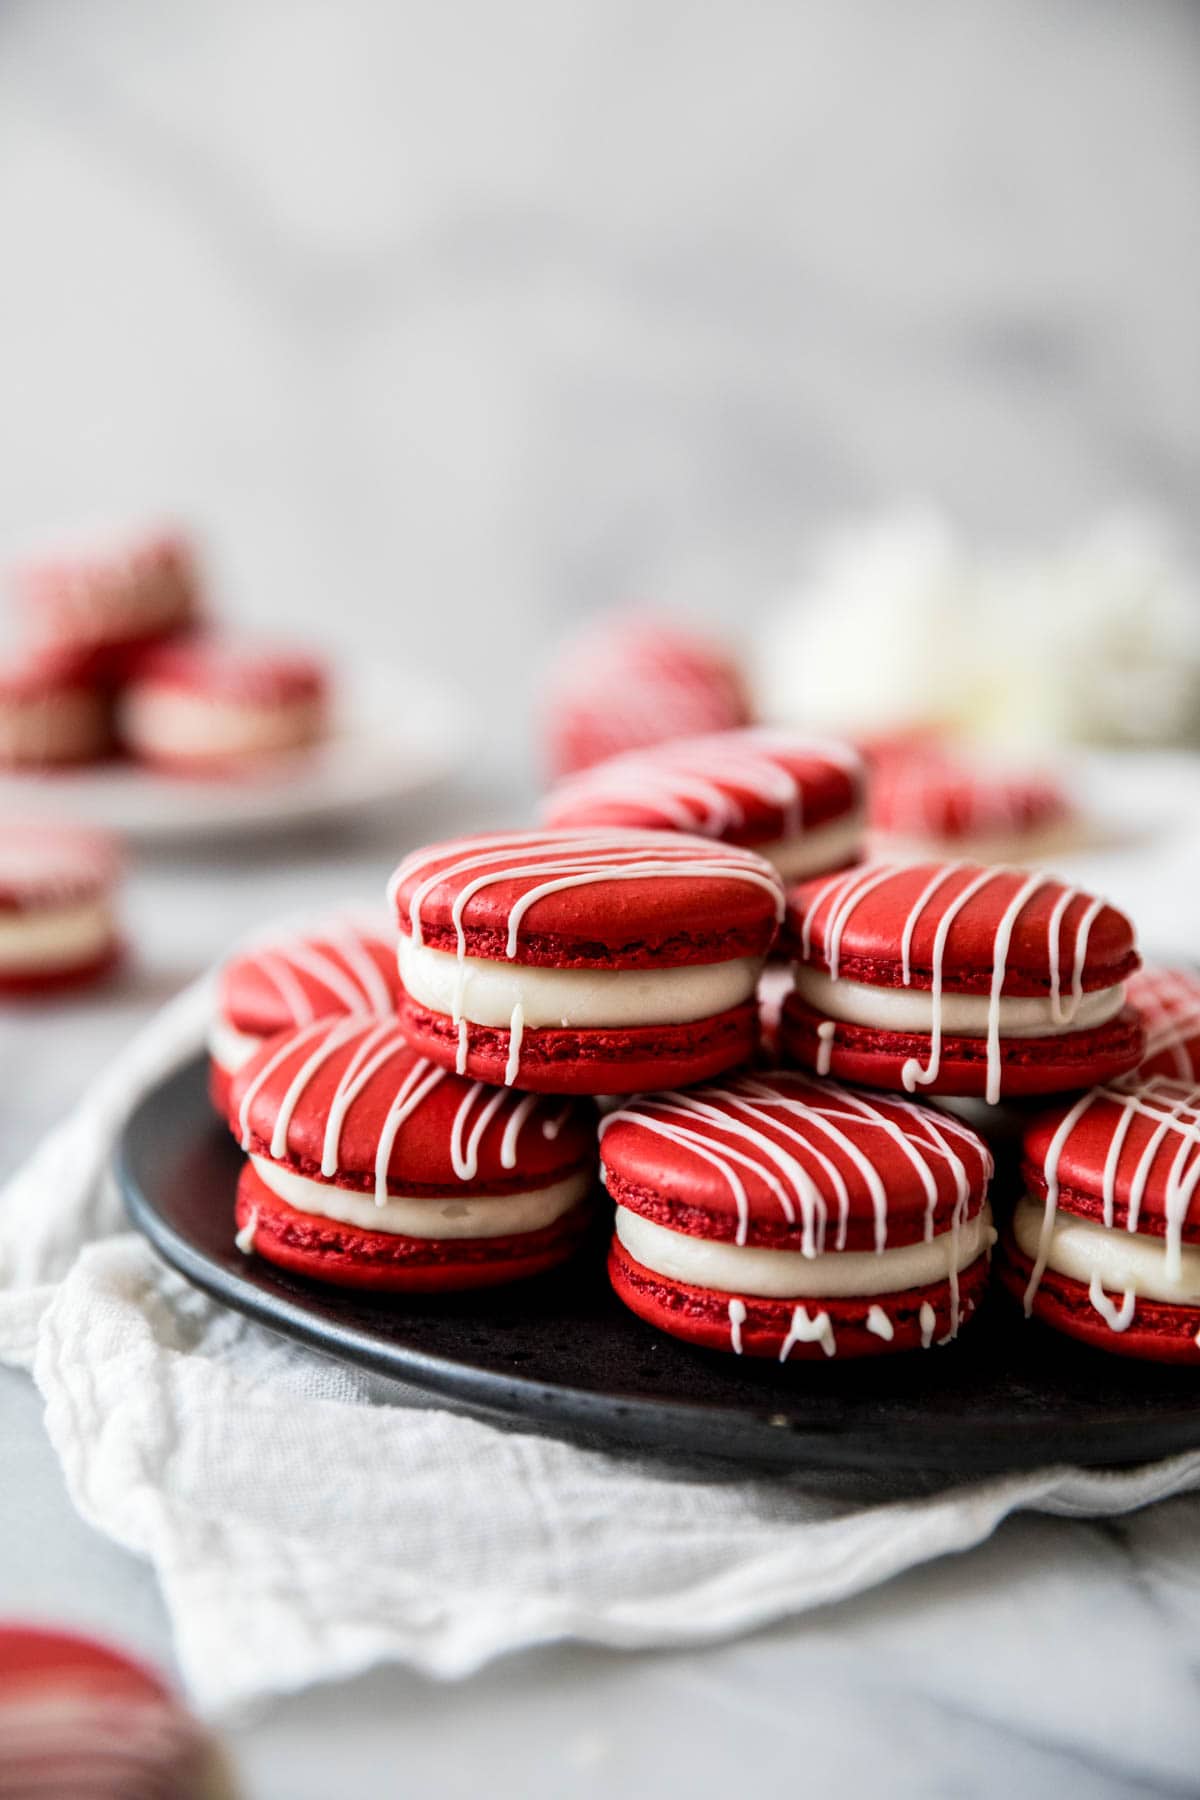
Note that while I prefer ermine frosting for my red velvet cupcakes and cake, I prefer and recommend cream cheese frosting here; I found it provided a more authentic red velvet flavor. You can use whatever you like, but I do recommend choosing between one of these for the most true red velvet flavor.
What You Need
If you’ve made macarons before, you know they can be a little tricky. Because of this, it’s very important that you follow my recipe closely, and that includes the ingredients!
Macaron Shells
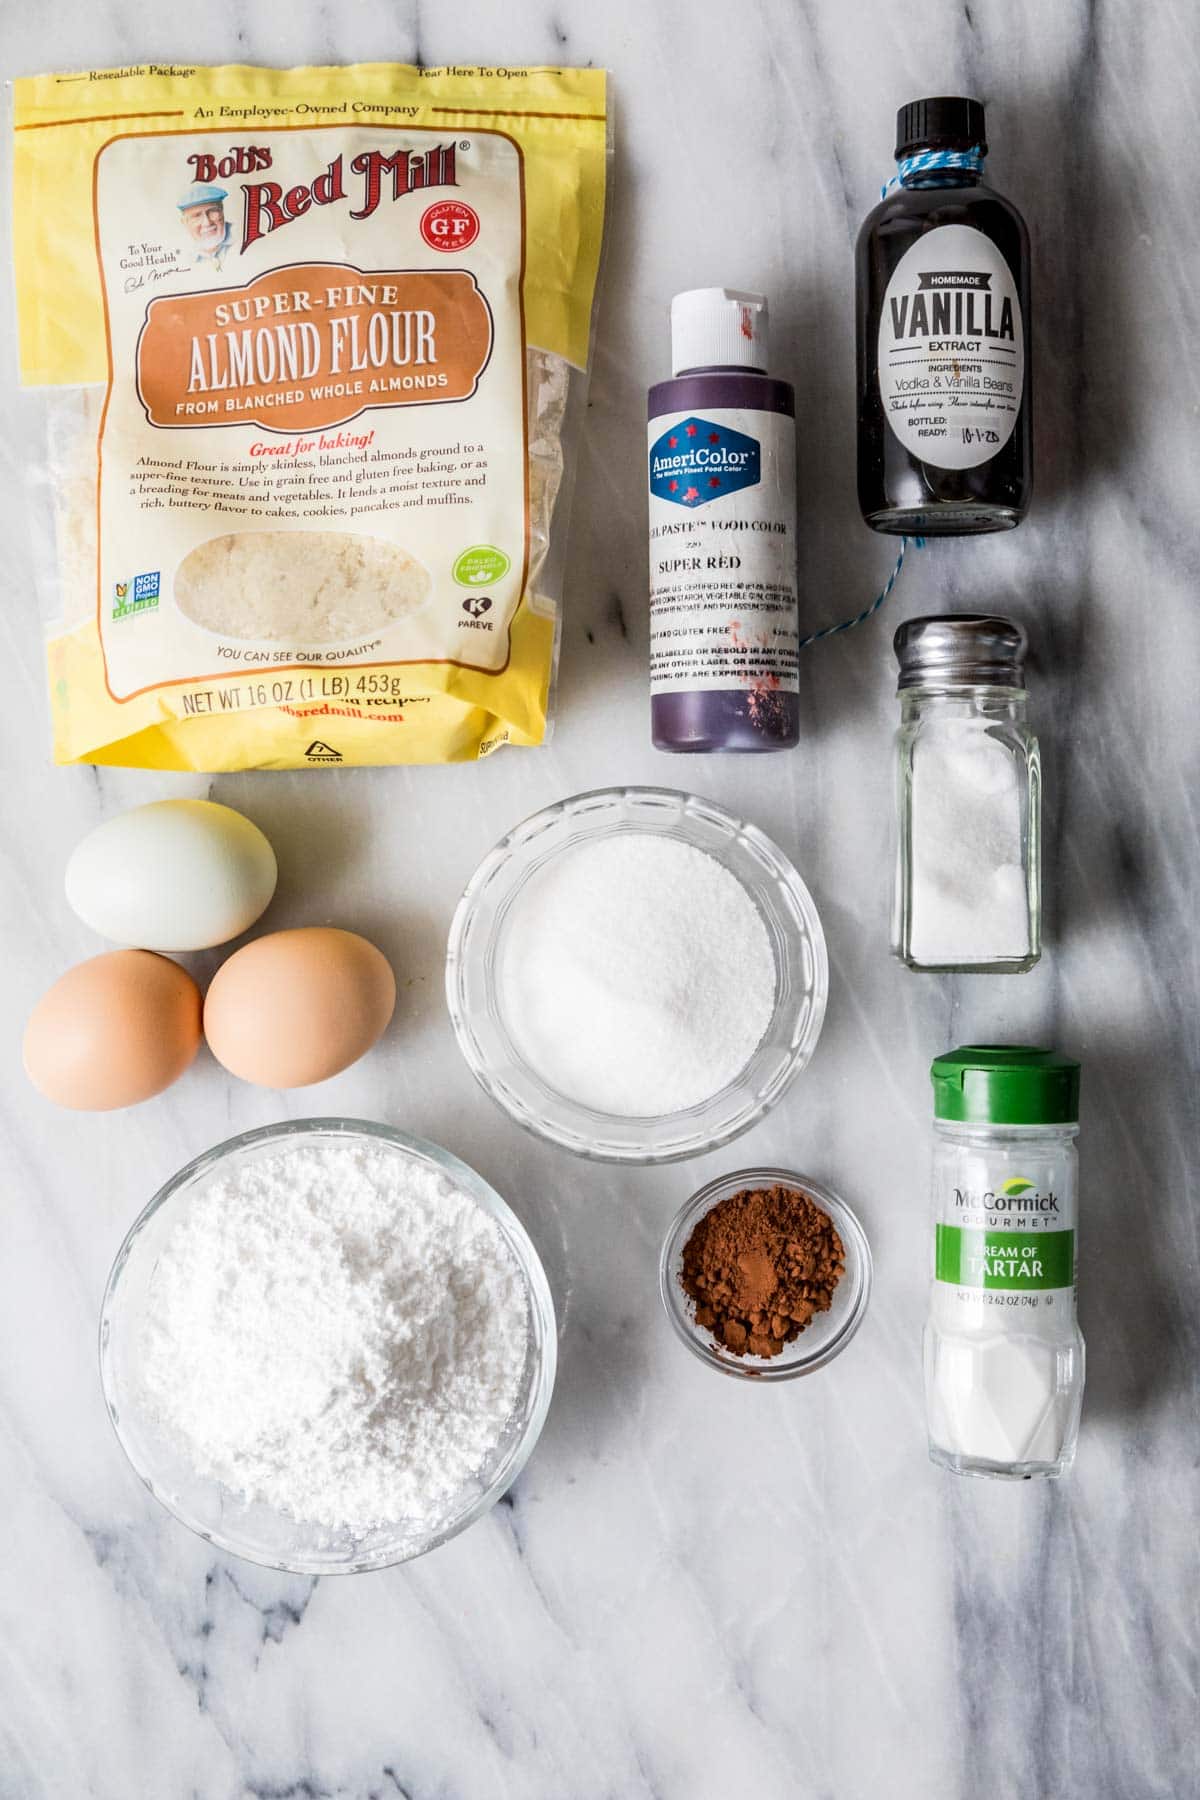
- Almond flour. Super fine, blanched almond flour works best for macarons. If you can’t find the superfine version, you can make your own. To do this, pulse your almond flour and powdered sugar in the food processor in 15 one-second pulses. Stir, then repeat this process one more time before using.
- Cocoa powder. I prefer to use Dutch process cocoa in this recipe, but you could use natural cocoa instead. I have a whole post about natural vs. dutch process cocoa, if you’re interested in learning the differences between the two!
- Red food coloring. I highly recommend using gel food coloring, as it provides the most vibrant color. Liquid food coloring isn’t near as potent, and you will end up introducing too much moisture into the meringue trying to get your color just right (especially when it comes to red coloring, it can be so hard to keep it from being pink!). I linked to the brand I like to use in the recipe card below.
- Cream of tartar. Cream of tartar isn’t mandatory for making red velvet macarons, but it is helpful, especially if you are a beginner. It helps stabilize the meringue and I use it in most of my meringue-involved recipes (like my meringue cookies)!
- Egg whites. I strongly recommend that you NOT use carton egg whites! They produce inconsistent results, and I cannot guarantee your success if you do use them. Instead, separate your own eggs and make sure you don’t get any egg yolk–not even a drop–in with the whites. Don’t want to waste your yolks? Use them to make lemon cheesecake or a fruit tart!
SAM’S TIP: Red velvet macarons are much less likely to be hollow, which is great; however, they can be prone to getting oily/wrinkly tops, especially if the cocoa powder is more oily or if you use too much food coloring. This is why I recommend Dutch process cocoa and gel food coloring.
For the Filling
The filling I’m using today is just a slightly silkier, smoother half batch of my cream cheese frosting. Here’s what you need to make it!
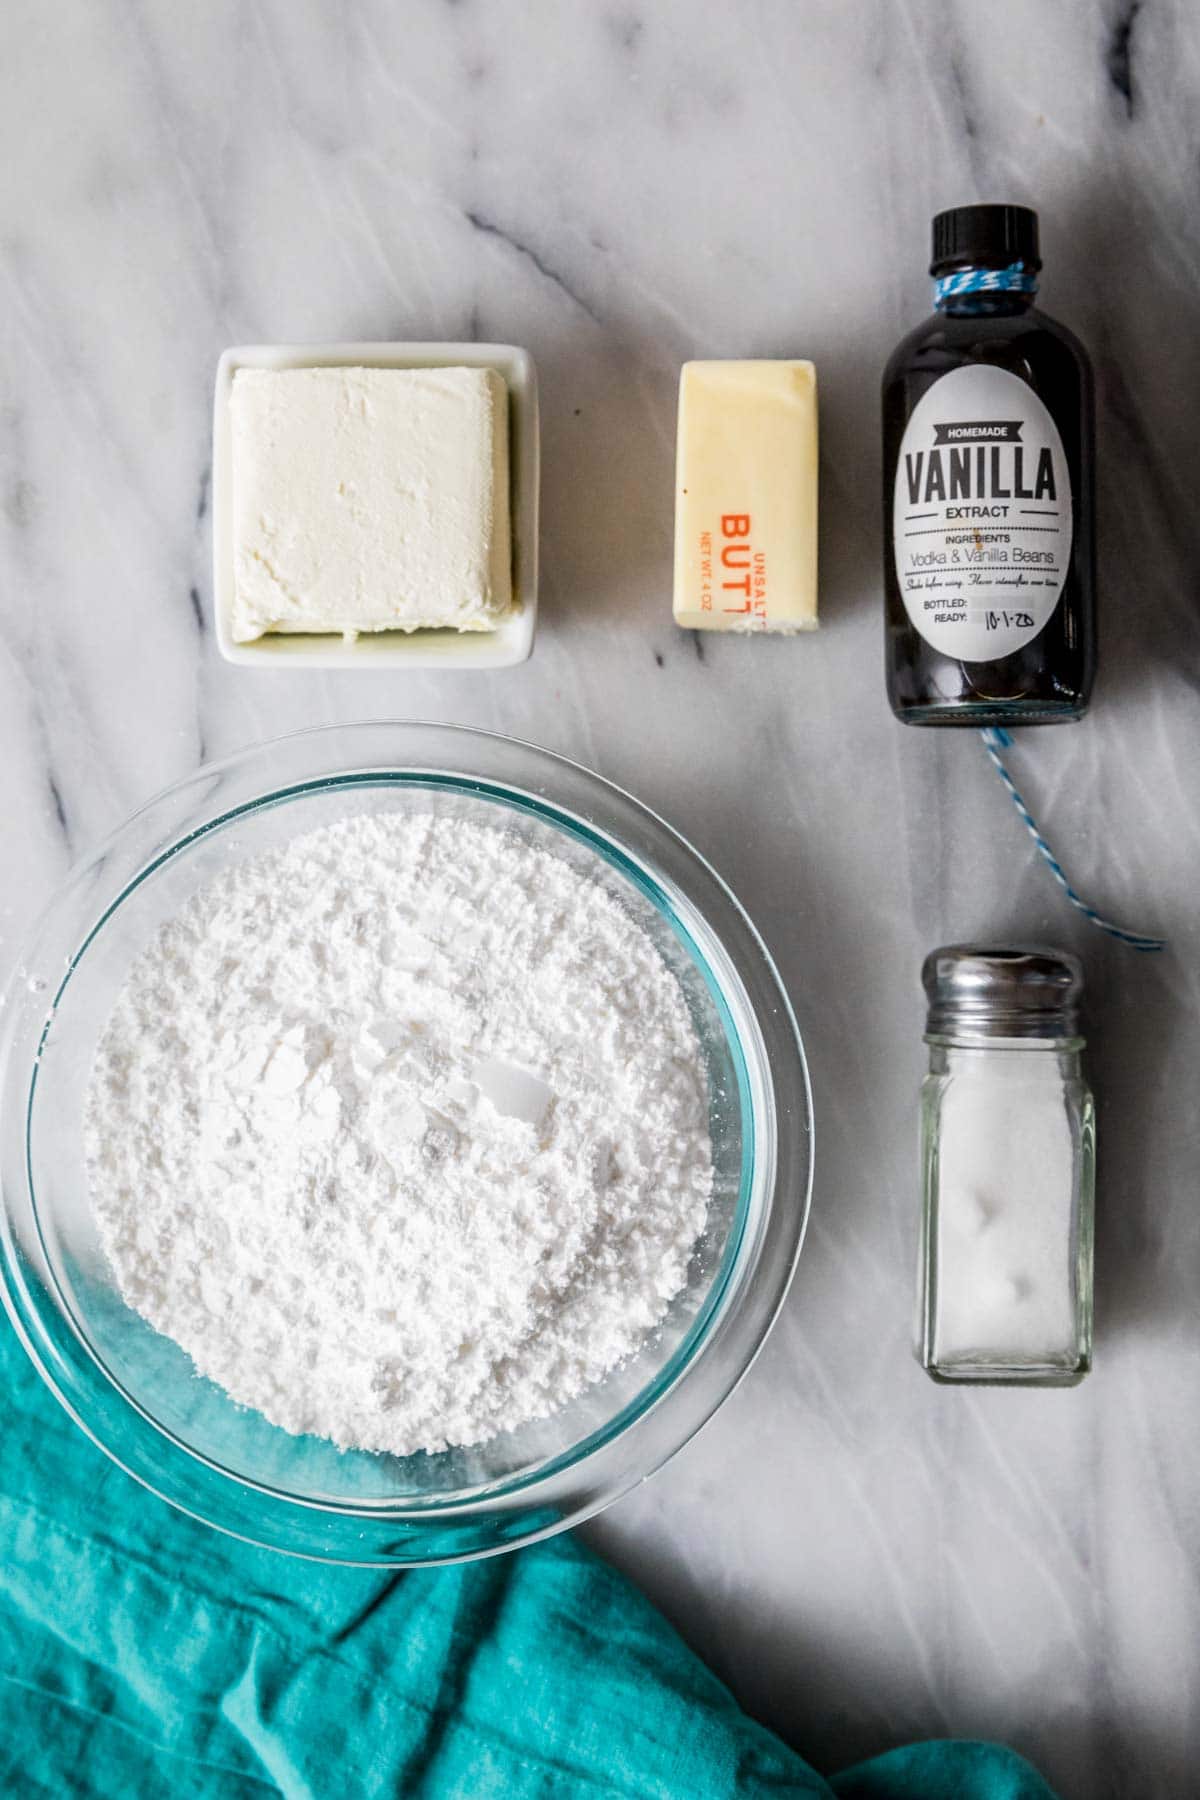
- Cream cheese. Stick with full-fat, block-style cream cheese here. Any other kind will be too soft and runny.
- Powdered sugar. Make sure you measure your powdered sugar properly, as it can be very easy to over-measure, just like over-measuring flour.
- Vanilla. A splash of vanilla balances the cream cheese flavor nicely.
- Butter. I use unsalted butter and salt, but if you only have salted butter on hand, you can just omit the salt.
Remember, this is just an overview of the ingredients I used and why. For the full recipe please scroll down to the bottom of the post!
SAM’S TIP: I highly recommend using a kitchen scale when baking, but especially when making macarons. It’s very important that you use precise measurements to make macarons, and a kitchen scale guarantees that!
How to Make Red Velvet Macarons
Preparation
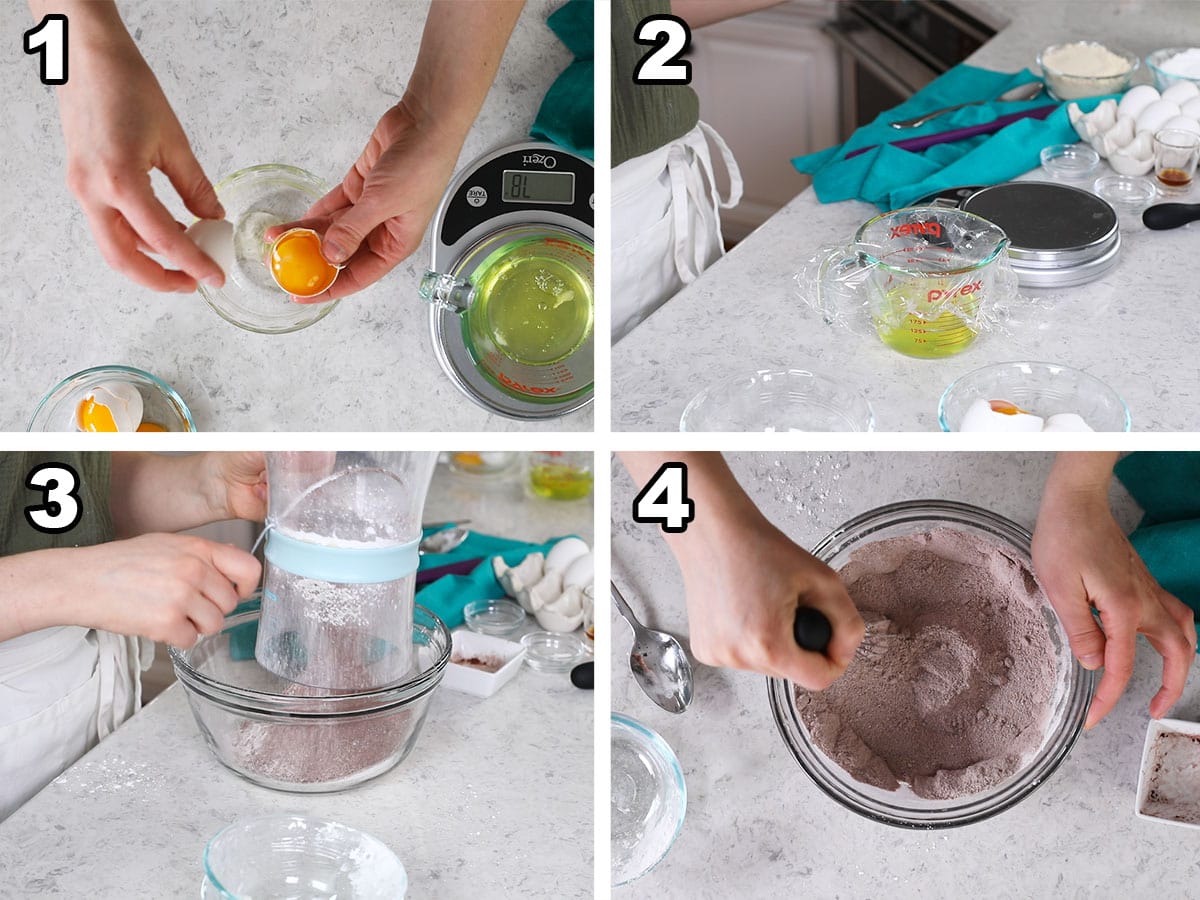
- Separate your egg whites and place them in a clean, dry, glass measuring cup. Be careful not to get any yolks in with the egg whites!
- Age the egg whites: cover the measuring cup with plastic wrap, poke a few holes in the top, and set aside for 24 hours. Similar to adding cream of tartar, aging your egg whites is technically optional, but it will help stabilize your meringue.
- Sift the almond flour, sugar, and cocoa powder into a medium bowl. Discard any lumps.
- Whisk the dry ingredients together, then set aside.
SAM’S TIP: Make sure all of your bowls and utensils are completely clean, dry, and grease free! If not, you may not be able to get your egg whites to reach stiff peaks, which is critical for proper red velvet macarons. I also recommend that you avoid any rubber, plastic, or silicone tools for this reason (they can hide grease pretty easily).
Meringue
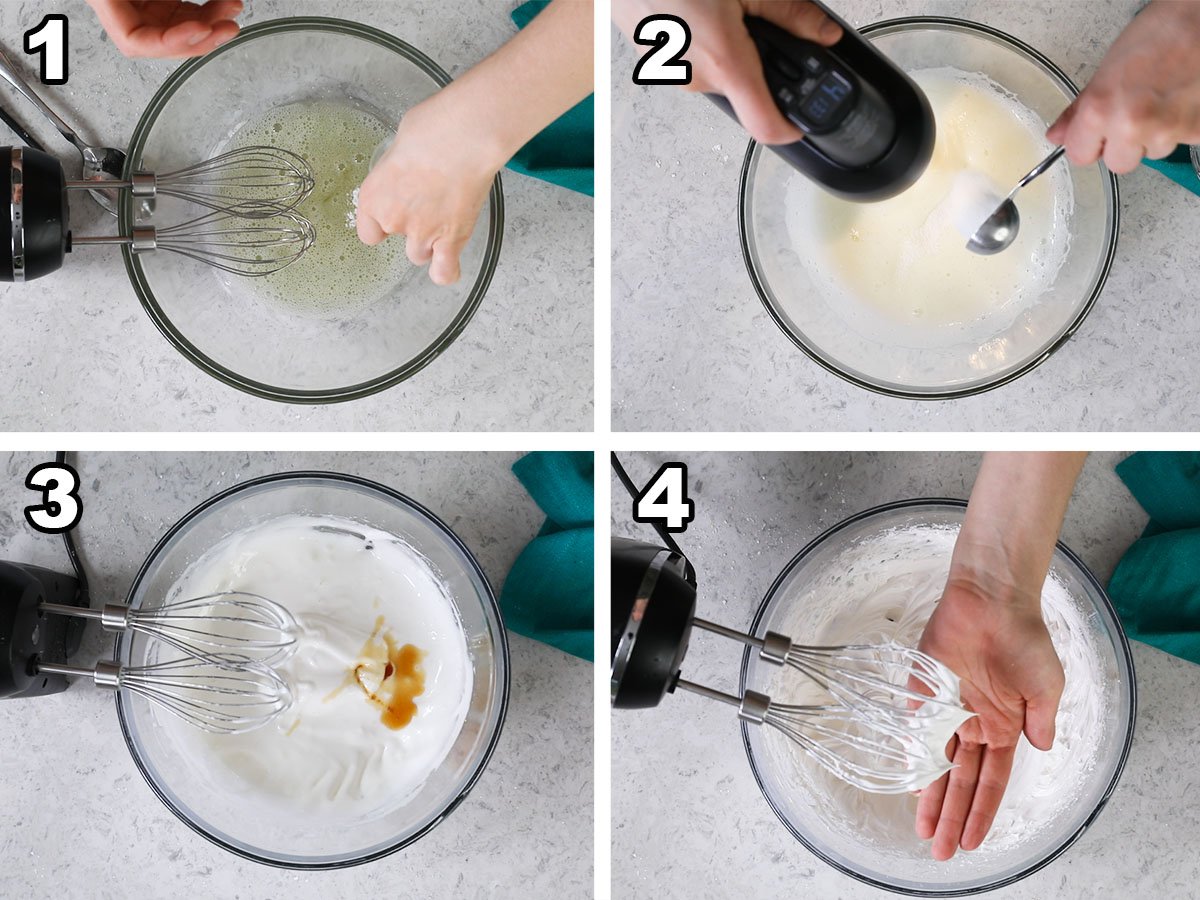
- Beat the aged egg whites in a clean, dry, grease-free bowl until foamy, about 30 seconds. Add the cream of tartar, then beat again for another 30 seconds.
- Add the sugar 1 tablespoon at a time, beating for 30 seconds after each addition before adding the next.
- Stir in the vanilla, salt, and food coloring until incorporated.
- Whip the meringue to stiff peaks; when you are done, you should have a thick, fluffy mixture that holds its shape when lifted out of the bowl.
Macaronage
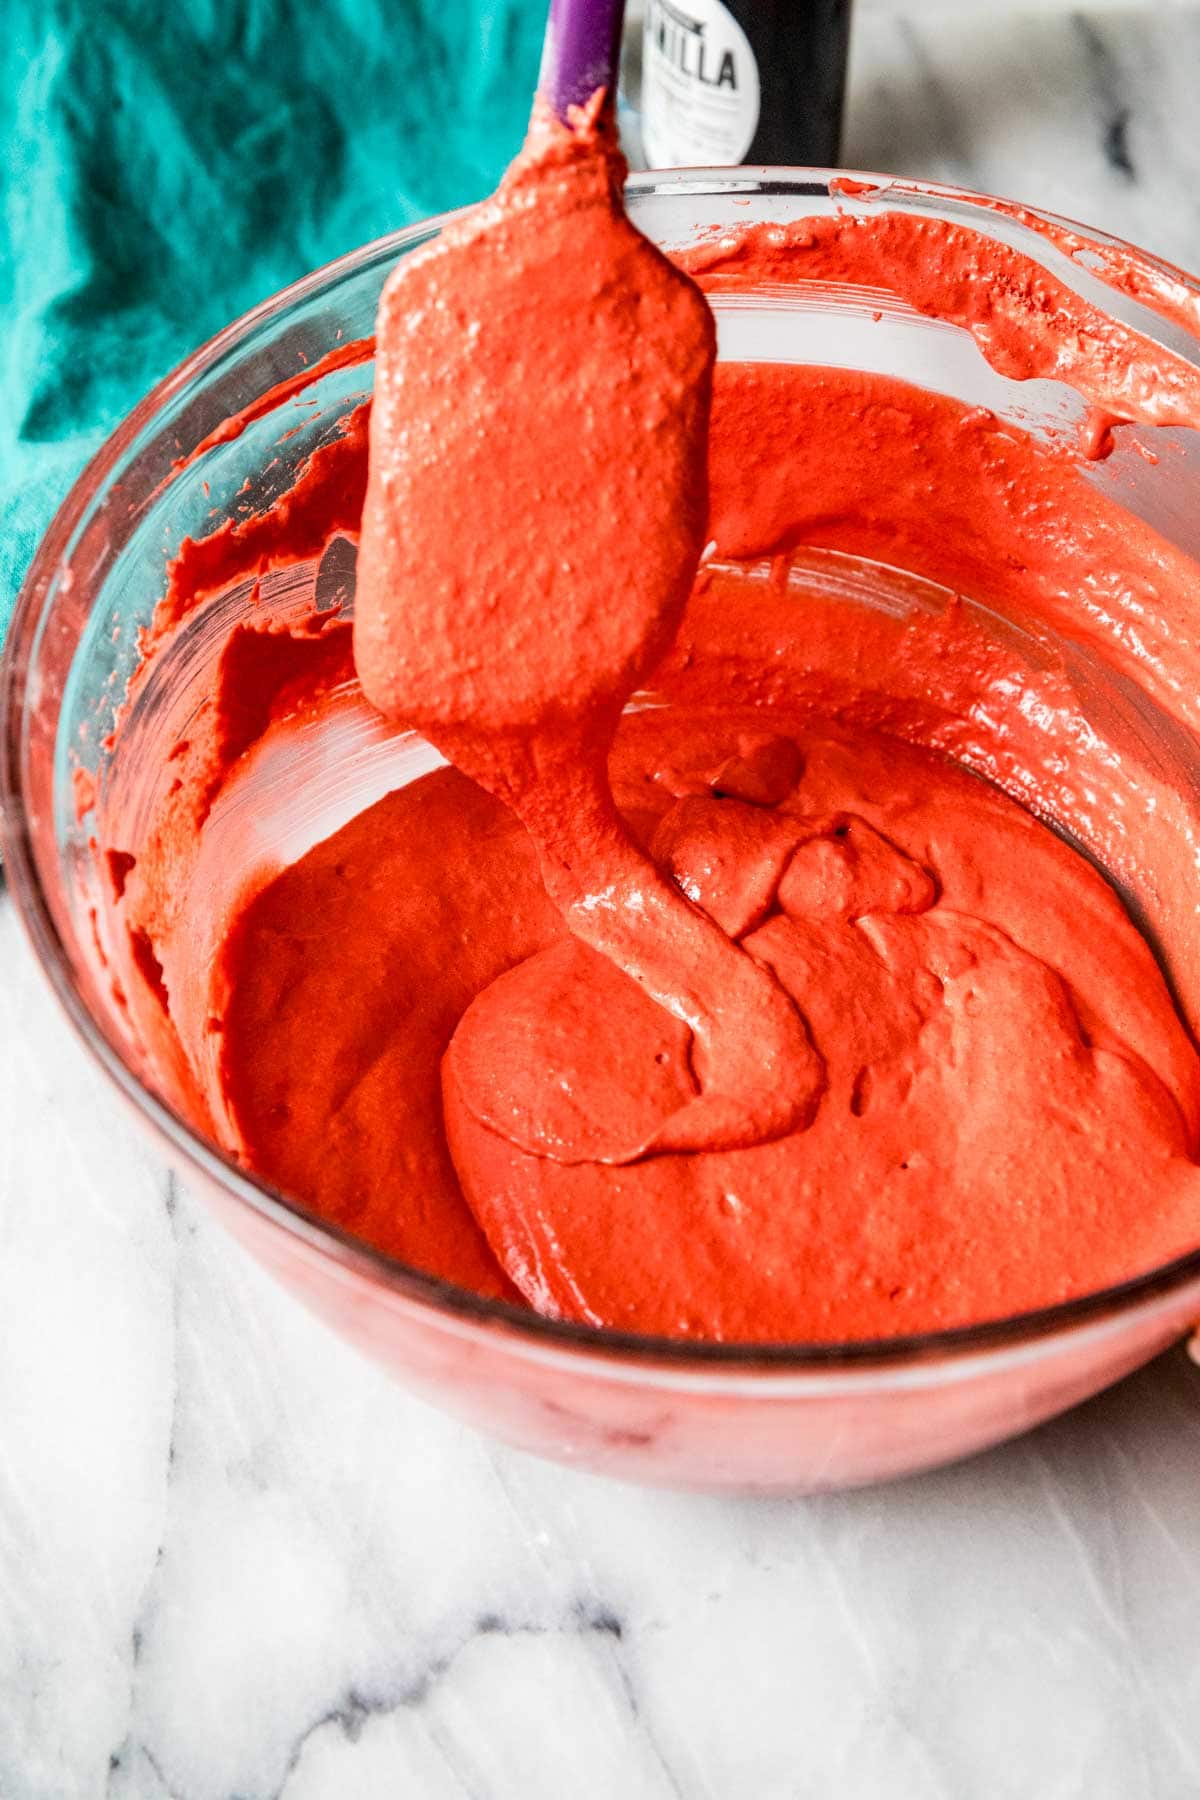
- Fold the dry ingredients into the egg whites in three parts.
- Macaronage: Keep folding, scraping, and smooshing the batter against the side of the bowl to deflate it. Do this until the batter falls off your spatula in a smooth ribbon.
- Figure-8 test: Try to make a figure-8 with the batter dripping off your spatula. If you can just barely make one before the batter breaks, you are ready to pipe! If not, keep smooshing, scraping, and folding.
Piping
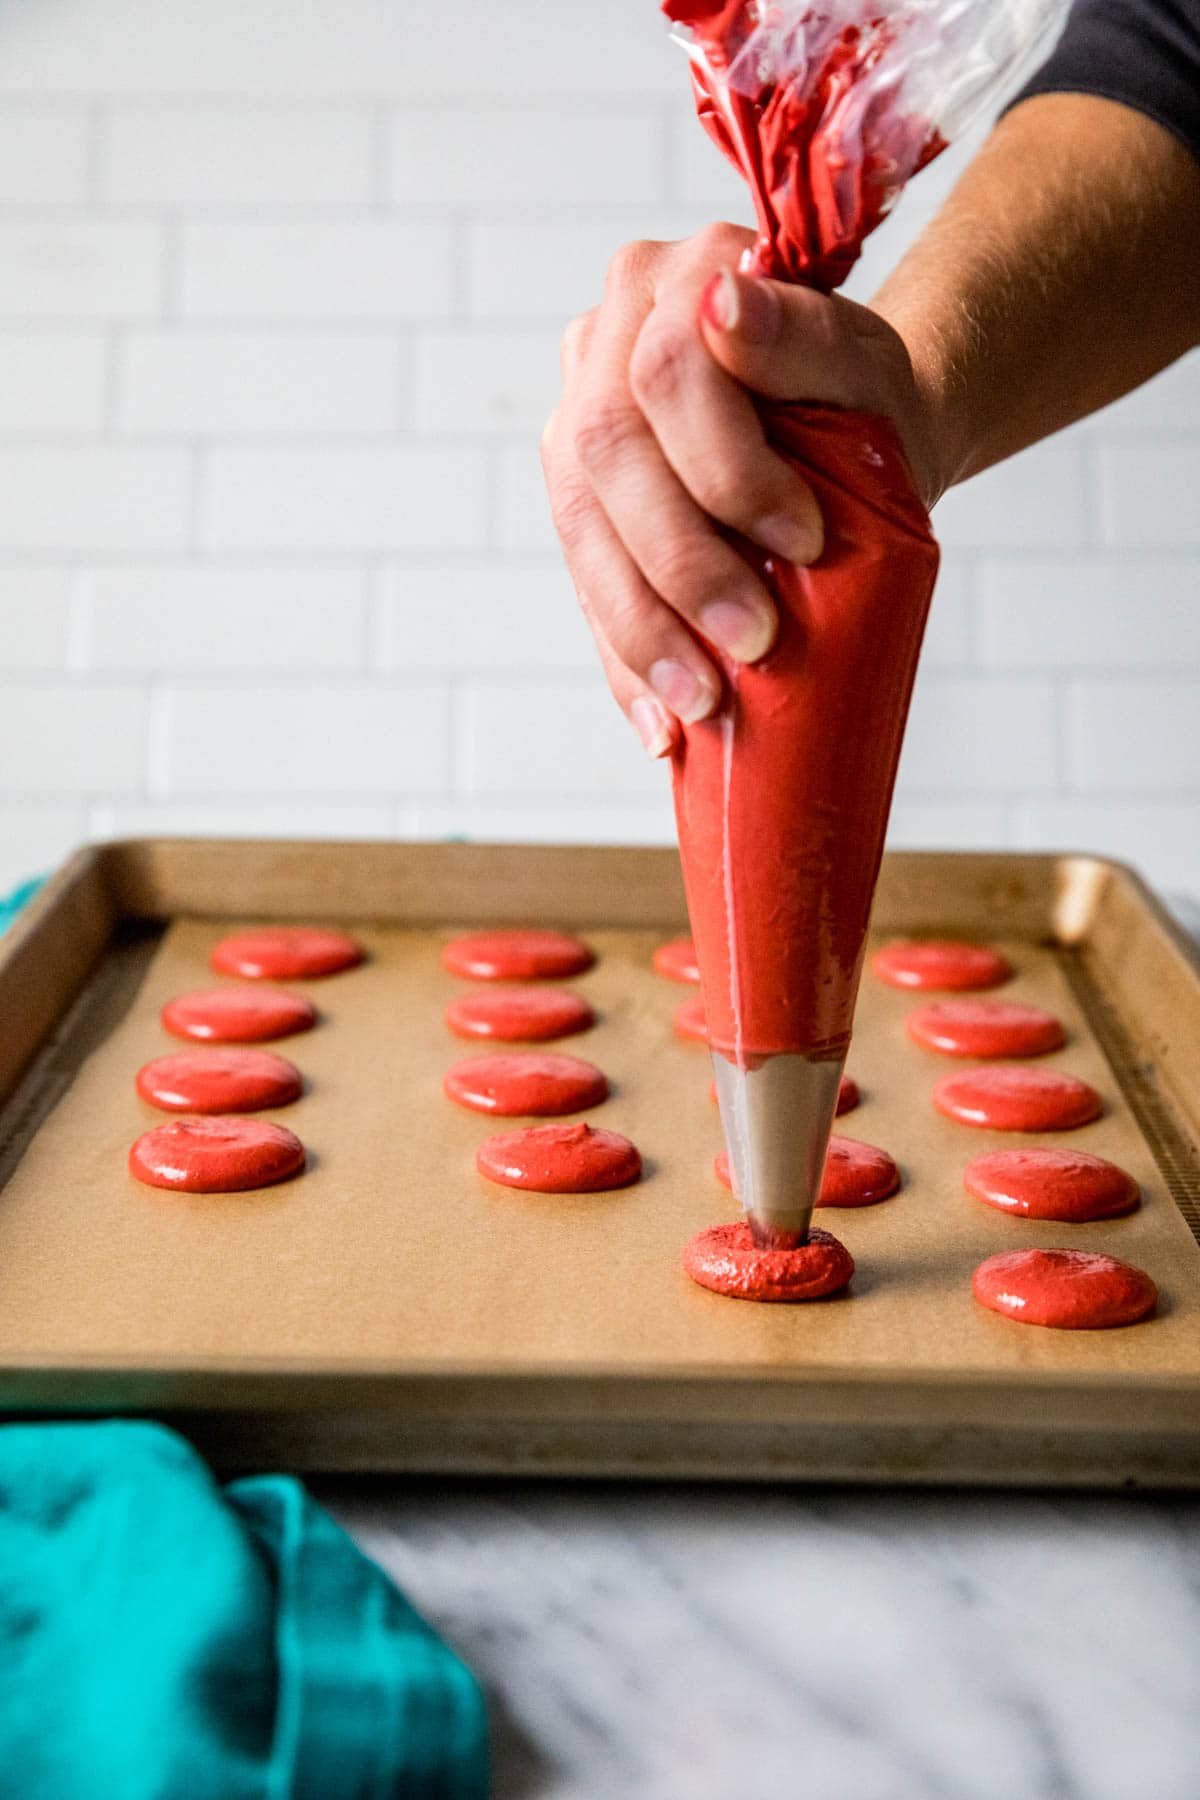
- Pipe the batter straight down onto parchment lined baking sheets, completing each macaron in a “C” motion with a flick of your wrist.
- Bang your pans on your counter a few times to release air bubbles, then let the macarons rest until they form a skin (this takes about 35 minutes for me).
- Bake at 325F (160C) one tray at a time for 10-11 minutes, turning the pan halfway through. Let the shells cool completely before filling.
Filling
- Stir together the softened cream cheese, butter, and vanilla until smooth, then gradually add the powdered sugar.
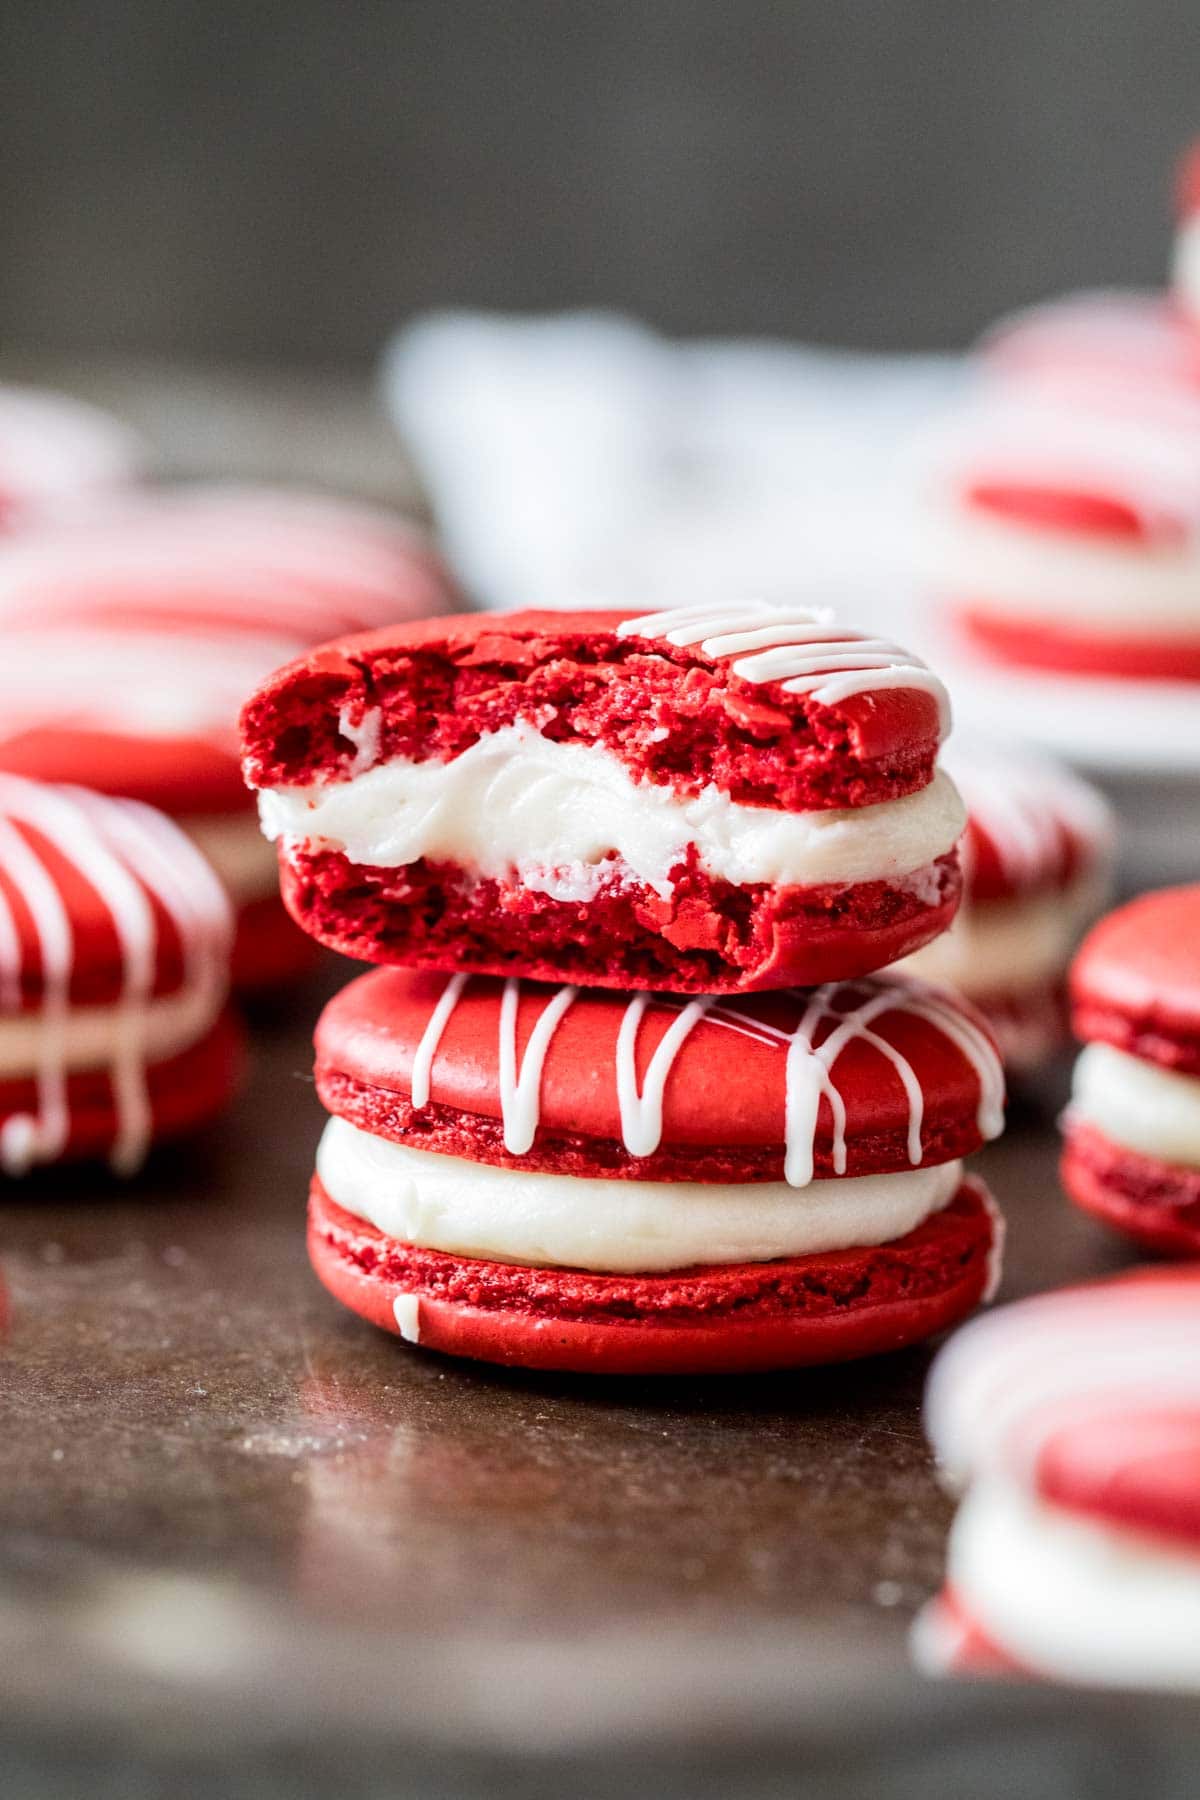
- Pipe the frosting onto one macaron shell, then top with another. Repeat with the remaining shells and frosting, then place in the fridge in an airtight container to mature for 24 hours.
SAM’S TIP: After piping the filling, I recommend placing your red velvet macarons in an airtight container in the refrigerator for 24 hours before enjoying. This gives the macarons time to mature, resulting in a better flavor and texture overall (if your shells ended up hollow, they’ll usually fill in during this time, too). But I can’t blame you for wanting to try them right away either 😉
Frequently Asked Questions
To add a white drizzle to your red velvet macarons, simply melt a handful (about 2 oz is all you’ll need) of white chocolate (you can follow this guide on how to melt chocolate in the microwave), then pour into a plastic piping bag. Let the chocolate cool slightly, then snip a very small hole in the pointy end of the bag. Drizzle the chocolate over the macarons; I like to do a criss cross pattern.
These macarons need to be refrigerated in an airtight container. They will last for up to two weeks when stored this way. Personally, I don’t like them straight from the fridge, so I let mine sit at room temperature for 15-20 minutes before serving.
No! Ermine frosting is another classic choice, and that would work well here. I like to use my white chocolate buttercream for my other macaron recipes, and while that will work here too, it won’t provide a classic red velvet cake flavor.
These red velvet macarons would be so pretty on a Christmas cookie tray!
Enjoy!
Let’s bake together! Subscribe to my newsletter and make sure to follow along on YouTube where I have over 500 free video tutorials! 💜

Red Velvet Macarons
Ingredients
For red velvet macarons
- 150 grams almond flour see note (1 ¼ cup)
- 145 grams powdered sugar (1 ¼ scant cup)
- 5 grams ( ) Dutch-process cocoa powder (1 Tablespoon) (see note)
- 110 grams aged egg whites room temperature (about 3 egg whites/110ml/just under ½ cup) (see note)
- 95 grams granulated sugar (scant ½ cup)
- ⅛ teaspoon cream of tartar optional
- ⅛ teaspoon table salt
- 1 teaspoon vanilla extract
- Red food coloring I recommend using a gel food coloring
Cream cheese frosting filling
- 4 oz cream cheese softened (use the brick-style cream cheese, not the spreadable sort sold in tubs) (113g)
- ¼ cup 4 Tablespoons unsalted butter, softened (57g)
- ½ teaspoon vanilla extract
- ⅛ teaspoon table salt
- 1 ¾ cups powdered sugar (220g)
Recommended Equipment
Instructions
- Before beginning: If you are a beginner, first read through the post and watch my video on how to make chocolate macarons. ALL equipment must be completely clean, dry, and grease-free. Avoid rubber, silicone, and plastic materials when whipping egg whites.
- Line several cookie sheets with parchment paper or clean, dry, silicone mats and set aside.
- In a medium-sized bowl, sift together almond flour, powdered sugar, and cocoa powder. Set aside.150 grams almond flour, 145 grams powdered sugar, 5 grams ( ) Dutch-process cocoa powder
- Add egg whites to a separate, large mixing bowl and use an electric mixer to beat on medium-speed until foamy (30 seconds).110 grams aged egg whites
- Add cream of tartar and stir again on medium speed (another 30 seconds).⅛ teaspoon cream of tartar
- Add about 1 Tablespoon of granulated sugar and beat for about 30 seconds before adding the next Tablespoon. Repeat, stirring for about 30 seconds between additions, until all sugar has been added.95 grams granulated sugar
- Once all sugar has been added, add vanilla extract, salt, and red food coloring (I typically need about a teaspoon to get a bright red color). Continue to beat on medium/medium-high speed until mixture reaches thick, fluffy, stiff peaks. This means if you lift the beaters from the bowl, the peak that forms will hold its shape and not fold over or shrink back in on itself.⅛ teaspoon table salt, 1 teaspoon vanilla extract, Red food coloring
- Add approximately a third of the cocoa powder mixture to the meringue and use a spatula to fold until combined. Repeat with the next third of the mixture, then the remaining dry mixture.
- Continue to fold the batter, moving your spatula in sweeping motions, scraping down the sides and bottom of the bowl and cutting through the middle of the batter and turning your bowl as you go. Use your spatula to smoosh the mixture against the side of the bowl periodically to help deflate it. Continue to fold until the batter flows smoothly and falls from the spatula in a smooth ribbon. You should be able to JUST BARELY make a figure-8 with the batter before the meringue breaks.
- Transfer macaron batter into a large pastry bag fitted with a round tip (I use the Ateco 804).
- Holding the piping bag straight up and down, pipe batter into 1 ½" circles onto prepared baking sheets. Flick your wrist in a “C” motion at the end of piping to complete the macaron (and to not leave it with peaks). Space macarons approximately 2" apart.
- Bang each pan very firmly on your countertop several times to release any air bubbles. Preheat your oven to 325F (160C).
- Allow macarons to rest until a skin forms on the surface (if you run the pad of your finger lightly over the top it should feel dry and not sticky or tacky). This typically takes about 35 minutes in my kitchen, but may vary in your own.
- Bake one tray at a time in the center rack of your oven for 10-11 minutes, turning the pan halfway through the baking time. Once finished baking, the feet should appear dry and if you very gently press on the top of a macaron it shouldn’t give.
- Allow macaron shells to cool completely before filling with cream cheese filling.
Cream cheese frosting filling
- Combine softened cream cheese and butter, vanilla, and salt in a medium-sized mixing bowl and stir until smooth and creamy.4 oz cream cheese, ¼ cup 4 Tablespoons unsalted butter, softened (57g), ½ teaspoon vanilla extract, ⅛ teaspoon table salt
- Gradually add powdered sugar until it has all been incorporated and frosting is smooth.1 ¾ cups powdered sugar
- Pipe frosting onto the bottom of one macaron shell, sandwich with another. For best results allow macarons to mature for 24 hours in an airtight container in the refrigerator before enjoying. If desired, drizzle melted white chocolate over shells before refrigerating.
Notes
Aged egg whites
Aging egg whites is recommended (more detail on this in the post). To do this, measure egg whites into a clean, dry measuring cup, cover with plastic wrap and poke several holes in the surface. Allow egg whites to sit at least 24 hours in the refrigerator before bringing to room temperature and proceeding with the recipe. Aging isn’t mandatory, but it can be helpful if you’ve struggled with your meringue in the past or if you are new to macarons.Cocoa powder
I prefer Dutch process for this recipe but natural cocoa powder may be substituted.Storing
After assembling, store red velvet macarons in an airtight container in the refrigerator for up to two weeks. Remove from refrigerator 15-20 minutes before enjoying. Macarons may also be frozen in an airtight container for several months. See my original macaron post for more details on storing/making in advance.Nutrition
Nutritional information is based on third-party calculations and should be considered an estimate only. Actual nutritional content will vary based upon brands used, measuring methods, cooking method, portion sizes, and more.









Danielle
These are delicious ❤️ Thank you!!
Sam Merritt
I’m so glad you enjoyed them so much, Danielle! 🙂
Theophania
Is there a way to make raspberry ones?
Sam
I haven’t tried it, but a raspberry macaron sounds wonderful! 🙂
Beth
This recipe and process led to perfect macarons. I made them for the holidays because they freeze well and are so pretty! They are ‘finicky’ as everyone agrees, but so worth it. My husband, who usually can take macarons or leave them, tried one and his eyes rolled back into his head, and he said “OMG, Wow!”
They are so delish. Thank you for such great instruction! Happy Holidays!🎄
Sam
I’m so glad they were such a hit, Beth! 🙂
Stacy Lubeski
Your recipes are the absolute best! I made these over the weekend and filled with your cream cheese frosting recipe, drizzled white chocolate and took a red velvet cupcake and stuck crumbs to the drizzle! Perfection, just like every other recipe from you!!
Sam
I’m so glad to hear you enjoyed them so much, Stacy! 🙂
Lorley
Made this recipe today. Turned out wonderful. I piped green cream cheese frosting for the middle, drizzled white chocolate over the tops and then brushed lightly with luster dust. Looked like a festive Christmas ornament.
I doubled the recipe with no problem. Thank you for all your tips and tricks. Macarons are so finicky. One time I used very thin parchment paper and my Mac’s came out lopsided. Another time I used my well used silpat mats and my Mac’s came out with teeny tiny feet. I continually make notes on what works best and my Mac’s are getting better each time. Persistence is the key. I can only image how much time it took you to test each step of your macaron recipes. Thanks again for another great eye catching recipe.
Sam
I’m so glad you enjoyed them so much, Lorley! I love the addition of the green to the frosting. What a wonderful Christmas dessert. 🙂
Fifi
For some reason when making regular vanilla macarons mine turned out underbaked the 2 times I made it, maybe scale, macronage, or I don’t know. Should the batters still have the tiny little bumps or be smooth?
Sam
The bumps typically depend on your flour. If your flour is super fine they will be smooth. If not you will have a few little bumps. Could the macarons just needed to have baked a little bit longer? Everyone’s oven is different so there can be some variations in cook time. 🙂