
Ice Cream Cake
This post may contain affiliate links. As an Amazon Associate I earn from qualifying purchases. Please read my disclosure policy.
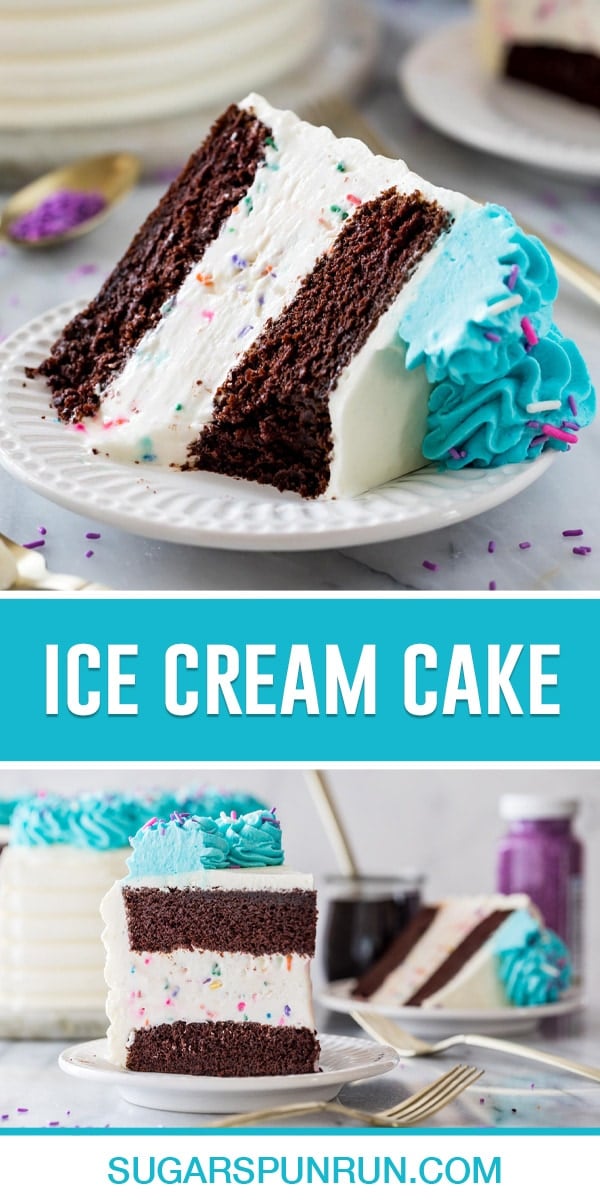
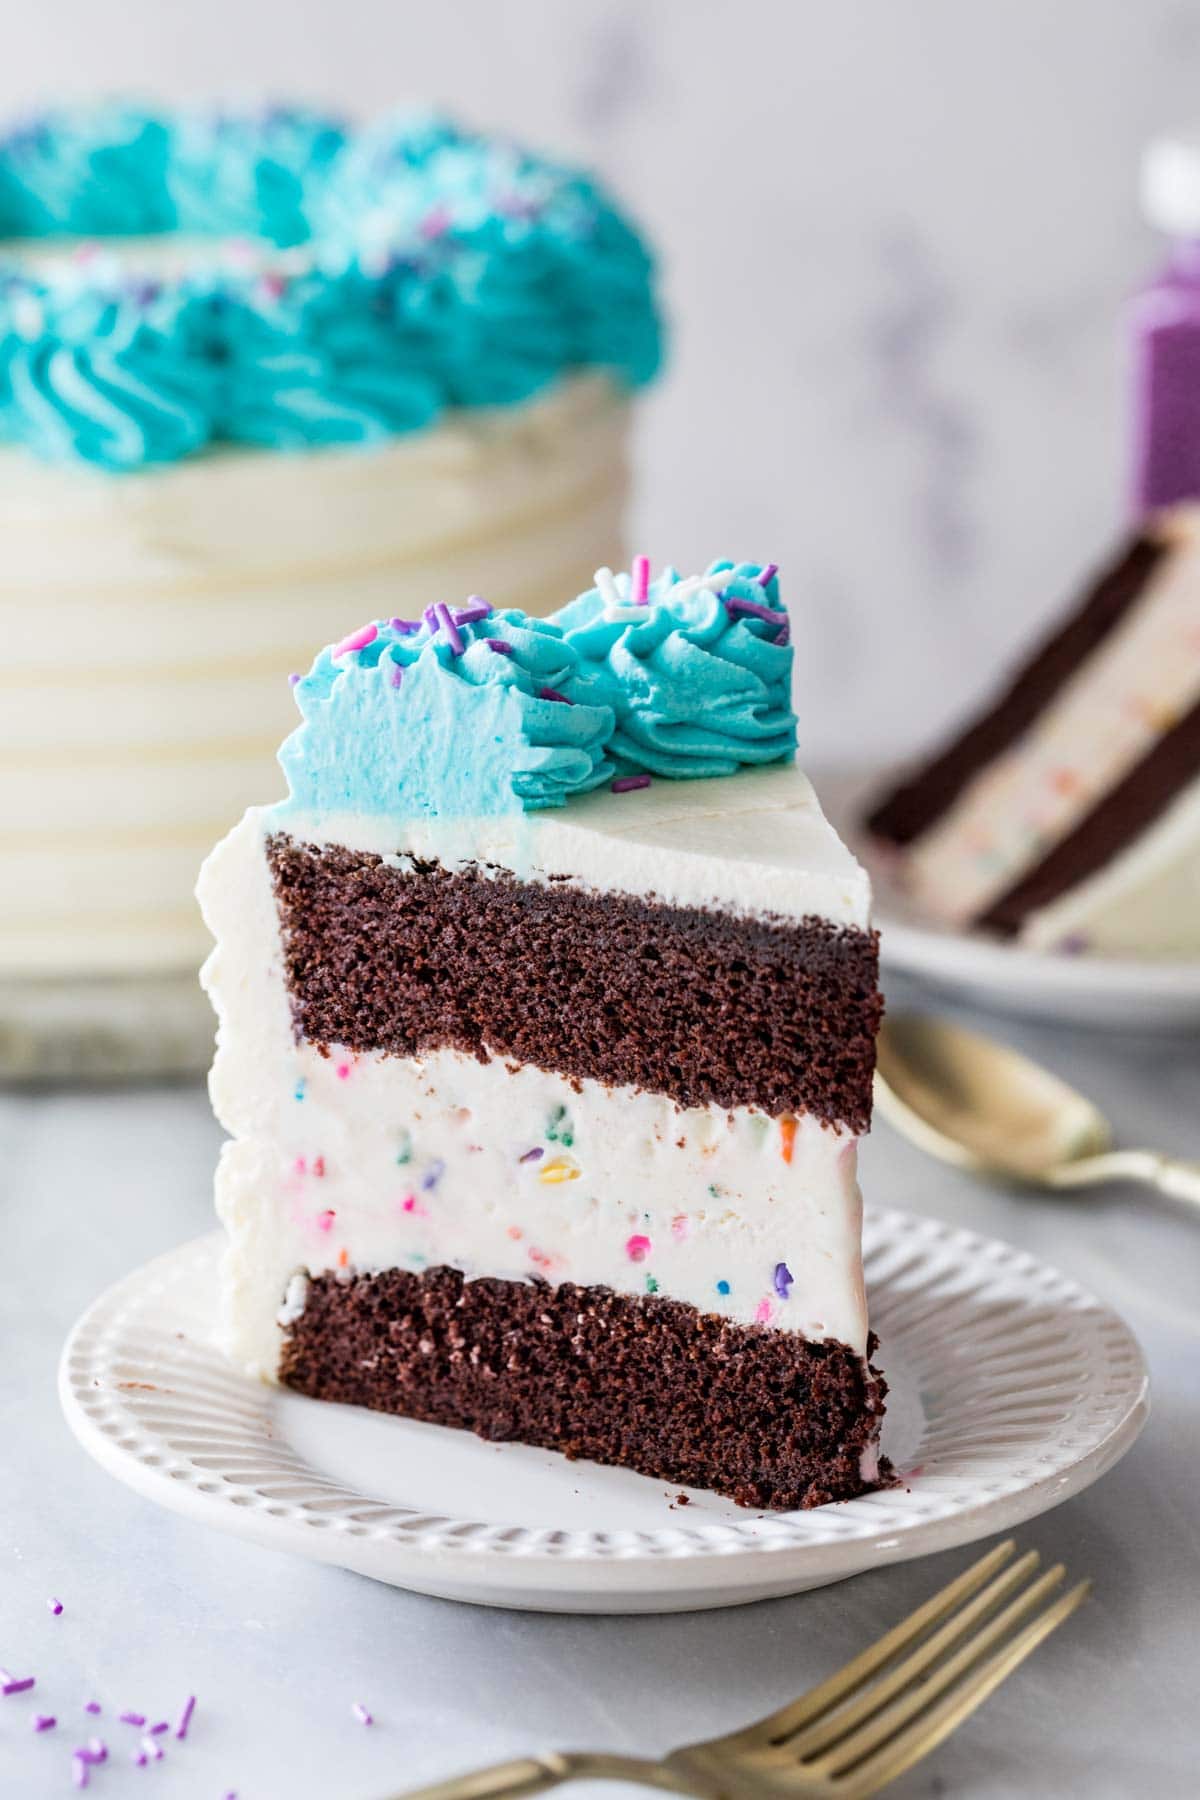
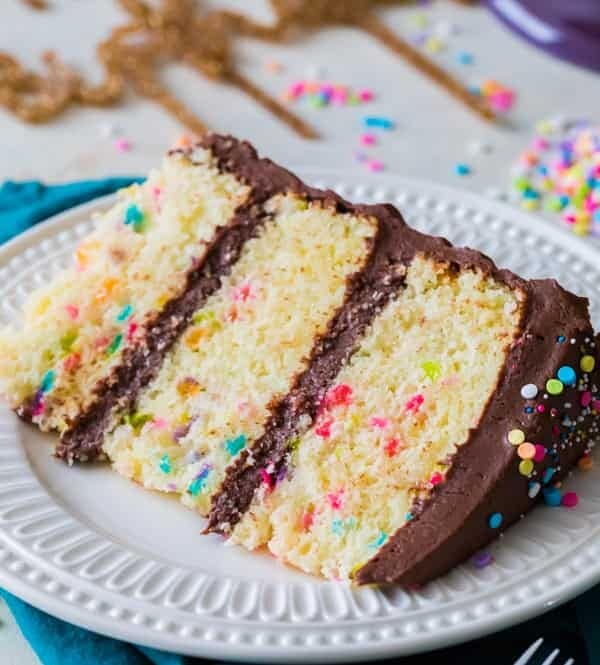
My 100% from-scratch Ice Cream Cake recipe sandwiches an easy homemade vanilla ice cream between two layers of fudgy chocolate cake. It’s a stunner of a cake that is PERFECT for birthdays! Recipe includes a how-to video!
The ULTIMATE Birthday Dessert
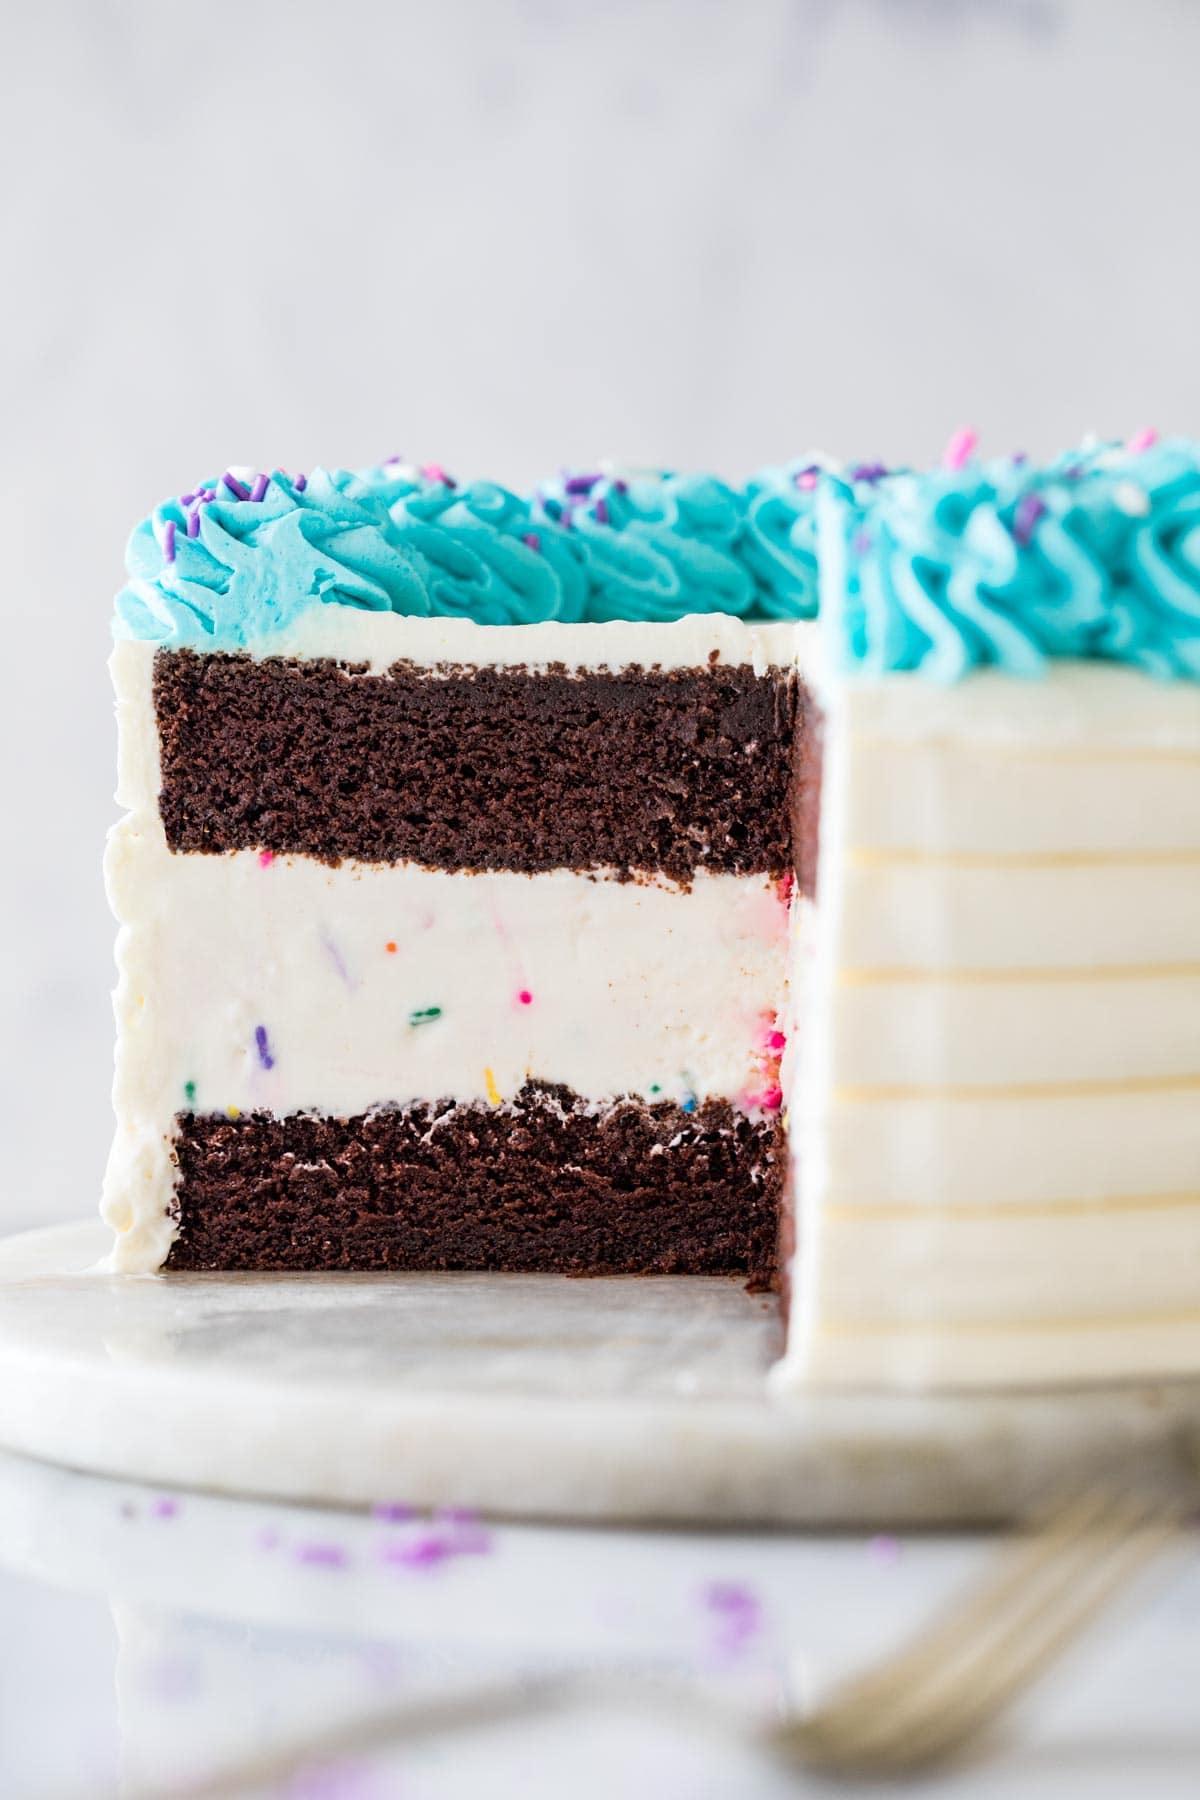
While many ice cream cakes are madeof just ice cream, that’s never been my favorite way to enjoy them. I like real cake layers in mine, and that’s exactly how I designed today’s ice cream cake recipe! Punctuated with fun sprinkles and frosted with stabilized whipped cream, never has a cake screamed it’s time to party so much since my Zebra cake!
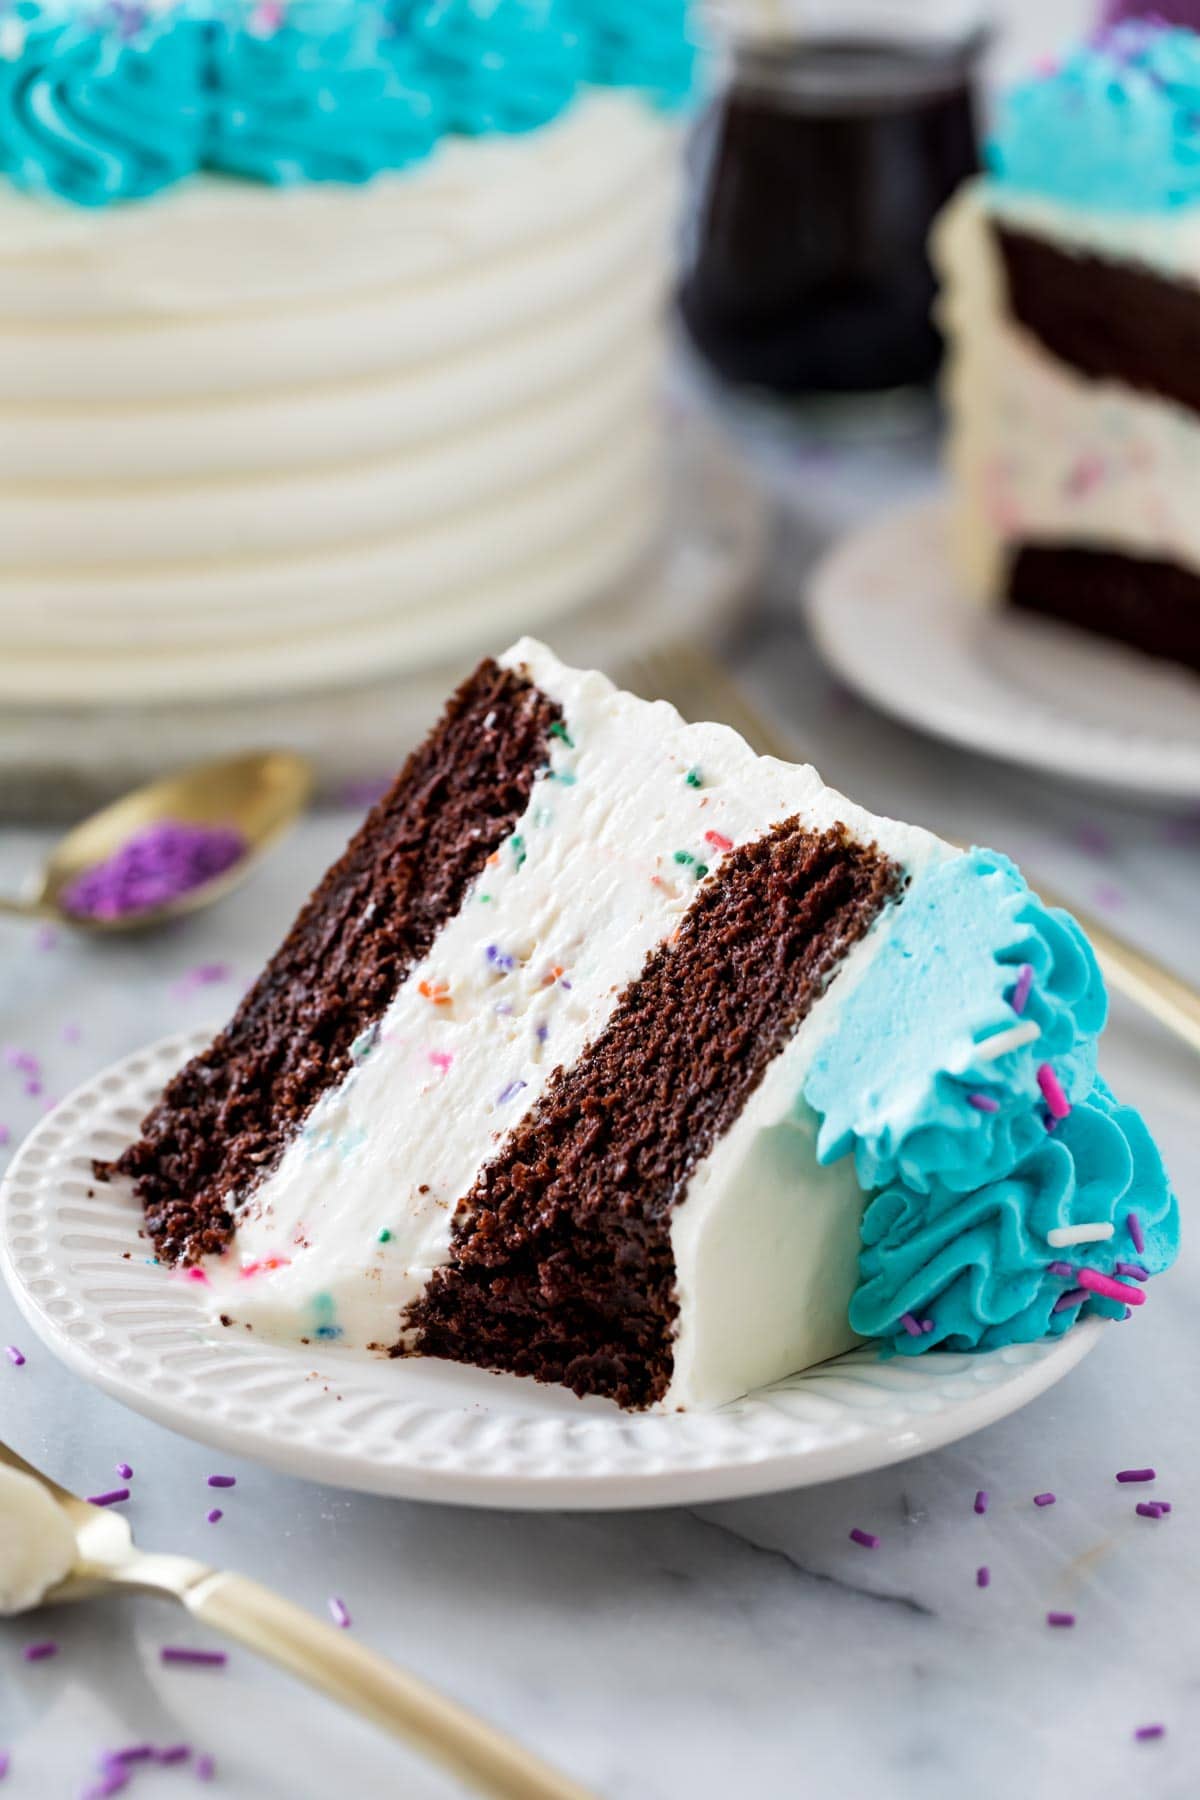
My ice cream cake recipe consists of fudgy, rich chocolate cake layers and an incredibly easy ice cream center (no ice cream machine needed!). The cake layers themselves are a slightly scaled down version of my chocolate cupcakes (it makes the perfect cake-to-ice-cream ratio). The cake layers were specifically designed to be frozen and eaten cold, unlike most of my cake recipes.
I’ve included many recipes notes and a video (of course!) below, and I definitely recommend you watch the video if you’re nervous about assembling your cake. I like to use an acetate cake collar to make things easy, but I also include instructions in case you don’t have or don’t want to buy one.
What You Need
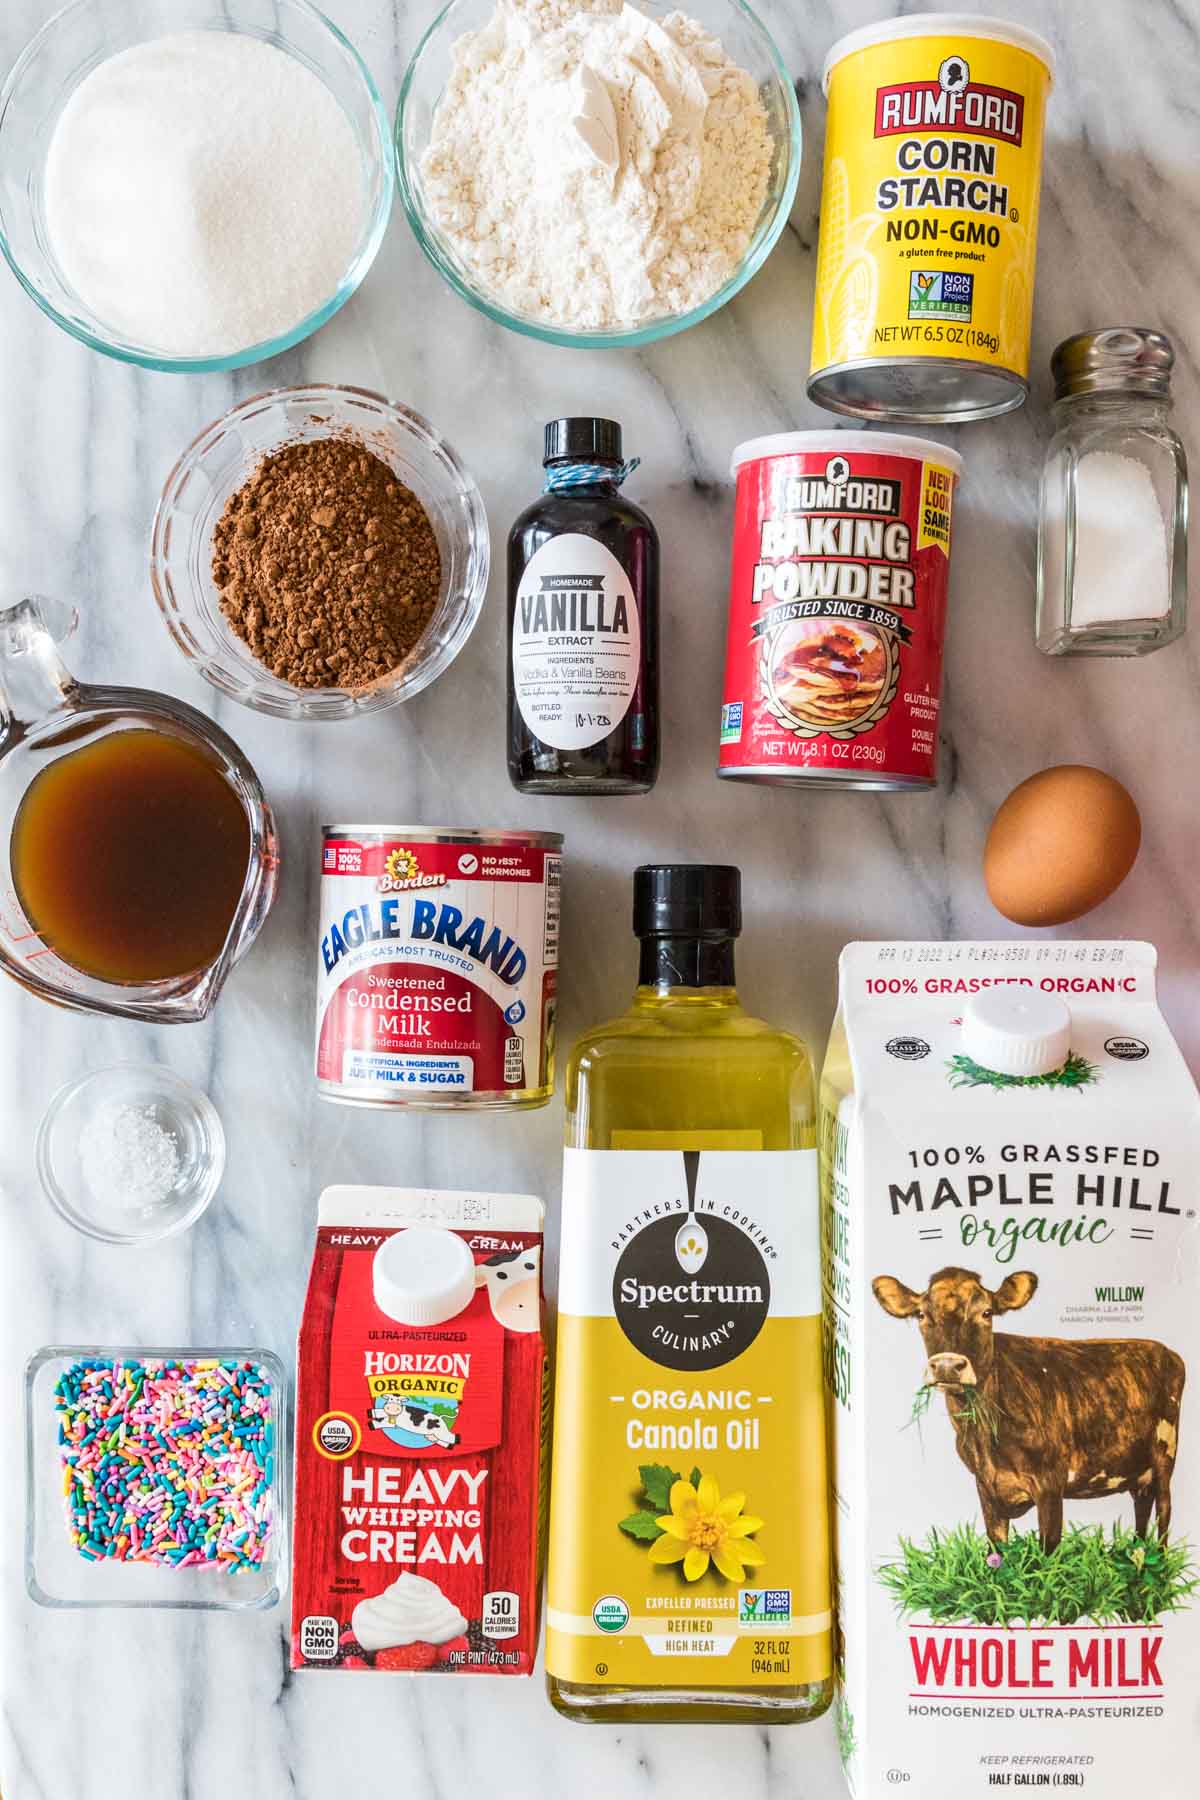
There are quite a few ingredients in the photo above, and while all of them are basic pantry staples, there are a few worth highlighting:
- Natural cocoa powder. I prefer using natural cocoa powder here, but you could use Dutch process instead. The flavor will be more intense with Dutch process cocoa.
- Hot water/coffee. Hot liquid helps to bloom the cocoa powder in the cake, ultimately intensifying the flavor for a rich chocolate cake. Use whichever you have on hand, but keep in mind that using coffee won’t actually make your cake taste like coffee (just in case you’re not a fan!).
- Corn starch. You know I love sneaking some cornstarch into my desserts to make them beautifully soft and tender, and this ice cream cake is no different. It helps make the cake sturdy, stackable, with a crumb that still melts-in-your-mouth despite being frozen!
- Sweetened condensed milk. We’ll use this to make an easy, no-churn ice cream layer for our ice cream cake. Make sure you’re using sweetened condensed milk and not evaporated milk, which won’t work!
- Heavy cream. Another ingredient for the ice cream, your heavy cream should be very cold in order to whip up properly.
SAM’S TIP: If you use 9″ pans instead of 8″ pans, the layers will be thinner and the bake time will be different as well. Keep an eye on your cakes while they bake; I recommend checking them after about 26 minutes with 9″ pans.
Remember, this is just an overview of the ingredients I used and why. For the full recipe please scroll down to the bottom of the post!
How to Make Ice Cream Cake
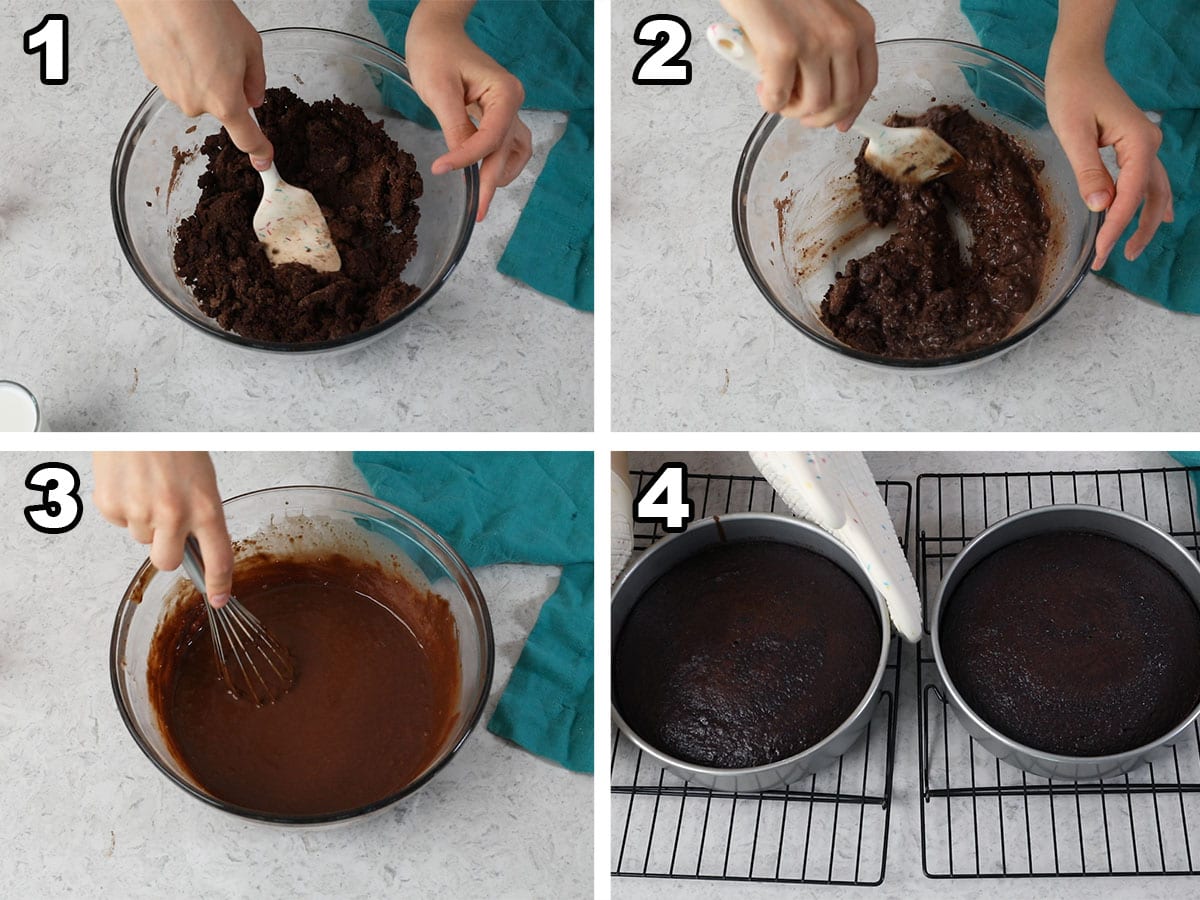
- Combine the dry ingredients, then stir in the egg, oil, and vanilla until combined. The batter will be a bit dry, but should be completely moistened. An electric or stand mixer makes easier work of this, but isn’t required!
- Add the milk and stir until the batter is evenly combined. Make sure you scrape the sides and bottom of the bowl, thicker/denser portions of batter like to hide out there and, if not incorporated, will yield a lumpy, sunken cake!
- Slowly pour in the hot coffee and gently stir until incorporated. Again, watch the sides and bottom (and be careful — don’t splash or burn yourself!).
- Divide the cake batter between two greased, floured, and parchment lined pans and bake for 30 minutes.
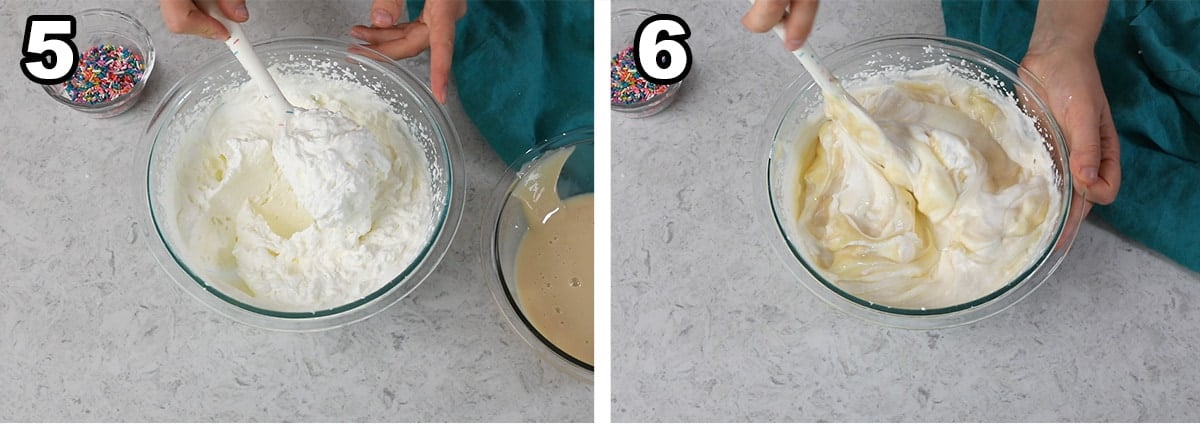
- Combine all ice cream ingredients except whipped cream and sprinkles, then whip the heavy cream in a separate bowl until it reaches stiff peaks. This means the mixture will be thick and fluffy and will resemble store-bought Cool Whip.
- Add the sprinkles and condensed milk mixture into the whipped cream and fold (no electric mixer here, just use a spatula!) until the mixture is cohesive.
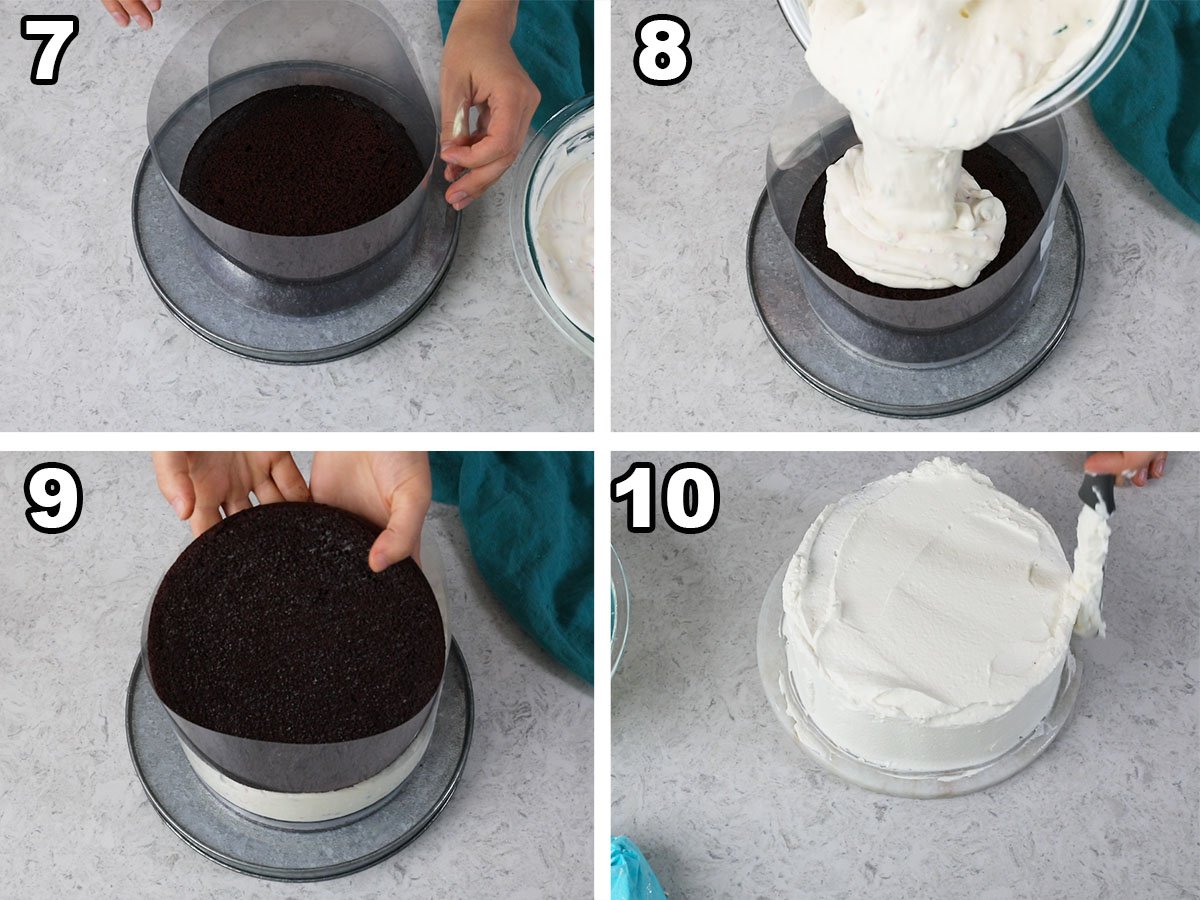
- Bring one cake layer out of the freezer, place it on your serving platter, and wrap a cake collar securely around it. Note: I know not everyone keeps cake collars handy (I never did until this recipe), so of course I have instructions on how to do this without one, just head to the recipe!
- Pouring the entire ice cream mixture over your cake layer.It’ll seem like a LOT of ice cream, but I promise it’s not too much!
- Gently nestle your second chocolate cake layer on top of the ice cream layer. Press a piece of plastic wrap against the exposed surface, and freeze overnight.
- Prepare your whipped cream frosting and frost/decorate the outside of your cake. Voila — that’s it!
SAM’S TIP: Let your ice cream cake sit for several minutes before slicing, or simply run a knife under very hot water and then wipe dry before cutting.
Frequently Asked Questions
Yes! This recipe is fantastic for preparing in advance. I typically assemble the cake layers and ice cream and let this sit in the freezer for a week or longer before decorating with frosting and serving.
Stabilized whipped cream frosting is really the best option for this cake. It freezes so well, has the perfect light texture, and isn’t too sweet. It’s really the only icing I recommend for this recipe. My homemade whipped cream is easier and will work too, but it can get a bit frosty, which I don’t love.
I don’t recommend any of my other buttercream-based frostings as they will become very hard/firm in the freezer and aren’t ideal for an ice cream cake. Cutting into it would be quite a chore.
Yes! I also have chocolate and strawberry variations of my no-churn ice cream, and you can certainly use those flavors instead of vanilla. I also have several other flavor suggestions in that post that you can use as well.
Or, if you’d like to skip the homemade ice cream step, feel free to substitute 1.5 quarts of your favorite ice cream. Just let it soften until it’s spreadable, then proceed with the recipe as written.
With two desserts wrapped into one, you couldn’t really ask for a better birthday cake!
Enjoy!
Let’s bake together! I’ll be walking you through all the steps in my written recipe and video below! If you try this recipe, be sure to tag me on Instagram, and you can also find me on YouTube and Facebook

Ice Cream Cake
Ingredients
For Cake Layers
- 1 ¼ cups (250 g) granulated sugar
- 1 cup (141 g) + 2 Tablespoons all-purpose flour
- ½ cup (50 g) natural cocoa powder
- 1 Tablespoon cornstarch
- 1 teaspoon baking powder
- 1 teaspoon baking soda
- ¾ teaspoon table salt
- ⅓ cup (79 ml) avocado, canola or vegetable oil
- 1 large egg, lightly beaten, room temperature preferred
- 2 teaspoons vanilla extract
- ½ cup (118 ml) whole milk, room temperature preferred
- ¾ cup (177 ml) hot coffee, may substitute hot/boiling water
For Ice Cream Layer (see note)
- 1 14 oz (396 g) can sweetened condensed milk
- 2 teaspoons vanilla extract
- 1 pinch fine sea salt, ⅛ teaspoon, may substitute table salt
- 2 cups (473 ml) heavy cream, very cold
- ⅓ cup (64 g) sprinkles, optional (use “jimmies” or traditional sprinkles, nonpareils are likely to bleed)
- 1 batch stabilized whipped cream frosting, see note
Instructions
Cakes
- Preheat oven to 350F (175C). Spray two 8” round cake pans with baking spray (or grease and flour them) and line the bottoms with parchment paper. Set aside.1 ¼ cups (250 g) granulated sugar, 1 cup (141 g) + 2 Tablespoons all-purpose flour, ½ cup (50 g) natural cocoa powder, 1 Tablespoon cornstarch, 1 teaspoon baking powder, 1 teaspoon baking soda, ¾ teaspoon table salt
- In a large mixing bowl, whisk together sugar, flour, cocoa powder, cornstarch, baking powder, baking soda, and salt.
- Add canola oil, egg, and vanilla extract and stir until completely combined/all the dry ingredients have been moistened (I like to use an electric mixer for this step but it may be done by hand, just a bit more work!).⅓ cup (79 ml) avocado, canola or vegetable oil, 1 large egg, 2 teaspoons vanilla extract
- Stir in milk until batter is uniform and completely combined.½ cup (118 ml) whole milk
- Slowly drizzle in hot coffee or hot water, stirring until well-combined. Be sure to scrape the sides and bottom of the bowl and ensure that the batter is uniform and smooth. Batter will be thin – this is normal!¾ cup (177 ml) hot coffee
- Evenly divide batter into prepared cake pans. Transfer to center rack of 350F (175C) preheated oven and bake 30 minutes or until a toothpick inserted in center comes out clean or with a few moist, fudgy crumbs. Allow cakes to cool in cake pan for 15 minutes then run a knife around the edge and carefully invert onto a cooling rack to cool completely before proceeding.
- Once cakes are cooled, place in freezer while you begin to prepare ice cream (if you will be storing the cakes longer than an hour, wrap them tightly in plastic wrap before freezing).
Ice Cream
- Combine condensed milk, vanilla extract, and salt in a large bowl and whisk to combine.1 14 oz (396 g) can sweetened condensed milk, 2 teaspoons vanilla extract, 1 pinch fine sea salt
- Pour cold heavy cream into a separate large mixing bowl and use an electric mixer to beat to stiff peaks (mixture should have greatly increased in volume and have a thick, fluffy consistency, like cool whip. If you lift a spoon or the beaters out of the cream, the peak that forms should be stiff and hold its shape without melting back down or folding over).2 cups (473 ml) heavy cream
- Add whipped cream to condensed milk mixture and add sprinkles. Use a spatula to gently fold together ingredients until uniform consistency.⅓ cup (64 g) sprinkles
Assembly
- Remove one cake layer from the freezer (unwrap if needed) and place on serving platter. If your cake collar is taller than 6”, trim it or it will be difficult to add your second cake layer.
- Wrap cake collar securely, tightly around the first cake layer and secure with tape. The collar should be straight up and down (don’t accidentally make it cone-shaped/skinnier at the top) and should overlap itself by several inches. Once you have secured the cake collar do not remove it until all layers have been frozen overnight.
- Pour ice cream over the first cake layer and smooth the surface with a spatula.
- Unwrap remaining cake layer and carefully, gently place over the ice cream.
- Cover the exposed layer by placing plastic wrap directly against the surface of the cake and return to the freezer to chill overnight before decorating.
- To decorate, prepare stabilized whipped cream frosting according to recipe(prepare just before removing cake) and decorate as desired.1 batch stabilized whipped cream frosting
- To serve, allow ice cream cake to sit at room temperature for 15-20 minutes before slicing and/or run a large, sharp knife under very hot water and then wipe dry before slicing. Cake may be served immediately, or stored in the freezer until ready to serve. Leftovers must be kept frozen.
Notes
How to make without a cake collar
A cake collar is a great inexpensive tool to have in your toolbox and you can find the one that I use linked in the equipment section above. However, if you don’t have one or don’t want to buy one, you can still make an ice cream cake. To do so, bake your cakes first. Then, clean one (cooled) cake pan and line the bottom and sides with plastic wrap or foil (or parchment paper, if you can get it flat and crease-free. Prepare your ice cream as instructed and pour it into the prepared cake pan and cover with plastic wrap. Individually wrap the cake layers as well. Freeze wrapped cake layers and ice cream overnight. The next day, assemble by unwrapping one cake layer, placing it on a cake platter, unwrapping the ice cream and inverting onto the first cake layer, then layering the second cake layer on top. Proceed to decorate as indicated!Store-bought ice cream
To substitute store-bought ice cream, you will need 1 ½ quarts of your preferred ice cream. Allow it to soften enough to be spreadable and then follow the above instructions for freezing and assembly.Cake size
You may instead make this cake as a 9” cake, just note that the bake time will be several minutes less for the cakes (start checking at 26 minutes). Keep an eye on them and use the toothpick test to check for doneness.Frosting note
For a simple covering of icing without a decorative border, make a single batch of my stabilized whipped cream frosting. To do the decorative border as shown in my photos, you will need 1 ½ batches. You can increase the recipe by 50% or simply double it (you’ll have some extra left over).Storing
Wrap leftovers in plastic wrap and freeze in an airtight container for up to a month.Nutrition
Nutrition information is automatically calculated, so should only be used as an approximation.
Like this? Leave a comment below!


I am going to make this cake with homemade ice cream, but with a different recipe. Should I still use 1.5 quarts, or another amount?
You will want to use the 1.5 quarts if using store bought ice cream. 🙂
Hi, before I make this beautiful cake I was wondering because I can’t get a cake collar in time , why can’t I just freeze the ice cream filling and chill the cakes the next day instead of freezing them as well?
Hi Denise! We actually have a note at the bottom of the recipe card on how to make this without a cake collar. Hope that helps! 🙂
Hey Jennifer,,made the cake and turned out pretty good. I need to work on my decorating hahaha It was a big hit Love that chocolate cake❤️
Hi Denise. I actually do that. I line the same cake pan I’m using for the cake with Saran Wrap and then put either softened store purchased ice cream or the ice cream recipe here into the pan, making sure it fills all of the edges. I wrap the plastic around to cover the top and then freeze it. I can then remove the plastic wrapped ice cream from the pan and, when I’m ready just place it on top of the bottom cake layer. Easy peasy.
Thanks Jennifer, I will let you know how I did.
How could I make this homemade ice cream raspberry ice cream?
I haven’t experimented with it, but you can check out my no strawberry no churn ice cream and substitute raspberry instead. 🙂
Made this recipe now twice. And I absolutely love it! Thank you
I’m so glad it was such a hit! 🙂
If I wanted the cake to be just basic vanilla, what could I substitute for the 1/2c. of cocoa powder?
Hi Anna! We haven’t experimented with a vanilla version of this recipe yet. You could try our vanilla cake, but just know that vanilla cakes typically are more dense than the chocolate cake, so it will be a bit different.
This is my first ever comment on a food blog. I never leave comments but this cake was incredible! I made it for my son’s birthday and it turned out perfect! The instructions made it so simple. I didn’t have the cake collar but was able to make it work just as instructed in the notes. I don’t prefe ice cream cakes of all ice cream. This is what an ice cream cake should be! Thank you!
Thank you so much for taking the time to leave a comment! I’m so glad it was such a hit! 🙂
I bought my first cake collar to make this for my brother`s birthday. What a great tool and this recipe is perfection; you never disappoint, Sam!
Thank you so much, Katie! I’m so glad you enjoyed it! 🙂
I made this cake for my birthday and it was so delicious! My whole family raved about how good it was, even the ones who usually don’t eat a lot of cake. I will definitely be making this again. I might try Oreos in the ice cream like the commenter above or even crushed Butterfingers. Thanks for a wonderful recipe!
I’m so glad it was such a hit! 🙂
Holy Moly! This turned out so great… I got a ton of compliments. I did switch the cocoa powder for dark chocolate cocoa powder, and added in oreo crumbles into the ice cream rather than the sprinkles. I used the stabilized whipped cream on the outside with a little ganache and more oreo crumbles. BAM! Amazing. Thank you for the recipe.
I’m so glad you enjoyed it so much, Elizabeth! 🙂