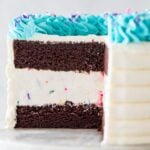
Ice Cream Cake
My 100% from-scratch Ice Cream Cake recipe sandwiches an easy homemade vanilla ice cream between two layers of fudgy chocolate cake. It’s a stunner of a cake that is PERFECT for birthdays! Recipe includes a how-to video!
Servings 14 servings
Calories 353kcal
Ingredients
For Cake Layers
- 1 ¼ cups (250 g) granulated sugar
- 1 cup (141 g) + 2 Tablespoons all-purpose flour
- ½ cup (50 g) natural cocoa powder
- 1 Tablespoon cornstarch
- 1 teaspoon baking powder
- 1 teaspoon baking soda
- ¾ teaspoon table salt
- ⅓ cup (79 ml) avocado, canola or vegetable oil
- 1 large egg lightly beaten, room temperature preferred
- 2 teaspoons vanilla extract
- ½ cup (118 ml) whole milk room temperature preferred
- ¾ cup (177 ml) hot coffee may substitute hot/boiling water
For Ice Cream Layer (see note)
- 1 14 oz (396 g) can sweetened condensed milk
- 2 teaspoons vanilla extract
- 1 pinch fine sea salt ⅛ teaspoon, may substitute table salt
- 2 cups (473 ml) heavy cream very cold
- ⅓ cup (64 g) sprinkles optional (use “jimmies” or traditional sprinkles, nonpareils are likely to bleed)
- 1 batch stabilized whipped cream frosting see note
Instructions
Cakes
- Preheat oven to 350F (175C). Spray two 8” round cake pans with baking spray (or grease and flour them) and line the bottoms with parchment paper. Set aside.1 ¼ cups (250 g) granulated sugar, 1 cup (141 g) + 2 Tablespoons all-purpose flour, ½ cup (50 g) natural cocoa powder, 1 Tablespoon cornstarch, 1 teaspoon baking powder, 1 teaspoon baking soda, ¾ teaspoon table salt
- In a large mixing bowl, whisk together sugar, flour, cocoa powder, cornstarch, baking powder, baking soda, and salt.
- Add canola oil, egg, and vanilla extract and stir until completely combined/all the dry ingredients have been moistened (I like to use an electric mixer for this step but it may be done by hand, just a bit more work!).⅓ cup (79 ml) avocado, canola or vegetable oil, 1 large egg, 2 teaspoons vanilla extract
- Stir in milk until batter is uniform and completely combined.½ cup (118 ml) whole milk
- Slowly drizzle in hot coffee or hot water, stirring until well-combined. Be sure to scrape the sides and bottom of the bowl and ensure that the batter is uniform and smooth. Batter will be thin – this is normal!¾ cup (177 ml) hot coffee
- Evenly divide batter into prepared cake pans. Transfer to center rack of 350F (175C) preheated oven and bake 30 minutes or until a toothpick inserted in center comes out clean or with a few moist, fudgy crumbs. Allow cakes to cool in cake pan for 15 minutes then run a knife around the edge and carefully invert onto a cooling rack to cool completely before proceeding.
- Once cakes are cooled, place in freezer while you begin to prepare ice cream (if you will be storing the cakes longer than an hour, wrap them tightly in plastic wrap before freezing).
Ice Cream
- Combine condensed milk, vanilla extract, and salt in a large bowl and whisk to combine.1 14 oz (396 g) can sweetened condensed milk, 2 teaspoons vanilla extract, 1 pinch fine sea salt
- Pour cold heavy cream into a separate large mixing bowl and use an electric mixer to beat to stiff peaks (mixture should have greatly increased in volume and have a thick, fluffy consistency, like cool whip. If you lift a spoon or the beaters out of the cream, the peak that forms should be stiff and hold its shape without melting back down or folding over).2 cups (473 ml) heavy cream
- Add whipped cream to condensed milk mixture and add sprinkles. Use a spatula to gently fold together ingredients until uniform consistency.⅓ cup (64 g) sprinkles
Assembly
- Remove one cake layer from the freezer (unwrap if needed) and place on serving platter. If your cake collar is taller than 6”, trim it or it will be difficult to add your second cake layer.
- Wrap cake collar securely, tightly around the first cake layer and secure with tape. The collar should be straight up and down (don’t accidentally make it cone-shaped/skinnier at the top) and should overlap itself by several inches. Once you have secured the cake collar do not remove it until all layers have been frozen overnight.
- Pour ice cream over the first cake layer and smooth the surface with a spatula.
- Unwrap remaining cake layer and carefully, gently place over the ice cream.
- Cover the exposed layer by placing plastic wrap directly against the surface of the cake and return to the freezer to chill overnight before decorating.
- To decorate, prepare stabilized whipped cream frosting according to recipe(prepare just before removing cake) and decorate as desired.1 batch stabilized whipped cream frosting
- To serve, allow ice cream cake to sit at room temperature for 15-20 minutes before slicing and/or run a large, sharp knife under very hot water and then wipe dry before slicing. Cake may be served immediately, or stored in the freezer until ready to serve. Leftovers must be kept frozen.
Video
Notes
How to make without a cake collar
A cake collar is a great inexpensive tool to have in your toolbox and you can find the one that I use linked in the equipment section above. However, if you don’t have one or don’t want to buy one, you can still make an ice cream cake. To do so, bake your cakes first. Then, clean one (cooled) cake pan and line the bottom and sides with plastic wrap or foil (or parchment paper, if you can get it flat and crease-free. Prepare your ice cream as instructed and pour it into the prepared cake pan and cover with plastic wrap. Individually wrap the cake layers as well. Freeze wrapped cake layers and ice cream overnight. The next day, assemble by unwrapping one cake layer, placing it on a cake platter, unwrapping the ice cream and inverting onto the first cake layer, then layering the second cake layer on top. Proceed to decorate as indicated!Store-bought ice cream
To substitute store-bought ice cream, you will need 1 ½ quarts of your preferred ice cream. Allow it to soften enough to be spreadable and then follow the above instructions for freezing and assembly.Cake size
You may instead make this cake as a 9” cake, just note that the bake time will be several minutes less for the cakes (start checking at 26 minutes). Keep an eye on them and use the toothpick test to check for doneness.Frosting note
For a simple covering of icing without a decorative border, make a single batch of my stabilized whipped cream frosting. To do the decorative border as shown in my photos, you will need 1 ½ batches. You can increase the recipe by 50% or simply double it (you’ll have some extra left over).Storing
Wrap leftovers in plastic wrap and freeze in an airtight container for up to a month.Nutrition
Serving: 1serving | Calories: 353kcal | Carbohydrates: 49g | Protein: 6g | Fat: 16g | Saturated Fat: 10g | Polyunsaturated Fat: 1g | Monounsaturated Fat: 4g | Trans Fat: 0.001g | Cholesterol: 62mg | Sodium: 285mg | Potassium: 227mg | Fiber: 1g | Sugar: 39g | Vitamin A: 612IU | Vitamin C: 1mg | Calcium: 148mg | Iron: 1mg