
Cheese Scones
This post may contain affiliate links. As an Amazon Associate I earn from qualifying purchases. Please read my disclosure policy.

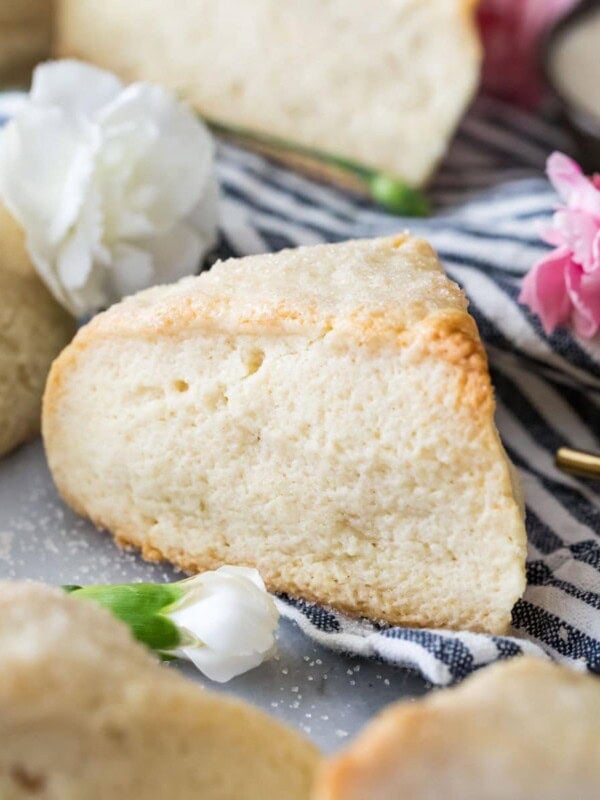
Cheese scones put a savory spin on their classic counterparts. Tall, buttery and flaky, they pair nicely with soups and chili, salads, and breakfast dishes! Use a food processor for the easiest (and prettiest) results (though I’ll tell you how to make them without one, too).

Savory Cheddar Scones
So far we’ve tackled lemon poppy seed scones, raspberry scones, chocolate chip scones, chocolate scones, pumpkin scones, and sourdough scones. We have yet to venture into savory scone territory, but that changes today with my new cheese scones!
A buttery, cheesy take on my classic scone recipe, these are an unexpected but very welcome twist. They are light, melt-in-your-mouth and buttery with LOTS of melty cheese. Perfect with breakfast, lunch, and dinner, you’ll be making them all the time.
5 Things to Know About This Recipe
- Easiest if you use a food processor, but you don’t have to use one. I include instructions for both methods, but I really prefer the food processor for the easiest and best looking results (just like when making my pie crust recipe and cornbread biscuits).
- Customizable with your favorite cheese. I include a few of my favorite varieties below, but essentially, if you like to eat it, you can use it here!
- Lamination makes the most amazing flaky layers. We just want to make sure we are careful not to over-work the dough during this process.
- A bit of sugar creates a balanced flavor. Yes, these are savory scones, but a tiny bit of sugar balances the flavors, just like in my tomato soup recipe and even my sloppy joe recipe. Don’t skip it!
- Best enjoyed right away. Scones don’t keep super well (unless you freeze them–more on this below!).
Table of Contents
Ingredients
I won’t go over every ingredient, but I will review a few you might have questions about.
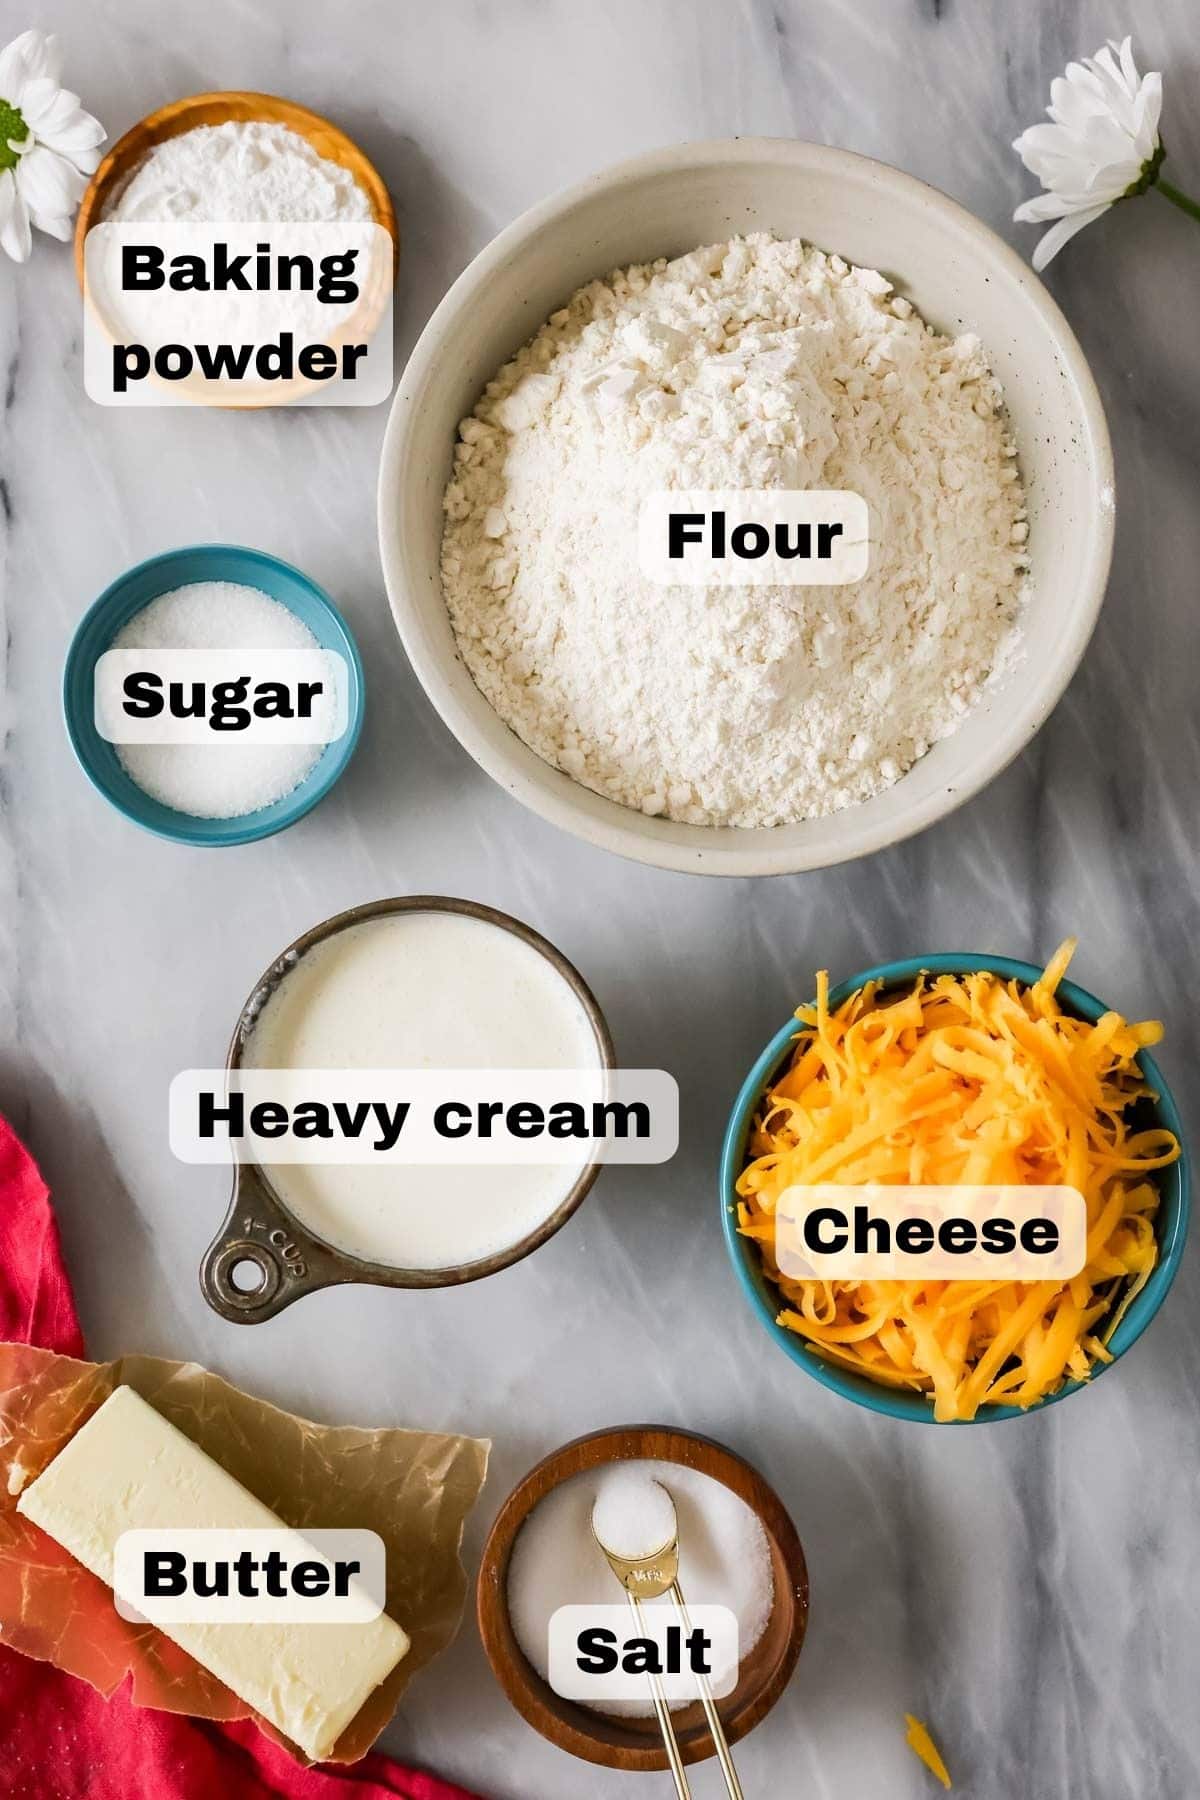
- Cheese. I like a sharp cheddar, but Gouda, Gruyere, Asiago, or really any other cheese you like to eat will work! I prefer to shred my own, but you can use store-bought in this instance. Don’t you dare do that with my mac and cheese recipe though!
- Unsalted butter. Make sure this is SUPER cold. Sometimes I even like to put mine in the freezer for up to half an hour beforehand. If you only have salted butter on hand, you can use that and reduce the salt in the recipe to ¾ teaspoon.
- Sugar. Just a bit! This balances the flavor of the scones and adds tenderness and moisture.
- Baking powder. Yes, we are adding a full tablespoon! Make sure you are using baking powder and not baking soda, as they are not the same thing. I talk more about the differences between the two in my post on baking powder vs baking soda.
- Heavy cream. Also known as double cream or whipping cream. We’ll add this to the dough and brush it on top of the scones just before they go in the oven. You could use buttermilk instead, but I prefer the texture with cream.
Remember, this is just an overview of the ingredients I used and why. For the full recipe please scroll down to the bottom of the post!
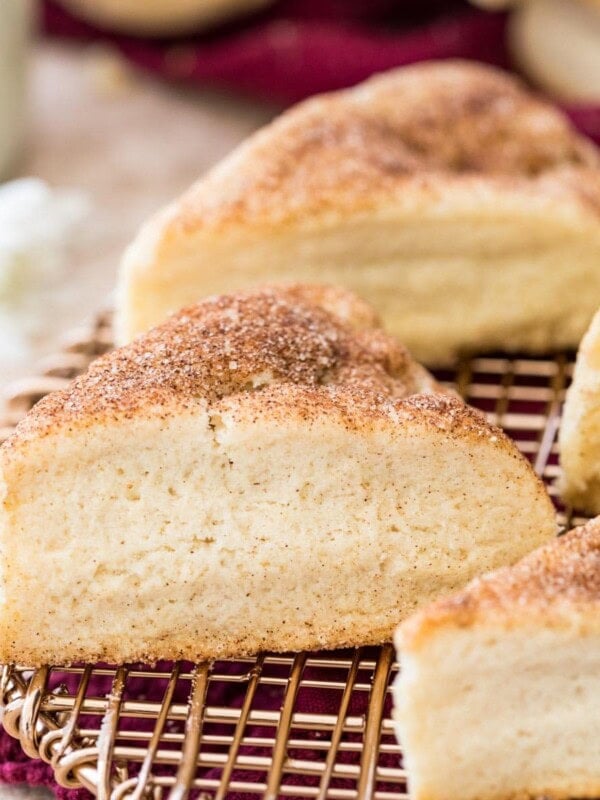
SAM’S TIP: A bit of garlic powder (¾ teaspoon) and/or chives would be tasty here for garlic cheese scones! If you decide to add garlic, add it with the dry ingredients.
How to Make Cheese Scones
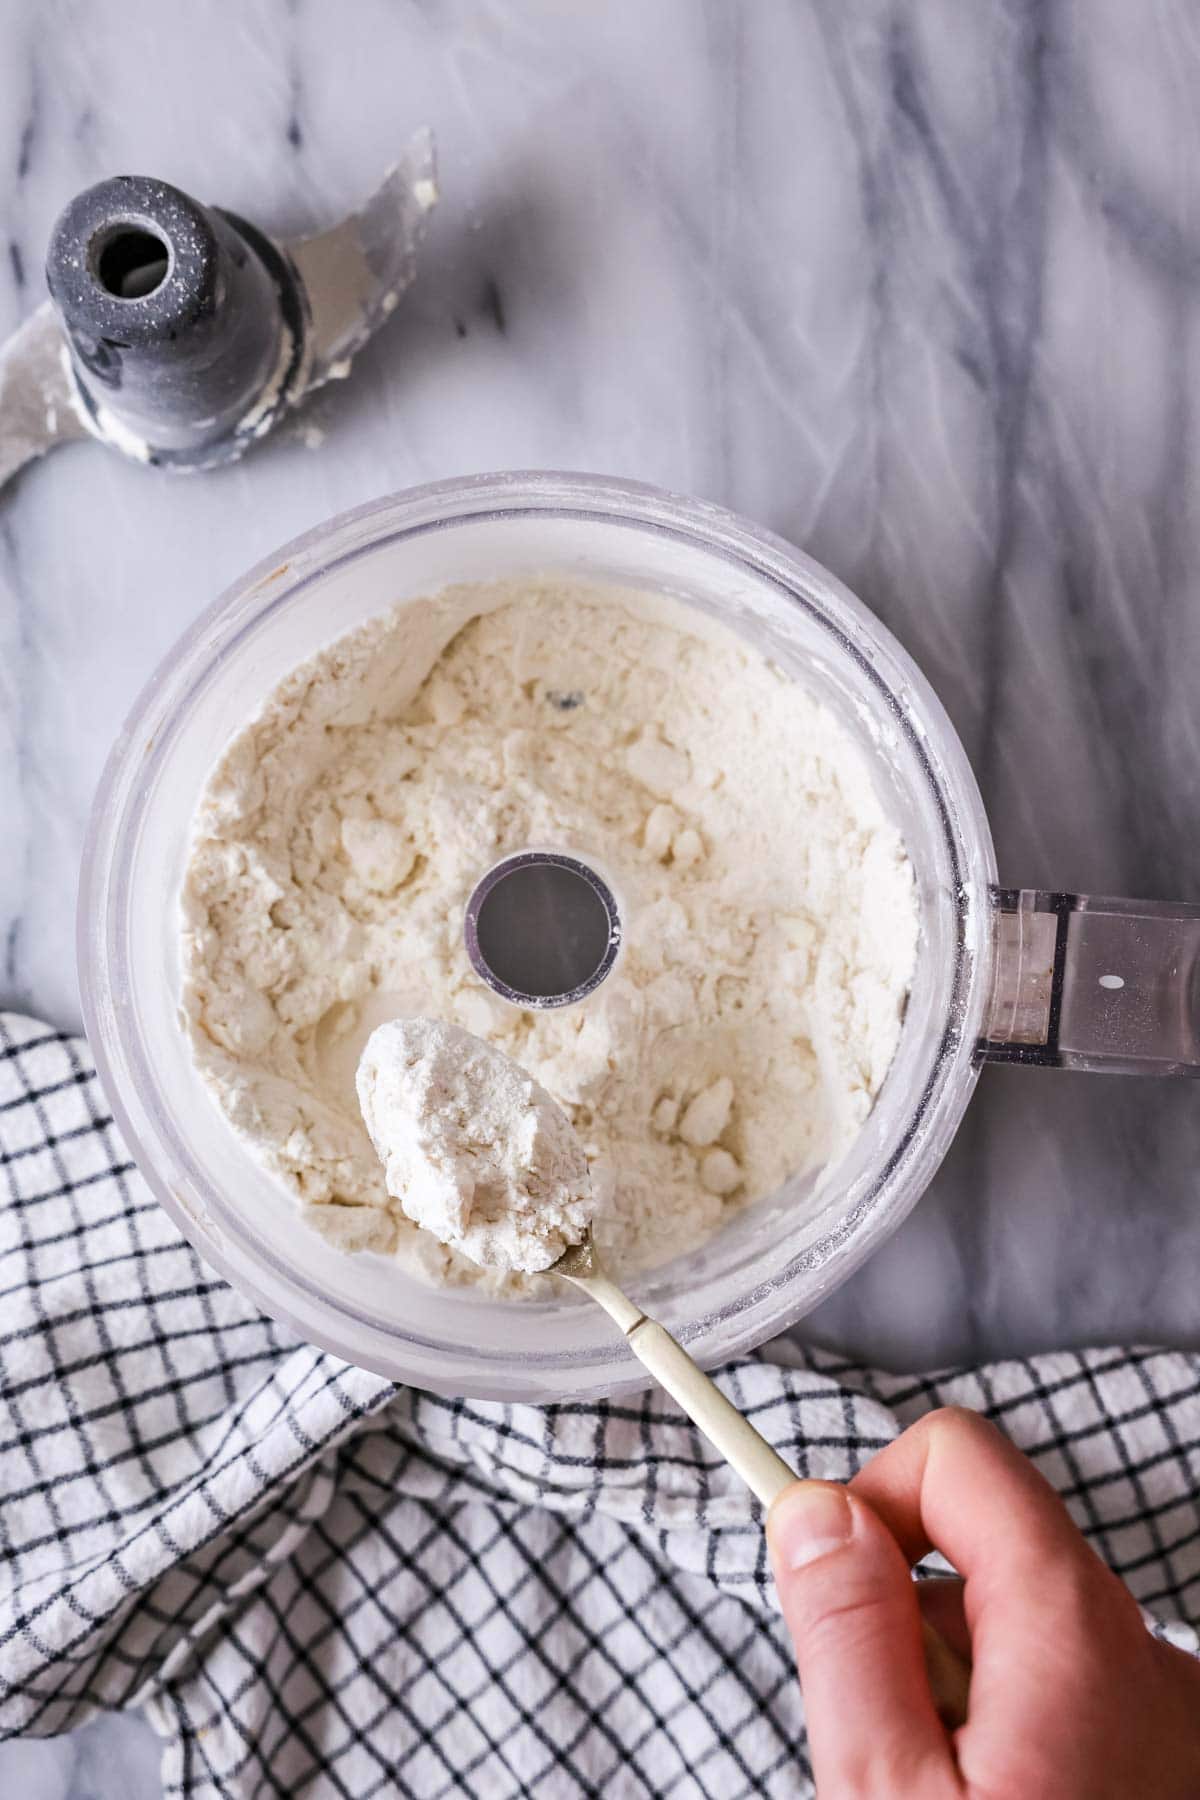
- Step 1: Cut the butter into the dry ingredients. Add the dry ingredients to the bowl of a food processor and pulse to combine. Scatter the butter pieces overtop, then pulse until well-distributed. You should still see discernible chunks of butter in the mixture.
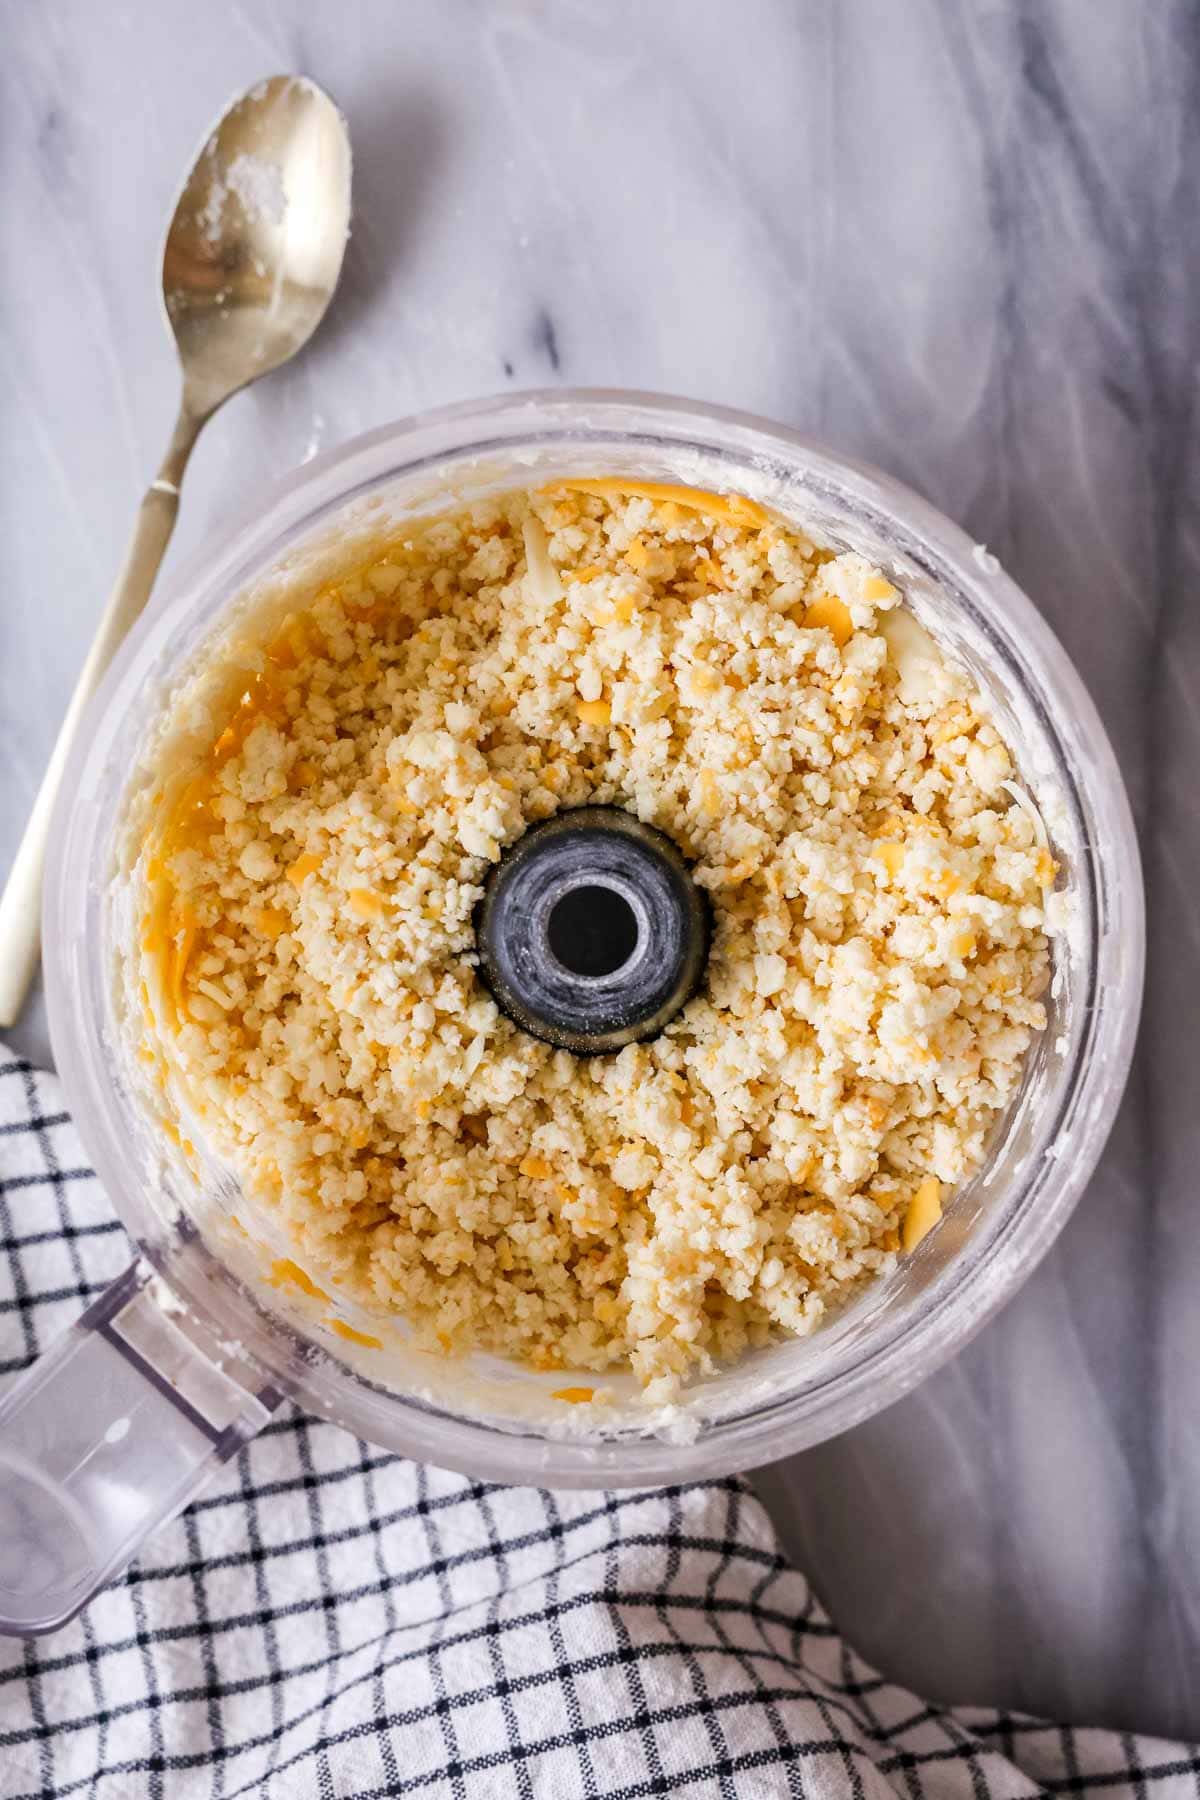
- Step 2: Add the cream and cheese. Drizzle the cream overtop and pulse until incorporated, then add the cheese and pulse again until the mixture starts to cling together. You can test this by pinching a bit between your fingers; it should stick together.
SAM’S TIP: When using a food processor, pulse–don’t blend! If you blend, the ingredients won’t evenly distribute and your dough will be unevenly combined and ultimately, over-worked.
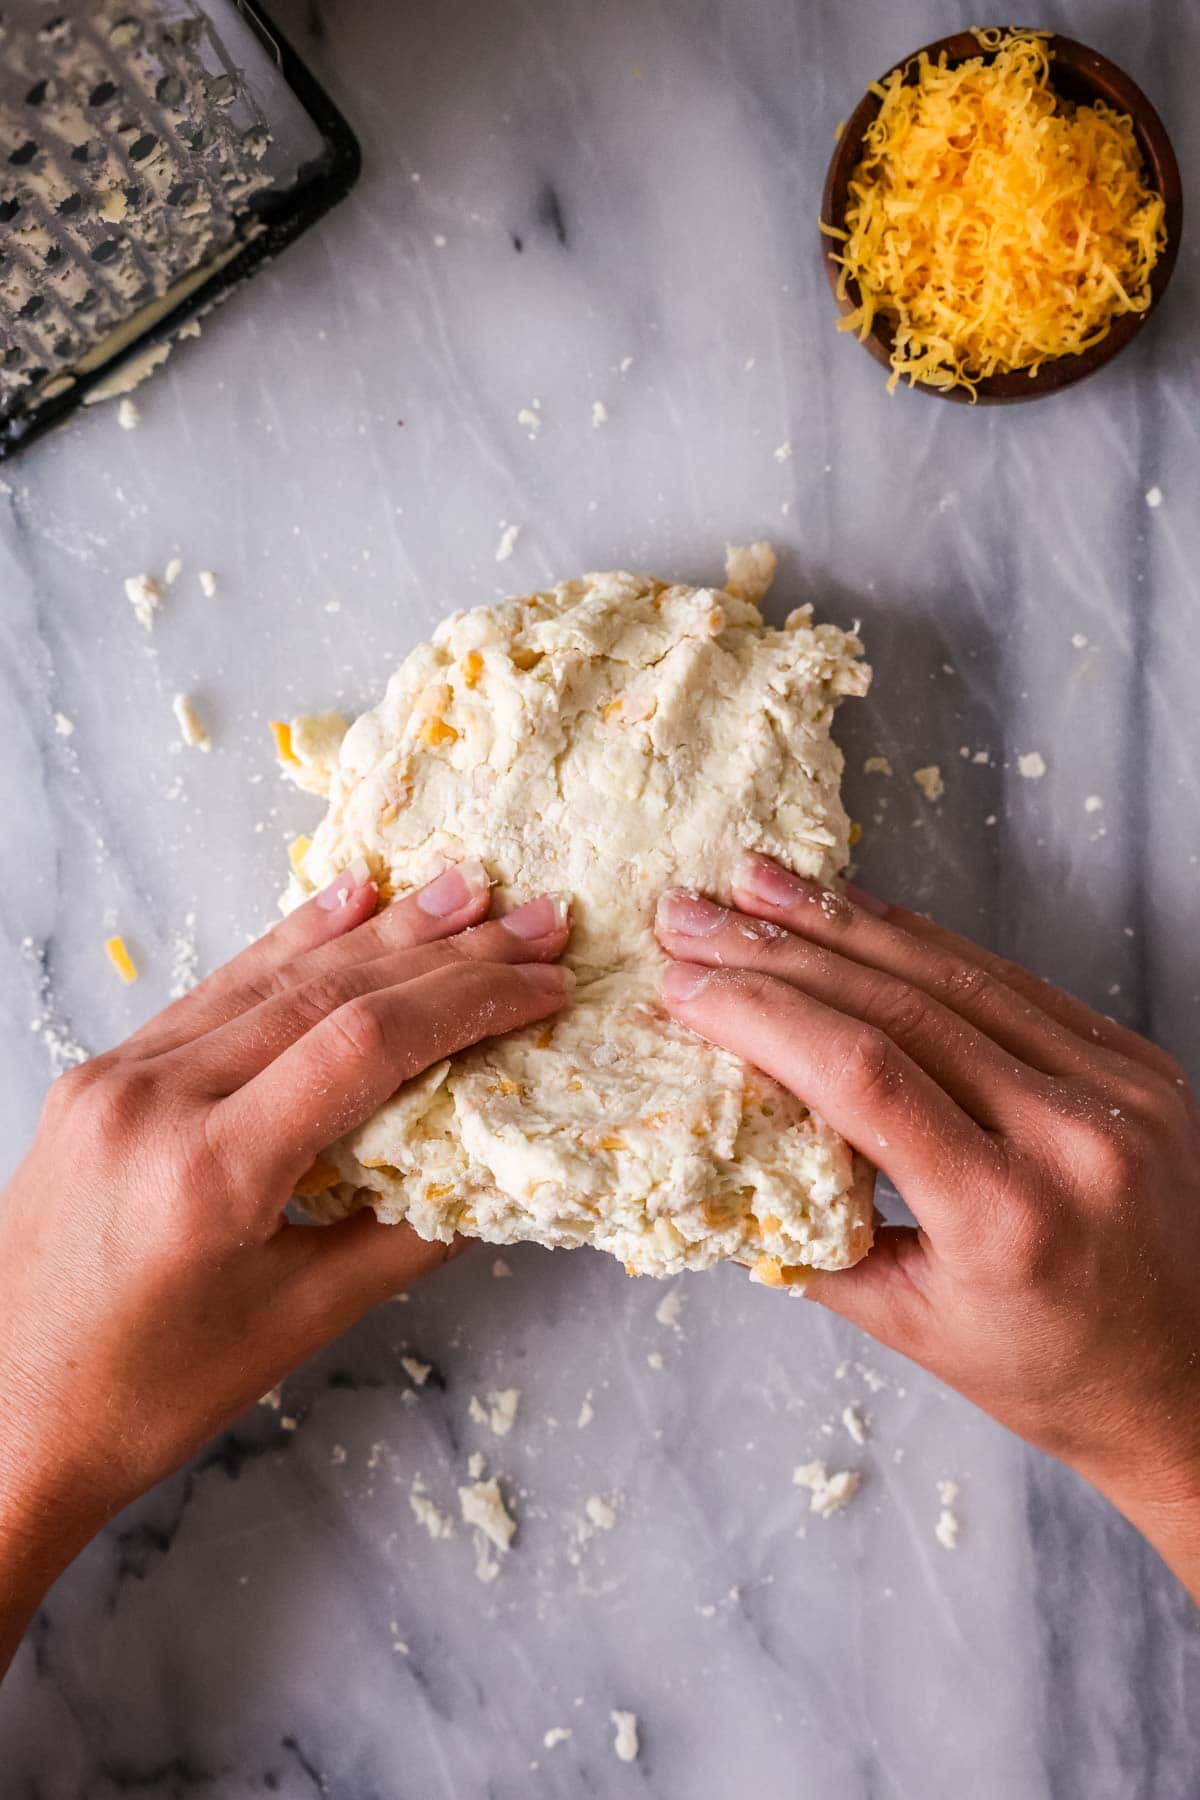
- Step 3: Laminate. Turn the dough out onto a lightly floured surface and gently form it into a ball. Flatten, then fold it over onto itself. Rotate the dough 90 degrees, then repeat until you’ve flattened and folded a total of five times. Do NOT overwork the dough, or your scones will be tough and dry.

- Step 4: Cut into wedges. Form the dough into a round disk, then cut into 8 wedges, pressing the knife straight down to cut. Do not saw into the dough, or your scones may end up falling over in the oven.

- Step 5: Bake. Place on a parchment lined baking sheet and brush each scone with cream. Sprinkle the remaining cheese over each scone, then bake until the edges start to turn golden brown.
SAM’S TIP: Let your scones cool for a few minutes on their baking sheet before enjoying. I do recommend enjoying fairly soon after baking, as the texture is best this way. If you do plan to enjoy them later, you may want to reheat for a few seconds in the microwave.

Frequently Asked Questions
Absolutely! Like many of my scone recipes, these scones freeze very well. Simply wrap them well in plastic wrap before storing in an airtight, freezer-safe container. To thaw, unwrap and microwave for a few seconds until warmed through.
You can also freeze the unbaked scones; once you’ve cut them, wrap in plastic and store in an airtight, freezer-safe container until ready to enjoy. Unwrap, brush with cream and sprinkle with cheese, then bake. They may need just a minute or two longer when baked from frozen.
These scones are tasty with breakfast, lunch, and dinner. Serve them as a side with your favorite omelet or scrambled eggs, pair them with a soup (suggestions below!) or salad for lunch, or dip them into a hearty chili or beef stew for dinner. The options are endless!
Yes! You can always substitute the cream with buttermilk or my easy buttermilk substitute instead (you’ll need a bit less liquid if you opt for the substitute). Personally, I liked the texture better with the cream though (they were even more tender).

Serve Your Cheese Scones With


If you want an equally cheesy, but simpler recipe, try my garlic cheese drop biscuits.
Enjoy!
Let’s bake together! Subscribe to my newsletter to be notified of all the newest recipes, and find my free recipe tutorials on YouTube 💜

Cheese Scones
Equipment
- Food Processor ( or box grater, see note)
Ingredients
- 2 cups (250 g) all-purpose flour
- 1 Tablespoon granulated sugar
- 1 Tablespoon baking powder
- 1 teaspoon salt
- 6 Tablespoons (85 g) unsalted butter, very cold
- ¾ cup (85 g) cheddar cheese, shredded
- ¾ cup (180 ml) heavy cream
Topping
- 2 Tablespoons heavy cream
- ¼ cup (28 g) cheddar cheese, shredded
Instructions
- Note: This recipe is easiest when made with a food processor, but it can be made without one, too, please see the notes below.
- Preheat oven to 425F (220C) and line a baking sheet with parchment paper. Set aside.
- In the basin of a food processor, combine flour, sugar, baking powder, and salt, and pulse to combine.2 cups (250 g) all-purpose flour, 1 Tablespoon granulated sugar, 1 Tablespoon baking powder, 1 teaspoon salt
- Cut butter into Tablespoon-sized pieces and scatter over the flour mixture. Pulse in 1 second intervals until butter is well-distributed (pea sized pieces will remain).6 Tablespoons (85 g) unsalted butter
- Drizzle cream over the flour/butter and pulse in 1-second intervals until the cream is incorporated.¾ cup (180 ml) heavy cream
- Sprinkle cheese over mixture and pulse in brief intervals until dough is just beginning to cling together.¾ cup (85 g) cheddar cheese
- Transfer dough to a lightly floured surface, handling as lightly as you can, form into a ball, then flatten into a disk. Fold the dough in half over itself and use your hands to gently flatten layers together. Rotate the dough 90 degrees and fold in half again, repeat this step 5 times, handling as gently as you can so as to not overwork the dough.
- Form the dough into a smooth disk about 1” thick. Use a knife to cut the disk into 8 equal wedges, pressing straight down with each cut. Transfer wedges to prepared baking sheet, spacing about 2” apart.
- Brush the tops of each wedge lightly with cream and sprinkle cheese over top. Bake in preheated 425F (220C) oven for 12 minutes, until the edges just begin to turn a golden brown.2 Tablespoons heavy cream, ¼ cup (28 g) cheddar cheese
- Allow scones to cool on baking sheet before enjoying!
Notes
Food processor alternative
If you don’t have a food processor, you can make this recipe by hand. Combine the flour, sugar, baking powder, and salt in a large bowl. Use a grater to shred the butter and toss into the flour mixture until combined. Add cheese and mix to combine. Pour cream over the dough and work together until just combined. Proceed with the recipe as written from step 6. When making them without a food processor you may wish to chill the scones in the refrigerator for 30 minutes prior to baking as the dough tends to get warm from the extra handling and may spread more.Garlic
For garlic cheese scones add ¾ teaspoon dried garlic with the dry ingredients. Some dried chives would be nice here, too!Nutrition
Nutrition information is automatically calculated, so should only be used as an approximation.
Like this? Leave a comment below!


I want to try this for a brunch! Has anyone ever tried adding fresh chopped jalapeno to this recipe?
Hi Colleen! I haven’t personally done it, but you shouldn’t have any issues folding in some jalapenos. 🙂
These look delicous!
We hope you love them 🙂
I’ve never left a comment before, but I couldn’t help myself today. I’ve tried many scone recipes and they’ve always been “meh” until this one. Super fast, easy to make (I think the laminating must make a difference) and they rose so beautifully. I used buttermilk (that’s what I was trying to use up) instead of heavy cream. I also stuck the butter in the freezer probably closer to an hour (distracted by other things) and it still came together beautifully. I’ll be using my food processor more often for sure. Thanks for the great recipe.
Thank you so much for taking the time to leave a comment, Sandra! I’m so glad you enjoyed them so much! 🙂
Can you use feta in this recipe? Thank you! 😊😊
I haven’t personally tried it, but I think it could work. 🙂