A perfectly plush, soft, classic vanilla cake recipe made entirely from scratch! It’s so simple to make, and tastes much better than a box mix! Recipe includes a how-to video.
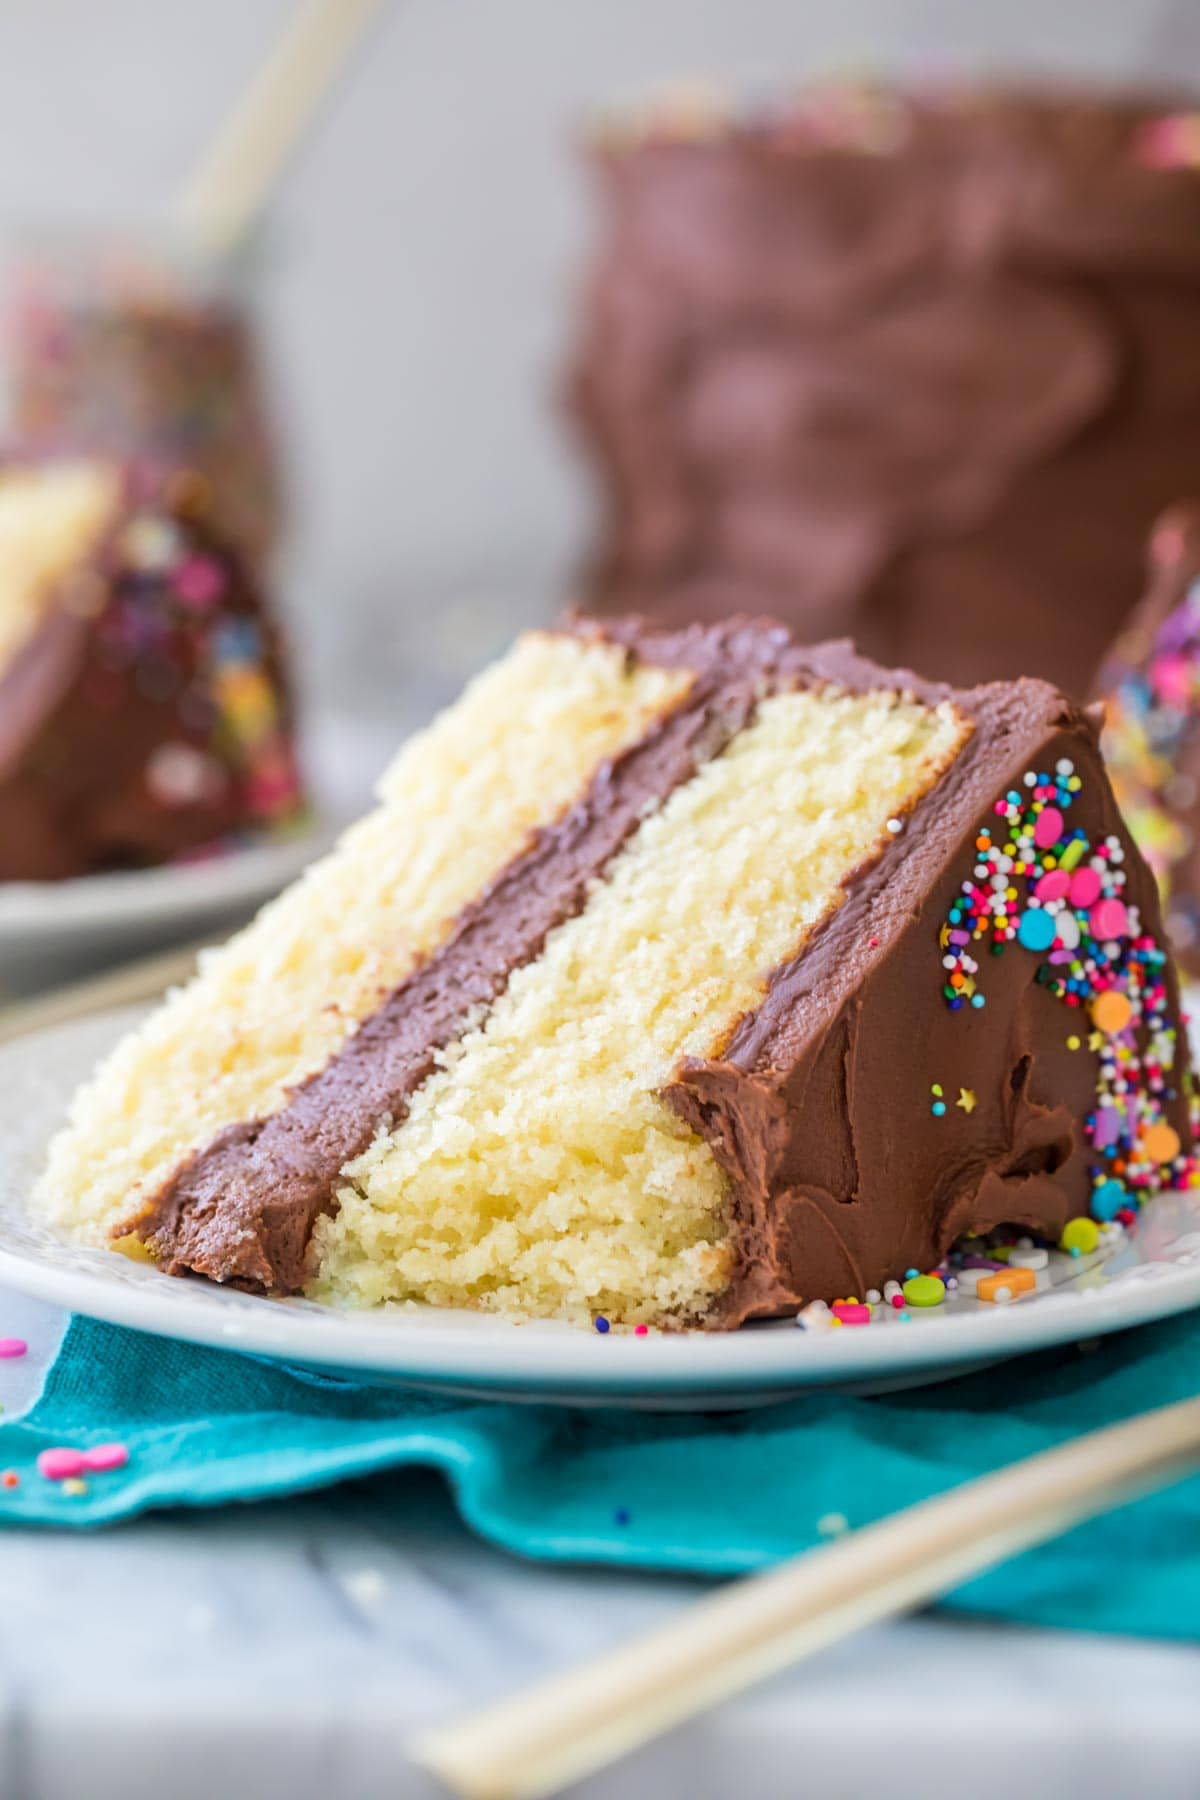
A Classic Vanilla Cake, Made Entirely From-Scratch
Every baker needs a solid vanilla cake recipe in their repertoire, and today’s recipe is just that.
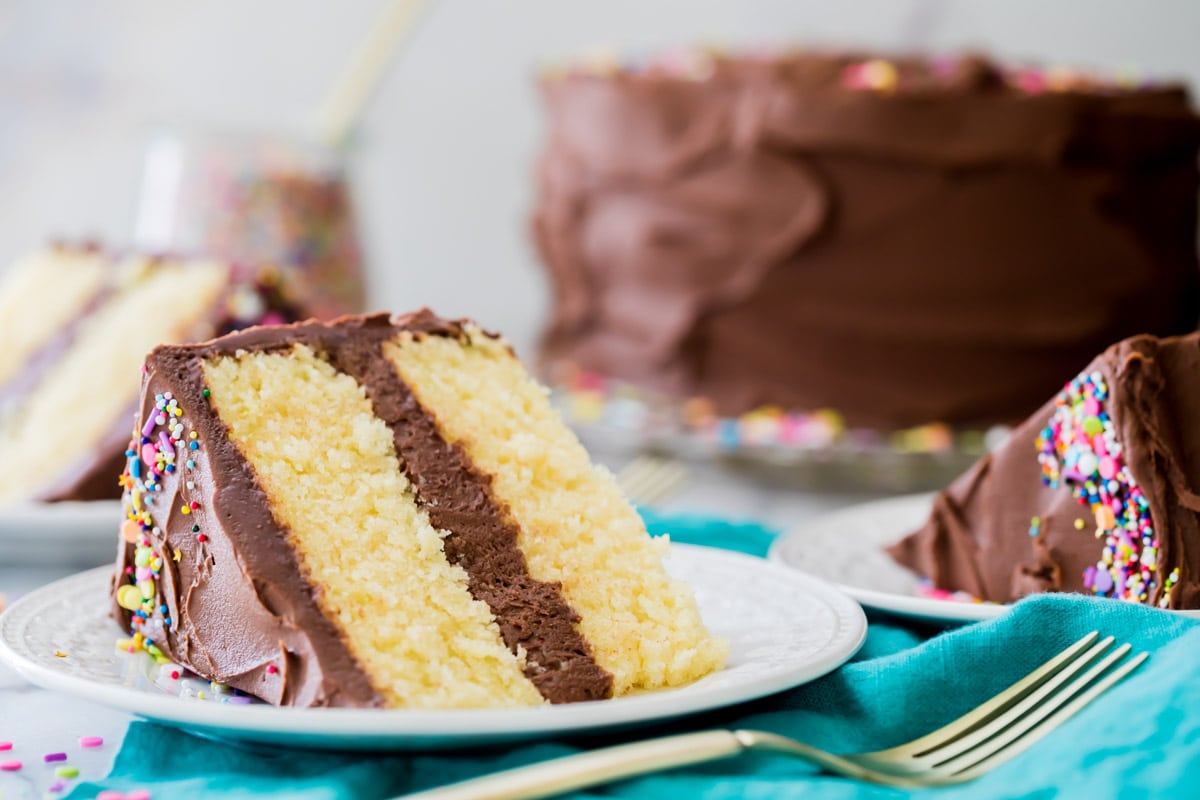
It’s soft, plush, and perfectly moist. Not to be confused with my white cake, this recipe is a beautiful pale golden color and distinctly vanilla flavored. It pairs beautifully with any frosting, although a traditional chocolate frosting is my favorite finish!
Like my chocolate cake, this has been one of my most popular recipes for years (and you may recognize it as the base for both my pineapple upside-down cake and my marble cake). It’s a simple, classic, and incredible vanilla cake. So many of you have tried and loved this recipe, and while the recipe remains exactly the same, I thought it was about time for a facelift with new photos and a new video.
The flavor and texture of this cake is so much better than box-mix, and the preparation is almost as easy. I’ve included a few tips below to help you be successful, so make sure to read all the notes before you get started.
What You Need
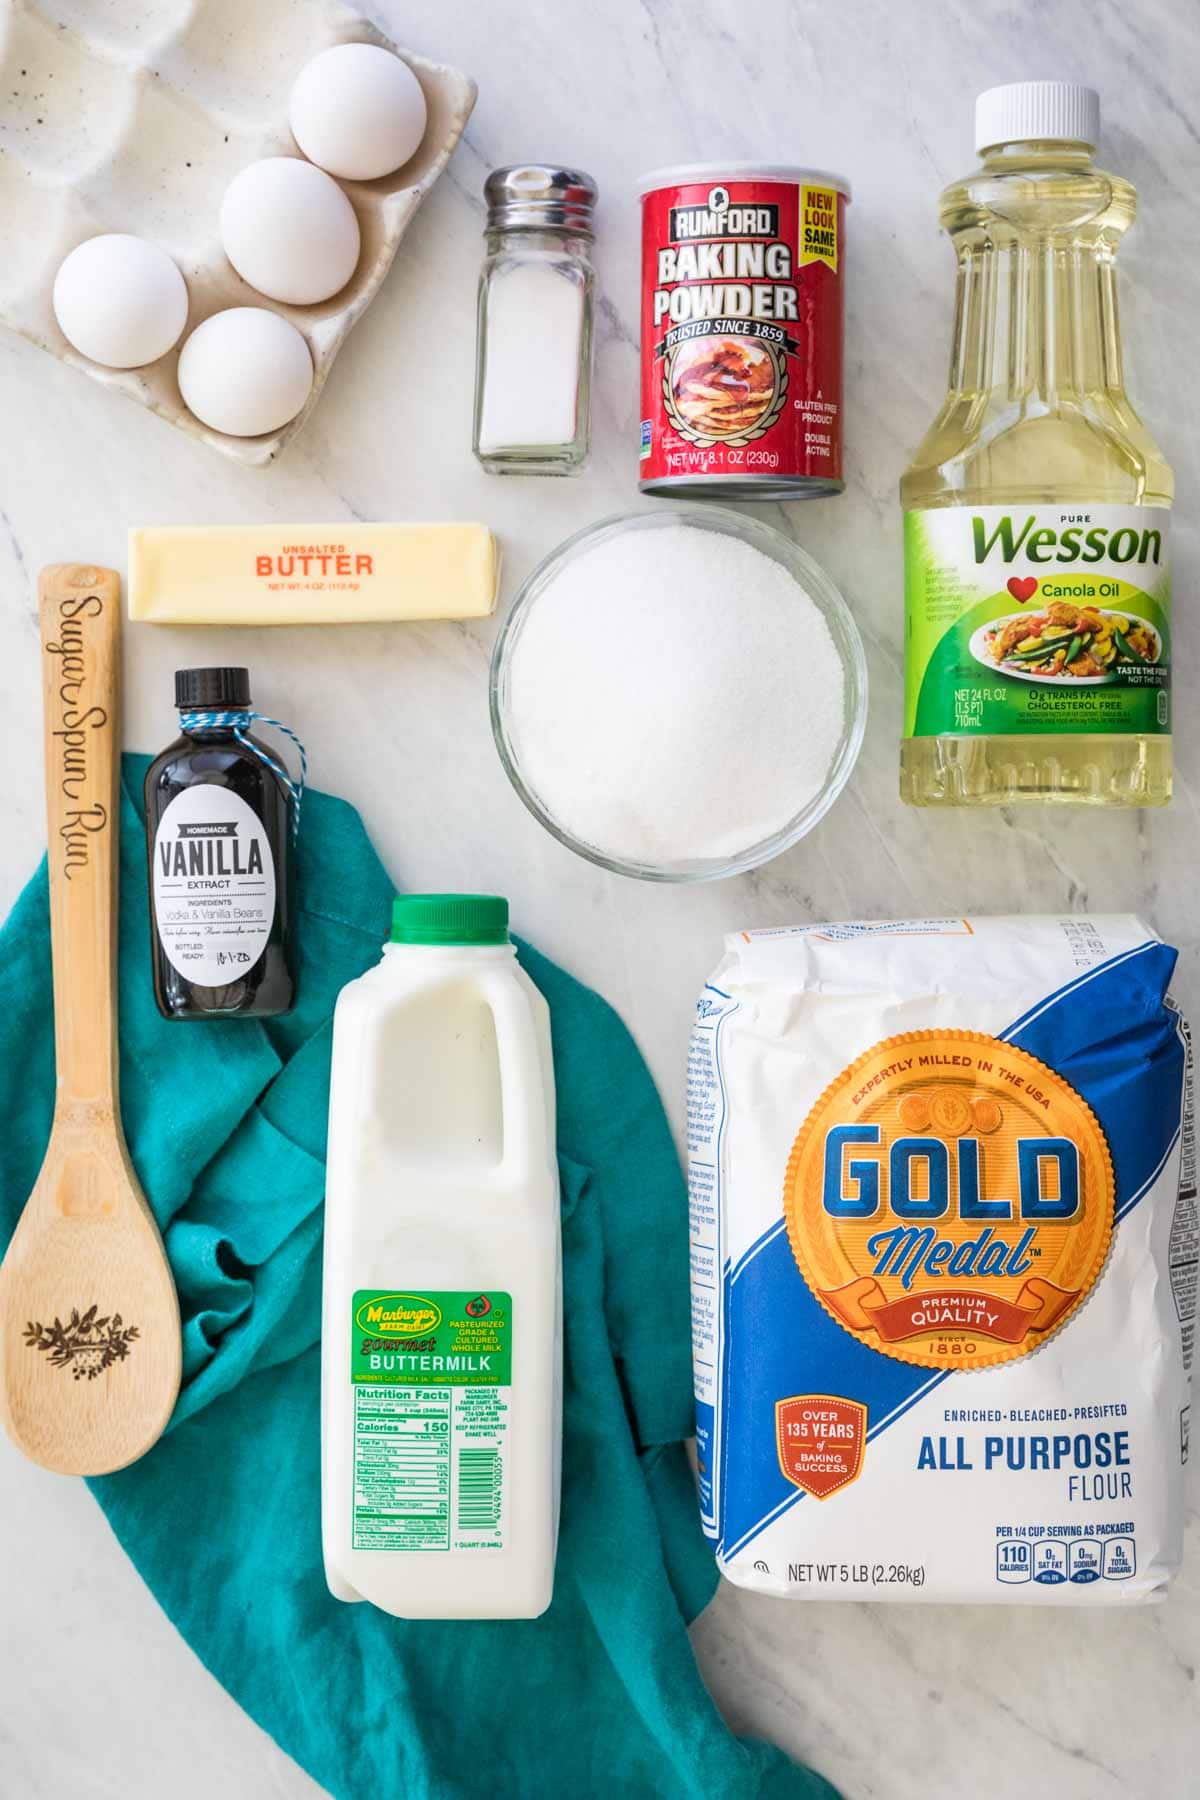
After testing many versions and combinations of ingredients, I’ve found that a good vanilla cake needs the following ingredients:
- Oil AND butter. A blend of these two ingredients gives the cake the best possible flavor and texture. Butter provides flavor while oil adds moisture and keeps it from being too dry. A cake made with all oil would be moist but lacking in flavor, and an all-butter cake may have a more buttery taste, but would be more dry. Any neutral cooking oil will work here, but I typically recommend using either vegetable or canola oil. For the butter, unsalted is best so we have maximum control over the flavor of the cake
- Sugar. Plain granulated sugar works best. Brown sugar would add moisture, but would detract from the classic vanilla flavor and even weigh down the cake a bit.
- Eggs. You’ll need four eggs, and it’s best if you bring them to room temperature before adding them (this helps them incorporate into the batter more evenly).
- Vanilla. You can’t have vanilla cake without vanilla! I recommend using a good quality vanilla extract, so if you’ve got a batch of homemade vanilla extract, use it here!
- Flour. I developed this vanilla cake recipe to be work with all-purpose flour and that’s what I always use. However, you *could* use cake flour instead. To substitute by weight, you would use the same amount, but if you are using measuring cups you will need to substitute your flour properly.
- Baking powder. I know a tablespoon of baking powder may seem like a lot, but that’s not a typo. Always make sure your baking soda is fresh and avoid using a generic brand, which I’ve had mixed results with in the past.
- Salt. You can just use plain table salt.
- Buttermilk. I strongly recommend using full-fat buttermilk for the best flavor and texture. While I do have a buttermilk substitute, it doesn’t really make this vanilla cake quite as moist and flavorful as I like it to be, so now I strictly recommend using real buttermilk. And no, you do not *need* to have baking soda in a recipe in order to use buttermilk; we’re using it for its moisture and flavor here!
SAM’S TIP: One of the biggest mistakes you can make with this recipe is neglecting to measure your flour properly. If you over or under-measure your flour, your cake will not turn out right! Use the right method, be as precise as possible, and use a kitchen scale if you have one.
Remember, this is just an overview of the ingredients I used and why. For the full recipe please scroll down to the bottom of the post!
How to Make Vanilla Cake
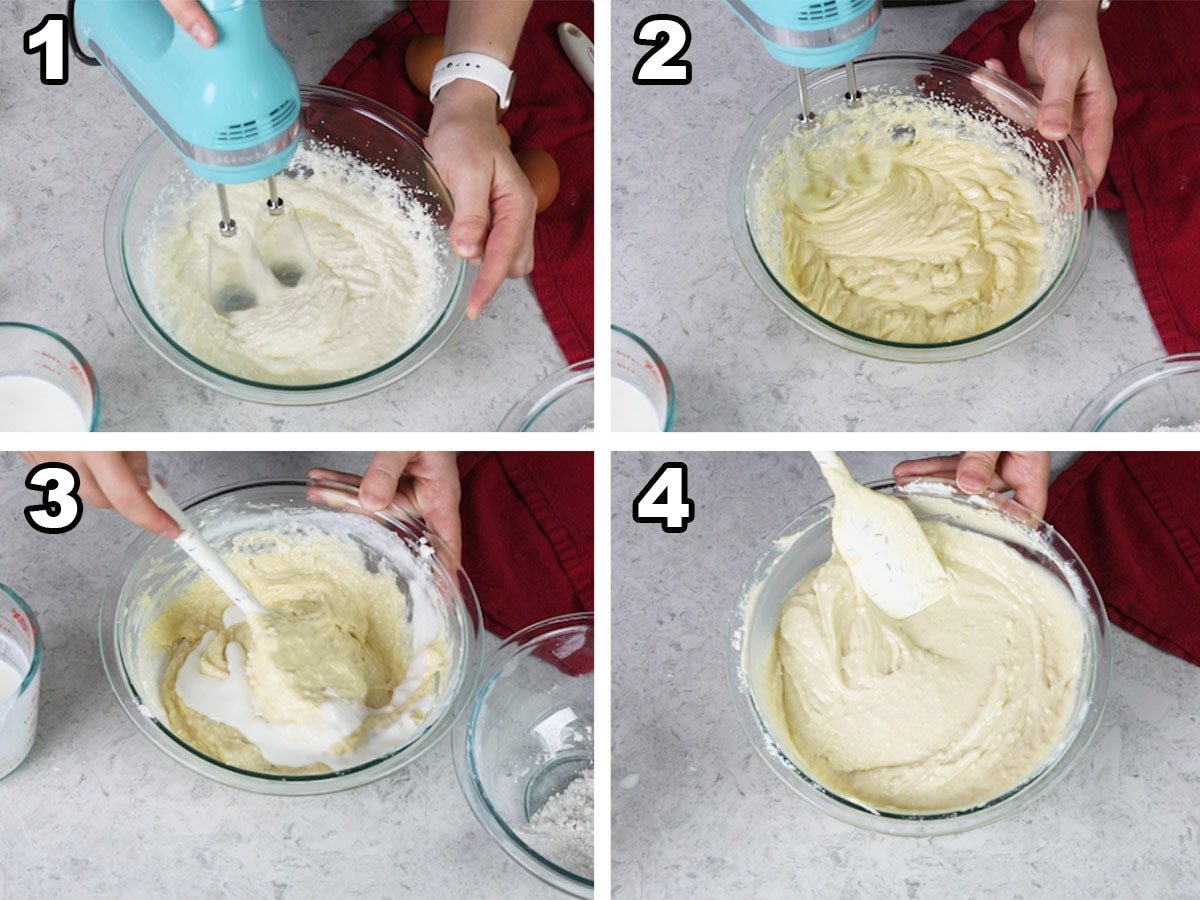
- Cream the butter, oil, and sugar in the bowl of a stand mixer.
- Add the eggs one at a time, beating well after each addition. Then, add your vanilla and stir to combine.
- Combine your dry ingredients in a separate bowl, then add about ⅓ of the mixture into your bowl. Use a spatula to gently stir until just combined. Follow this with about ½ of your buttermilk, and stir again until just combined. .
- Add ½ of the remaining dry ingredients stir, and then add the remainder of the buttermilk. Finish with the final portion of dry ingredients and use your spatula to make sure the batter is smooth–do NOT overmix!
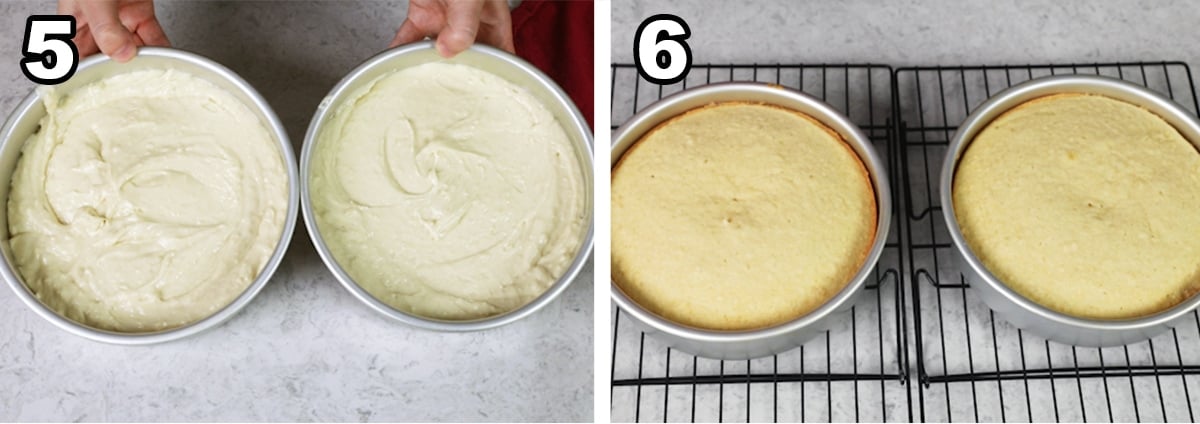
- Divide the batter evenly into two greased baking pans.
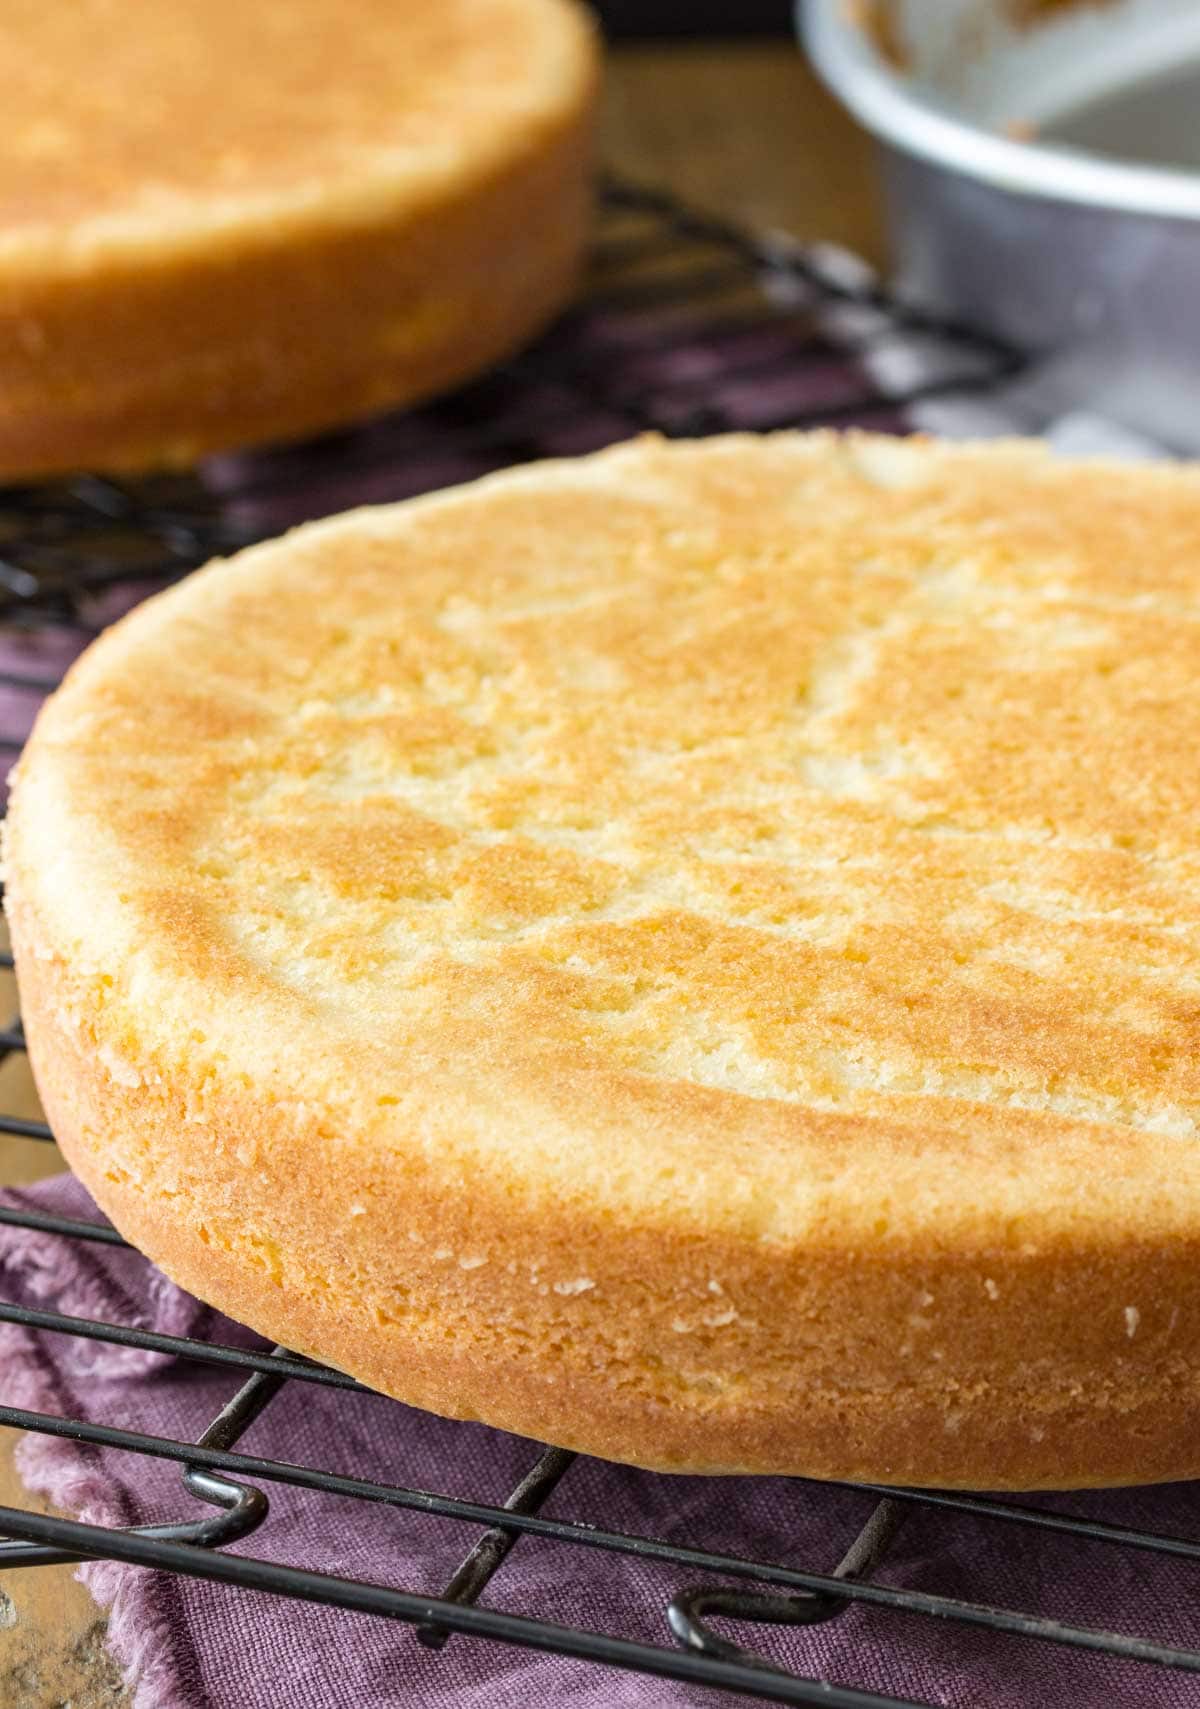
- Bake, then use a toothpick to test for doneness. Let the cakes cool in their pans a bit before inverting onto a cooling rack, where they’ll need to cool completely before frosting.
SAM’S TIP: While a toothpick that comes out clean indicates a fully baked cake, an over-baked cake will also yield a clean toothpick. It’s best to pull your vanilla cake out of the oven when a toothpick shows moist crumbs!
Frequently Asked Questions
Yes! This vanilla cake recipe will make 24 vanilla cupcakes. I’ve included instructions for cupcakes in the recipe notes.
A cake that has been over-baked or one in which too much flour was used will be crumbly when cut into. If you invert the cake too soon or try to handle it while it’s too warm, this could also make it break.
Cakes made from scratch require a bit more care and technique than those that come from a box-mix. When making any cake from scratch, take care to not over-mix, over-bake, or use too much flour, or the cake can end up tasting like cornbread. This applies to any cake that is made from scratch, not just this recipe!
What causes dry cake?
Dryness is typically the biggest complaint bakers have when making a cake from scratch, so I thought this FAQ deserved its own space. There are three main causes for a dry cake: over-measuring the flour (addressed above), over-mixing, and over-baking.
- Do not over-mix your batter! Mixing the batter properly can be tricky and this is often where most mistakes are made with homemade cakes. To avoid over-mixing, thoroughly cream together the wet ingredients, particularly the butter, sugar, oil, and eggs. I highly recommend using an electric mixer for this step! However, once you get to the point of combining your wet and dry ingredients, you need to be gentle and fold by hand using a spatula. Alternate adding the dry ingredients and the buttermilk, folding thoroughly, but not aggressively. The batter will be smooth and mostly cohesive; there may be some small lumps remaining, but that’s fine! Also, remember that while over-mixing can make your vanilla cake both dry and dense, under-mixing has its own risks and should be avoided as well!
- Do not over-bake your cake! Even a minute too long in the oven can cause a cake to be too dry and dense. When baking, place your cake pans on the center rack of your oven and always make sure your oven is running at the proper temperature (most ovens do not, so keep a thermometer in yours!). Don’t check your vanilla cake too early (that can make it sink!), but do keep an eye on it. When your cake is ready to come out of the oven, the center should spring back if lightly touched–it should not deflate or appear jiggly. You can also use the toothpick test to check for doneness. To do this, simply insert a toothpick in the center of your cake; it’s done if the toothpick comes out with a few moist crumbs (not wet batter). Once your vanilla cake is done, let it cool in the pan for only 10-15 minutes before running a knife around the edge and inverting it onto a cooling rack to cool completely.
SAM’S NOTE: Under-mixing your cake batter, not baking the cake for long enough, or opening the oven door too frequently while the cake bakes can cause the cake to sink as it cools.
Enjoy!
Let’s bake together! I’ll be walking you through all the steps in my written recipe and video below! If you try this recipe, be sure to tag me on Instagram, and you can also find me on YouTube and Facebook
Vanilla Cake
Ingredients
- ½ cup (113 g) unsalted butter softened to room temperature
- ½ cup (120 ml) avocado, canola or vegetable oil¹
- 1 ½ cup (300 g) granulated sugar
- 4 large eggs room temperature preferred
- 1 Tablespoon vanilla extract
- 3 cups (375 g) all-purpose flour²
- 1 Tablespoon baking powder
- ½ teaspoon salt
- 1 ¼ cup (300 ml) buttermilk room temperature preferred
- 1 batch Chocolate Frosting click link for recipe, or use one of the other frostings recommended in the notes below
Recommended Equipment
Instructions
- Preheat oven to 350F (177C) and prepare two deep 8" round cake pans³ by lining the bottoms with parchment paper and lightly greasing the sides. Set aside.
- In the bowl of a stand mixer (or in a large bowl using an electric mixer) cream together the butter, canola oil and sugar until creamy and well-combined.½ cup (113 g) unsalted butter, ½ cup (120 ml) avocado, canola or vegetable oil¹, 1 ½ cup (300 g) granulated sugar
- Add eggs, one at a time, beating until thoroughly combined after each addition.4 large eggs
- Stir in vanilla extract.1 Tablespoon vanilla extract
- In a separate, medium-sized bowl, whisk together flour, baking powder, and salt.3 cups (375 g) all-purpose flour², 1 Tablespoon baking powder, ½ teaspoon salt
- Using a spatula and gently hand-mixing, alternate adding flour mixture and buttermilk to the butter mixture, starting and ending with flour mixture and mixing until just combined after each addition. The batter should be thoroughly combined, but there may be some small lumps in the batter and avoid over-mixing (and do not use your electric mixer or stand mixer for this step).1 ¼ cup (300 ml) buttermilk
- Evenly divide batter into your prepared cake pans, and bake on 350F (175C) for 30-35 minutes. When the cake is done, the surface should spring back to the touch and a toothpick inserted in the center should come out mostly clean with few moist crumbs (no wet batter).
- Allow cakes to cool in their cake pans for 10-15 minutes before inverting onto cooling rack to cool completely before frosting.
- Frost cake using my chocolate frosting (or see notes for other favorite frosting options) and decorate with sprinkles (if desired).1 batch Chocolate Frosting
Notes
¹Cooking oil
You may use any neutral cooking oil instead of vegetable or canola oil. I generally don’t recommend olive oil, which is heavier and has a distinct flavor that could affect the end taste result of your cake.²Cake Flour
You may substitute cake flour for all-purpose flour. Use 3 ⅓ cups or 375g of cake flour.³Different size baking pans
- 13×9″ pan: This recipe makes enough for one 13×9″ baking pan. Readers have reported the approximate bake time is 30 minutes.
- Two 9″ pans: Readers have reported this cake takes approximately 25 minutes to bake in 9″ pans.
- Bundt pan: Readers have reported this cake takes approximately 40-45 minutes to bake in a bundt pan
Vanilla Cupcakes:
This recipe will make approximately 24 vanilla cupcakes. Fill cupcake liners no more than ¾ of the way full. Bake on 350F for 17-18 minutes or until a toothpick inserted in the center comes out with a few moist crumbs or clean.Frosting Options
The chocolate frosting I linked to in the ingredients is my favorite pairing with this cake, but here are some other great options:Video note
In the video I mistakenly say to add more buttermilk than is necessary. The written recipe is correct with 1 ¼ cups of buttermilk.Nutrition
Nutritional information is based on third-party calculations and should be considered an estimate only. Actual nutritional content will vary based upon brands used, measuring methods, cooking method, portion sizes, and more.

Fabio Scotto Diluzio
This was my very first time making a cake, and it was a success!! I’ve just recently started pursuing my baking obsession and I’ve been driving my wife crazy since I’ve baked for 3 days in a row, lol. This cake is fluffy and delicious and will definitely be my go to vanilla cake with chocolate buttercream icing or whatever else I find goes with vanilla cake lol My daughter and wife loved it!!!
Thanks Sam, I’m looking forward to making more delicious recipes from your website.
Emily @ Sugar Spun Run
We’re so happy it was such a success for you! You can’t go wrong with that combination. Let us know what else you try 🙂
Emily
Hi Sam! I’m super excited to make this cake. I’m making it for a party, but I’m a little low on time and was hoping to make it a few days in advance (ex. if I were to make it tonight (Wednesday), and the party is Friday evening). How long does this cake stay fresh/ moist/ good in the fridge for?
Sam Merritt
Hi Emily! If you just wrap the cake layers in plastic wrap sealing out any air, after they have cooled completely the cakes will still be nice and fresh on Friday. 🙂
Warda
Hi Emily,
I am a home baker (sell cakes on the side). If you bake the cake in advance, you can saran wrap it really well & put in ziplock bags and stick in the freezer. Can always use simple syrup and hydrate the cake when assembling. This cake holds well in the freezer.
Jordan
Best cake I have made for vanilla!!!
Cleo
A+ recipe! Easy to follow and execute and one of the best vanilla cake recipes I’ve made in a long time. The chocolate frosting is also a winner.
PS. Can confirm that sour cream/water mix is a good buttermilk substitute.
Annabella Argyle
Prepping was really good but cook time was way off. I did it for 30 minutes an wasn’t ready after putting a toothpick in it. Did it for another 10 minutes and thought it was ready and collapsed on me. It actually needs 1 hour to cook. Other then that good recipe, not too hard to understand
Sam Merritt
Hi Annabella! I just want to double check that you used 2 8 inch pans and you let your oven preheat before putting the cakes in? Do you have a thermometer in your oven? It sounds like it may have been acting up on you. 🙁 This cake definitely shouldn’t take an hour and if it collapsed it’s likely because it was checked much too early. 🙁
Dodo bird ate a cake
Any suggestions for substituting sugar for diabetic guests? Thanks in advance!
Sam Merritt
Unfortunately I am not familiar with baking for diabetics so I can’t say for sure. 🙁
Dodo bird ate a cake
That’s ok. I ended up using half the sugar and replaced it with more milk instead. It is a hit with my family and they preferred it with less sugar (It is my second time making this recipe!). Thanks again 🙂 awesome recipe.