
Sourdough Donuts
This post may contain affiliate links. As an Amazon Associate I earn from qualifying purchases. Please read my disclosure policy.

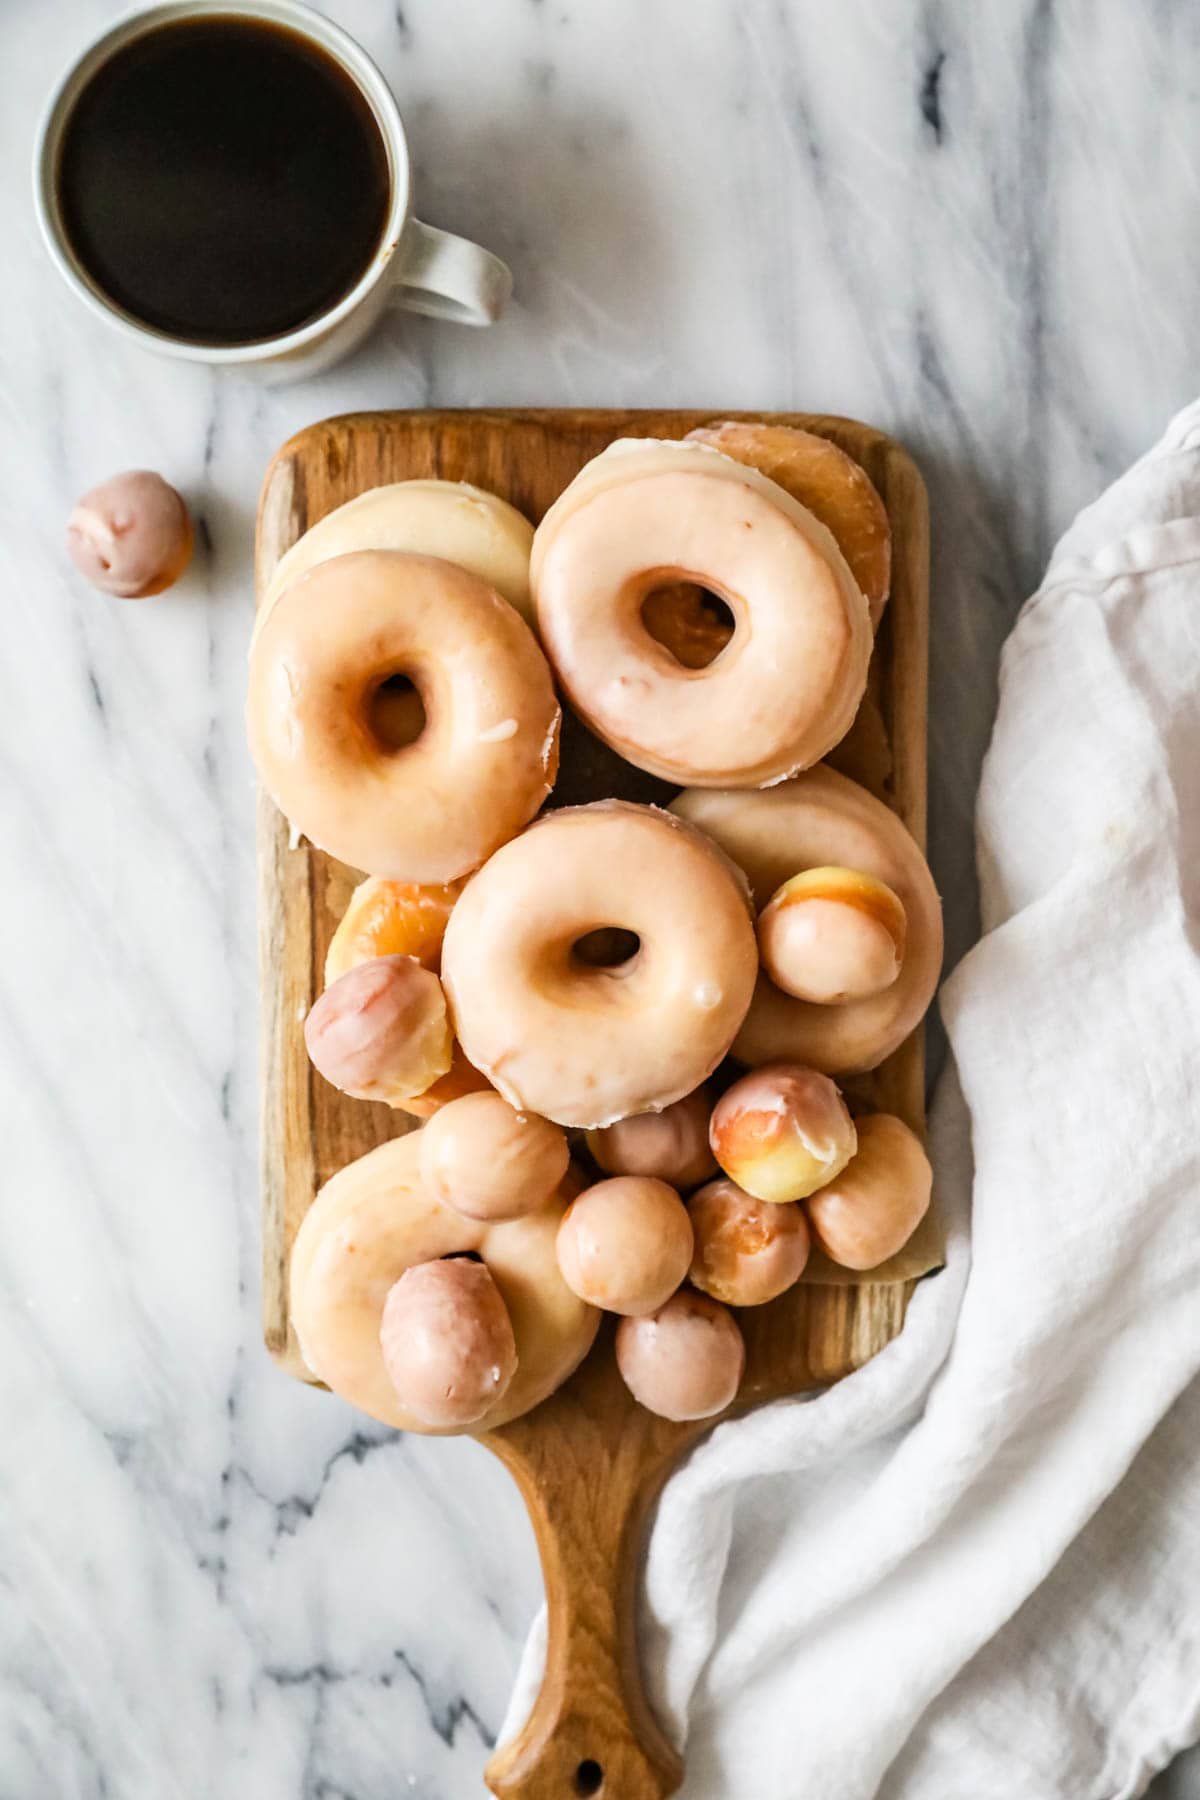
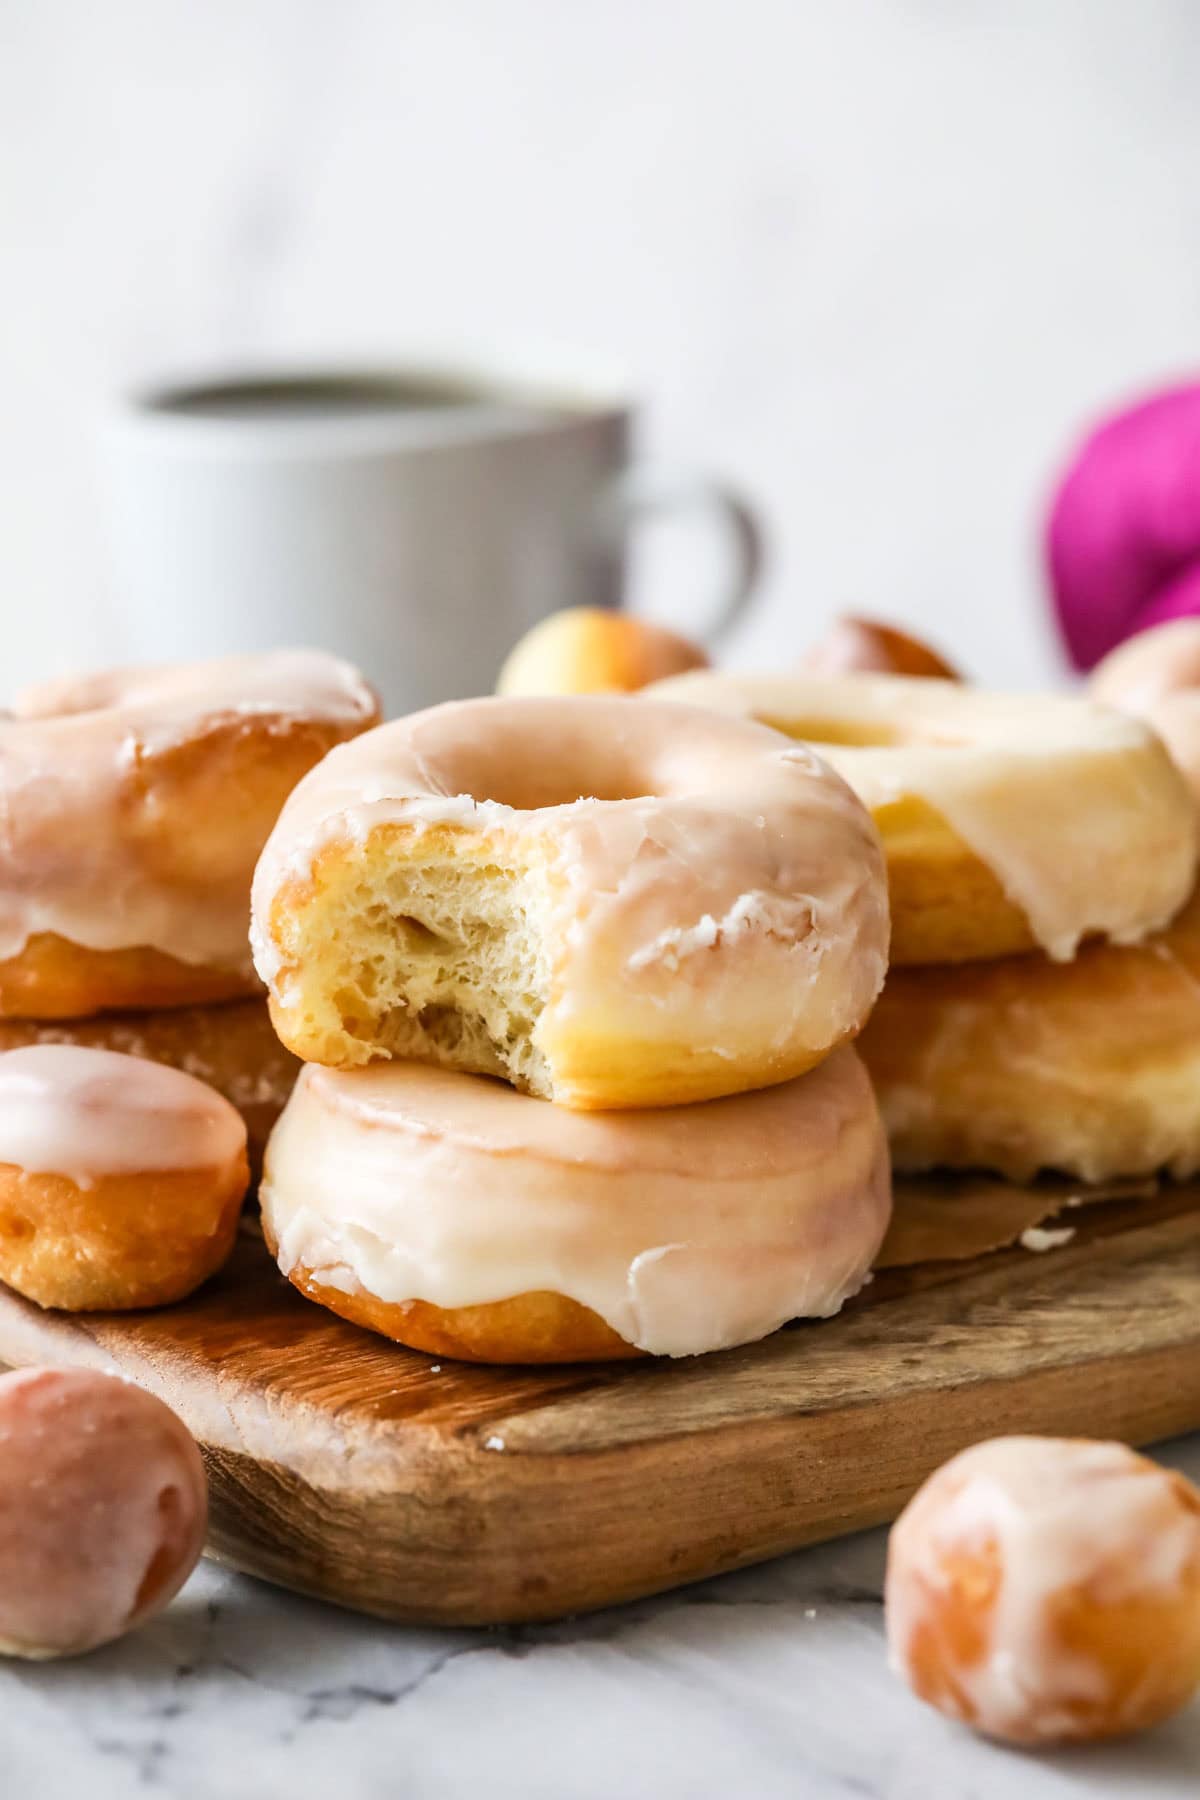
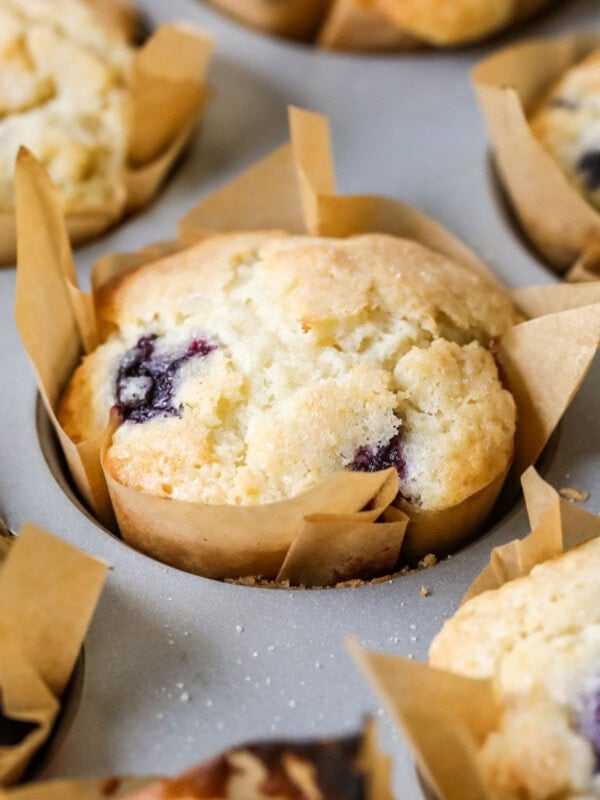
Make the most INCREDIBLE homemade sourdough donuts with my trusted sourdough donut recipe! Pillowy soft, appropriately chewy, and perfectly sweet with a homemade glaze. Recipe includes a how-to video!

Our Favorite Sourdough Donut Recipe
We make these sourdough donuts a LOT! They are a family favorite and have officially outranked my classic homemade donuts and pretty much any other donuts out there (for us, at least!).
While the actual work involved is pretty easy, this recipe requires some patience and experience with working with yeast doughs, so it’s not the most beginner-friendly option. If you’re new, I recommend watching the how-to video (in the recipe card below). Much like with macarons, the toughest part is getting a knack for understanding the dough. The end result is nothing short of amazing though, and they’re absolutely worth the effort!

Why You’ll Love This Recipe
- A true sourdough donut recipe (no supplemental yeast required)! I’m really proud of this, because many sourdough donut recipes out there will supplement the recipes with store-bought yeast, but we don’t do that! Just like with my sourdough dinner rolls, sourdough pizza dough, and sourdough bread, we use homegrown yeast from our sourdough starter. As a result, this dough requires some patience. You need to make sure it rises properly and work on your specific dough’s timeline. In a cold kitchen, it takes longer, and conversely things move faster in a warm kitchen. Knowing your starter and your kitchen helps with this so much!
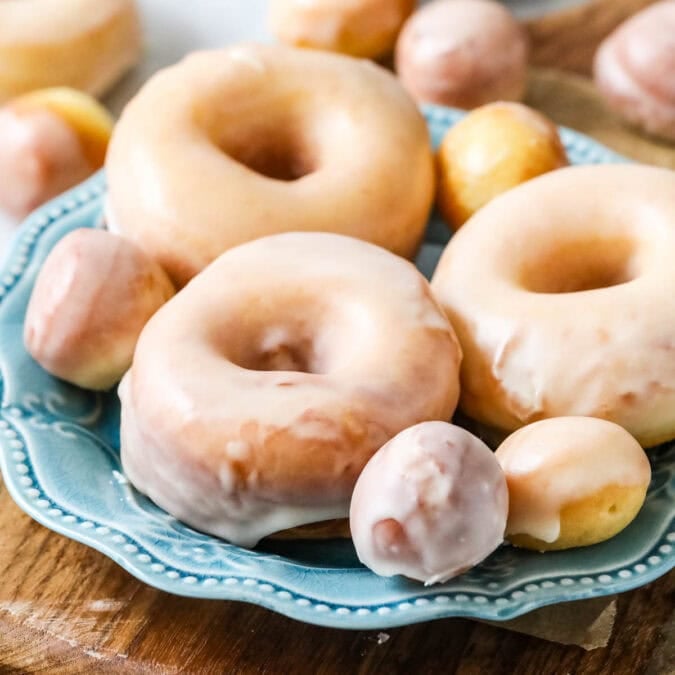
- Incredible texture: pillowy, airy, perfectly textured, soft with just the right chew. The glaze is buttery smooth and the perfect complement.
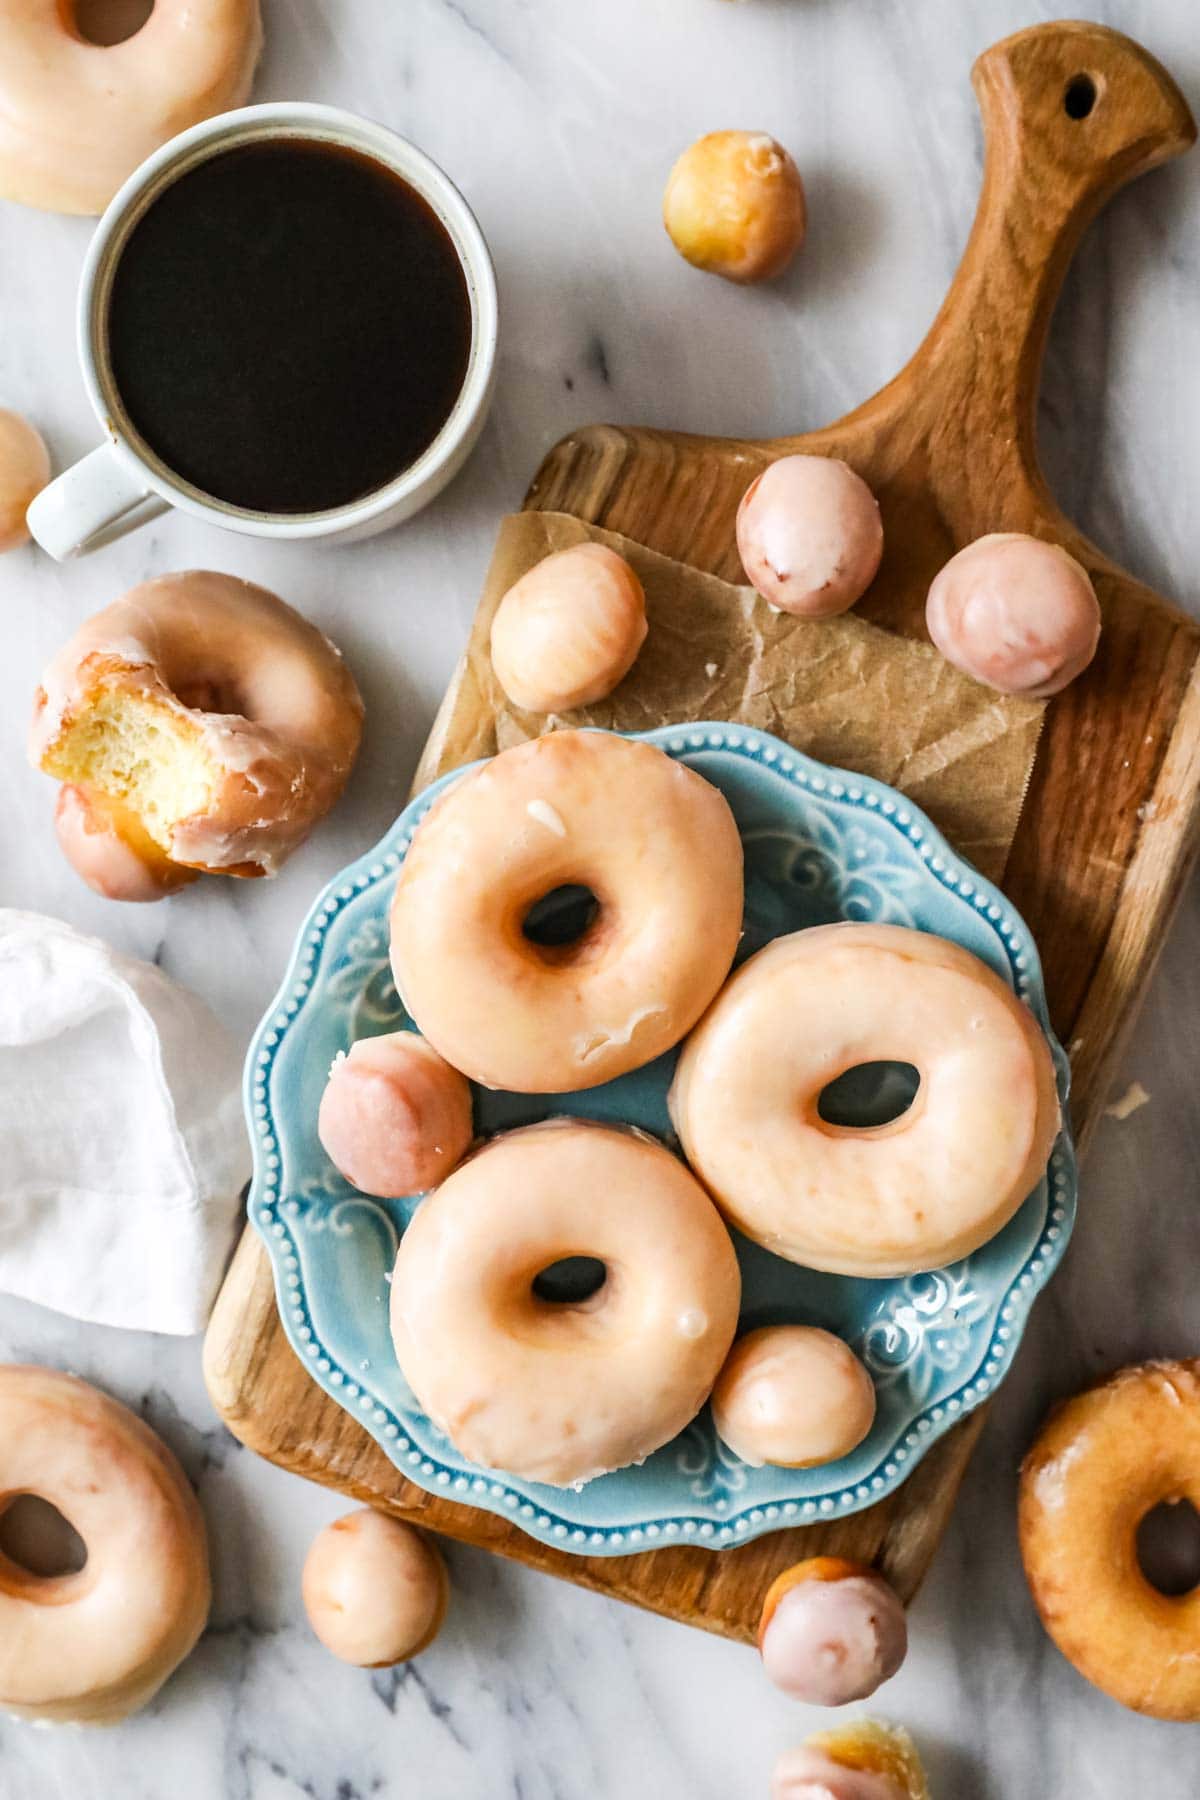
- Speaking of glaze, I offer several easy topping options for these sourdough donuts, from a classic vanilla glaze to a simple powdered sugar coating. Feel free to get creative to suit your taste/occasion (the glaze from my fruity pebbles cookies would be amazing!).
- Includes plenty of tips for frying, in case you are new to frying or not quite as confident in your frying skills. I also have a how-to video that walks you through the entire process of making these sourdough donuts. Psst: If frying isn’t your thing, I’ve also successfully baked these donuts and include instructions on how to do so in the recipc ard.
Ingredients
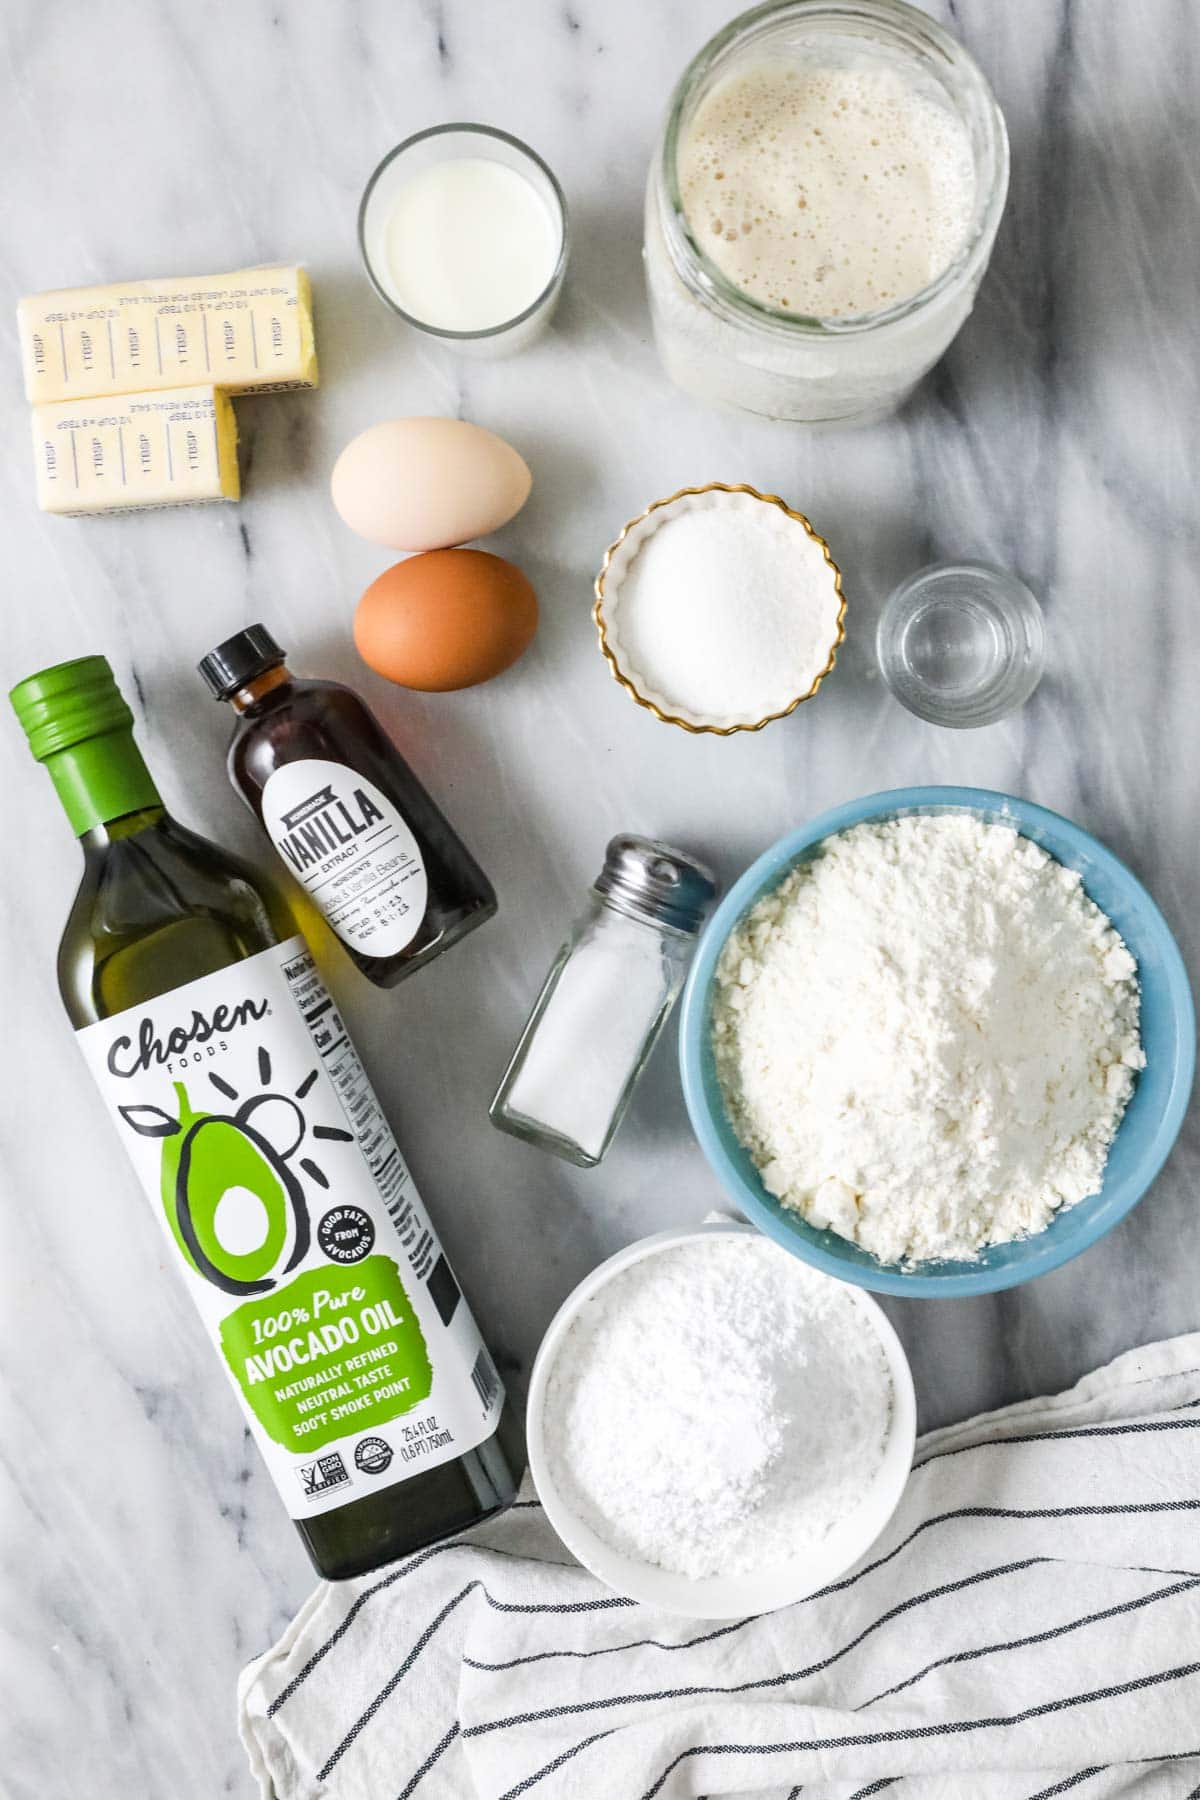
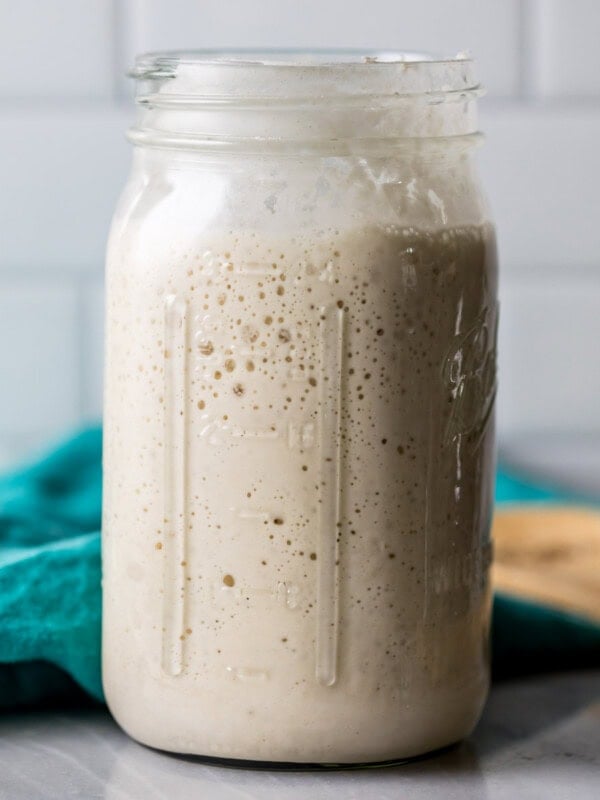
- Sourdough starter. No additional yeast today! We’re using active, bubbly sourdough starter to give these sourdough donuts a fantastic rise and flavor. Check out my post on how to make a sourdough starter if you haven’t yet started your sourdough journey.
- Milk. Whole milk is my preference, but you can substitute a non-dairy milk if needed.
- Flour. I recommend all-purpose flour. Note that we will start with just two cups, then add more as needed (usually around three cups total). Every kitchen is different, and you may need more or less flour depending on yours. This is a common practice when making yeast doughs (see my non-sourdough pizza dough as an example), even if we are using cultured sourdough instead of supplemental yeast.
- Oil. Stick with a neutral oil that is good for frying, like vegetable, canola, or avocado. Avocado oil can be pricey–especially when you bake as much as I do–but it has been my preference lately for making everything from Funfetti cake to beignets!
- Eggs. Just two, and if you can remember to leave them out so they can come to room temperature, that’s ideal. This will help them incorporate into the dough much more easily.
SAM’S TIP: If you want to top your sourdough donuts with a chocolate topping, you can use the chocolate glaze from my baked donuts or the chocolate ganache glaze from my Boston cream donuts (richer and more gourmet!).
This is just an overview of the ingredients I used and why. For the full recipe please scroll down to the bottom of the post!
How to Make Sourdough Donuts
This is one recipe where I really do recommend using a stand mixer, if you have one. The dough is a soft and sticky one and should stay this way in order to get the softest, most pillowy donuts. If you mix and knead the dough by hand you’ll simply need to add more flour than is ideal so that it’s even manageable (and don’t use an electric mixer — you’ll just burn out the motor).
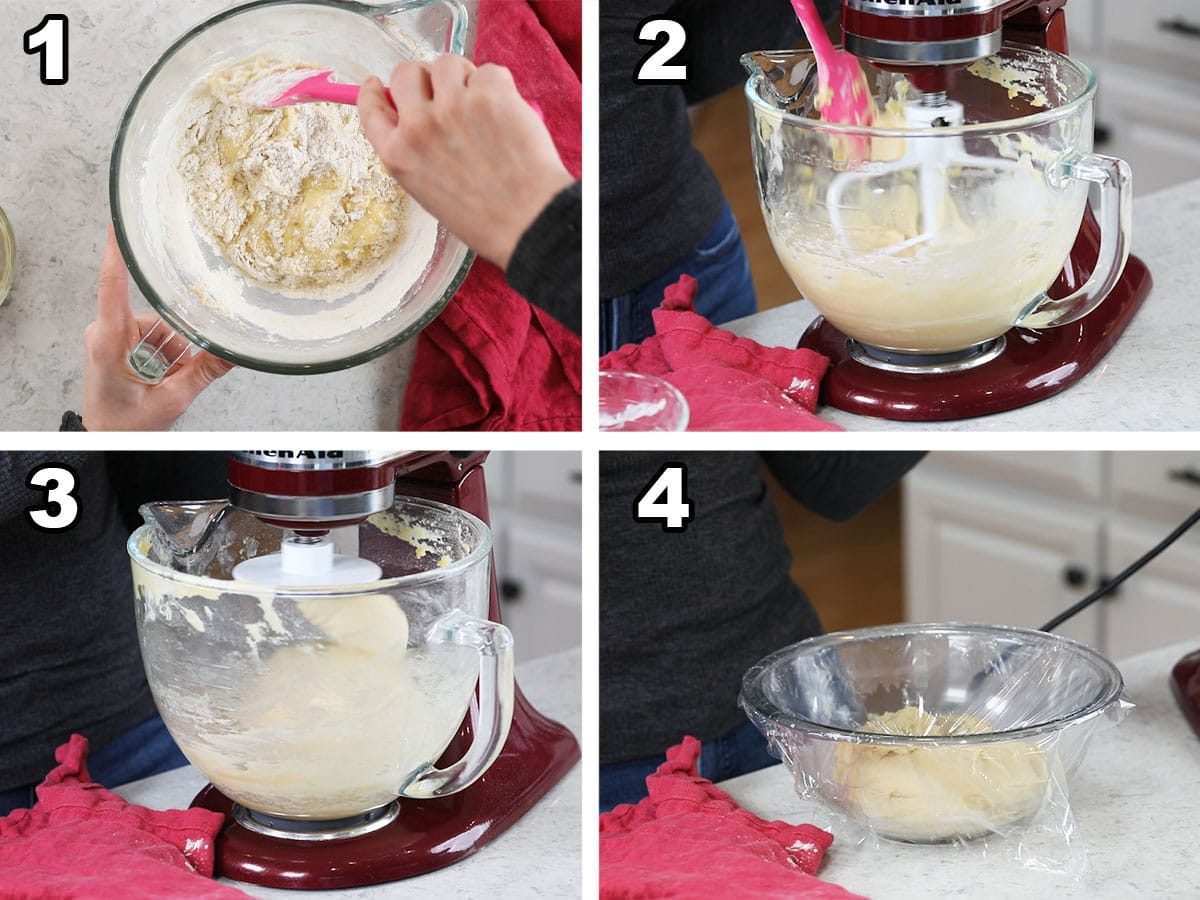
- Combine the wet ingredients in the bowl of a stand mixer, then add the salt and 2 cups of the flour. No, you do not have to worry about the salt hurting the yeast (I get this question a lot, it’s not an issue!).
- Add the butter a tablespoon at a time with the mixer on low speed. Once the butter is fully incorporated, switch your mixer attachment from the paddle to the dough hook.
- Slowly add additional flour with the mixer on low speed until the dough clings to itself and pulls away from the sides of the bowl. Knead with the dough hook until smooth and elastic; this usually takes me about 10 minutes.
- Transfer to a lightly oiled bowl and cover. Let the dough rise in a warm spot until doubled in size, then set in the fridge overnight.
SAM’S TIP: In the winter it can take FOREVER for the dough to rise properly; I put mine in my oven with the proofing setting on.
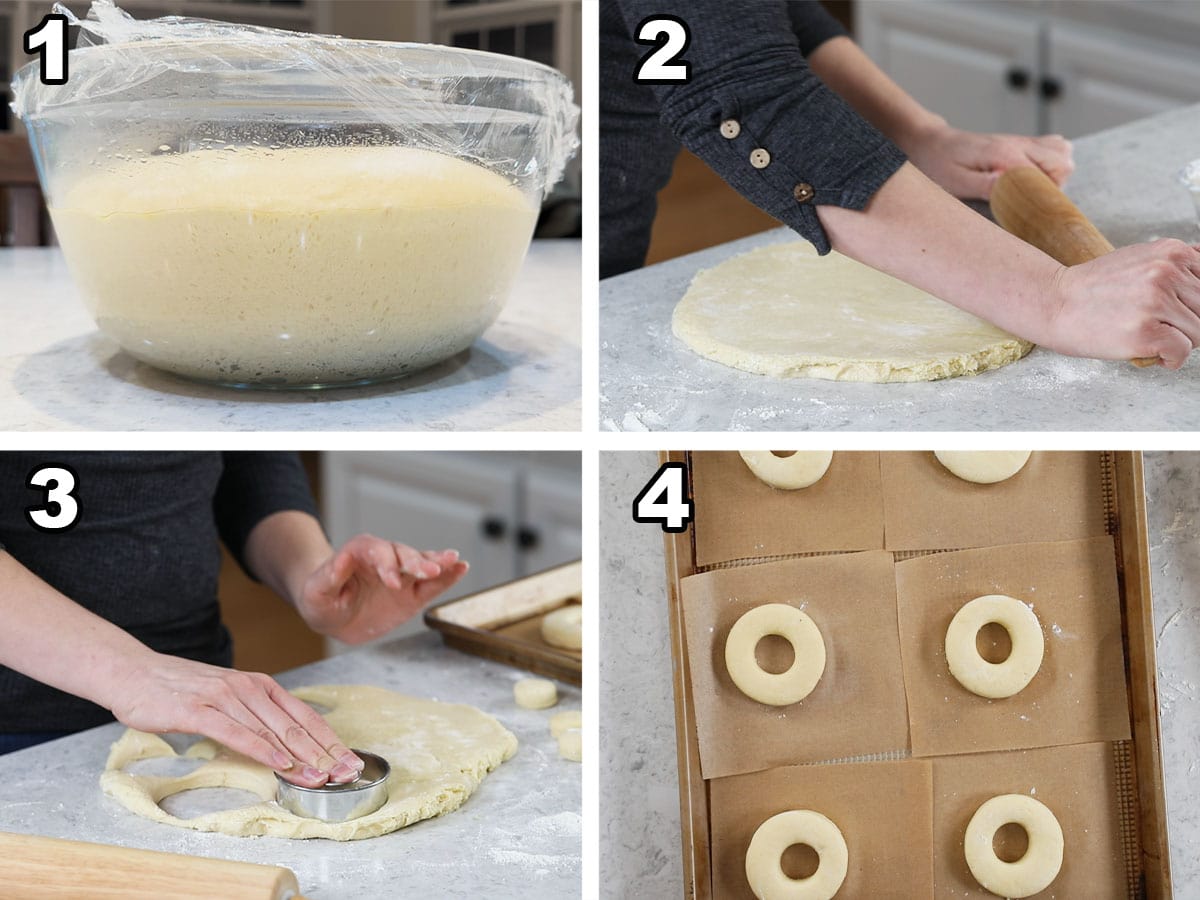
- Remove the dough from the fridge and turn it out onto a lightly floured surface.
- Roll the dough to ½” thickness using a rolling pin.
- Cut your donuts using a donut cutter, then brush each donut with flour. Save the donut holes–we will fry them too!
- Place each donut on its own parchment square before you place on your baking sheet; this will allow you to easily transfer them to and from the baking sheet. Cover the entire sheet with plastic wrap and let rise again until the donuts are puffy, about 2 hours.
- Poke test: to make sure your sourdough donuts have proofed adequately, gently press a floured finger into the dough. You want the indentation to spring back slowly, but not all the way.
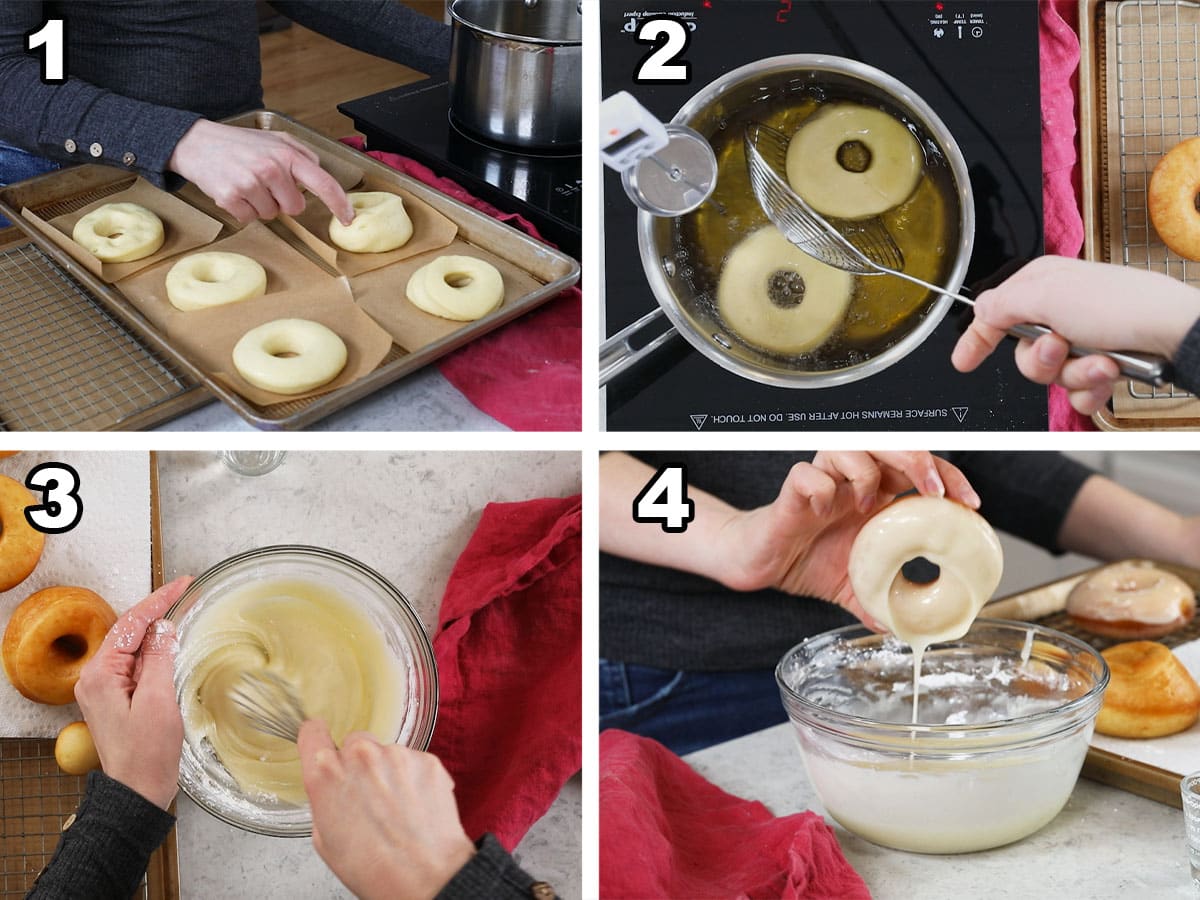
- Fry in 350F oil until golden brown on both sides (or 185F internal temp). I typically fry 1-2 donuts at a time for about one minute on each side. See my tips below for frying if you are new to this, as it does take some practice!
- Make the glaze: whisk the sugar, vanilla, butter, and hot water together until smooth.
- Dip the donuts in glaze and transfer to a cooling rack. Once the glaze solidifies, dig in!
SAM’S TIP: You don’t need to let the donuts cool completely if you are dipping them in glaze, but you will have to if you choose a powdered sugar coating.
Frying Tips
- Mise en Place: make sure you have your frying station and tools set up before you start frying, as the process moves quickly. I recommend having a frying spider or tongs and a rimmed baking sheet lined with paper towels and a cooling rack nearby.
- Oil temperature: it is very important that you monitor your oil with a thermometer the ENTIRE time you are frying. Don’t let it get too hot, or you will burn your donuts and dry them out. Oil that is too cool is a problem too, and it can lead to donuts that are soggy, greasy, and undercooked. Heat the oil slowly and be careful when lowering your donuts into it! The temperature will drop once you add the donuts (so it’s important not to add too many at once), and you need to make sure it comes back up before you add your next batch.
- Test donut: It’s always a good idea to do a test donut to see how long it takes to cook and if the inside is properly cooked before moving forward with the whole batch.
- Donut holes vs donuts: donut holes will cook faster than donuts, so save those for the end or beginning of frying. You can do a few of these at a time.
Frequently Asked Questions
If you end up with anything other than pillowy soft sourdough donuts, something went wrong either with the rising, the proofing, the frying, etc.
Unfortunately there are quite a few ways to go wrong with this recipe, but stick to the recipe, follow my cues, be patient (and try again if you don’t get the right results) and you will be rewarded. If you don’t get the results described, be patient and try again. I promise you this recipe works (it’s been tested inside and outside of my kitchen many times!)!
If you have a specific question or need troubleshooting help, please leave me a comment.
Yes. Look, honestly, the best donuts are fried so I do recommend frying for best donut-shop results. However you can absolutely bake them instead (and they’re still delicious). I included notes in the recipe card on how to bake the dough and note that the donuts stay super pale even when they’re finished baking (so don’t look for golden-browning as your cue that they’re done or you’ll end up over-baking them).
You can alternatively try my baked donuts or baked chocolate donuts.
The biggest difference lies in the yeast; homemade sourdough donuts use wild yeast grown in active sourdough starter, while regular donuts use commercial yeast (the kind sold in your grocery store). Using sourdough starter results in a present and pleasant tangy flavor and even more pillowy texture that is distinctly different. You really need to try them for yourself to see which you prefer!
I have more sourdough recipes for you below, but if you want more donut recipes, check out my old fashioned chocolate donuts, sour cream donuts, or apple cider donuts!
Enjoy!
Let’s bake together! Subscribe to my newsletter to be notified of all the newest recipes, and find my free recipe tutorials on YouTube 💜
Sourdough Donuts
Equipment
- Stand mixer (see note)
- Donut cutter
Ingredients
- ⅓ cup (83 ml) milk, I use whole milk
- ⅔ cup (150 g) active sourdough starter
- 2 large eggs, room temperature
- ⅓ cup (66 g) granulated sugar
- ½ teaspoon vanilla extract
- 3 cups (375 g) all-purpose flour, plus additional as needed
- ¾ teaspoon table salt
- 6 Tablespoons (85 g) unsalted butter, very soft and cut into 6 pieces
- Neutral cooking oil, for frying (vegetable, canola, or avocado oil)
Glaze topping (see note)
- 1 ½ cups (190 g) powdered sugar
- ¼ cup (57 g) salted butter, melted
- ½ teaspoon vanilla extract
- 1 ½ -2 Tablespoons hot water
Instructions
- BEFORE BEGINNING: Note that this recipe requires 6-8 hours (sometimes longer!) resting at room temperature followed by a 12+ hour overnight fermentation in the refrigerator, and then 1-3 hours of rising the next day. I recommend preparing the dough in the morning or early afternoon and then cutting and frying the donuts the next day.
- Pour sourdough starter into the bowl of your stand mixer fitted with the paddle attachment. Warm the milk to 100F-110F (38C-43C) and add to the sourdough starter, stir to combine.⅓ cup (83 ml) milk, ⅔ cup (150 g) active sourdough starter
- Add eggs, sugar, vanilla extract, and about 2 cups (250g) of flour. Sprinkle salt over the flour and stir well until all ingredients are well combined.2 large eggs, ⅓ cup (66 g) granulated sugar, ½ teaspoon vanilla extract, ¾ teaspoon table salt
- Turn your stand mixer on low and add butter 1 Tablespoon at a time until all butter is incorporated.6 Tablespoons (85 g) unsalted butter
- Switch the paddle attachment out for the dough hook and, with mixer on low-speed, slowly add remaining flour as needed until dough forms a ball that pulls away from the slides of the bowl and clings to itself (you may not need the full cup/125g of flour, or you may need more to reach the proper consistency).
- Continue kneading until dough is smooth and elastic, about 7-10 minutes on low speed (I use speed 2 on my mixer). The dough will still be slightly tacky but should not stick to your fingertips if prodded.
- Place dough into a large, lightly oiled bowl, cover with plastic wrap, and let sit in a warm draft-free place until doubled in size (typically 6-8 hours, but this can take longer if your kitchen is cold, look for a warm place to keep your dough). Once doubled in size, transfer bowl to the refrigerator and refrigerate overnight.
The next day – Cutting the donuts
- Cut twelve 6” squares of parchment paper to place your donuts on after cutting (do not use wax paper).
- After overnight ferment, turn dough out onto a clean, lightly floured surface and roll out to be ½” (1.3cm) thick. Use a donut cutter to cut out donuts (I use a 2 ¾” (7cm) donut cutter with a 1 ¼” (3cm) hole).
- Lightly brush each side of the donut with flour (I dip my fingers in flour and then run them around the top and bottom of each donut after cutting it).
- Transfer each donut to its own individual square of parchment and place on a baking sheet (I store the donut holes on a separate parchment lined baking sheet)
- Cover baking sheets with plastic wrap, and let rise in a warm place until donuts are puffed and pass the poke test (below). This is typically 1.5-2 hours, but may take longer in a colder room.
- Check donuts are finished proofing: Donuts will be puffed when they’ve risen. To test that they’re ready to cook, lightly flour a finger and gently press into the dough. If the indent springs back quickly, the donuts need more time. If it springs back slowly and not all the way, they’re perfect and ready to use. If dough doesn’t spring back at all, the donuts are overproofed and the texture won’t be quite right (but I would still cook them anyway).
- When donuts are nearly finished proofing, fill a medium-sized saucepan with about 2” (5cm) of oil and fit a frying thermometer to the side. Heat over medium heat until oil reaches 350F (175C).
Frying
- When donuts are finished proofing and oil is heated, fry donuts 1-2 at a time, flipping halfway through, until donut is a light golden brown on both sides (for me this took about 45-60 seconds each side), or until the interior temperature is 185F (85C) if checked with an instant read thermometer. Be sure to allow oil to return to temperature in between frying donuts, and don’t fry too many at once. Carefully remove the donut to a cooling rack or paper towel lined plate and allow to cool briefly (donuts do not need to be cooled completely and can be dipped warm) before glazing.Neutral cooking oil
Glaze (see note for alternative toppings)
- Whisk together sugar, melted butter, vanilla extract, and hot water until smooth.1 ½ cups (190 g) powdered sugar, ¼ cup (57 g) salted butter, ½ teaspoon vanilla extract, 1 ½ -2 Tablespoons hot water
- Dip donuts, one at a time, in glaze, then transfer to a cooling rack and allow glaze to harden before enjoying.
Notes
Stand mixer
A stand mixer is best for this recipe because you can get away with adding less flour and having a slightly stickier dough, which makes for lighter, softer donuts. If you don’t have one, the dough can be prepared by hand (don’t use a handheld mixer, the motor won’t be able to handle it) but the donuts will be more dense as you’ll likely need to add more flour in order to be able to manage it.Baking
Sourdough donuts (and, possibly, all donuts) are best fried. However, they can be baked! Follow the instructions through step 13, preheat your oven to 350F (175C) and once donuts are proofed, brush with a bit of melted salted butter and bake in the center rack of 350F (175C) preheated oven for 8-10 minutes. The donuts will stay quite pale in color even when they’re finished baking. I like to dip them in the glaze or brush with more melted butter and dip in cinnamon sugar.Topping
Alternatively you may dip warm donuts in granulated sugar or cinnamon sugar, or allow the donuts to cool a bit and then dip in powdered sugar.Storing
Donuts don’t keep well for long, but after preparing you can store in an airtight container for up to 3 days. The donut dough really needs to be used on its own timeline, though I think you could safely let it ferment (in the refrigerator) for up to 24 hours. Use it too soon and it won’t be ready, wait too long and it’ll be over-proofed. After frying, the donuts are best served the same day; they simply don’t keep well (which is why donut shops make them fresh daily and usually toss the leftovers!).Nutrition
Nutrition information is automatically calculated, so should only be used as an approximation.
Like this? Leave a comment below!


These are actually the best thing literally ever. Sour too! I added maybe 30 more grams starter. I never want another kind of donut.
Thank you so much for trying my recipe, Thomas! I’m so glad it was such a hit! 🙂
How sticky should the dough be when its “coming together” in the mixer? I used the dough hook and after 10 minutes it was not pulling away from the bowl at all, it was a sticky soupy mess. I had to add almost an extra cup of flour to get it to pull away from the sides at all. Any idea what went wrong? I’m concerned the donuts are going to be tough now from too much flour/overmixing.
Hi Kelly! You can see how my dough looks on the dough hook in picture 3 in the post. You can also see it in the video just above the recipe if that helps. 🙂 I hope you enjoyed the donuts! 🙂
So do these in fact taste sour like sourdough bread, or does the sour fry out like sourdough english muffins? We’d love to try this recipe but aren’t sure about sour donuts, lol!
Hi Karen! I can taste the sourdough in the donuts. You certainly can taste other flavors, but they do have a tang to them. I hope you give them a try!
We made them this morning and they were delicious! (couldn’t wait for a reply, lol) The tang is not noticeable with the glaze, I think, although it’s a pleasant flavor to begin with. Thanks for a great recipe!
Seriously! These are THE best sourdough donuts I have ever tasted. I made sourdough donuts another time using a different recipe, and, while they tasted good, the texture was just too chewy and tough. So I decided to give this recipe a try. Wow! They turned out exactly like the recipe describes; fluffy-soft with the perfect amount of chewyness. I will definitely be making these again. The only change that I made is I used organic lard instead of unsalted butter in the dough. The dough sat in the fridge for over 24 hours and did not get really sour.
Thank you so much for trying my recipe, Catherine! I’m so glad you enjoyed it so much! 🙂
I tired this doughnut recipe and it’s amazing thank you for sharing
This recipe is well written, I just took my sourdough starter out the fridge from its winter rest so I will be making these this weekend after it has had time to awaken from it’s slumber. I can’t wait to try it out. I don’t use granulated sugar for anything as I prefer raw honey, would this work in this recipe and would the grams be the same or would I have to adjust it?
I cannot wait to try this recipe! 🍩
Never had a recipe of yours my family and I didn’t love!
Also, I think you were trying to say homegrown yeast 😂
I hope you love the donuts, Brittany! 🙂
Absolutely delicious! Well written recipe and ingredient list! Thank you so much!!!!
You’re very welcome! I’m so glad you enjoyed them so much! Thank you for trying my recipe. 🙂
could I make a stiff sweet starter for this to cut down on the sour
Hi Ashley! Honestly I haven’t experimented with it so I can’t say for sure how it would change things. If you do try it I would love to know how it goes. 🙂
Hi, could we skip the overnight proof and go straight to shaping and second proof?
Hi Kelsey! I wouldn’t recommend it. You really want that dough to ferment for that 12 hours. 🙂
This was AMAZING. My family loved it you are awesome Sam!
Thank you so much for trying my recipes, Ella! I’m so glad everyone enjoyed them so much! 🙂
Excited to try these ! Can they be made in an air fryer instead of deep frying? Have you tried?
I haven’t personally tried it so I can’t say for sure how they would turn out. I would think it would be possible, but I just haven’t done it. If you do try it I would love to know how it goes. 🙂
These donuts are so very good! This recipe is a definite keeper. I’ve already sent it to my daughter. I only got 7 donuts. Perhaps my cutter is larger? Regardless, it’s 7 soft, fluffy pieces of deliciousness. They are soft on the inside & crunchy on the outside. Just the way I like donuts. The glaze is yummy too. As another reviewer said, if you’re used to working with sourdough, the recipe is pretty typical & not difficult.
Thank you so much for trying my recipe, Joyce! I am so glad you enjoyed the donuts so much! 🙂
Can I double the recipe if I want to make 2 dozen?
Hi Stephanie! I haven’t personally done it, but I think it could work. 🙂
I followed this recipe and they turned out great! The flavour of this dough is something else…
Thank you for sharing it with the world.
Xx Clara
You’re welcome, Clara! Thank you so much for trying my recipe! I’m so glad it was such a hit! 🙂