My Sourdough Pizza Crust recipe makes a thin, crispy, and oh-so-flavorful crust that will make any pizza taste like an artisan pizza. It’s great for preparing in advance, freezes well and makes enough for the whole family. Recipe includes a how-to video!

The BEST Sourdough Pizza Crust
Grab your sourdough starter because today we’re making sourdough pizza crust! My recipe ferments overnight (or longer) for the most nutritional benefits and BEST flavor.
While today’s recipe isn’t particularly complicated, there are quite a few steps and it does require some patience (it’s quite different from my quick & easy homemade pizza dough that way). However, the time it takes is largely hands-off and most of the time spent making it is just waiting (patiently or impatiently–you decide 😉).
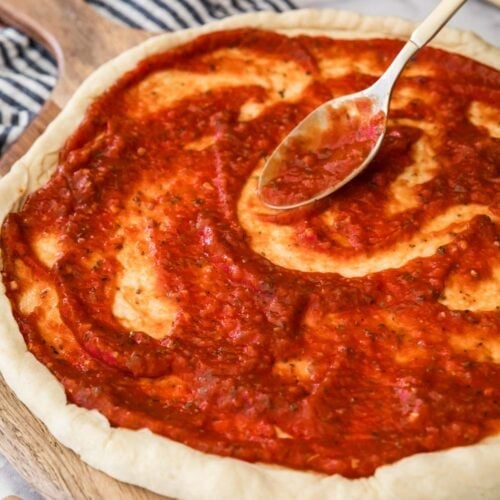
The best part of today’s recipe is that it’s a choose-your-own-ending type of recipe. Use your favorite toppings, I am pretty classic, usually using my homemade pizza sauce, mozzarella cheese, and sometimes(ooh, I’m going to get some hate for this) pineapple, but feel free to go wild with the toppings, though, or even use the toppings from my dessert pizza! The sourdough complements so many different flavor combinations (and I’d love to hear what you come up with in the comments!).
Why you’ll love it:
- No yeast required!
- Incredible flavor and crisp texture.
- Just a bit of hands-on time.
- Freezes nicely for grab-and-go dinners!

What You Need
As with my sourdough bread, you only need a few (6, to be exact!) basic ingredients to make today’s recipe. In addition to the ingredients discussed below, you’ll also need any toppings you’d like. Pizza sauce, mozzarella cheese, and basil are common toppings, but we make everything from margherita pizza to bbq chicken pizza with ours!
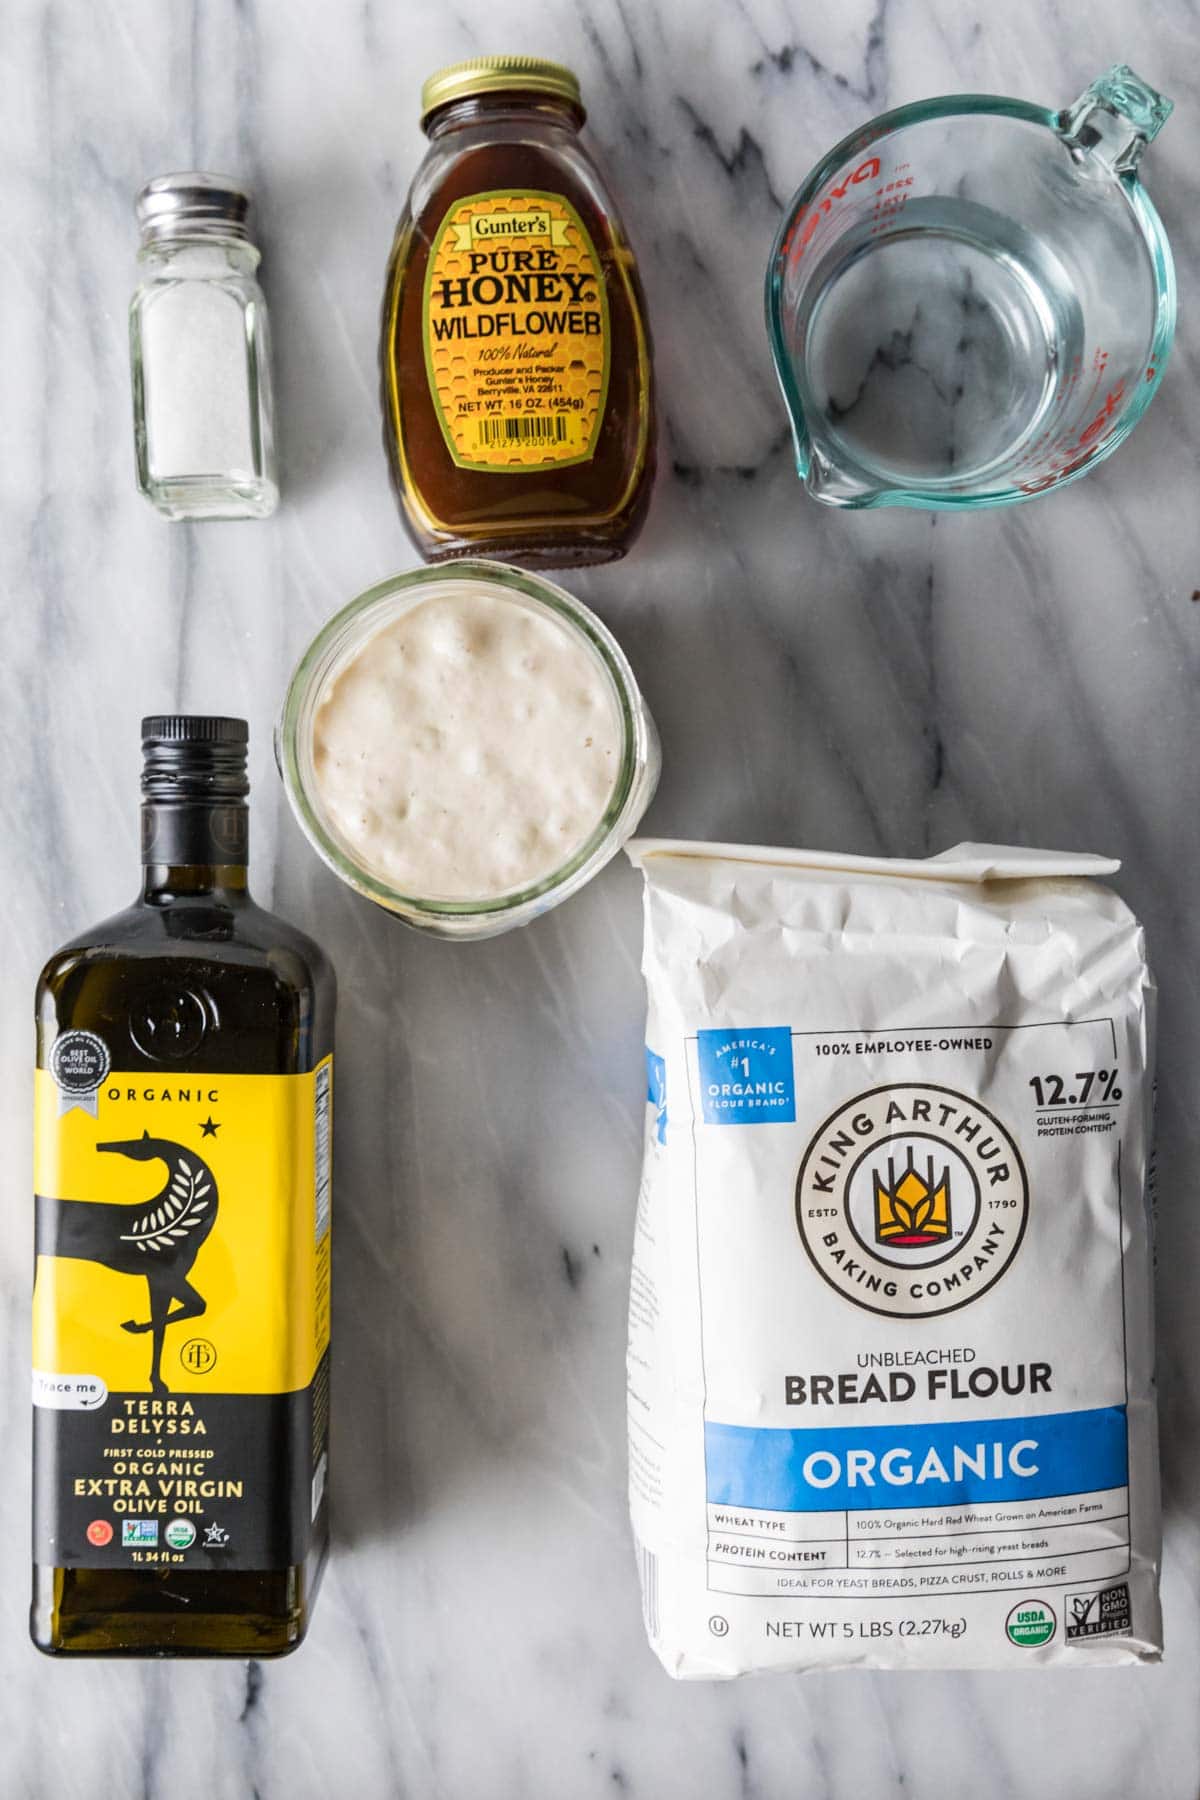
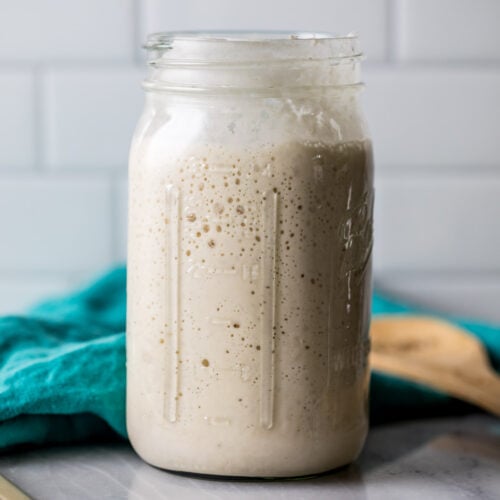
- Sourdough starter. Your starter should be active and bubbly–if it isn’t yet, don’t use it! Don’t have a starter already? Check out my post on how to make a sourdough starter! It breaks down every step (with photos) so you can make your own at home. It’s surprisingly very easy!
- Olive oil. This keeps the pizza dough nice and chewy. Even though we are only using a small amount, I recommend using extra virgin olive oil for the best flavor.
- Honey. Pizza dough has a reputation for being bland, but between the sourdough flavor and a bit of honey for sweetness, this dough is super flavorful.
- Warm water. Make sure your water is between 90-100F before adding it. If you don’t have a kitchen thermometer, I highly recommend this one.
- Bread flour. Bread flour has a higher protein content than all-purpose, which makes it ideal for pizza dough. The extra protein creates more gluten and yields a chewier crust than its all-purpose counterpart. All-purpose flour could work in a pinch, but it will yield fluffier results.
- Salt. Salt is critical for flavor, especially in this recipe with so few ingredients.
SAM’S TIP: You can increase the hydration in this dough by bumping the water up another ⅓ cup. If you do this, you will get a thicker dough that is a bit easier to form a crust on; however, it will be very crisp. Personally, I like using amounts listed in the recipe because it strikes the perfect balance between crispness and chew (and all of my taste testers agreed).
Remember, this is just an overview of the ingredients I used and why. For the full recipe please scroll down to the bottom of the post!
How to Make Sourdough Pizza Crust
Making the Dough
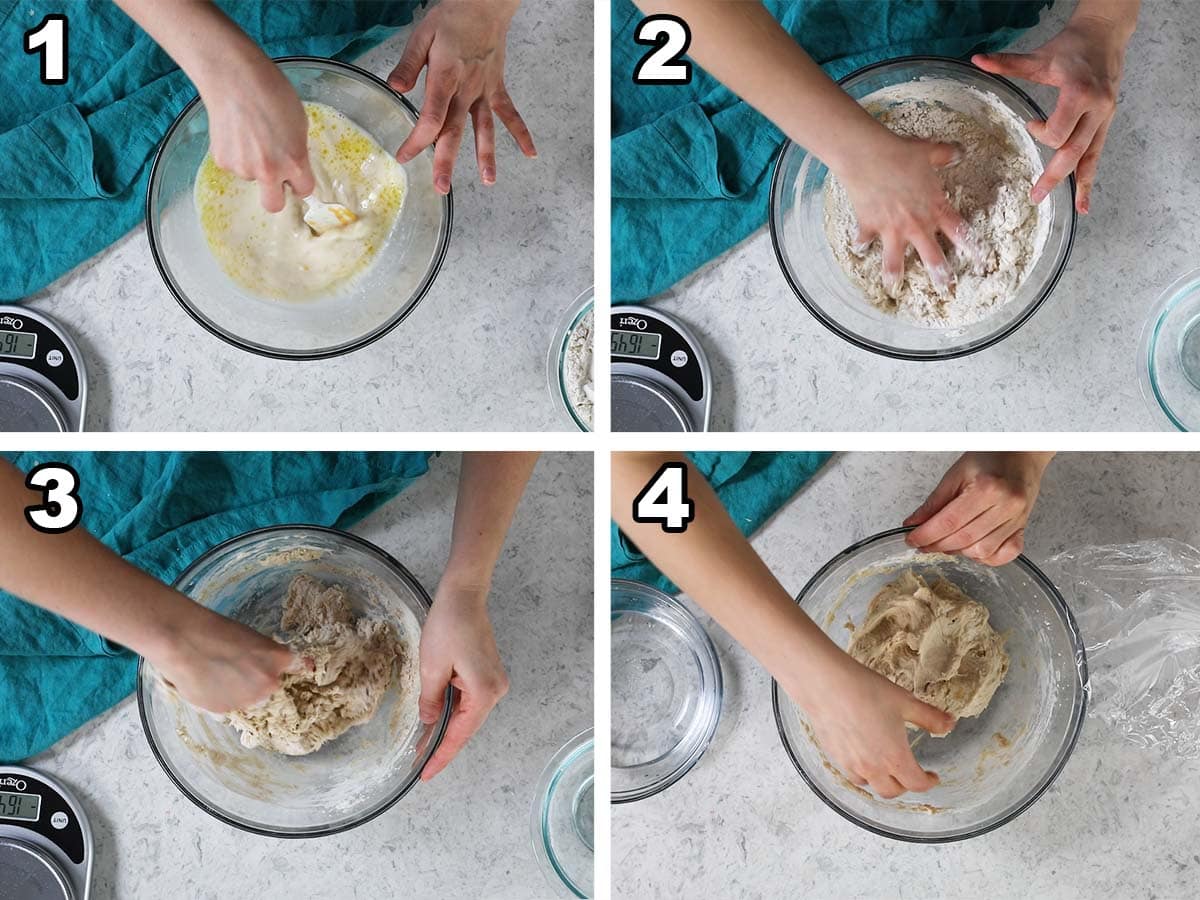
- Stir together the wet ingredients until combined.
- Add the dry ingredients and stir until the dough clings together (the dough will be shaggy, don’t overdo it).
- Autolyse. Cover the dough and let it sit for 30-60 minutes. This lets our flour hydrate and our starter begins breaking down the starches in the dough.
- Form the dough into a ball using your hands.
Stretch & Fold
Stretching and folding is commonly used in sourdough recipes. It’s an alternative to kneading (which is common with classic yeast recipes, like my homemade bread, but would be difficult with such a high-hydration dough as this one). It improves the structure of the crust and helps the gluten develop.
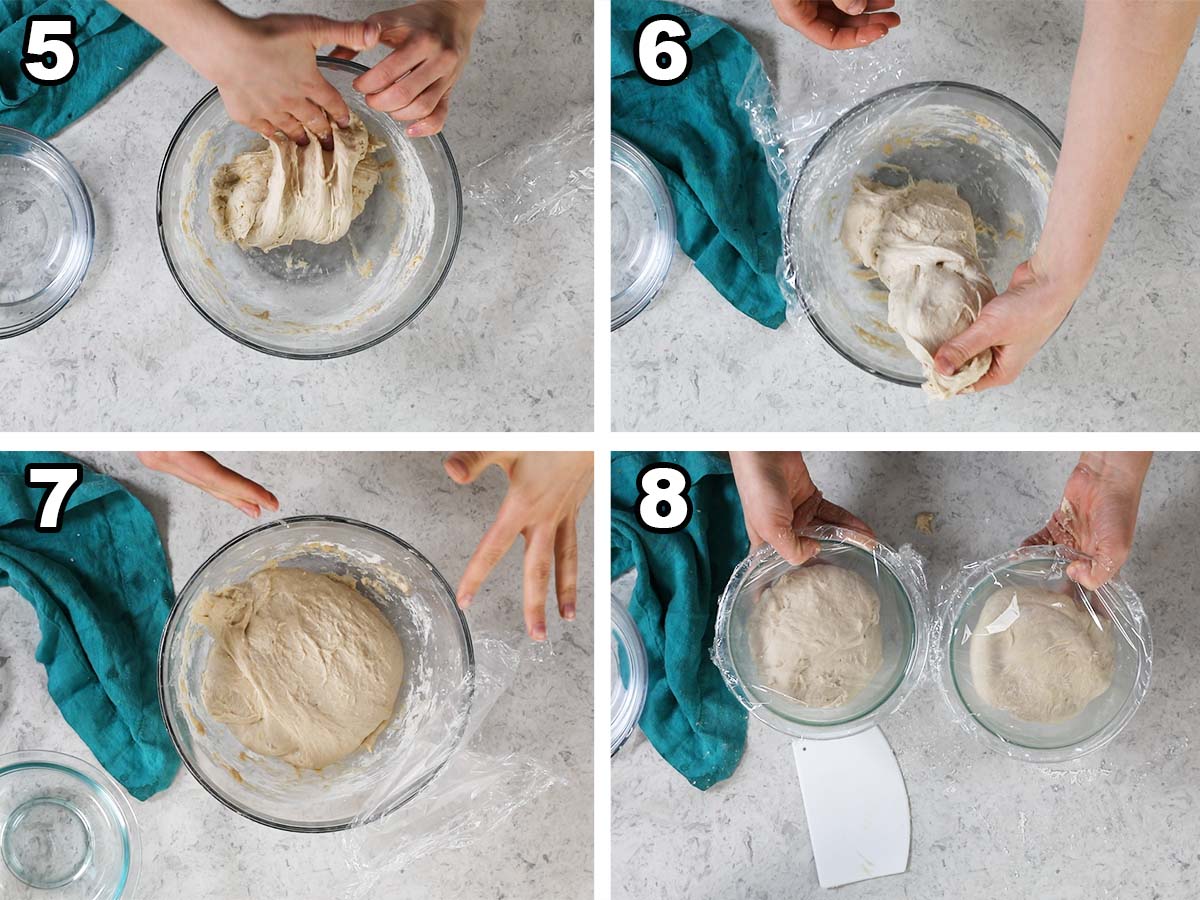
- Run your hands under cool water before stretching the top of the dough up and over the bottom. Rotate the bowl 90 degrees and repeat this process a total of four times.
- Cover the dough and let it rest for 30 minutes, repeating the stretch and fold process every 30 minutes until the dough increases in size by about 50%.
- Divide the dough into two pieces and place in lightly oiled bowls (the dough will need a bit of room to rise).
- Cover with plastic and let rest in the fridge overnight or up to 3 days. Bring the dough out of the fridge to sit at room temperature at least half an hour before using (cold dough is more difficult to shape, it can sit at room temperature for up to several hours before you use it).
SAM’S TIP: Give your oven at least 30 minutes to preheat to 500F! My oven notoriously tells me it’s ready when the temperature is not actually at 500F, so give it time and if you have an oven thermometer, use it! You want your oven to be nice and HOT for crispy results.
Baking the Crust
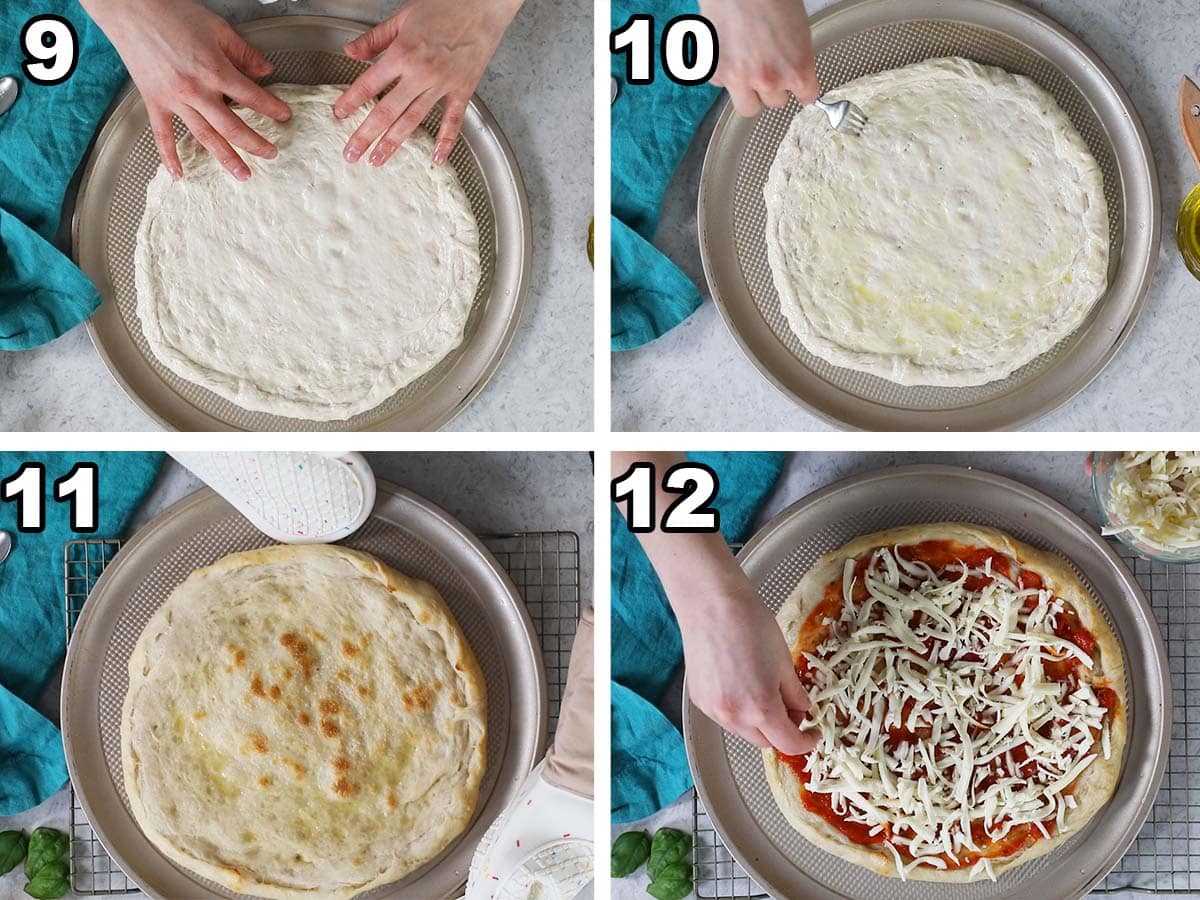
- Place the dough onto a lightly oiled pizza pan and form it into a 10-12″ circle.
- Form a crust with your hands, then brush the pizza with olive oil and pierce all over the bottom with a fork.
- Bake in a 500F oven for 8-9 minutes, then remove and brush with more olive oil.
- Add your toppings and bake for an additional 8-11 minutes (depends on your oven; look for a golden crust and melty, bubbly cheese!).
SAM’S TIP: I like to make my sourdough pizza crust in bulk, typically 3 batches at a time (giving me 6 pizzas). I’ll then par-bake them and freeze them for later. This makes for convenient last-minute or weekday meals!

Frequently Asked Questions
This recipe makes two 10-12” pizzas. The crust is thin and the pizzas are not huge, so I’d say each pizza could feed 4 people depending on their appetite and the sides you serve with it (homemade garlic knots are always a good idea!).
Yes! To do this, follow the recipe through the par-baking step, then cool, wrap in plastic, and freeze for several months. When ready to enjoy, let the crust thaw at room temperature, brush with olive oil (at least in a perfect world you should brush with olive oil again — I always forget!), add your toppings, and bake.
Sourdough pizza is easier to digest and has more nutrients, vitamins, and good bacteria than regular pizza crust. Keep in mind, sourdough pizza is still NOT considered health food when topped with lots of cheese or other indulgent toppings (just like my sourdough pancakes).

How do you like this sourdough pizza crust vs my traditional homemade pizza dough? Let me know in the comments!
Enjoy!
Let’s bake together! I’ll be walking you through all the steps in my written recipe and video below! If you try this recipe, be sure to tag me on Instagram, and you can also find me on YouTube and Facebook

Sourdough Pizza Crust
Ingredients
- ½ cup (115 g) active sourdough starter
- 1 cup (236 ml) warm water (90-100F/32-37C)
- 1 Tablespoon (14 g) olive oil
- 2 teaspoons (11 g) honey (may substitute sugar)
- 2 ¾ cups + 2 Tablespoons (370 g) bread flour
- 1 teaspoon (5 g) salt
- Additional olive oil for brushing pizza
- Pizza toppings: pizza sauce mozzarella cheese
Recommended Equipment
Instructions
- Combine sourdough starter, water, olive oil and honey in a medium-sized mixing bowl and stir until well-combined.½ cup (115 g) active sourdough starter, 1 cup (236 ml) warm water, 1 Tablespoon (14 g) olive oil, 2 teaspoons (11 g) honey
- Add flour and salt and stir until you have a shaggy dough that clings together. Cover with plastic wrap and allow it to sit for 30-60 minutes (autolyse).2 ¾ cups + 2 Tablespoons (370 g) bread flour, 1 teaspoon (5 g) salt
Stretch & Fold
- Use your hands to form the dough into a ball in the bowl.
- Run your hands under cool water and grasp the top of the dough and stretch it over the bottom. Turn the dough 90 degrees and repeat this process. Do this twice more until you have made your way all the way around the dough.
- Allow dough to rest, covered, in a warm place for 30 minutes.
- Repeat step 2 every 30 minutes until dough has increased in size about 50%. I find this typically takes about 3-4 hours for me.
- Divide dough into two pieces and place each in a lightly oiled bowl. Cover with plastic wrap and transfer to the refrigerator to rest overnight or up to 3 days.
Assembly & Baking
- Remove dough from fridge and leave it covered to rest at room temperature for at least 30 minutes and up to several hours. Preheat your oven to 500F (250C).
- Once oven is preheated, lightly oil a pizza pan with olive oil.
- Turn out the pizza dough onto the prepared pan and use your hands to gently shape it into a 10-12” (28cm) circle (it will be fairly thin). Fold over or pinch the edges to form a crust.
- Brush the pizza all over with olive oil and use a fork to pierce the bottom all over.Additional olive oil for brushing pizza
- Transfer pizza to 500F (250C) oven and bake for 8-9 minutes.
- Remove pizza from oven and brush all over again with a light layer of olive oil, then add your toppings.Pizza toppings: pizza sauce
- Return to the oven and bake another 8-11 minutes, until crust is golden and cheese is melted and bubbly.
Notes
Storing/Making in Advance
Pizza dough will keep in the refrigerator for several days. If I want to have pizza crusts ready to go, I will follow the recipe through “Assembly and Baking” step 5 (par-baking the crust) then allow it to cool, wrap tightly in plastic wrap and freeze for up to several months. When ready to use, simply thaw (or partially thaw) in the plastic wrap at room temperature then proceed with the recipe from “Assembly and Baking” step 6 (brush with oil, add toppings and bake).Nutrition
Nutritional information is based on third-party calculations and should be considered an estimate only. Actual nutritional content will vary based upon brands used, measuring methods, cooking method, portion sizes, and more.






leigh
can I use King Arthur 00 flour instead of bread flour?
Sam Merritt
Hi Leigh! I haven’t tried it, but I think it could work. You may need to alter the amount of flour in the dough. 🙂
Leigh
they turned out perfectly! I used the same amount of 00 PIZZA flour. best pizza I’ve ever made
Sam Merritt
That’s great to hear! I’m so glad you enjoyed it. 🙂