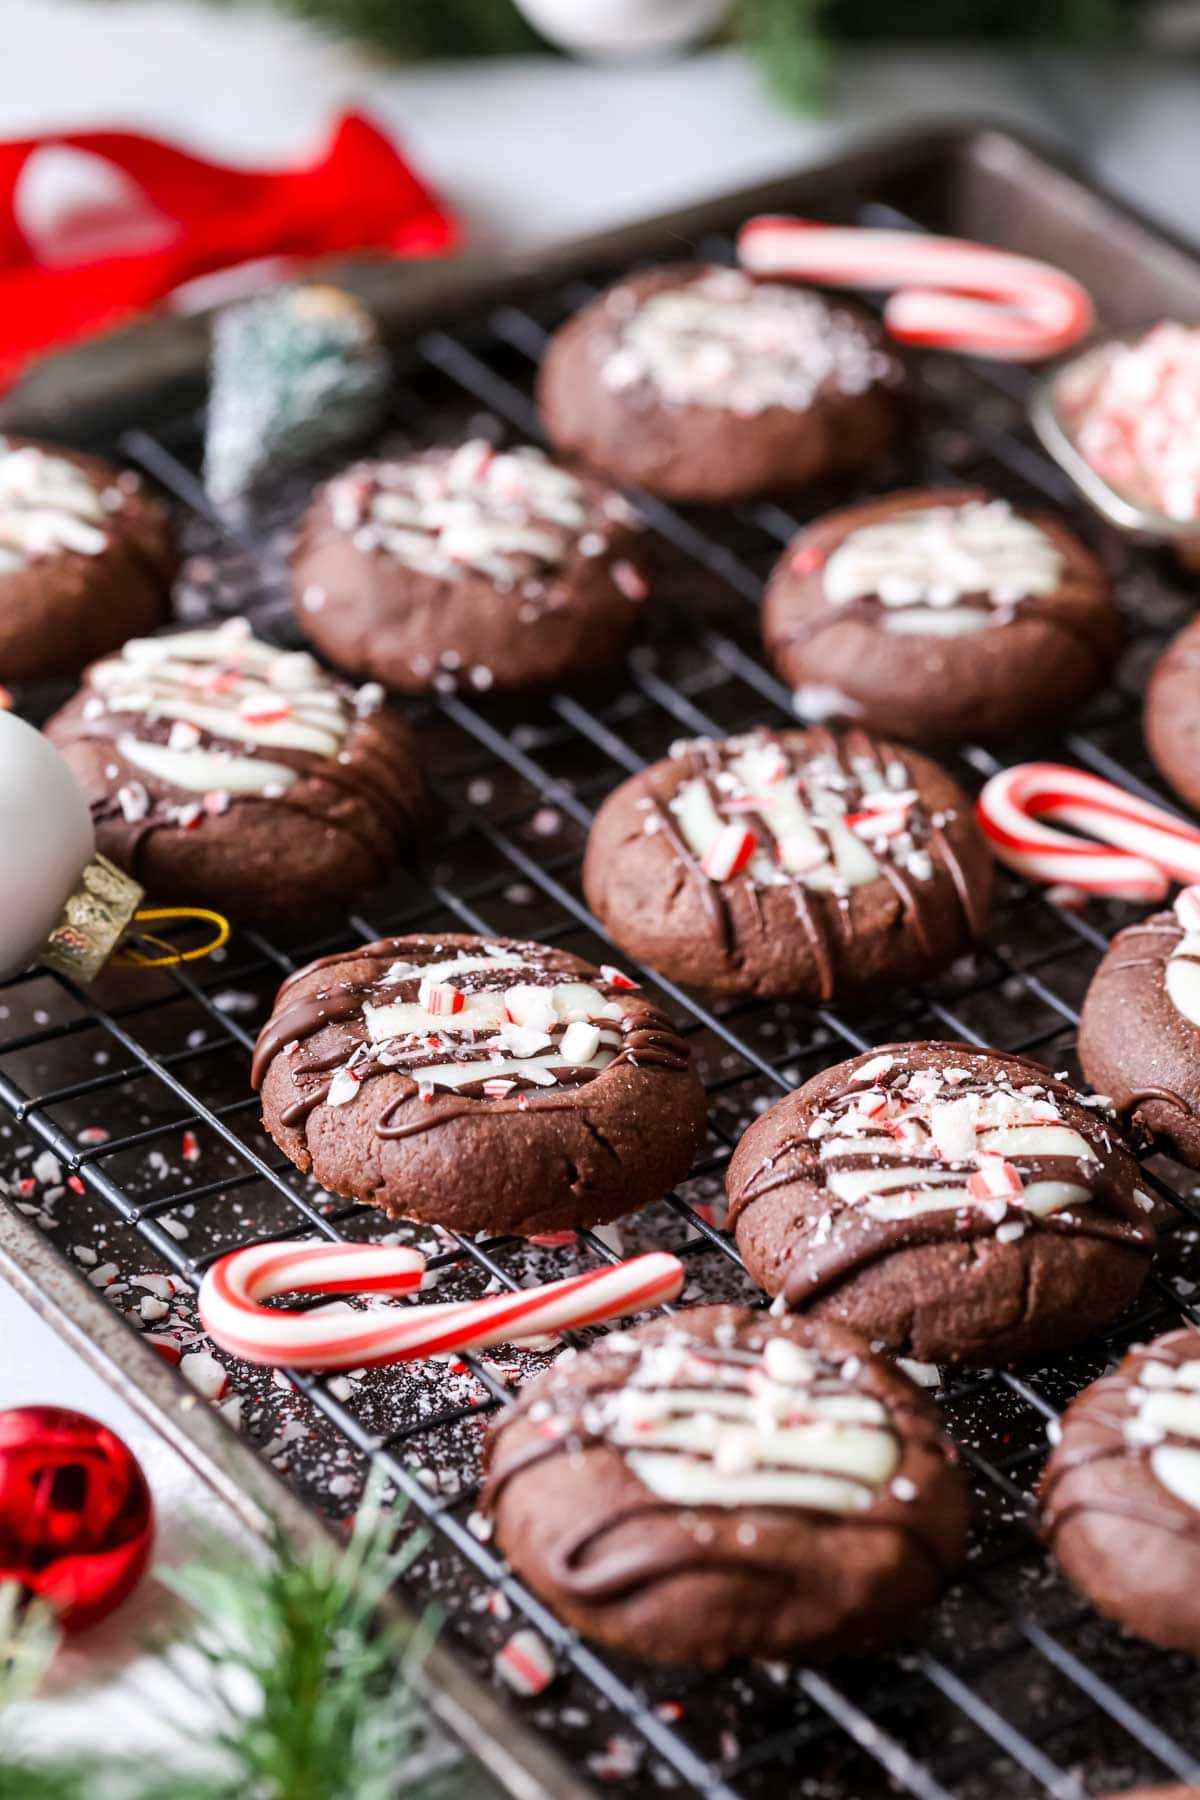
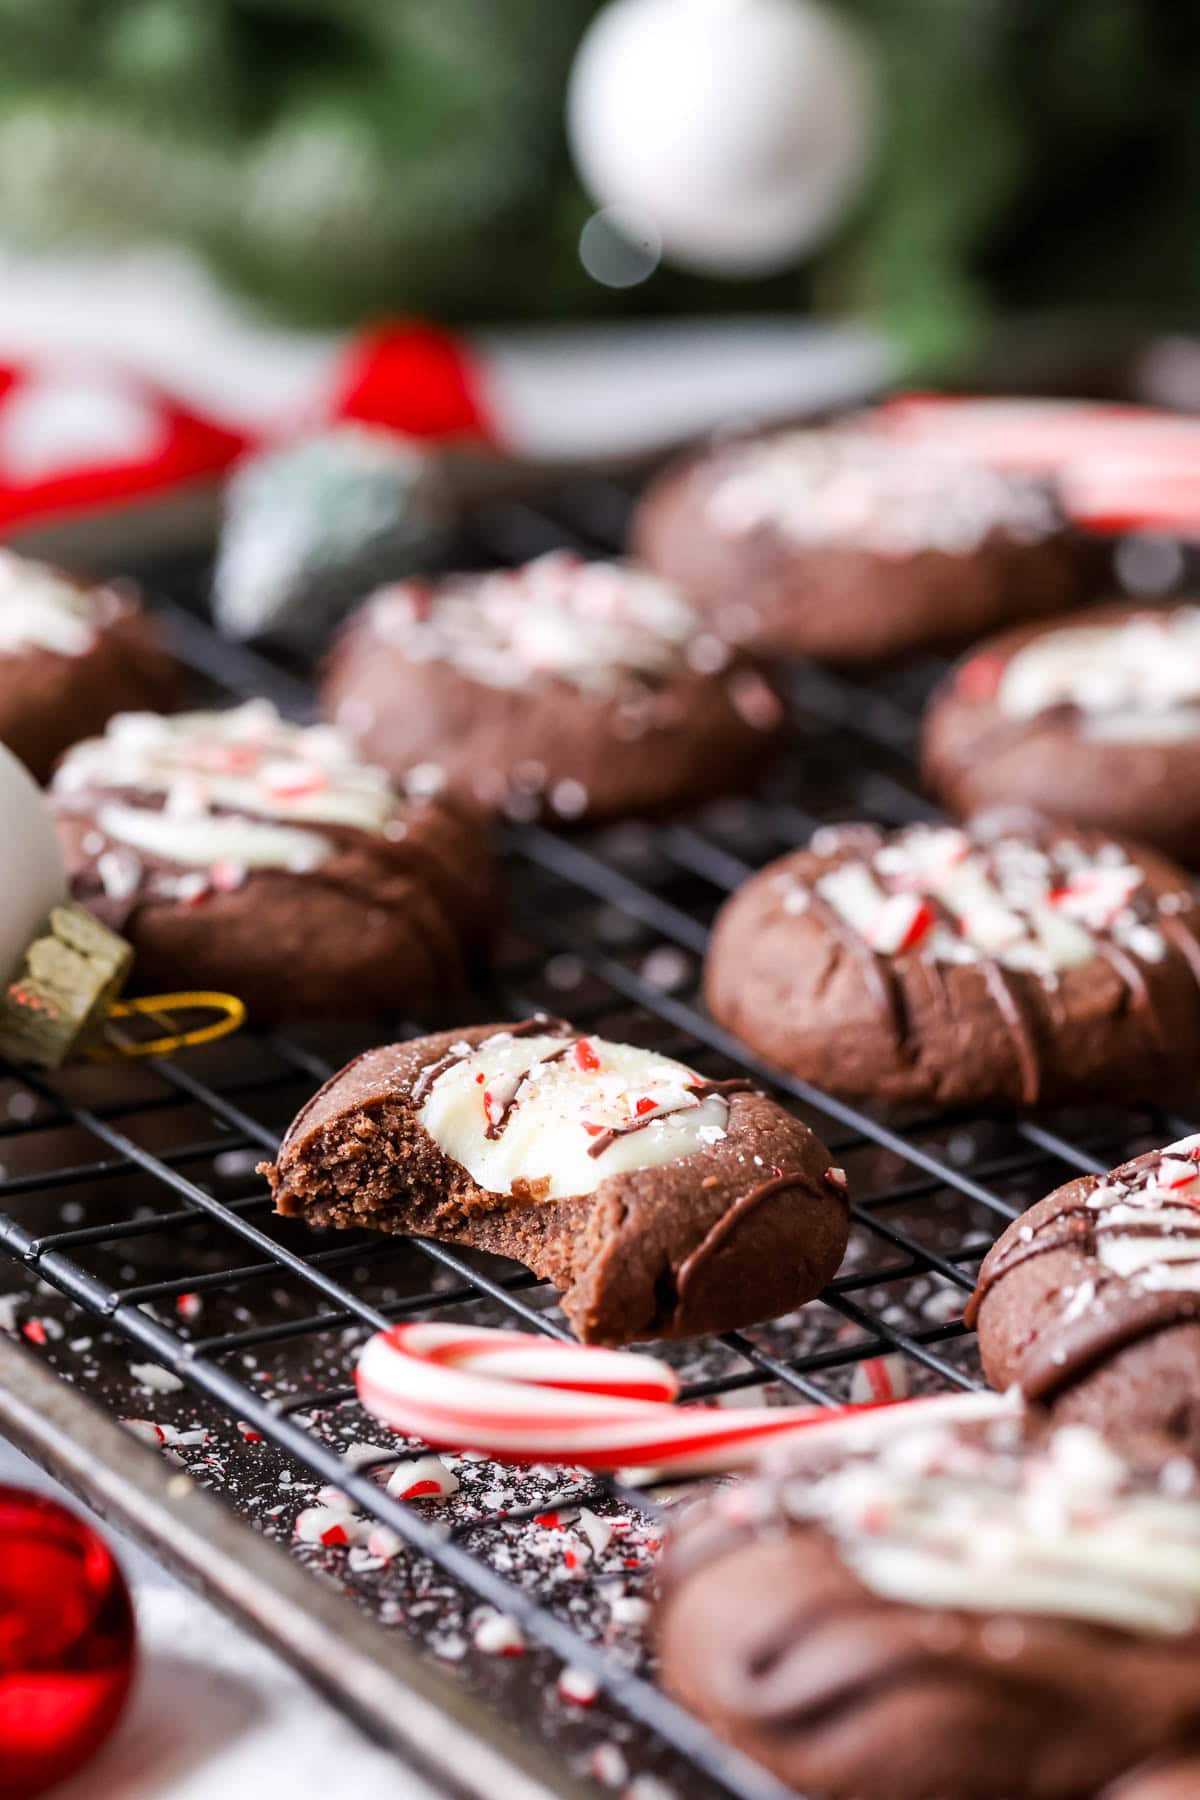
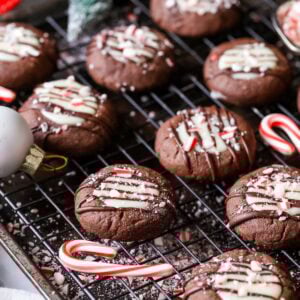
Chocolate peppermint thumbprint cookies combine classic flavors in a unique way. Rich chocolate cookie bases, peppermint white chocolate filling, and a sprinkle of crushed peppermint candy–like peppermint bark, but in cookie form! Recipe includes a how-to video!
Peppermint Bark Thumbprint Cookies
I’ve got a brand new Christmas cookie recipe for you! Similar to my peppermint bark cookies, these chocolate peppermint thumbprint cookies are so festive and fun. We’re pairing a soft, thick chocolate cookie base with a bright peppermint white chocolate filling and crunchy peppermint candy canes for texture.
Why You Should Make These Cookies
- Classic, yet unique. Thumbprint cookies and peppermint bark are both holiday staples, and this recipe combines them!
- Minimal chilling. Only a 30 minute stint in the freezer–Enough time to clean up after prepping the dough.
- Perfected. The cookies hold their shape in the oven (a common complaint with thumbprint cookies) and the peppermint flavor is just right.
- Easy decorating. We’ll simply pour a teaspoon of white chocolate ganache in each cookie, add a drizzle of chocolate, and sprinkle with candy canes. No fancy equipment, piping skills, or sprinkles needed!
Jump to:
Ingredients
I won’t go over every ingredient here, but I will review a few that you might have questions about.
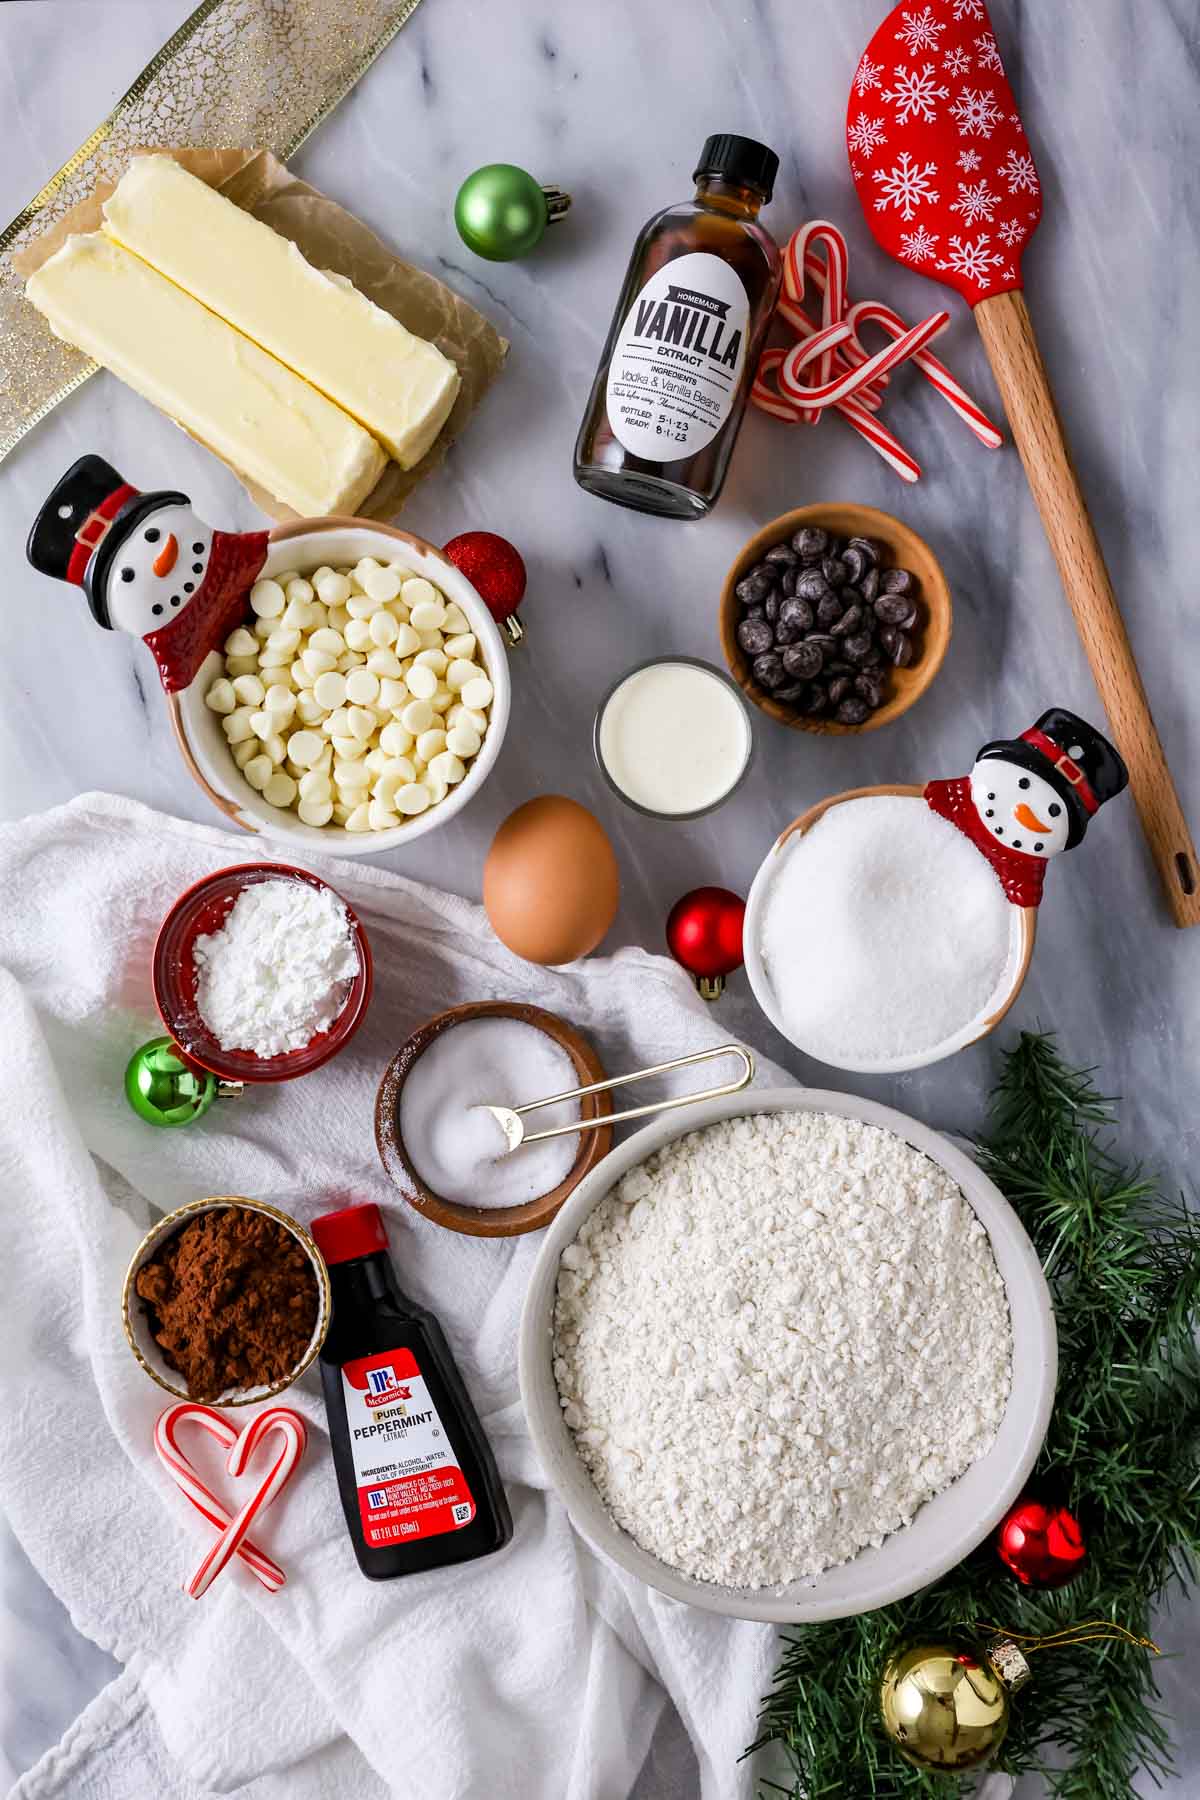
- Dutch cocoa. Dutch cocoa makes a flavorful, chocolatey base that suits the filling well. In a pinch you can use natural cocoa, but I prefer the richer flavor Dutch cocoa provides. You can learn more about the differences between the two in my post on natural vs dutch process cocoa.
- Egg yolk. We’ll skip the egg white, which would make our cookies spread too much in the oven. If you don’t want to waste it, then you can repurpose your egg white in a batch of candied almonds, candied pecans, or candied walnuts!
- Peppermint extract. Don’t use mint extract–stick with peppermint. Mint is a different flavor profile and doesn’t work as well here.
- Chocolate chips. You’ll need both white chocolate chips and semisweet chocolate chips. I have a whole post on how to melt chocolate chips in the microwave if you need help with this step.
- Cornstarch. A tablespoon helps our cookies hold their shape in the oven and yields a softer, more tender texture. I don’t have a good substitute for this ingredient.
Remember, this is just an overview of the ingredients I used and why. For the full recipe please scroll down to the bottom of the post!
SAM’S TIP: Mint extract is NOT the same thing as peppermint extract, and using it will completely change the flavor of your cookies. Mint is most similar to spearmint, while peppermint is more classic. I use peppermint extract in all of my mint chocolate desserts, so I can promise you it is the right choice here!
How to Make Peppermint Bark Thumbprint Cookies
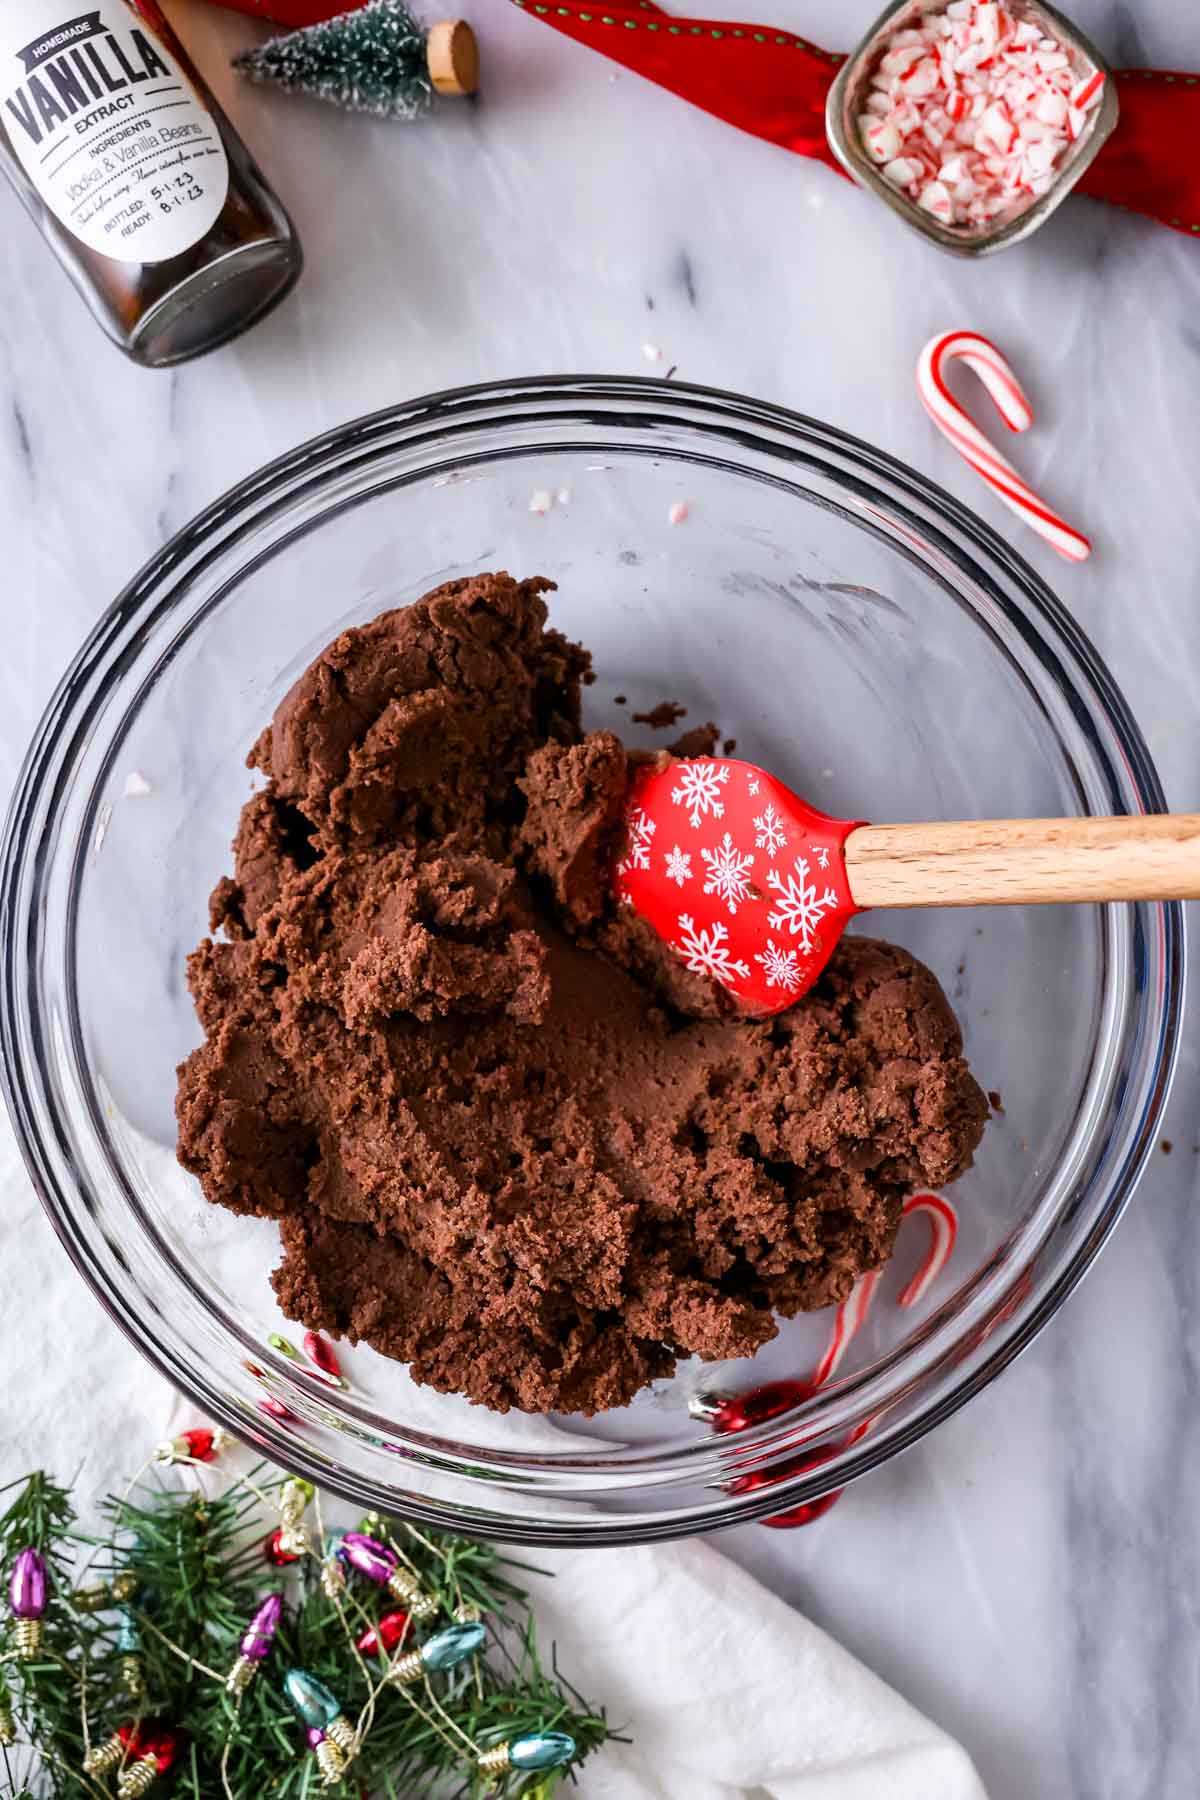
- Step 1: Make the dough. Cream the butter and sugar together, then add the egg and vanilla. Gradually stir in the dry ingredients (I do this in 4-5 parts) until the dough is smooth and combined. It will be dry, but it will come together!
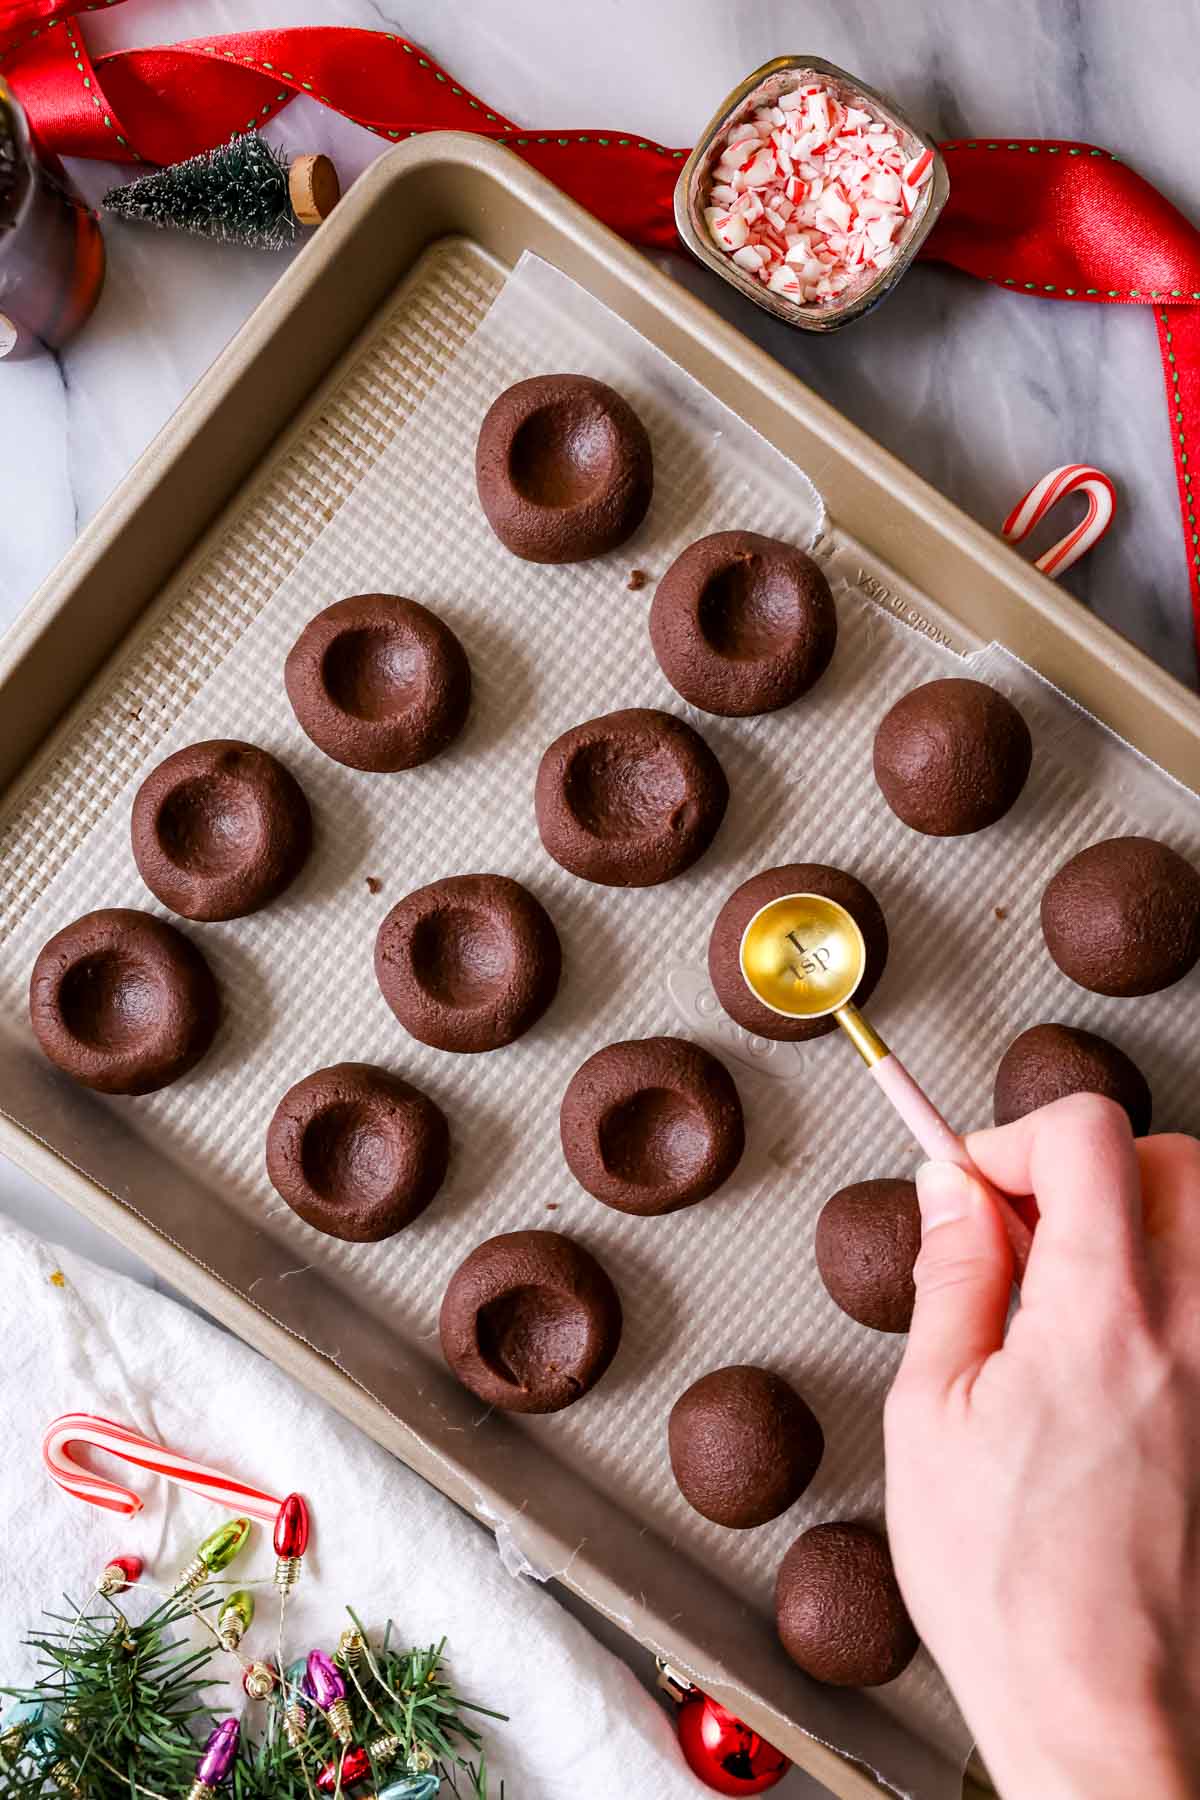
- Step 2: Add the indents. Roll 1 ½ tablespoon scoops of dough into smooth balls. Use a teaspoon or your thumb to make an indent in the center of each cookie, then transfer the cookies to the freezer for at least 30 minutes.
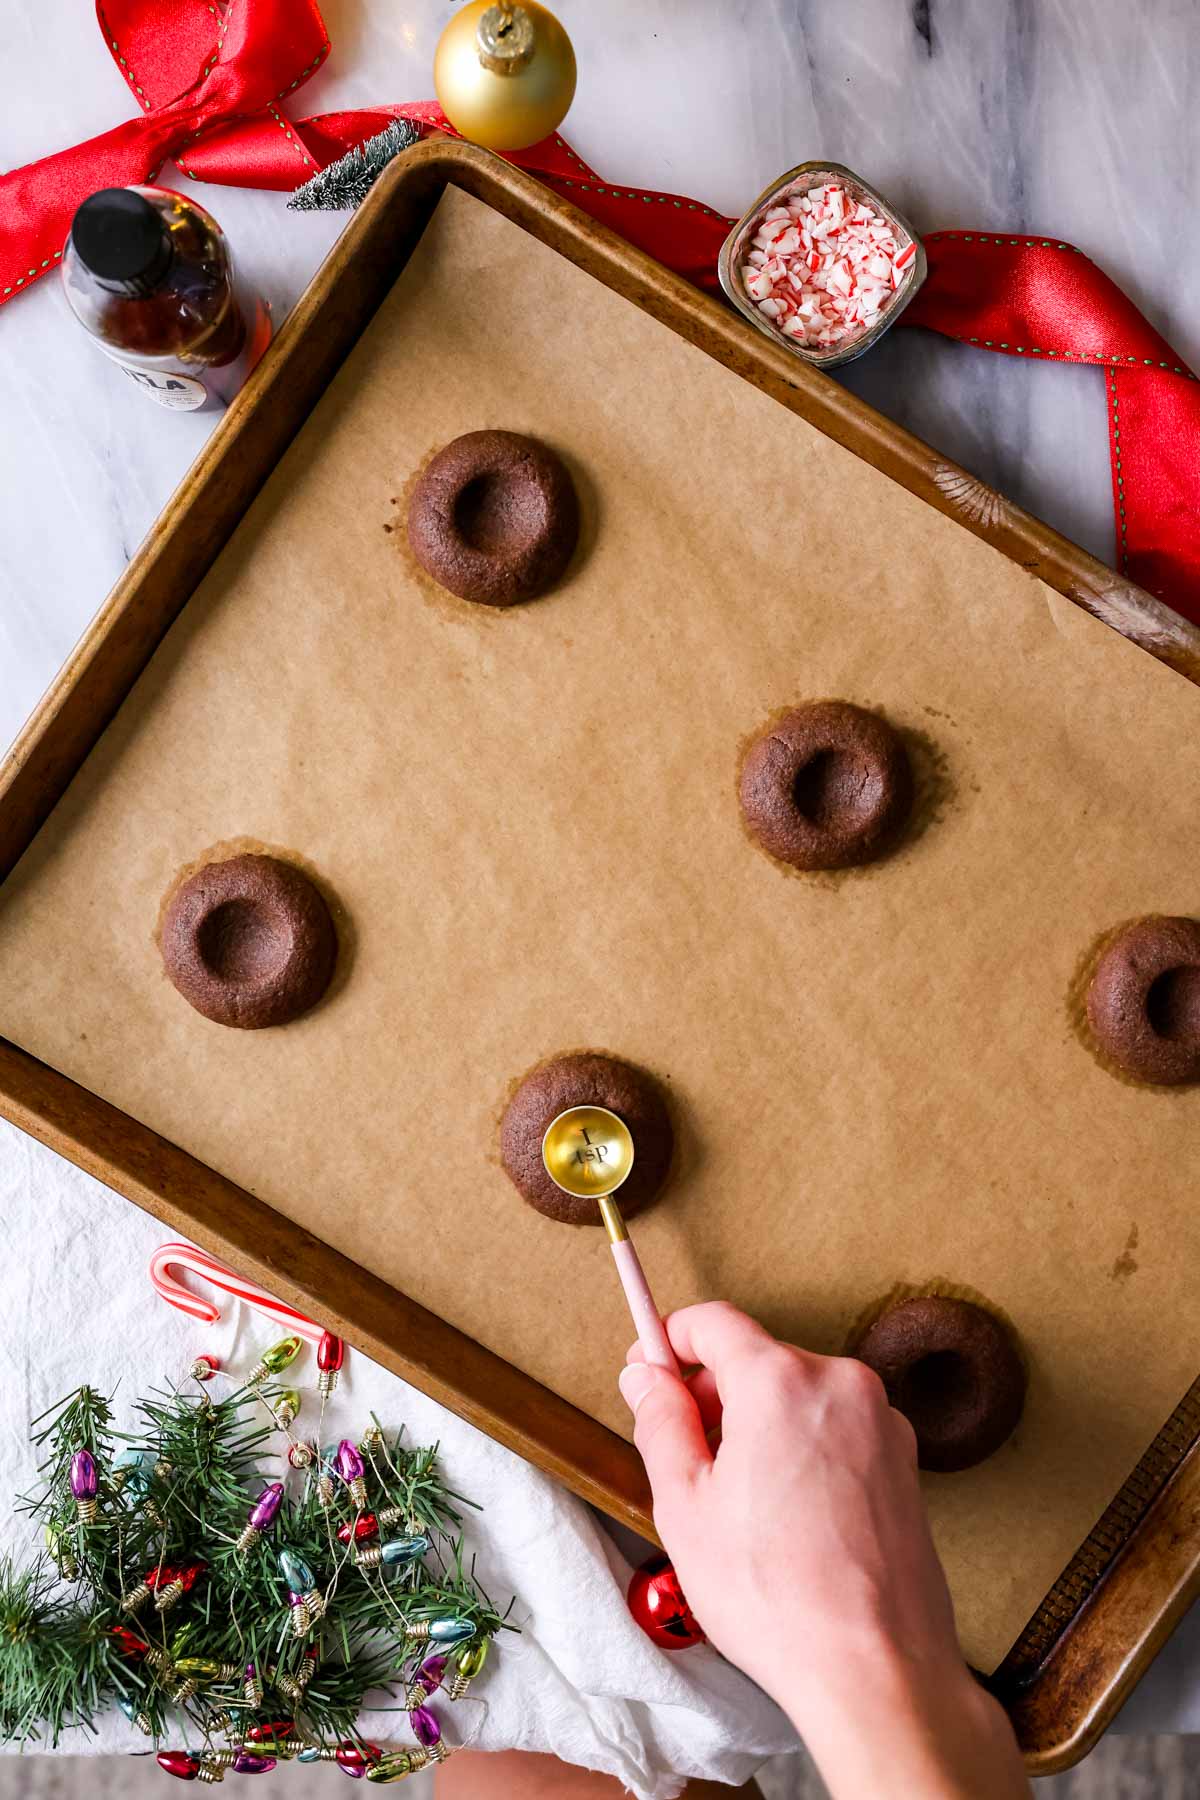
- Step 3: Bake & indent again. Remove the cookies from the freezer and place on parchment lined baking sheets. Bake for about 9 minutes (see tip below for how to know when the cookies are done!), then remove and indent again while still hot from the oven.
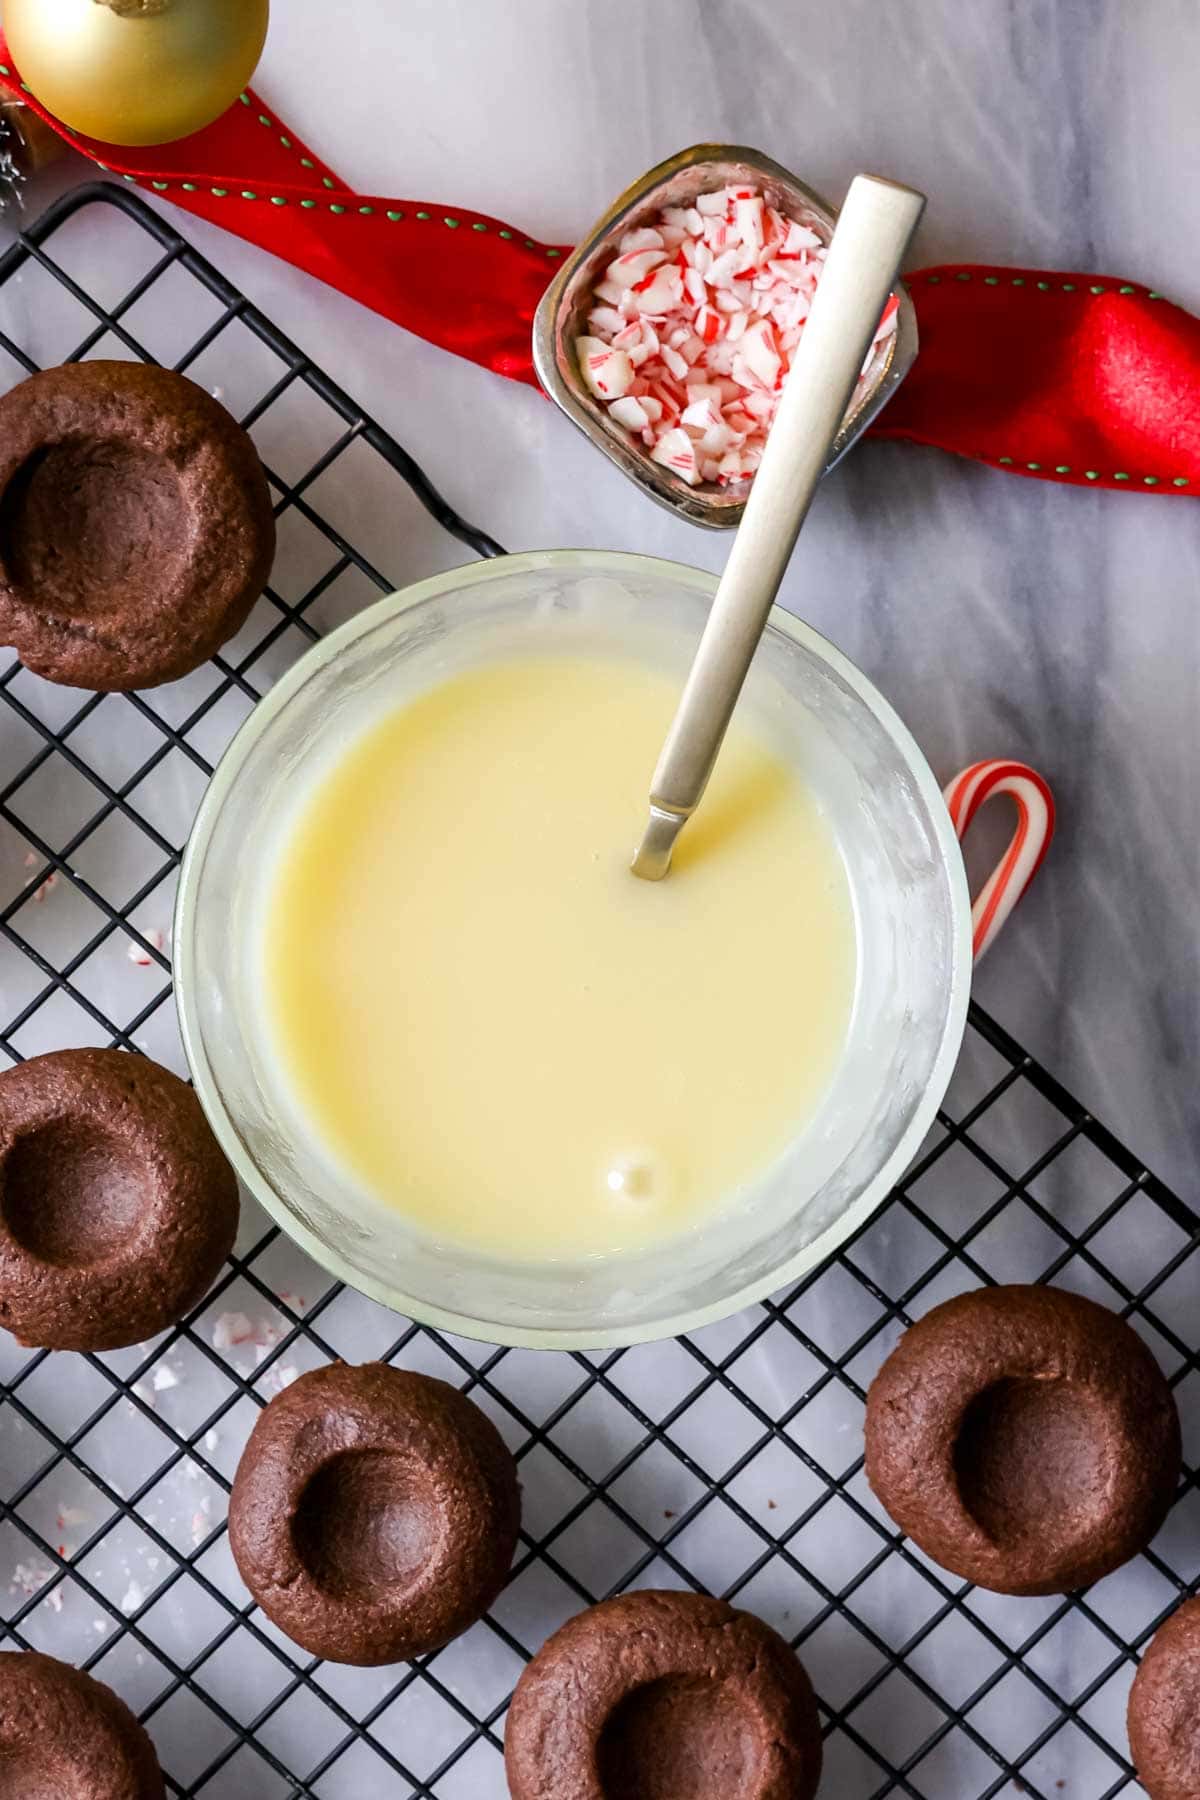
- Step 4: Make the filling. Slowly heat the white chocolate and cream until smooth and melted, then stir in the peppermint extract.
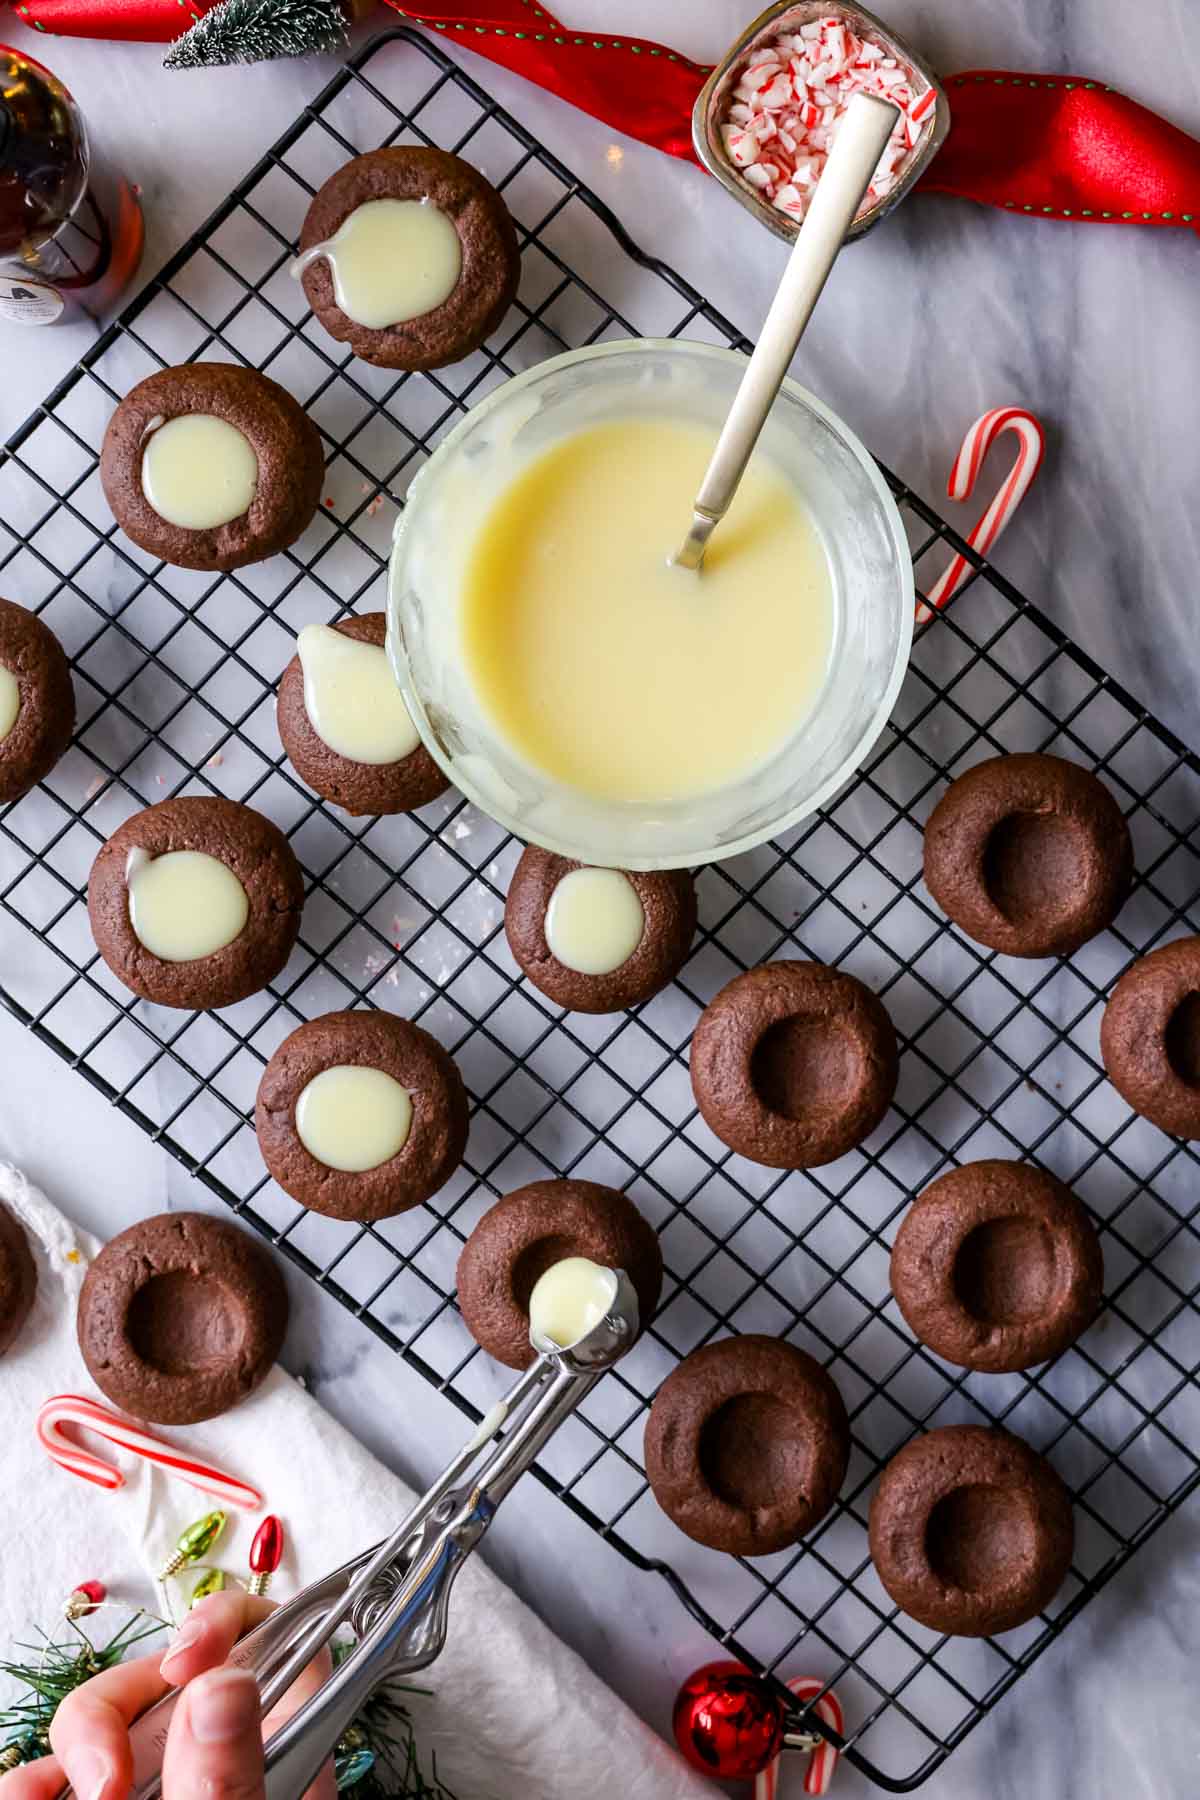
- Step 5: Fill the cookies. Add about a teaspoon of the ganache to each cookie (you may have some leftover–pour over ice cream or dip some pretzels in it!).

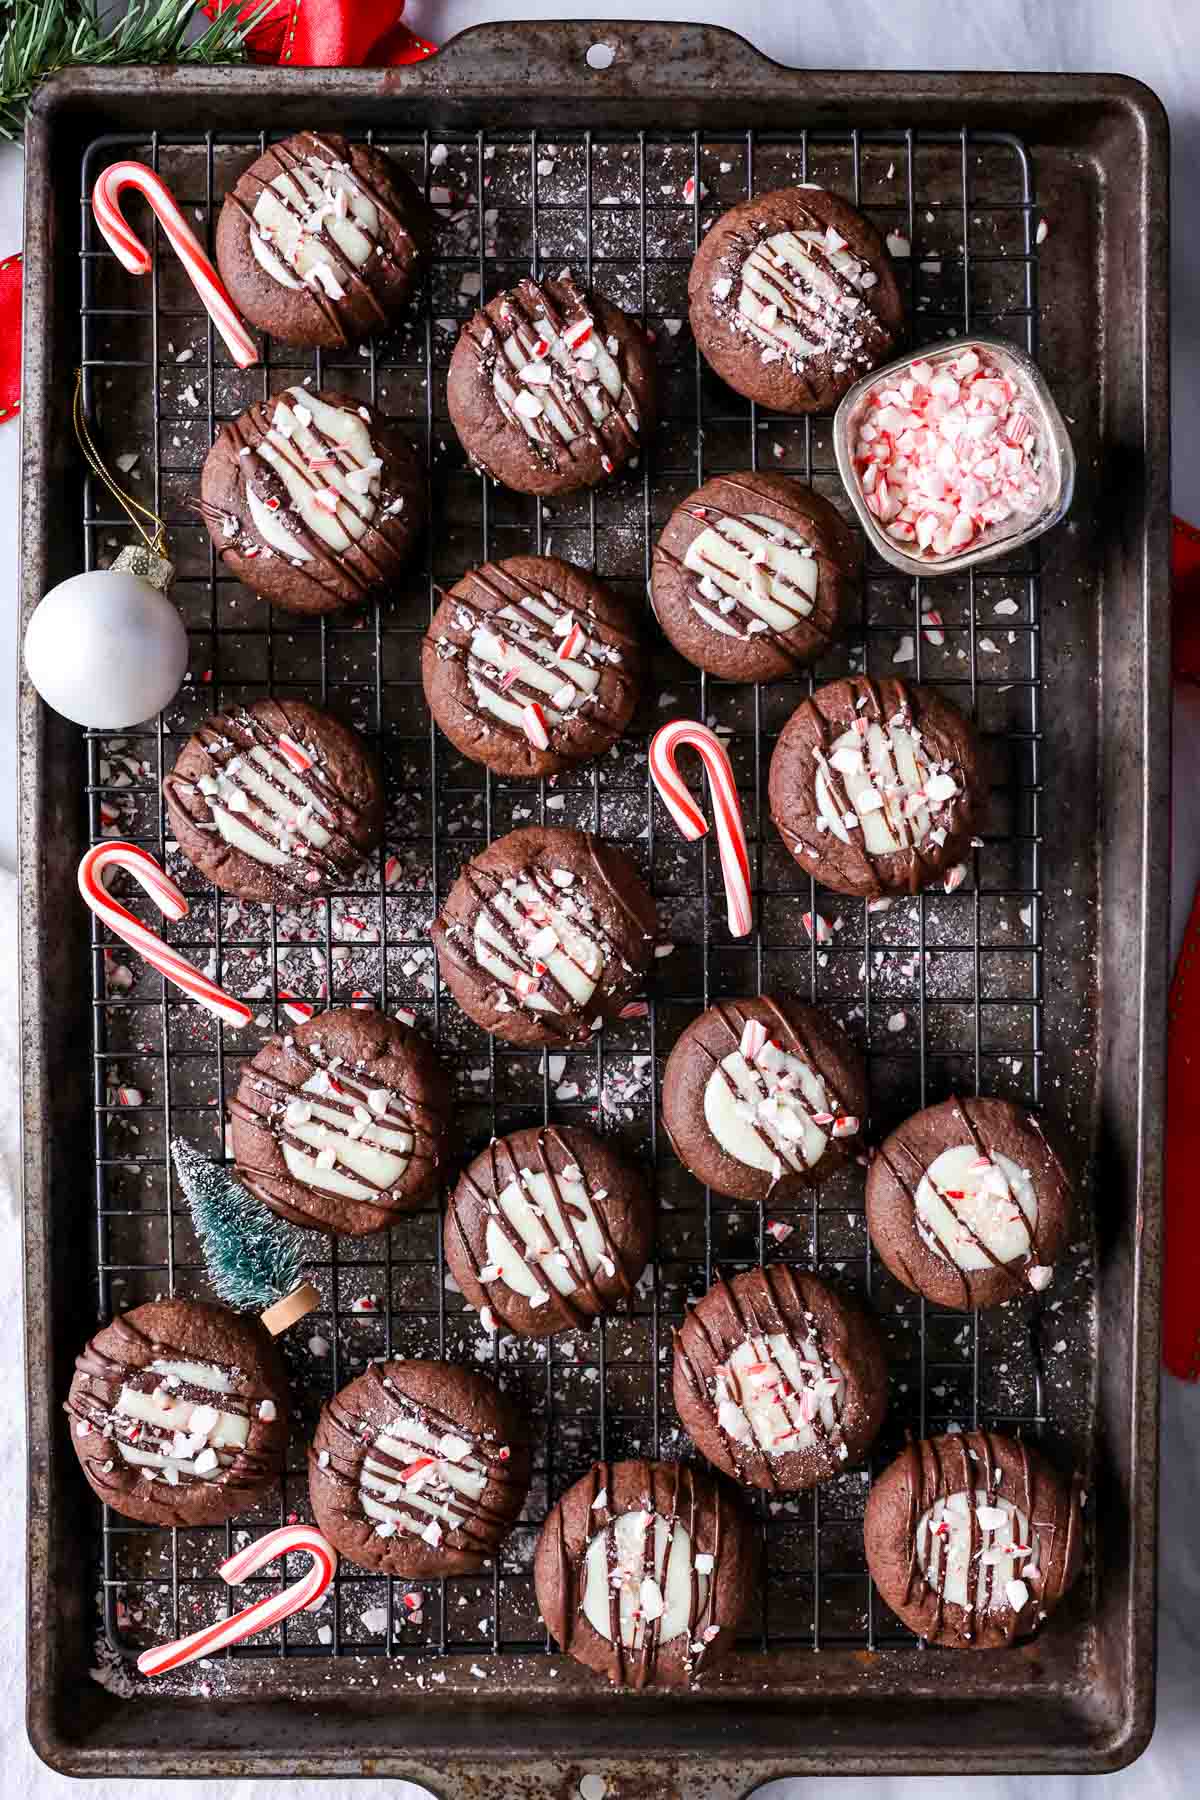
- Step 6: Decorate. Drizzle the melted semisweet chocolate overtop, then add a sprinkle of crushed peppermint candy. The filling will need to set before you can dig in.
SAM’S TIP: It can be tricky to know when these cookies are done since they’re chocolate (you can’t really look for browning!). I will usually gently touch the cookie to make sure it’s not gooey or use a spoon to scoot the edge and make sure it feels done and not raw. Don’t over-bake them, or the cookies will be crumbly when cooled and will seem stale a lot sooner.
Frequently Asked Questions
The tops remain slightly sticky, but you should be able to stack them once the chocolate sets up. I do recommend putting wax paper between your layers though.
This can happen if your butter was too warm, if you used a whole egg instead of just the egg yolk, if you skip the chilling step, or if you place your cookie dough on hot cookie sheets.
Your cookies will be crumbly if you over-measure your flour, add the dry ingredients all at once, or if you over-bake them. See my tip above for knowing when these chocolate peppermint thumbprint cookies are done baking (and get an oven thermometer too if you don’t have one–that’s a game changer!).
Related Recipes


I have quite a few flavors of thumbprint cookies here on the blog, but I’m curious if you’d like to see more. Maybe a gingerbread thumbprint cookie? Let me know in the comments below!
Enjoy!
Let’s bake together! Subscribe to my newsletter to be notified of all the newest recipes, and find my free recipe tutorials on YouTube 💜
Chocolate Peppermint Thumbprint Cookies
Ingredients
Thumbprints
- 1 cup (226 g) unsalted butter softened
- ⅔ cup (135 g) granulated sugar
- 1 teaspoon vanilla extract
- 1 large egg yolk
- 2 cups (250 g) all-purpose flour
- ¼ cup (25 g) Dutch cocoa powder
- 1 Tablespoon cornstarch
- ½ teaspoon salt
White Chocolate Peppermint Filling
- ⅔ cup (113 g) white chocolate chips
- 3 Tablespoons heavy cream
- 1 teaspoon peppermint extract
Topping
- 2 Tablespoons semisweet chocolate chips (or couverture chocolate)
- 2 Tablespoons crushed candy canes
Recommended Equipment
- Parchment paper liners
Instructions
For the thumbprints
- In a large mixing bowl, use an electric mixer to beat together butter and sugar until creamy and well-combined.1 cup (226 g) unsalted butter, ⅔ cup (135 g) granulated sugar
- Stir in vanilla and egg yolk until well combined.1 teaspoon vanilla extract, 1 large egg yolk
- In a separate medium-sized mixing bowl, whisk together flour, cocoa, cornstarch, and salt.2 cups (250 g) all-purpose flour, ¼ cup (25 g) Dutch cocoa powder, 1 Tablespoon cornstarch, ½ teaspoon salt
- Gradually (in 4 or 5 parts) stir the dry ingredients into the wet, mixing until combined. Dough will be a bit dry, but add the flour mixture slowly and stir until it is well combined and smooth. Use a spatula to scrape the sides and bottom of the bowl to be sure all ingredients are incorporated.
- Scoop dough by 1.5 Tablespoon sized scoop (28g) and roll into a smooth ball. Use the back of a rounded teaspoon (or use your thumb!) to make an indent into the dough, place on a wax paper lined baking sheet or plate. Repeat until all cookie dough is formed and indented, transfer baking sheet or plate to freezer and freeze for at least 30 minutes.
- While cookie dough balls are freezing, preheat your oven to 350F (175C) and line baking sheets with parchment paper. Set aside.
- When the dough has finished chilling, remove from the freezer and place on prepared baking sheets, spacing cookies at least 2” (5cm) apart. Transfer to center rack of 350F (175C) preheated oven for 8-10 minutes. Immediately upon removing from oven, carefully use the back of a clean rounded teaspoon to re-indent the cookies. Allow cookies to cool while you prepare the white chocolate peppermint filling.
For the white chocolate peppermint filling
- In a small microwave-safe bowl, combine white chocolate chips and cream. Heat in the microwave for 25 seconds. Remove from microwave, stir, and continue to heat in 20 second intervals until smooth and completely melted.⅔ cup (113 g) white chocolate chips, 3 Tablespoons heavy cream
- Add peppermint extract and stir to combine.1 teaspoon peppermint extract
Assembly
- Fill the indent of each cooled cookie with the prepared filling, usually about 1 teaspoon of filling per cookie (you may have leftover filling).
- Place chocolate chips in a microwave-safe dish and heat for 25 seconds. Stir well and return to the microwave and heat in 10-second intervals, if needed, until completely melted and smooth. Drizzle evenly over the tops of the cookies.2 Tablespoons semisweet chocolate chips
- Sprinkle with crushed candy canes. Let cookies sit until filling has set.2 Tablespoons crushed candy canes
- Enjoy!
Notes
Egg white
Don’t use the egg white in the cookie recipe just to avoid wasting it – your cookies will spread too much! Instead, save the egg white to make a batch of candied pecans!Storing
Store in an airtight container at room temperature for up to 3 days. You can refrigerate the cookies in an airtight container for up to 5 days, but the candy cane pieces will likely melt in the fridge.Nutrition
Nutritional information is based on third-party calculations and should be considered an estimate only. Actual nutritional content will vary based upon brands used, measuring methods, cooking method, portion sizes, and more.


Tammy
These cookies were absolutely amazing! I’m still dreaming about them almost two months later! I took them to two family Christmas events and they were the absolute highlight. Everyone raved about how delicious they were and wanted more. I followed the recipe exactly and made sure not to bake them too long. They turned out perfect! I am definitely making these every year! Thank you!
Sam Merritt
Thank you so much for trying my recipe, Tammy! I’m so glad you enjoyed them so much! 🙂
Anne Keefer
These cookies were the sneaky BIG winner of the cookie baking season in our home. The other comments reflect a slightly less moist, less fudgy cookie, but that edge gave these 2 bite cookies the blue ribbon. The combination of white ganache and dense chocolate cookie was perfect. I have marked this page so I can find it in the future. Thank you for this perfect holiday cookie.
Sam Merritt
Thank you so much for trying my recipe, Anne! I’m so glad it was such a hit! 🙂
Ada
I really wanted to like this recipe, but it needs improvement. The dough and final result both tasted like flour. Not chocolatey, not sugary, just bland, floury cookie. Not sure what went wrong. I tried adding more sugar and some melted chocolate to half the recipe, but it still didn’t help. This idea has lots of potential, but not good enough yet. 😔
Sam Merritt
Hi Ada! Did you use Dutch cocoa? I would also worry that maybe the cookies were over-baked and I’d try baking them a tad less, that usually works wonders 🙂
Kathy
These were beautiful cookies, and the white chocolate peppermint ganache was really good, but the cookie base was rather dry and lacking in flavor. I’d be tempted to make this again but use a brownie batter as the base – the cookie is just crying out for more fudginess.
Sam Merritt
Hi Kathy! I would wonder if perhaps the cookies baked a tad too long? The cookie base needs to be sturdy and can’t be TOO fudgy or it won’t hold its shape, but if they’re dry and flavorless this makes me wonder if they just needed a bit more time in the oven.