
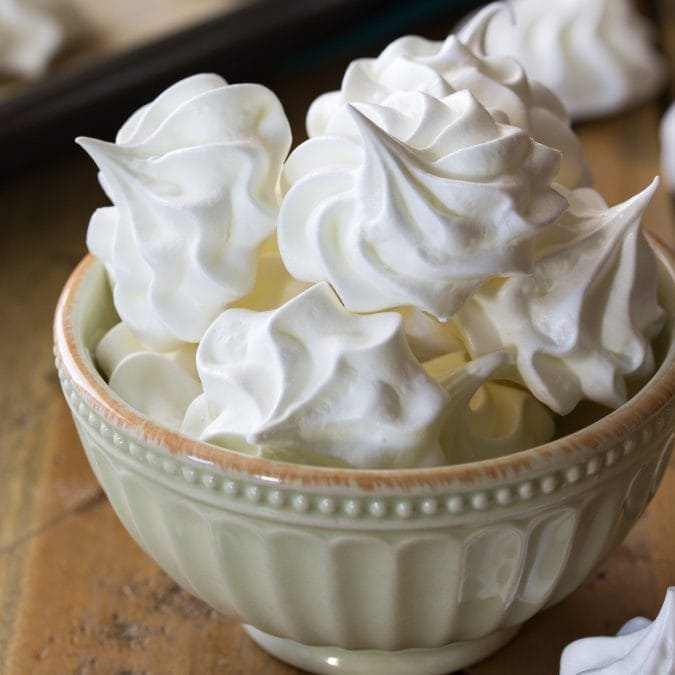
Meringue Cookies
This post may contain affiliate links. As an Amazon Associate I earn from qualifying purchases. Please read my disclosure policy.
A classic recipe for meringue cookies! These little meringues only call for 5 ingredients, and at under 25 calories a pop they are easily the lightest recipe on my blog! The technique takes a little bit of practice, and a long time in the oven, but I’ll walk you through the steps in the recipe so that you can make your own perfect meringues!
Sweet & Simple Meringue Cookies
I have another recipe for your holiday cookie tray today — classic meringue cookies!
Meringues only require 5 ingredients to make, but they can be a little bit finicky — even the weather can affect them. Winter is a great time to try them out, as you’re much less likely to have a very humid day this time of year, and humidity is one of the greatest nemesis of meringue cookies.
I’ve been making this recipe over and over again the past few months to make sure that I understood all of the ins and outs of making perfect meringue cookies, and I’m finally ready to share what I’ve learned with you, so that you too can make these addictive little meringue cookies.
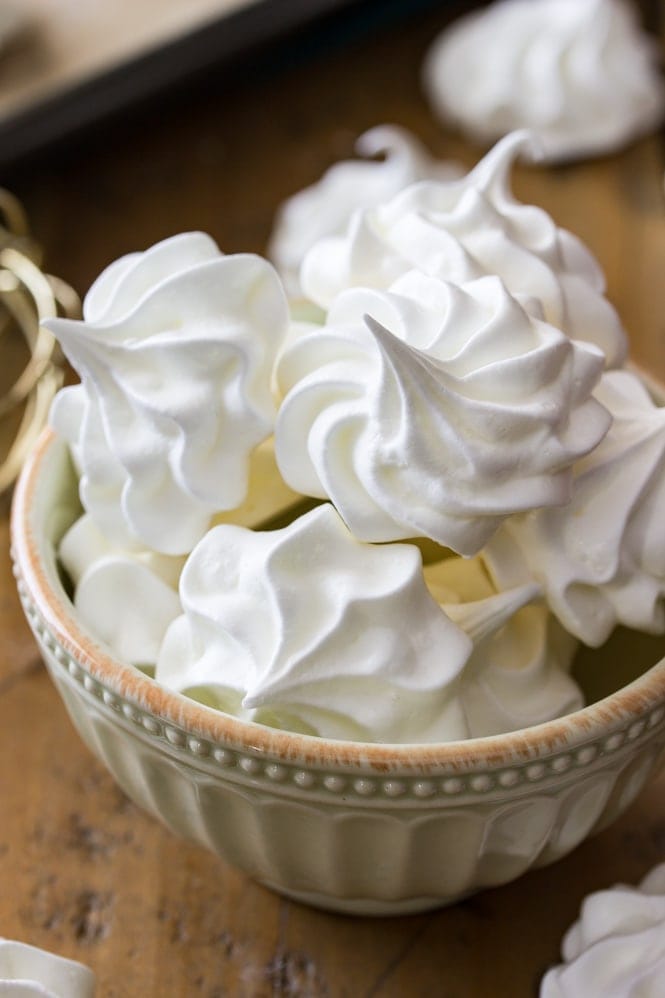
If you’ve never had one, meringues are light, airy cookies with crisp interiors. I’m sharing a classic vanilla meringue recipe today (with notes on how to add your own different flavors!). The taste always reminds me of marshmallow 😍.
Making Meringue: Stiff Peaks
This recipe calls for four egg whites and a single cup of sugar. That may not seem like it’s going to yield you very many meringues when you start, but you’ll be surprised by how much these ingredients increase in volume.
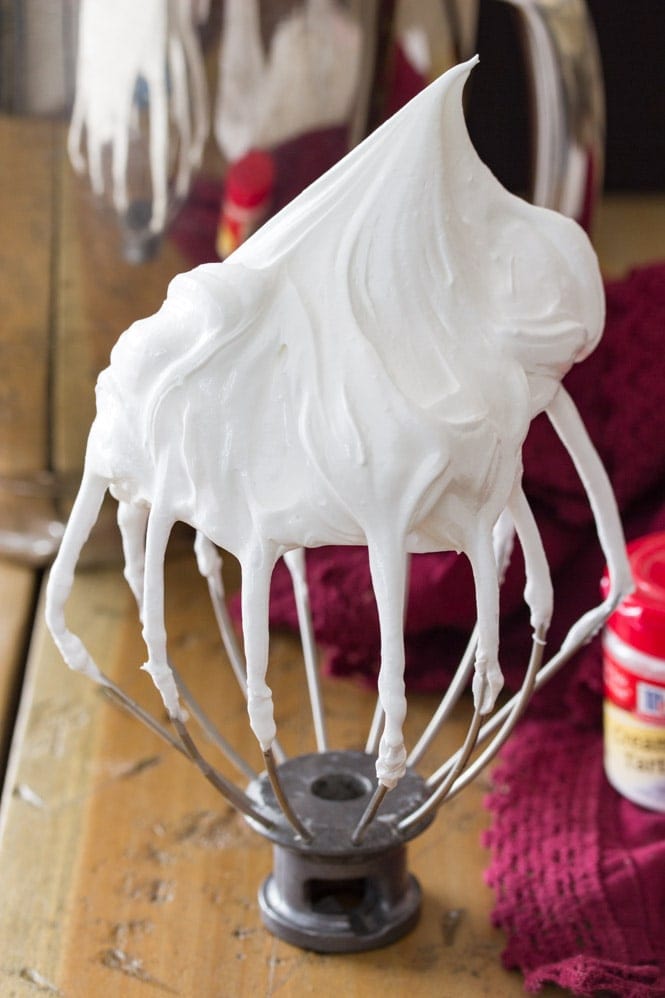
As you add the sugar, the mixture will become thick, glossy, and sticky, that’s exactly what you are looking for! You’ll also want the mixture to achieve stiff peaks — that’s how you’ll know that it’s done.
If you’ve made my angel food cake, whipped cream, or Swiss meringue buttercream before, then you’re already familiar with the concept of stiff peaks. It means that when you turn the batter over (like you can see in the image below with the meringue cookie batter), the peak that forms stands tall and does not fold back into itself. I’ve included a video in today’s post so you can see exactly how the meringue should look, in case you haven’t ever made meringue before.
Tips for No-Fail Meringue Cookies
- Make sure that the bowl and beater that you are using to beat your meringue is completely grease and moisture free. Any moisture can ruin your meringues.
- Crack your eggs in a separate bowl when separating the whites. Even a tiny bit of yolk can ruin your meringues, so crack each egg in a small bowl before adding it to the bowl that you will be mixing the meringue batter in.
- Add the sugar gradually, one Tablespoon at a time, and give it a chance to dissolve before adding more.
- You can test that the sugar is completely absorbed by taking a small bit of the batter and rubbing it between your fingers — if it’s not, it’ll feel gritty.
- Don’t stop until you get stiff peaks. The batter will take several minutes, at least, of beating to achieve stiff peaks, but keep going. It will increase in volume and be very thick and glossy — that’s what you’re looking for! See the photo above or the video for a visual.
- Don’t over-beat your batter, either! Once you hit stiff peaks, stop! You can stir in your extract and any food coloring at this point, but don’t push it because over-beating the batter is just as bad as not beating it enough.
- If you’ve found that your meringues have gotten soft after you finished baking them, you can actually pop them back in the oven at 225F for another 10-20 minutes (watch them, if they begin to turn golden brown around the edges turn off the heat immediately) and then let them cool in the oven for another hour, this has always worked for me with meringues that start to get chewy.

Adding Color and Other Flavoring
Once you get the hang of making meringues, feel free to play with lots of different flavors and colors — I made these Peppermint Bark Meringues by adding 1/4 teaspoon peppermint extract, striping the piping bag with red food coloring (I used a clean paintbrush that I only use for baking), and dipping the baked, cooled meringue cookies in dark chocolate and crushed peppermint pieces!
Enjoy!
More Christmas Treats You Might Like:
Meringue Cookies
Equipment
Ingredients
- 4 large egg whites, room temperature
- ½ teaspoon cream of tartar
- ⅛ teaspoon salt
- 1 cup (200 g) granulated sugar
- 1 teaspoon vanilla extract¹
Instructions
- Preheat oven to 225F (105C) and line a large cookie sheet (or two regular-sized cookie sheets -- make sure they will fit in your oven together) with parchment paper. Set aside.
- Combine egg whites, cream of tartar, and salt in a large, completely clean, completely grease-free bowl².4 large egg whites, ½ teaspoon cream of tartar, ⅛ teaspoon salt
- Using an electric mixer or a stand mixer (with either the whisk or paddle attachment), stir on low speed until mixture becomes foamy.
- Increase speed to high.
- With mixer on high, gradually add sugar, about 1 Tablespoon at a time, stirring after each addition until sugar is dissolved (about 15-20 seconds between each addition).1 cup (200 g) granulated sugar
- Beat until mixture is thick, shiny, and has increased in volume. Mixture should have stiff peaks and sugar should be completely dissolved (you can test this by rubbing a small bit of the mixture between your fingers, if it feels gritty, the sugar isn't dissolved).
- Stir in vanilla extract and any other extract you may like to use. If using food coloring, add the food coloring at this stage, too.1 teaspoon vanilla extract¹
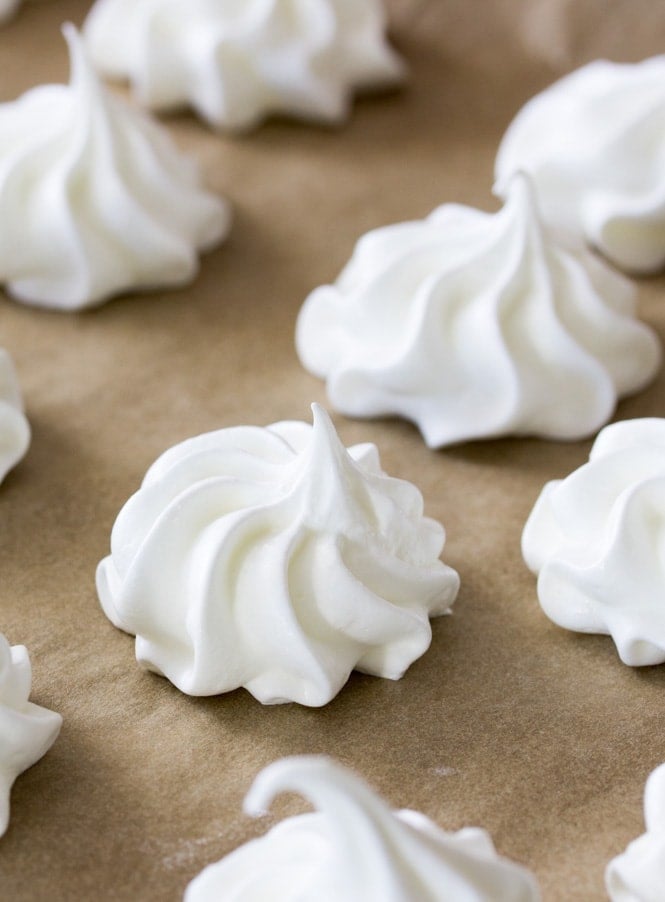
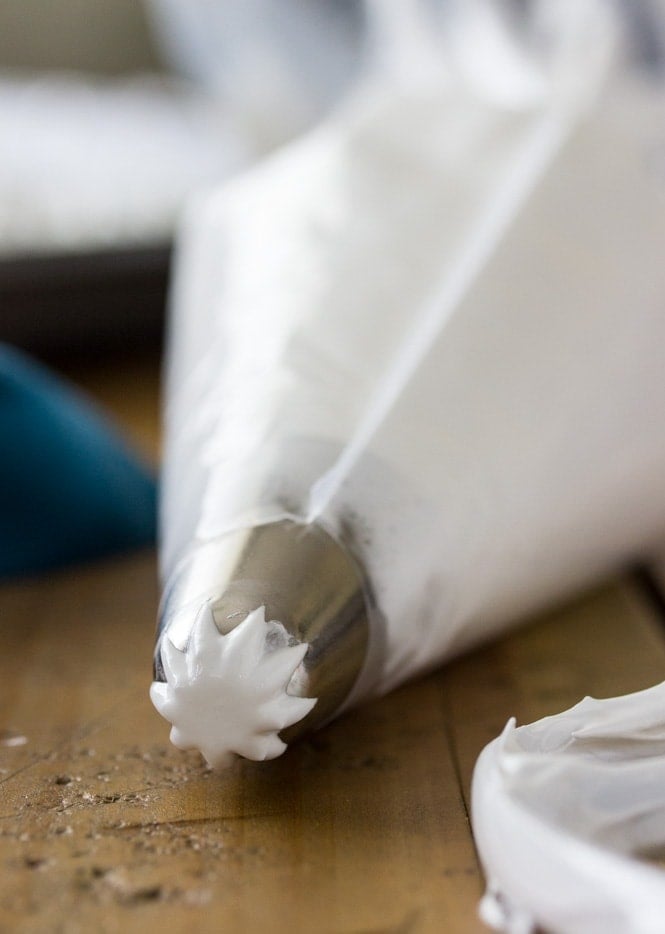
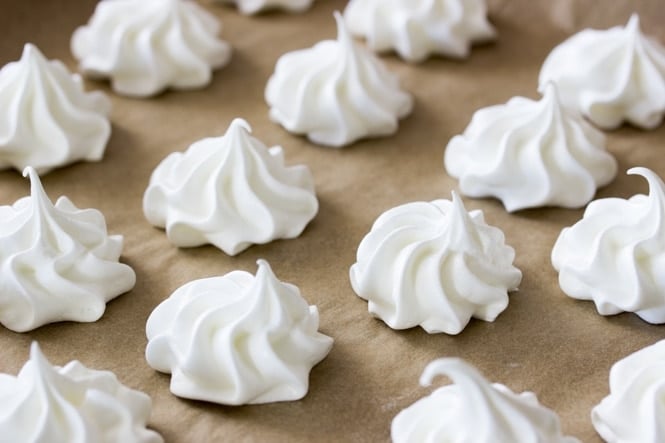
- Fit a large disposable piping bag with a large tip (I used Ateco 846, but any large star tip will work or you can just snip the edge of the piping bag for a “kiss” formation) and transfer meringue to prepared piping bag and pipe onto prepared cookie sheet. The meringue cookies can be pretty close to each other as they won’t spread, and you will want to bake all of the cookies at the same time, so make sure you make enough space.
- Bake on 225F (105C) for 1 hour. Turn off the oven once the baking time has passed, and do not open the oven. Leave the oven door closed and allow cookies to cool completely in the oven (1-2 hours) before removing.
- Meringue cookies should be crisp and can be stored in an airtight container. Keep away from heat and moisture as it can soften your meringues.
Notes
Recipes to use those leftover egg yolks:
Nutrition
Nutrition information is automatically calculated, so should only be used as an approximation.
Like this? Leave a comment below!


Very easy recipe and the merengue cookies are perfect with a nice crunch. I used 1/2t. Of vanilla & a 1/2t. of lavender paste. I also used them like packing peanuts to protect cupcakes while driving. 😄👍
Those sound delicious, Linda! And great idea–how resourceful of you! 😄
This recipe rocks the only thing I’d have to say that would be wrong is that my merengue paste didn’t stiffen up much it was most like a glue consistency and I’m not sure why that is I was mixing for more than 7 minutes other than that they turned out crisp and taste very very good
I’m glad you enjoyed them, Simon! You may have just needed to mix it longer. Sometimes it can take a while. 🙂
I have never made meringue cookies before and I have been making Belgian waffles this week so I saved the whites. I found your recipe looking for ideas for them. This was a super recipe. SO easy to follow and they came out perfect. I can’t believe it. I also can’t believe I have never made meringue lol. I felt so proud of myself when I made them and they came out so beautifully. My mother used to make Lemon Meringue pie. I’m going to do that next. IF you have a recipe for it, I am going to search for yours first :). I am also going to try your Nilla Wafers this weekend too. Thank you again.
I’m so glad you enjoyed it so much, Dana! I have been working on a lemon meringue pie, but haven’t quite perfected it yet. 🙂
Meringues are such lovely and joyful treats. I halved this recipe to make a batch of lemon and then almond meringues with gel food coloring for extra whimsy. Using different sugar in each batch, I didn’t achieve a perfect consistency. Despite thinking I was incorporating slowly, there was still some graininess. But they were still cute and yummy treats for my gluten free guests. Next time i’ll try to source super fine sugar and try again.
the recipe was good in general but it took way over an hour to cook fully, it took about 2 hours and 30 minutes to fully cook, not sure why this happens
Do you think it’s ok to use protein powder for sweetness, rather than sugar?
Unfortunately I don’t think that’s going to work quite the same here. 🙁
I have made Meringue several times over the years, this is by far the easiest and consistent meringue recipe I have used. Thank you!
That’s so nice to hear, Dario! Thanks so much for your review 😊
I followed another recipe today and they didn’t keep their shape. I found this recipe and followed my cookies turned out perfect. The only thing I can think that made my first recipe fail is that I had the tiniest bit of yoke when I separated the eggs. Also, my cream of tartar was old. Maybe that made it fail ??? But then I followed this recipe; They kept their shape wonderfully. The texture and taste were much better than my batch from the other recipe, both my family and I agreed on this. This recipe is a keeper. Thank you so much for sharing! xoxoxo
Both of the things you mentioned definitely could’ve caused the first recipe to fail. 🙁 We’re happy that failure led you to our recipe though! Thanks so much for coming back to leave a review, Gayle! Enjoy your cookies ❤
THIS TOTALLY WORKED! I made about 60-80 and my family will likely finish them all by the end of the day. For me, I had to re-bake the cookies to fix the chewiness, but I was glad to come here and have the troubleshooting tips. I will make them again this weekend when I make another batch of lemon curd too. I will end up baking them longer than originally asked for or use convection. I second the 1-2 hour rest time, and I would even go as far as to say if you have 2 ovens, leave them in overnight if your home isn’t humid. I took mine out after 2 bakes and a long rest, then put in an OXO storage container and they were AMAZING the next day. this is a keeper. thank you!
We’re so happy you found the post helpful, Ryan! Thanks for your review–enjoy your cookies (if there are any left!) 😊
I’ve made this recipe a couple times now, and it works great. I made it the first time a few months ago with/for my grandkids ~ pink food coloring and peppermint extract. Everyone loved them. And yesterday I made three batches with adult flavors: lemon (extract)/ginger (powder), cardamom (powder) and almond (extract). All delicious. I might try using lemon zest instead of the extract next time. I’m not a fan of lavender, but others might like it. Hmmmm…. chile powder? Might be yummy.
They all sound absolutely delicious, Jenny! We’re so happy you are enjoying our recipe ❤
It did not work out and ended up just super runny, is there a way I can fix this?
I’m so sorry to hear this, Hailey! If your meringue was too runny it may have needed to be whipped more. Did your meringue make it to stiff peaks? If you haven’t baked it and haven’t over-beaten it I would say just keep mixing. I hope that helps. 🙂
Yesterday, I followed a different recipe for Meringue Cookies and they came out cracked and did not keep their piped form well. Today, I followed your recipe, video, and hints to the “T” and my meringues came out absolutely beautiful. They piped so well, too. I will only use your recipe and pointers from now on. Thank you so much for a great recipe and tips.
We are so happy our recipe did the trick, Martha! Thanks so much for coming back to leave a review. We can’t wait to hear what else you bake 😊
Hi, would I be able to fold in super crushed Oreos into the batter right at the end? Thanks!!
They would probably have to be really really small pieces but that should work. 🙂
I’ve done this before but I crushed it with the cream and my meringue deflated. Then next batch I took the cream out and crushed just the cookie and it was so good!!
Thank you !!! Finally a meringue recipe that really works
easy to make and delicious
We’re so happy our recipe was a winner for you, Alicia! Thanks for your review ♥
Hi! I just put a batch in the oven, but still have a good amount of batter left. Would it be possible to refrigerate or freeze it for future use?
Hi Ann! The batter will eventually deflate after some time in the fridge, but it should be fine while your first batch bakes. Hope that helps 🙂
Can I add almonds (and/or coconut) to this recipe?
Thanks!
Hi Andy! You can fold them in at the end. 🙂
Can these be frozen?
Hi Darcy! Yes! You will want to make sure to put them in airtight containers and use wax paper to separate the layers. The best way to thaw them would probably be placing them on a wire rack in a non-humid environment and eat them shortly after they are thawed (thawing shouldn’t take much more than an hour). You really don’t want them to sit out and risk absorbing any moisture. Hope that helps! 🙂