
Marble Cake
This post may contain affiliate links. As an Amazon Associate I earn from qualifying purchases. Please read my disclosure policy.
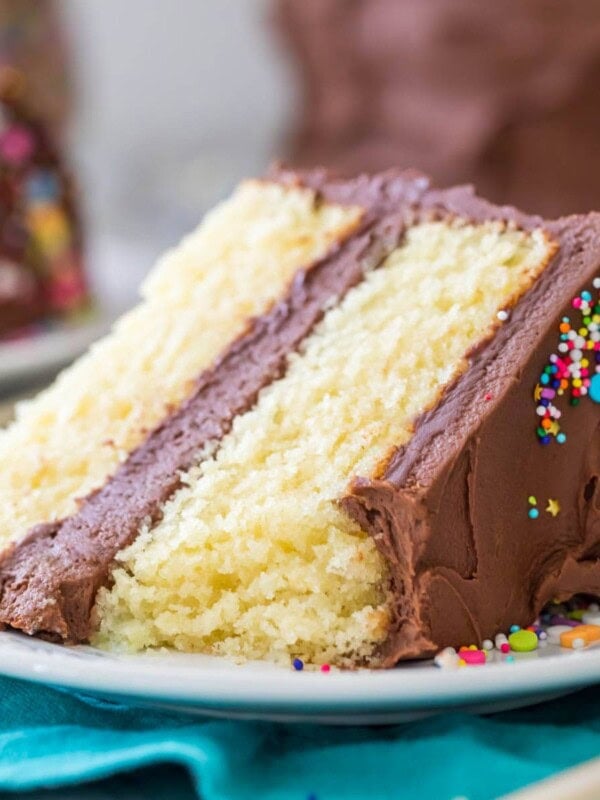
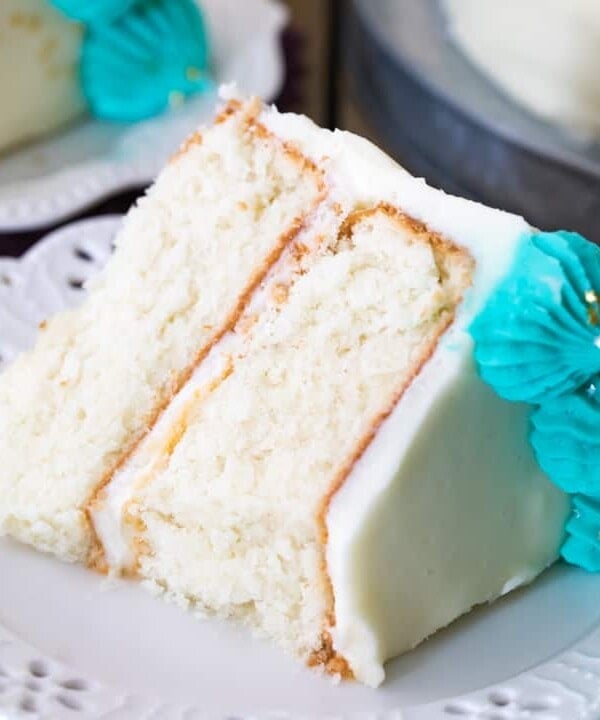
The ultimate people pleaser, this soft, fluffy, moist Marble Cake is a swirled masterpiece of vanilla and chocolate. This cake is shockingly easy to make and tastes as good as it looks! Recipe includes a how-to video.

Marble Cake (AKA: The People Pleaser)
Some people like chocolate cake, some people like vanilla cake–but everyone loves this marble cake!
It’s a beautiful, swirled combination that’s perfectly chocolatey with just the right amount of vanilla. If you’ve tried and enjoyed my zebra cake, you’ll love this richer, more elegant take, minus the whipped egg whites and special ingredients. It’s simple, gorgeous, and designed to please!
This recipe is a close cousin to my popular vanilla cake; it’s wonderfully soft, moist, and so flavorful. When developing this recipe, I originally toyed with the idea of making two separate batters, but ultimately decided it was too much of a hassle. That technique produced many more dishes and a much larger mess, and the cakes didn’t bake as evenly together as I would’ve liked. After a dozen more rounds of testing, I finally figured out a way to keep things simple with one batter for both flavors.
You’ll love my recipe because it’s:
- Perfect for parties–everyone is happy!
- Soft, fluffy, and moist.
- Simple to make with just one batter.
- Cloaked with a thick and fudgy chocolate frosting (just one of many options–more below!)
What You Need
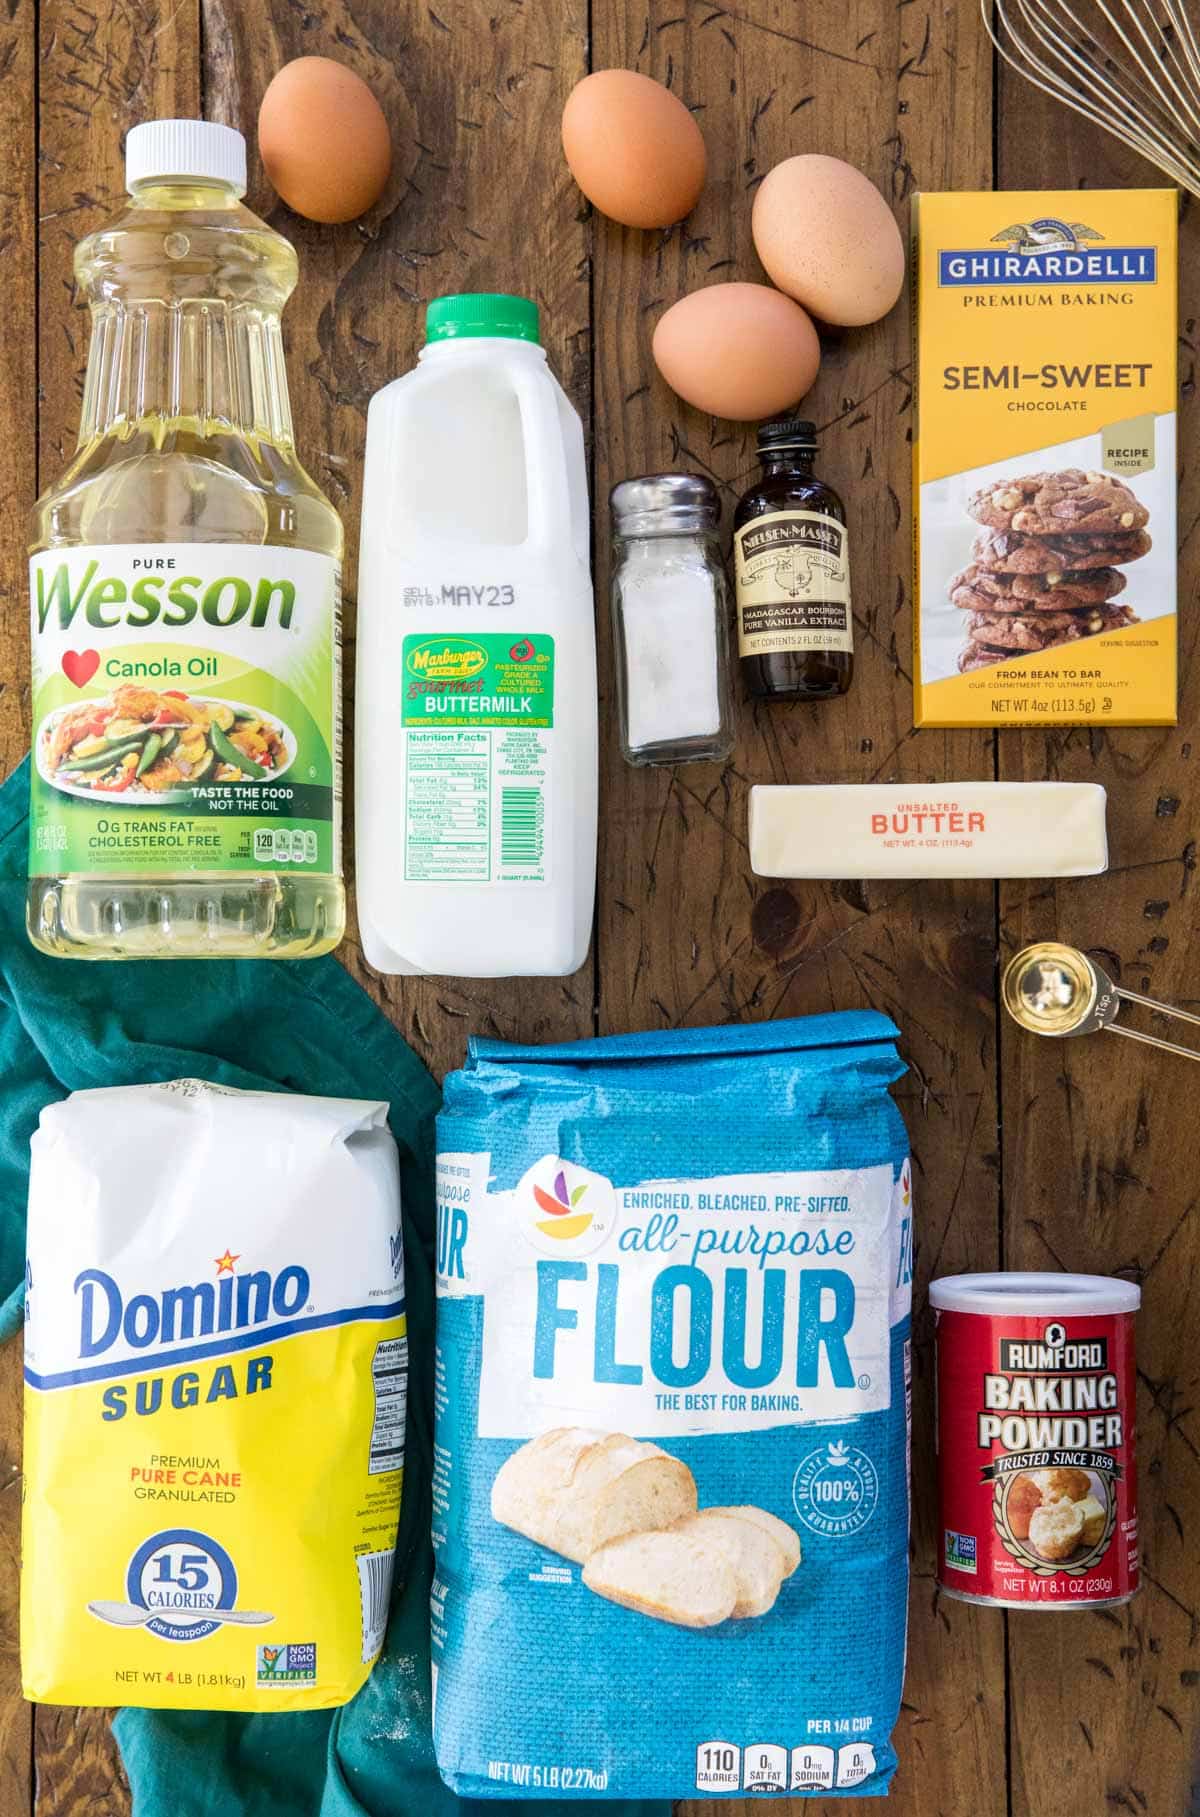
This marble cake uses basic ingredients you’ll already have on hand. Let’s go over a few of the key players:
- Butter and oil. Butter adds flavor that you would miss from using just oil, and oil adds moisture that you would miss if you only used butter.
- Flour. I use all-purpose, but cake flour may be substituted; see the notes below the recipe card.
- Baking powder. A tablespoon may seem like a lot. It’s not a typo, trust me on this one 😉.
- Buttermilk. Yes, even though we aren’t using baking soda (which is often used alongside buttermilk, if you recall my buttermilk substitute post), we are still using buttermilk. It adds flavor and moisture to the marble cake.
- Chocolate. Adding cocoa powder didn’t give me the deep, distinct chocolate flavor that I was looking for (largely because we aren’t adding any hot water to bloom it, like in my chocolate cake recipe), but adding melted semisweet chocolate did the trick. You can use semisweet or dark chocolate here depending on your preference.
SAM’S TIP: If you only have salted butter on hand, you can reduce the salt in the recipe to ½ teaspoon.
Remember, this is just an overview of the ingredients I used and why. For the full recipe please scroll down to the bottom of the post!
How to Make Marble Cake
- Heat your chopped chocolate in the microwave until it’s smooth and melted, then set aside.
- Cream the butter, oil, and sugar until fluffy, then stir in the eggs one at a time. Add the vanilla.
- Combine the dry ingredients in a separate bowl, then alternate adding this mixture and the buttermilk to the wet ingredients, starting and ending with the dry ingredients.
- Portion ⅓-½ of the batter into a separate bowl and add stir in the melted chocolate until uniform.
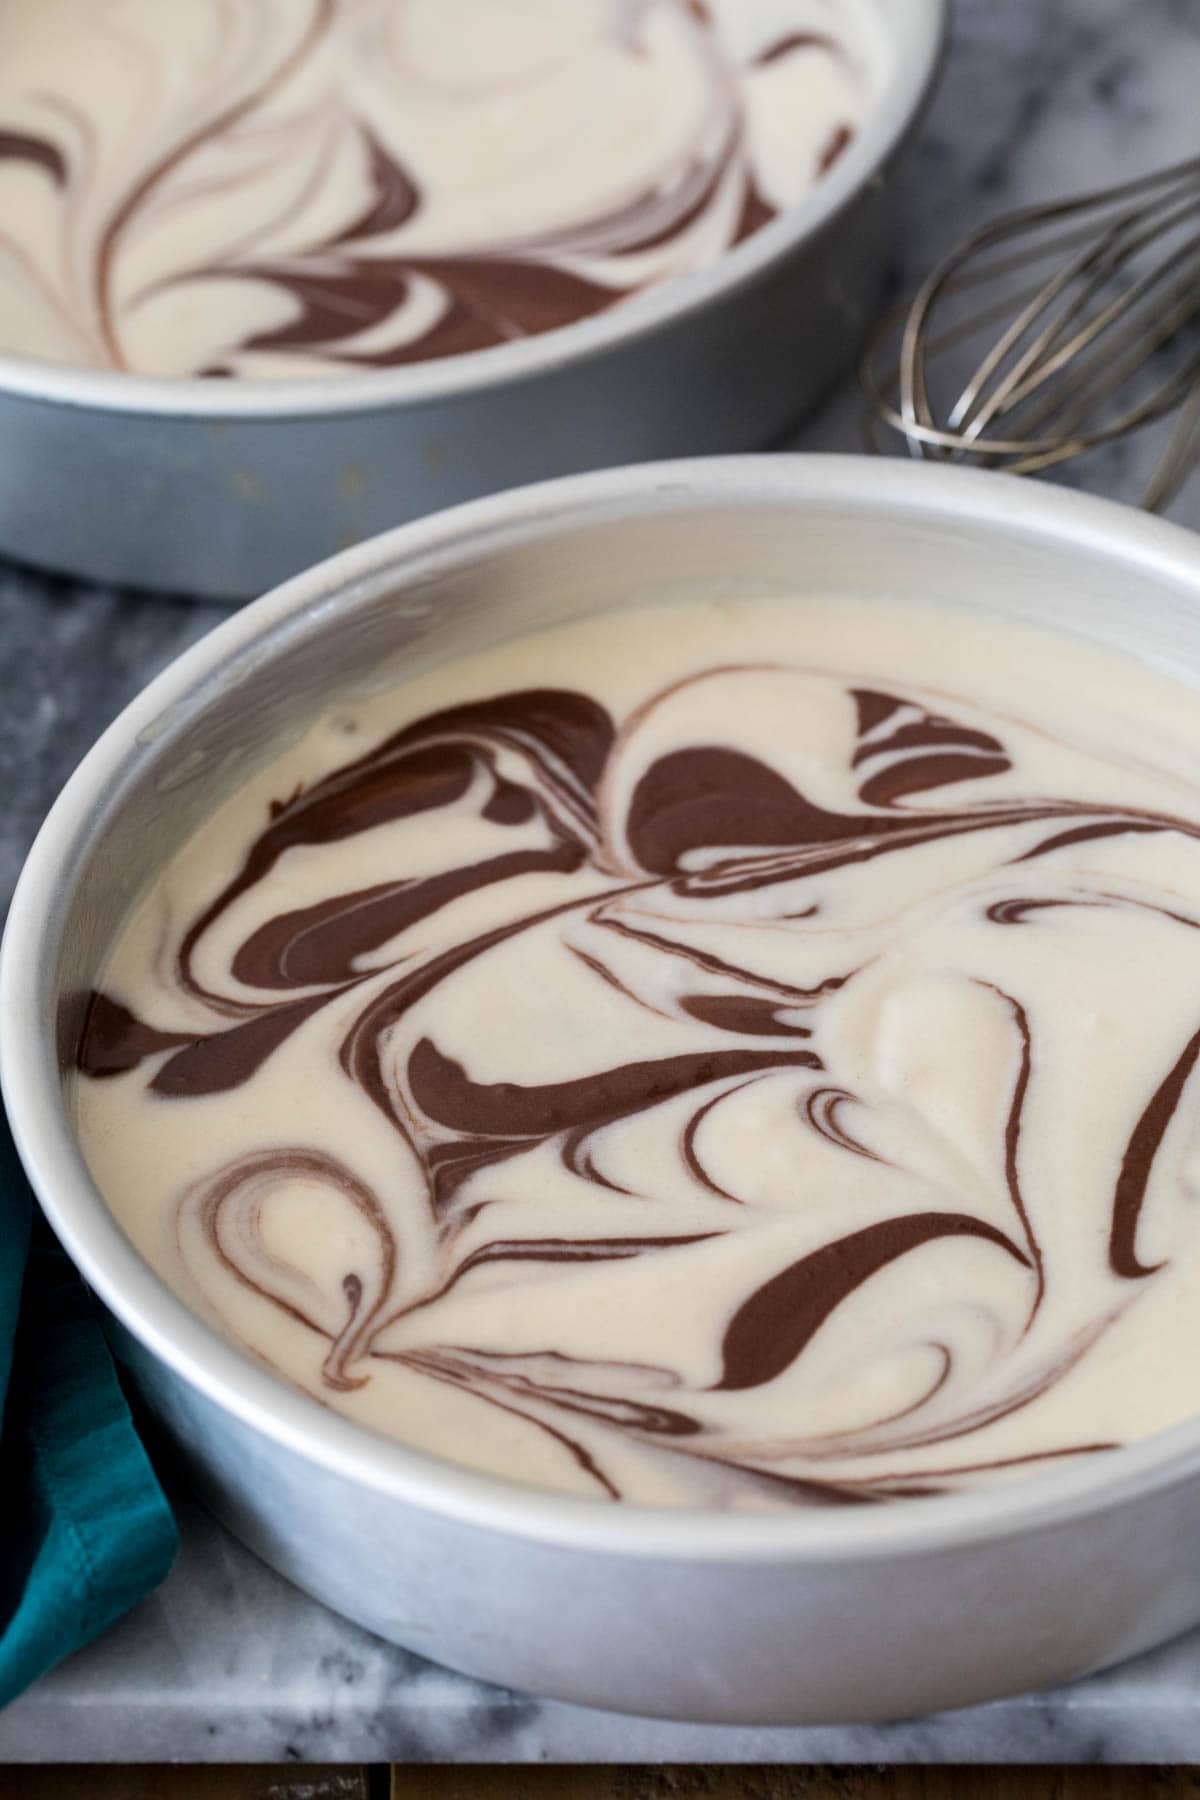
- Alternate adding the vanilla and chocolate batter into your pans, then swirl them with a knife for a marbled appearance.
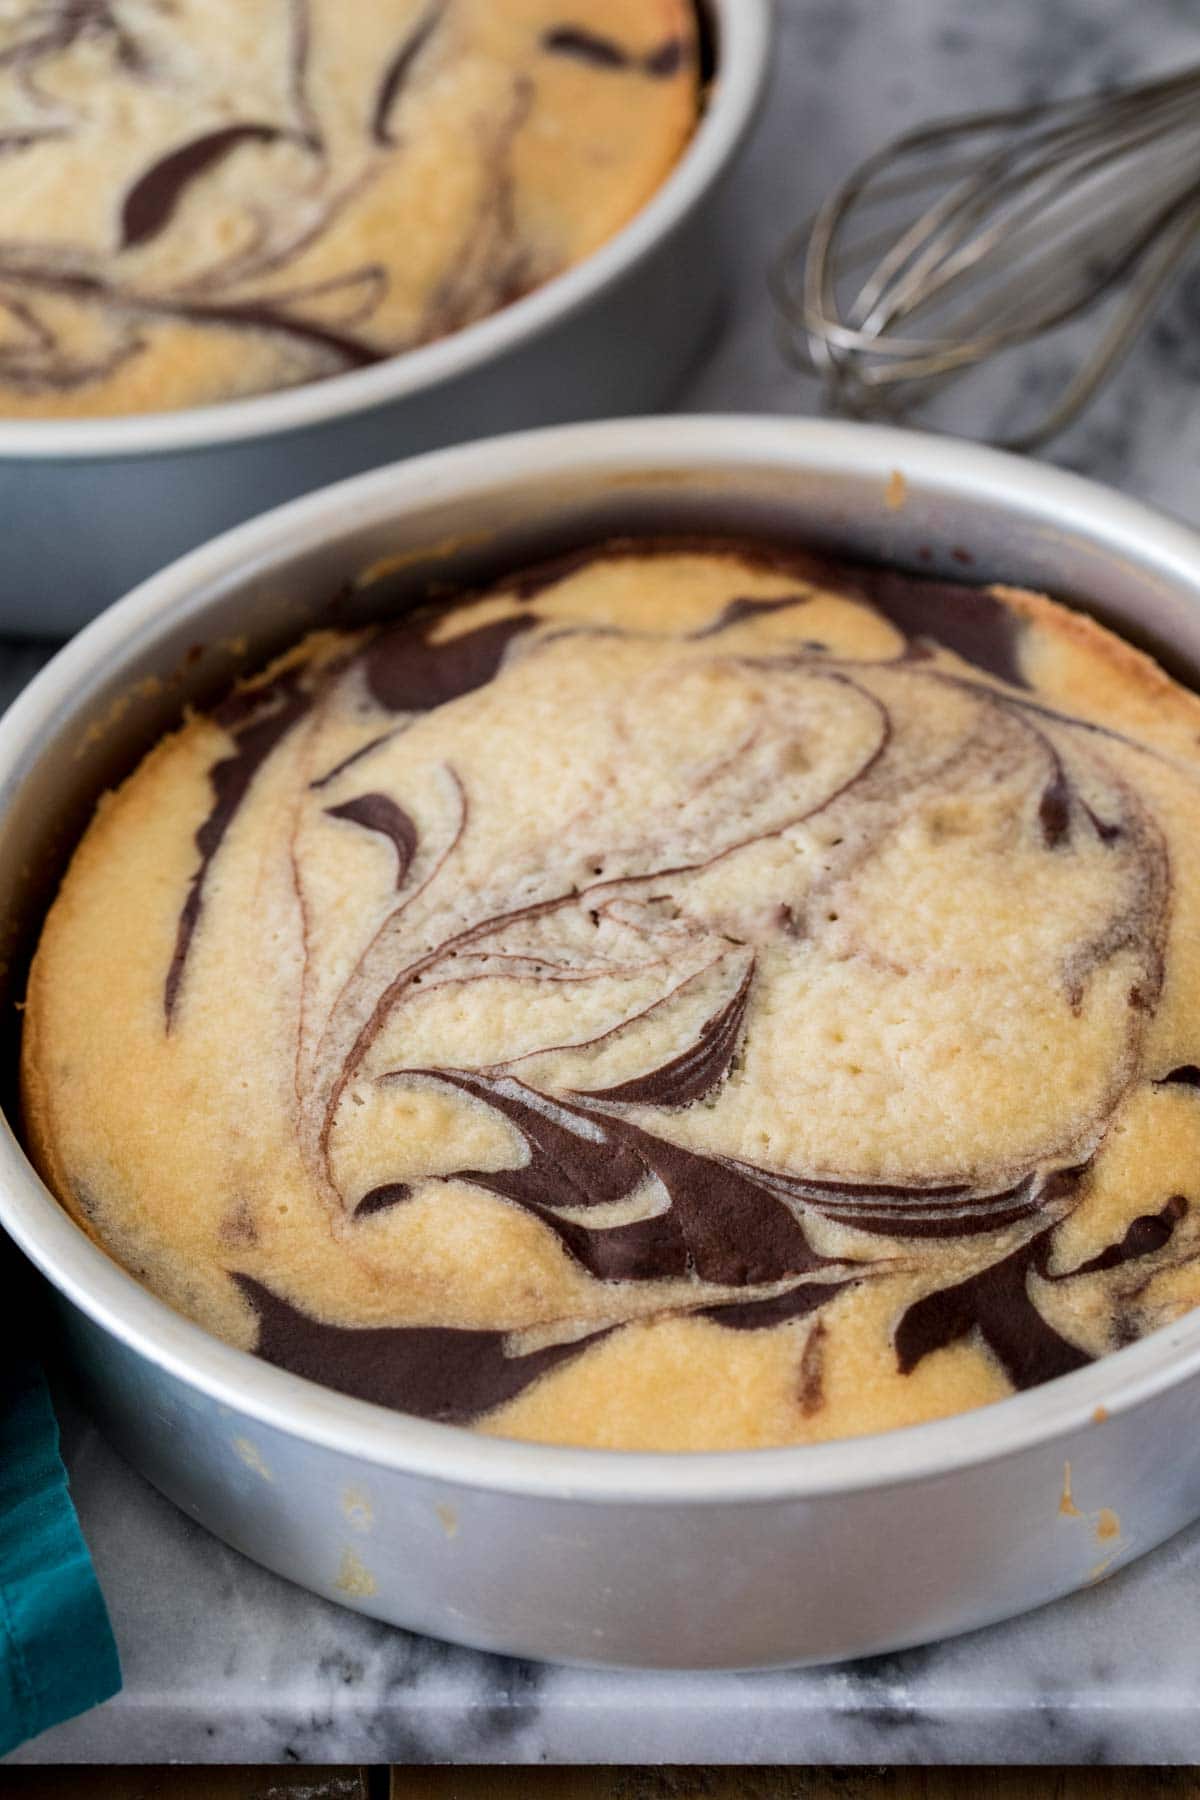
- Bake your cakes for 30 minutes, let them cool in their pans for 15 minutes, then invert them onto a cooling rack to cool completely before frosting.
SAM’S TIP: You can also reverse-cream this marble cake (the technique I used in my caramel cake) for a plush, dense crumb. If you often accidentally over-mix your cakes, it’s almost impossible to do so with the reverse-creaming method.
Frequently Asked Questions
I like using my favorite chocolate frosting (though in the video I used my chocolate buttercream; either will work!). If you’re looking for a vanilla option, my classic buttercream frosting, cream cheese frosting, Swiss meringue buttercream, or German buttercream would work well.
There are a few causes for a dry cake, but the main reasons are over-measuring your flour, overmixing, or overbaking.
I use a kitchen scale to measure my ingredients to avoid over-measuring my flour, as this is a very common mistake. I suggest you do the same! Once you begin combining the dry and wet ingredients, you want to be very careful to mix until just combined–and don’t use a mixer. Finally, you want to bake your marble cake until a toothpick comes out clean, or preferably, with a few moist crumbs; many ovens run hot though, so you’ll want to start checking your cake a few minutes before it should be done.
Follow these tips and your marble cake should turn out perfectly moist every time!
Store your marble cake in an airtight container. I recommend keeping it at room temperature, where it will keep for 2-3 days (so long as it isn’t a particularly humid environment). This cake may be refrigerated (again, in an airtight container) and will keep for about 5-7 days in the fridge–BUT, keep in mind that the refrigerator will dry out your cake, even in a container.
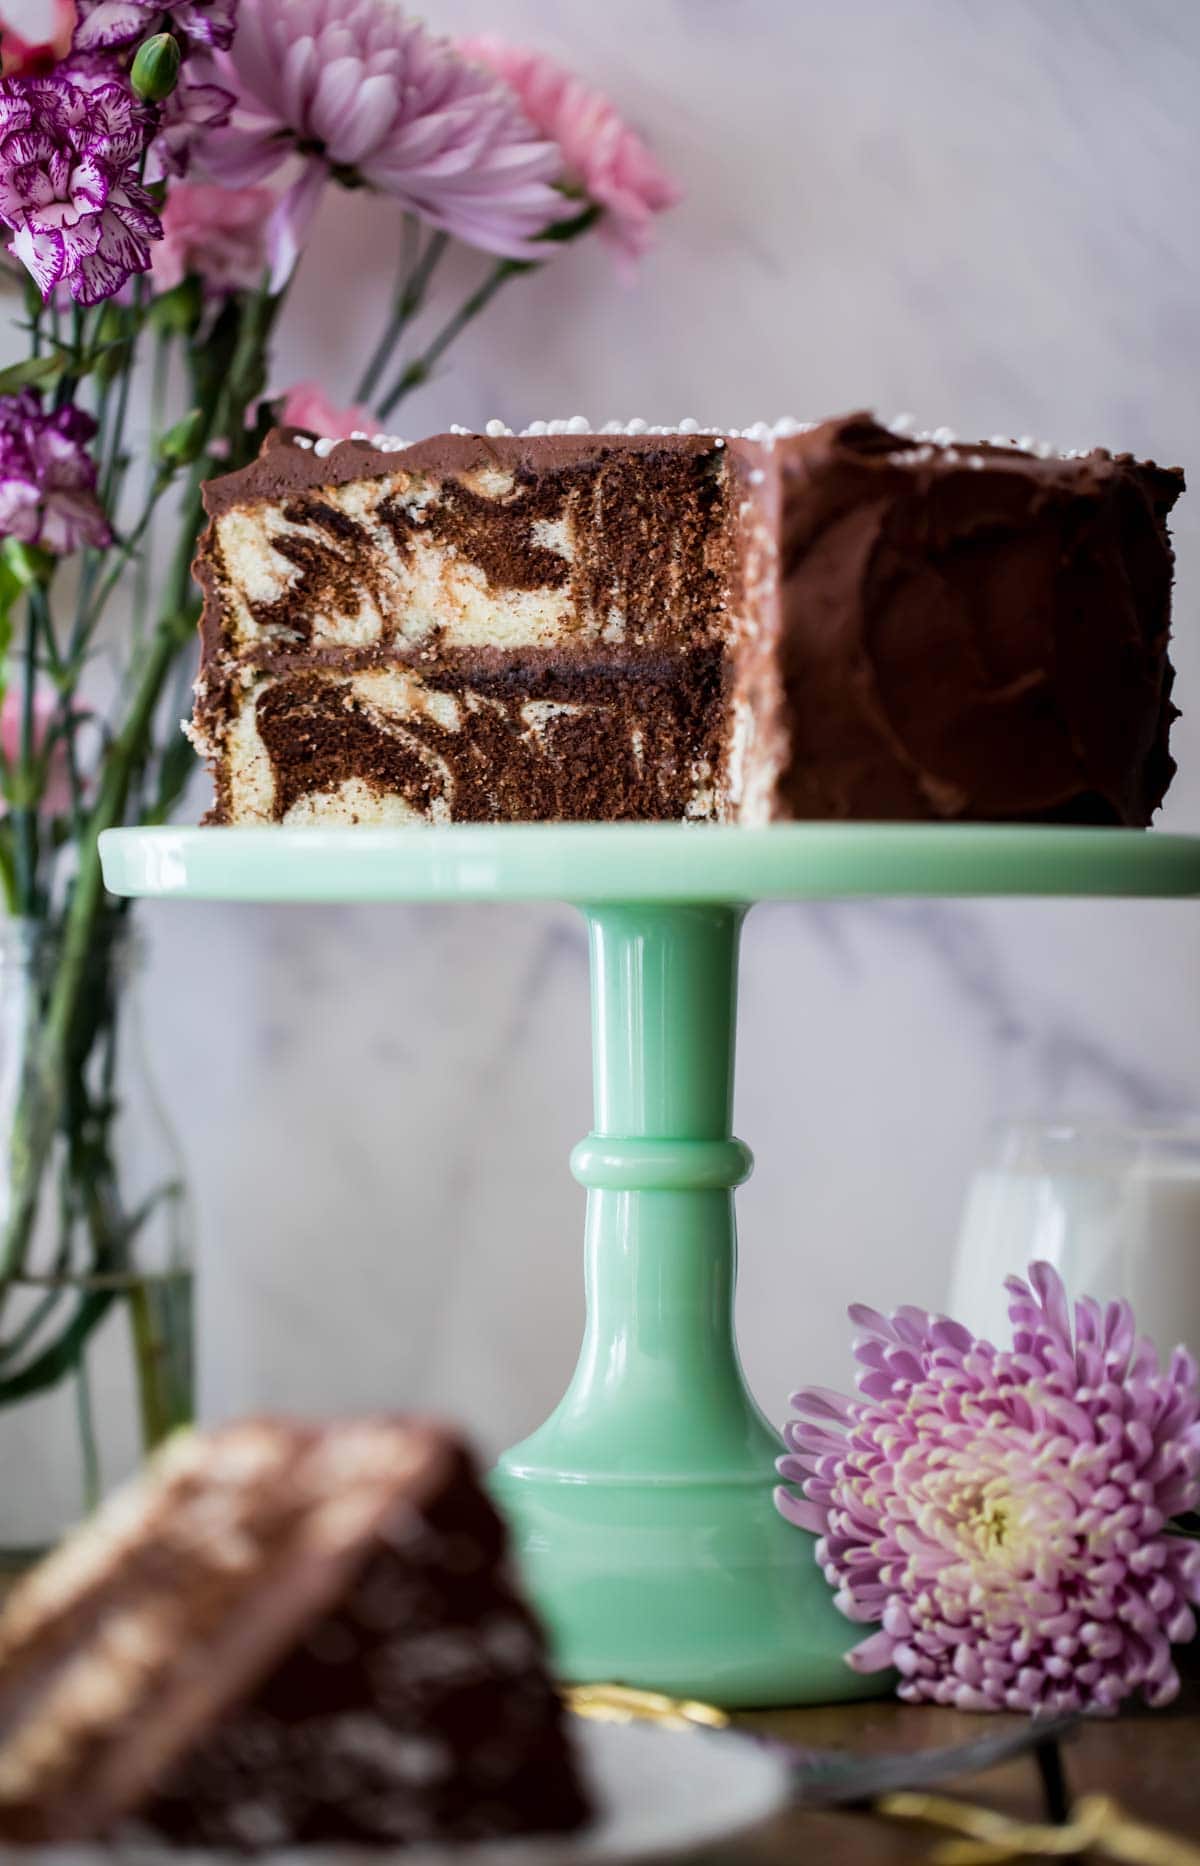
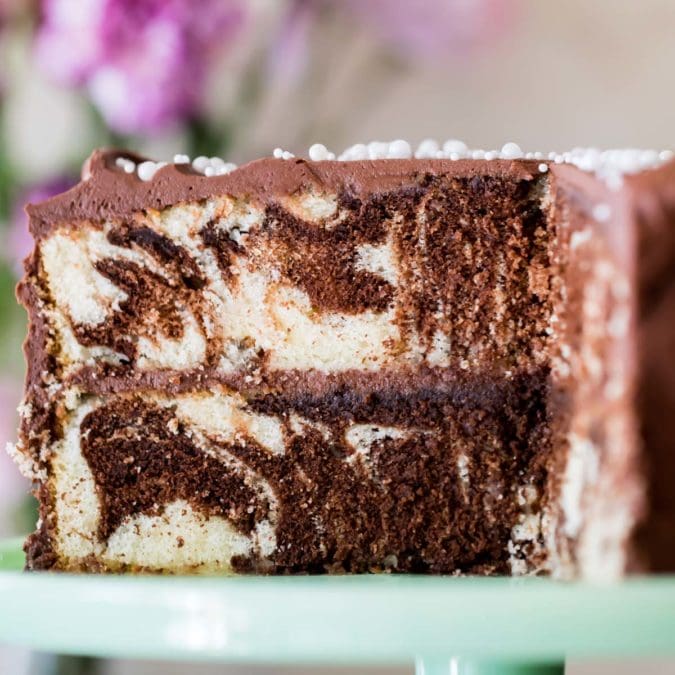
It’s always exciting to see the beautiful swirls when you cut into a marble cake!
Enjoy!
Let’s bake together! I’ll be walking you through all the steps in my written recipe and video below! If you try this recipe, be sure to tag me on Instagram, and you can also find me on YouTube and Facebook
Marble Cake
Equipment
Ingredients
- 4 oz semisweet chocolate bar, finely chopped
- ½ cup (113 g) unsalted butter, softened
- ½ cup (120 ml) avocado, vegetable, or canola oil
- 1 ¾ cup (350 g) granulated sugar
- 4 large eggs, room temperature preferred
- 2 teaspoons vanilla extract
- 3 cups (375 g) all-purpose flour
- 1 Tablespoon baking powder
- ¾ teaspoon salt
- 1 ¼ cup (300 ml) buttermilk, room temperature preferred
Chocolate Buttercream Frosting (see post for more frosting options)
- 1 cup (170 g) semisweet chocolate chips
- 1 cup (226 g) unsalted butter, softened to room temperature
- 2 cups (320 g) powdered sugar
- ½ teaspoon vanilla extract
- ½ teaspoon salt
- 2 Tablespoons heavy cream
Instructions
- Preheat oven to 350F and generously grease and flour two 8" round cake pans (you may instead use 9" pans, just keep in mind you will need to bake the cake for about 5 minutes less than indicated). Set aside.
- Place chopped chocolate in a microwave-safe bowl and microwave for 30 seconds. Stir well, and then return to microwave and heat in 15-second increments, stirring well in between, until chocolate is completely melted and smooth. Set aside.4 oz semisweet chocolate bar
- Using an electric or stand mixer, cream together butter, oil, and sugar until light and fluffy (about 30 seconds on high speed).½ cup (113 g) unsalted butter, ½ cup (120 ml) avocado, vegetable, or canola oil, 1 ¾ cup (350 g) granulated sugar
- Add eggs, one at a time, beating well after each addition. Pause as needed to scrape down sides and bottom of bowl.4 large eggs
- Stir in vanilla extract.2 teaspoons vanilla extract
- In a separate, medium-sized bowl, whisk together flour, baking powder, and salt.3 cups (375 g) all-purpose flour, 1 Tablespoon baking powder, ¾ teaspoon salt
- Using a spatula and gently hand-mixing, alternate adding flour mixture and buttermilk to the butter/oil batter, starting and ending with flour mixture and mixing until just combined after each addition. Do not overmix!1 ¼ cup (300 ml) buttermilk
- Pour ⅓-½ of the batter into a separate bowl and add chocolate mixture. Stir until completely combined and batter is evenly chocolate.
- Alternate adding vanilla and chocolate batter to each pan, evenly distributing batter into each pan. Use a knife to swirl for marbled appearance.
- Bake on 350F (175C) for 30 minutes, or until toothpick inserted in center comes out mostly clean but with a few moist crumbs (do not over-bake or the cake will be dry, you want there to be a few crumbs).
- Allow cake to cool for 15 minutes before carefully inverting onto cooling rack to cool completely before frosting.
Chocolate Frosting¹
- In a microwave-safe bowl, microwave chocolate chips at 15 second intervals, stirring between intervals, until chips are completely melted. Set aside and allow to cool slightly (about 10 minutes, stirring occasionally).1 cup (170 g) semisweet chocolate chips
- Cream room temperature butter with an electric mixer. Stir in slightly cooled chocolate and beat well.1 cup (226 g) unsalted butter
- Gradually add sugar, scraping down the sides and bottom of bowl occasionally.2 cups (320 g) powdered sugar
- Sprinkle in salt and vanilla extract, stir well.½ teaspoon vanilla extract, ½ teaspoon salt
- Gradually add heavy cream, increase speed to high and beat for 1 minute.2 Tablespoons heavy cream
- Spread a thick layer of frosting over the top of one cake round and sprinkle with mini chocolate chips. Top with second cake round and evenly frost cake. Slice and serve.
Notes
Cake Flour
Cake flour may be substituted. If using weights, use the same weight indicated in the recipe. If using cups you will need to use 3 cups + 6 Tablespoons of cake flour (cake flour is lighter than all purpose, which is why the weight is the same but the volume is different).Storing
Store cake in an airtight container at room temperature for up to 2 days or in the refrigerator for up to 5 days. Keep in mind the refrigerator tends to dry out cakes and make them a bit dry!Troubleshooting
A cake that turns out dense, dry, or crumbly (or tasting like cornbread) was most likely over-mixed, the flour was over-measured, or the cake was over-baked. When mixing wet and dry ingredients together, do not use an electric mixer, use a spatula and a gentle hand to stir ingredients together until combined. If you are not using a scale for this recipe, please see my tutorial on how to measure flour. When baking, always bake in the center rack. Make sure that your oven is not running hot, as many ovens run much hotter or cooler than indicated. Keep an oven thermometer near the center of your oven to monitor the temperature, as an oven that runs hot will cook a cake too fast and dry it out. Use the toothpick test to test if your cake is done. Ideally a toothpick inserted in the center of the cake should come out with a few moist crumbs (but not wet batter). If the toothpick comes out completely clean, the cake is definitely done baking and may be bordering on being over-baked.Nutrition
Nutrition information is automatically calculated, so should only be used as an approximation.
Like this? Leave a comment below!

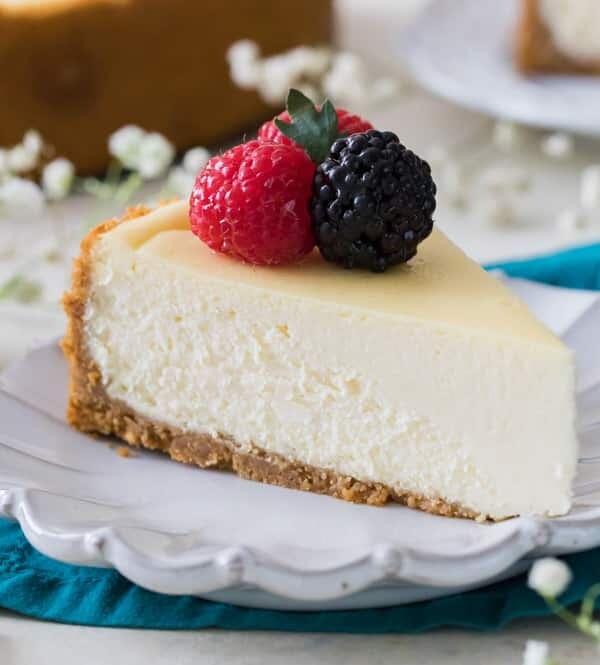


I just recently stumbled upon your site and just LOVE it! You do a fantastic job explaining your recipes and giving great, helpful hints. I tried your pineapple upside down cake and your pumpkin cheesecake recipes, both were extraordinary and are now family favorites. You are so lovely and your videos are wonderful. Best to you and your husband and baby to come or maybe already arrived?
Thank you so much, Debi! He actually arrived a little while ago. He’s a very happy, healthy baby. I’m glad you have enjoyed everything so much! Happy baking. 🙂
Delicious marble cake. Will definitely be making again.
I am so glad you enjoyed it so much, Jill! 🙂
the cake was fantastic! I made it for our Hamilton watch party, since it came out on Disney plus. the frosting could stand to have a richer, deeper chocolate flavor, so I added some cocoa powder. I mixed the cake just enough, and the texture was so incredibly soft and light. My whole family loved this marble cake.
I am so glad you enjoyed the cake so much, Clara! 🙂
Hi Sam! We were working with this recipe and I dont think the instructions noted when to add the creamed butter, oil and sugar? We followed the instructions and weren’t sure when to put that in so now our batter is lumpy 🙁
Hi Megan! I added a note to make it a little more clear. See step 7. 🙂
Hello, I am in Colorado and wanted to know what changes (if any) I should make for high altitude. Thanks!
Hi Nathan! Unfortunately I am completely unfamiliar with high altitude baking, I am hoping someone else can chime in with a suggestion.
Hello Nathan! I live up on a mountain (nearly 2,000 ft) in TN, not quite as high as Colorado’s mountains, but adjustments are usually in the baking time only for me. Anything over 3,000 needs more adjusting. Here’s a link, hope it’s helpful. https://www.allrecipes.com/article/high-altitude-cake-baking/
Can this cake be made into cupcakes? If so, what should I do differently ?
It may be a little difficult to swirl it but it will still work as cupcakes. I’m not sure what the baking time would be.
Generally speaking, when making cake to cupcakes they usually have a similar bake time. I start watching them about 7-10 min before the cake would normally be done.
Can i use cocao powder instead of a bar?
Hi Chitrini! I wouldn’t recommend cocoa powder here. I tried many different versions and the cocoa powder versions always came out kinda dry.
Halfed the recipe but ended up adding less milk and a bit more flour to get the same consistency as shown in the video the cake, turned out good taste wise but my cake cracked from the top. dont know what I did wrong
I’m so sorry it cracked! It sounds like you needed more moisture in the cake; reducing the milk and increasing the flour probably caused the crack. I hope this helps! 🙂
But that would have made the mixture really thin, similar to that of a chocolate cake mix
It really shouldn’t. Check the video for the consistency it should be. 🙂
Hello! I’m so excited to try this recipe! I’m using 2 6in pans, how long should I keep those in the over for?
Thankyou 🙂
Hi Jay! You will have some extra batter if cooking them in 6 inch pans. Make sure to not overfill the pans. I am not sure how long it would need to bake but just keep an eye on it. 🙂
My family loved this cake!! I think what helped me make this a success was watching your video. I typically throw all of the flour and liquid in my stand up mixer and mix away. Taking the time to fold in the buttermilk and flour was the key to this moist cake! Thank you, this is a keeper.
I am so glad you enjoyed it so much, Deb! 🙂
Hi i backed this cake and couple of issues…
1. The batter was very lumpy when I paddle mixed dry and wet ingredients towards end… I had to use the electric blade mixer to make it even.
2. The cake turned out very oily… The same happened with your recipe of your chocolate cake.. Extremely oily though i measured everything to the T and double checked…
Whats going wrong????!!!
Hi Chitra! I am SO sorry for the delayed response. It sounds like you may be over-mixing the batter a little too much. The batter will probably still be a little lumpy when you get everything combined. It is just the nature of cake making. I would try not mixing it so much next time. Again, I apologize for the delayed response. 🙁
This is one of the best cakes I’ve ever made! My family wants this as their birthday cake now. The video was really, really helpful. I think I would have over-mixed without watching the video. I can’t wait to make this again! Thank you for the recipe!!
I am so glad everyone loved it so much, Elle! I’m glad the video was helpful for you. 🙂
In your video you hand mixed all the ingredients but I noticed in the printed recipe you use a stand mixer. Is that an error? I am making this cake for someone else and want to make sure this is done correctly.
Thank you.
Hi Pam! You can use an electric or a stand mixer, either is completely fine. Starting at step 7 you will want to switch to only stirring by hand, and take care to not overmix. I hope that helps!
Delicious, recipe came out perfectly!!!
I am so glad you enjoyed it, Dima! 🙂
I loved it so much thank you for sharing this recipe!! But I was also wondering if it’s 770 kcal per slice or for the whole cake? thanks! <3
Hi Jocelyn! The calories listed are per serving. 🙂