
Madeleines (the Best, Easiest Recipe, with Video!)
This post may contain affiliate links. As an Amazon Associate I earn from qualifying purchases. Please read my disclosure policy.

No resting, no tricky technique, just perfect, golden, light & airy Madeleines in under 30 minutes! I’m so proud to be sharing my recipe with you today, after weeks of testing I finally have a recipe for the best little butter cakes I’ve ever tasted and you won’t believe how easy they are! Includes a how-to video in the recipe card!
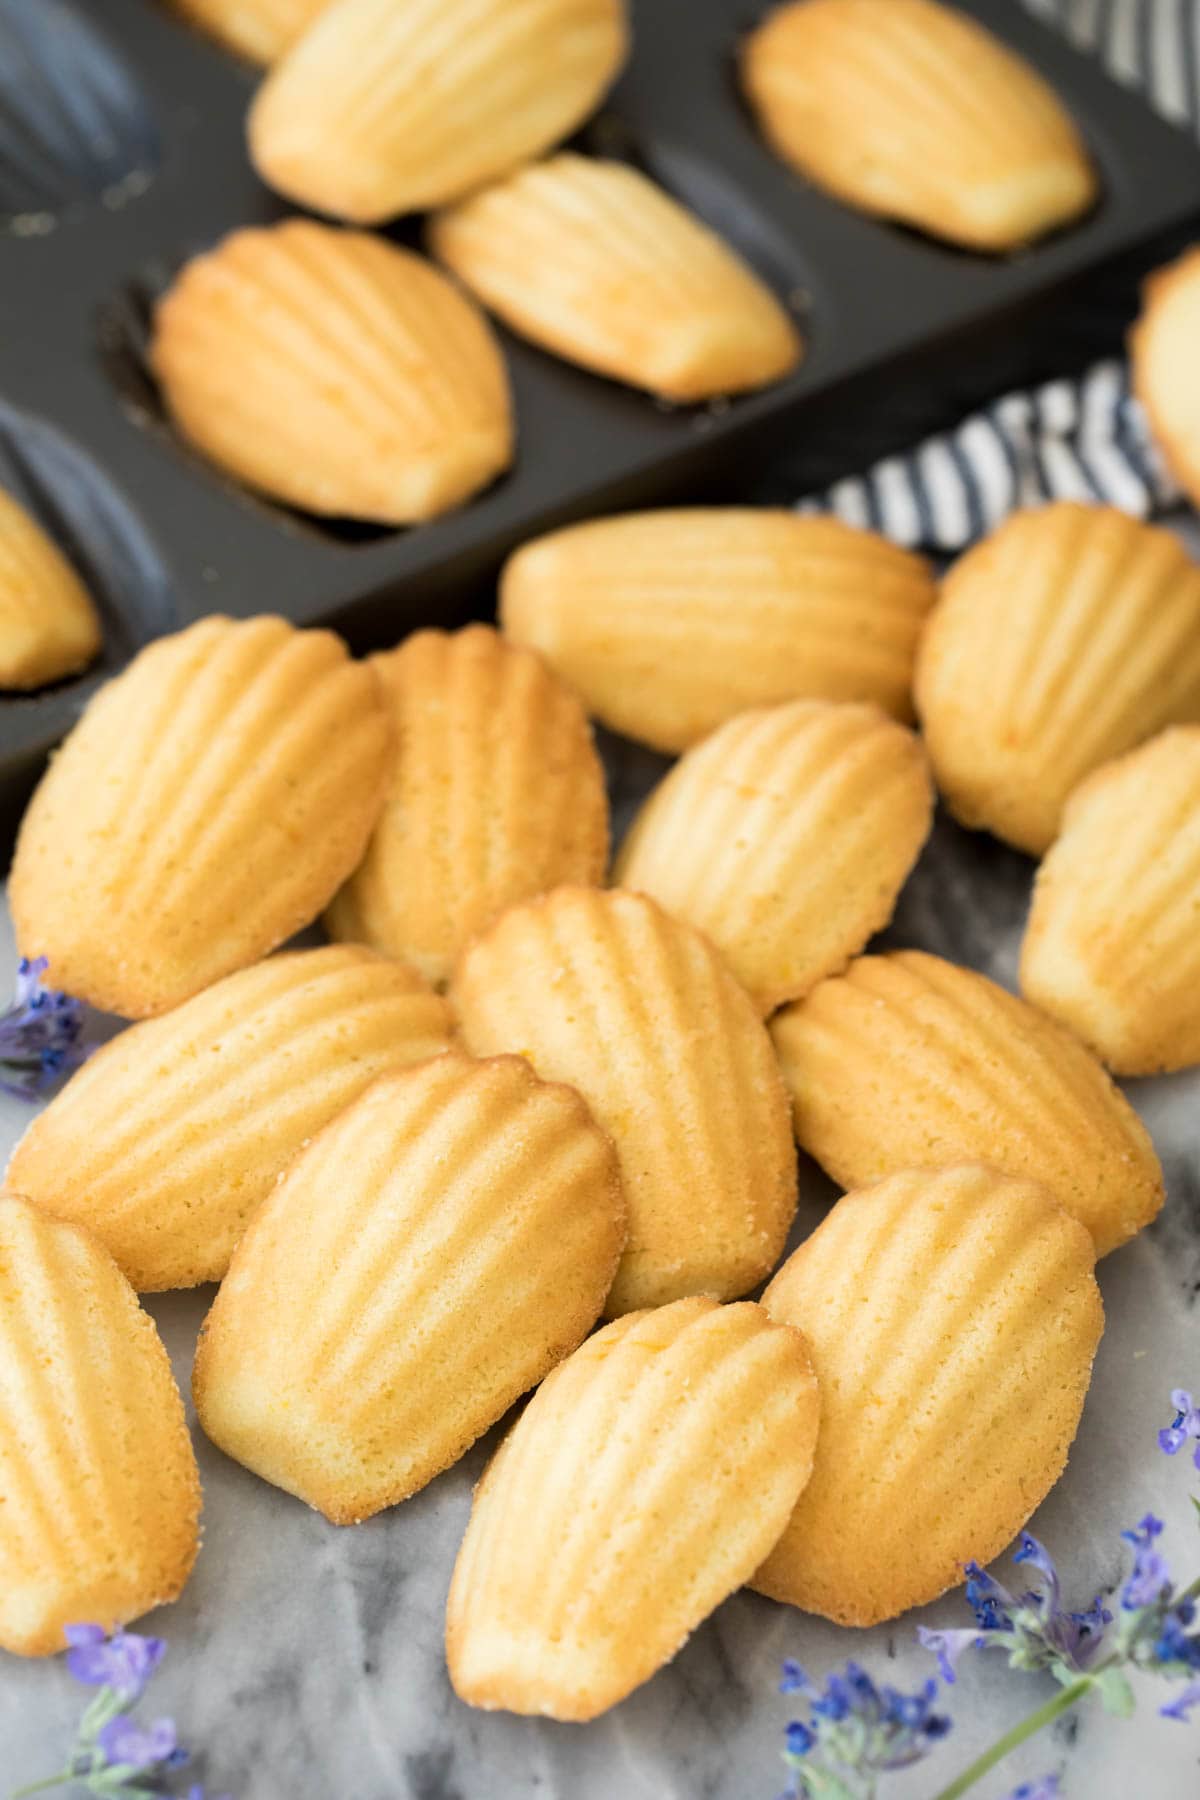
These delicate cookies are shockingly easy to make considering how hard this recipe was for me to crack! Also known as French butter cakes, madeleines are well-known, easily-recognizable, sophisticated little cakes. They have a reputation for being fussy, and what they’re really known for is their scalloped shell-shape and their characteristic bump. It took weeks upon weeks to finally get this recipe perfected, but it was definitely worth it.
If you’ve made madeleines before, you’ll notice that my recipe is fairly different from many traditional recipes. It also produces better results with simpler technique than traditional recipes. There’s no whipping our eggs to “ribbon” stage and there’s no long chilling period (or any chilling period at all). Just perfect madeleines that:
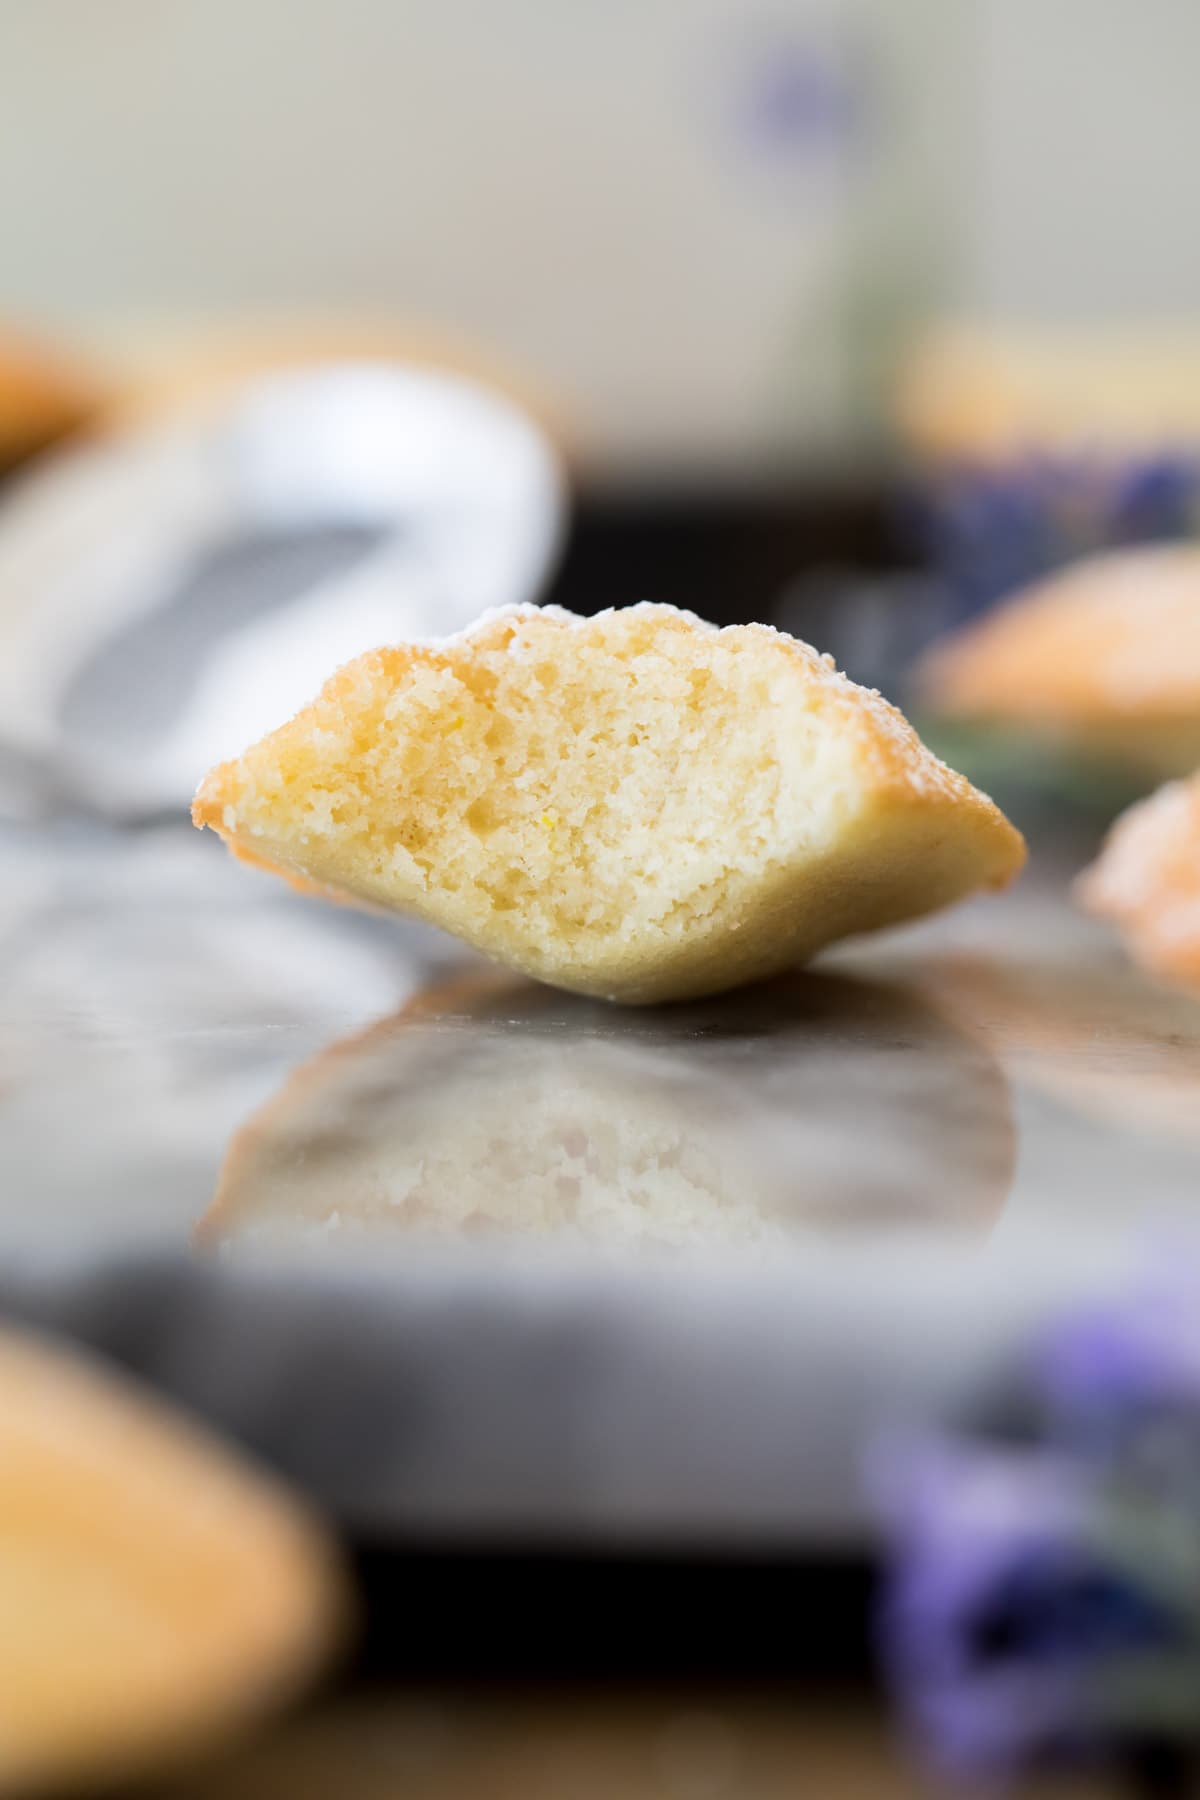
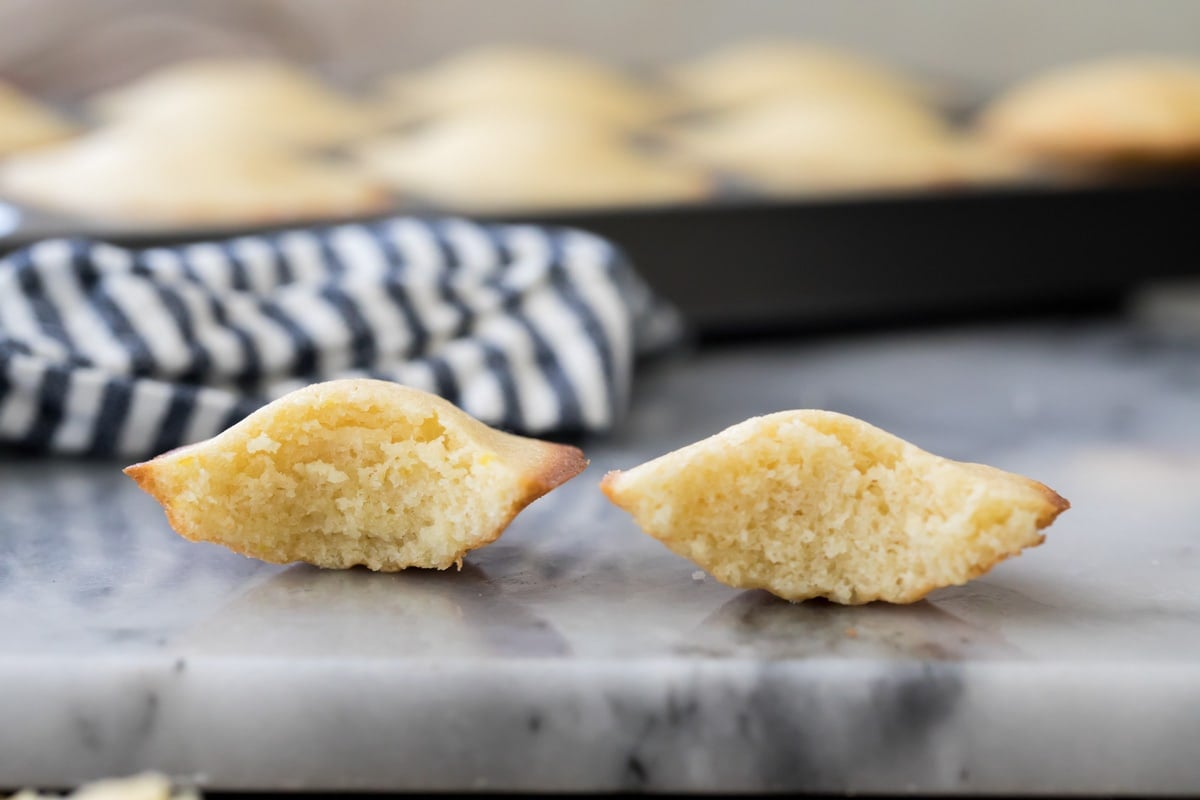
- Are light and airy with a melt-in-your-mouth interior
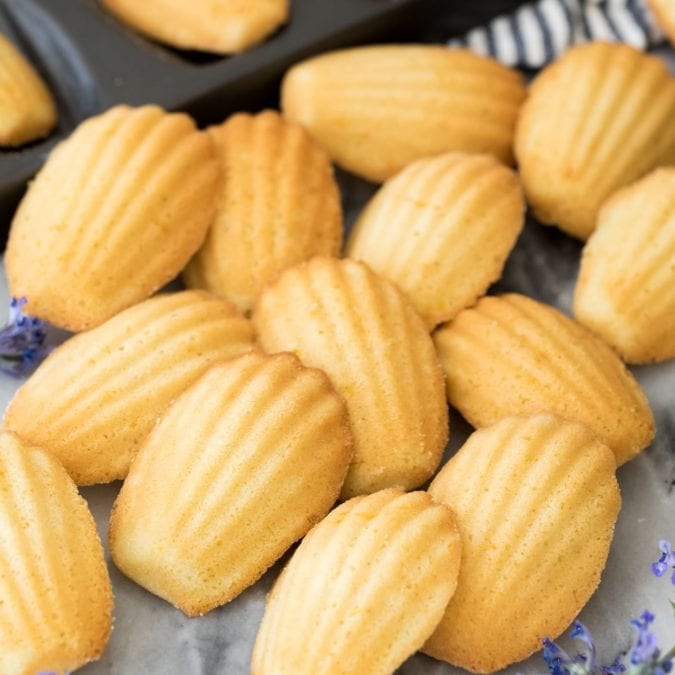
- Beautiful golden brown with just barely crisp exteriors.
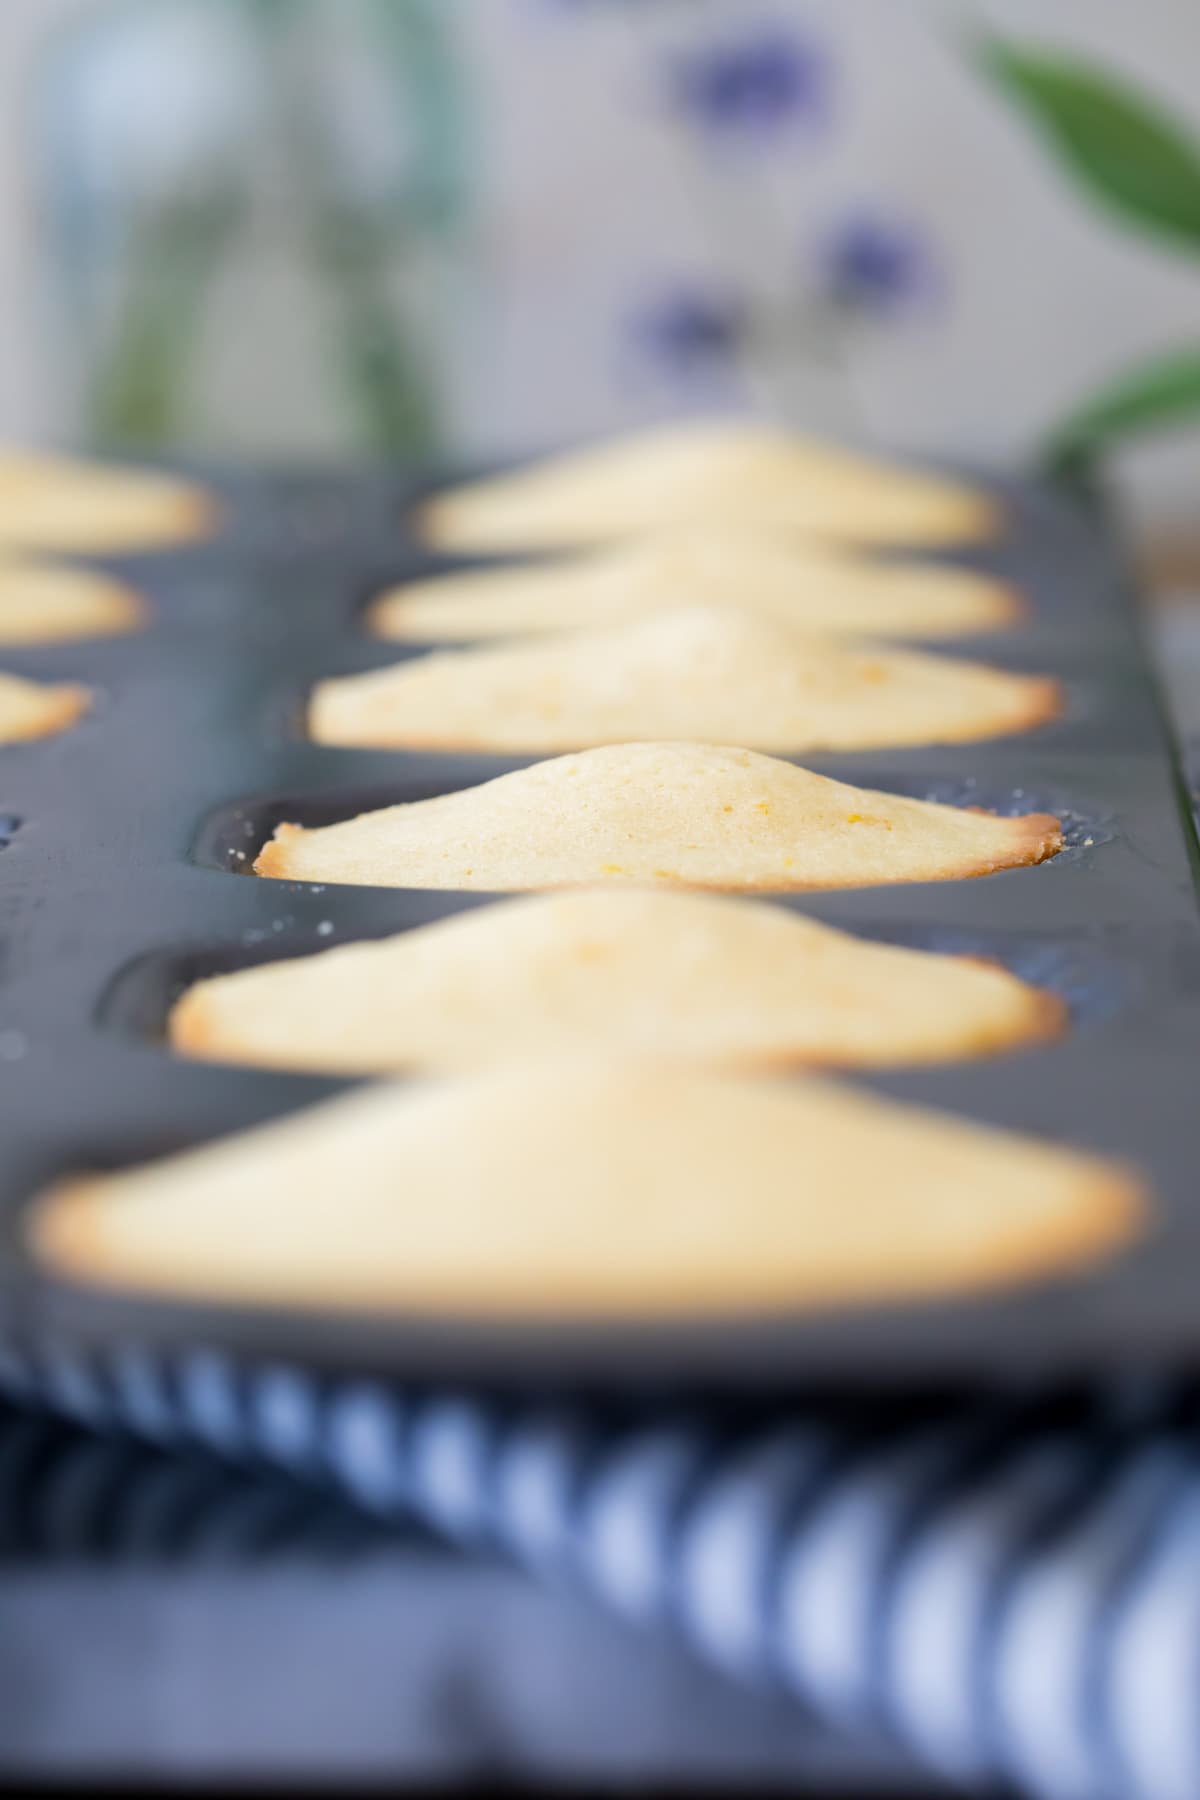
- Perfectly shell-shaped on one side with the classic madeleine “hump” on the other
- Not at all fussy or difficult.
I’ve always been honest with you here. If fussy technique or extra time is needed for the best results, I’m going to encourage you to learn that technique or take that time. Despite my hatred of water baths, I teach you how to use one in my creme brûlée recipe, and I already have my fair share of fussier French recipes (cream puffs and petit fours, to name a few!) in which we’ve tackled different techniques. I was ready to spend paragraphs talking about how to ribbon and the importance of resting (I still talk about it a little below).
But after weeks of testing, it turns out it isn’t necessary after all.
Are They Cookies or Cakes?
Technically, madeleines (or petite madeleines) are small butter cakes. However, because of their shape and size they’re often referred to as cookies. Truthfully they’re mostly like a cross between the two desserts (and who could ask for a better hybrid?). They’re a bit more dense than your average cake recipe, but much, much lighter and fluffier than any cookie.
Whether you call them cookies or cakes, there are two absolutely key characteristics that all madeleines must have: A beautiful scalloped, shell-shaped exterior on one side and a pronounced hump on the other. Check and check ☑️ ☑️
If you’re curious, here’s a brief history on the origins of madeleines.
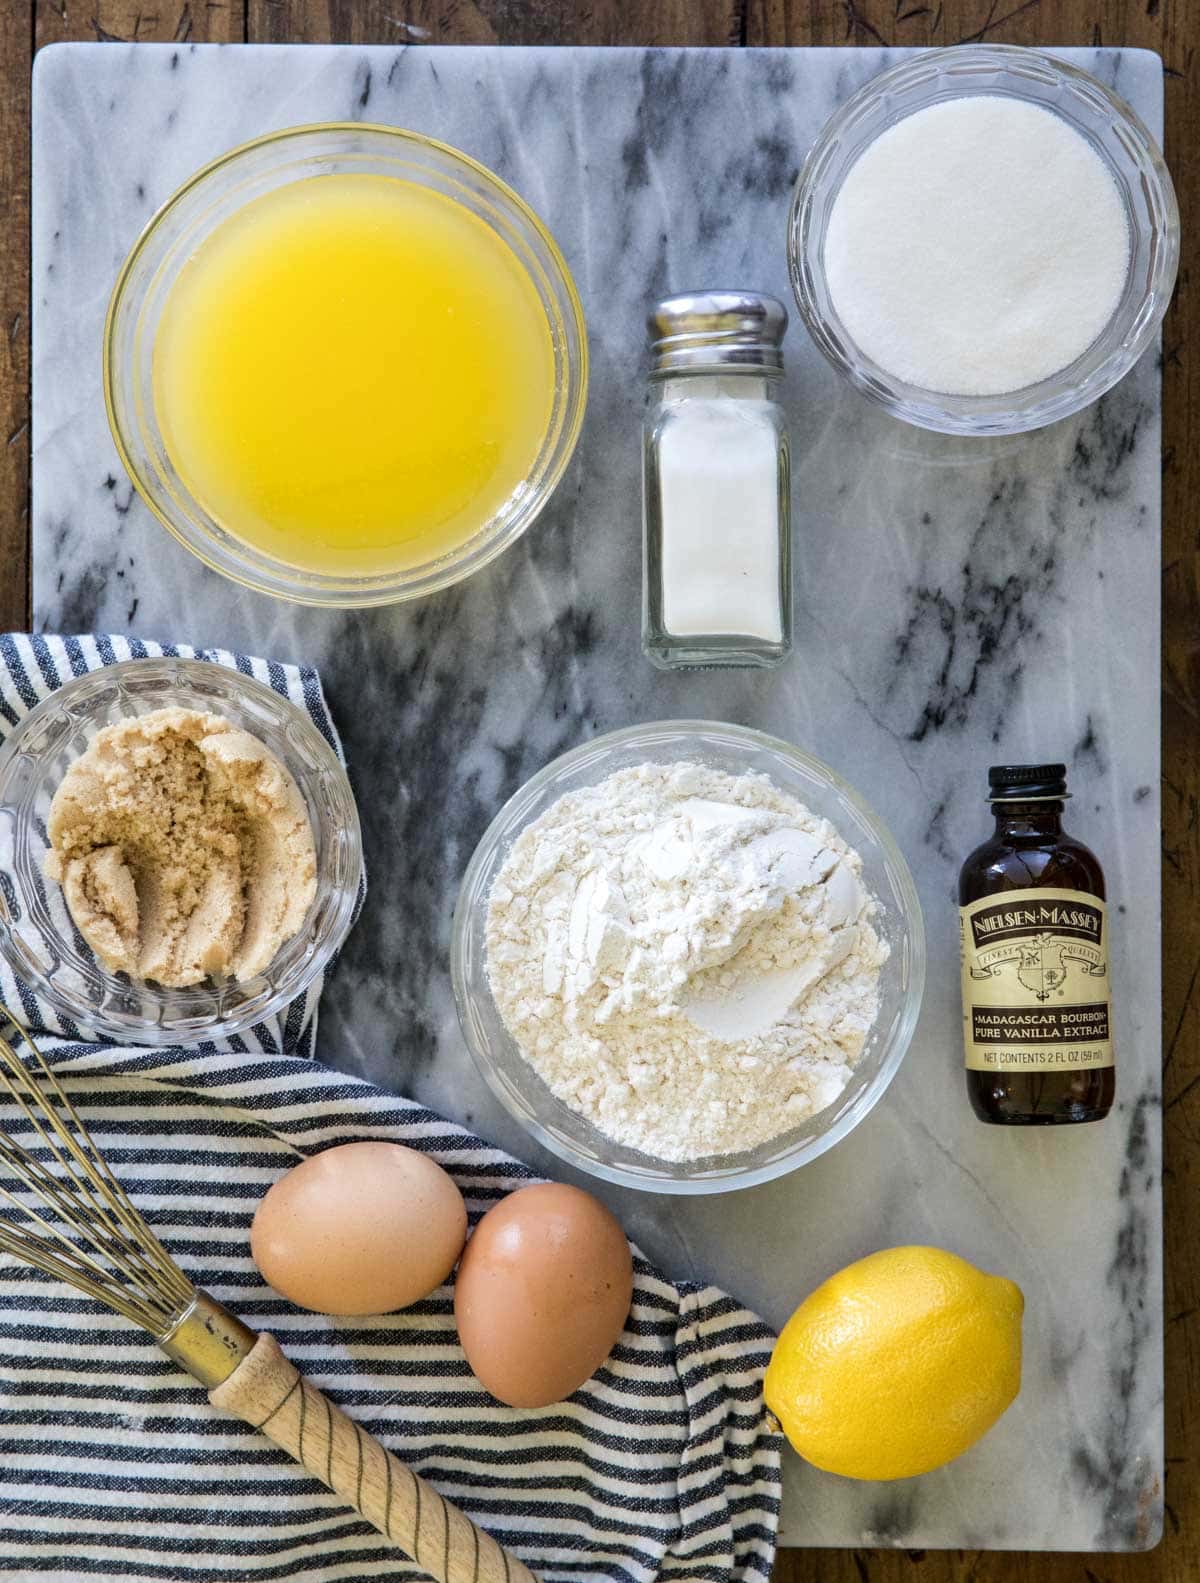
What You Need:
- Butter. My madeleine recipe uses more butter than other recipes you might have tried or seen. It’s not a mistake, this creates more flavorful, more buttery, more delicious madeleines than you’ve seriously ever tasted before. For real. Melt the butter before you begin so that it has time to cool before you add it to your batter.
- Eggs. You need just two eggs for this recipe. Large or extra large will work (and I’ve even used jumbo-sized with success).
- Sugar. I use a blend of granulated and brown sugar. Many madeleine recipes strictly stick to granulated sugar, but adding brown sugar gives the madeleines a richer flavor, a more distinct golden-brown coloring, and it also encourages a little bit of extra caramelization where the batter makes contact with the shell indent in the pan. This adds so much flavor and an extra (slight) crispness to the exterior of the madeleine. It’s just so good! I use slightly more sugar than some traditional recipes, but I don’t recommend reducing the amount. It makes them delicious straight out of the oven, no dusting of powdered sugar or chocolate dip required.
- Vanilla Extract and Salt. For flavor.
- Flour. My recipe uses all-purpose (“plain”) flour. You’ll sift it into your batter (to remove any lumps in the flour) and gently fold in with a spatula. Madeleine batter is fairly thin, like cake batter.
- Citrus Zest (optional). Lemon or orange zest is a common addition, and if I have a fresh citrus fruit lying around I always add some (make sure to avoid the pith!). If you don’t, though, you can skip it and they’ll still be delicious.
Please note that baking powder is not included on this list. Many madeleine recipes use baking powder to help encourage the madeleine hump/belly to form, but it is not necessary here.
Please also note that this is just an overview of the ingredients used. For the full recipe with amounts, please scroll down to the recipe card.
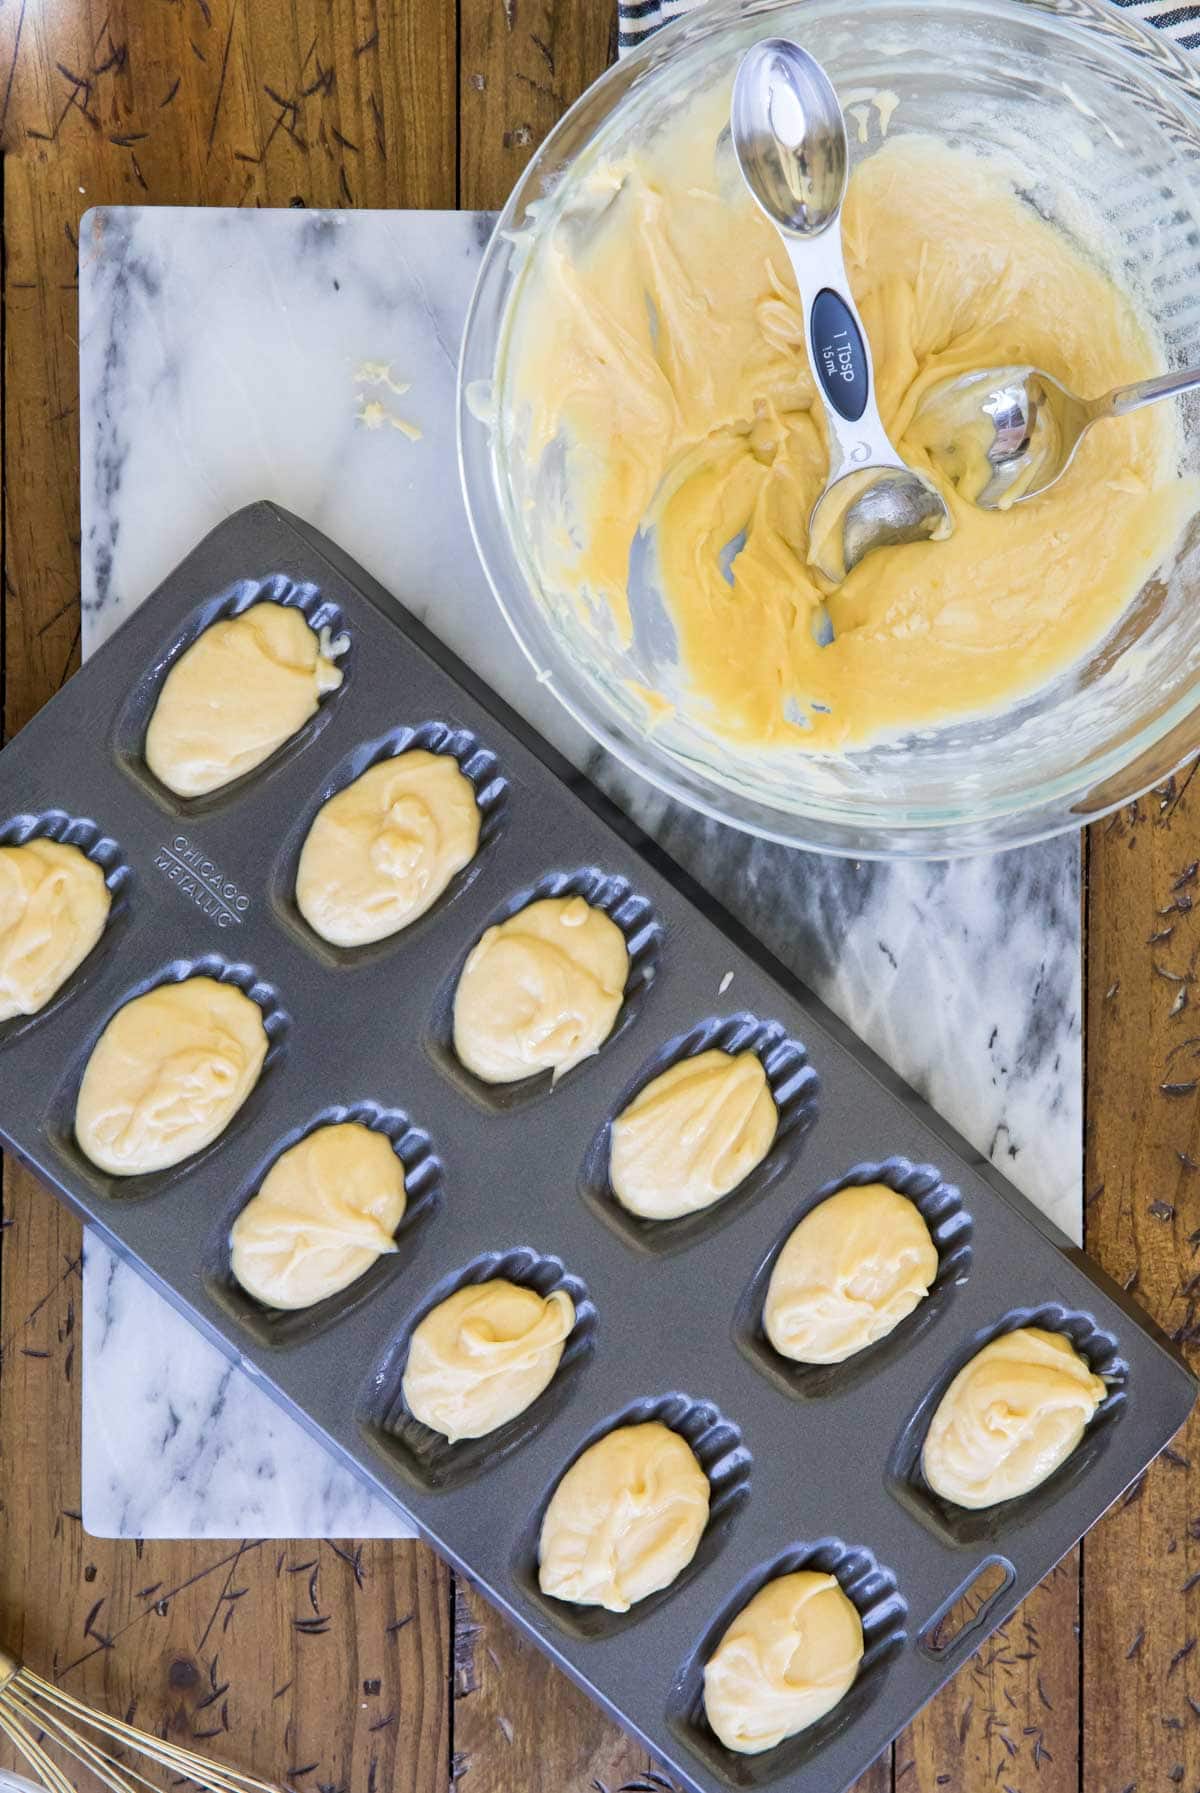
Another Key Ingredient: The Madeleine Pan
Another key “ingredient” is the pan! You absolutely need a scalloped pan like the one seen above in order to make madeleines. It’s the only way to get that characteristic shape. This is the pan that I use.
I use a non-stick pan, but it’s still important to prep the pan before using to make sure that the madeleines don’t stick. Non-stick spray works, but my preference is to mix together melted butter and a pinch of flour and coat the pan with that. It gives the scalloped exterior shell of the madeleine a better, butterier flavor.
Ribboning and Resting (And Why I do Neither)
Most madeleine recipes call for the batter to be both ribboned and rested before it is baked. My recipe calls for neither, though I tested many, many recipes where I tried both techniques before landing here.
Ribboning (in this instance) is the process of whipping the eggs vigorously (usually with an electric mixer) until the batter is thickened and falls “like a ribbon” from the beater. This incorporates a lot of air into the batter and is typical of a genoise (or, “sponge cake”, which madeleines technically are). My recipe does require you to vigorously whisk the eggs/sugar/salt by hand for a few seconds, but it’s not necessary to go all the way to ribbon stage. With our higher ratio of butter and sugar here, we still end up with a light, delicately cakey interior without needing an electric mixer.
Resting simply means chilling in this situation. Resting helps the batter to thicken and in many recipes it’s essential in order for the hallmark bump or hump of the madeleine to form. The idea is that the chilled batter expands quickly in a hot oven, causing the hump.
Resting is critical with many recipes (even with my crepes I call for at least a half an hour of chilling to help the gluten relax). With some of the madeleine recipes I developed and tested, resting was critical or the madeleines ended up flat (or they spread with crackled edges out of the pan). But with this version, the madeleines still end up with a perfect, buttery-soft interior and that trademark bump, with or without resting.
Your batter will thicken while the madeleines rest. If you have a single small pan like I do and need to wait for one batch to bake before using up the rest of the batter, you’ll notice it is much more stiff when you go to bake round two. This is fine and there’s no significant difference in the madeleines made with the thinner or thicker batter. That being said, if you want to make the batter a day or two in advance, you can store it tightly covered in the refrigerator until you are ready to bake.
Toppings
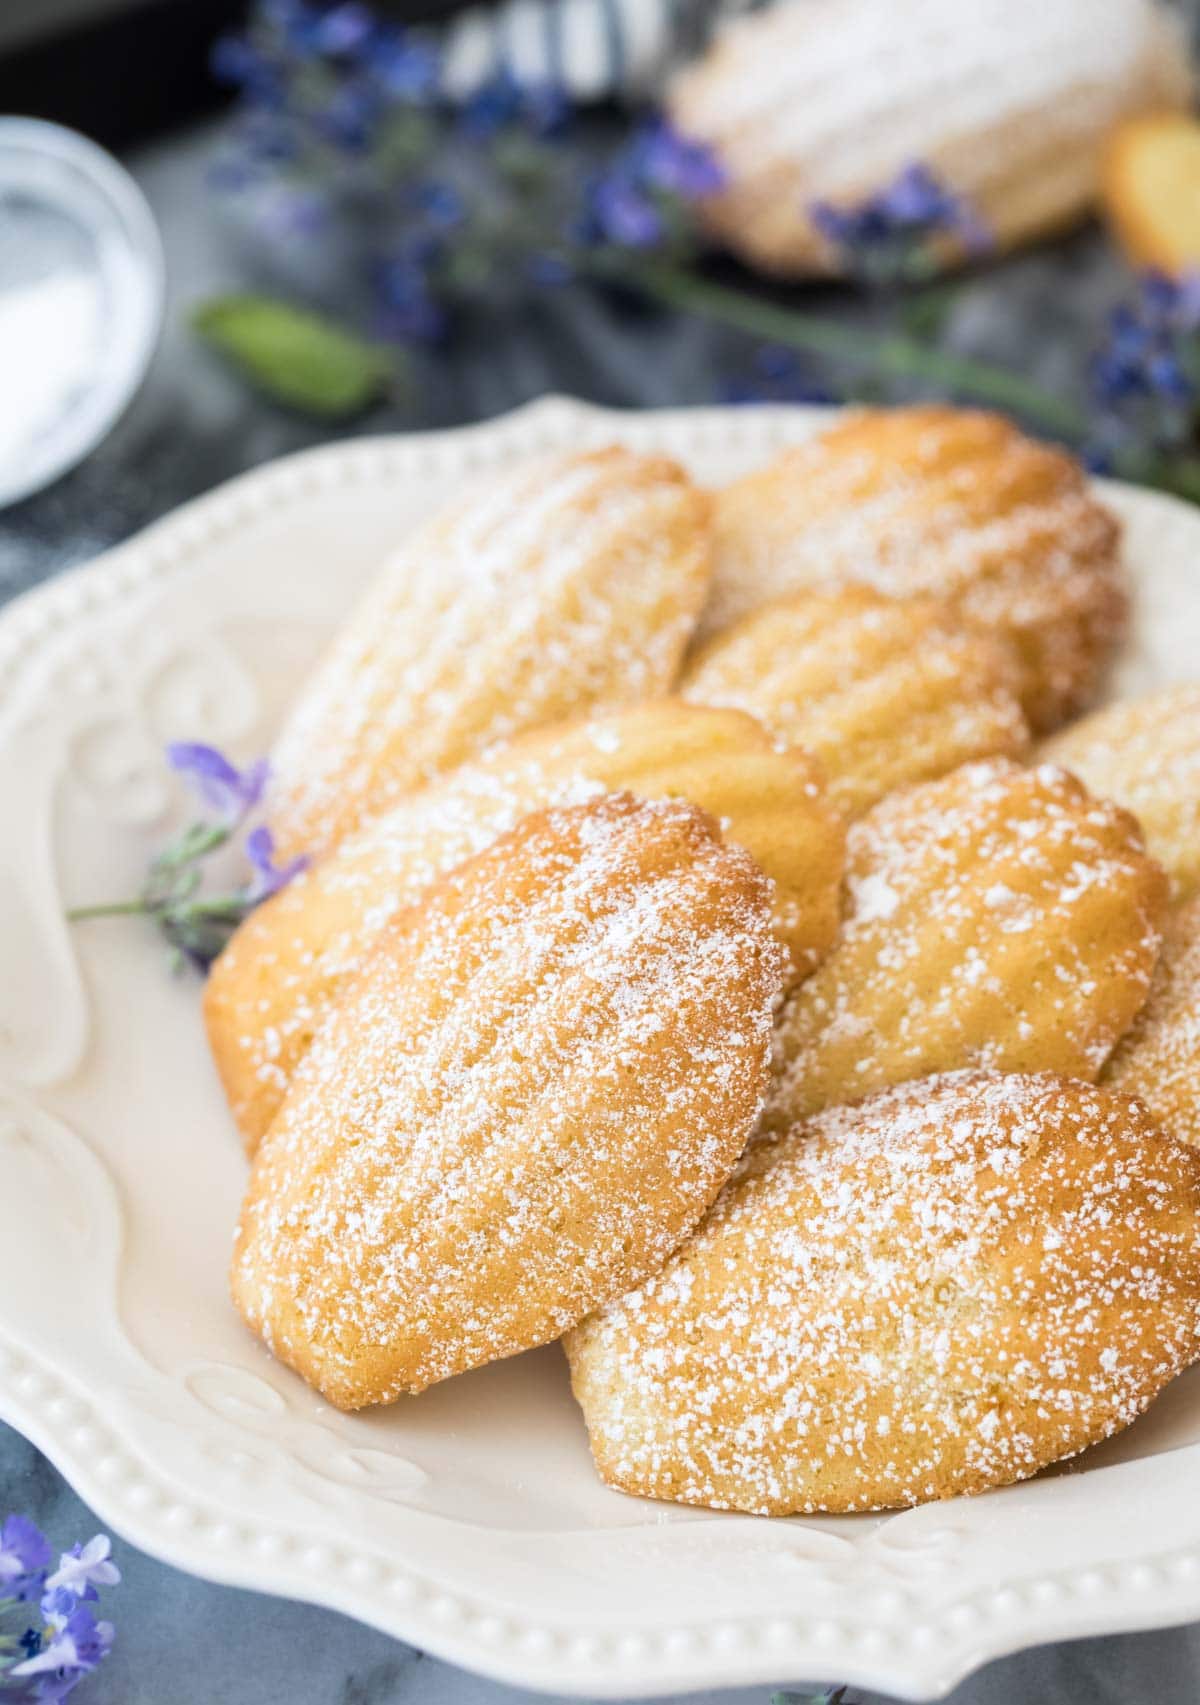
Many madeleine-makers top theirs off with a dusting of powdered sugar just before serving. This adds a nice extra sweetness to the cakes, but while I added some sugar for aesthetics in the photo below my recipe is perfectly sweetened so that no additional sugar is necessary.
A chocolate coating (made of melting chocolate bars, melting wafers, or chocolate chips and then dipping the cakes) is another popular choice, but again it’s not necessary here. Never thought I’d say chocolate isn’t a necessity but somehow here we are.
More Recipes You Might Like:
Storing
Madeleines are truly best served fresh, shortly after they are made (even better if they’re still warm!). However, these will keep for up to three days in an airtight container at room temperature. They may also be frozen for at least a month if allowed to cool completely and then frozen in an airtight container. Again though, they’re better fresh!
Enjoy! I really can’t wait to hear how you like these, so please leave me a comment or tag me on Instagram when you try them!
Madeleines (the Best, Easiest Recipe, with Video!)
Equipment
Ingredients
For Coating the Pan:
- 1 Tablespoon unsalted butter
- 1 ½ teaspoons all-purpose flour
For Madeleines:
- 10 Tablespoons (141 g) unsalted butter, cut into pieces
- 2 large eggs, room temperature
- ½ cup (100 g) granulated sugar
- 3 Tablespoons light brown sugar, firmly packed
- 2 teaspoons vanilla extract
- ⅛ teaspoon salt
- 1 ¼ cup (155 g) all-purpose flour
- 2 teaspoons lemon or orange zest, optional
Instructions
- Preheat oven to 375F (190C) and whisk together 1 Tablespoon melted butter and 1 ½ teaspoons flour. Use a pastry brush to lightly but thoroughly grease every cavity of your madeleine pan. Set aside.1 Tablespoon unsalted butter, 1 ½ teaspoons all-purpose flour
- In a small heatproof bowl, melt remaining 10 Tablespoons of butter. Set aside to cool.10 Tablespoons (141 g) unsalted butter
- In a large bowl, combine eggs, sugars, vanilla extract, and salt. Whisk vigorously until thoroughly combined (about 30 seconds).2 large eggs, ½ cup (100 g) granulated sugar, 3 Tablespoons light brown sugar, 2 teaspoons vanilla extract, ⅛ teaspoon salt
- Sift flour into the egg mixture, about ⅓ of the flour at a time, gently stirring into egg mixture after each addition.1 ¼ cup (155 g) all-purpose flour
- Drizzle cooled melted butter around the edge of the batter and add zest, if using. Gently fold into batter using a spatula until ingredients are thoroughly combined (but do not over-mix).2 teaspoons lemon or orange zest
- Drop batter by heaping Tablespoon into prepared pan.
- Transfer to center rack of 375F (190C) preheated oven and bake for 9 minutes or madeleines are light golden brown and spring back when lightly touched. Remove to a cooling rack to cool immediately.
- If your madeleine pan did not hold all of the batter, allow the pan to cool before re-brushing with butter/flour mixture and refilling with batter and baking your next batch.
- If desired, sprinkle madeleines with additional powdered sugar or dip in melted chocolate before serving.
Notes
Storing
Madeleines are best served fresh, but will keep in an airtight container at room temperature for 3 days.Nutrition
Nutrition information is automatically calculated, so should only be used as an approximation.
Like this? Leave a comment below!


One of the best recipes I have found. The way you lay out the ingredients etc is something I have never seen before….so helpful….and they worked out perfectly! However I have a question….can I colour the batter with jel food colour (used in macarons)!
Thanks!
My first time making these little gems! Making about 100 decorated ones for my son and daughter in laws baby shower. They came out perfect!! Thank you so much for this simple but delicious recipe!! 🥰
So easy, so tasty, so quick, sadly the shelf life is one day, EVERYONE eats them,ha,ha.
I agree with the rest of the comments, this recipe is magic. I’ve followed many madeleine recipes before and this is by far the easiest and comes out stellar. 100% love bot having to whip the eggs/sugar to the ribbon texture.
Hi Sam – Thanks so much for the great Madeleine recipe. I tried a test batch, cutting the recipe in half, and they were perfect! Today when I made the whole recipe, the Madeleines tasted great but were very brown and quite crispy on the edge. The inside wasn’t fully cooked until they became quite dark on the outside. I measured everything out carefully but am wondering whether the problem may be too much butter…not enough mixing…too long in the oven? Any suggestions? I’m happy to try again – they’re so good!
Hi Valerie! Is it possible that your oven was running too hot when you cooked the full tray? If they were browning on the outside but not quite cooked on the inside there may have just been too high of a heat. I don’t think the amount of mixing will cause this.
Fabulous recipe – made mine with brown butter and they came out perfect and without any faff!
They cam out so beautiful and taste amazing! Thank you for sharing your recipe!
Hi, Sam! Congratulations on whatever research you did to create a recipe that yields an utterly delicious true-to-tradition madeleine. Previously, I had been reluctant to attempt the fussy recipes. With your encouragement, I made 24 of them this evening using both a 16 and an 8 madeleine pan. I added 1/2 teaspoon of Roots All Natural citric acid to the zest of one lemon, and the taste is lovely. Folding the butter into the batter required patience and assurance that it eventually would combine. Everything else was a piece of cake — or madeleine — in about 40 minutes. 5 stars from both me and my husband.. Astounding!
I overworked the batter so they were a little dense but the flavor was good. Lemon zest added to half & flavor was great. I’ll be more patient next time.Thank you for the recipe!
I can’t do dairy or wheat. Could I use a cup for cup flour? (I think yes) but what to sub for butter?
Hi Meran! I can’t say for sure how it would work, but you can try a plant based stick butter. Let me know how it goes. 🙂
I haven’t made this yet but I wanted to leave a comment to thank you for the way your recipe instructions are organized. Having the ingredient amounts in with the instructions is BRILLIANT and I have always said I wish more recipes were written this way. Can’t wait to try it!
I hope you love them, Kevin! 🙂
Update: I made them. They are perfect! Even in a muffin tin, and despite my oven not running at the temperature it’s supposed to. 😐 The recipe seems to be forgiving. Nice bump even when cooked right after mixing and only about 30-40 seconds initial whisking. Thank you!!
Yay! I’m so glad they turned out. 🙂
PLUS the gram measurements is another huge bonus!
Making these was my first time baking madeleines, and they came out perfect! I followed the recipe exactly but didn’t add any zest because I wanted to try them plain first. I used a madeleine pan with 12 heart-shaped wells, just purchased this week from Sur la Table. They are so cute! I think I could get closer to 24 from the recipe in that pan.
Hi Sam
Got a Madeleine pan for Christmas and made these the day after. I was a little worried as the drizzled butter would not combine easily and the instructions were not to overmix. But slowly and surely it came together. They popped right out of the pan and were puffy and golden brown on the bottom.
These were always one of those items I never thought I would make. Thanks to the ease of your recipe, (and the new Madeleine pan) these are now in my rotation of baked items.
Thanks Sam.
I’m so glad they turned out so wonderfully! What a great Christmas gift to receive! 🙂
This was my first time baking the madelines. This recipy was super easy to make and the madelines were so tasty. I highly recommend this recipe if you haven’t baked one yet! 😀
Just made em, went with the zest of a whole cara cara orange, absolutely delicious!! Definitely taste the zest, love that they fell right out of the pan!
Yum! That sounds so good, Tom! Thanks for trying our recipe ❤️
Love this recipe!! I added two teaspoon of fresh grated orange, but couldn’t taste it. Next time maybe use an extract flavoring? They turned out perfect!