
Cup of Dirt Recipe
This post may contain affiliate links. As an Amazon Associate I earn from qualifying purchases. Please read my disclosure policy.
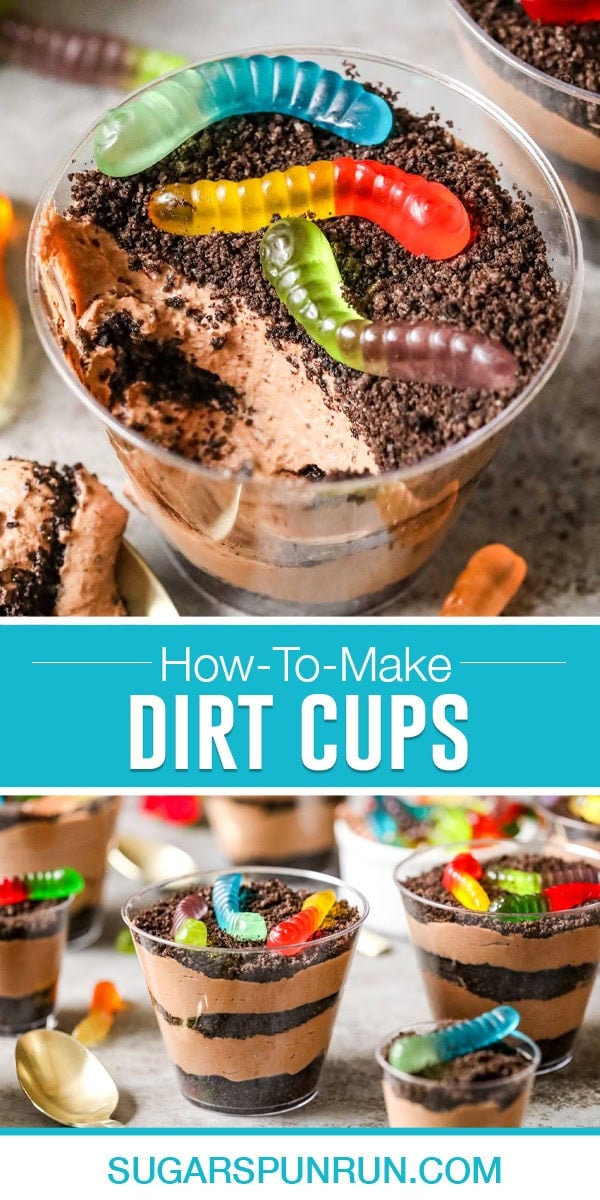
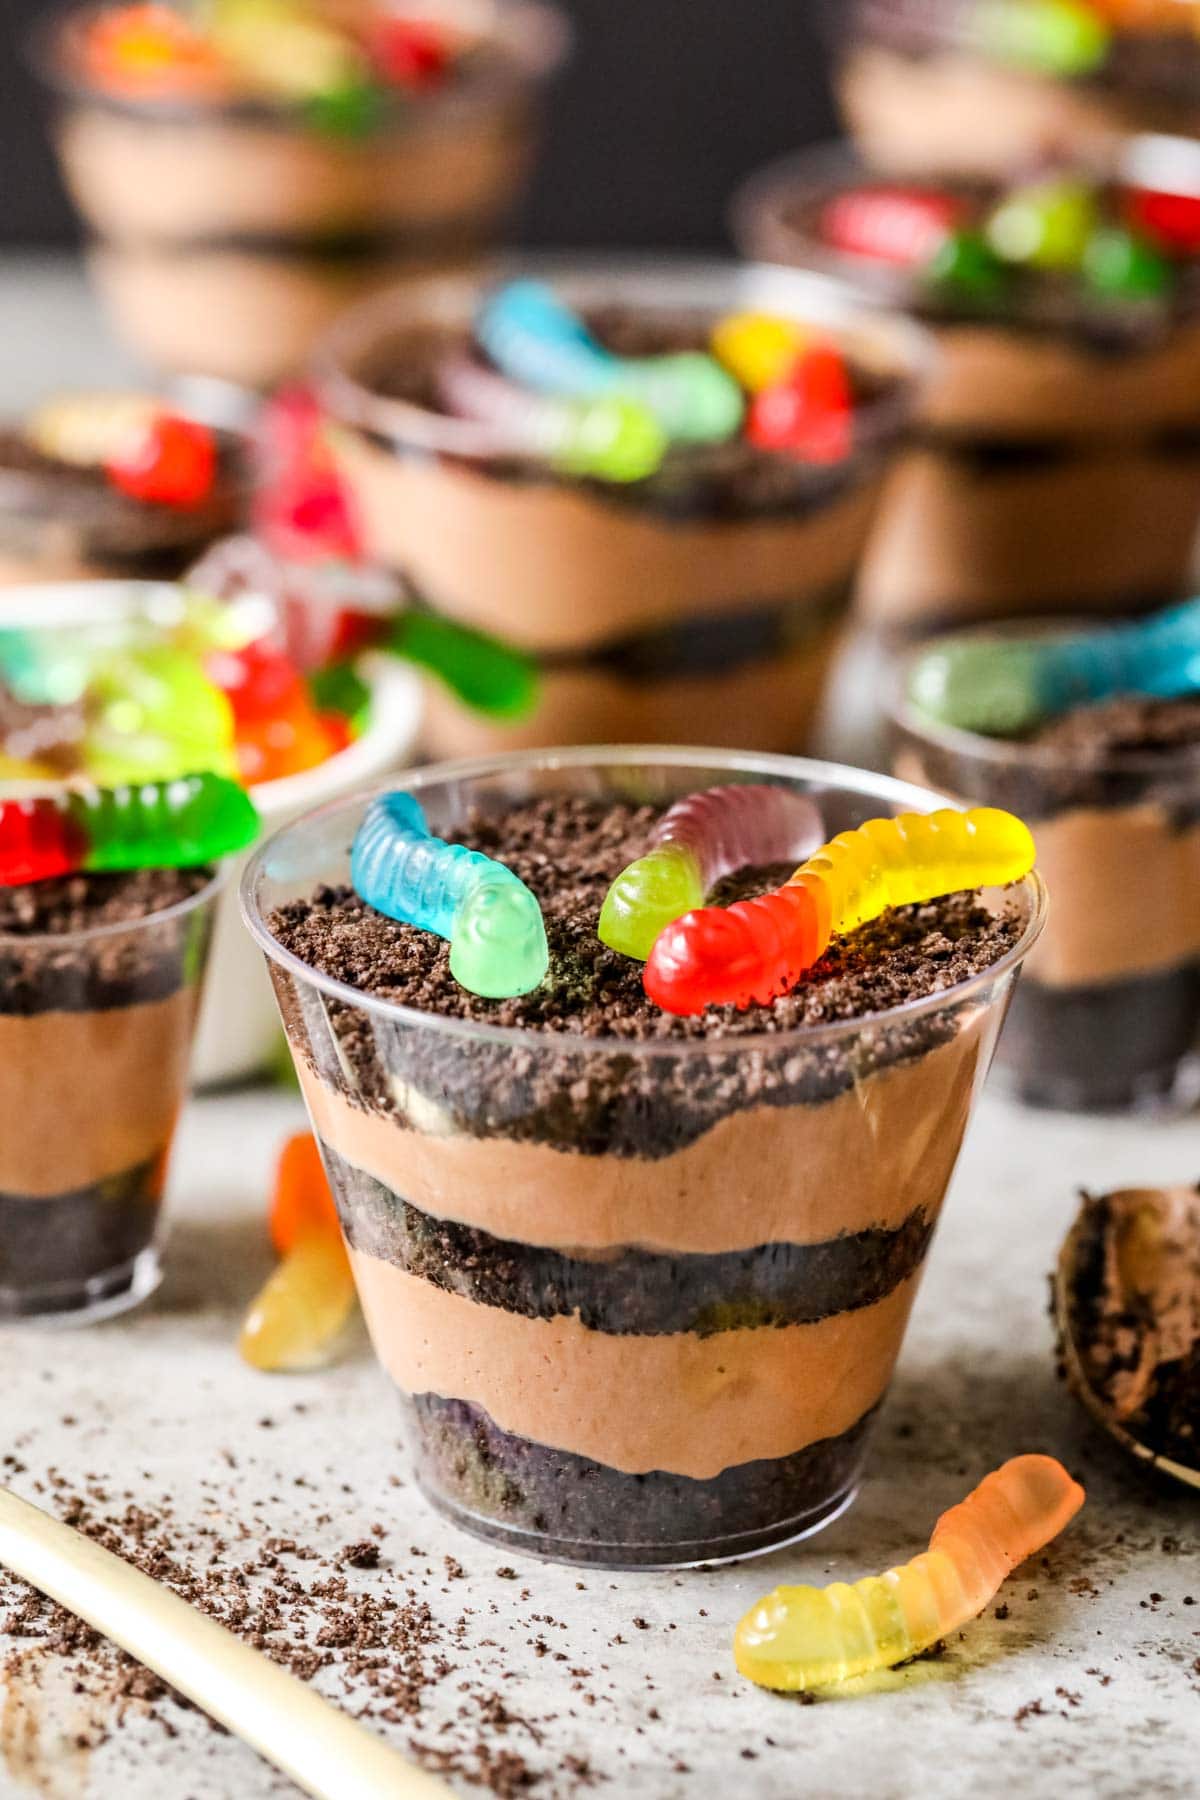
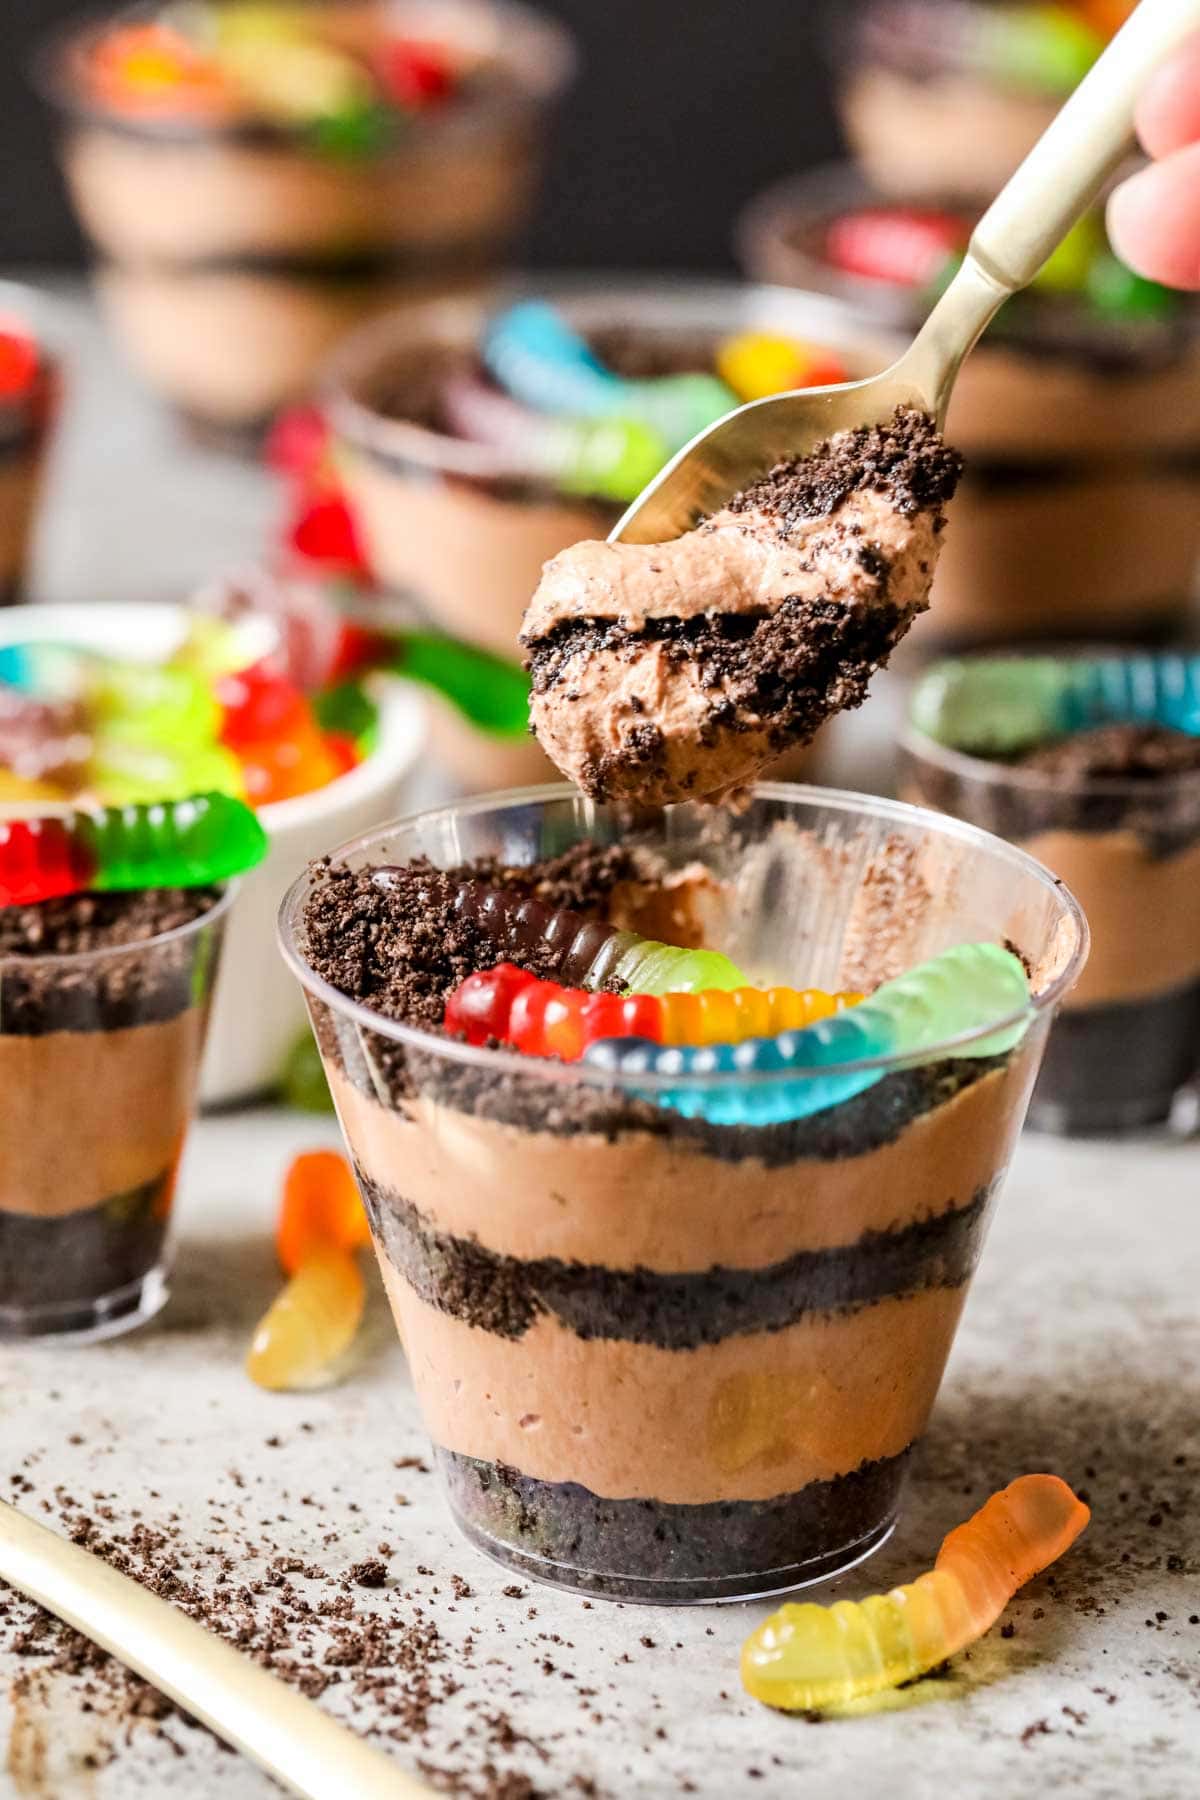
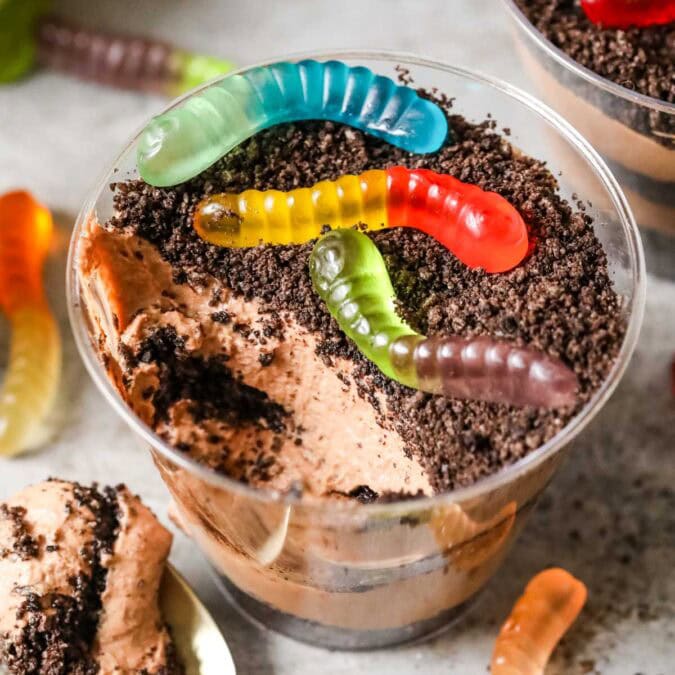
With layers of creamy homemade chocolate pudding and crushed Oreos, this is a cup of dirt you’ll actually want to eat! My version makes the pudding from-scratch (no Cool Whip or pudding mix!) and is loved by kids of all ages.
From-Scratch Cup of Dirt Recipe
I’ve got a thing for transforming nostalgic childhood favorites into from-scratch treats for my own kids. So far we’ve tackled brown sugar cinnamon pop tarts, pink lemonade, pizza rolls, and even homemade peanut butter! Today we’re adding a cup of dirt recipe to the mix–it’s 100% from-scratch (even the Oreos, if you want!) and totally kid-approved.
Why You’ll Love This Recipe
- Nostalgic & kid-friendly: 90’s kids will remember dirt cups from their childhood–these are even better! They’d make a fun treat for a kid’s birthday party or even an interactive snack when learning about soil.
- No pudding mix or Cool Whip: If you’ve made my strawberry pretzel salad or no-bake cheesecake, you’re probably like me and prefer to take the from-scratch route rather than buying a tub of Cool Whip (or a box of pudding). Yes, it’s more effort, but the flavor is better, it’s just as easy, and you avoid those artificial flavors, high fructose corn syrup, etc.
- No-bake: perfect for days when you don’t feel like turning on the oven! Keep in mind there is some chilling time though–at least 2 hours.
- Party ready, especially if you portion each cup of dirt in the smaller 2 oz shot glasses I share in the recipe notes.
Table of Contents
Ingredients
If you have substitution questions, this is the place to start. Otherwise, keep scrolling!
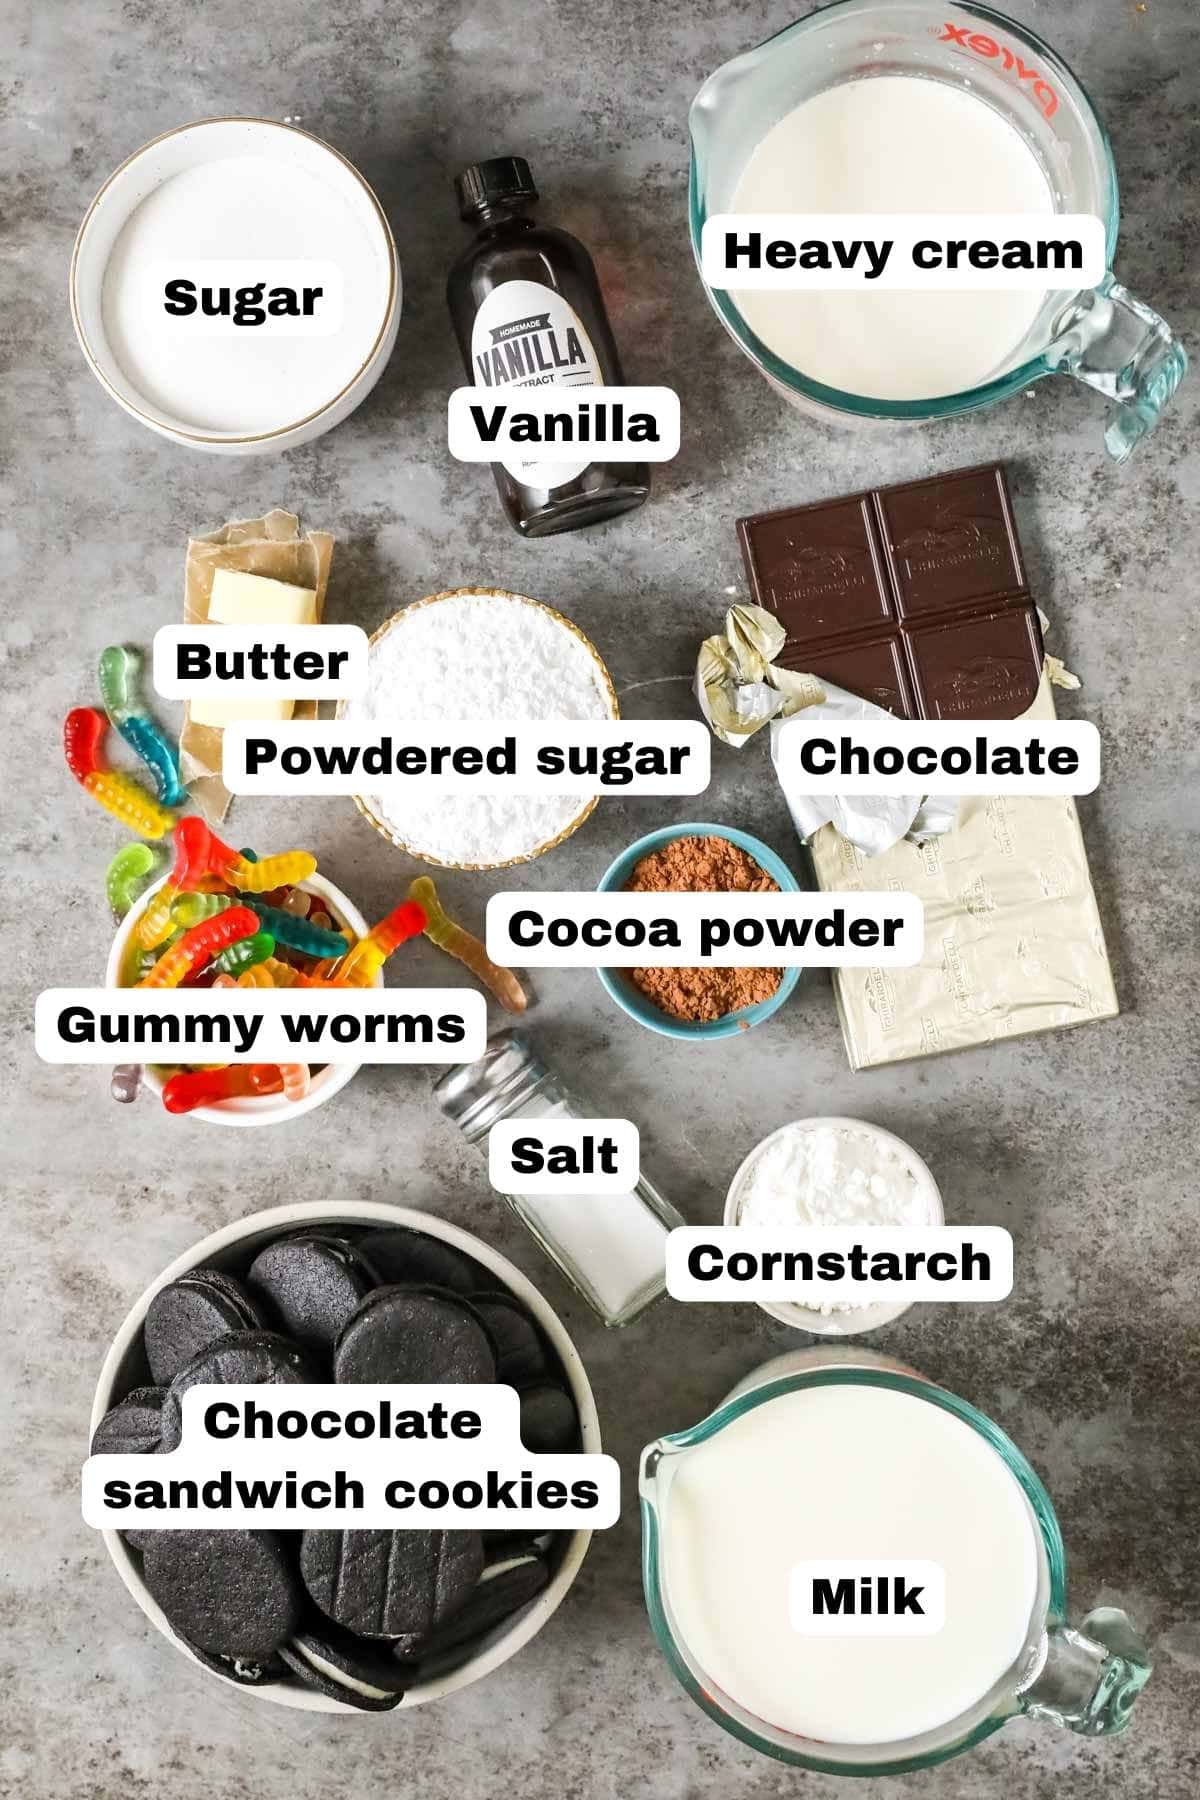
- Oreos. Regular or double stuff will work–and you will want to leave the cream in the cookies when you pulverize them. If you really want to go the extra mile, make my homemade Oreo cookies to use instead!
- Chocolate. Grab a dark chocolate baking bar (or a semisweet one) and chop it into pieces roughly the size of chocolate chips. And yes, I do recommend doing this over using actual chocolate chips, which won’t melt quite as nicely (but will technically still work in a pinch — you’d need about 2/3 cup!).
- Cocoa powder. Stick with natural cocoa powder for your dirt cups, as it will provide the most authentic chocolate pudding flavor. Dutch process cocoa will work (not in all recipes though!), but the flavor won’t be quite the same.
- Milk. I use and recommend whole milk. I haven’t tried this recipe with non-dairy milks, so I can’t say for sure how they would perform here.
- Cornstarch. Cornstarch plays an important roll in making sure the pudding thickens. While many pudding recipes (think my chocolate pie or even French silk pie) rely heavily on eggs to thicken them properly, this recipe is actually egg free and therefore needs the cornstarch to help it thicken properly.
Remember, this is just an overview of the ingredients I used and why. For the full recipe please scroll down to the bottom of the post!
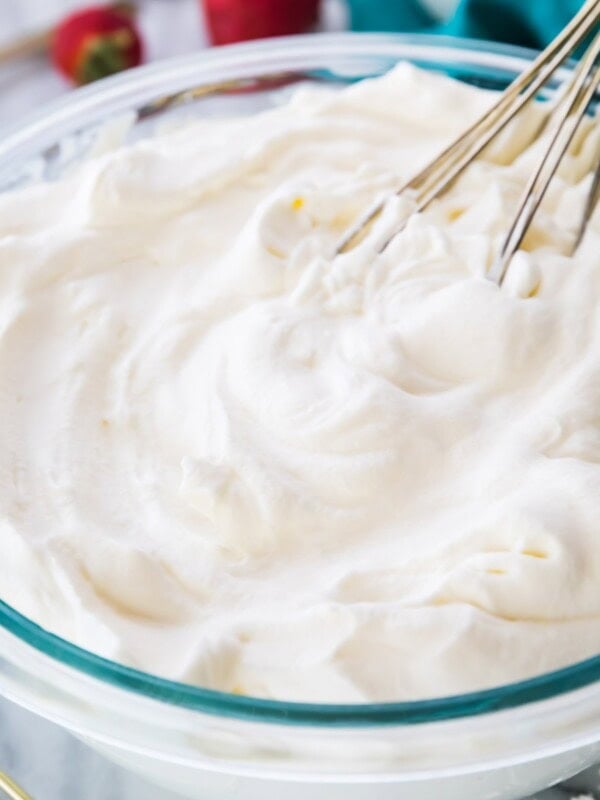
SAM’S TIP: Make sure your heavy cream is nice and COLD before you try to whip it. This will help it whip up much easier (chilling your bowl and beater is a good idea too!).
How to Make Dirt Cups
Prep the pudding

- Cook til thickened. Combine the dry ingredients and sugar, then whisk in the milk. Cook over medium heat, whisking constantly, until thickened. You’ll know the it’s ready when it coats the back of a spoon and is thick like a pudding.
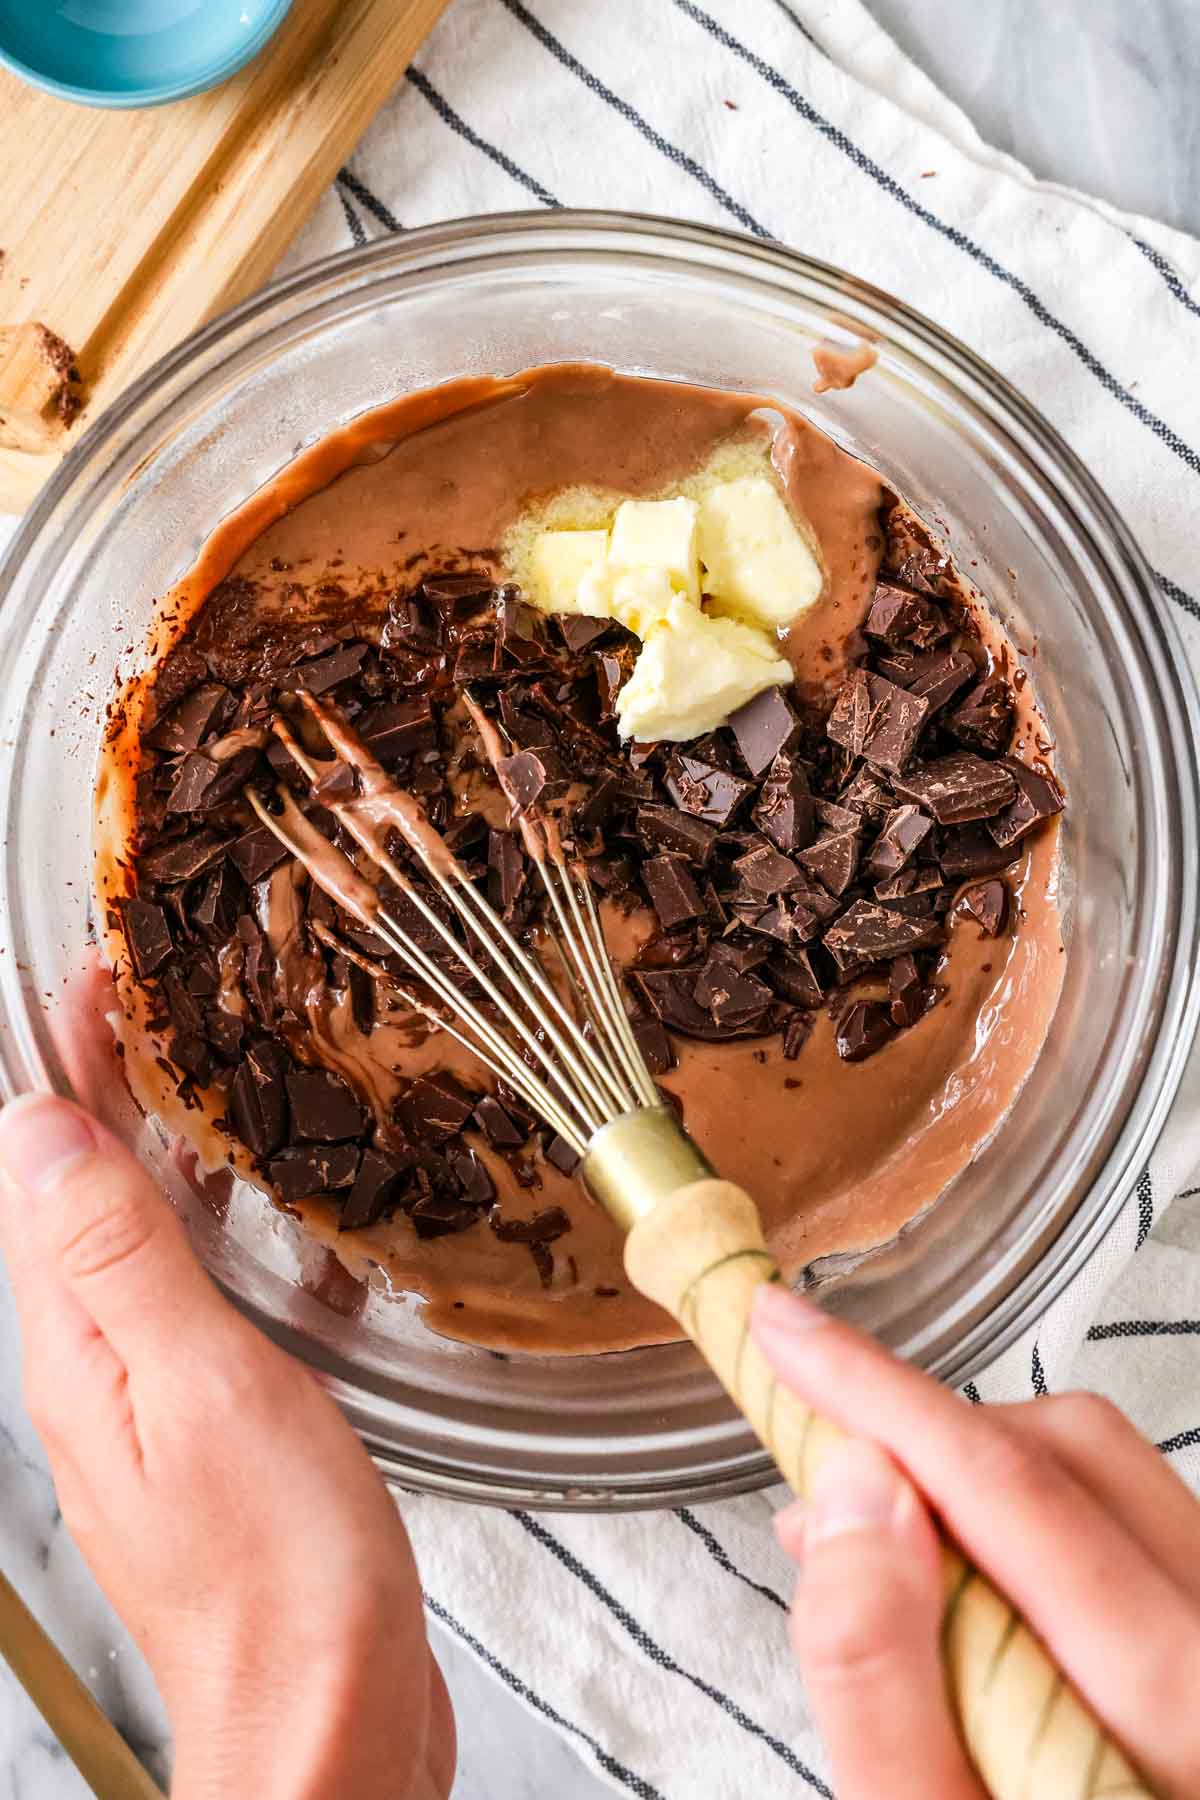
- Add the chocolate. Remove the pudding from the heat and stir in the butter, vanilla, and chopped chocolate. Whisk until the butter and chocolate have completely melted, then strain and cover before placing in the fridge to chill.
Make the whipped cream
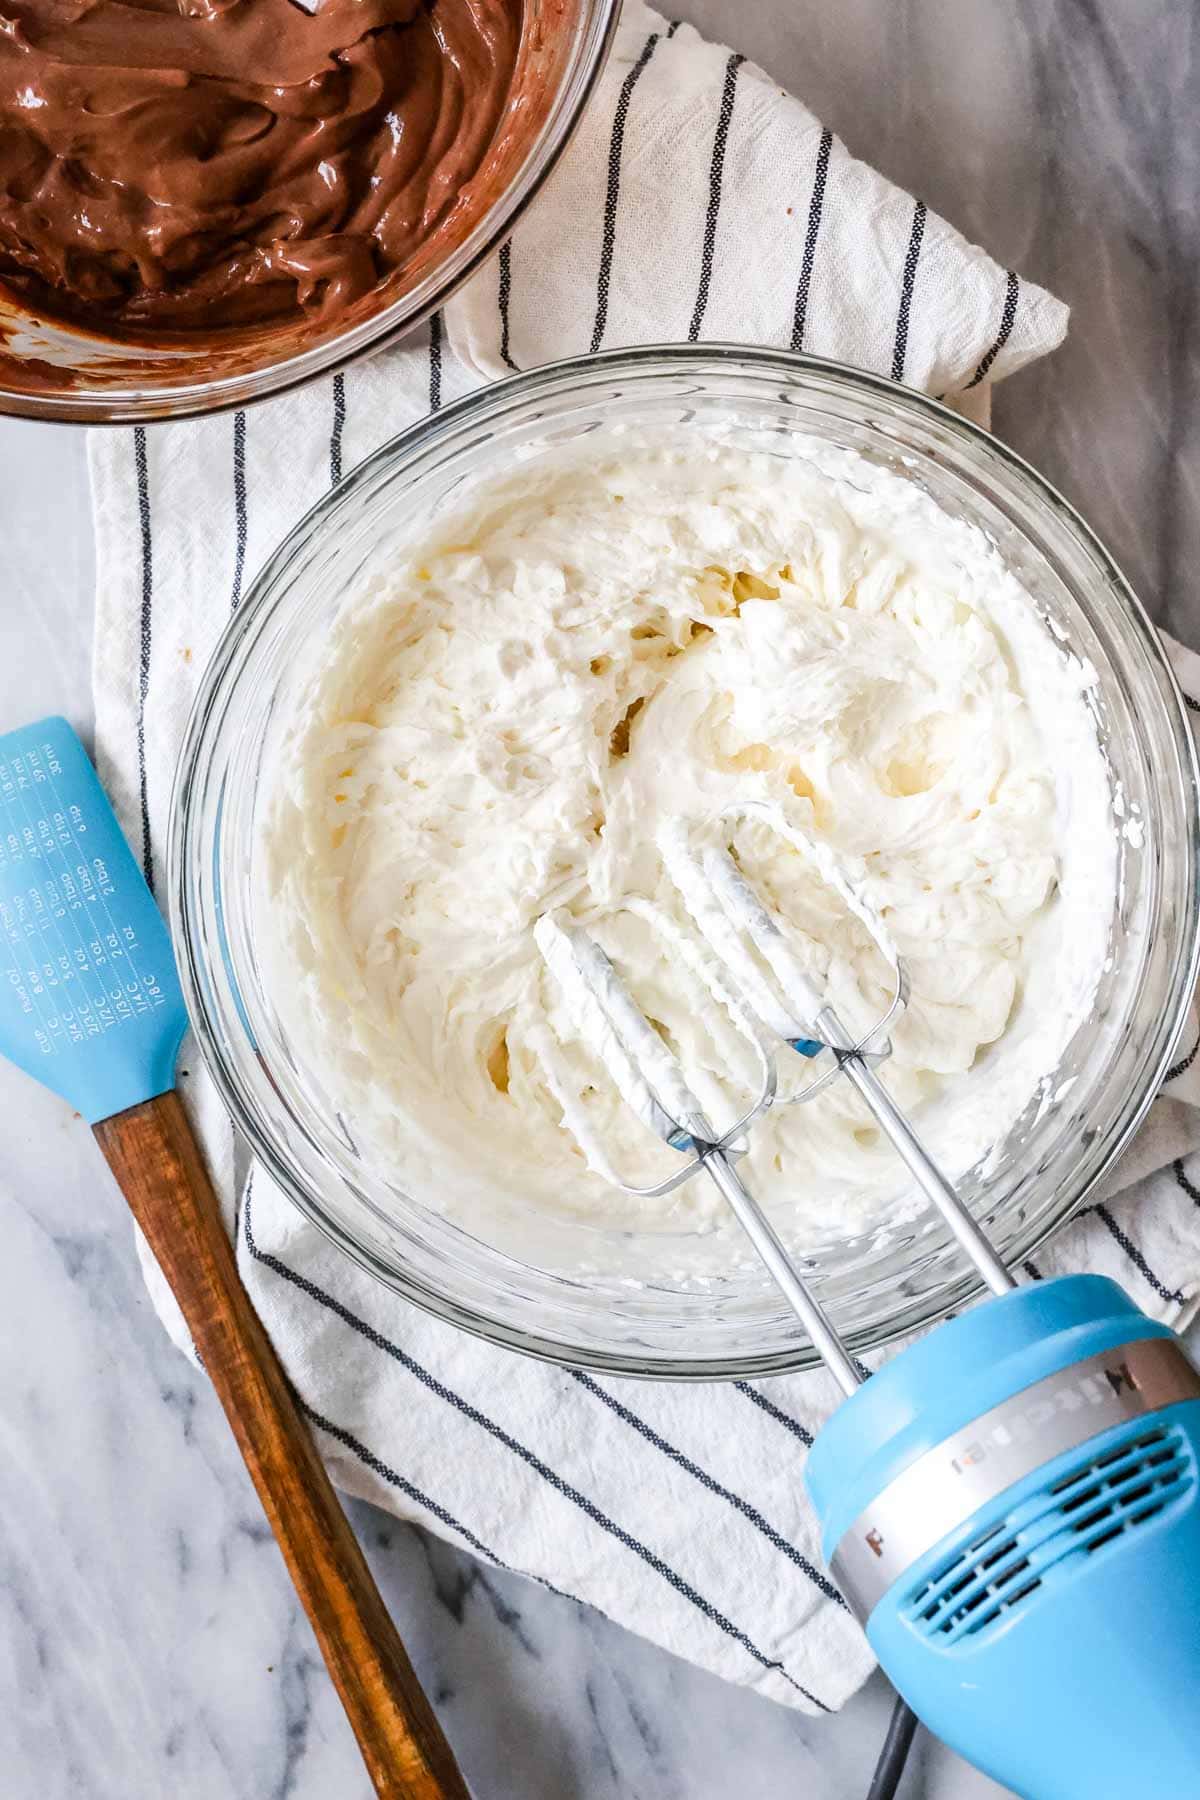
- Whip to stiff peaks. Add the cream, sugar, and vanilla to a large bowl and whip to thick and fluffy stiff peaks (like Cool Whip!).
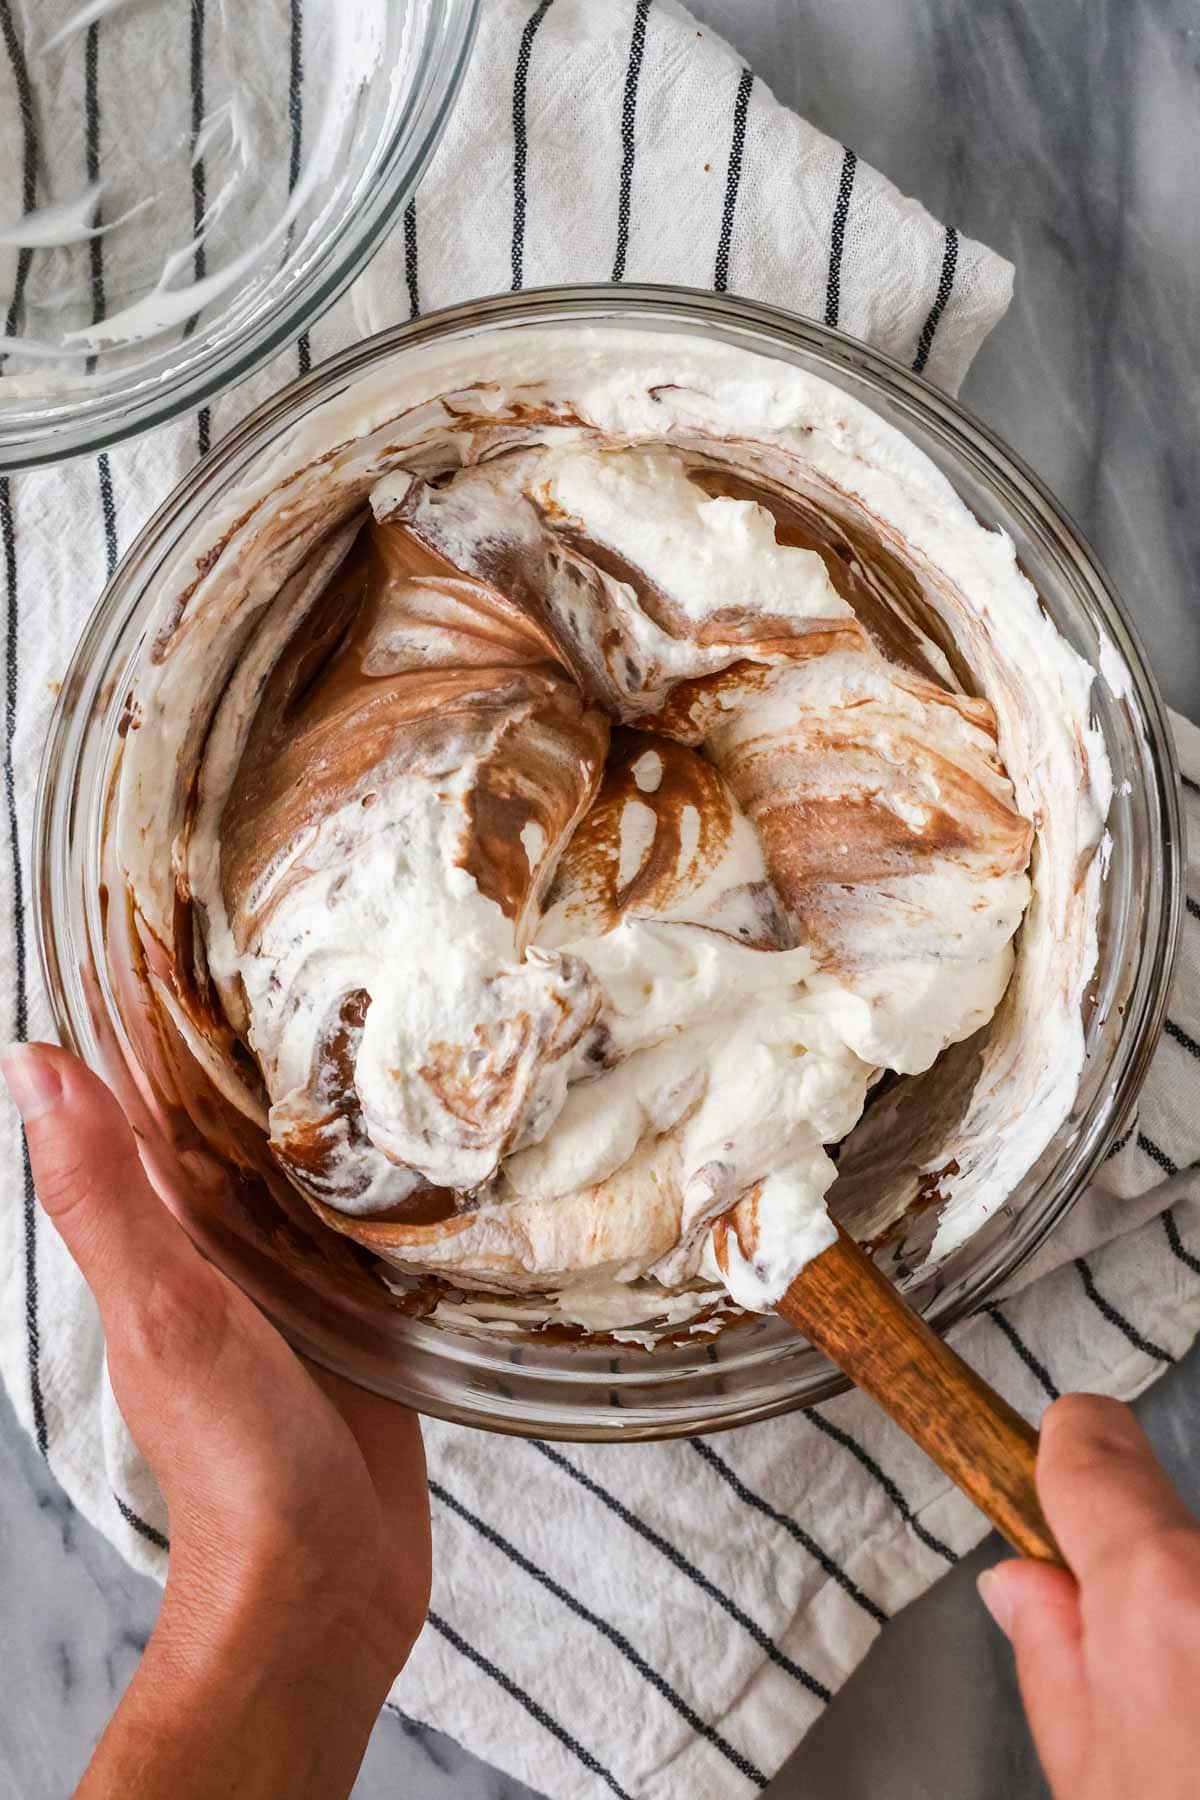
- Fold into the chocolate pudding. Gently fold the whipped cream into the completely cooled (important!) pudding until everything is cohesive.
Make the dirt
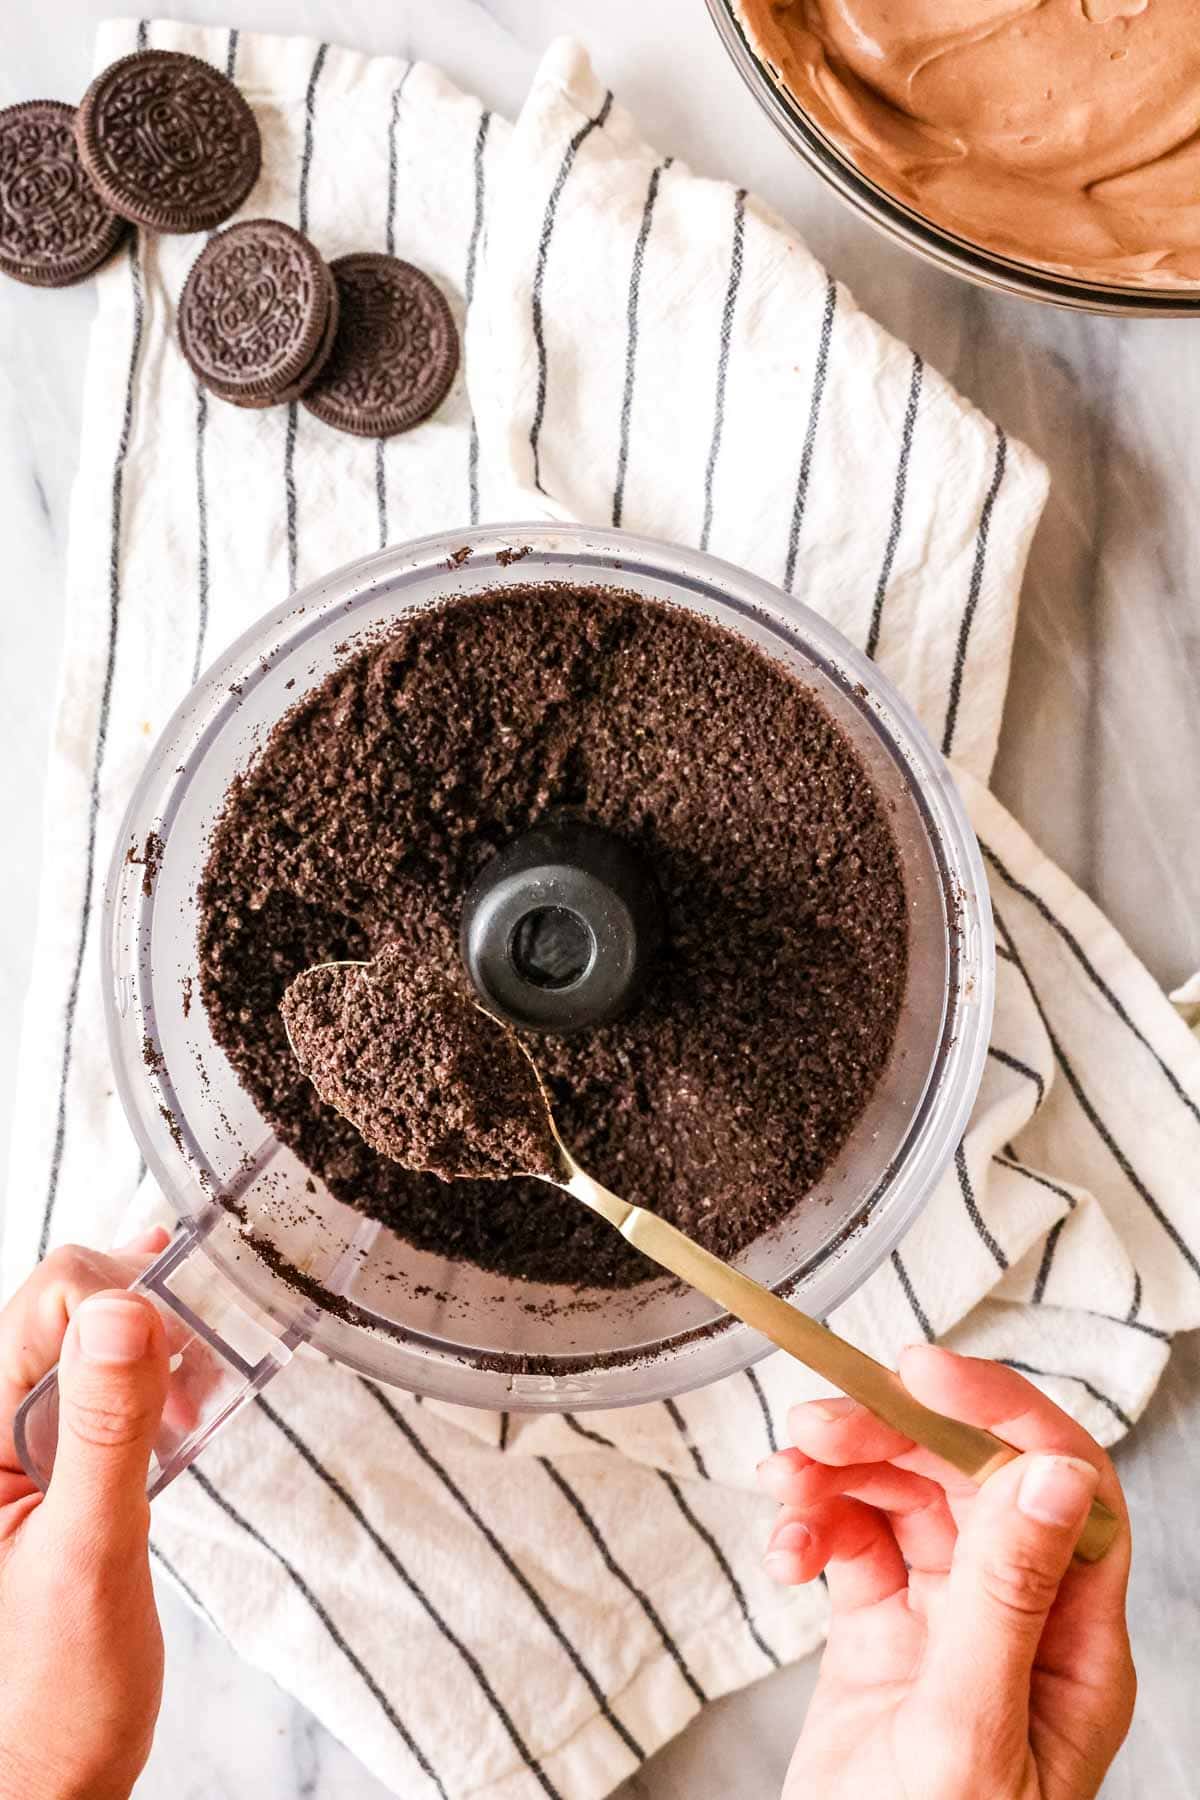
- Crush the Oreos. Pulverize the Oreos in a food processor or place in a Ziploc bag and smash with a rolling pin. You do not need to remove the cream from the cookies before doing this!
Assemble
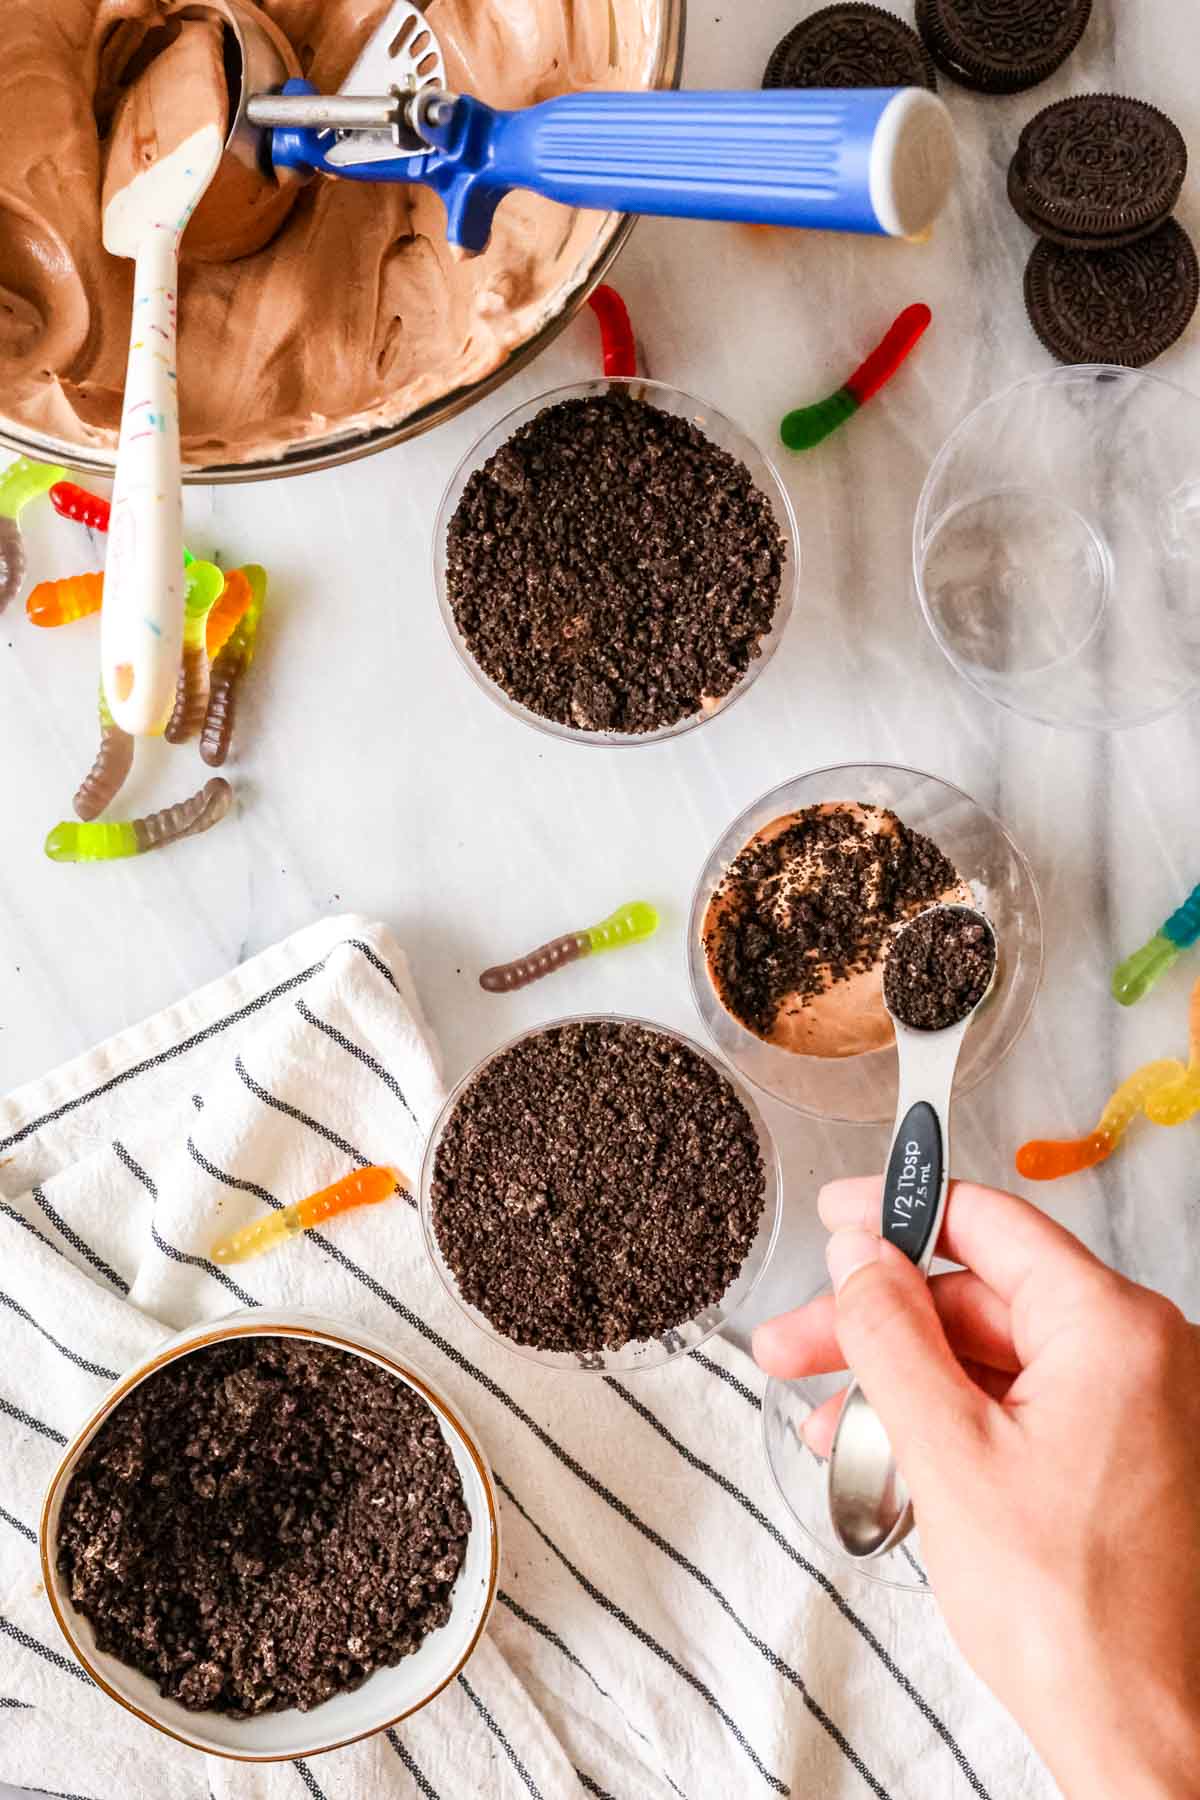
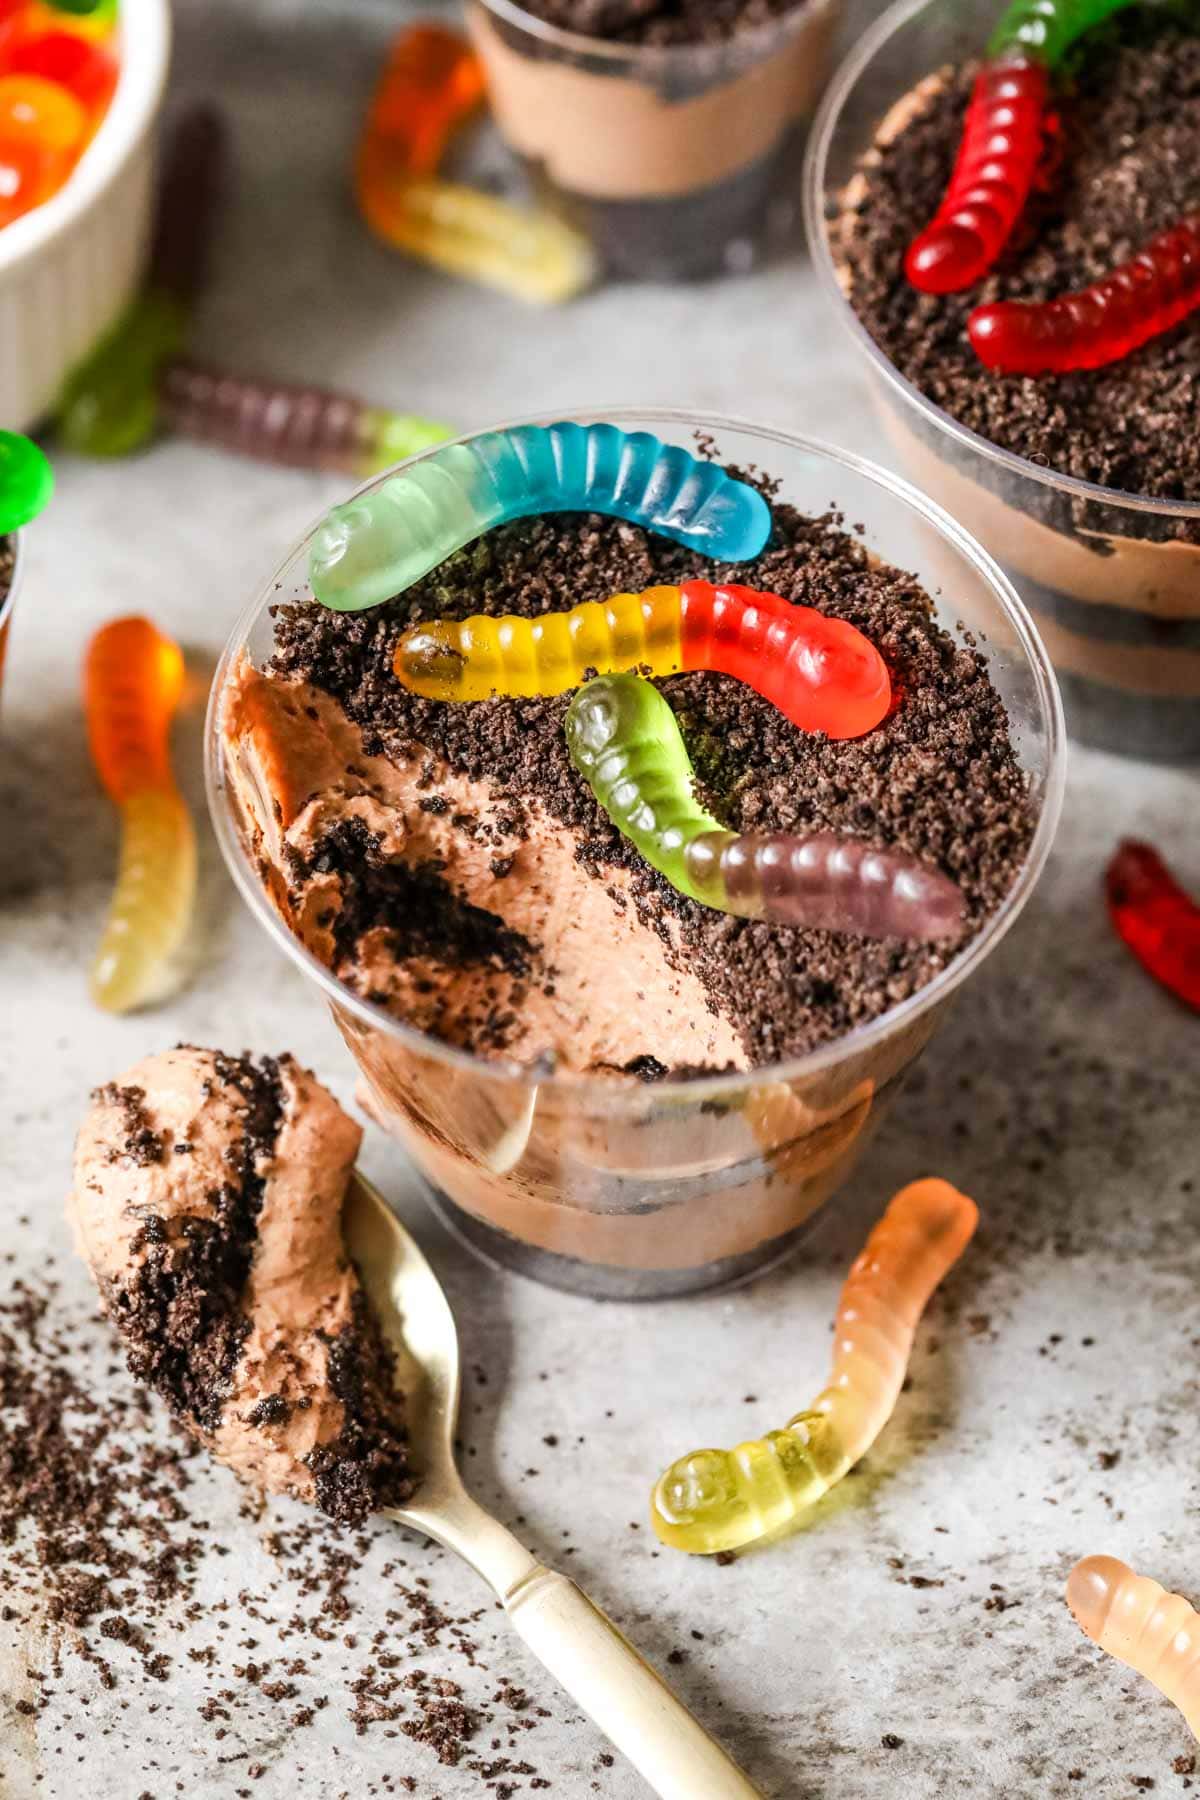
- Assemble and serve! Layer Oreo crumbs into each cup, then top with a layer of pudding. Repeat so you have two layers of each, then add your gummy worms on top.
SAM’S TIP: While gummy worms are the traditional topping for dirt cups, you can absolutely get creative with the decoration. Swap the gummy worms for candy pumpkins for a Halloween dessert or use candy eggs or gummy carrots for an Easter dessert!
Frequently Asked Questions
Like many dishes, the origin of the cup of dirt isn’t crystal clear. Signs seem to point towards the midwestern United States though. They become very popular in the late 1980s and 1990s, and they remain a nostalgic dessert for many kids (now adults!) born during that time period.
If you are interested in reading more, here’s a full article about the history of dirt cups.
Yes! You can make them up to 3 days in advance of serving. Just make sure to place your dirt cups in an airtight container or seal each cup of dirt with with plastic wrap before placing in the fridge.
Note that I recommend adding the gummy worms just before serving so they don’t get hard in the fridge.
I’ve heard of quite a few including worms in dirt, mud and worms, dirt pudding, dirt cups, and dirt dessert. Dirt cake is similar, but served in a large dish and sliced instead of in individual cups (and my dirt cake recipe uses a homemade vanilla pudding instead of chocolate).
More Nostalgic Recipes
If you can’t get enough dirt and worms, try my dirt cookies next!
Enjoy!
Let’s bake together! Subscribe to my newsletter to be notified of all the newest recipes, and find my free recipe tutorials on YouTube 💜
Cup of Dirt
Equipment
- 9 oz clear plastic cups (see note)
Ingredients
For the pudding
- ¾ cup (150 g) granulated sugar
- 3 Tablespoons cornstarch
- 2 Tablespoons natural cocoa powder
- ¼ teaspoon salt
- 3 cups (710 ml) whole milk
- 4 oz (113 g) dark chocolate bar, chopped into pieces
- 2 Tablespoons (28 g) unsalted butter, cut into pieces
- 1 teaspoon vanilla extract
For the whipped cream
- 1 ½ cups (355 ml) heavy cream
- ½ cup (65 g) powdered sugar
- 1 teaspoon vanilla extract
For assembly
- 30 Oreo cookies, (see note)
- Gummy worms, for decoration
Instructions
For the pudding
- In a medium saucepan, whisk together sugar, cornstarch, cocoa powder, and salt.¾ cup (150 g) granulated sugar, 3 Tablespoons cornstarch, 2 Tablespoons natural cocoa powder, ¼ teaspoon salt
- Add milk and whisk to combine.3 cups (710 ml) whole milk
- Transfer to a stovetop over medium heat and cook, whisking constantly until mixture thickens to a pudding-like consistency and coats the back of a spoon. MIxture will likely bubble as it nears the end of the cooking process.
- Remove from heat and immediately add chocolate, butter, and vanilla and whisk until butter and chocolate are melted and all ingredients are smooth and combined.4 oz (113 g) dark chocolate bar, 2 Tablespoons (28 g) unsalted butter, 1 teaspoon vanilla extract
- Pour pudding through a fine mesh strainer into a heatproof bowl. Allow to cool for 15 minutes, stirring occasionally. Press a piece of plastic wrap or parchment paper directly against the surface of the pudding (to prevent a skin from forming) and refrigerate until cooled completely, at least 2 hours.
For the whipped cream
- Once pudding has chilled, prepare the whipped cream. In a large mixing bowl, use an electric mixer to beat together heavy cream, sugar, and vanilla until thickened and stiff peaks are achieved (mixture will be a Cool Whip consistency).1 ½ cups (355 ml) heavy cream, ½ cup (65 g) powdered sugar, 1 teaspoon vanilla extract
- Add whipped cream to the (cooled) pudding mixture and use a spatula to gently fold together until combined. Set aside.
Assembly
- Crush cookies into fine crumbs (I use a food processor or place them in a ziploc bag and smash them with a rolling pin).30 Oreo cookies
- Scoop about 1 ½ Tablespoons of oreo crumbs into the bottom of your serving cup. Layer with about ⅓ cup pudding, then repeat with another layer of crumbs and pudding and then a final dusting of crumbs on top. If desired, top with gummy worms just before serving.Gummy worms
Notes
Serving cups
I used 9 oz clear plastic cups for the dirt cups in the photos, however these are fairly large servings! If you want smaller cups, you could alternatively make these in 2-oz disposable plastic shot glasses (affiliate). You’ll get quite a lot more cups!Oreo Cookies
Alternatively you could make ½ batch of my homemade Oreo cookies and crumble these. I do make and fill the cookies before crumbling them.Storing
Cover tightly and store in the refrigerator for up to 3 days.Nutrition
Nutrition information is automatically calculated, so should only be used as an approximation.
Like this? Leave a comment below!


Another winning recipe, Sam! I followed the recipe exactly (no time for the homemade Oreos though ;). The homemade chocolate pudding is perfect! I let the pudding sit in the fridge overnight before making and mixing it with the whipped cream. I used 5.5 ounce snack cups with lids (convenient for storing), and was able get 15 cups with a little leftover for sampling. I will add the gummy worms before serving to my family tonight.
I’m so glad they were such a hit, Tammy! I won’t hold the store bought oreo usage against you. 😉