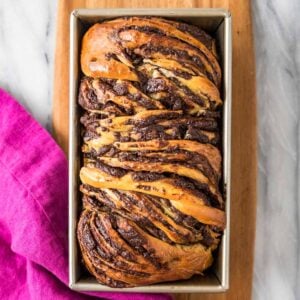
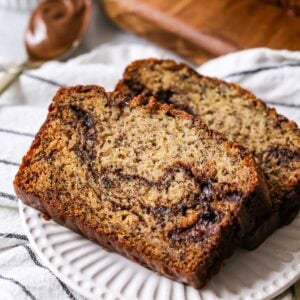
With a tender, perfectly dense, and chocolate swirled crumb, this chocolate babka is bakery worthy. Learn how to make it in your own kitchen with my easy-to-follow recipe! Recipe includes a how-to video!
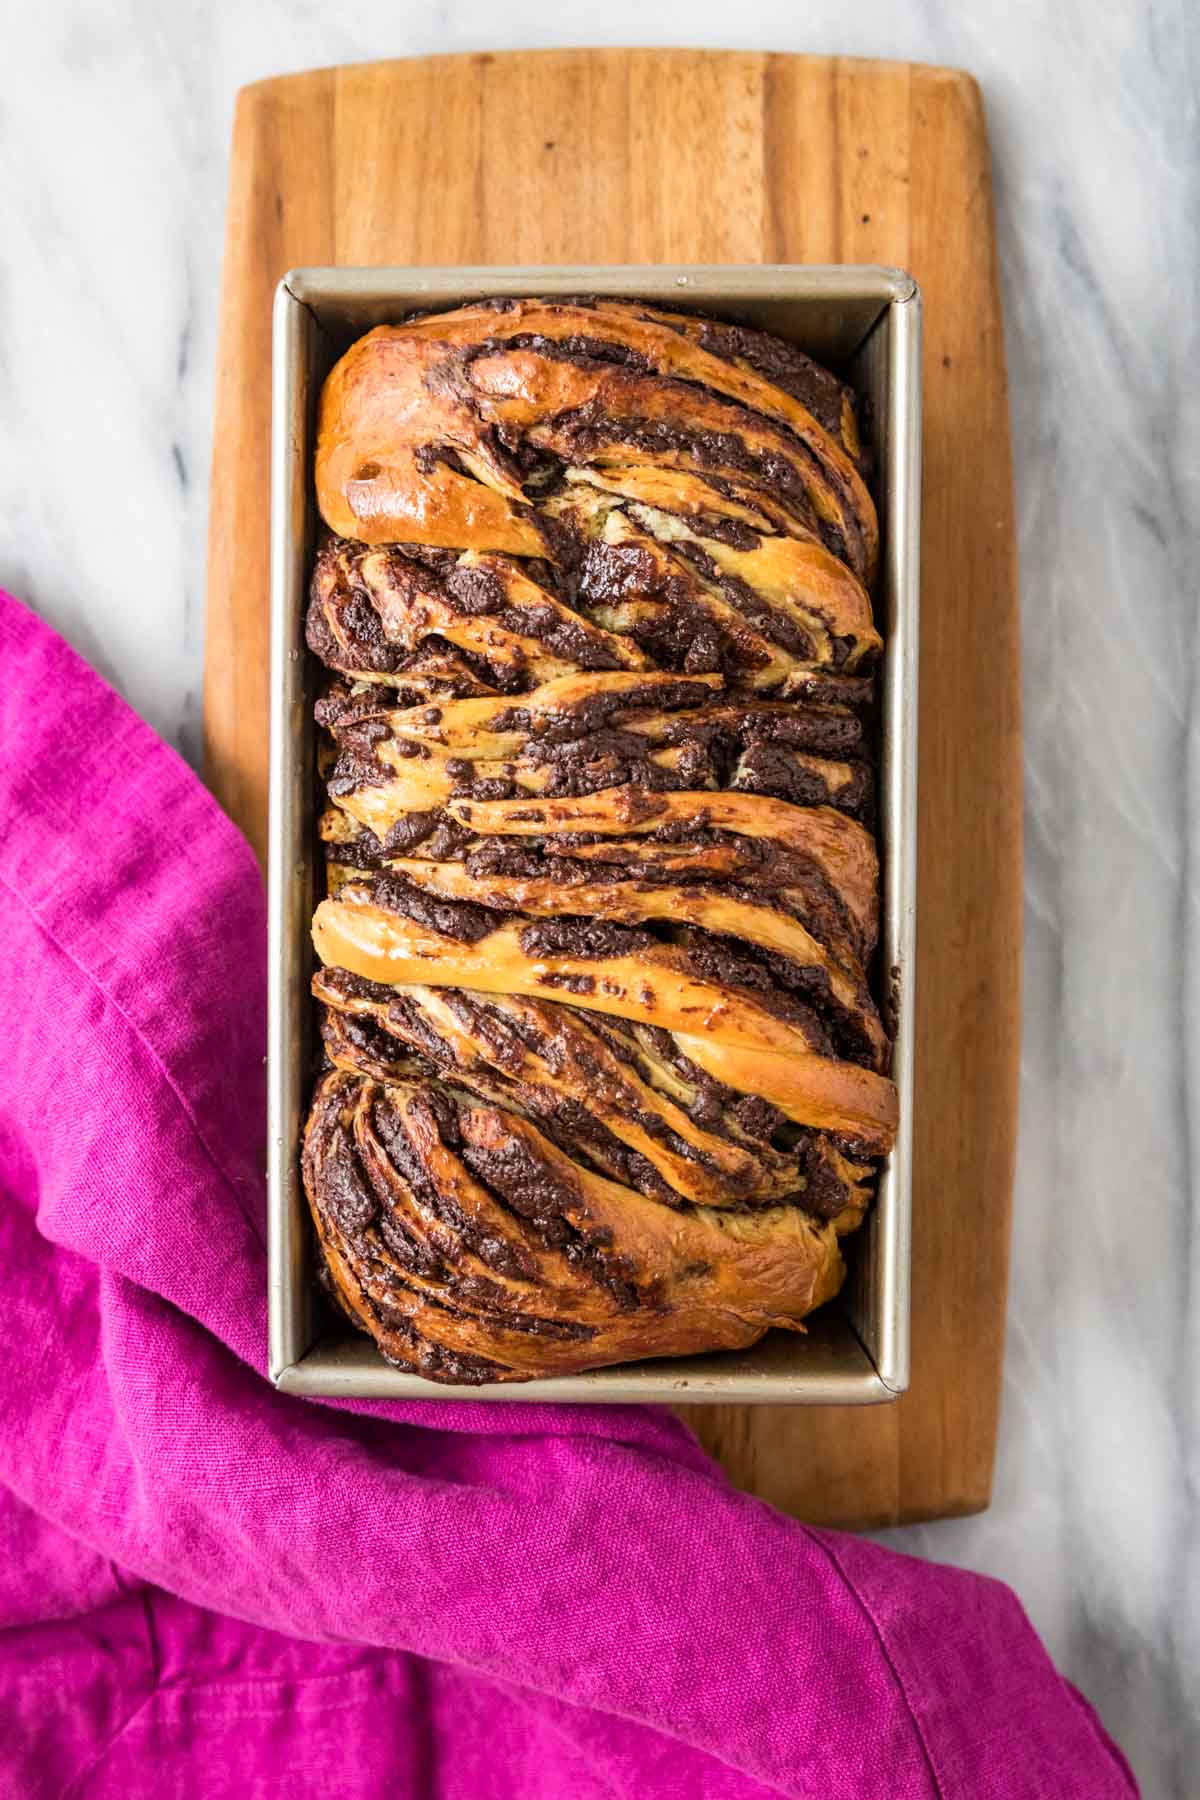
Chocolate Babka: The Superior Babka
If you’ve ever seen the popular Seinfeld episode featuring chocolate babka, you know that nothing (not even cinnamon babka!) tops this coveted, chocolate rippled treat. Sweet, tender and perfectly enriched with eggs, sugar, and butter, this bread is worth all the hype–it’s completely irresistible!
Unlike Jerry and Elaine though, you don’t have to stand in a long bakery line for your chocolate babka. You can make it right in your own kitchen 🎉
Babka is like a beautiful hybrid between cake and bread. It’s quite different from most yeast breads, with a tender, dense, and cakey texture rather than a light and airy, open crumb. On the other hand, it’s also more dense than a traditional cake. So it’s really a nice mix between the two.
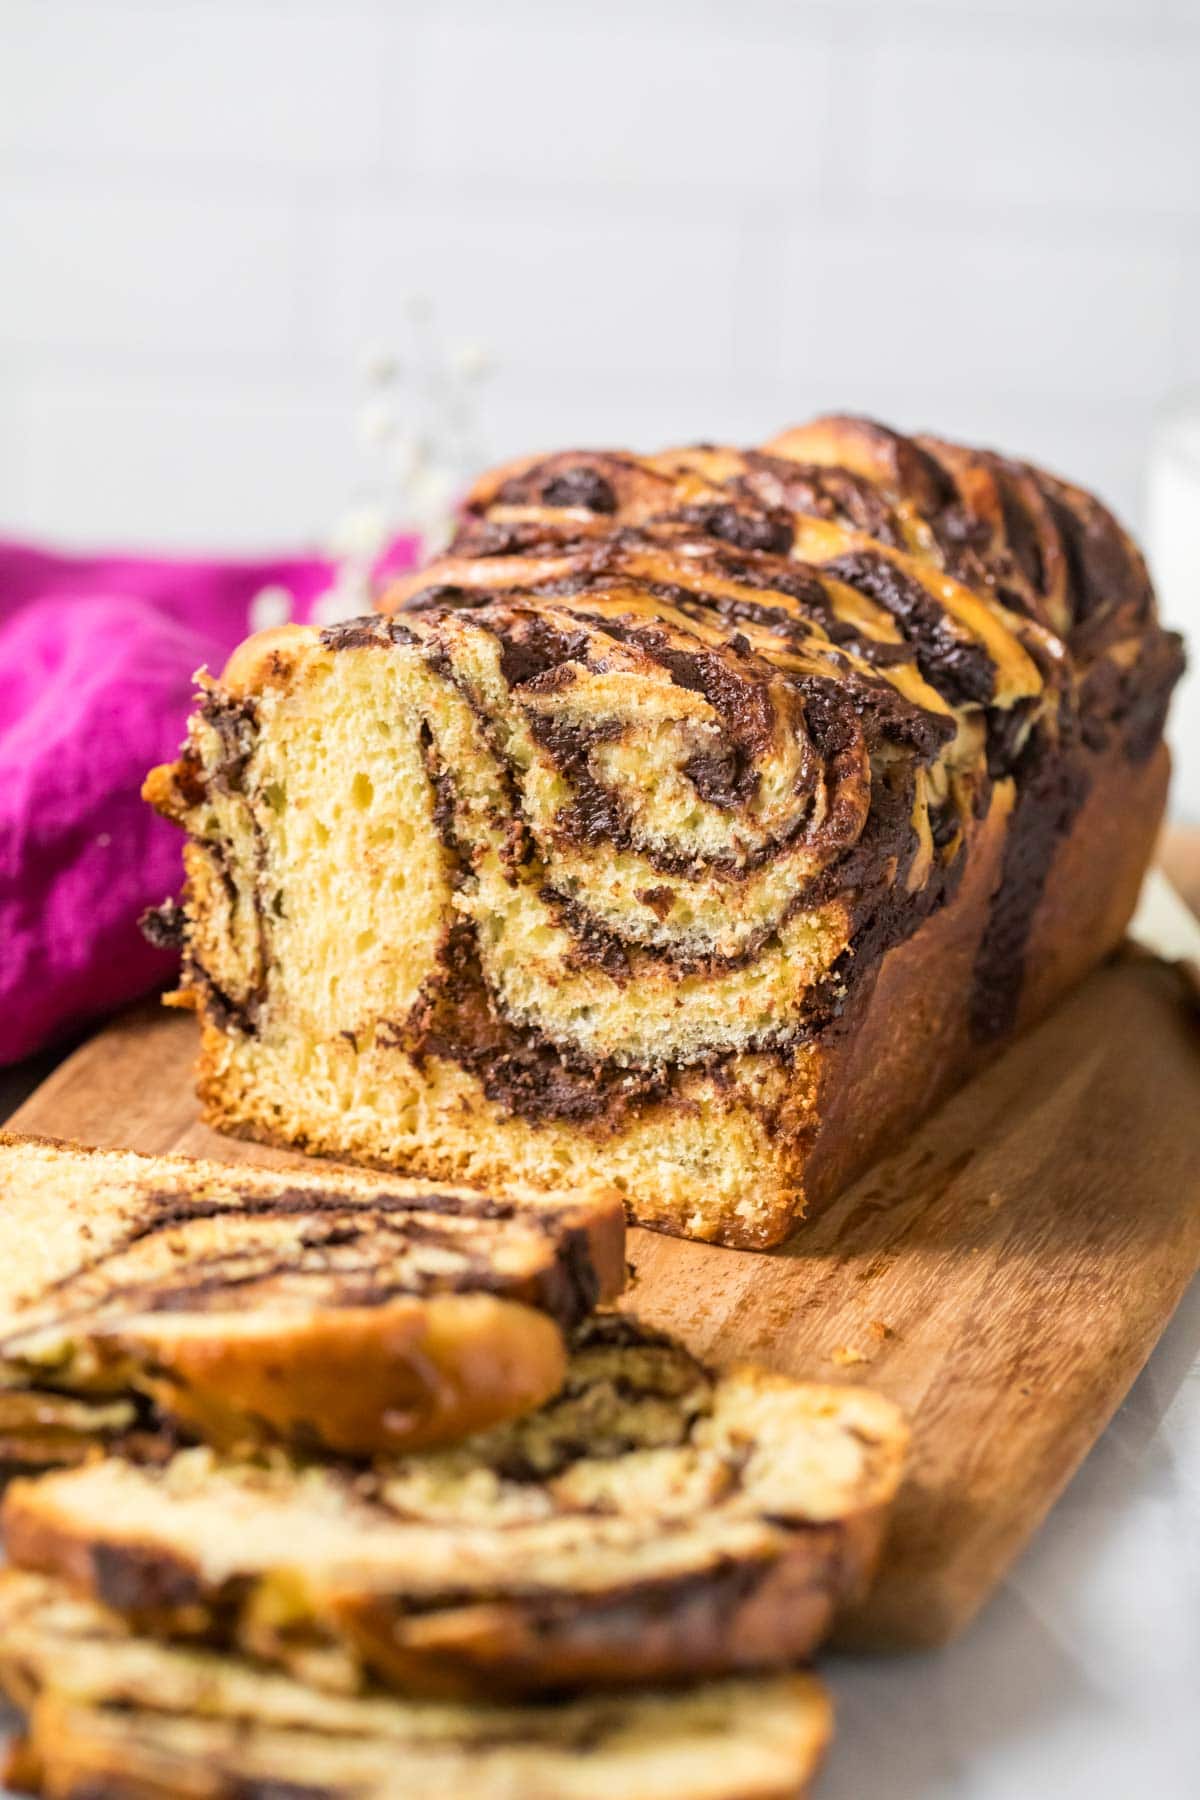
Why You’ll Love This Recipe
- Impressive, bakery-style look and taste that anyone can achieve at home.
- No fancy ingredients; we’re keeping things simple, you don’t even need bread flour for this recipe.
- Includes step-by-step photos and instructions, plus a how-to video. Even if you’re a beginner, you’ve got this!
- You can make it by hand or with a stand mixer and a dough hook. I personally prefer using a stand mixer though, as this allows for a sticker dough and more tender chocolate babka.
Ingredients
As with most enriched breads (like my sweet bread and cinnamon rolls), there are quite a few ingredients needed to make this chocolate babka.
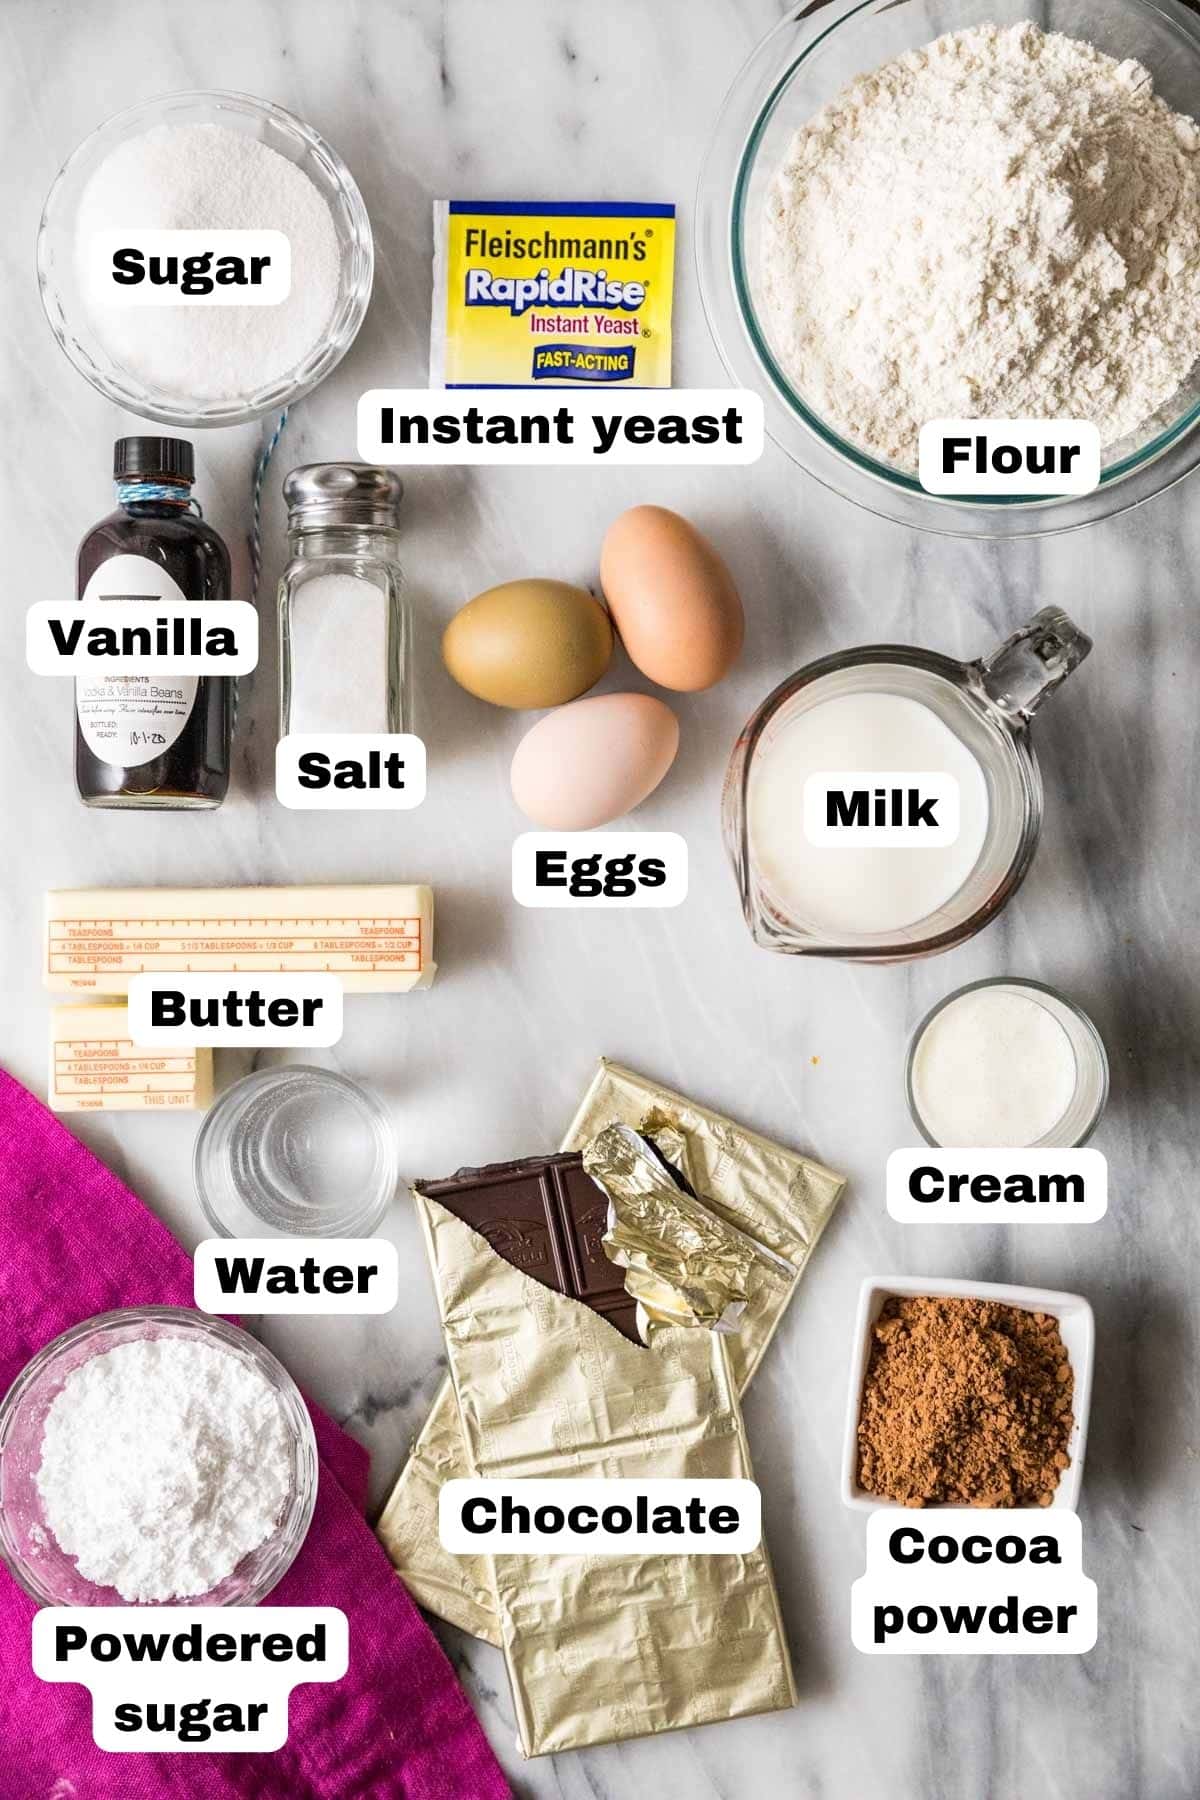
- Flour. Similar to many of my yeast recipes, this recipe lists a range of flour instead of a set amount. This is because your kitchen, the weather, and so many other factors will affect how much flour you will ultimately need to add. You’ll know your dough has enough flour when it is still sticky, but starts to pull away from the sides of the bowl. Watch my video below for visual cues on this.
- Instant yeast. I tried this chocolate babka recipe with both instant and active dry yeast, and I preferred instant. Note that 1 ¼ teaspoon is less than a full packet, so don’t just dump in the whole packet!
- Egg + egg yolk. Two whole eggs and an extra egg yolk enrich our dough and make it tender and moist. If you don’t want to waste your extra egg white, use it for candied pecans.
- Milk. I prefer whole milk and recommend you use the same if you can, though any milk technically will work here. Make sure your milk is between 100-105F–if it’s too hot, it will kill your yeast!
- Chocolate. Some people like to use Nutella for their chocolate babka filling (reminds me of my Nutella stuffed cookies!), but I am using a more traditional homemade chocolate filling. You’ll need a chopped chocolate bar for this; I prefer 60% cacao, but you could also use semisweet chocolate.
SAM’S TIP: A teaspoon of cinnamon in the filling would be delicious, if you like chocolate and cinnamon together (if you like that combo, check out my chocolate rolls!).
This is just an overview of the ingredients I used and why. For the full recipe please scroll down to the bottom of the post!
How to Make Chocolate Babka
Prep the Dough
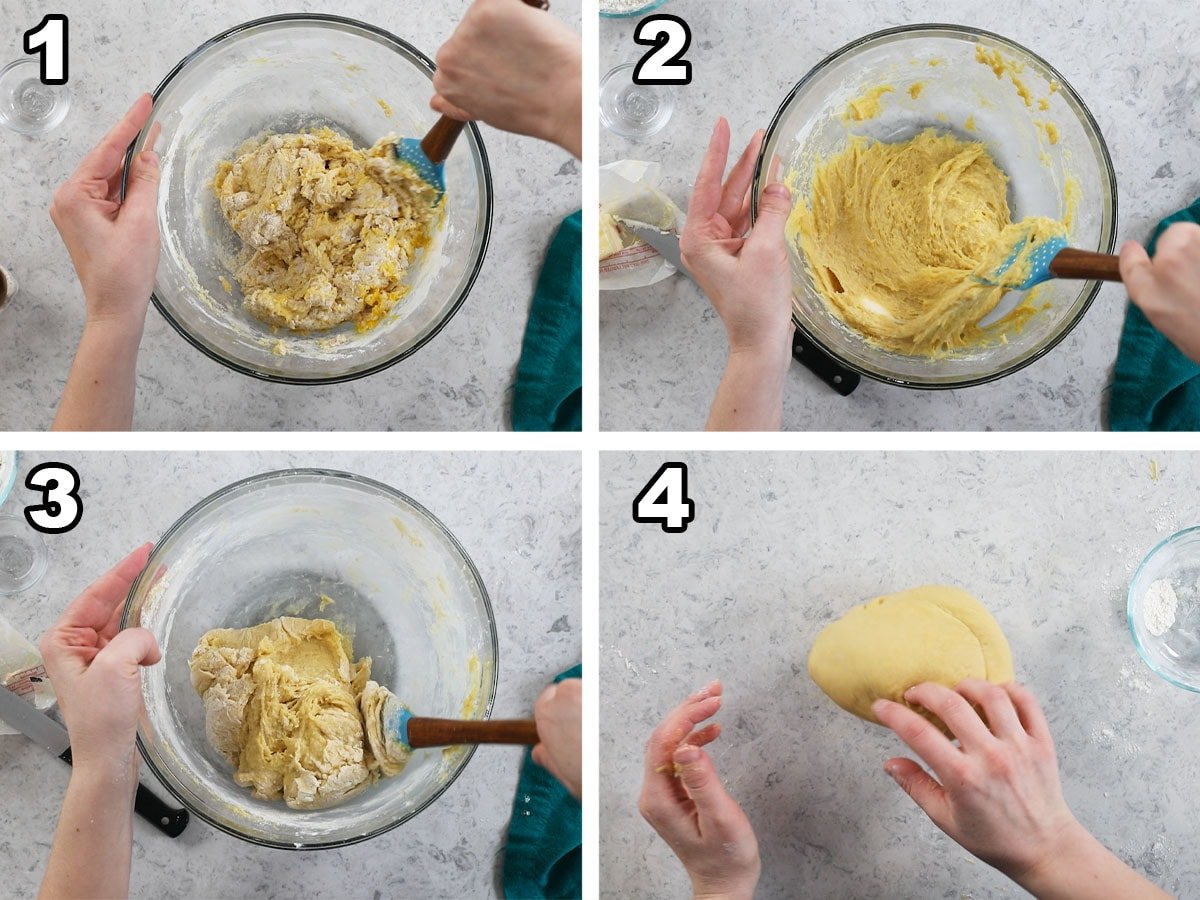
- Whisk the dry ingredients and 2 ½ cups of the flour in a bowl, then stir in the eggs, milk, and vanilla until combined.
- Add the butter, working with 1 tablespoon at a time. Mix until each addition is completely incorporated into the dough before adding the next.
- Gradually add more flour until the dough starts pulling away from the bowl and clinging to itself.
- Knead the dough until smooth, elastic, and cohesive (about 10-15 minutes by hand or 5-10 minutes in a stand mixer), then transfer to a large oiled bowl, cover, and let rise in a warm place. Once the dough has puffed and increased in size (it will not double in size like many other yeast breads do), place it in the fridge overnight.
SAM’S TIP: The dough can be made by hand as shown, but this is actually one recipe where it’s really nice to use a stand mixer if you have one (with the dough hook attachment). The babka simply turns out best when the dough is still a bit sticky/tacky and just slightly too difficult to work by hand, and a stand mixer makes it possible/easier to achieve this.
Filling
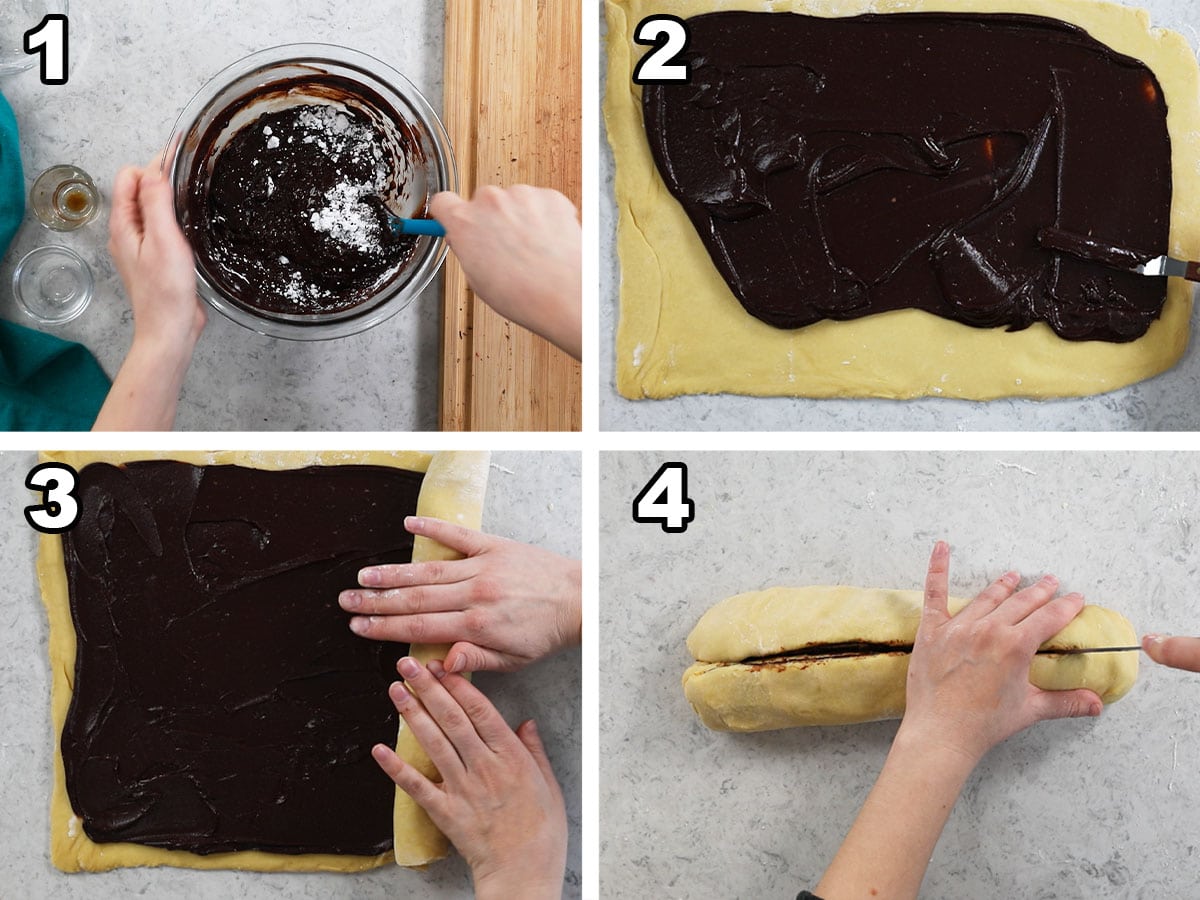
- Make the filling by heating the chocolate, butter, and cream in the microwave until melted and smooth, then stir in the cocoa powder. Add the remaining ingredients, stir until smooth, then set aside.
- Form the dough into an 18×12″ rectangle and spread the chocolate filling evenly over the surface. Make sure to leave a ½” edge around the perimeter where there is no filling.
- Roll the dough into a log, starting with the shorter end and pinching the seam at the end. You may need to squish the ends as you roll so they don’t get too long.
- Cut the log lengthwise down the center (note I rotated the dough after rolling it in the photos above!), then place the two halves next to each other with the cut sides facing up.
Twisting/Baking
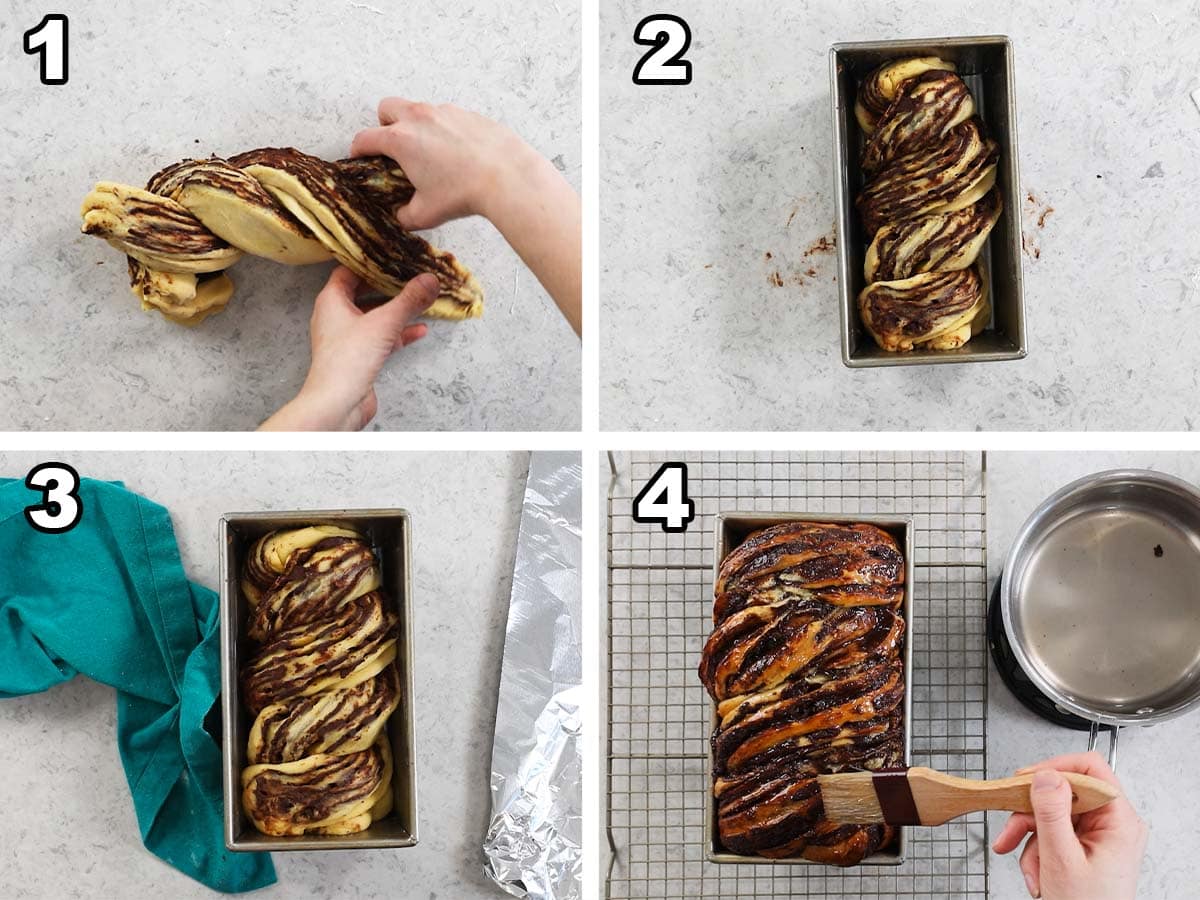
- Twist the logs around each other 4-5 times. I do this by starting in the middle and twisting on the bottom twice, then twisting the top twice. It’s messy, but worth it.
- Transfer your dough to a bread pan and cover loosely with plastic wrap. Let the dough rise until puffy again. Once puffed, remove the plastic wrap.
- Bake for 30 minutes, then tent with foil and bake for another 30-35 minutes. Tenting keeps our bread from getting too dark. While your chocolate babka bakes, prep the simple syrup.
- Brush the top of the bread with simple syrup immediately after baking and let cool for at least 30 minutes before removing from the pan. It will seem like a lot of syrup, but it’s key for the proper flavor and moisture.
SAM’S TIP: Don’t transfer the chocolate babka out of the pan right away or it could fall apart. Give it about 30 minutes, then remove. You don’t want to cut into it right away either; it’s best to let it cool completely if you can. I will admit, it tastes best when it’s still just a little warm from the oven though 😉
Frequently Asked Questions
Store your babka at room temperature in an airtight container. The longer the bread sits, the dryer and harder it will get, so enjoy it within the first 1-2 days of preparing for the best flavor and texture. If you want to try and soften up your chocolate babka, you can pop it in the microwave.
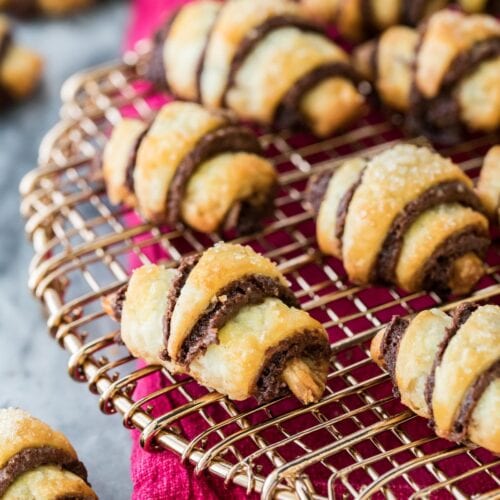
Yes, similar to rugelach and hamantaschen, babka has Jewish origins. The version of chocolate babka we all know and love today is quite different from the original Jewish creation though; you can read more about the history of babka.
You bet! Nutella is a popular choice that would work well here, just spread an even layer over the dough instead of the chocolate called for. Some chopped hazelnuts would also be a nice addition with the chocolate hazelnut spread. I’ve also been experimenting with a cinnamon/sugar filling and suspect you could get pretty creative with your own additions (the gears are currently turning in my head for a fruit-filled babka).
Please don’t. The simple syrup is a traditional addition and keeps the babka moist and soft. Skipping it could leave you with a dry bread (or one that dries out much faster than it ought to).
Leave me a comment below if you’d like to see a cinnamon babka recipe 😄
Enjoy!
Let’s bake together! Subscribe to my newsletter to be notified of all the newest recipes, and find my free recipe tutorials on YouTube 💜
Chocolate Babka
Ingredients
Bread
- 3 -3 ½ cups (375-438 g) all-purpose flour divided
- ⅓ cup (66 g) granulated sugar
- 1 ¼ teaspoon instant yeast
- ¾ teaspoon salt
- 2 eggs + 1 egg yolk lightly beaten, room temperature preferred
- ½ cup (118 ml) milk warmed to 100F (38C)
- 1 ½ teaspoons vanilla extract
- ⅓ cup (75 g) unsalted butter softened to room temperature and cut into tablespoons
Chocolate Filling
- 8 oz (227 g) 60% chocolate bar finely chopped
- ⅓ cup (75 g) unsalted butter
- ¼ cup (60 ml) heavy cream
- 2 Tablespoons natural cocoa powder
- ½ cup (65 g) powdered sugar
- ½ teaspoon vanilla extract
- ¼ teaspoon salt
Syrup
- ⅓ cup (66 g) granulated sugar
- ¼ cup (60 ml) water
Recommended Equipment
Instructions
- In a large mixing bowl (or the bowl of your stand mixer), whisk together 2 ½ cup (312g) flour, sugar, yeast, and salt.3 -3 ½ cups (375-438 g) all-purpose flour, ⅓ cup (66 g) granulated sugar, 1 ¼ teaspoon instant yeast, ¾ teaspoon salt
- Add lightly beaten eggs, egg yolk, milk, and vanilla extract and stir until dough is combined.2 eggs + 1 egg yolk, ½ cup (118 ml) milk, 1 ½ teaspoons vanilla extract
- Add butter, 1 Tablespoon at a time, stirring until butter is completely incorporated before adding the next, and continue mixing until all butter is completely combined.⅓ cup (75 g) unsalted butter
- Gradually add remaining flour, a few tablespoons at a time, until dough begins clinging to itself and pulling away from the side of the bowl when stirring.
- Transfer dough to a lightly floured surface and knead by hand (about 10-15 minutes), or use the dough hook attachment on your stand mixer (about 5-10 minutes) until dough is cohesive, smooth and elastic. Dough will be sticky but should not stick to your hands. You may need to add additional flour during this process, especially if kneading by hand, this is fine.
- Transfer to a large oiled bowl, cover with plastic wrap and set in a warm spot to rise until puffed (it will increase in size by about 25%, it will not double as many bread doughs do!), about 1-2 hours.
- Once dough has puffed, transfer to the refrigerator and let it rest overnight (for at least 12 and up to 24 hours).
Prepare the filling
- The next day, before removing the dough from the refrigerator, lightly grease a 9×5” (23x13cm) bread pan with butter and prepare the filling.
- In a medium sized, microwave-safe bowl, combine chopped chocolate, butter, and cream. Heat in the microwave for 25 seconds, stir well, and repeat until mixture is smooth.8 oz (227 g) 60% chocolate bar, ⅓ cup (75 g) unsalted butter, ¼ cup (60 ml) heavy cream
- Add cocoa powder to mixture and stir until smooth and combined.2 Tablespoons natural cocoa powder
- Add powdered sugar, vanilla extract, and salt and whisk together until completely combined and smooth. Set aside while you roll out your dough. Note that the filling should be a spreadable consistency, similar to peanut butter, in order to easily use it. If yours is particularly warm or liquid, pop it in the fridge so it can become more firm and spreadable.½ cup (65 g) powdered sugar, ½ teaspoon vanilla extract, ¼ teaspoon salt
Assembly
- Remove dough from refrigerator and turn out onto a clean, lightly floured surface. Use a rolling pin to roll dough into an 18×12” (46x30cm) rectangle.
- Spread chocolate filling evenly over the dough, leaving a ½ inch (1.5cm) perimeter.
- Starting at a shorter (12”) end, roll dough into a tight log, pinching the seam at the end. As you roll you may need to gently squish in the ends so it doesn’t become too long. it will
- Use a sharp knife to cut the log in half lengthwise.
- With the cut-sides facing up, place the two halves beside each other and twist them around one another 4-5 times. It helps to start in the middle and make two twists down and then, from the middle, two twists up.
- Carefully transfer to your prepared bread pan (you may need to gently squish the dough from each end to fit).
- Cover the bread pan loosely with plastic wrap and let rise until puffy, about 30-60 minutes. Meanwhile, preheat your oven to 350F (175C).
Baking
- Once dough is finished rising, transfer to center rack of 350F (175C) preheated oven and bake for 30 minutes. At the 30 minute mark, tent the bread with foil (to prevent over-browning), and return to 350F (175C) oven to bake for another 30-35 minutes. When temped with an instant read thermometer, the center of the bread should be between 185F-190F (85-88C) when finished.
Simple syrup
- Several minutes before bread is finished baking (or immediately after baking), prepare your simple syrup. In a small saucepan over low heat, stir together sugar and water until sugar is dissolved. Immediately after the bread finishes baking, use a pastry brush and brush all of the syrup evenly over the top of the bread.⅓ cup (66 g) granulated sugar, ¼ cup (60 ml) water
- Allow bread to cool in its pan for at least 30 minutes before removing to a cooling rack where it should cool for another hour before enjoying (the warmer the bread is when you cut into it, the more fragile it will be).
Notes
Stand mixer
If you have one, I recommend using a stand mixer rather than making this recipe by hand. It’s doable by hand, and I demonstrate this in the recipe, but by making it in the mixer you can get away with adding less flour and having a stickier dough, which actually makes for an even softer, more tender babka.Assembly notes
The babka should be cold when you roll it out, it’s much easier to handle this way. As you roll up and cut the babka, you may notice the chocolate solidifying, this is totally fine and normal.Storing
Store babka in an airtight container at room temperature for up to 3 days. The fresher it is, the better and softer it tastes!Freezing
Wrap tightly in plastic wrap then wrap in foil and freeze for up to 3 months. To thaw, it’s best to thaw (still wrapped) overnight in the refrigerator then bring to room temperature.Nutrition
Nutritional information is based on third-party calculations and should be considered an estimate only. Actual nutritional content will vary based upon brands used, measuring methods, cooking method, portion sizes, and more.


Wendy
Another yummy recipe and the video was very helpful. The filling was a little runny and there was a lot of it, but getting messy is half the fun!
Casey @ Sugar Spun Run
We’re so glad you enjoyed it, Wendy!
Tony
fantastic! I’ve tried a dozen babka recipes, searching for a tender crumb. Sam’s recipe is the absolute best!
Sam Merritt
Thank you so much for trusting my recipes, Tony! I’m so glad you enjoyed it so much! 🙂
Nyaziah
Can I substitute the heavy cream for whole milk?
Sam
I haven’t tried the filling made with milk, but I think it could work. The chocolate could be a bit thinner. 🙂
Kierra
Hey there. Going to attempt this recipe tonight/tomorrow but I want to use nutella. It seems like the filling being a bit thin may be a thing so i was thinking of trying to thicken the nutella. What do you think about mixing with some powdered sugar?
Sam
Hi Kierra! Sorry I missed this! It would probably be a bit sweet. It could ultimately actually make it more watery because sugar is actually a liquid. I probably wouldn’t mix it with anything. Maybe put it in the refrigerator before using. If you do try it I would love to know how it goes. 🙂
Ky
hi, I was wondering if you have experimented using active sourdough starter with this recipe?
Sam
I have not, but it would be an interesting experiment. If you try it I would love to know how it goes. I’m not sure what alterations would need to be made.
Viv
This recipe is a mess—literally! Have tried it twice now and the chocolate filling goes everywhere during the rolling, cutting, twisting process. The second time I even tried refrigerating the log before cutting it lengthwise to try to solidify the chocolate filling. No luck! Any advice?
Sam
Hi Viv! That sounds frustrating, I’m sorry to hear it. The filling part is a bit messy. Have you taken a peek at the video? Does yours look similar to mine there?
Sue
I had the same issue with this recipe. The filling was very soft – pourable, even. I waited a bit, but it never solidified at all. I checked the recipe AND the video, and I did everything as you did, Sam, but it didn’t come out the same. Could it be down to ingredients? I used Ghirardelli baking chocolate and ultra pasteurized heavy cream. Otherwise this recipe seems great (still baking my loaf) so I’d love to solve this issue.
Sam
Hi Sue! Those ingredients should be totally fine so I don’t think that’s the issue. I think you may just be warming your chocolate more than I am, which isn’t a bad thing but if yours is more of a pourable consistency than a spreadable cooled ganache-like one, it may just need to cool down more before you use it to make the assembly easier. You could help this along by putting the chocolate mixture in the fridge for a few minutes, and I think I’ll add a note to the recipe card just in case anyone else runs into this issue. I hope this helps and I hope you still were able to enjoy the babka!
Robin Fowler
A local baker makes chocolate babka for holidays. $15 a loaf. It is so good, but I’m going to make this one for Easter! I always have great success with your detailed, yet easy to follow, recipes.
Sam
I really hope you love the babka, Robin! Thank you for the kind words about my recipes, I really appreciate it! ❤︎