
Chantilly Cake
This post may contain affiliate links. As an Amazon Associate I earn from qualifying purchases. Please read my disclosure policy.
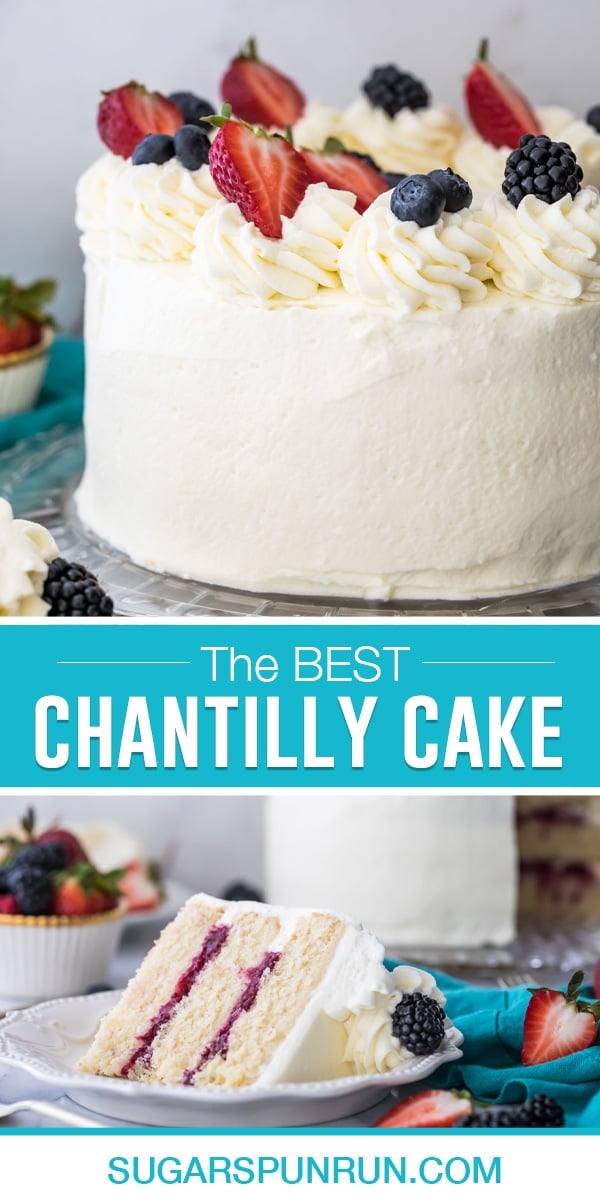
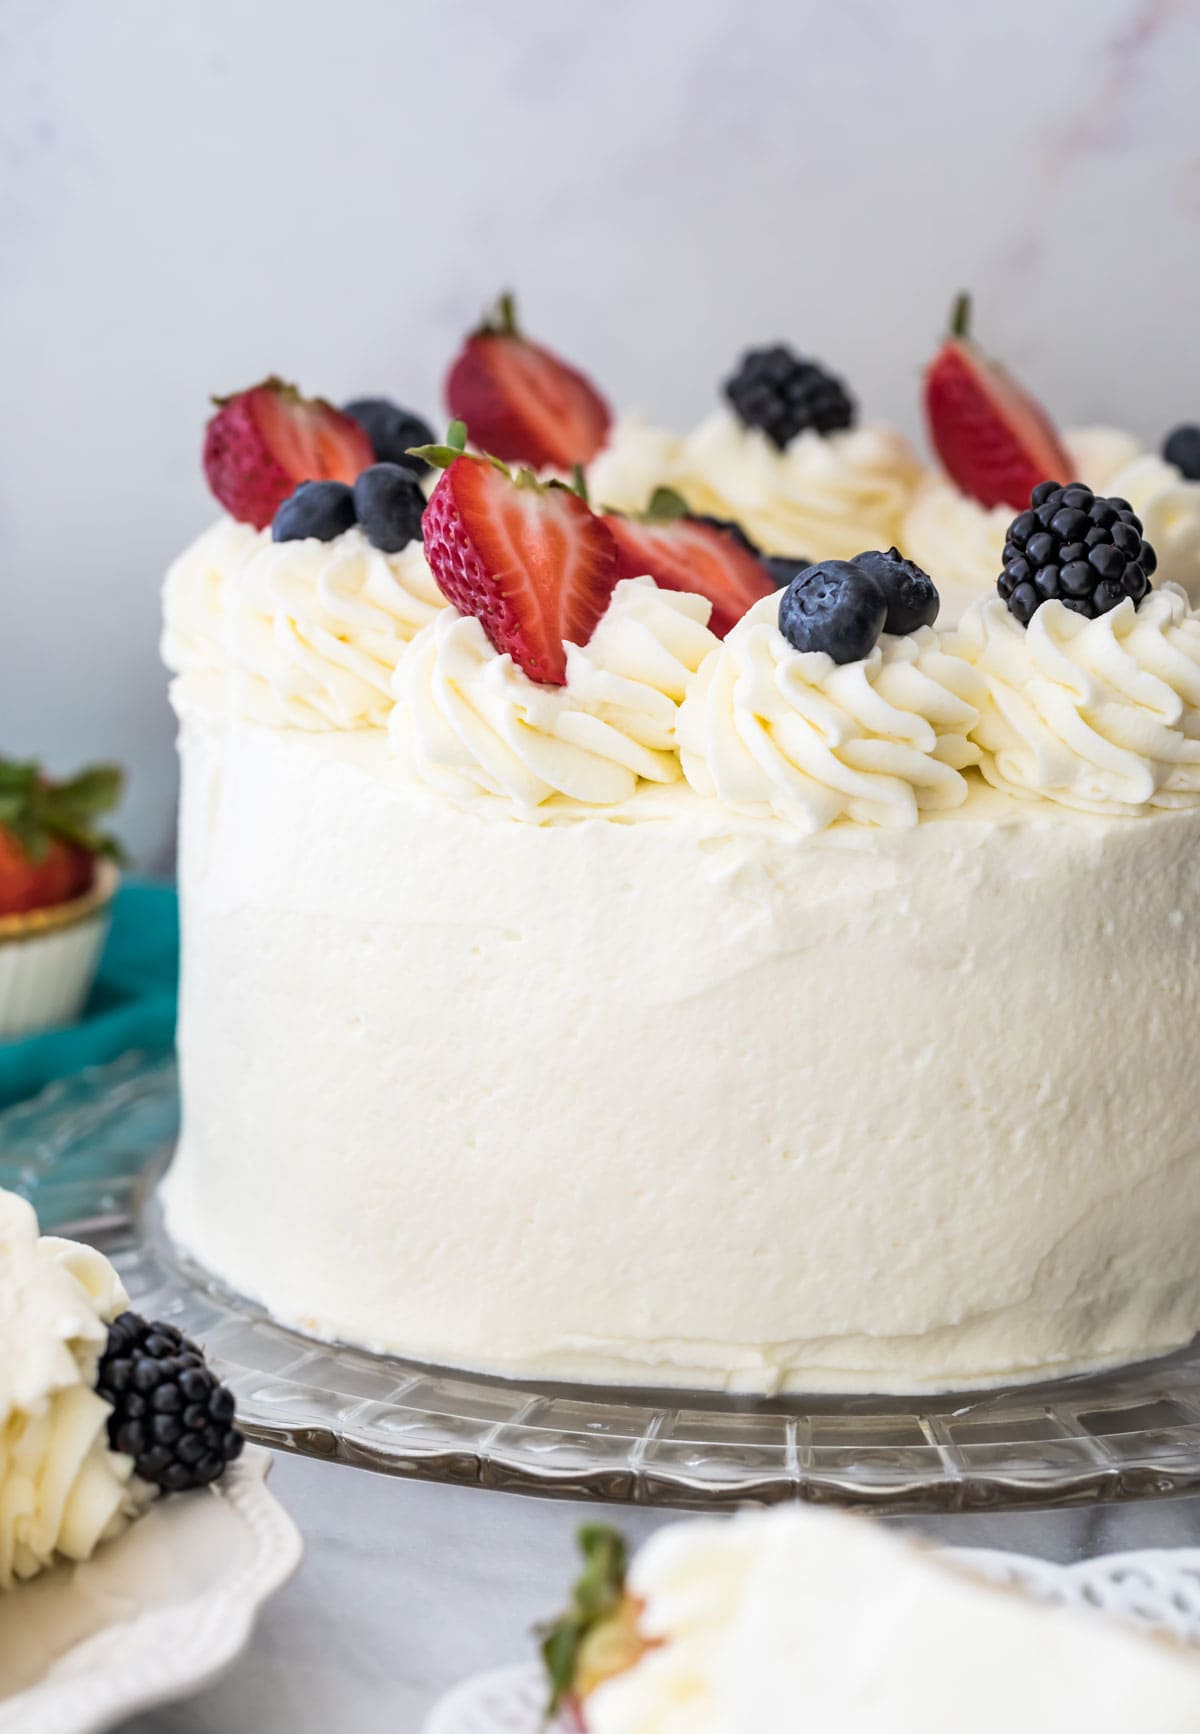
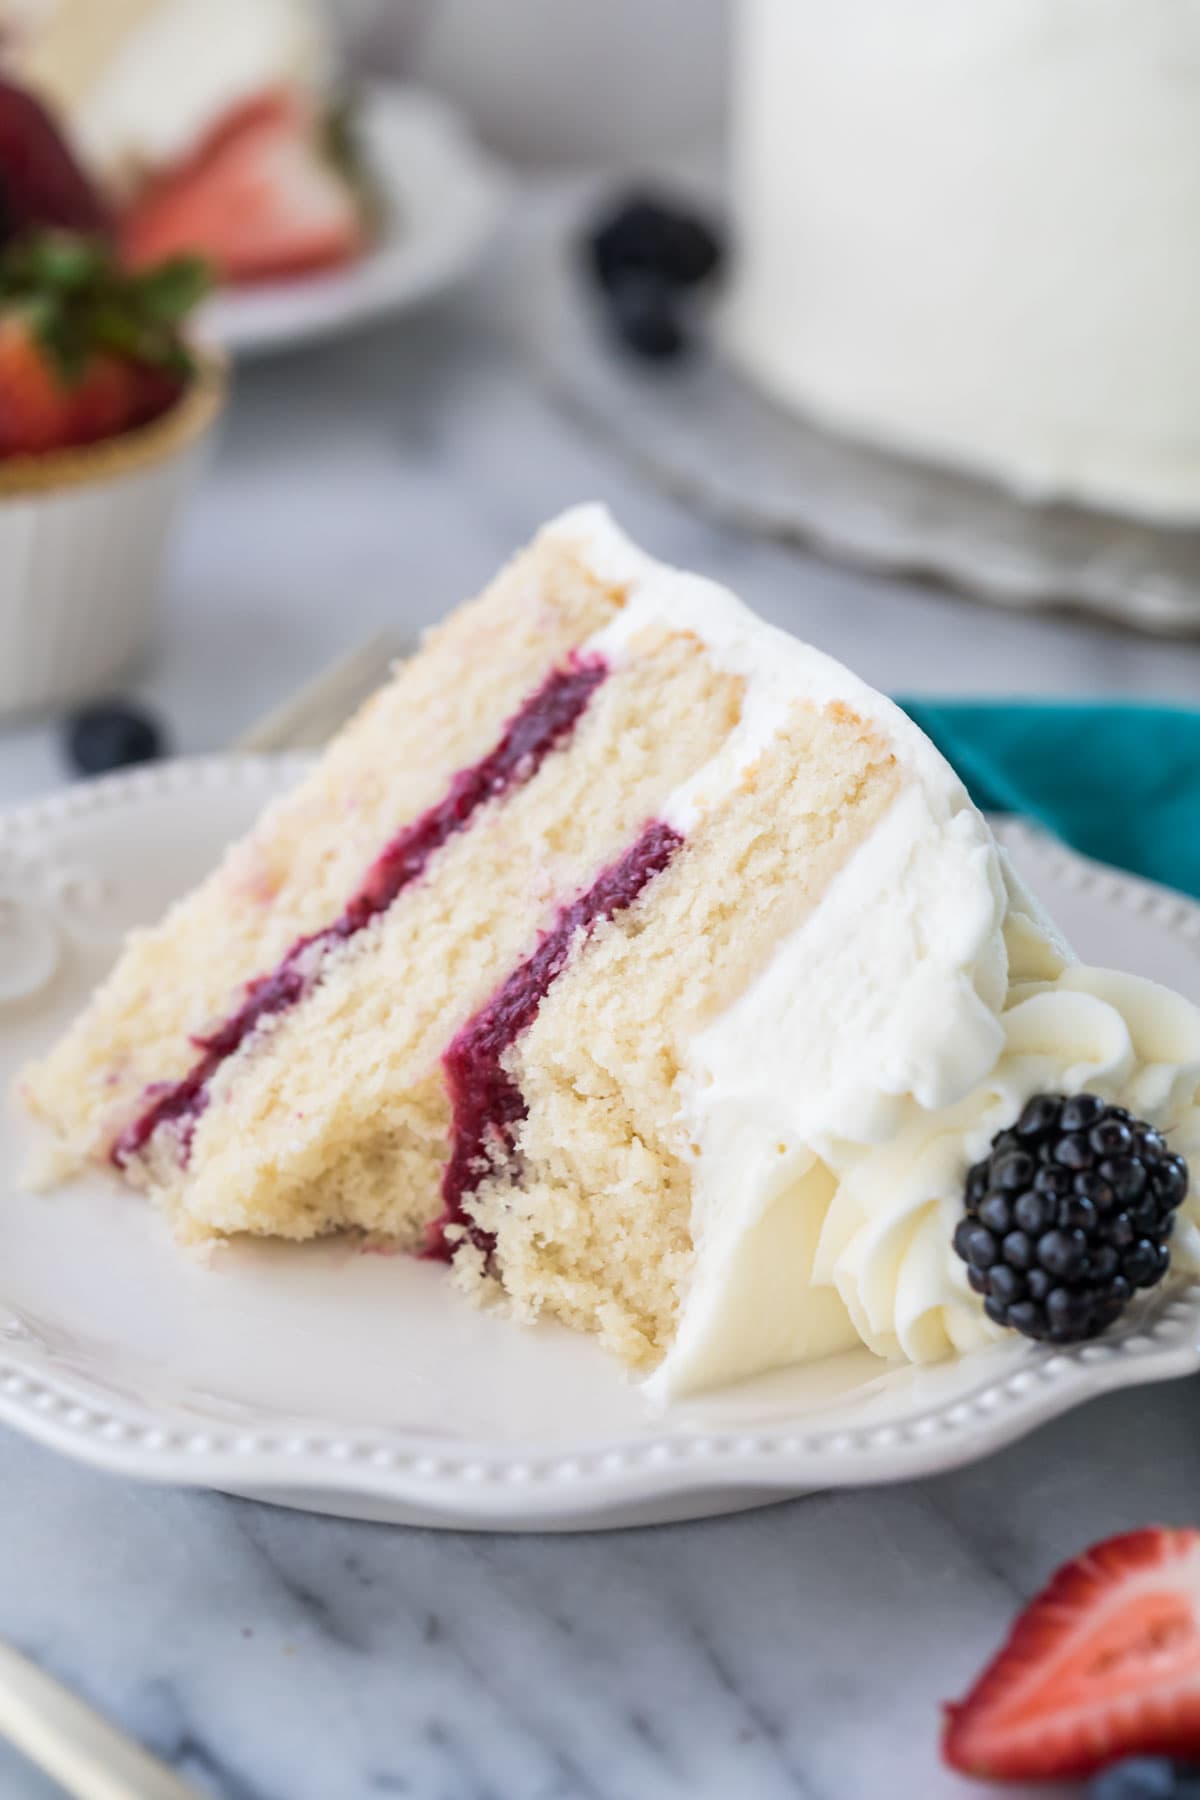
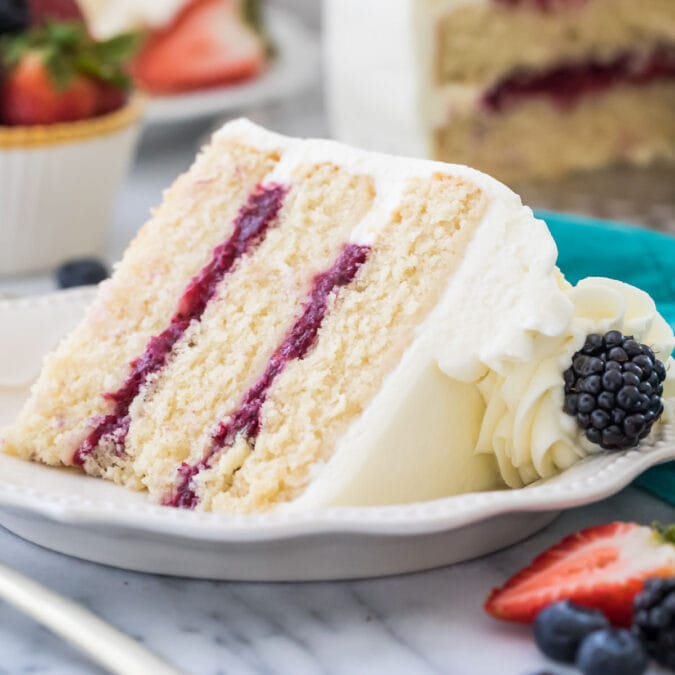
Today I’m so excited to be sharing my version of the well-loved Chantilly Cake! Start with a super soft, from-scratch vanilla cake, fill it with a (quick & easy) fresh homemade jam and finish everything off with an incredible whipped cream cheese/mascarpone frosting! Recipe includes a how-to video!
The Perfect Chantilly Cake
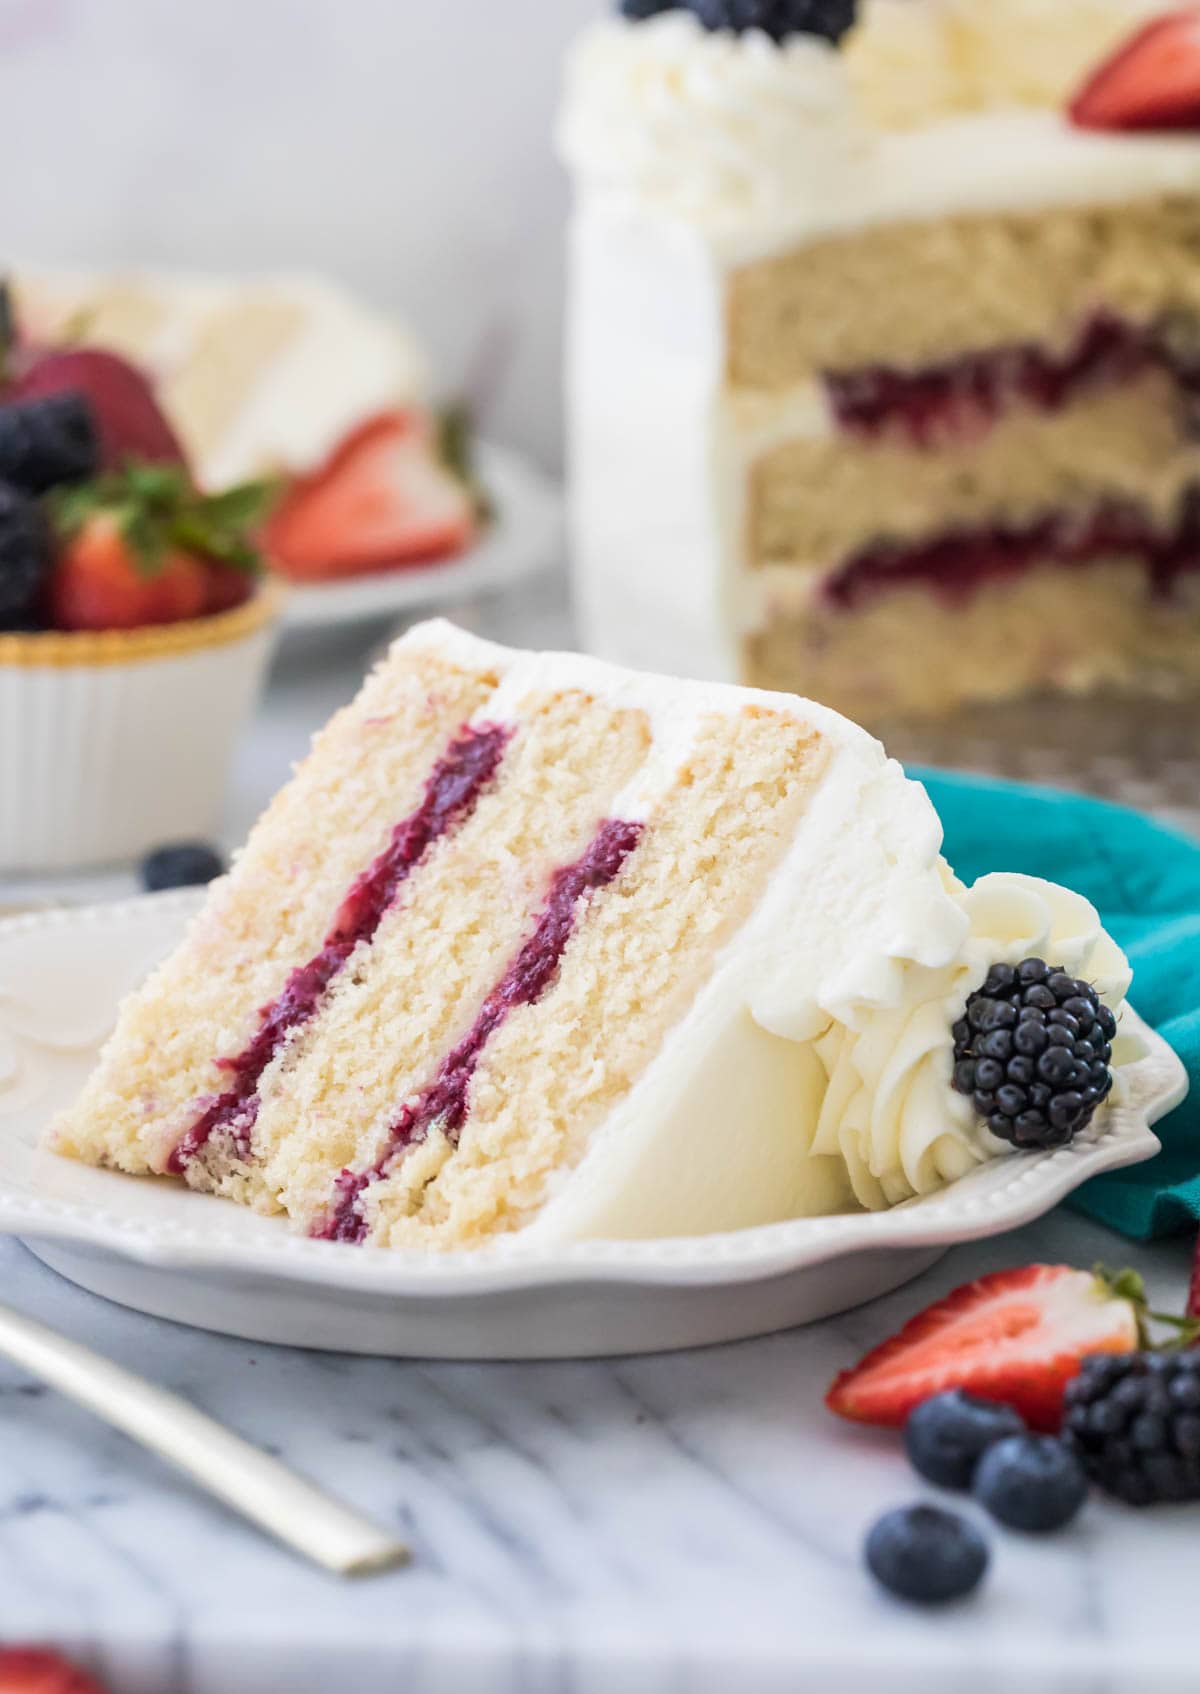
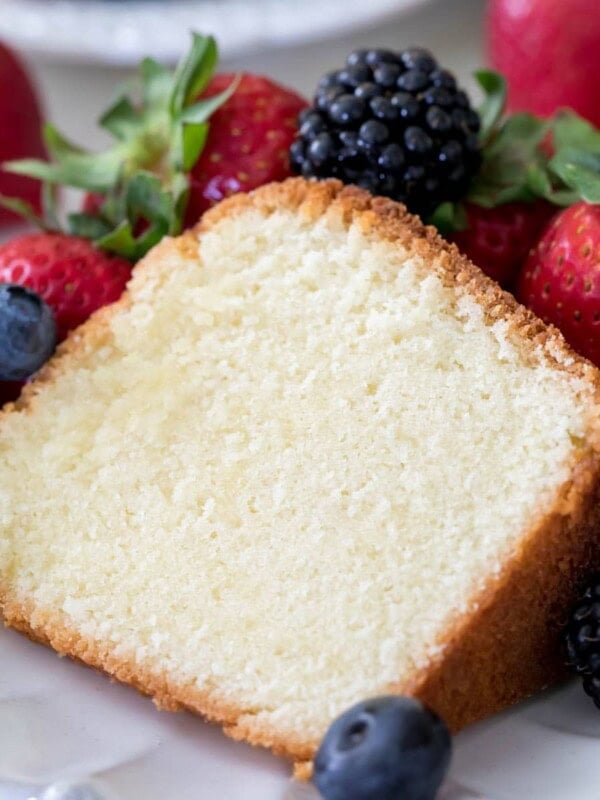
Chantilly cake is a super soft, plush cake (that stays soft, even in the fridge!) filled with a fresh berry jam and cloaked in a whipped mascarpone frosting.
I’ve taken my own liberties with this well-loved cake and I think you’ll love this completely from-scratch, irresistible version that’s perfectly sweetened and tempered with the bright flavor of fresh summer berries.
I think it’s pretty well documented on the blog that my angel food cake has been my favorite cake for decades, but it’s been replaced by my Chantilly cake. That’s not a claim that I make lightly, this cake is incredible and I can’t wait for you to try it.
Let’s get to it!
What You Need
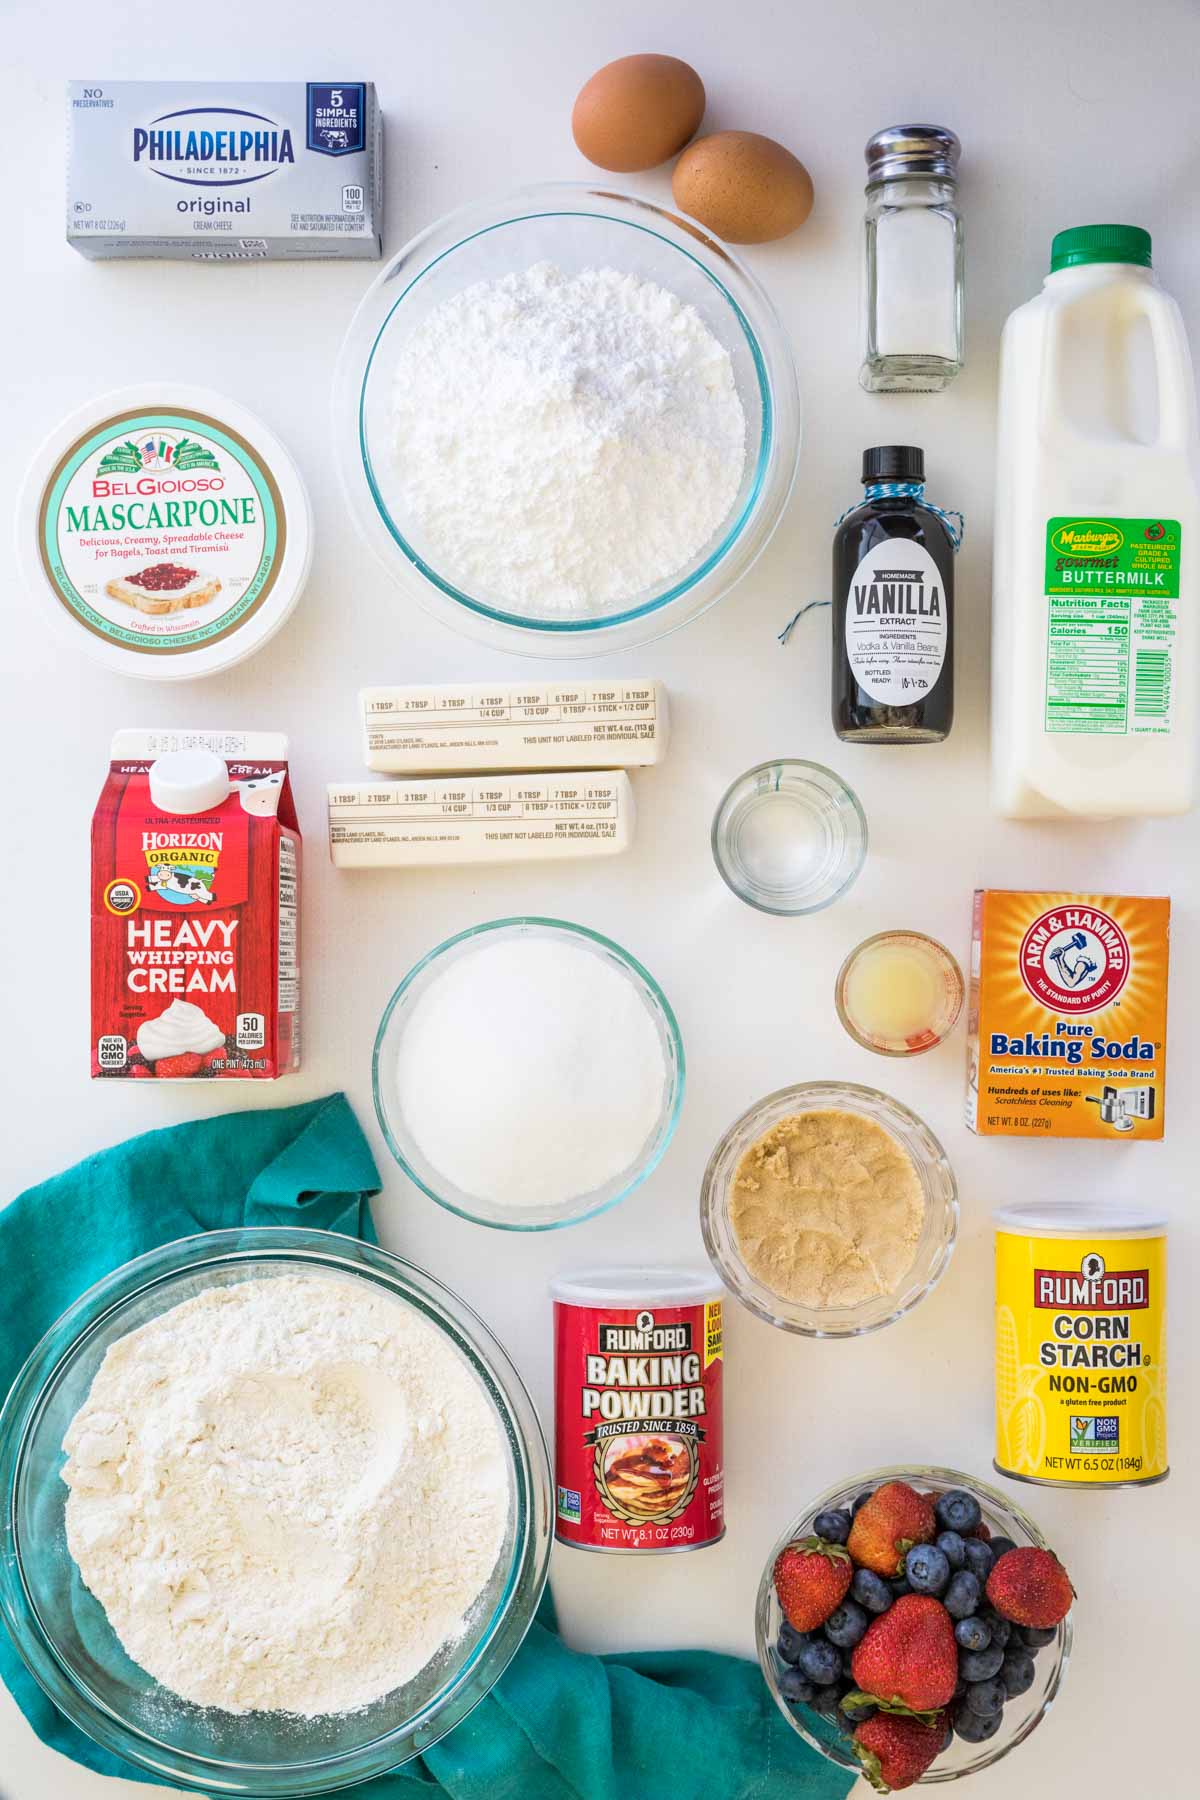
The ingredients for my Chantilly cake were chosen with extreme care. I wanted a cake that was sturdy with a melt-in-your-mouth crumb, but importantly it needed to be soft and moist… moist enough that it didn’t dry out despite needing to be stored in the fridge.
I wont trouble you with all of the ingredients (I think you can figure out the point of the vanilla and salt (flavor) and the baking powder and soda play the typical roll of adding some lift to the crumb), but let’s go over some key players:
- Butter. Initially I worried that an all-butter cake (as opposed to one made with a combo of butter and oil, my typical preference) would not stay as soft and moist as I needed it to in the fridge. However, by using a combination of the reverse creaming method (discussed further down in the post) and plenty of buttermilk, I developed a slightly dense (not dry!) but soft, moist cake that stays soft even after days in the refrigerator.
- Flour. While I initially thought I would have to resort to cake flour for the lightest crumb, I ultimately found that I got the best results when I made this cake with all-purpose flour, and so that is what I recommend.
- Sugar. Granulated sugar and brown sugar both add sweetness, but the brown sugar also adds subtle flavor and extra moisture to the crumb. Hint: If you don’t have brown sugar on hand, see my tutorial on how to make brown sugar.
- Buttermilk. This acidic ingredient not only reacts with the baking soda to give the cake a bit of lift, it also adds incredible flavor and moisture to the cake and leaves us with a tender crumb. Hint: If you don’t have buttermilk on hand, try my easy buttermilk substitute!
- Mascarpone, cream cheese & whipped cream. These are the key ingredients for Chantilly cake frosting (plus some powdered sugar for stability). Use softened, full-fat cream cheese for best results. The mascarpone should still be slightly chilled when you use it, I typically remove from the fridge only 15-20 minutes before using.
- Fruit. You can use fresh or frozen fruit to make the jam filling, but for decorating the cake you’ll want to use fresh fruit. Berries are your best bet here, I used raspberries, strawberries, blackberries, and blueberries.
Remember, this is just an overview of the ingredients I used and why. For the full recipe please scroll down to the bottom of the post!
How to Make Chantilly Cake
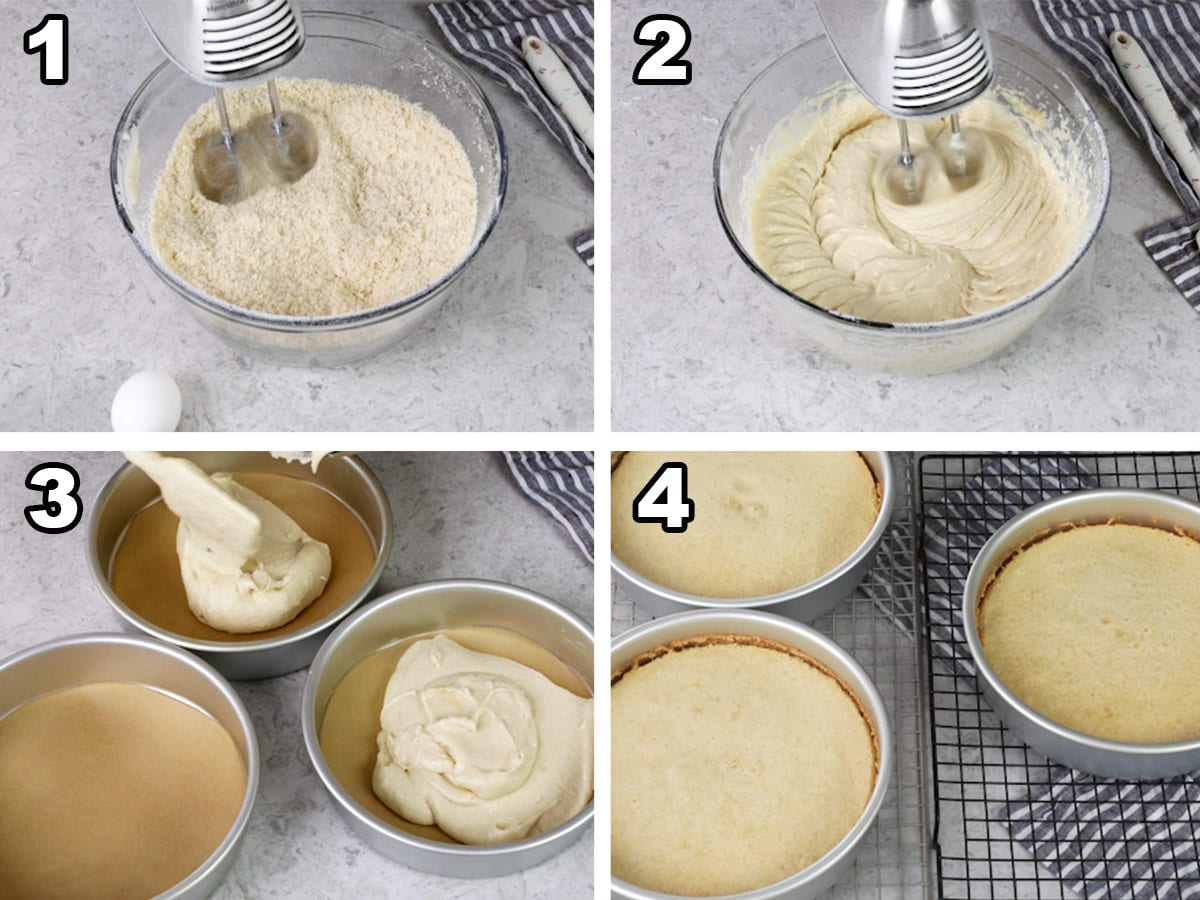
For Chantilly cake we’re using the reverse creaming method which I’ve covered before with my caramel cake. It’s a simple technique where, instead of first creaming together the butter and sugar, you gradually add the butter into the dry ingredients. This allows for that tight, plush crumb I keep bragging about, and as a bonus it is incredibly difficult to over-mix this cake and my cakes always seems to stay softer longer when made this way.
- Combine dry ingredients and sugar (sugar is technically considered a “wet” ingredient, which can be confusing!). Using an electric mixer (or stand mixer), add one tablespoon of butter at a time, not adding the next tablespoon until the previous one has been worked into the dough. Once all of the butter has been added, the mixture will resemble coarse, sandy crumbs.
- Separately, whisk together buttermilk, eggs, and vanilla extract and slowly pour into the dry ingredients while mixing. Stir until you have a smooth, silky batter that’s lump-free.
- Evenly divide batter into three greased 8″ pans. To ensure the cakes won’t stick, I like to line the bottom of each pan with a round of parchment paper.
- Bake until a toothpick inserted in the center comes out clean or with a few moist crumbs. The cakes will be pale even when they’re finished baking, this is normal!
SAM’S TIP: I’ve found that these cake layers bake up nice and flat and I’ve never personally needed to trim them, but if your cake layers are rounded with a dome-like top I recommend using a sharp knife to level the layers before assembling.
Berry Filling
My Chantilly cake filling is simple and made on the stovetop using either fresh or frozen berries. I use the same method that I use in my raspberry cake filling.
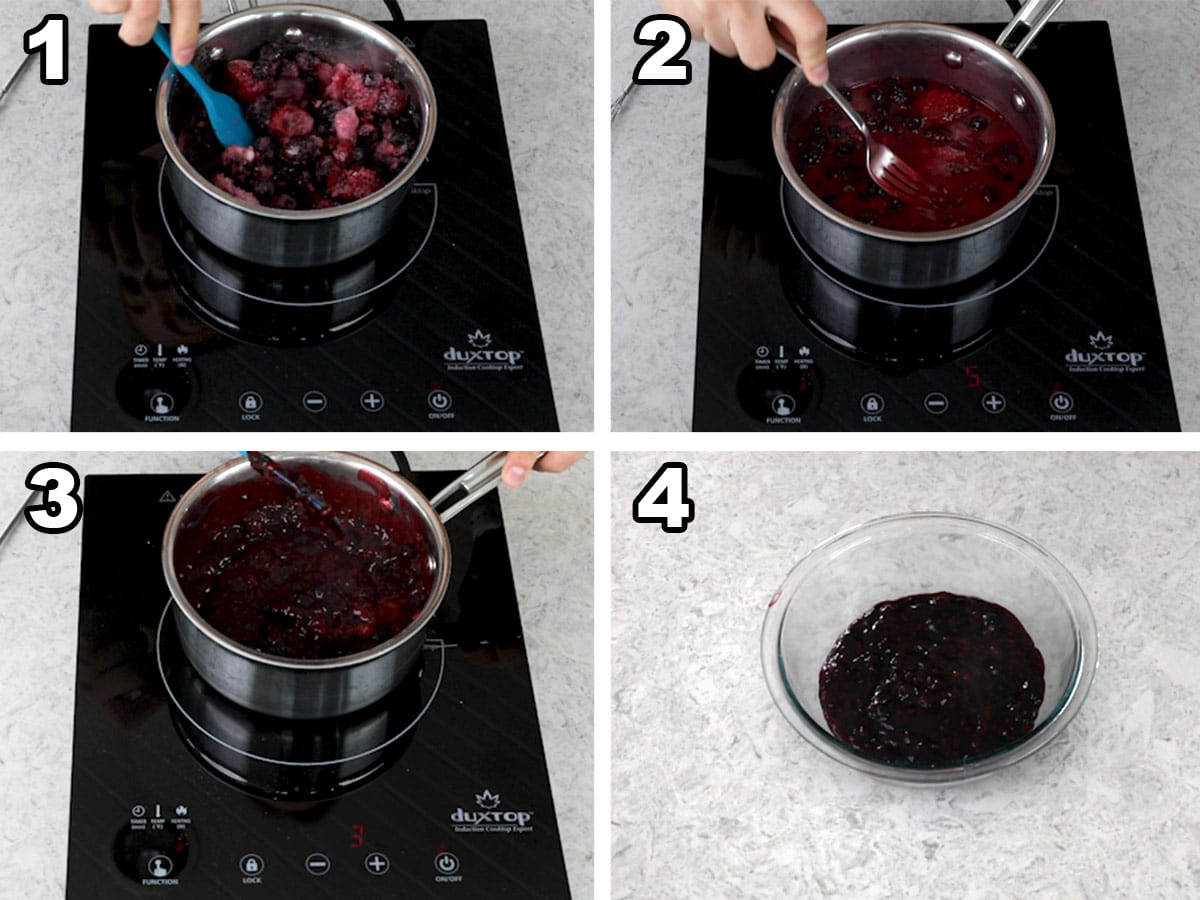
- Whisk together sugar and cornstarch (to remove any lumps) and then add the remaining ingredients and stir. Heat on the stovetop over medium heat.
- Once the berries release their juices, use a fork or potato masher to smash the berries (for a smoother filling).
- Continue to cook until the mixture is thickened. Keep in mind that it will continue to thicken as it cools, but you want it to be near a jam-like consistency, don’t cook it so much that you remove all of the liquid and it’s like a paste!
- Pour into a heatproof container and let cool completely before using. You can speed up the process by placing the jam in the fridge (not freezer).
Most Chantilly cakes are not filled with berry jam. Instead, they’re filled with fresh berries (mixed into the whipped frosting that we’ll go over below). I personally much prefer the texture and flavor of using a simple homemade berry jam, so that’s the way I make my version. If you would like to go the more classic route, see the notes in the printable recipe.
How to Make Chantilly Frosting
This may be my favorite part of the entire Chantilly cake. It certainly ties the whole thing together with an airy, lightly-sweetened frosting that’s a cross between my cream cheese frosting and whipped cream frosting.
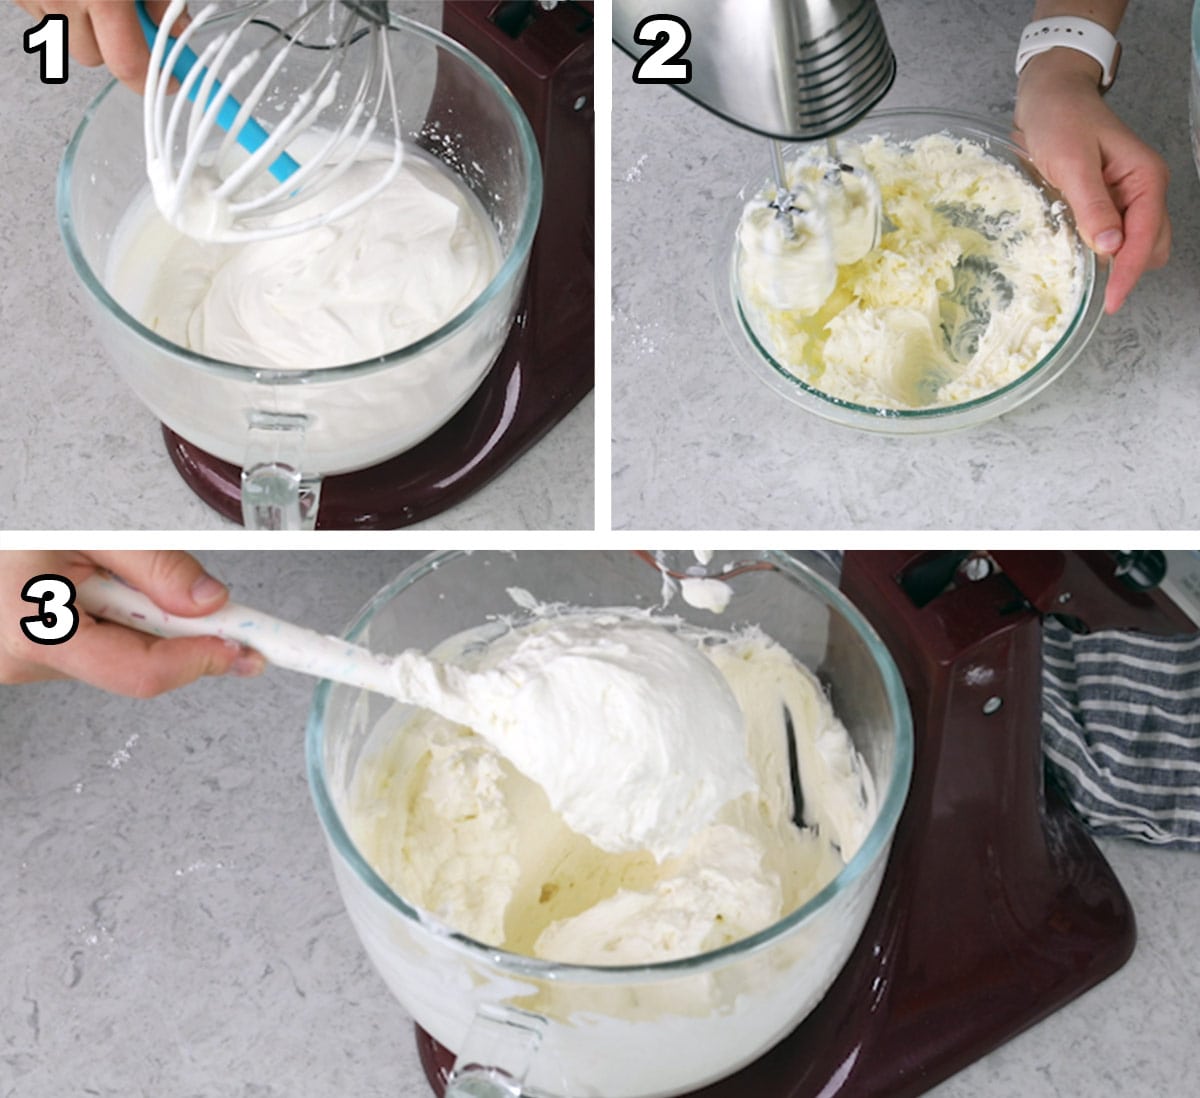
- Combine heavy cream, some of your powdered sugar, and vanilla extract and beat until you have just barely achieved stiff peaks (if you pull the whisk out of the cream, the peak that forms should mostly hold its shape but if it dissolves a bit or folds over on itself that is OK in this instance). The mixture should no longer be very liquid, but instead should be taking on a thick, fluffy consistency.
- In a separate bowl, briefly beat together cream cheese, mascarpone, and remaining sugar just until smooth. Do not over-do this step as over-beaten mascarpone becomes grainy!
- Add the mascarpone/cream cheese mixture to the whipped cream and slowly increase your mixer speed until the icing is thick and fluffy, smooth, and well-combined. Its ultimate texture is similar to a very thick and stable whipped cream, but it is not as sturdy or firm as classic buttercream frosting.
Assembling Chantilly Cake
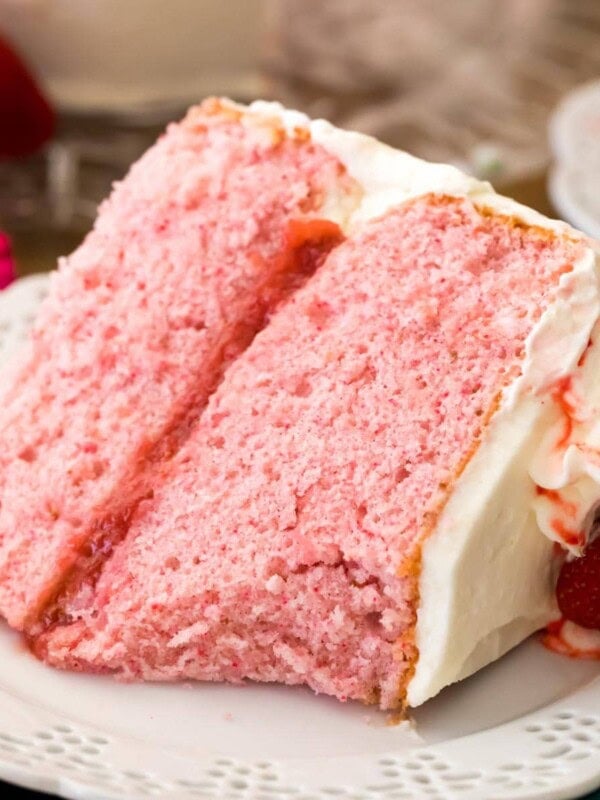
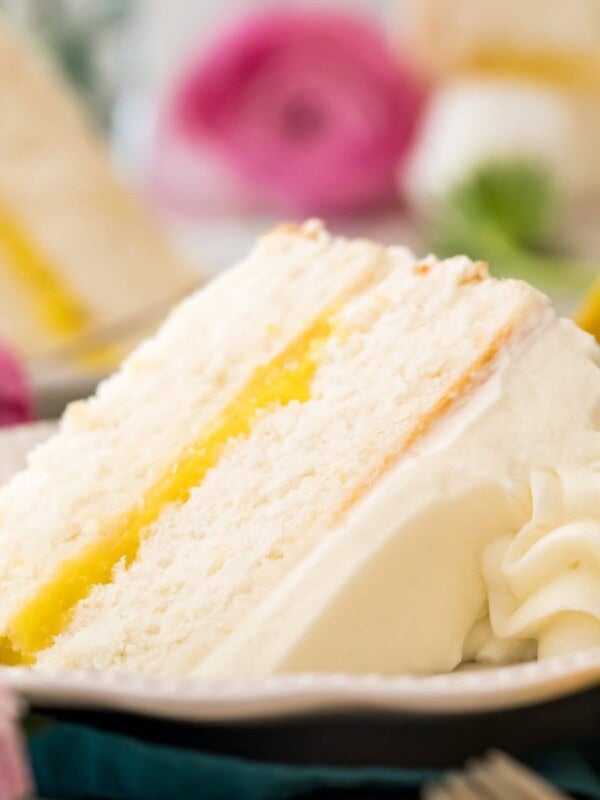
While the steps aren’t terribly different from your standard cake assembly (and are the same as with my strawberry cake or lemon cake), I think it’s worth going over and wanted to at least demonstrate how to make a frosting dam.
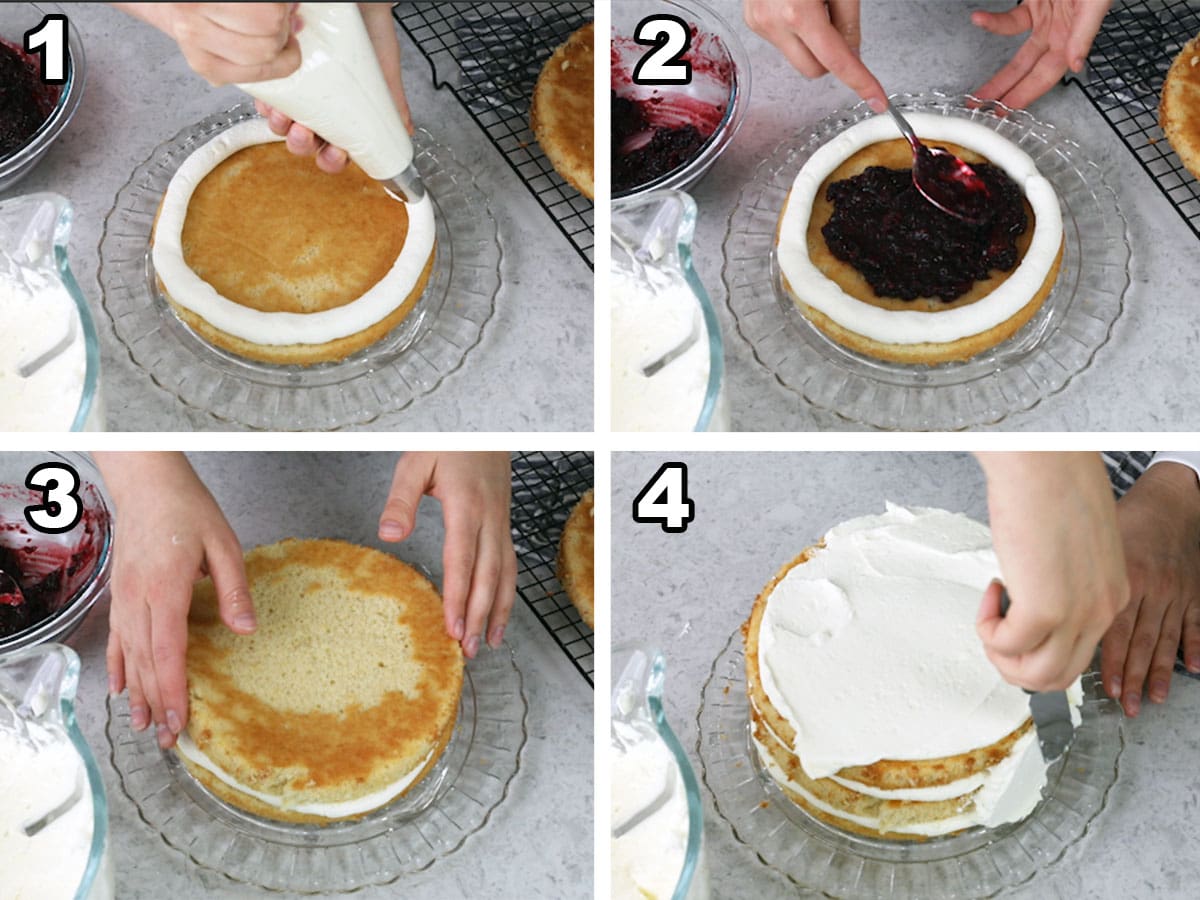
- Place your first cake layer on your serving platter. Fit a piping bag with an open tip, fill with frosting, and pipe a thick ring around the inside edge of your cake. This is your dam that will keep the filling from squeezing out the sides of the cake.
- Spread half of the jam evenly into the center of the ring. If you’re making a traditional Chantilly cake with fresh fruit, you would skip the dam, spread the frosting (rather than piping) and then top with an even layer of fresh fruit.
- Top with your next layer of cake and repeat the steps above.
- Top with remaining layer and then cover the entire cake with frosting. This recipe makes enough frosting that you can cover the cake and pipe a decorative border or swirls on top, if desired.
Frequently Asked Questions
I’ve never been to Whole Foods or had their cake, though I know that the Chantilly cake as we’ve come to know it has origins that reach back to a Whole Foods bakery over 13 years ago and the cake has something of a cult following.
While I’m happy for my cake to pay tribute to that one, mine deviates a fair bit from the original in a few ways, particularly the filling (but don’t second-guess it, it’s so good!). If you’ve tried the bakery version, I’d love to know what you think of my version!
Yes, this is how the well-known classic version of Chantilly cake is made. Instead of preparing the jam, just spread an even amount of frosting between each cake layer and top the frosting with a generous amount of whole or sliced berries before adding the next cake layer. Make sure to wash and dry your fresh berries very well, as they can become moldy in your cake and it will not keep as long as a cake made with the jam!
In my personal experience, the homemade jam filling is preferable for texture and flavor, but either method will work!
Chantilly cake frosting can be a bit finicky.
First, make sure you whip the cream to the proper stage, just barely reaching stiff peaks (the video will be helpful if you’re a visual person!).
Second, the cream cheese should be softened but the mascarpone should still be slightly chilled. If the mascarpone becomes too warm or if it is over-beaten, it can separate and become grainy and gritty. Read the instructions carefully (twice for good measure!) and for extra insurance make sure you watch the video before beginning.
Enjoy!
More Recipes You Might Like

Let’s bake together! I’ll be walking you through all the steps in my written recipe and video below! If you try this recipe, be sure to tag me on Instagram, and you can also find me on YouTube and Facebook
Chantilly Cake
Ingredients
Cake Layers
- 2 ⅔ cups (333 g) all-purpose flour
- 1 ½ cups (300 g) granulated sugar
- ½ cup (100 g) light brown sugar, firmly packed
- ½ teaspoon baking soda
- 1 teaspoon baking powder
- 1 teaspoon salt
- 12 Tablespoons (170 g) unsalted butter, softened and cut into 12 pieces
- 1 ½ cups (355 ml) buttermilk, room temperature preferred
- 2 large eggs, room temperature preferred
- 1 Tablespoon vanilla extract
Berry Filling (see note 1 if you would like to use fresh berries only rather than jam)
- ⅓ cup (65 g) granulated sugar
- 3 Tablespoons (23 g) cornstarch
- 3 (340 g) cups/12 oz fresh or frozen mixed berries. I used a blend of strawberries, raspberries, and blackberries.
- 3 Tablespoons water
- 1 ½ Tablespoons lemon juice
Chantilly Cream Frosting
- 2 ½ cups (590 ml) heavy cream or heavy whipping cream
- 2 cup (250 g) powdered sugar, divided
- 2 teaspoons vanilla extract
- 8 oz (226 g) cream cheese, softened
- 8 oz (226 g) mascarpone, softened at room temperature for 15-20 minutes
- Additional fresh fruit, for decorating the cake (if desired). I used fresh berries.
Instructions
- Preheat oven to 350F (175C) and thoroughly grease and flour three 8” cake pans or spray with baking spray. To ensure cakes don’t stick, I recommend lining the bottoms of your cake pans with rounds of parchment paper.
- In a large bowl (or in the bowl of a stand mixer fitted with a paddle attachment), combine flour, sugars, baking soda, baking powder, and salt and stir.2 ⅔ cups (333 g) all-purpose flour, 1 ½ cups (300 g) granulated sugar, ½ cup (100 g) light brown sugar, ½ teaspoon baking soda, 1 teaspoon baking powder, 1 teaspoon salt
- With an electric mixer (or your stand mixer) running on low speed, add butter, one tablespoon at a time, not adding the next tablespoon until the previous one is fully incorporated into the dry ingredients. Once all butter has been added the mixture should appear slightly sandy in texture.12 Tablespoons (170 g) unsalted butter
- In a separate bowl or large measuring cup, whisk together buttermilk, eggs, and vanilla extract until combined.1 ½ cups (355 ml) buttermilk, 2 large eggs, 1 Tablespoon vanilla extract
- Turn mixer speed to low and slowly pour buttermilk mixture into batter until completely combined. Be sure to pause and scrape the sides and bottom of the bowl as needed. Once finished, batter should be smooth and silky.
- Evenly divide batter into prepared cake pans and transfer to 350F (175C) preheated oven (if all of your cake pans do not fit at once it is OK to leave a cake pan on the counter while the other two bake). If your oven bakes unevenly, be sure to rotate cake pans midway through baking. Bake for 30-32 minutes or until a toothpick inserted in the center of the cake comes out clean or with a few moist crumbs (cakes may still be very pale when baked through, this is OK, and yes they are supposed to be thin layers).
- Allow cakes to cool in pan for 10-15 minutes then run a knife around the edge of the cake to loosen it from the pan and carefully invert onto a cooling rack to cool completely. Cakes must be completely cooled before assembling!
Berry Filling²
- Combine sugar and cornstarch in a small saucepan and whisk until combined.⅓ cup (65 g) granulated sugar, 3 Tablespoons (23 g) cornstarch
- Add berries, water, and lemon juice and stir together until ingredients are all combined.3 (340 g) cups/12 oz fresh or frozen mixed berries. I used a blend of strawberries, 3 Tablespoons water, 1 ½ Tablespoons lemon juice
- Transfer saucepan to stovetop and turn heat to medium (do not increase heat above medium, heat slowly so the sugar has time to dissolve and the mixture thickens properly).
- Stir constantly until berries have released their juices. At this point, take a potato masher or fork and smash/break up the berries.
- Continue to stir constantly as the mixture cooks and thickens to a loose jam-like consistency. This may take several minutes. Keep in mind that the mixture will continue to thicken as it cools, so you don’t want it to be too thick when you remove it from the stove or it could become like a paste once cooled.
- Transfer berry filling to a heatproof container and allow to cool completely before spreading over cake³
Chantilly Cream Frosting
- Combine heavy cream, 1 ½ cups powdered sugar (190g), and vanilla extract and use an electric mixer to beat until you have just achieved stiff peaks (meaning the peak that forms when you pull the beater out of the cream holds its shape and doesn’t dissolve back into itself. Normally I would say the peak should stand tall and not fold over, but if it folds over a little in this instance that is fine).2 ½ cups (590 ml) heavy cream or heavy whipping cream, 2 cup (250 g) powdered sugar, 2 teaspoons vanilla extract
- In a separate bowl, combine cream cheese, mascarpone cheese, and remaining 1/2 cup (63g) powdered sugar. Briefly beat together these ingredients on low-speed just until smooth (mascarpone can become grainy if it is over-mixed).8 oz (226 g) cream cheese, 8 oz (226 g) mascarpone
- Add mascarpone mixture to whipped cream mixture and beat on low-speed. Gradually increase speed to high and beat until the mixture is thick and fluffy.
Cake Assembly
- Place one cooled cake layer on a cake plate/serving dish. Use a large round tip (I use a ½” tip/Ateco 826, but you can just use a large ziploc bag with a corner snipped) to pipe a dam along the top edge of the cake, forming a ring.
- Fill this ring with ½ of your cooled jam filling, spreading the filling evenly.
- Top first layer with a second layer of cake and repeat steps above by piping a dam and filling with remaining jam.
- Top with remaining layer of cake. Cover entire cake evenly with mascarpone frosting. You will have a bit extra left to pipe decorative rosettes or other decorations on top, I like to use my Ateco 848 to do additional decorations and then top the cake with additional fresh fruit.Additional fresh fruit
- Store cake covered in the refrigerator. Enjoy!
Notes
¹Using fresh berries
Many berry chantilly cakes use whole or sliced fresh berries rather than make a berry jam filling. I prefer the jam filling, but if you don’t you can simply skip this process and use fresh berries instead (you’ll need about 4 cups for the layers and the topping). Simply cover each cake layer with a thin layer of frosting and then scatter with fresh berries before adding your next layer.²Berry filling preparation notes/making filling in advance
Berry filling may be prepared up to 3 days in advance and stored in an airtight container in the refrigerator. If the mixture is too thick to spread once you are ready to use, briefly heat it in the microwave and stir well until it is easy to spread.Storing and making in advance
This cake should be stored in an airtight container in the refrigerator. Once assembled, it should be enjoyed within 4-5 days for best results. The finished cake may be frozen for up to 2 months. Cake layers may be prepared up to 2 days in advance and after cooling may be stored, tightly wrapped, at room temperature. See note above for preparing berry filling in advance. I do not recommend preparing the frosting in advance, its consistency is best for decorating when used immediately after preparing.Gluten-free note
I have not tried it myself, but others have successfully made this recipe with Cup4Cup gluten-free flour.Nutrition
Nutrition information is automatically calculated, so should only be used as an approximation.
Like this? Leave a comment below!


I made this cake for my aunt’s 97th birthday and it was very well received. One thing I noticed, though, is that the cake was not white like your photo. Given that the recipe calls for brown sugar, I can understand why. My question is how you achieved your results – did you use white sugar or white coloring?
Thank you and enjoy all that you do.
Hi Clarence! This isn’t a white cake. I would say the color is somewhere between a yellow and a white cake. If your butter is particularly dark in color or your egg yolks are particularly yellow it could cause a variation in color. I’m glad everyone enjoyed it!
Does this icing pipe well? I want to decorate it lambeth style so I need a sturdy icing. Can’t wait to make it. I absolutely adore your recipes!
Hi Kimberly! This frosting is probably a bit too soft for that much piping. 🙁
I frosted the cake with the frosting as per the recipe. For piping I added powdered sugar until more stable. It worked but you need to put it in the fridge to also add firmness. Certainly not an optimal piping consistency but you can get it to work acceptably if you do these things.
Thank you very much for sharing this recipe. I finally found the best chantilly cake recipe. I am so happy. I have tried couple recipes before and they were not good. I made this for my daughter’s birthday and she loved it and the rest of my family, even our guests. One guest asked where I ordered the cake. ☺️
I’m so glad everyone enjoyed it so much, Catherine! That’s the perfect compliment. 🙂
Can I make cupcakes with this recipe? Maybe put the filling in each? This looks like a really good recipe for a white cake. My granddaughter wants white & chocolate for her 16th birthday. I’m also making your chocolate with oreo frosting. Love your recipes. Used them for my daughter’s wedding.
Hi Dottie! This could work as cupcakes. Happy 16th to your grand-daughter! 🙂
How do I substitute almond flavoring for vanilla? We love Chantilly Cake with almond flavoring. Love how simple your cake looks compared to others.
Hi Laura! I would probably reduce the vanilla to a teaspoon and use 1/2 teaspoon of almond extract since it’s pretty potent. If you want a stronger flavor you could use more. 🙂
Could I use a chocolate frosting instead of the mascarpone? And if so, would there be a type of chocolate frosting that would be best?
Of course! I don’t prefer chocolate with this cake, but I might recommend my chocolate Swiss meringue buttercream as it’s a pretty light and silky one that would pair nicely with the cake, but really any of my chocolate frostings would work fine here.
I made this cake and it was the yummies cake EVER! And the frosting was to die for! However, I had a problem, that was 100% my fault, nothing to do with the recipe, I am sure. I am hoping you can help me figure it out because I am making it again this weekend for a family gathering.
When I stacked the layers, the bottom layer gave way and the whole cake collapsed. It wasn’t a big deal because I was just making it for my family and they didn’t care what it looked like. I just ended up scooping the whole cake into a big Tupperware and dumping the frosting on top and then I put it in the freezer. By the way, it freezes great! My family devoured it!
Anyway, any ideas what would cause the cake to fall apart? Maybe I didn’t cook it long enough?
Oh no! I’m so sorry to hear this happened, Hilary! I would guess it needed to bake a little bit longer, unless it was really dry and crumbly, in which case it was baked too long. I like to use the toothpick test to make sure they are done. Insert a toothpick into the center of the cake and when you pull it out, it should come out, ideally, with a few moist crumbs. 🙂
I have made this cake several more times since this first attempt and it has come out amazing every time. It is my number one favorite cake of all times! I think I just needed to cook it a little longer and let it cook completely that day. Now I always put it in the freezer for a while before I stack and frost it and I have never had a problem since! Thank you! Thank you!
Hi Sam,
FYI
The video freezes at the point where you are checking the whipping cream for light peaks. I’ve been trying to watch it periodically for about a week now. I like to watch it each time I bake this to get it perfect every time. It’s my son and my grandsons birthday cake of choice every year. 4 years running now! The rest of my family are all chocolate cake lovers but even they love this cake.
Thanks for making me “THE BEST” 😉 baker in the family!
This is jut for your info not posting.
Hope all the people you love are happy and healthy!
Tami
I’m so glad you’ve enjoyed it so much, Tami! I can’t seem to replicate the freezing video issue so unfortunately I don’t know how to fix it. 🙁
Well that great! I’m glad I’m the only one it is affecting. Maybe I’ll try a different device. 😊
Can I make this like sheet cake and cut in to two layers only. I don’t want to make tall cake. If yes then what your think what pan will be best.
Hi Sara! This cake should fit into a 9 x 13, but I’m not sure on a bake time. 🙂
I’ve tried this recipe twice and it was perfect both times. I actually mixed it in my thermomix, but I’ve just purchased a Kenwood stand mixer and was wondering about making the Chantilly cream in it? Would it work? And if so, which attachment is preferable to use please ? Im still a newbie with the stand mixer- thanks
We’re so glad you’ve been enjoying the recipe, Rita! We’d recommend using the whisk attachment 😊
Sam,
Trying to do this with the Wilton 5-layer pan set (6″) so I can do this in multiple colored layers (for Mother’s day, so it’s important!). I’ve done your vanilla cake this way and it turned out great using a recommended time to bake (300F, 17-20 minutes). Two questions :
1. Should this work fine for baking time for this cake? I know this is a lighter cake, so I’m slightly concerned.
2. What type of dye would you suggest for making 3 of the layers pink?
Thanks so much for all your efforts, I’ve made so many wonderful things from your site!
Hi Trevor! We haven’t baked this recipe in 6″ pans, so we can’t say for sure how long they’d take to bake. As for the food coloring, we love using Americolor gel food coloring ☺️
Hi Sam. I haven’t try this cake but it looks so good and delicious. Can I also make it as an ombre cake? can I make it in advance ( like a week before)and store in the refrigerator until use?
Hi Maan! This cake should take food coloring well, so you should have no problem with the ombre. We cover making in advance in the recipe notes. Hope you love it! 😊
Hi! I’ve tried this recipe and it’s the best yet! I love how sponge and fluffy the cake is. My nephew’s birthday is coming up and I wanted to make his cake using this cake recipe. My only questions are: would this cake recipe work fine for tiered cakes? And, instead of the whipped frosting, would it taste as good with buttercream? Thank you in advance.
Hi Keila! This is a pretty sturdy cake, so should work fine as a tiered cake. Buttercream is a bit sweeter, but will still be pretty good on this cake. 🙂
Hi Sam! Can I use a hand held electric mixer to make the chantilly frosting?
Sure thing!
I was wondering, is this a white-ish cake? I’m surprised at the color in the picture since it has whole eggs, not egg whites. I’m not looking for a purely white cake but if it’s more white than yellow that would be great!
Hi Sarita! This cake does have a yellow tint to it. You can see more angles in the video, but it is a whitish cake. 🙂
Delicious cake all-around! The frosting is superb and the best I’ve ever tasted! My family and I very much enjoyed it. Would using fresh fruit to make the berry filling produce different results than using frozen fruit? I noticed that in using frozen fruit, I can bite into the seeds as I’m tasting the cake, even though I used a fork to break up the berries well when making the filling.
Hi Susana! The fresh fruit won’t make a difference. The raspberry or blackberry seeds are what you are running into. You can strain the filling, but you’ll lose a bit of bulk. You could either increase the recipe to get more or just know that you won’t have quite as much when the cake is finished. 🙂
I am planning on making this for Easter and was wondering if I can use Lemon curd for the filling? I have a ton of fresh lemons and your lemon bars were a huge hit, so I wanted to use the lemon curd as a filling.
Hi Theresa! That should work just fine. 🙂