
The Best Cheesecake Recipe
This post may contain affiliate links. As an Amazon Associate I earn from qualifying purchases. Please read my disclosure policy.
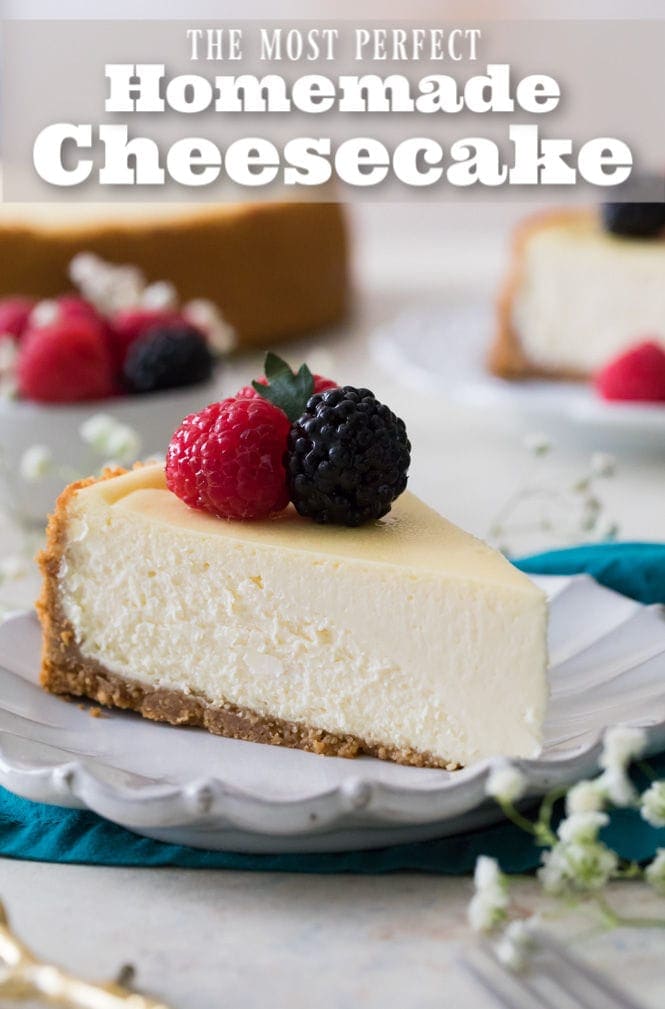
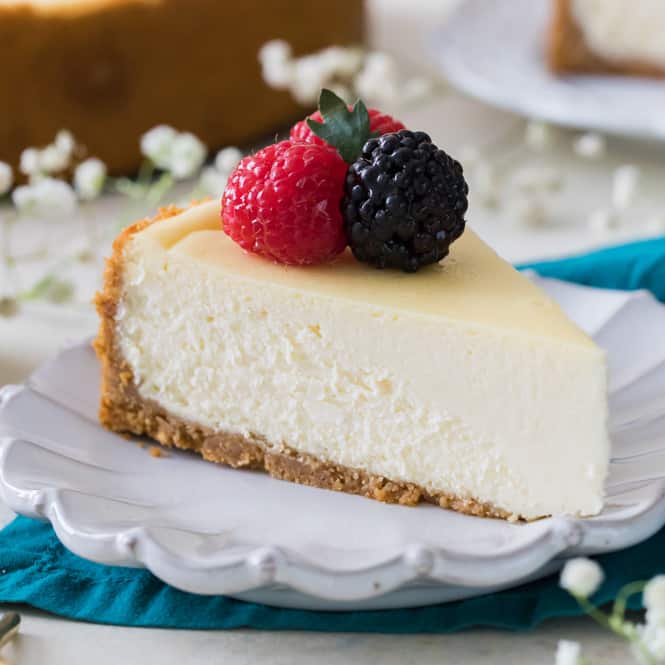
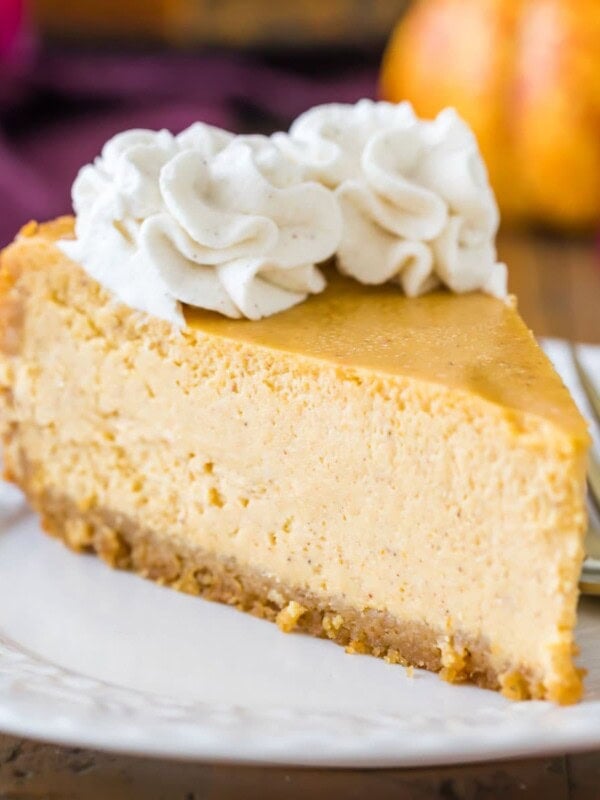
Today I’m so excited to show you how to make the best Cheesecake Recipe of your life. Simple, classic, and no water bath required!! The texture is smooth, rich, and creamy, served over a crisp homemade graham cracker crust.
I’ve included tons of detailed tips and important info in today’s post so you can make the perfect creamy cheesecake every time. For a visual how-to, be sure to check out my step-by-step video beneath the recipe!

The Perfect Cheesecake Recipe
This cheesecake recipe has been a long time coming.
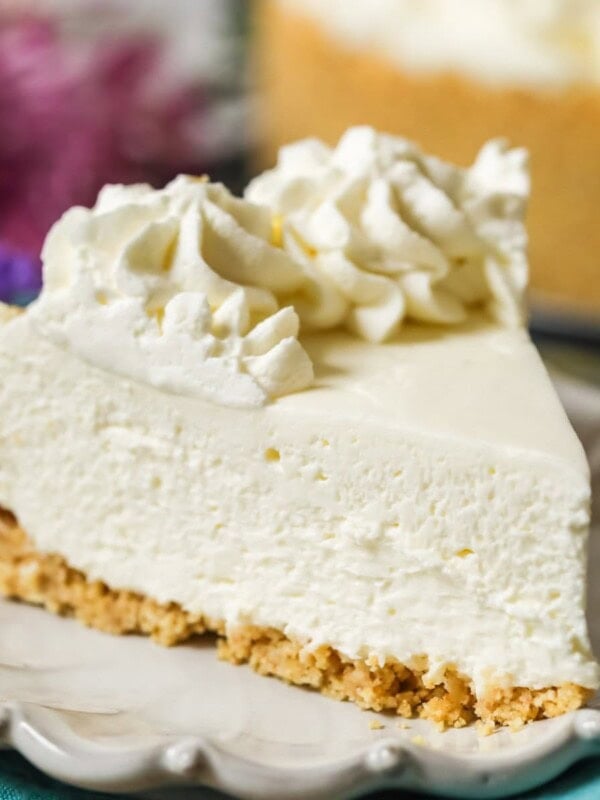
For a recipe with so few ingredients (cream cheese, eggs, sugar, sour cream, vanilla & salt), it took a lot longer than you might think to develop the perfect version. I’ve shared a few cheesecake variations in the past, including my No-Bake Cheesecake, but getting a perfected classic version took lots of testing. Finally, here we are.
Oh, and we are skipping the water bath! I’ve always found them to be largely unnecessary with cheesecakes. Cook yours on a low temperature and follow my tips below and you’ll have a perfectly creamy and crack-less cheesecake without all the hassle of a water bath.
Other tested/perfected classics to try: my Pound Cake, Chocolate Cake, and Carrot Cake, (to name just a handful).

Must-Know Tips for Baking the Perfect Cheesecake (Without a Water Bath!)
Use room temperature ingredients
It’s important that your cream cheese comes to room temperature before you begin making your cheesecake. This will prevent any lumps and ensure a cheesecake with a smooth, creamy texture. However, to ensure that all of your ingredients blend together nicely and give you the desired result, they should all be at room temperature before you begin.
Take it easy on the eggs
Over-beating your eggs is one of the quickest ways to ruin a cheesecake. Over-beating can ruin the texture and can cause cracks. To prevent this, lightly scramble each egg before adding it into your batter. Keep your mixer on low speed and stir until just combined. Be sure to pause after each addition and scrape down the sides and bottom of your mixing bowl.

Don’t open the oven!
I know how tempting it can be to want to check on your perfect, beautiful cheesecake, but wait until it’s finished baking (or close to it) before opening the oven door! Yes, you will have to test for doneness at some point and there’s a real possibility it will need more time in the oven, but minimize opening the oven as much as possible.
Opening the oven door can drastically reduce the temperature of your oven, which will slow the baking process and might cause your cheesecake to sink or crack.
Free your crust!
Once your cheesecake is done baking, allow it to cool for 10 minutes on top of the stove. Then, run a knife around the inside of the springform pan to loosen the crust from the sides.
As your cheesecake cools, it may to shrink a bit. If the crust is stuck to the pan, your crust won’t give but your cheesecake will (leaving you with cracks). Free the crust from the sides so it can contract with your filling as needed.
Cool at room temperature before moving to the fridge
I always let my cheesecake come to room temperature before chilling. For bests results, let it cool as gradually as possible. I put mine on top of my oven (the warmest spot in my house) so it can gradually cool off as the oven does.
This pre-chilling cooling period can take an hour or two, but it’s worth it. An abrupt temperature change (moving the cheesecake directly from oven to fridge) is likely to make it crack.

How to Store Cheesecake
Cheesecake should always be stored chilled in the refrigerator. When I’m ready to store mine, I’ll usually replace the springform ring and then cover the top with foil.
Cheesecake shouldn’t be left out at room temperature for more than 4 hours (or less if it’s particularly hot/humid!).
Can I Freeze Cheesecake?
Yes, you can freeze your cheesecake! Fortunately, this cheesecake recipe actually freezes very well. To freeze, first allow your cheesecake to cool on the stovetop and in the fridge as instructed. Once it’s chilled, you can freeze by wrapping thoroughly in plastic wrap and then wrapping in foil. Cheesecake will keep in the freezer for several months.
To thaw, transfer to the fridge and let it thaw there overnight.
Here’s a great source for more information on freezing cheesecake, including suggestions if you’d like to freeze by the slice.

Other Cheesecake Variations You Might Like:
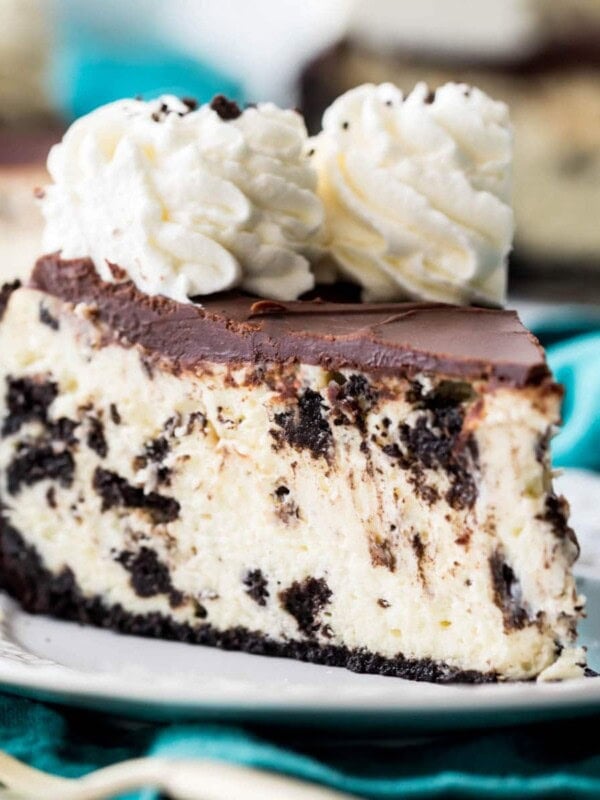
- Oreo Cheesecake
- Pumpkin Cheesecake
- Chocolate Cheesecake
- Or try something different and serve this cheesecake on an Oreo Crust!
Enjoy!
The BEST Cheesecake Recipe

Equipment
Ingredients
Graham Cracker Crust¹
- 1 ½ cups graham cracker crumbs, (170g)
- 2 Tablespoons sugar
- 1 Tablespoon brown sugar, (can substitute white)
- 7 Tablespoons butter, melted
Cheesecake
- 32 oz cream cheese², softened to room temperature (910g)
- 1 cup sugar, (200g)
- ⅔ cups sour cream, (160g)
- 1 ½ teaspoons vanilla extract
- ⅛ teaspoon salt
- 4 large eggs, room temperature, lightly beaten
Instructions
- Preheat oven to 325F (160C).
- Prepare Graham Cracker crust first by combining graham cracker crumbs, sugar, and brown sugar, and stirring well. Add melted butter and use a fork to combine ingredients well.1 ½ cups graham cracker crumbs, 2 Tablespoons sugar, 1 Tablespoon brown sugar, 7 Tablespoons butter
- Pour crumbs into a 9” Springform pan and press firmly into the bottom and up the sides of your pan. Set aside.
Cheesecake
- In the bowl of a stand mixer or in a large bowl (using a hand mixer) add cream cheese and stir until smooth and creamy (don’t over-beat or you’ll incorporate too much air).32 oz cream cheese²
- Add sugar and stir again until creamy.1 cup sugar
- Add sour cream, vanilla extract, and salt, and stir until well-combined. If using a stand mixer, make sure you pause periodically to scrape the sides and bottom of the bowl with a spatula so that all ingredients are evenly incorporated.⅔ cups sour cream, 1 ½ teaspoons vanilla extract, ⅛ teaspoon salt
- With mixer on low speed, gradually add lightly beaten eggs, one at a time, stirring just until each egg is just incorporated. Once all eggs have been added, use a spatula to scrape the sides and bottom of the bowl again and make sure all ingredients are well combined.4 large eggs
- Pour cheesecake batter into prepared springform pan. To insure against leaks, place pan on a cookie sheet that’s been lined with foil.
- Transfer to the center rack of your oven and bake on 325F (160C) for 50-60 minutes (or longer as needed, see note 3). Edges will likely have slightly puffed and may have just begun to turn a light golden brown and the center should spring back to the touch but will still be Jello-jiggly. Don't over-bake or the texture will suffer, which means we all suffer.
- Remove from oven and allow to cool on top of the oven⁴ for 10 minutes. Once 10 minutes has passed, use a knife to gently loosen the crust from the inside of the springform pan (this will help prevent cracks as your cheesecake cools and shrinks). Do not remove the ring of the springform pan.
- Allow cheesecake to cool another 1-2 hours or until near room temperature before transferring to refrigerator and allowing to cool overnight or at least 6 hours. I remove the ring of the springform pan just before serving then return it to the pan to store. Enjoy!
Notes
1) Graham cracker crust
For more details on making this crust or to use whole graham crackers, please see my Graham Cracker Crust Recipe.2) Cream cheese
Make sure that you use the brick-style cream cheese, not the spreadable version that is available in tubs.3)Bake time
Exact bake time can vary depending on your oven, whether you bake your cheesecake on a baking pan or not, the color of your springform pan (light or dark), and even the precise temperature of your ingredients. Because of this I recommend checking your cheesecake at 50 minutes and adding time as needed. However, it is not uncommon for the cheesecake to take as long as 75 minutes to bake, but it's better to check sooner.4) Cooling cheesecake
I recommend the top of the oven because it is usually the warmest place in my house (after it’s been on for over an hour). This will help to cool the cheesecake more gradually and will also help avoid cracks).Nutrition
Nutrition information is automatically calculated, so should only be used as an approximation.
Like this? Leave a comment below!


My cheesecake raised and had more of a fluffy consistency rather than dense. Any suggestions?
Hi Ashley! I think the batter may have been over-whipped introducing too much air into the ingredients cause this fluffy texture. I hope this helps. 🙂
Could I make mini cheesecakes with this recipe? Not mini muffin size but, like a cupcake size. Or should I reduce the amount of time they are in the oven. Thankyou in advance
Hi Aubrey! I actually have a mini cheesecake recipe. You can follow the guidelines there. 🙂
Thankyou!
Can I use this recipe with a 10″ springform pan? You didn’t state what size pan you used.
Hi Felicia! The recipe states that I use a 9″ pan (listed in “Equipment” and step 3). However, a 10″ one will work but the cheesecake will need to bake for less time so just keep an eye on it. Enjoy!
Perfection! I followed your instructions to the letter including cook time and it came out beautifully, I made this for my husband but I am not a cheesecake fan usually it’s heavy and gluey sticking to my tongue so usually a no thank you but this cheesecake I have had two slices of much to the hubs chagrin thank you thank you simply the best.
I am so glad everyone enjoyed it so much, Liz! 🙂
Can I add a little bit of lemon juice?
Sure!
How long do you wait to remove the springform?
Hi Vanessa! I don’t remove it until I’m ready to serve, but you can remove it any time once the cheesecake has cooled completely.
Is it ok to use a pie dish if I don’t have a springform pan?
Hi Luz! It will probably be too much batter for a pie dish, unless you have a deep one but it will still work. Make sure to not overfill the dish. Your baking time will vary so be sure to check for signs of doneness. 🙂
Have you ever tried making this with Egg Nog?
I have not, but that sounds like a delicious variation to play around with in the future! Yum!
Your cheesecake recipe is wonderful . I have shared it with several friends and they loved it as well. Your cheesecake inspired me to buy new springform pans and bake holiday gifts this year. Thank you!
Thank you so much, Michele! I am so glad you enjoy it so much and I really appreciate your support. 🙂
how long should i bake using individual mini grahm cracker pie crusts i have 12 mini pie crusts
Hi Dave! I actually have a recipe for mini cheesecakes that may help give you some guidance. They are made in muffin tins. 🙂
Would you adjust anything for baking in a 10″ springform?
Hi Jordan! The bake time will probably be slightly less. 🙂
My son loves cheesecake and I used this recipe. He said it was the best cheesecake he had ever eaten ! I followed all the tips but still got a huge crack in the center – it’s ok I covered it with strawberries and a berry compote and it all worked out ! This will now be my go to recipe for cheesecake. Thanks!!
I’m so glad you enjoyed it so much, Mehrin! I’m sorry about the crack. Make sure to read the section in the post on preventing cracks. I hope you can avoid the crack next time. 🙂
I love the recipe. It even works when using the 9″ pre made crust pans. I have used this recipe with a pie form as well but sometimes time is an issue and in these times, pre made crust is my go to. I like using strawberry pie filling on top or simply making my own. I have my own cheesecake recipe that I make on special occasions. I use the water bath method as well but the recipe is a 3 hour ordeal and my wife is not a fan of my lemon cheesecake so this is a go to recipe now. My family loves the original so I make both on special occasions. Don’t change anything with this recipe. The only thing I suggest is to open the oven the last ten minutes and turn the oven down to 250 to let the cheesecake drop temp gradually if it is cold in your home. It will stop the cheesecake from cracking. It doesn’t drop temp as fast as it will cooling on top of your oven. I then move it to the oven for a couple of hours until it’s room temp then add room temp topping and refrigerate until chilled. The rest is history. Especially after my wife and kids get a hold of it. Lol.
I am so glad you enjoyed it so much, John! 🙂
When you use a pre-made crust do you do the water bath while baking?
I followed this recipe to make my first ever homemade cheesecake. It was easily the best cheesecake I have ever had in my life. IN MY LIFE.
It was surprisingly easy to make and not even expensive. This recipe has a perfect flavor and is delicious as is. I made a cooked strawberry topping and that was a delicious enhancement.
I appreciated learning the things to watch out for that commonly cause problems. It was so helpful to know EXACTLY what to do. I used a 9” springform and I was surprised how tall and dense the cheesecake turned out!
I noticed when I added my (room temp lightly scrambled) eggs to the batter that it seemed like some small lumps formed. These then translated into a slight bit of a gritty texture in the finished product. Any ideas of what I might have done wrong, or not quite right, for this to happen?
Thanks so much for sharing this recipe – it will be a Thanksgiving staple from now on.
Hi Jessica! I don’t think the eggs were the problem here. I think the batter may have just needed to be mixed a little bit longer to make it nice and smooth before adding the eggs. I hope this helps! 🙂
I didn’t ready all the way through and used the tub cream cheese…epic fail (on my part)🤦🏻♀️
Wondering, can silken tofu be used instead of cream cheese?
Oh no, what a bummer! To be completely honest I have no idea about baking with tofu but maybe someone else can chime in who has tried it. I’m not sure how it tastes but cream cheese has a distinct flavor and I worry you would lose the classic cheesecake flavor if you don’t use it 🙁
I imagine the tofu would help maintain a texture but the taste would be altered. A vegan cream cheese added to the tofu might being back some of the traditional flavor. If nothing else, you can go with a syrupy delicious fruit topping to help it have good cheesecake vibes.
Signed, a terrible chef but former vegan.