
Peanut Butter Pie Recipe
This post may contain affiliate links. As an Amazon Associate I earn from qualifying purchases. Please read my disclosure policy.
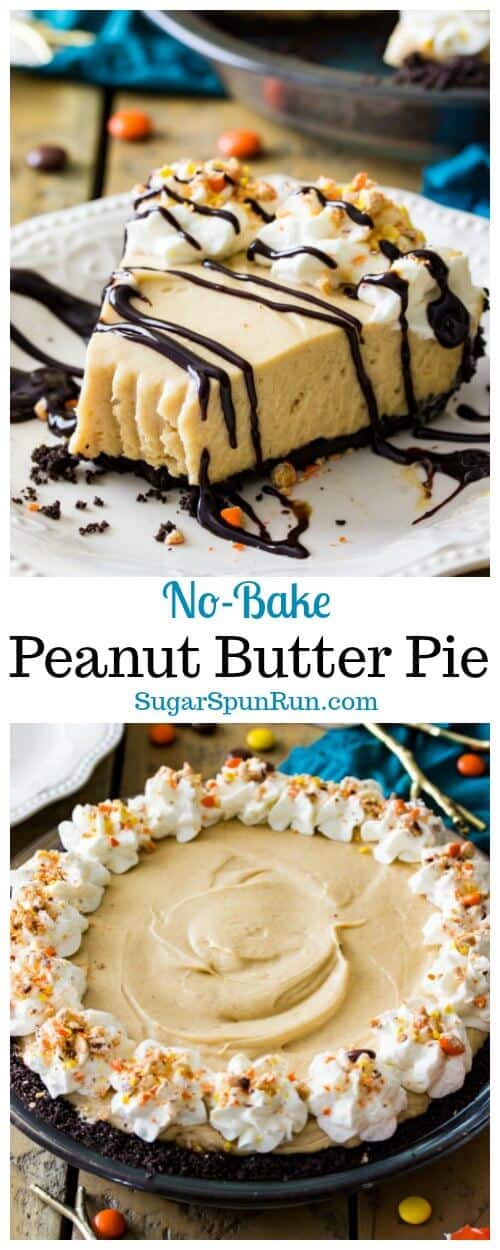
My easy, creamy, no-bake peanut butter pie recipe made without any gelatin or cool whip! It has a smooth, creamy peanut butter filling and a crisp Oreo cookie crust. Recipe includes a how-to video!
No-Bake Peanut Butter Pie
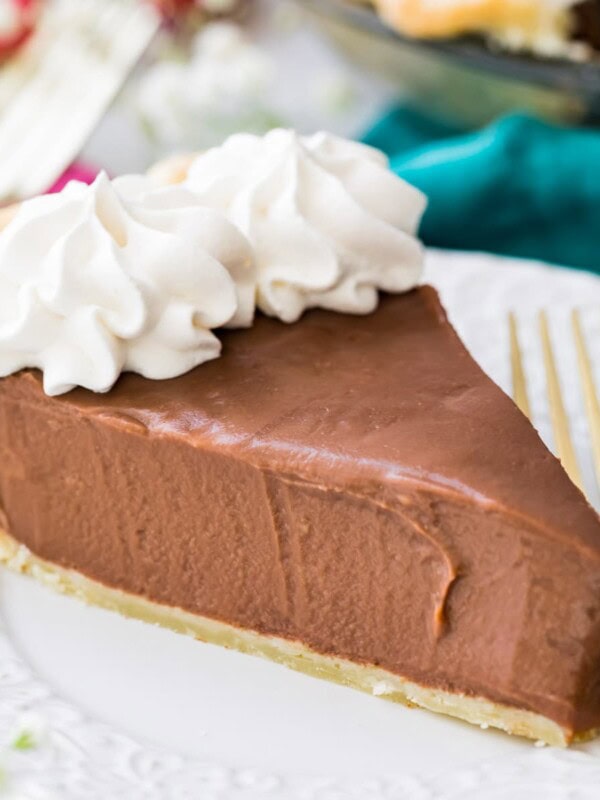
One of my favorite no-bake desserts, this peanut butter pie recipe is chocolate peanut butter perfection! It has a creamy (yet appropriately fluffy), and silky smooth peanut butter filling over a crunchy Oreo cookie crust. What sets my recipe apart from the rest is that the filling is made from scratch (no gelatin, Cool Whip, etc.) and there’s absolutely no baking required (not even for the crust!).
You are going to love this one!
How to Make the BEST Peanut Butter Pie
- Skip the gelatin. We’ll use brick-style cream cheese instead for a slice-able consistency. This doesn’t make the pie a cheesecake, though (but if you’re looking for one, here’s my peanut butter cheesecake!).
- Use homemade whipped cream instead of Cool Whip. It not only gives the pie a richer (and less artificial!) flavor and smooth, fluffy interior, but it’s also incredibly simple to make. This is essential for a pillowy, creamy texture!
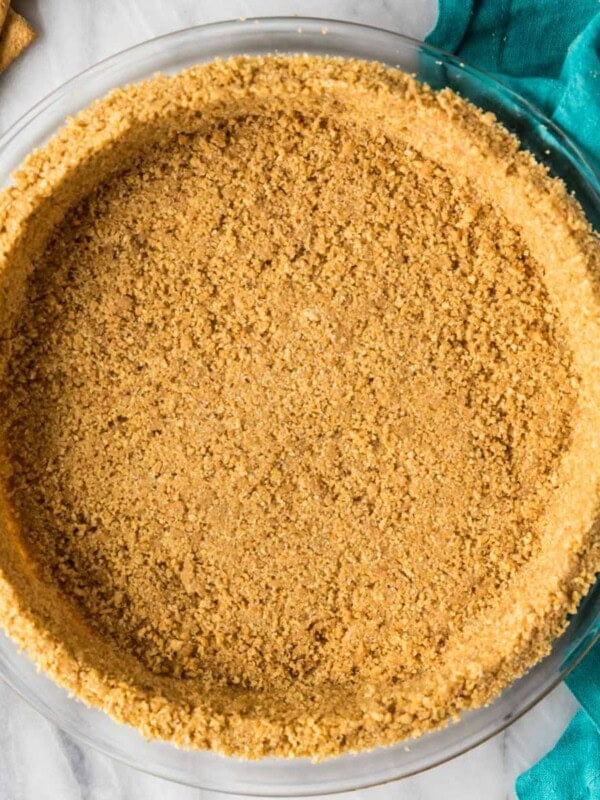
- Make your own crust! Not only is a pre-made crust too small to hold all of the filling we’re making today, but you just don’t get that same buttery cookie crumb you get from homemade. It’s also just so, so easy to make to make your own Oreo crust–we’re talking literally two ingredients! There’s no need to scrape out the filling or pre-bake the crust before using, either. Simply pop it in the freezer while you prepare your filling.
- Freeze or refrigerate: you decide! The consistency of this pie changes depending on how you decide to chill it, so you can customize your results. I talk more about this in the FAQ section below.
Ingredients
Less than 10 ingredients in this peanut butter pie recipe! Let’s go over a few before we get started.
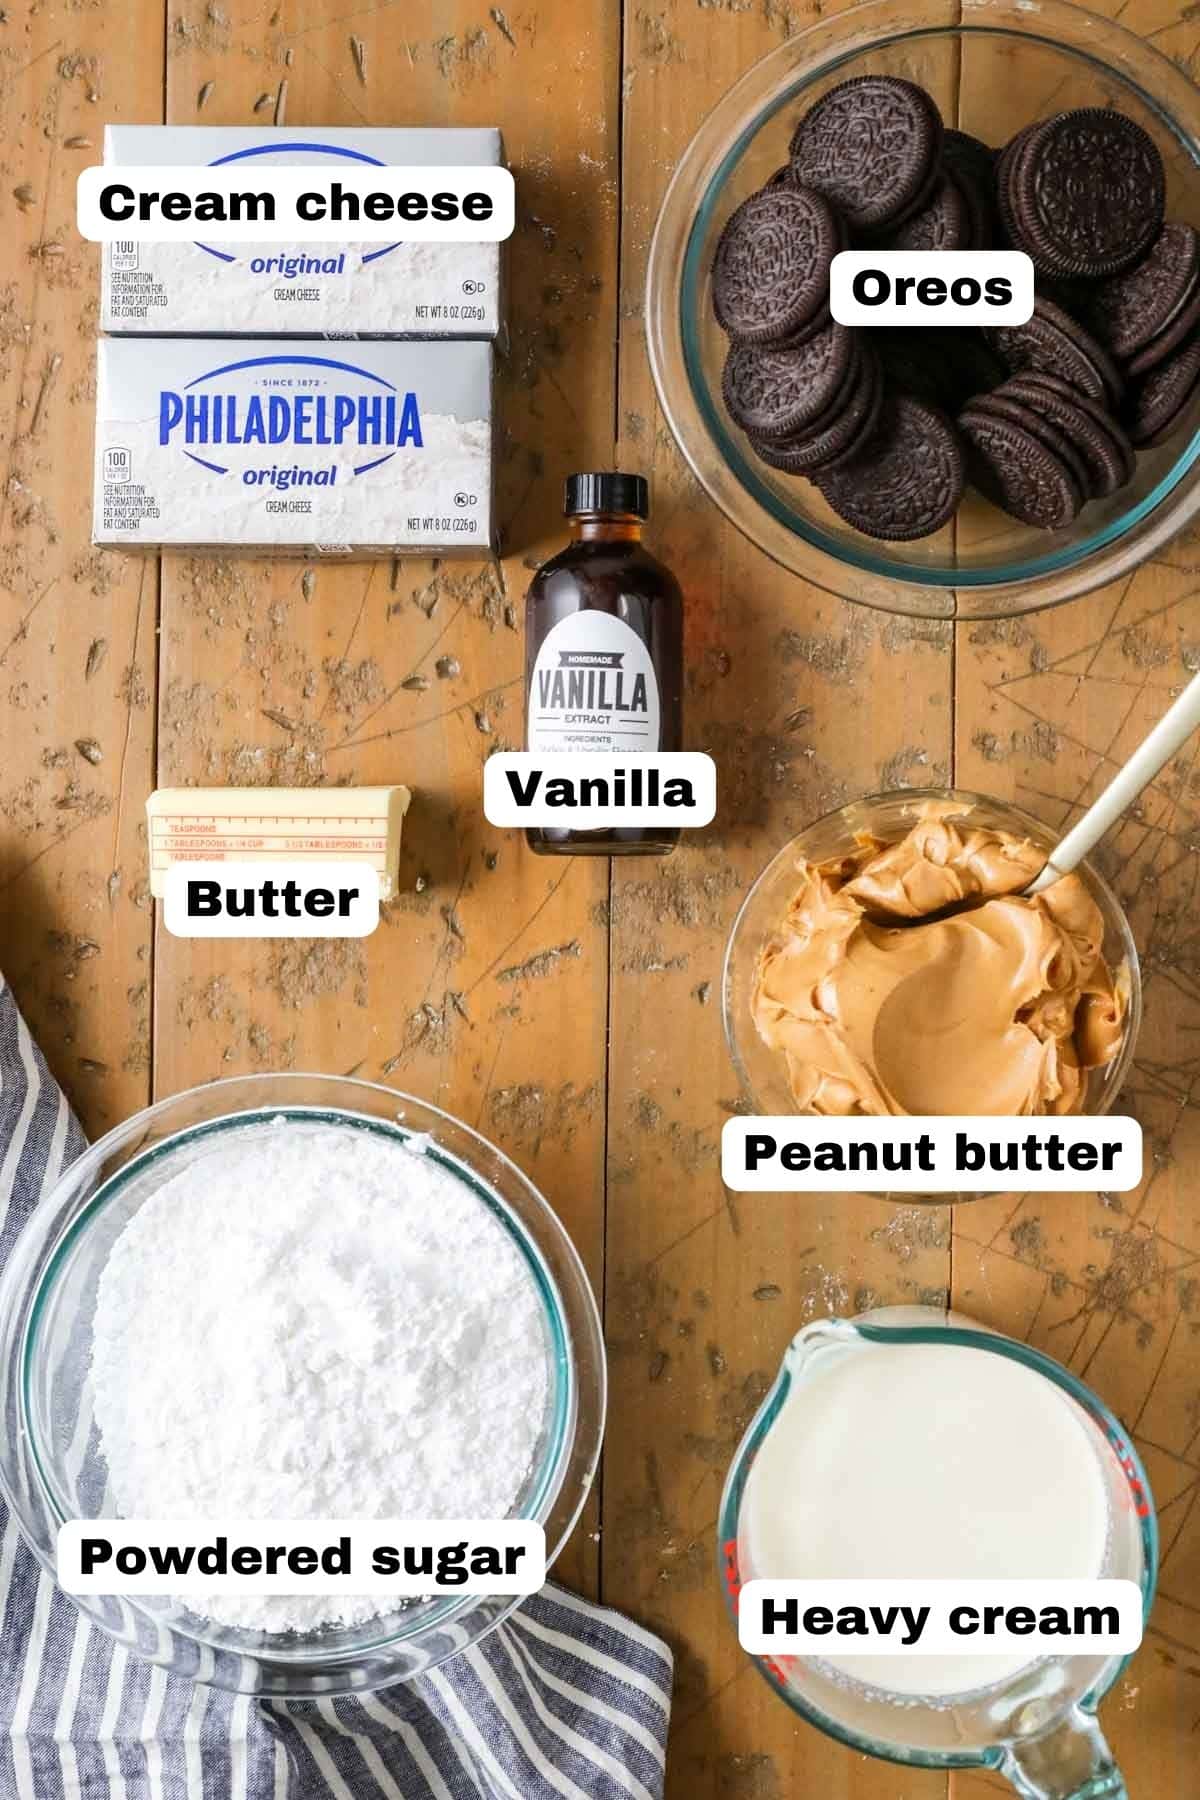
- Peanut butter. I use creamy peanut butter, but crunchy would work if you don’t mind the texture. I have not experimented with natural peanut butter (the kind where the oil separates into the top), but if you try it with that type I’d love to know how it works for you.
- Cream cheese. This not only adds depth of flavor, but it also helps to give it a stable, easy-to-slice consistency.
- Heavy cream. We’ll whip this into thick, fluffy whipped cream. Double cream or heavy whipping cream would also work.
- Oreos. You’ll need 24 sandwich cookies (whole, without the cream removed). I usually have you remove the cream if you are making an Oreo crust for a springform pan (like my Oreo cheesecake), but it’s not necessary here (since we’re not baking it, there’s no need to worry about the crust leaking).
- Butter. This is for the crust. Personally, I like to use salted butter to help counteract the sweetness of the filling, but you can use unsalted butter if that’s all you have on hand.
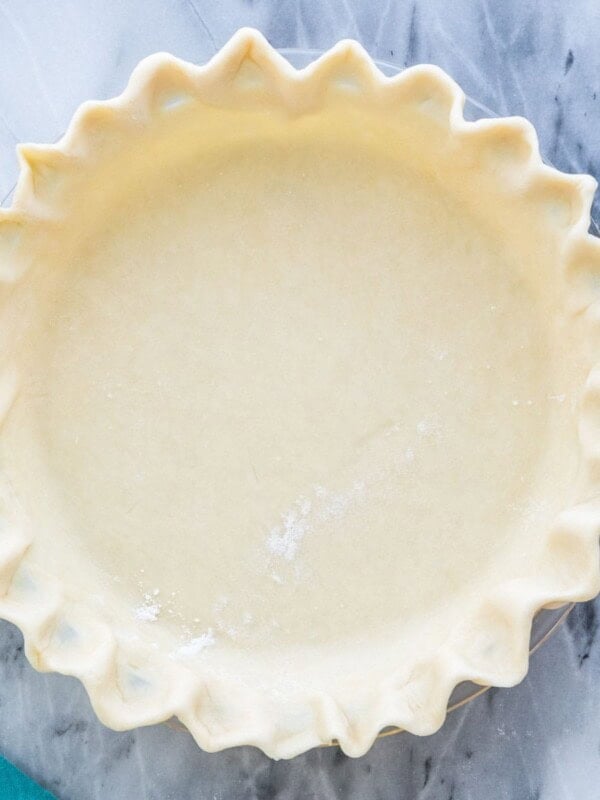
SAM’S TIP: If you don’t like or can’t eat chocolate, you can make my equally simple graham cracker crust instead (or substitute the Oreo cookies for Golden Oreos or Biscoff cookies).
Remember, this is just an overview of the ingredients I used and why. For the full recipe please scroll down to the bottom of the post!
How to Make Peanut Butter Pie
Make the Crust
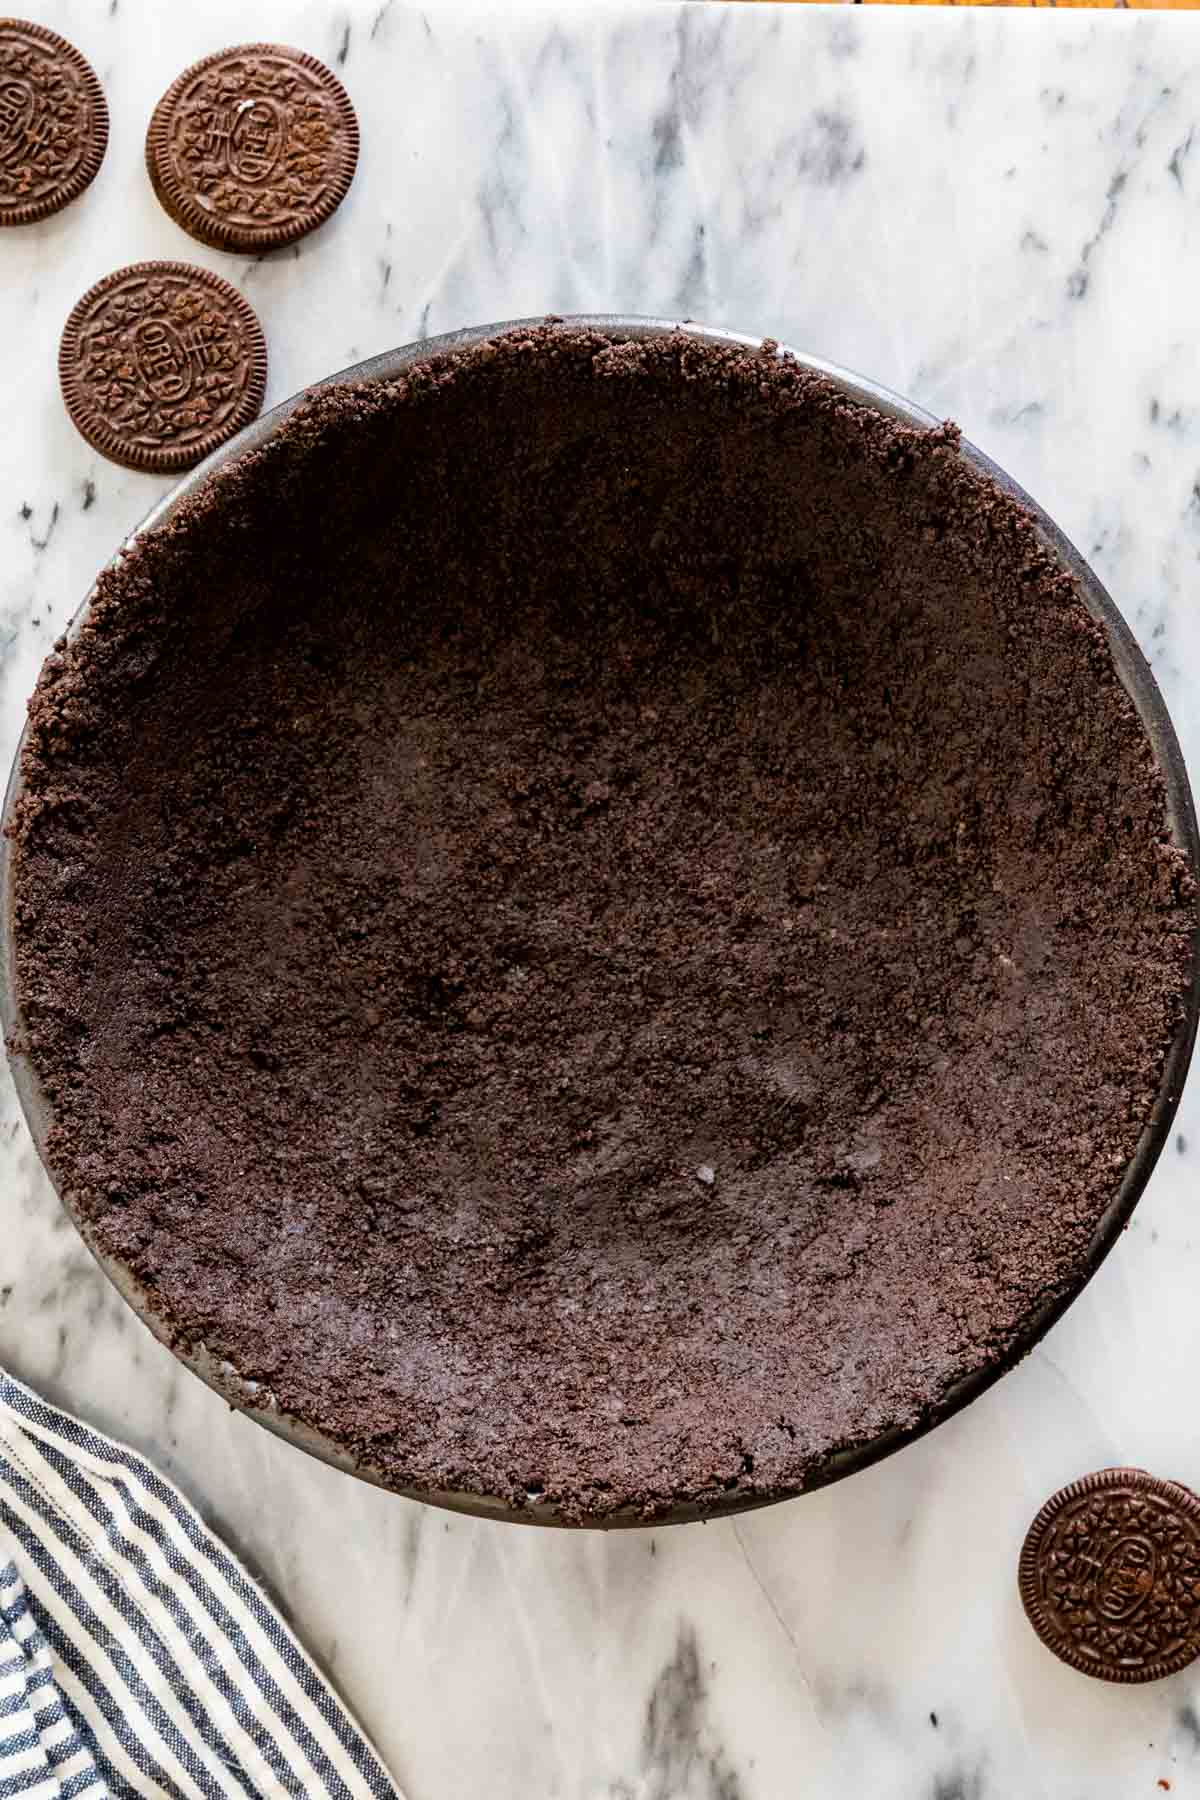
- Pulse the Oreos in your food processor until they are fine crumbs. There is no need to remove the cream first; just toss the cookies as-is into the food processor.
- Add the melted butter and pulse again to combine.
- Press the mixture into your pie pan using the bottom of a glass, measuring cup, or spoon. Place the crust in your freezer while you make your filling.
Assemble
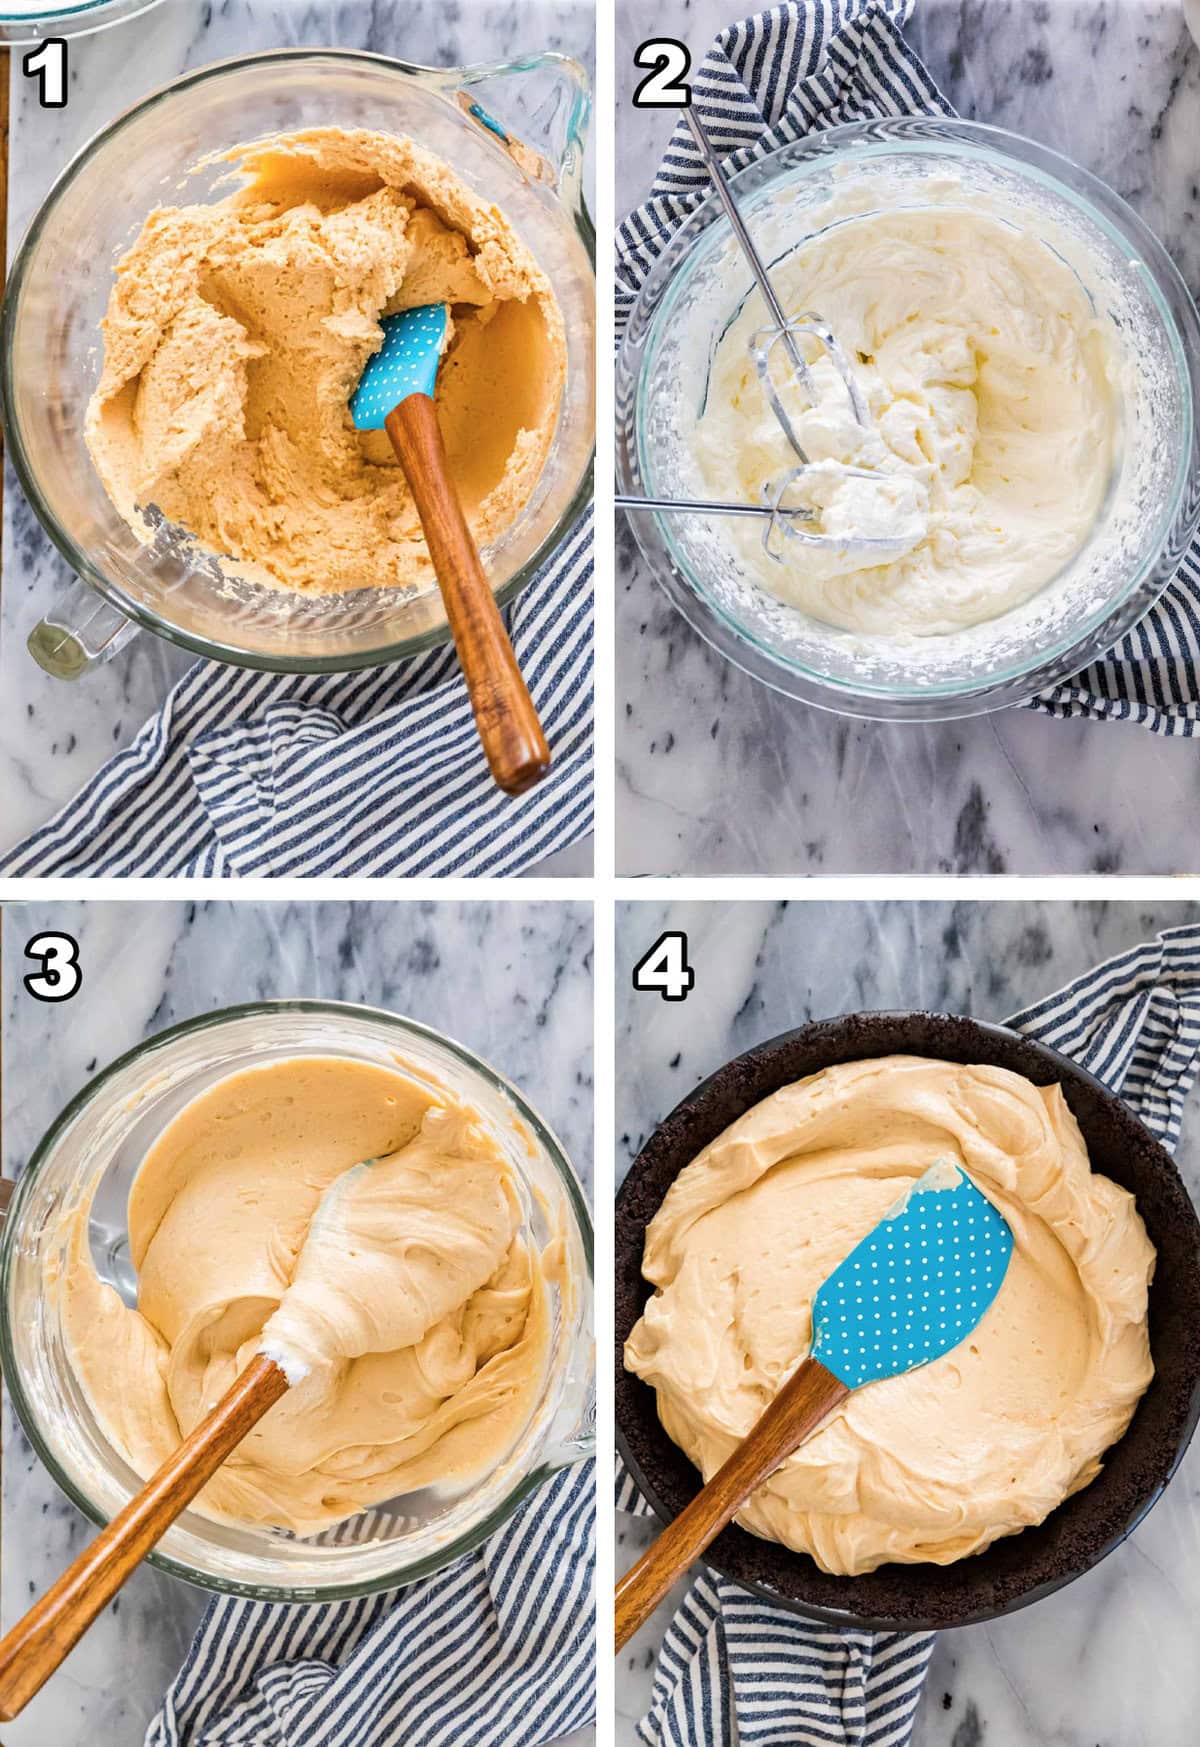
- Beat the cream cheese and peanut butter until combined, then stir in the powdered sugar and vanilla. Set this aside.
- Whip the cream and remaining powdered sugar to stiff peaks in a separate bowl. The cream should be fluffy and thick when you are done. If you haven’t whipped cream before or have questions about any aspect of the process, check out my guide on how to make whipped cream.
- Fold the whipped cream into the peanut butter mixture until smooth and combined.
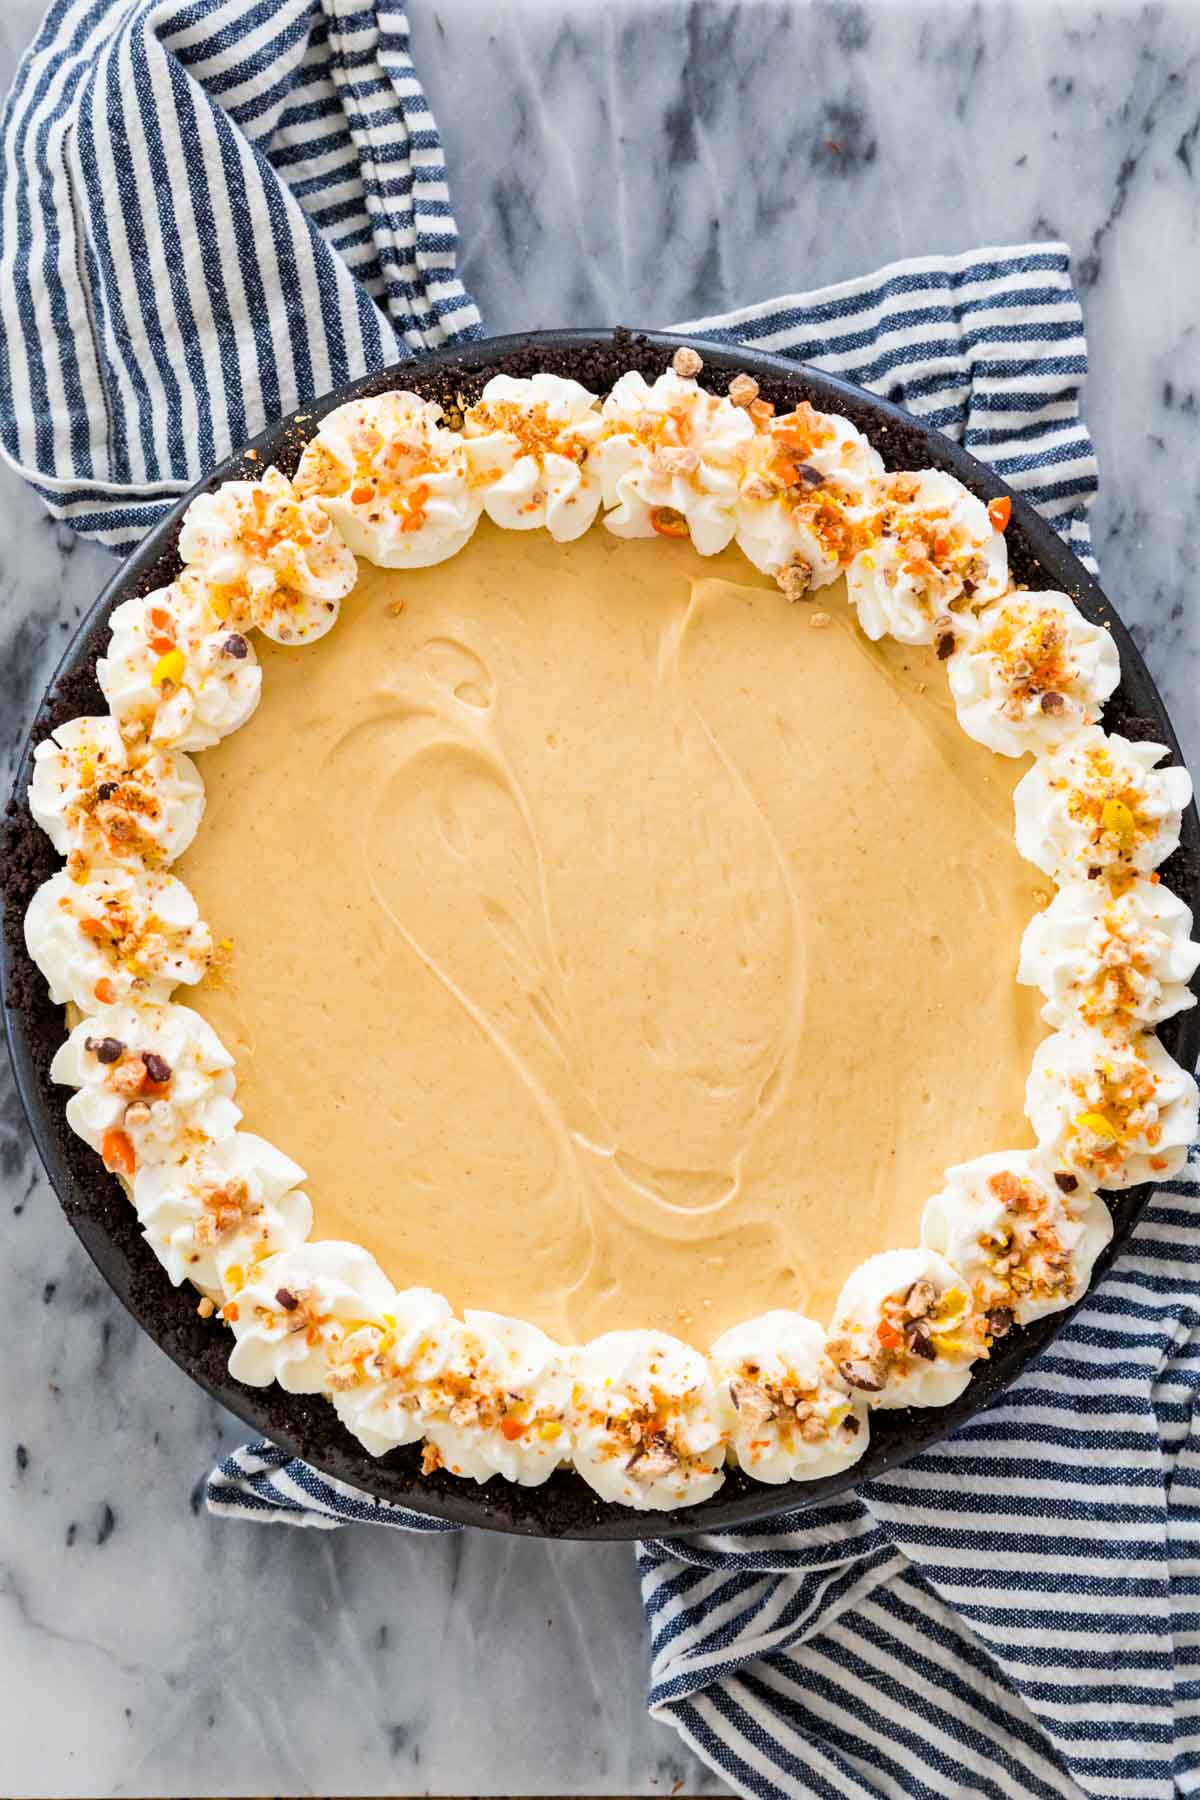
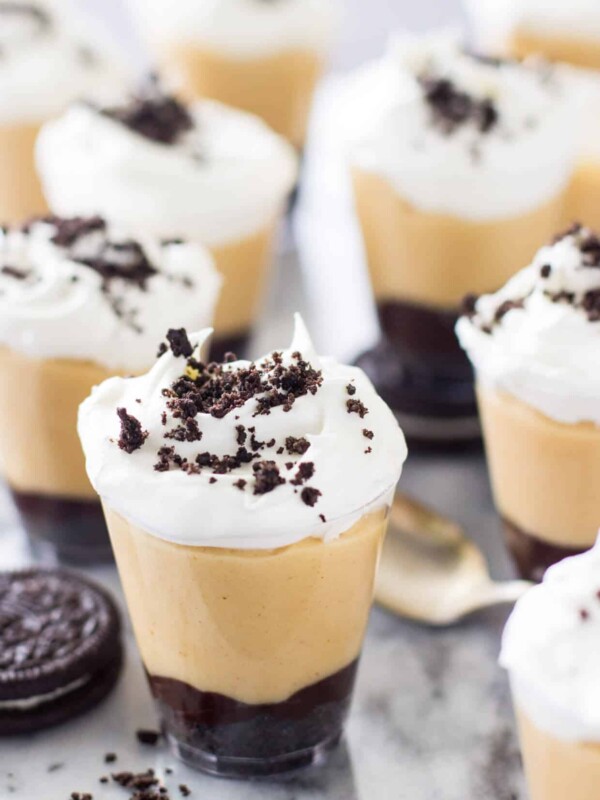
- Spread the filling into the crust, then cover and place in either the fridge or freezer (more on this below). Decorate with a whipped cream border and crushed candy pieces before serving, if desired.
SAM’S TIP: This pie softens fairly quickly at room temperature, especially during the hot summer months. Because of this, I recommend keeping it chilled whenever you aren’t slicing it (no matter where you ultimately store it).
Frequently Asked Questions
You can do either! Refrigerating requires at least 4-6 hours of chilling, and the pie sets up with a consistency that’s softer, similar to my chocolate pie. Most recipes call for refrigeration rather than freezing.
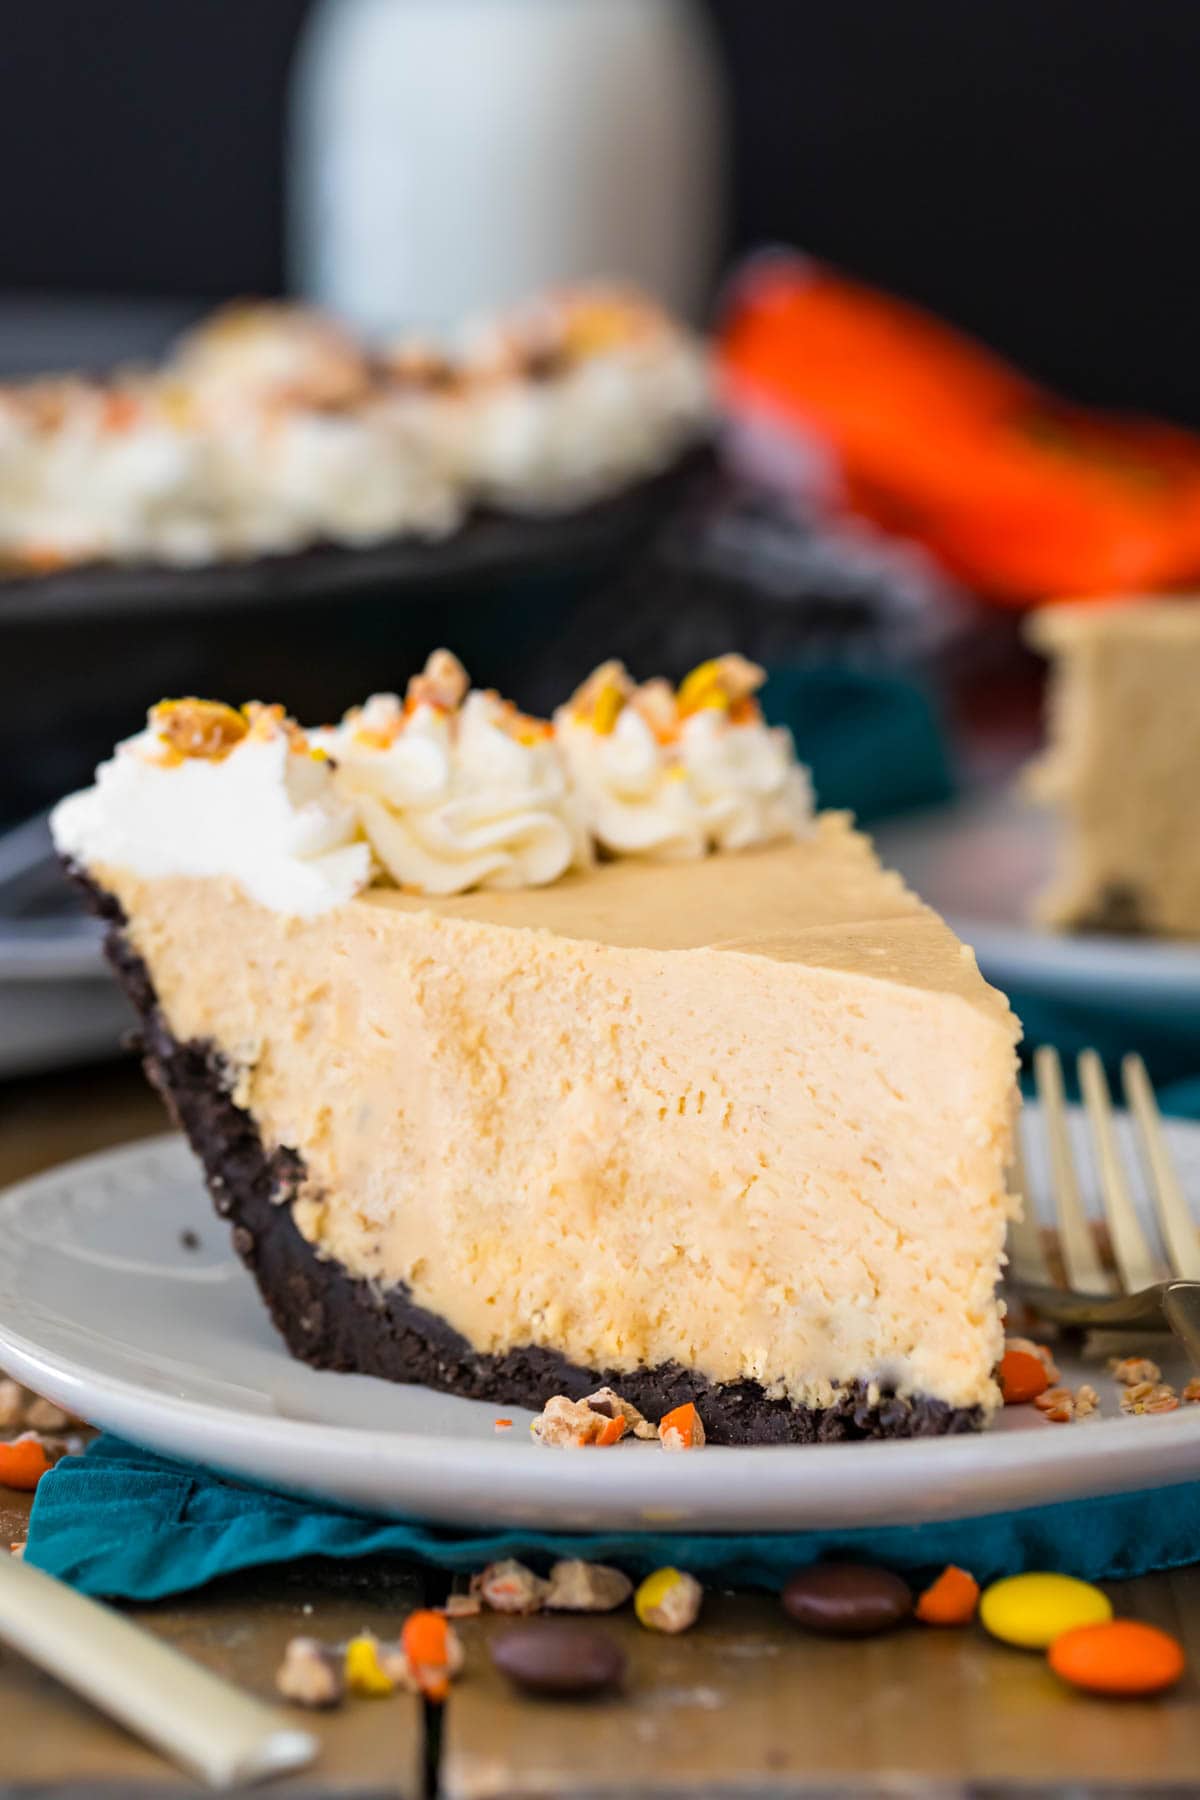
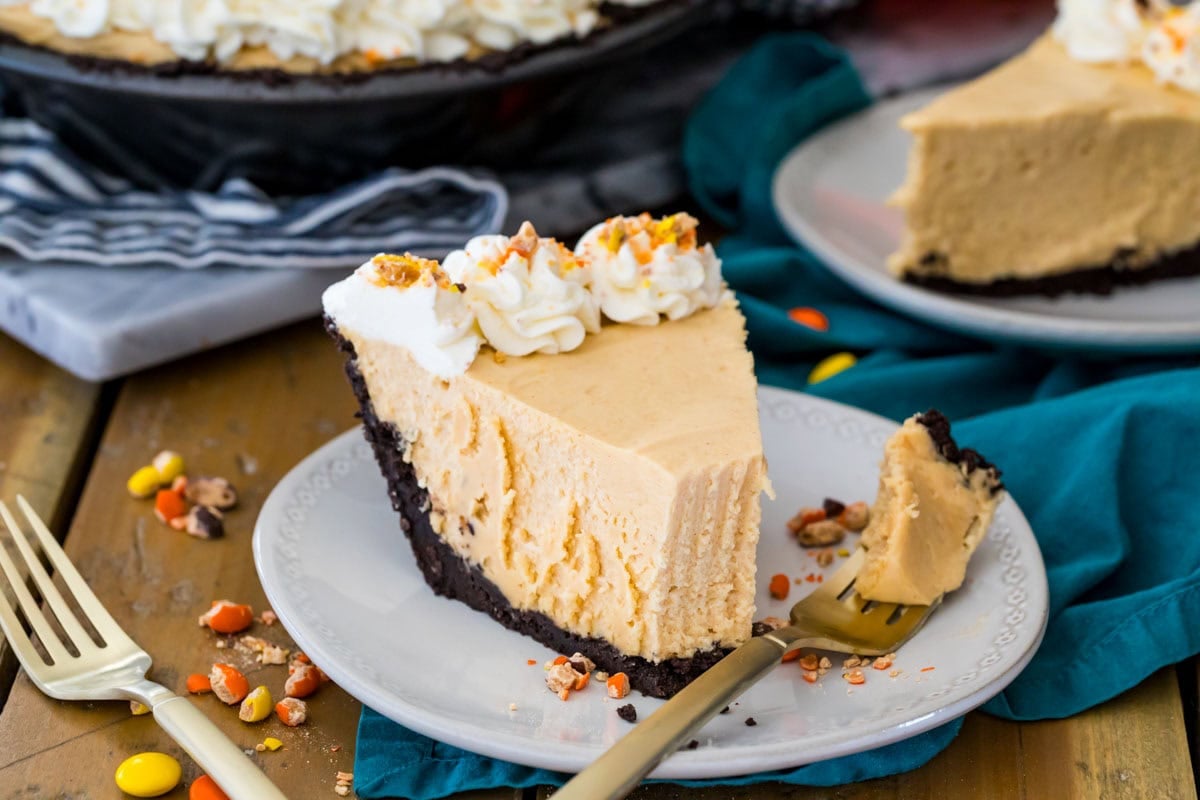
Freezing requires at least 2 hours of chilling. Frozen pie ends up even more firm and has a consistency that’s closer to New York cheesecake or chocolate icebox pie. The photos in this post were of a frozen pie.
Regardless of whether you keep your pie in the refrigerator or freezer, cover it well with plastic wrap. It will keep in the fridge for about 5 days or in the freezer for about a month.
This pie is perfect without any toppings. However, after making and chilling the pie, I like to pipe a decorative border (I use a 2A tip) of homemade whipped cream around the edge and then sprinkle that with crushed Reese’s Pieces. It adds a nice extra pop of color, but again, totally optional.
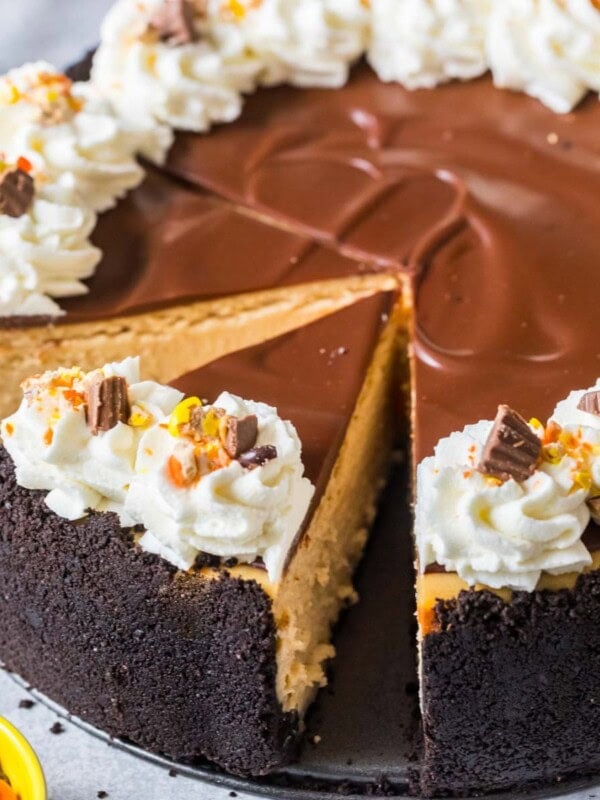
Alternatively you could drizzle your slice with homemade caramel sauce, chocolate ganache, or chocolate sauce (one of my favorite additions)…yum!
If you love peanut butter and chocolate, try my buckeye brownies next!
Enjoy!
Let’s bake together! Subscribe to my newsletter to be notified of all the newest recipes, and find my free recipe tutorials on YouTube 💜

Peanut Butter Pie
Ingredients
Oreo Crust
- 24 Oreo sandwich cookies, (do not remove the cream filling)
- 5 Tablespoons (70 g) butter, melted (salted or unsalted)
Peanut Butter Pie Filling
- 12 oz (340 g) cream cheese (brick-style, not the "spreadable" kind sold in tubs), softened
- 1 ½ cups (375 g) creamy peanut butter
- 2 ¼ cups (280 g) powdered sugar, divided
- 1 teaspoon (5 ml) vanilla extract
- 1 ½ cups (355 ml) heavy cream
For Whipped Cream Topping (optional)
- ¾ cup (175 ml) heavy cream
- ¼ cup (30 g) powdered sugar
- ½ teaspoon vanilla extract
- 2 Tablespoons crushed Reese’s Pieces for decorating, optional
Instructions
Oreo Crust
- Prepare your pie crust first by placing Oreo cookies in a food processor and pulsing until nothing but fine crumbs remain24 Oreo sandwich cookies
- Add melted butter and pulse until well-combined.5 Tablespoons (70 g) butter, melted (salted or unsalted)
- Pour cookie crumb/butter mixture into the bottom of a 9 ½" pie pan. Use the back of a spoon or the clean flat bottom of a measuring cup to evenly, firmly press crumbs into the bottom and sides of pie pan.
- Place in freezer while you assemble your filling.
Pie Filling
- In a large bowl, combine softened cream cheese and peanut butter. Use an electric mixer to stir until well-combined.12 oz (340 g) cream cheese (brick-style, not the "spreadable" kind sold in tubs), 1 ½ cups (375 g) creamy peanut butter
- Gradually add 1 cup (125g) of powdered sugar, stirring until completely combined.
- Stir in vanilla extract.1 teaspoon (5 ml) vanilla extract
- Pour 1 ½ cups heavy cream in a separate, medium-sized, clean bowl. Add remaining 1 ¼ cup (155g) of powdered sugar, and use an electric mixer to beat, starting on low-speed and gradually increasing to high, until stiff peaks are achieved (mixture should be thick, fluffy, and resemble Cool Whip, see image in post or video for a visual).1 ½ cups (355 ml) heavy cream
- Add whipped cream into peanut butter mixture and stir gently, but as well as you can using a spatula. Switch to your electric mixer on low and use that to briefly stir until the ingredients are well-combined and smooth (don't over-mix).
- Spread peanut butter filling evenly into prepared pie crust and refrigerate covered for 4-6 hours (preferably overnight), or freeze¹, covered, for at least 2 hours before serving. Prepare whipped cream shortly before serving (if using).
Homemade Whipped Cream Topping (optional)
- Before serving the pie, combine heavy cream, powdered sugar, and vanilla extract in a clean medium-sized bowl.¾ cup (175 ml) heavy cream, ¼ cup (30 g) powdered sugar, ½ teaspoon vanilla extract
- Use an electric mixer to stir on low-speed. Gradually increase speed to high and beat until stiff peaks form.
- Spread whipped topping over the center of the pie, or to be more decorative you can transfer to a piping bag fitted with a 2D Wilton piping tip or similar and pipe a decorative ring around the edge of the pie.2 Tablespoons crushed Reese’s Pieces for decorating
- Slice, serve, and enjoy! Since this pie is a no-bake one, keep it in the refrigerator or freezer when not enjoying because it loses its firmness quickly at room temperature.
Notes
¹Refrigerator vs Freezer
Refrigerating this pie will give you a creamier, softer consistency (similar to my chocolate pie), while freezing it will give you a firmer, easier to slice one with a consistency that reminds me more of cheesecake. I typically refrigerate as I like the consistency best.Storing
Store well-covered. Pie will keep in the refrigerator for about 5 days or will keep frozen for one month.Nutrition
Nutrition information is automatically calculated, so should only be used as an approximation.
Like this? Leave a comment below!
This recipe was originally published 08/10/2017, I’ve updated it to include newer pictures and additional tips.


If I am planning to freeze the pie until ready to eat in 1 week, how long should I let it thaw before slicing? Also, do you think it will have the same texture after thawing? Thank you!
Hi Annemarie! You shouldn’t have any issues with the texture of this pie if freezing. I’m not sure how long it would take to thaw. I would probably let it thaw overnight in the refrigerator. 🙂
I made this for a big family gathering at New Year’s. It was an absolute favorite, so much so my dad asked me to make it for his birthday BBQ 3wks later! This pie is absolutely delish! (FYI: I followed the recipe and had enough filling for 2 pies, wish I’d made 2 crusts!) I had something similar at Chili’s but refuse to pay $11+ a slice.
We are so happy the pie is such a hit for you. Thanks for coming back to leave a review–we really appreciate it! 😍
I couldn’t get the video to work and I was wondering what brand peanut butter you used. It looks delishous and can’t wait to make it.
I’m so sorry to hear this happened! Are you running a pop up blocker on your computer? That will prevent the video from playing. You can always find my videos on Youtube if need be. I just use JIF peanut butter here. Enjoy! 🙂
For peanut butter pies, I love to use the peanut butter Oreos for the crust!
Yummm. 🙂
QUESTION: Topping 3/4C per recipe or 1 1/2C per directions?
¾ cup is correct. We list this in step #1 in that section of the directions 😊
I don’t know what brick type cream cheese is. I only see tubs here. what do I do?🙏
You could try the tub-style, but it might not set up properly. The ingredient list on the cream cheese we use includes: pasteurized milk and cream, salt, carob bean gum, and cheese culture. If your cream cheese has similar ingredients, it will probably work. If it has extra ingredients though, your cheesecake probably won’t turn out quite as nicely. Hope this helps! 🙂
All of her recipes are perfect. Great for serving company.
The Peanut Butter pie receipe is fab! Before moving from the US we had a Amish resturant famous for Peanut Butter pies, this recipe is spot on! We now live in Mexicos Yucatan. Our Mayan neighbors think this pie is incredible, they love it.
Of course I have shared your website to them. Welcome to Mexico.
I’m so glad everyone has enjoyed it so much, Virginia! Thank you for spreading the word and I hope everyone else is loving the recipes just as much. 🙂
This pie is absolutely delicious!
I have made the crust with nutter butters and it turned out really well, albeit a bit crumblier than with the Oreos. I figured I’d share for those who have peanut butter fiends in their households.
I’m so glad you enjoyed it so much, Tiffany! 🙂
This wasn’t bad, but it was just very sweet. If you enjoy super sweet treats then this pie is great! If not, I made it with 1 1/2 cups of powdered sugar (could probably do less) in the filling and 2 Tbsp of powdered sugar in the whipped cream topping and it was more peanut buttery vs sweet.
I use cheap Family Dollar peanut sandwich cookies, and it comes out great.