Learn how to make a Sourdough Starter for using in sourdough bread, pizzas, pancakes, and more! This in-depth guide breaks down the growing process into easy steps and includes plenty of tips for success.
Easy Sourdough Starter
Today I’m sharing my favorite tips and tricks on how to make a sourdough starter. Homemade sourdough took the internet by storm in 2020 and has since become a weekly routine for many bakers (including me!). I’m sharing everything I’ve learned over the last few years so you can enjoy sourdough bread, pancakes, sourdough english muffins, and more, too!
Just like baking with yeast, I know that homemade sourdough can be intimidating. But again, just like with yeast, there’s really nothing to be afraid of. If you can measure flour and water, you can do this!
Today’s post will outline how often to feed your starter, signs that it’s gone bad, what to do with the discard, and more. Also, I’ll be sharing several recipes that incorporate this sourdough starter (and the discard, too!) over the next few weeks, so keep an eye out for those! 😊
What You Need
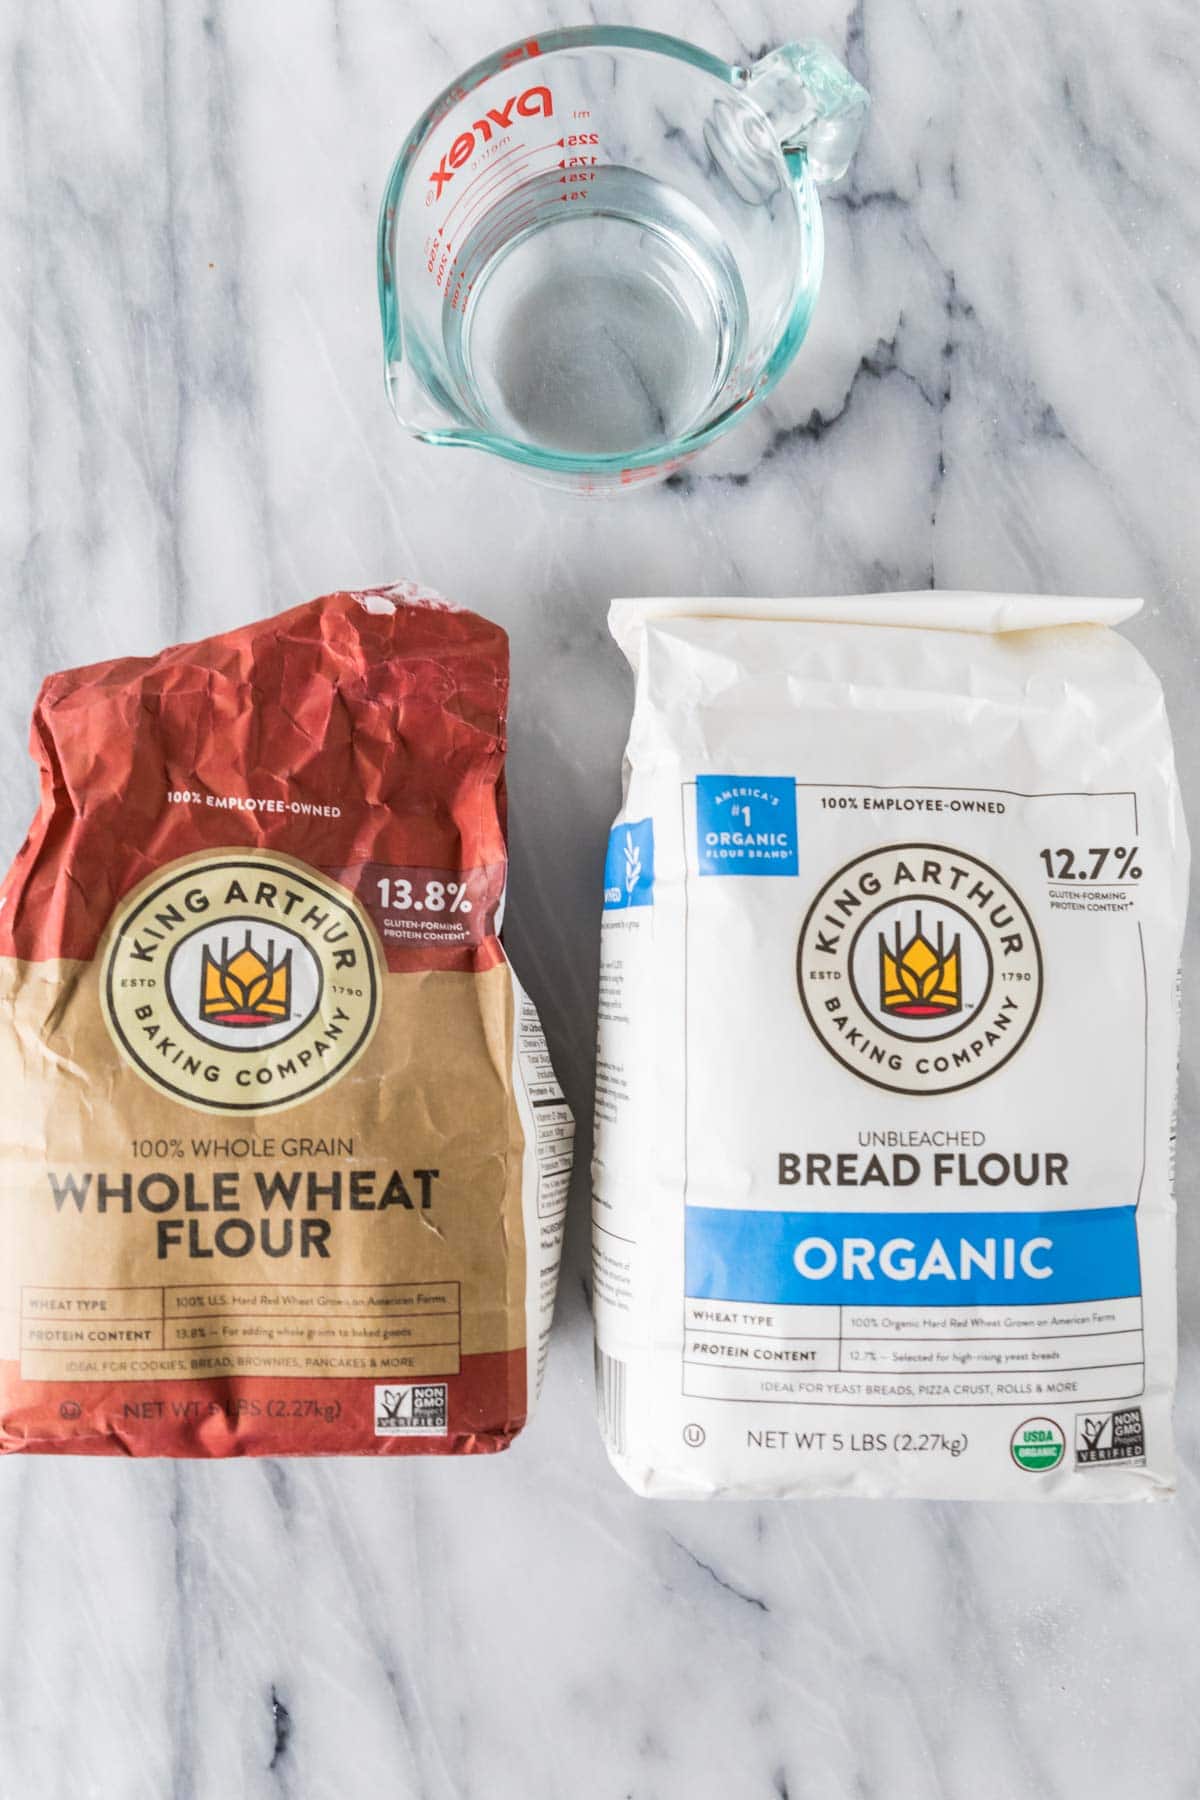
All sourdough starters are essentially the same, but the amount of flour and water used may vary. Here’s what I recommend:
- Flour. I begin with whole wheat flour for the first few days (it feeds the starter with more diverse microorganisms, and some people claim it quickens the growing process). After that, I switch to bread or all-purpose flour. I recommend you switch to the flour you’ll be baking with most often and stick with that; for me, that’s bread flour because that’s what I use to make my sourdough bread.
- Water. If your water isn’t filtered, use bottled water, at least in the beginning. I don’t recommend using unfiltered water because the chemicals in it, such as chlorine, can slow or kill the starter.
- Glass jar. Place your sourdough starter in a glass that allows room for it to double; I like to use a quart-sized mason jar. I recommend using a rubber band or dry erase marker to note the levels when feeding the starter so you know once it’s doubled.
SAM’S TIP: Sourdough starters aren’t an exact science, but weights are easiest for this recipe to ensure you’re using equal parts water and flour, so I really recommend using a kitchen scale (it’ll save you dishes, too). I use 80g of flour and water, but you can really use any amount, so long as it’s the same weight of both. You can easily increase or decrease this amount for larger or smaller recipes (just discard more or less starter and add more or less water/flour), as long as you maintain 100% hydration, meaning equal weights of flour and water.
How to Make A Sourdough Starter
Days 1 & 2
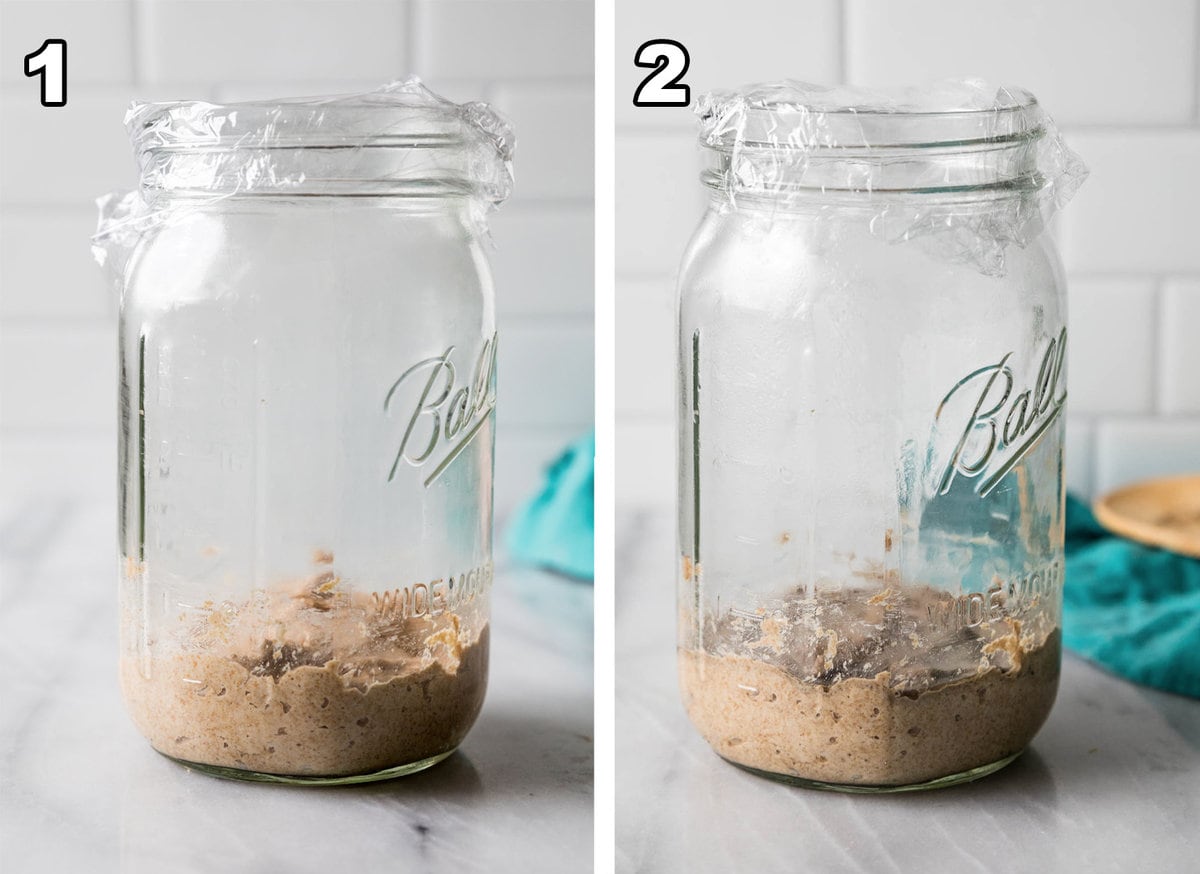
Start by combining your whole wheat flour and warm water in a large glass jar that is large enough for the starter to double. Make sure to stir until there are no dry spots of flour remaining, then cover and place in a warm location for 24 hours.
On day 2, you may notice some liquid on top of your starter, no worries! Just stir your starter and remove slightly more than half (if you want to be precise, which you do not need to be, reserve 80 grams of starter before adding 80g each of flour and water). Cover and let rest in a warm spot for another day.
When discarding, you can use a kitchen scale or just eyeball it, fortunately it is not an exact science. However you must discard, otherwise you will have even more waste because you’ll have to keep feeding the starter more and more.
SAM’S TIP: You can feed your discard to make a new sourdough starter to give as a gift or refrigerate it and keep as a spare (something I wished I’d done when I lost my first starter to a fly!). You can also use your discard in other recipes; I have a sourdough pancake recipe that uses discard. Note that you cannot begin using the discard for at least a week.
Days 3 & 4
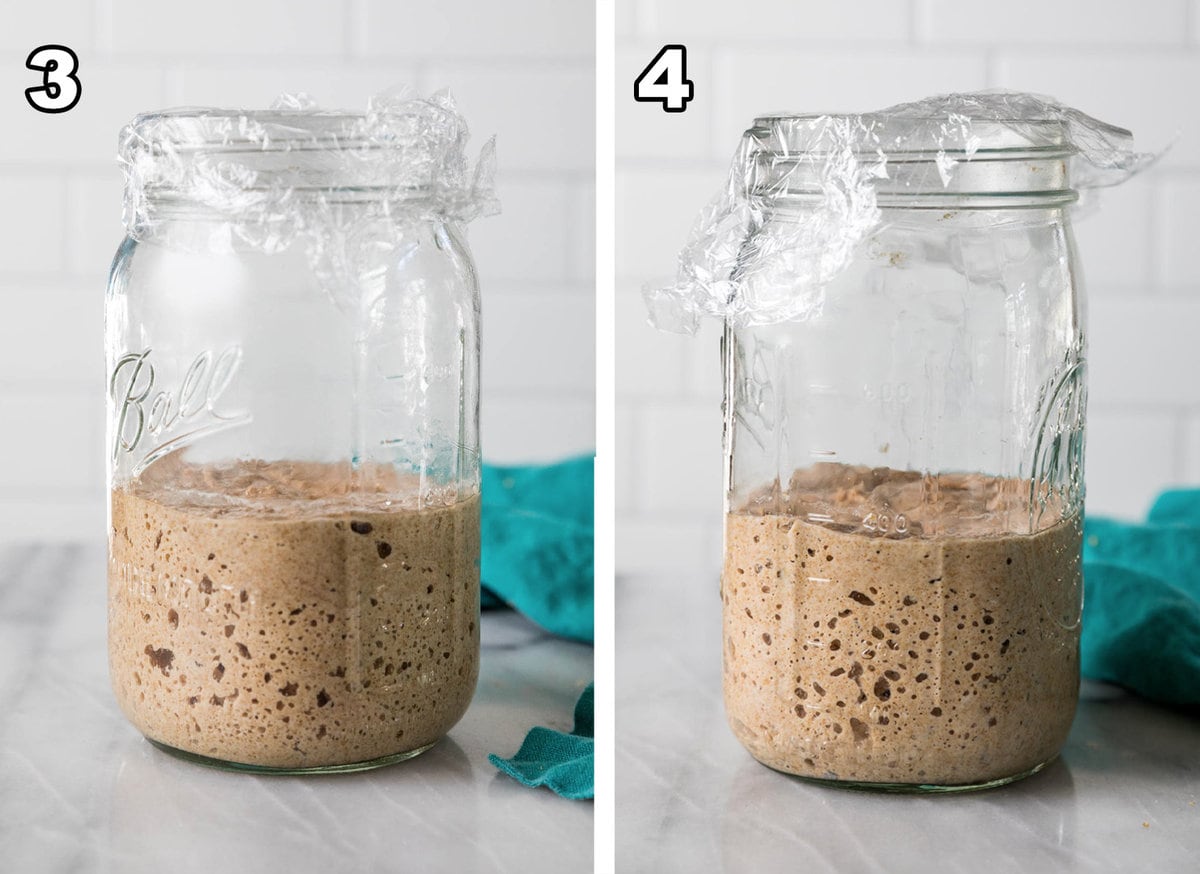
On day 3, your starter may begin to grow some bubbles. Again, you’ll want to remove all but 80 grams (a bit over half), then stir in equal parts (80g each) of warm water and flour. You may see some bubbles at this point.
On day 4, repeat the same steps as days 2 and 3. You should definitely see some bubbles in the starter at this point.
Days 5 & 6
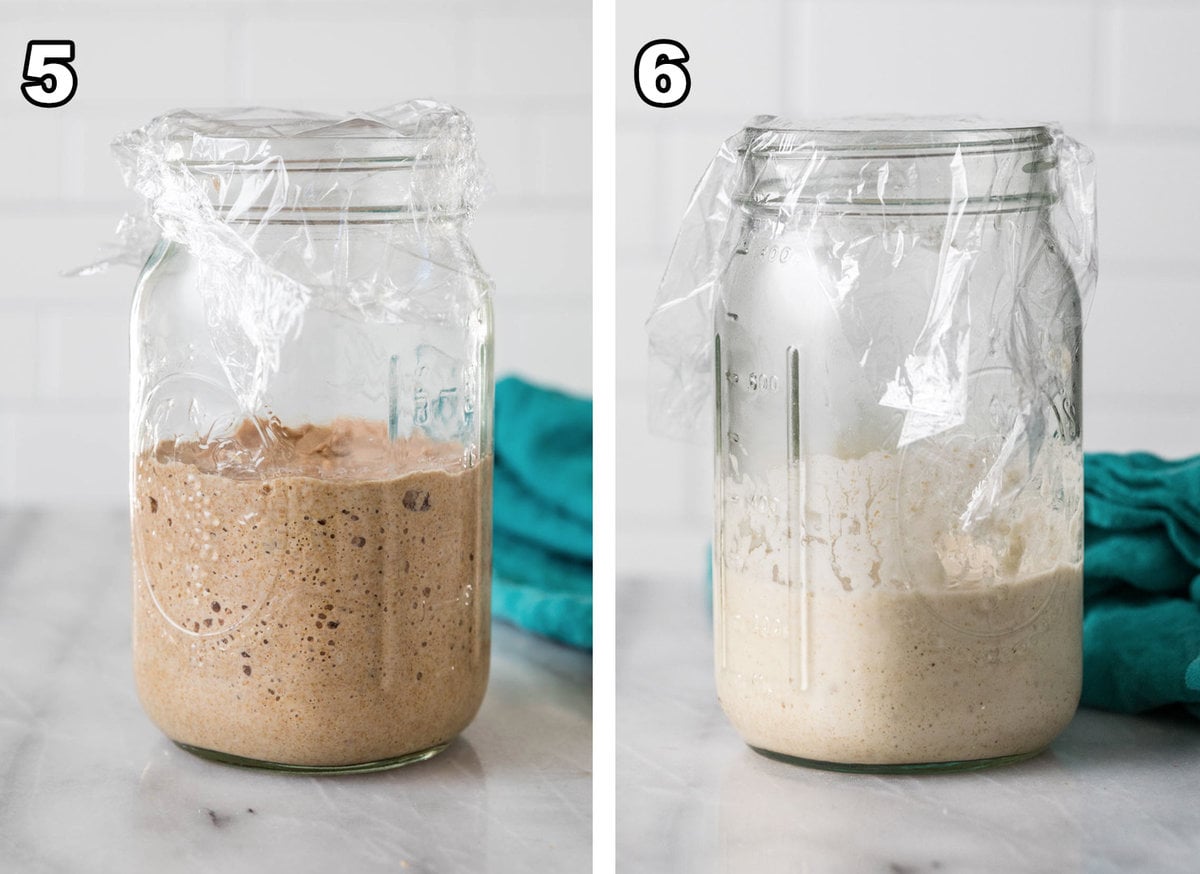
Things start to change on day 5! First, you may notice that your starter has begun to increase in size after feeding. Second, you’ll now start discarding and feeding twice a day. Finally, you’ll switch over to your new flour (either bread or all-purpose depending on your preference).
On day 6, repeat the same steps as day 5. You’ll notice the starter getting lighter in color as the ratio of whole wheat flour remaining drops.
SAM’S TIP: Try to feed your sourdough starter at the same time every day! I’ll admit that I’ve definitely forgotten and fed mine much later, or even accidentally skipped a day (not recommended until after you’ve established your starter).
Days 7 & 8
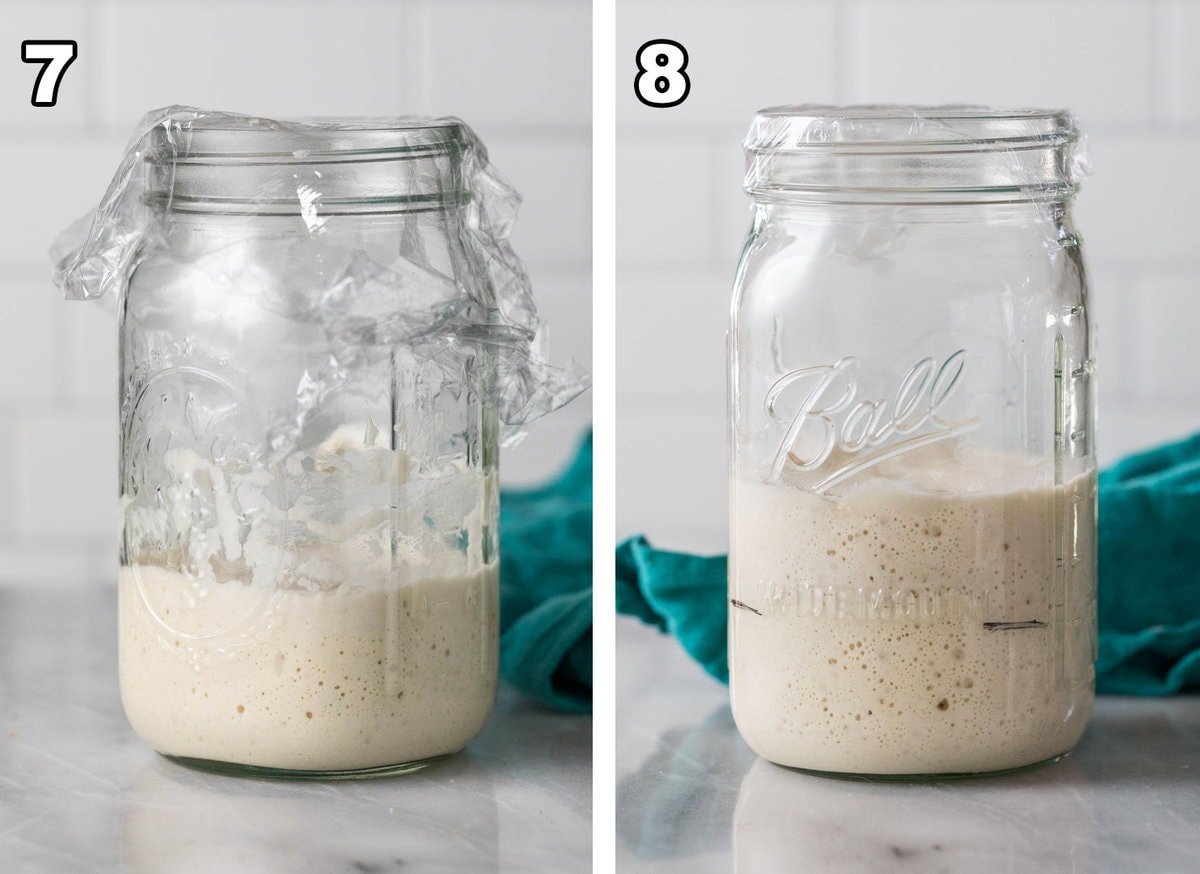
Day 7 is the same as days 5 and 6. Make sure to discard and feed with your new flour twice a day at this point.
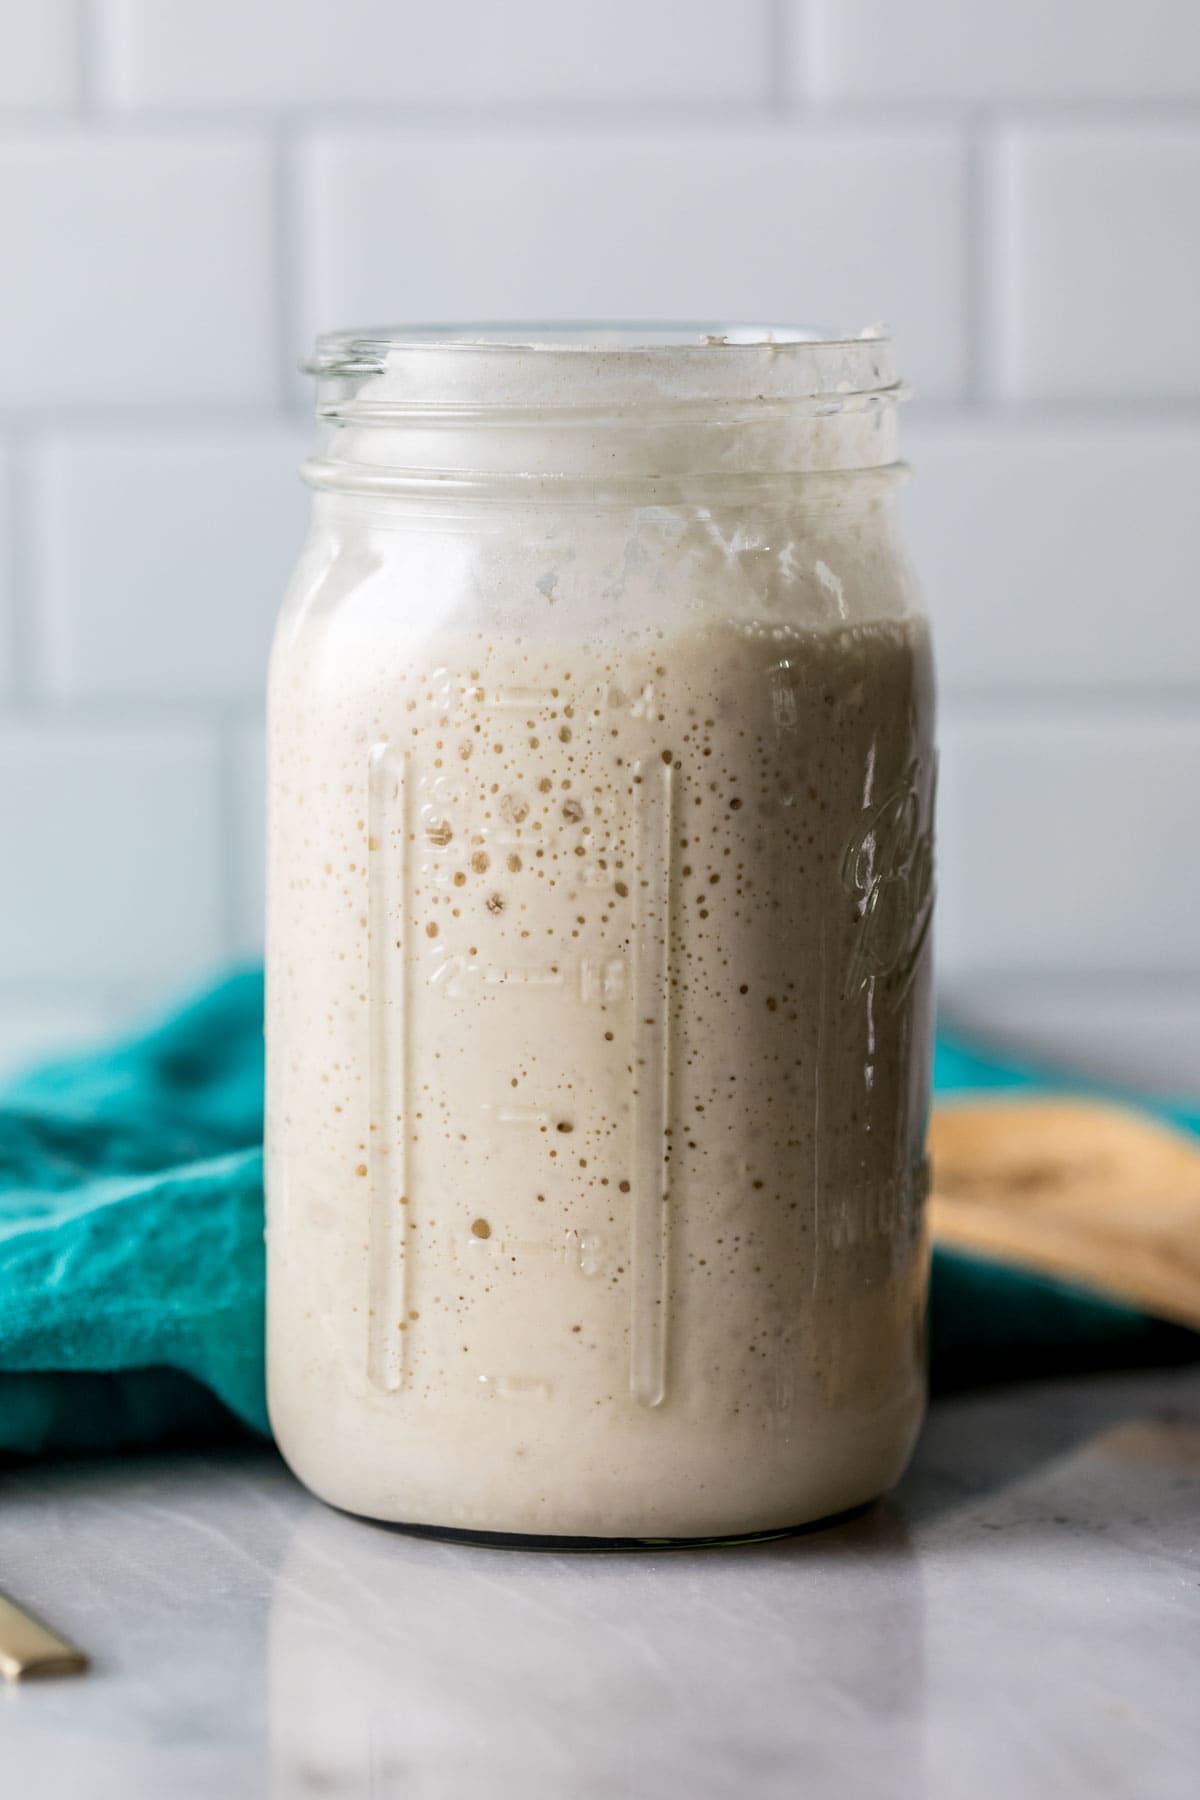
Day 8 should find you with a bubbly and vigorously (or, at least, more vigorously than previously) growing sourdough starter. At this point, it should be doubling in size within 6-8 hours, so you can reduce feedings back down to once per day. You may note the black line on my jar for “Day 8”; I mark the starter’s height right after feeding and then I can easily see once it’s doubled (as it has in the photo).
If yours hasn’t quite reached this stage yet, keep feeding twice a day until it does, it’ll get there! The last time I made a new starter it actually took closer to two weeks before mine was doubling within 8 hours (I attribute this to the cool weather and my chilly kitchen).
Now you know how to make a sourdough starter! Keep discarding and feeding the starter every day for at least two weeks or longer before using in recipes. Check the recipe notes below for more details on maintenance and storing options.
SAM’S TIP: To speed up growth, keep the starter in a warm (but never hot) location, like on top of the refrigerator. If I’m trying to speed up the growth of my starter (say I fed it a bit later than usual, and I want to use it sooner rather than later), I’ll place mine in the oven with the oven light on (do not turn on the oven!!).
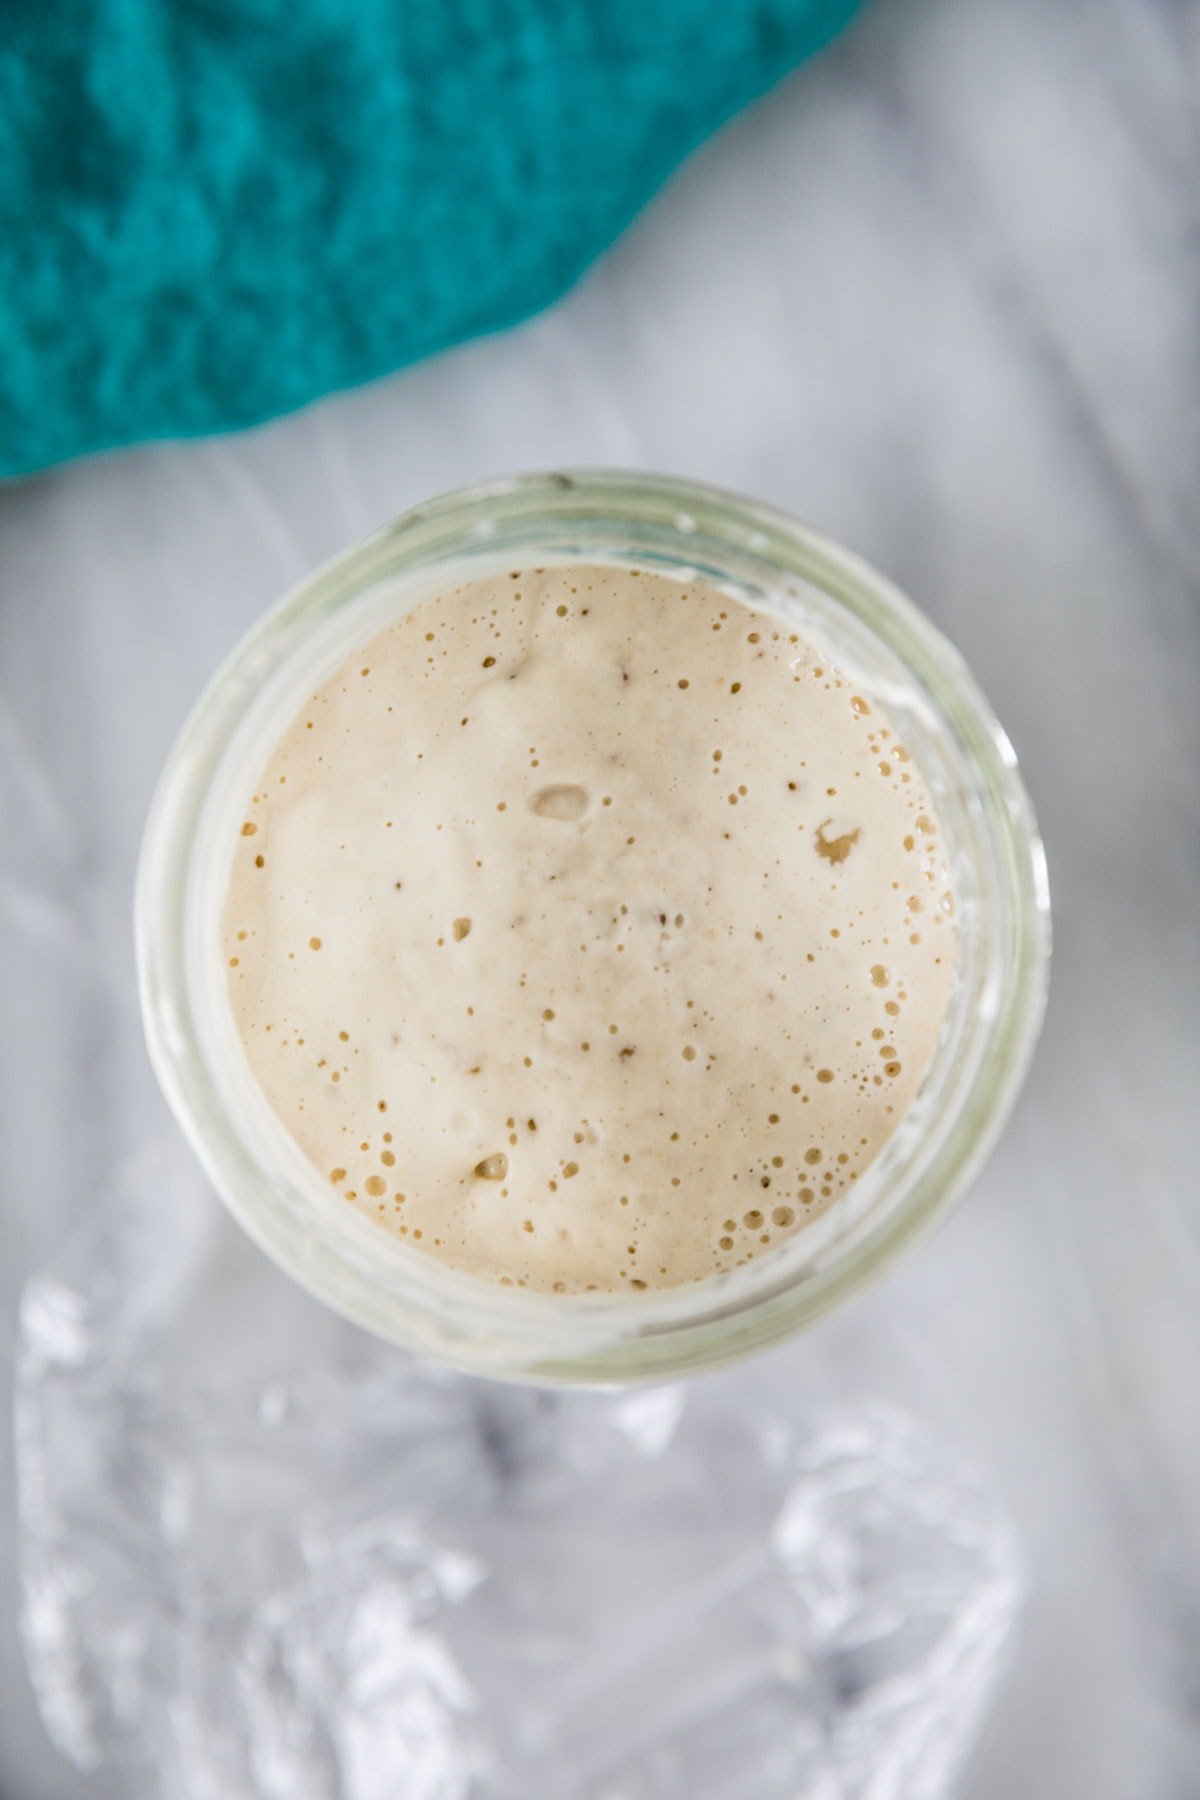
Oh, and don’t forget to name your starter! My current starter is named “Scotty”. I made a brand new starter for today’s post (so I could photograph its day-by-day growth) and named her Ophelia. I couldn’t bring myself to just toss her when I was finished growing her (you do get attached 😆) so my sister adopted her when I was finished.
Frequently Asked Questions
Some people say you can use your sourdough starter right away after 7 days, but I like to give mine at least 2-3 weeks of growing before I feel it’s strong enough. I suspect the starter would not be quite strong enough to make a satisfactory loaf of bread after only 7 days.
You want to use your starter when it is at its height; it should be active and bubbly and doubled in size. I like to look for a few clues: is the starter doubling in size within 12 hours? Is it bubbly? Smell it, it should smell pleasantly sour but also a bit sweet. You can also do the “float test“, which means taking a bit of the starter and dropping it into a bowl of water. If it floats, it means it’s ready to use.
This is called “hooch” and it happens when your sourdough is hungry. It doesn’t mean it’s bad though! You can stir it back into the starter before discarding (for a more sour taste) or just pour it off when discarding.
Look for colorful (commonly pink) streaks, which are mold. Also, if the starter doesn’t show any growth after 3 or so feedings, it’s likely bad.
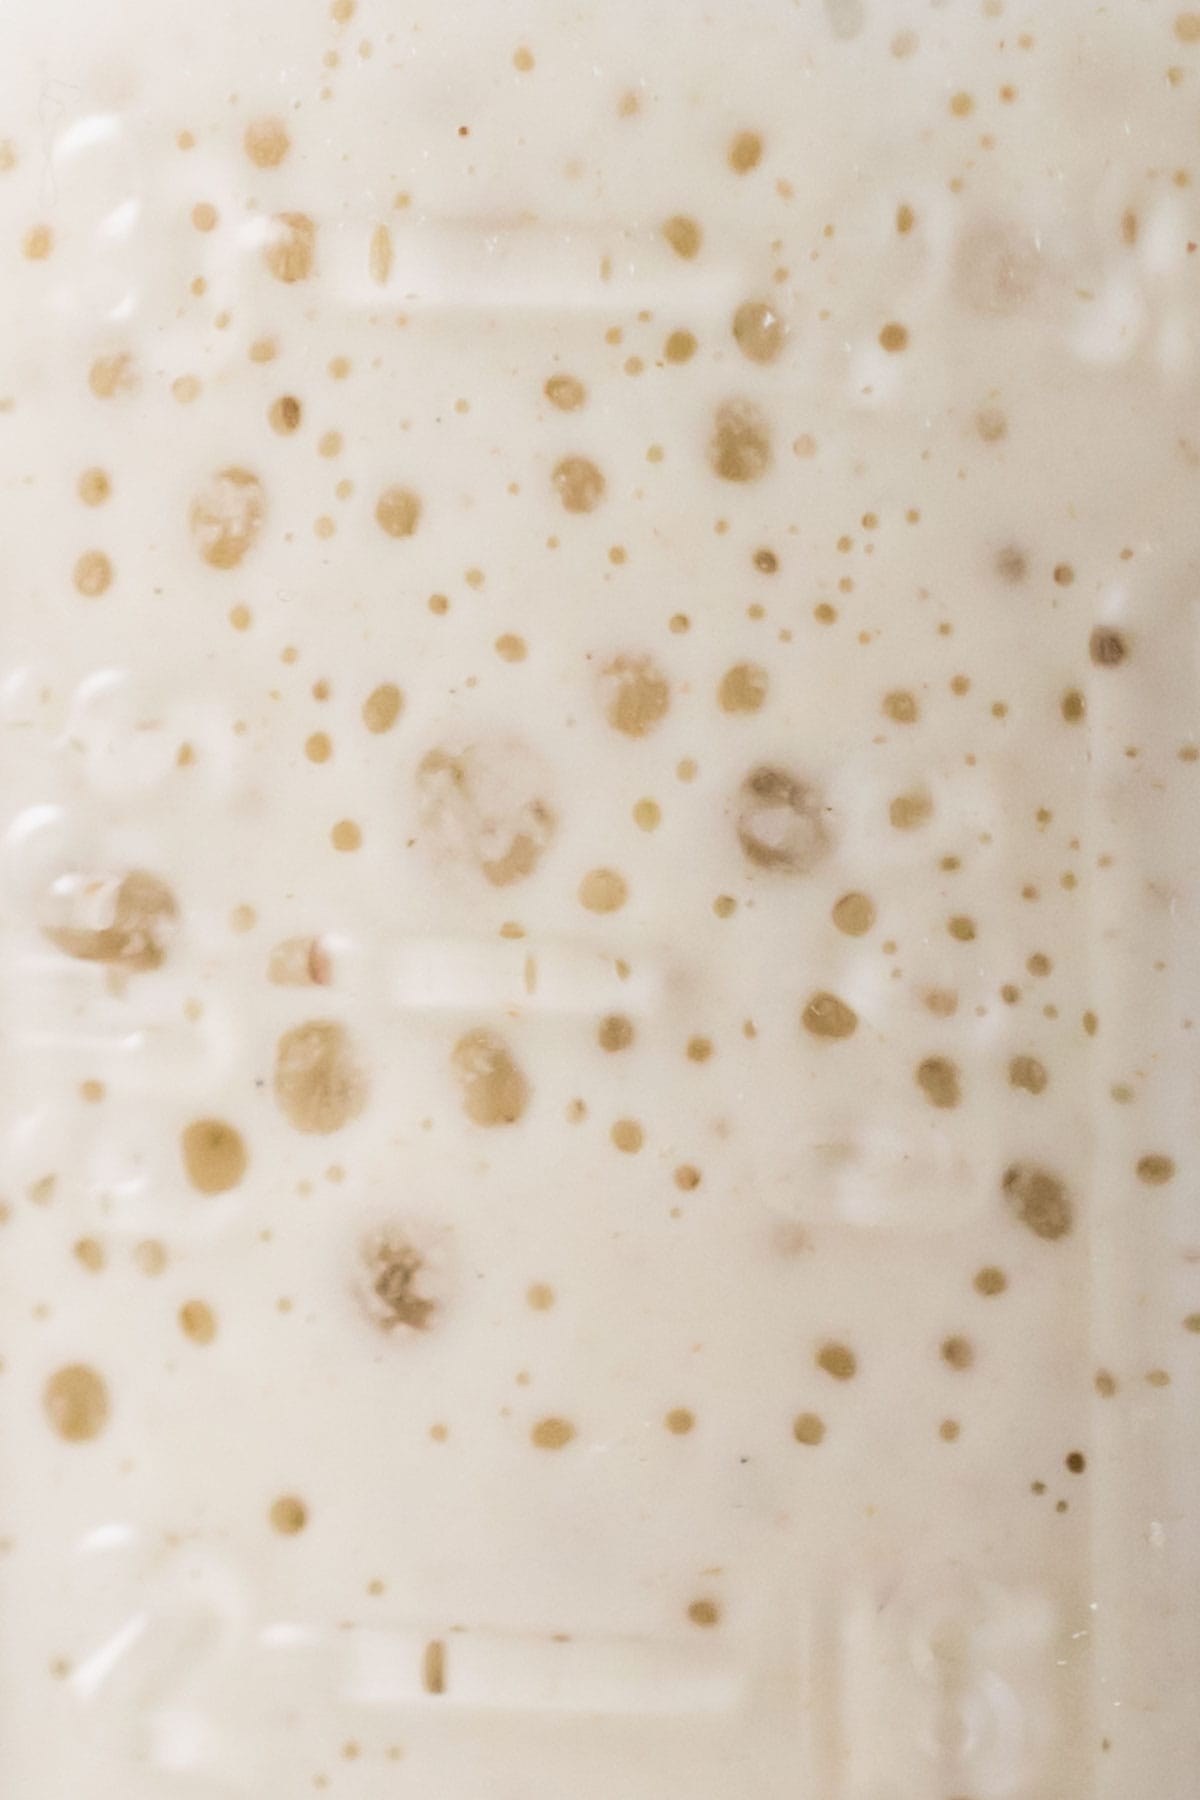
I use my sourdough starter often, so I just store it at room temperature and feed once a day (this is after the initial growing period). If you won’t be baking as often, you can feed it, let it eat for 2-3 hours, then put it in the fridge where you can feed it weekly. When you are ready to use it, feed the starter and watch for it to double before proceeding.
Enjoy, and stay tuned! I have lots more sourdough recipes coming up, including sourdough bread and sourdough pizza crust, and save your discard for making sourdough chocolate chip cookies, sourdough crackers, sourdough brownies, and more!
Let’s bake together! I’ll be walking you through all the steps in my written recipe below! If you try this recipe, be sure to tag me on Instagram, and you can also find me on YouTube and Facebook
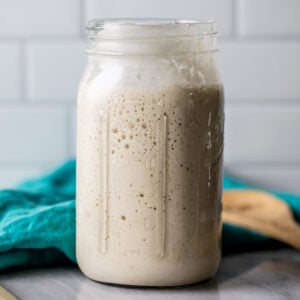
How to Make a Sourdough Starter
Ingredients
For Feeding (Days 1-5)
- 80 grams whole wheat flour (⅔ cup)
- 80 grams warm filtered water (⅓ cup) (water should be between 90-100F/32-37C)
For Feeding (Day 5+)
- 80 grams all-purpose or bread flour (⅔ cup)
- 80 grams filtered water (⅓ cup) (water should be between 90-100F/32-37C)
Recommended Equipment
- Spoon
Instructions
DAY ONE
- Combine 80 grams whole wheat flour and 80 grams filtered water in a glass container and stir well until no dry bits of flour remain (try to eliminate all lumps, bit it’s alright if some small ones remain). The mixture will be very, very thick, but if it's too dry to stir add another splash of water.80 grams whole wheat flour, 80 grams warm filtered water
- Cover container and place in a warm (not hot!) spot to rest, undisturbed, for 24 hours.
DAY 2
- The starter won’t look too different, but may have darkened in color and may have a bit of liquid on its surface (this is fine). Stir and discard slightly more than half the starter (you'll discard about 140g, leaving about 80g/¼ cup behind).To your starter, add 80 grams whole wheat flour and 80 grams warm (95F/35C) filtered water. Stir well, cover, place in a warm place
DAY 3
- Starter will increase in size and you should hopefully start to see bubbles. Discard slightly more than half the starter (you'll discard about 140g, leaving about 80g/¼ cup behind).To your starter, add 80 grams whole wheat flour and 80 grams warm (95F/35C) filtered water. Stir well, cover, place in a warm place
DAY 4
- Starter should have bubbles and possibly a small bit of liquid on top. Discard slightly more than half the starter (you'll discard about 140g, leaving about 80g/¼ cup behind).To your starter, add 80 grams whole wheat flour and 80 grams warm (95F/35C) filtered water. Stir well, cover, place in a warm place
DAY 5
- Your starter should be increasing in size by this point and possibly even doubling. You’ll begin feeding the sourdough twice a day (12 hours apart) and you will switch over to either bread flour or all-purpose flour (your choice, see note).
- In the morning: Discard slightly more than half the starter (you'll discard about 140g, leaving about 80g/¼ cup behind).To your starter, add 80 grams all-purpose or bread flour and 80 grams warm (95F/35C) filtered water. Stir well, cover, place in a warm place80 grams all-purpose or bread flour, 80 grams filtered water
- In the evening: Discard slightly more than half the starter (you'll discard about 140g, leaving about 80g/¼ cup behind). To your starter, add 80 grams all-purpose or bread flour and 80 grams warm (95F/35C) filtered water. Stir well, cover, place in a warm place
DAY 6
- In the morning: Discard slightly more than half the starter (you'll discard about 140g, leaving about 80g/¼ cup behind). To your starter, add 80 grams all-purpose or bread flour and 80 grams warm (95F/35C) filtered water. Stir well, cover, place in a warm place
- In the evening: Discard slightly more than half the starter (you'll discard about 140g, leaving about 80g/¼ cup behind). To your starter, add 80 grams all-purpose or bread flour and 80 grams warm (95F/35C) filtered water. Stir well, cover, place in a warm place
DAY 7
- In the morning: Discard slightly more than half the starter (you'll discard about 140g, leaving about 80g/¼ cup behind). To your starter, add 80 grams all-purpose or bread flour and 80 grams warm (95F/35C) filtered water. Stir well, cover, place in a warm place
- In the evening: Discard slightly more than half the starter (you'll discard about 140g, leaving about 80g/¼ cup behind). To your starter, add 80 grams all-purpose or bread flour and 80 grams warm (95F/35C) filtered water. Stir well, cover, place in a warm place
DAY 8
- If your sourdough is now growing vigorously and bubbly and doubling within 6-8 hours, you can reduce to just feeding once a day. If yours is not, continue feeding twice a day until it rises well and is bubbly within 6-8 hours of a feeding.
- Well done, you’ve established your sourdough starter!
Maintenance
- Every day (preferably at the same time every day) discard about half of the starter then feed it 80 grams of your preferred flour and 80 grams of warm water. Make a mark on the jar with a dry erase marker or wrap a rubber band around the jar to mark how full your jar is and watch for it to double to know it is ready to use!Alternatively follow my instructions in the notes section below for storing your sourdough starter in the refrigerator to use and feed weekly. Note that I recommend regularly feeding the sourdough starter for at least two weeks before attempting to use it in recipes. If you use quite a bit of your starter for a recipe, you may wish to feed it one or two consecutive days without discarding to get it back to a reasonable volume before discarding again.
Notes
Water
Filtered water is best, you can use bottled water. Tap water often contains chlorine, which can kill your starter or keep it from growing properly.Flour
On day 5, I recommend switching to the flour you’ll be baking with most often and sticking with that. For me it’s bread flour, I feed my sourdough starter with this because this is the flour I’ll use to make my sourdough bread. However I still use this starter/discard in recipes that don’t use bread flour, so you can use whichever you prefer.Discard
You can eyeball this, it doesn’t have to be exact. Aim to keep a bit less than half of your starter and discard the rest. A scale makes measuring everything easy, and in the first week I’ll usually just pour 80g of the starter into a new jar, adding 80g each of flour and water, then discard what’s in the original jar. Once established (and I’m feeling a little lazy and comfortable with my starter) I keep it in the same jar, pour the discard straight into the trash (if I’m not using it) and just add flour and water to the jar, switching to a new/clean jar once a week. The discard will not be usable for recipes until day 8.Feeding
When I first begin a new starter, I like to feed it a 1:1:1 ratio (starter:flour:water) until it’s established. Then I may vary how much I feed it, depending on how quickly it rises and falls. I typically feed my starter once a day once its fallen.Storing
If you bake several times a week, store your starter at room temperature and discard/feed daily. If you bake less often you may store it in the refrigerator. To do this, feed your starter, cover, then let it feed for several hours. Once you begin to notice bubbles, transfer to the refrigerator. Discard/feed it once a week. When ready to use, feed it and watch for it to double before using.Baking in Bread
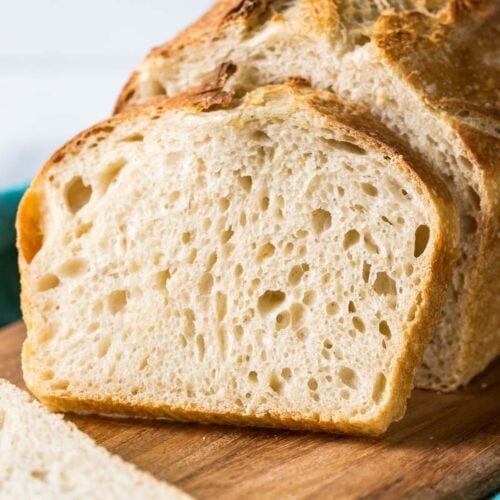
Once your starter is established, use it to bake my personal favorite sourdough bread!Nutritional information is based on third-party calculations and should be considered an estimate only. Actual nutritional content will vary based upon brands used, measuring methods, cooking method, portion sizes, and more.








Elizabeth
Excellent tips!!!
Mel
Perfection … like all the recipes I try from Sam!
Sam Merritt
Thank you so much for your support, Mel! 🙂
Penelope
My starter doubled after 3 hours on day 2 & tripled after another hour & a half. It then fell back down to about 1-1/2x the original size. Is this normal behaviour? I live in Belize, so my house is almost always warm. I used whole wheat flour & filtered rainwater at ~95°F.
Sam Merritt
Hi Penelope! I haven’t experienced it growing that much. It will sometimes be a little more robust in the beginning, but it will slow down. It’s not quite ready to use at day 2. Keep going. 🙂
Penelope
Oh I plan to go to at least day 8. I was worried I had done something to ruin it before it even started.
Things I may have messed up:
• I read the sourdough starter maintenance article & realised I was using the wrong cover. I can’t find, in this article, where it says not to use a solid cover. So I was using plastic screw-on lids.
• I had made some yogurt & strained it, and wanted to use the whey in the starter. I put it in a mason jar with a plastic lid & failed to put it in the fridge overnight. I used it anyway. I collected new whey yesterday & it smells about the same as the one that sat out.
• I forgot I was supposed to switch to different flour on the first feeding of day 5, so I used whole wheat in the morning & (whatever type of flour “Bebe Agua” is, as that’s what’s available here) in the evening.
• My timing isn’t great. I started at 9, then 10, then 11… then last night I had to move it up to 8:30 so I could go to bed before midnight. I did get pretty close today – 9:00. 🤦♀️
Despite all this, Sam (née Charlie but then I realised that’s my neighbour’s name) still doubles daily. (I use masking tape to mark the top of the starter, and it always grows above the masking tape — which is about as wide as the space between the tape itself & the bottom of the jar.) And there are always circular hollow spaces in the starter, which I assume is what you mean by “bubbly”. I’ve only had a small amount of liquid once, when I was still using the plastic lid. The smell is mild & pleasant. So I think he’s coming along nicely despite my mistakes. 🤞
If you use a starter that’s not strong enough, what happens? Is it poison? Does the bread just not rise? Something in between?
Also, did I miss where it says *when* you can start using the discard in other recipes?
Thank you!!
Sam Merritt
If your starter isn’t strong enough the texture and rise of your bread won’t be what it should be. You can start to use that discard once your starter is established. 🙂
Mel
Mine is doing the same thing! I am on day 2 and just came back to look to see if I missed anything. A few hours after I fed it it’s already doubled in size. I too did whole wheat flour and ~95 degree F water.
Penelope
Did you put a solid lid on it? When I read the “maintaining your sourdough starter” article, I saw that you’re not supposed to use a solid lid. (I didn’t see that info in this article.)
I waited almost two weeks on mine & haven’t made bread yet (because I still had sourdough that I’d bought), but I’ve made crackers & a couple kinds of cookies with the discard. Sammy is very happy. He’s in the fridge this week while I’m away. 😊
Sam Merritt
Hi Penelope! I cover mine with a piece of cling wrap. You won’t want to use a solid lid on it. 🙂
Cheryl
Hey Sam, what will happen if I don’t discard the sourdough starter and just continue to feed it?
Sam
It will overflow your container pretty quickly.
Lisa
Did I miss how much yeast to add to the starter? All I see is feeding instructions. Please advise.
Thank you for your time.
Sam Merritt
Hi Lisa! The feeding process grows the yeast itself. You don’t add any yeast. 🙂
Susy
Hi Sam,
I have made this recipe and at first I found it very overwhelming because of the process itself but as the days went by, I started to really enjoyed it specially when I noticed it was working and growing quite well. I thank you for your steps by steps directions, my starter raised quite well. I appreciate your time spent on this recipe. Worked really nicely!
Sam
Thank you, Susy! I’m glad it was clear and easy to follow. I hope you love all of your sourdough goodies. 🙂
Bev
Can you use rye flour instead of the whole wheat flour?
Sam
Hi Bev! I haven’t personally done it, but it could work. 🙂
June Kowalczyk
I’m a senior who doesn’t bake bread weekly. I’ve been told once the starter is ready, you can freeze it. Thaw starter when needed, let starter come to room temperature to use. Is this true?
Sam
Hi June! You will need your starter to be at room temperature for most uses. I don’t know how freezing it will go. I haven’t ever tried doing that. I do have an article on how to care for your sourdough starter that I just published that could be helpful. 🙂
June Kowalczyk
I’m in Canada and there’s a well known market in Toronto that is known for sourdough bread. They also make and sell freeze dried sourdough starter. There website is where I got the information..re: freezing sourdough starter. Apparently they do it all the time. I guess I’ll have to try and see if it fails. Nothing ventured, nothing gained.
Sam
Interesting. Let me know how it goes! 🙂
Riv K.
Hi Sam, quick question – how should I store/feed my active bubbly starter if I plan on using it for sourdough bread once a week? Should I store it in the fridge for the remainder of the week during which I will not be using it? I don’t want to be feeding it daily if I’m only using it once a week…
Sam
Hi Riv! I’m so sorry I am just now seeing this! I did just publish an article on how to keep and store your sourdough starter that should be helpful. 🙂