
Ermine Frosting
This post may contain affiliate links. As an Amazon Associate I earn from qualifying purchases. Please read my disclosure policy.
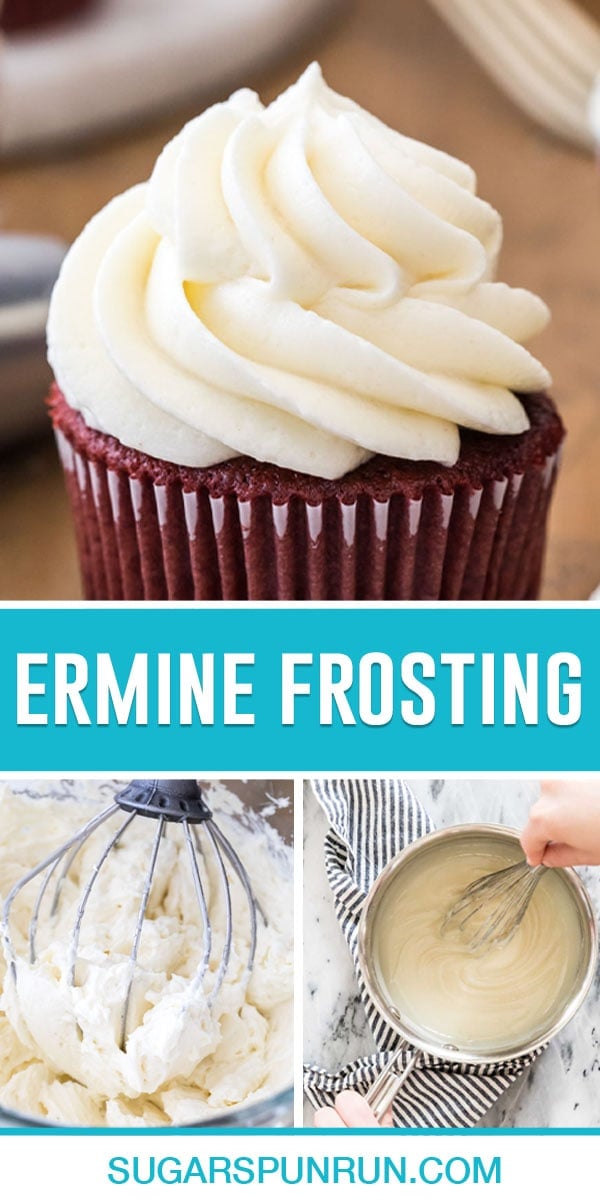
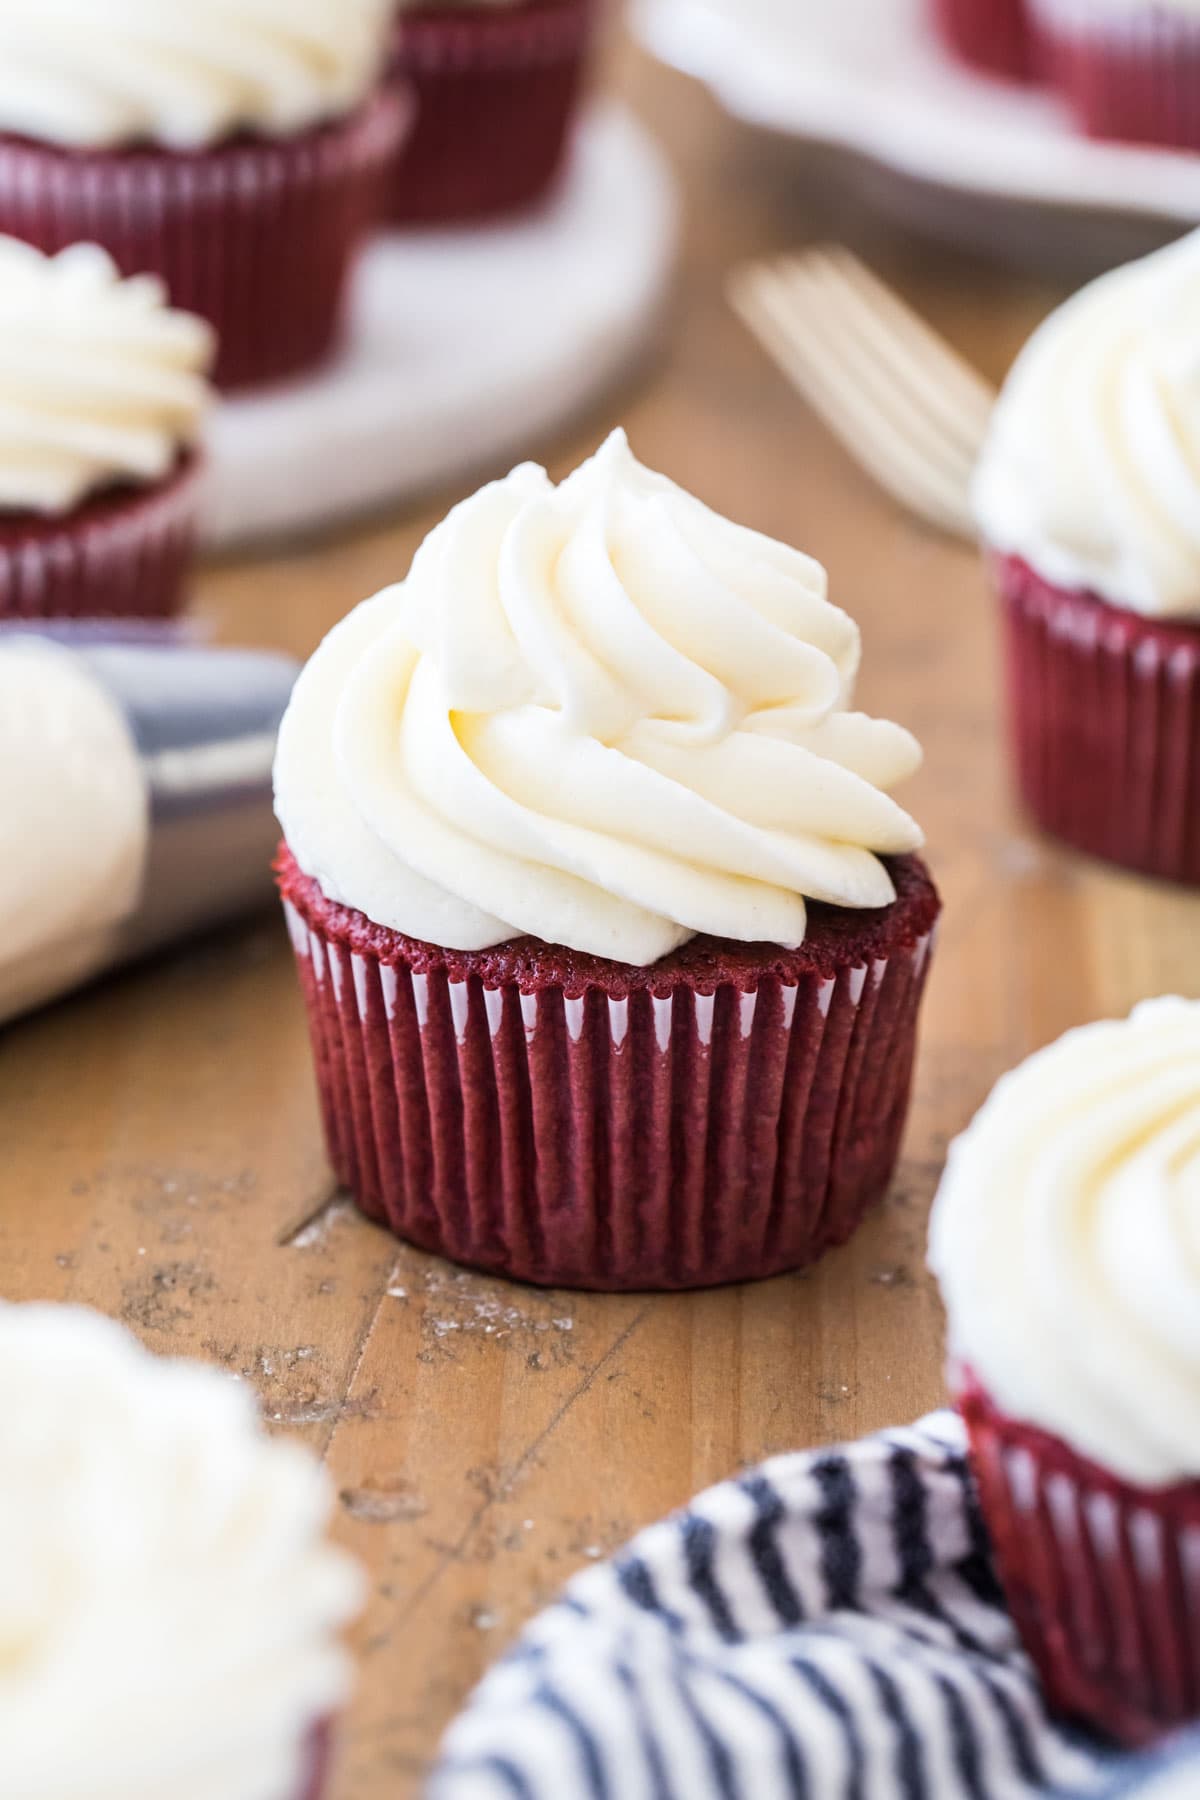
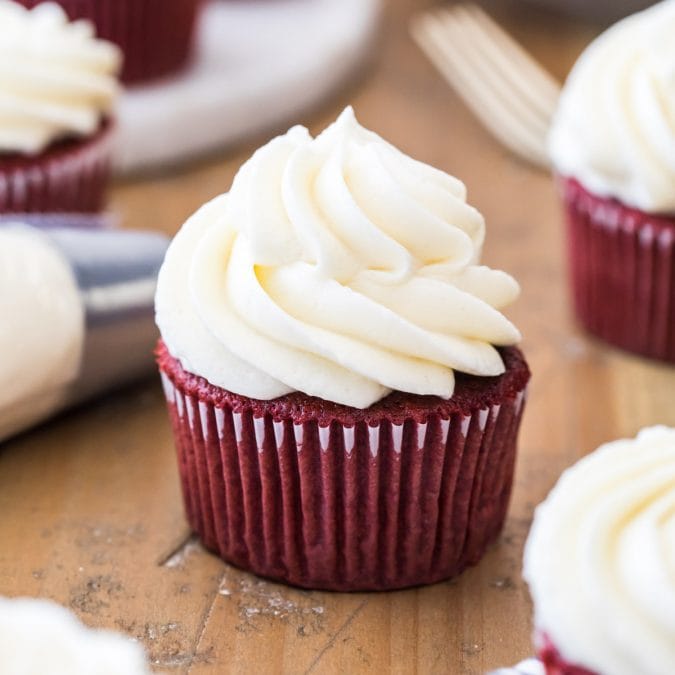
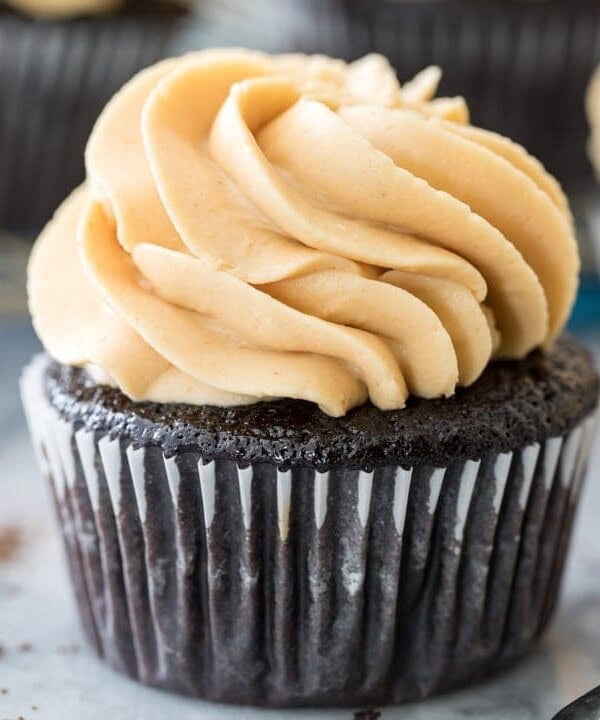
Ermine Frosting is an old-fashioned recipe also often known as “boiled milk frosting”. It’s silky smooth and less sweet than traditional buttercream and is the traditional frosting used for red velvet cake. If you’re not a fan of sugary, overly-sweet icings, you’ll appreciate the more subtle sweetness but beautiful pipe-ability (it’s great for decorating) of today’s recipe. Recipe includes lots of tips and a how-to video so you can have flawless results in your own kitchen!
Adding another one to my frosting library today! This was a must-have considering the recipes I have coming for you later this week… (hint!)! Ermine frosting is a classic, old-fashioned recipe that’s been around for ages. I bet your grandmother knows how to make it!
It’s great for piping and can be colored with food coloring. While there is some stovetop time required, there’s no candy thermometer needed. If you’ve tried my Whoopie Pies yet and made the filling, you’ve essentially had ermine frosting before, but today we’re making it the traditional way with granulated sugar.
What Does Ermine Icing Taste Like?
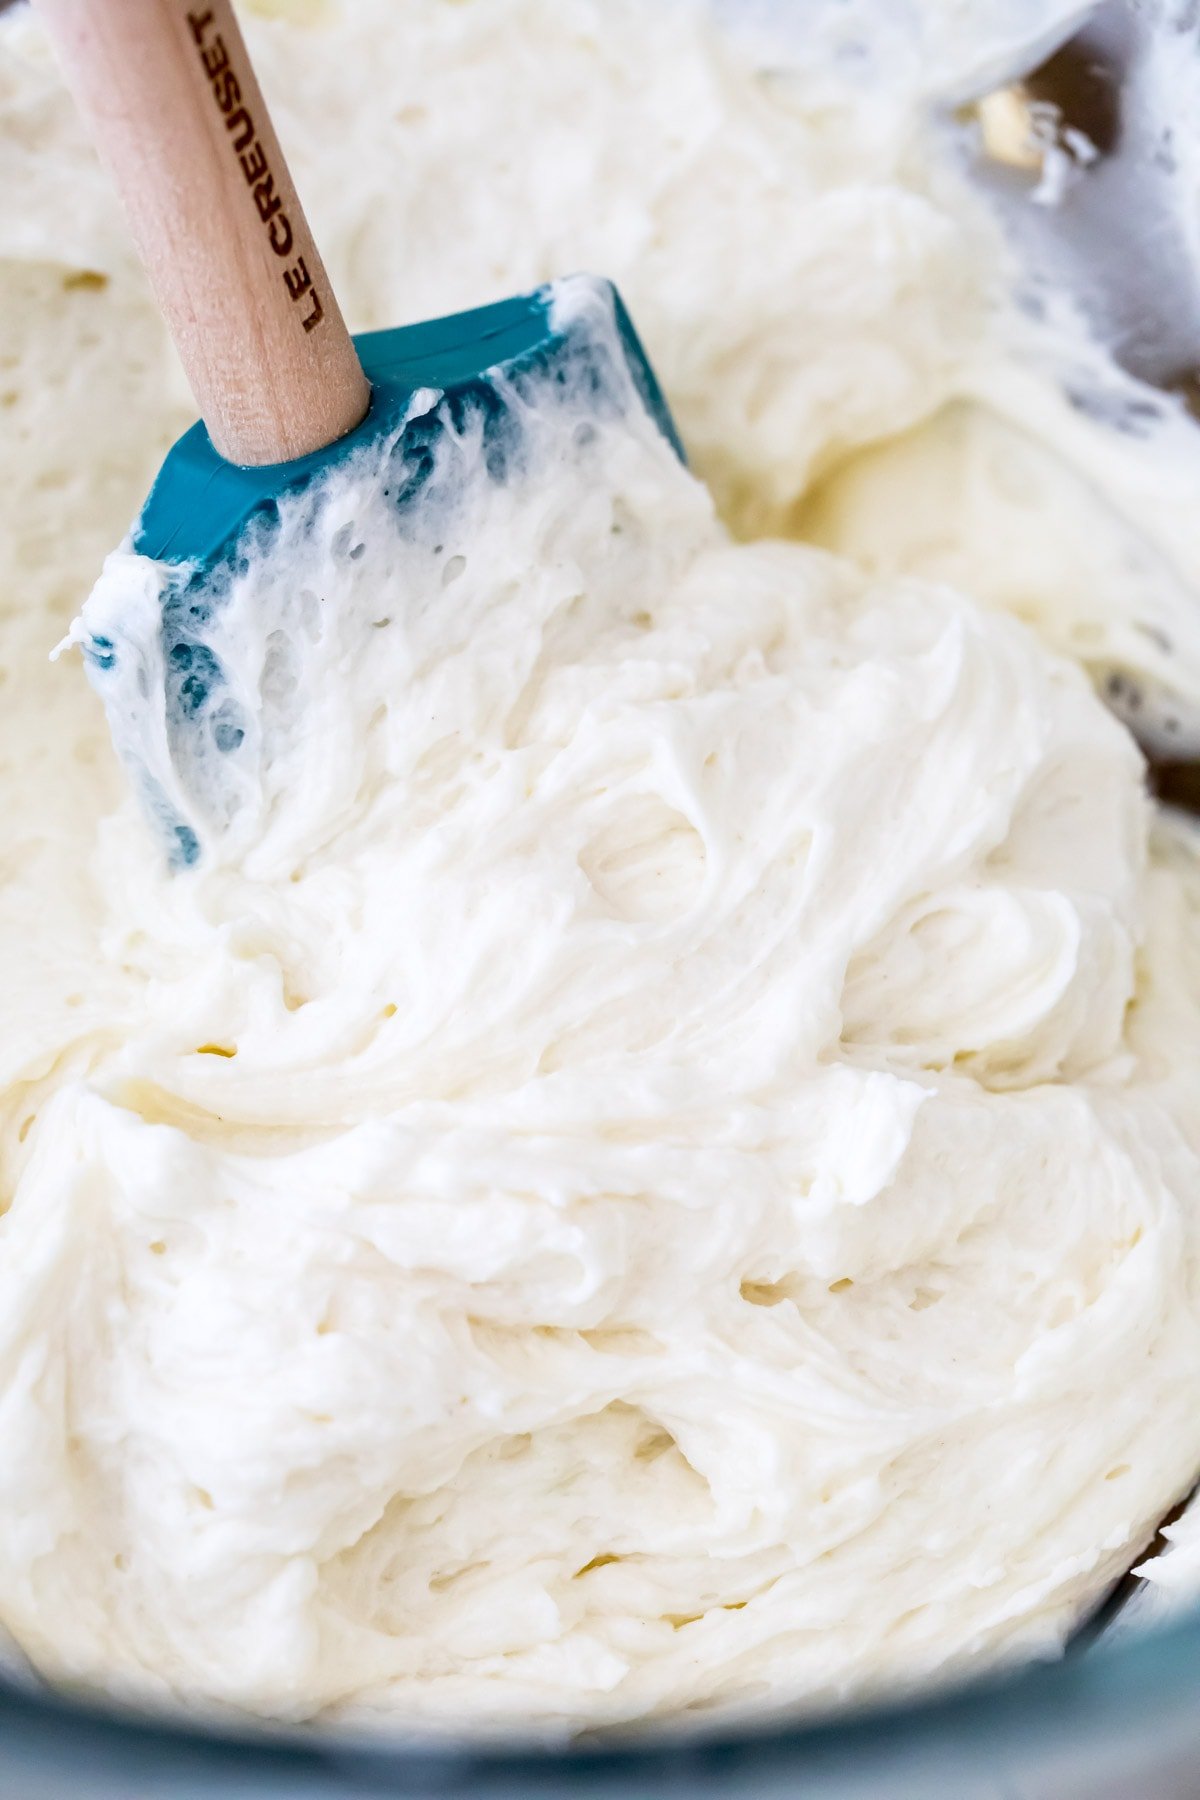
If I had to compare it to any of my other frostings I would say it most reminds me of my Swiss meringue buttercream. It’s buttery, silky smooth on the tongue, and not too sweet. In fact, it’s much less sweet than traditional buttercream frosting. I have to be careful when I make it, it’s so delicious it’s easy to eat several cupcake’s worth by the finger-full without even realizing it.
What You Need (and Key Ingredient Tips and Substitutions):
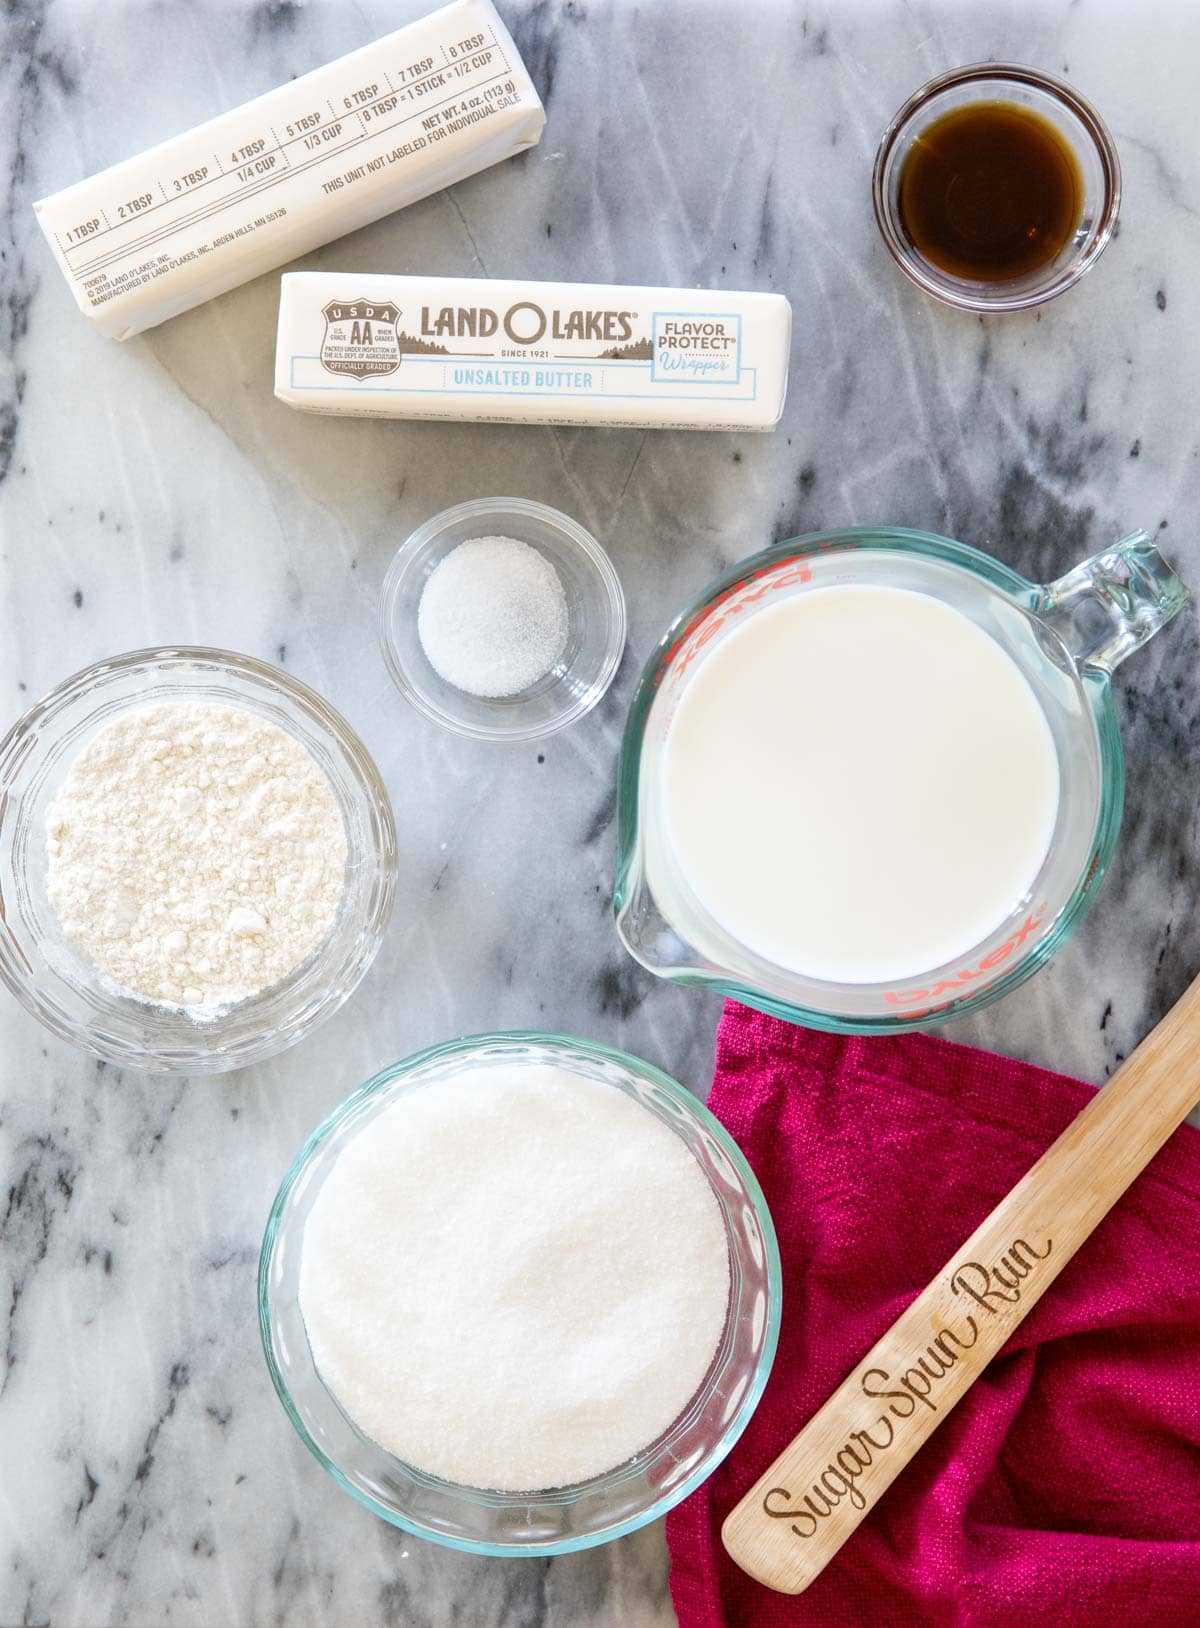
- Sugar. We are using white granulated sugar and not powdered sugar (which is the most commonly used icing sugar, and what I use for my cream cheese frosting.). Don’t worry, we’ll cook this with our flour and milk so your icing will not be grainy. Brown sugar may be substituted (expect a richer, slightly caramelized flavor!).
- Flour. Use all-purpose or plain flour, and whisk it well with the sugar to remove any lumps. Flour works as a thickener here and we’ll be making a pudding out of the flour, sugar, salt, and milk. This will then be whipped into the butter, giving our Ermine frosting its signature consistency and smooth, velvety mouthfeel.
- Salt. For flavor.
- Milk. I use whole milk, but 2% milk would work as would almond or coconut milk.
- Butter. I recommend using unsalted and adding salt to best control the flavor, but if you only have salted on hand please see my post on substituting salted for unsalted butter. The butter should be softened, but not so soft that it’s greasy or melty or your ermine frosting will be too soft.
- Vanilla extract. You may substitute your favorite flavoring, but vanilla is the classic flavor used here.
If you’d like, you can also add any food coloring. Stir this in at the end until the desired color is reached (I love using gel food colorings for the most vibrant color).
How to Make Ermine Frosting BRIGHT White
Ermine frosting typically turns out to be very white, but if your butter is particularly yellow or your vanilla extract particularly dark, then sometimes it doesn’t have that pure, snow-white consistency you might be looking for. To get a pure white frosting, I recommend using clear vanilla extract instead of typical vanilla.
If that isn’t enough to keep your frosting a true-white color, you can add a tiny bit of violet colored food coloring. And I do mean a tiny bit! I dip the very end of a toothpick into the food color, dip that in my frosting, then stir well. This works because violet is on the opposite end of the color wheel from yellow (and if your frosting isn’t bright white, it’s yellow from the butter and vanilla), so we balance this with a tiny hint of violet for bright white frosting.
What to Pair It With:
Ermine icing is traditionally made to be served on red velvet cake and red velvet cupcakes. Click the links to see my perfected version of each.
It will also work with just about any of my other cake or cupcake recipes but pairs especially well with my chocolate cake, coconut cake, chocolate cupcakes, and dark chocolate cupcakes.
Troubleshooting
While ermine frosting is generally pretty simple to make, occasionally a would-be-cake-decorator finds themselves with a melty, gloppy mess instead of a bowl of billowy smooth frosting. There are three main issues that usually cause this, and knowing about them in advance and knowing what to look for is the best way to prevent this.
Runny Frosting
- Your roux wasn’t cooked properly. It’s important to whisk constantly while cooking and keep your heat on medium. Do not crank the heat up to high to speed up the cooking process, or you’re liable to burn your roux and the sugar won’t have a chance to melt properly. Remember: medium-low and slow is the way to go!
- The flour mixture was added to the butter before it was cooled completely. This is so important. If your roux is even a bit too warm when you add it to your butter, you’ll have a greasy, curdled mess on your hands. Have patience and let it cool completely.
- Your butter was too soft. Remember, you want it to be softened, but not to the point where it is melty or oily to pick up. If your butter is too soft (this happens quickly, especially during the summer) you could end up with an icing that’s much too soft and runny. I usually remove my butter from the refrigerator 45-60 minutes before I’m ready to begin creaming it for the frosting.
If your frosting isn’t necessarily “runny” but is still quite soft and difficult to decorate with, it may just be a bit too warm. Pop it in the fridge for 20-30 minutes before using.
Help! My Icing Curdled!
If your ermine frosting looks curdled, split, or grainy, the most likely problem is that either your butter was too cold or your flour mixture was too cold.
Don’t worry, there’s still hope! Keep whipping it (this could take several minutes or longer) and most of the time it will eventually come together.
Storing and Making in Advance
You can make ermine frosting up to a week in advance of using. Store in an airtight container in the refrigerator. Before using, let the frosting come sit at room temperature for at least 15-30 minutes. You may need to briefly whip it again with an electric mixer to return it to the proper consistency before using. Alternatively you may freeze in an airtight container for several months. Thaw in the refrigerator overnight, then follow the steps above (sit at room temperature and re-whip) before using.
Once you’ve frosted your cake or cupcakes, this icing will do well at room temperature (below 75F) for up to two days. Beyond that I recommend refrigerating. As with just about any frosting recipe, this one does not stand up well to heat and is prone to melting outdoors at high summertime temperatures.
Other Recipes to Try:
Enjoy, and stay tuned for my long-awaited Red Velvet Cake recipe that’s coming later this week!
Let’s bake together! Don’t forget to watch the how-to VIDEO in the recipe card!
Ermine Frosting
Equipment
Ingredients
- 1 cup (200 g) granulated sugar
- 5 Tablespoons (40 g) all-purpose (plain), flour
- ¼ teaspoon salt
- 1 cup (236 ml) milk¹
- 1 cup (226 g) unsalted butter, softened but not melty
- 1 teaspoon vanilla extract
Instructions
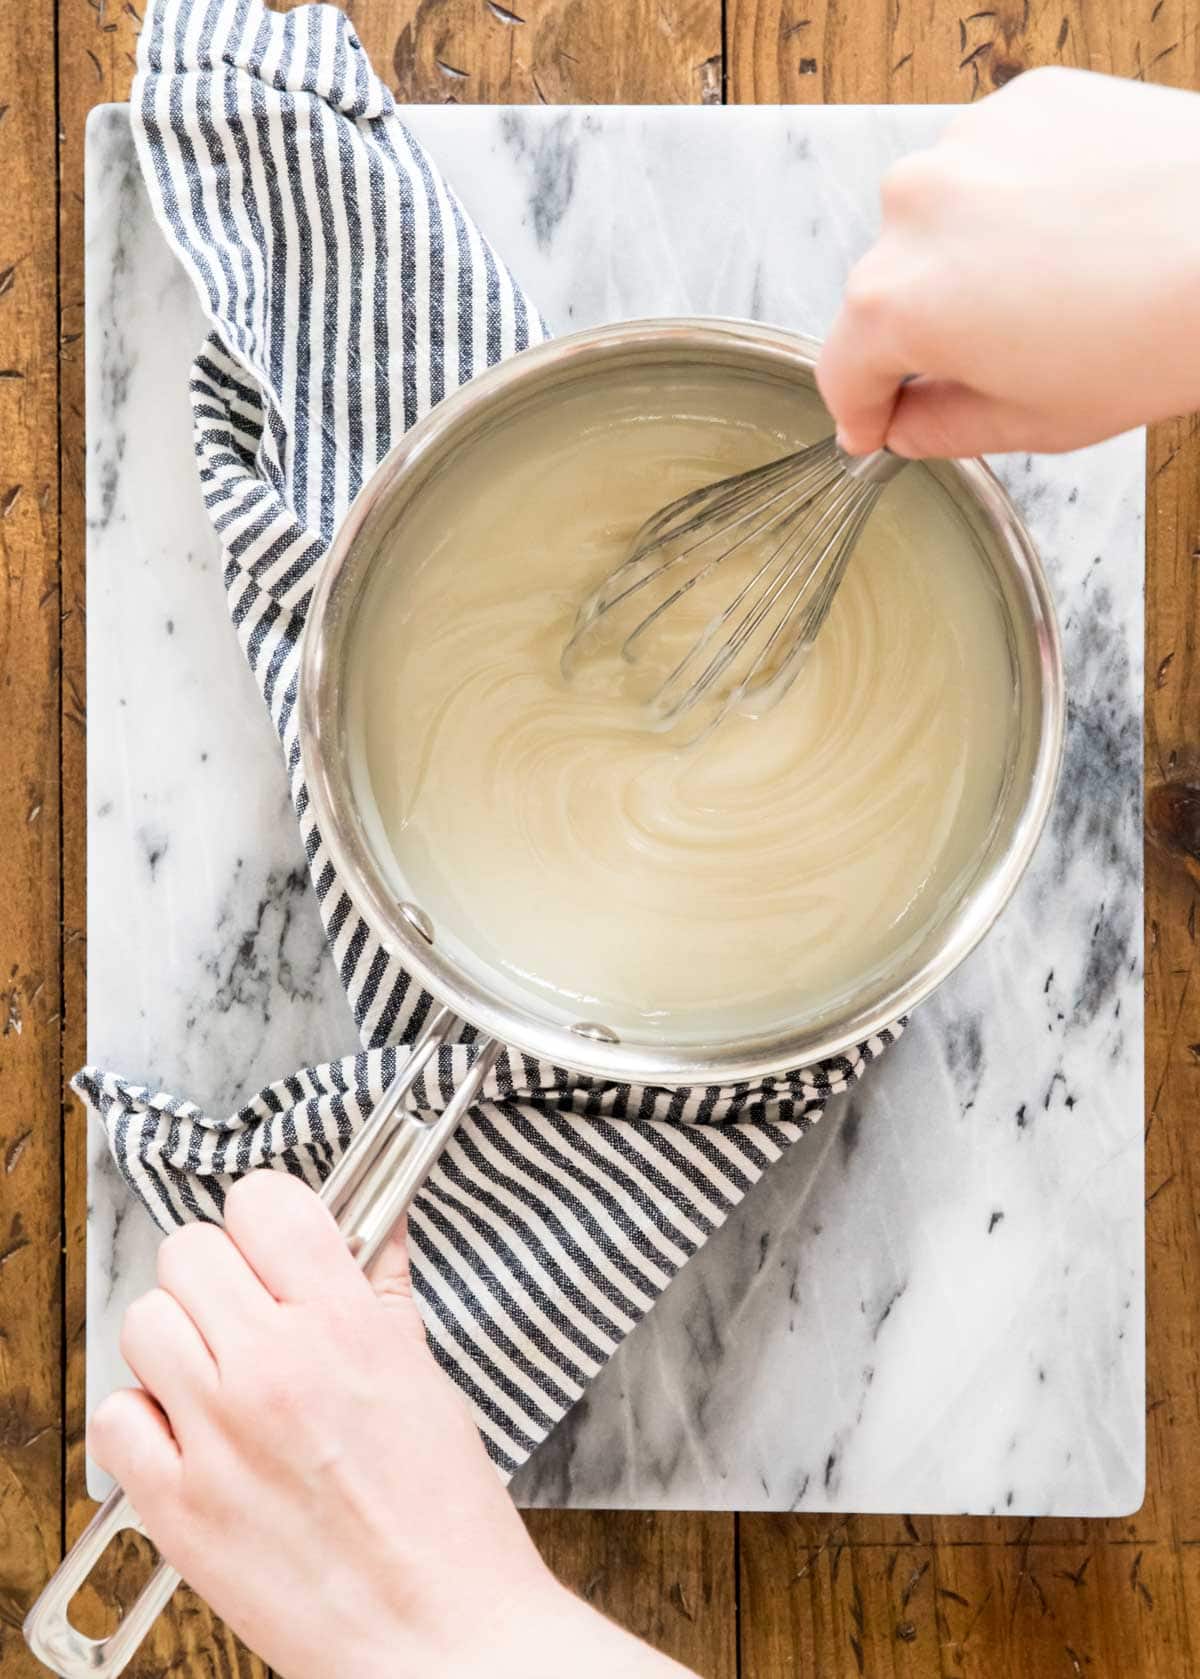
- Combine sugar, flour, and salt in a medium-sized saucepan and whisk well to combine and remove any lumps from the flour.1 cup (200 g) granulated sugar, 5 Tablespoons (40 g) all-purpose (plain), ¼ teaspoon salt
- Turn stovetop heat to medium and whisk in milk until mixture is smooth.1 cup (236 ml) milk¹
- Continue whisking constantly until mixture is thickened to a pudding-like consistency (do not crank up the heat or you’ll burn it and the sugar won’t dissolve properly) and the whisk leaves a trail.
- Remove from heat and pour into a heat-proof container and cover the surface with a piece of plastic wrap, wax paper, or parchment paper pressed directly against the surface (to prevent a skin from forming). Allow to cool completely to room temperature (alternatively you may make this mixture a day or two in advance, store in the refrigerator, then bring to room temperature before proceeding).
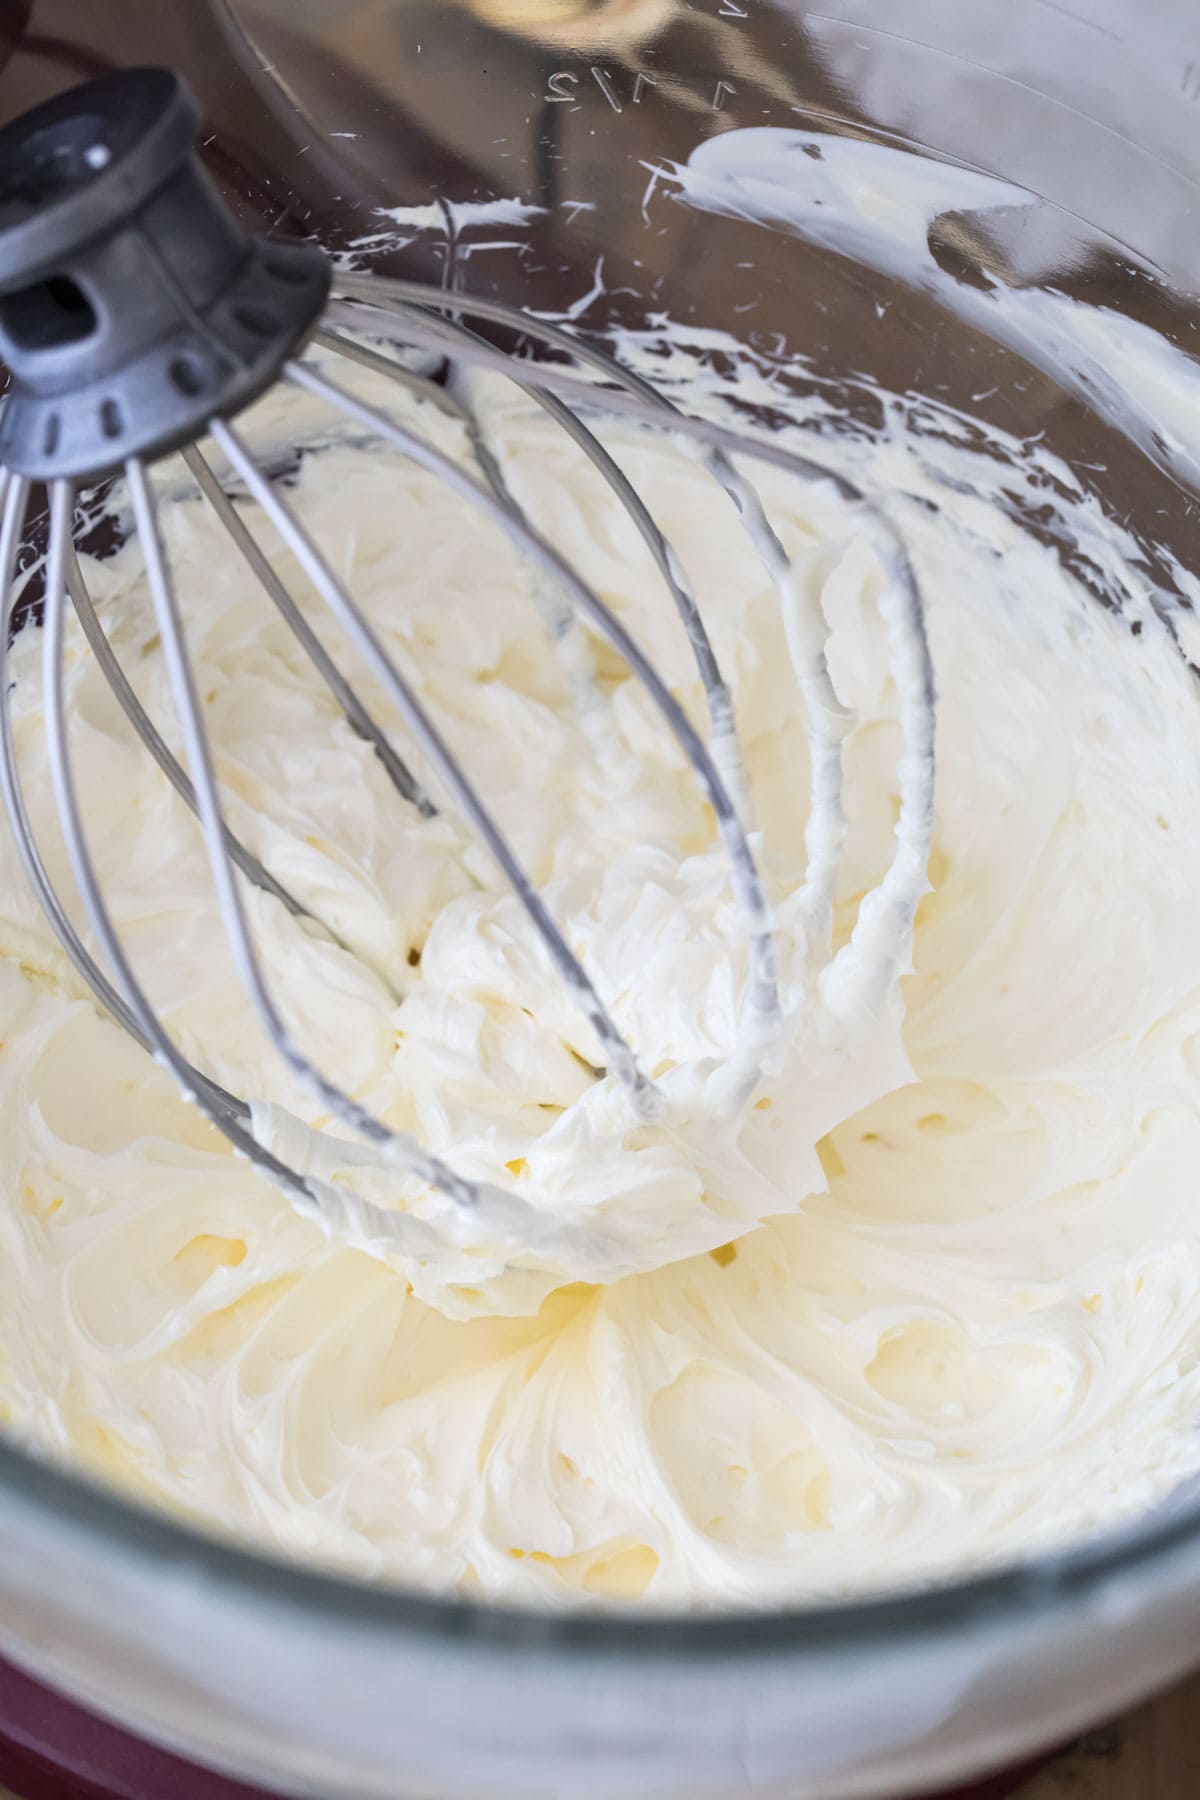
- Once flour mixture has cooled, use an electric mixer or stand mixer to beat butter on high speed until it is light and fluffy (this usually takes several minutes, and you may need to scrape the bowl with a spatula).1 cup (226 g) unsalted butter
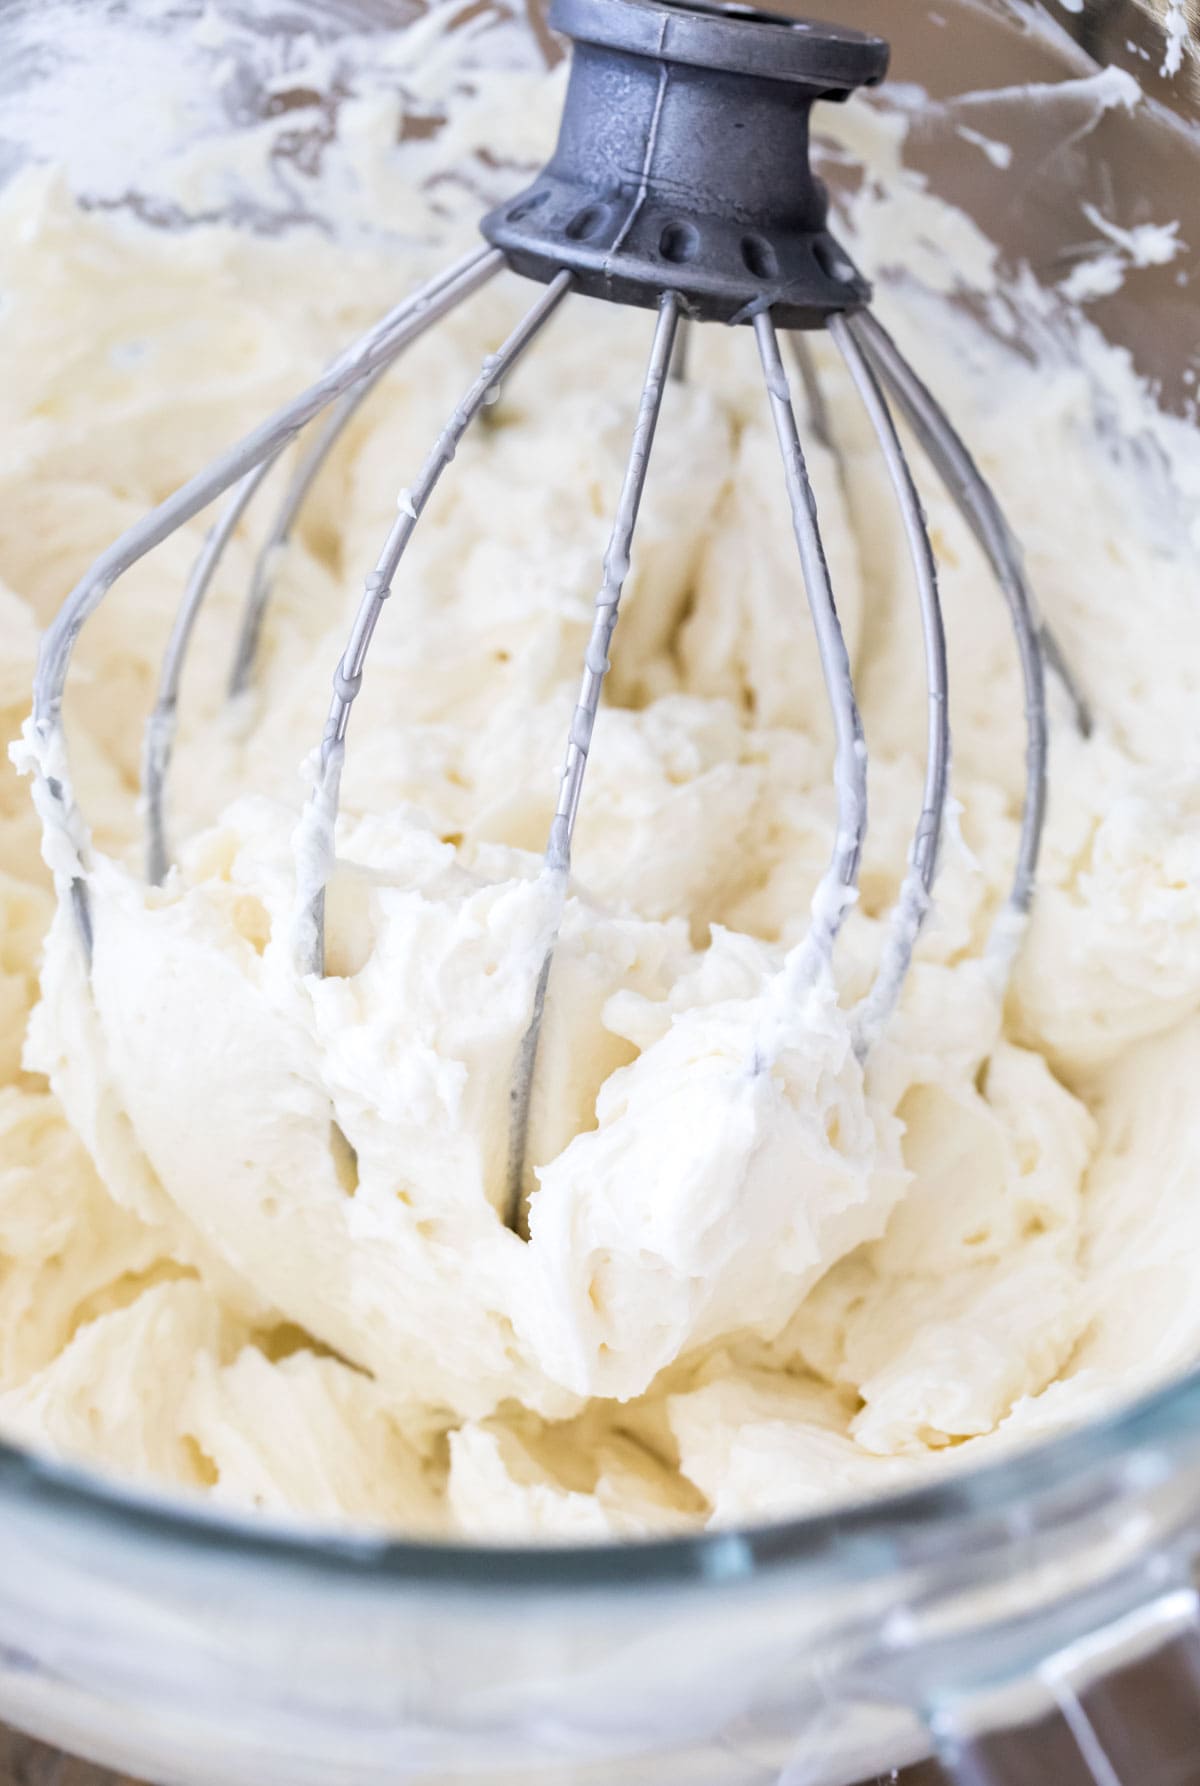
- Reduce mixer speed to medium and gradually add flour mixture, one heaping spoonful at a time, waiting until each spoonful is incorporated before adding the next and beating until all ingredients are well-combined. Scrape sides and bottom of bowl with a spatula, then stir in vanilla extract. Gradually increase speed to medium-high and whip frosting until it is smooth, light, and airy (it should not seem greasy). If you have any difficulty or experience your frosting splitting please see the troubleshooting section in the blog post.1 teaspoon vanilla extract
- Use your spatula to deflate the frosting to work out any air bubbles, then use as desired.
Notes
Storing
Store in an airtight container in the refrigerator for up to a week. Before using, allow icing to sit at room temperature for 30 minutes or longer and then re-whip with mixer before using. Frosting may also be frozen for several months, thawed in the refrigerator, and then brought to room temperature, whipped, and used.Nutrition
Nutrition information is automatically calculated, so should only be used as an approximation.
Like this? Leave a comment below!


I made this frosting exactly as instructed (using whole milk), with the exception of adding 1/2 tsp peppermint extract, to make a peppermint ermine frosting. It was delicious and so easy to spread onto the cake I baked. I had enough to generously frost the middle and top of a 9″ round 2-layer cake, and it had a naked cake look on the sides, which I’m a fan of. I did have a thick layer in the middle and on top 🙂 This will definitely be a go-to frosting recipe for me!! Great recipe and instructions! Can’t wait to try out the chocolate variation. Coconut extract may also be delicious in this particular recipe!
Thank you so much for trying my recipe, Amelia! I am so glad it was such a hit! 🙂
Very excited to try this recipe as the one i just tried had instructions where you creamed the butter and sugar together then add the pudding like mix; needless to say it was graining. Taste was there but graining. I also add the guts of a vanilla bean along with extract and will be doing that with your recipe. After tasting ermine, I don’t think I will go back to buttercream. Just waiting to use your recipe in hopes to be elated!
Hi hope you love this frosting, Mary! 🙂
I think I have been tainted! This recipe came out perfect! No grit no grain and smooth as can be. There wasn’t enough on the spatula to taste test😋. I’m glad I found your recipe after the first one I tried that didn’t turn out.
I’m so glad it was such a hit! 🙂
This recipe sounds delicious and I can’t wait to try it just as it is, but I would also like to convert this into a gluten free version and I’m very interested in how it would taste with heavy whipping cream. To your knowledge would I use cornstarch or 1:1 gluten free flour? Also can I use heavy whipping cream and if so are there any measurement changes? Thank you so much for answering this recipe. I can’t wait to try it.
Hi Chantel! I haven’t personally tried making it gluten free or with heavy cream. Heavy cream is thicker so it could potentially cause issues. I would think a 1:1 gluten free flour could work as a flour substitute, but I’m not sure how it would go with the heavy cream.
Thank you, Sam. That information is very helpful. Well, I love to experiment and own so, when I get the chance I’ll try both. I’ll let you know if the outcome is you’re like. Thanks again for sharing your recipes with us. Every time I try one it turns out way better than any other recipe.