
Cookie Dough Whoopie Pies
This post may contain affiliate links. As an Amazon Associate I earn from qualifying purchases. Please read my disclosure policy.

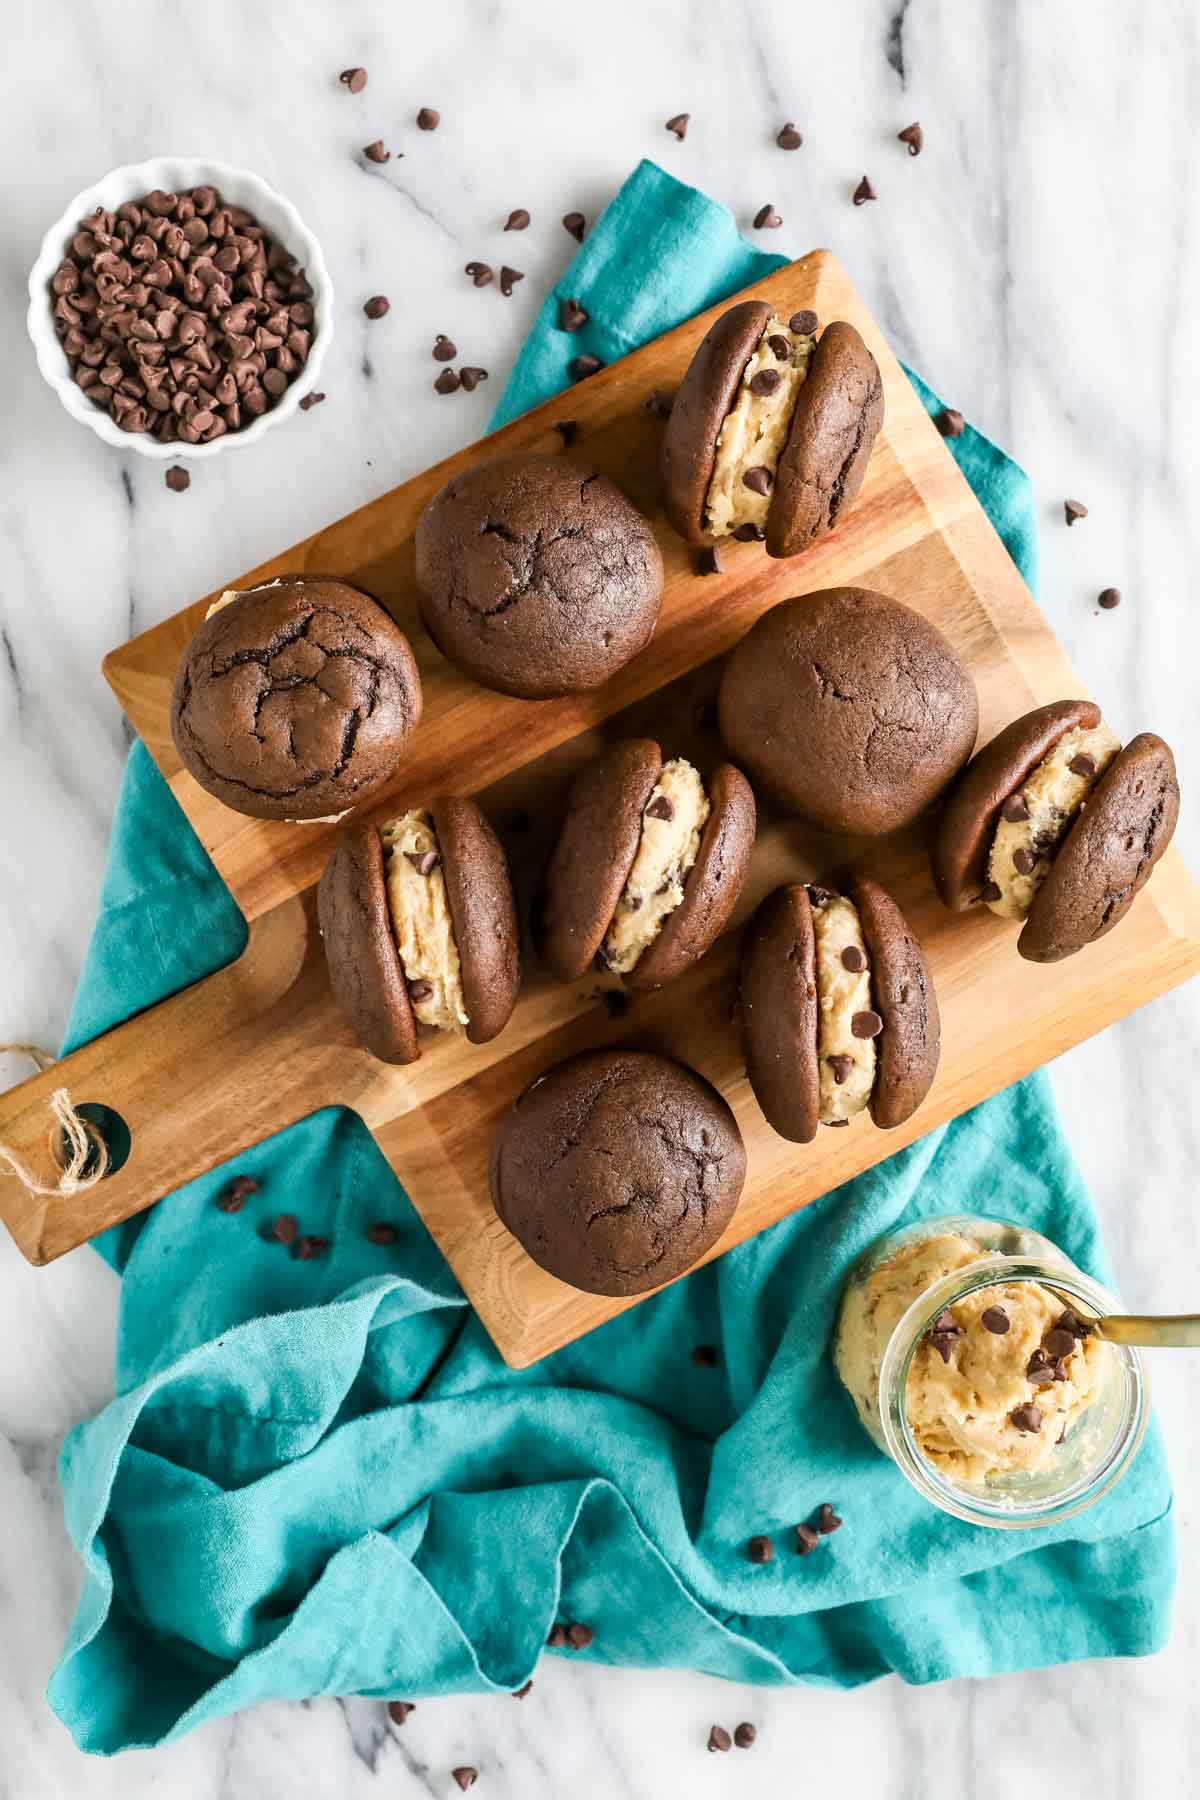
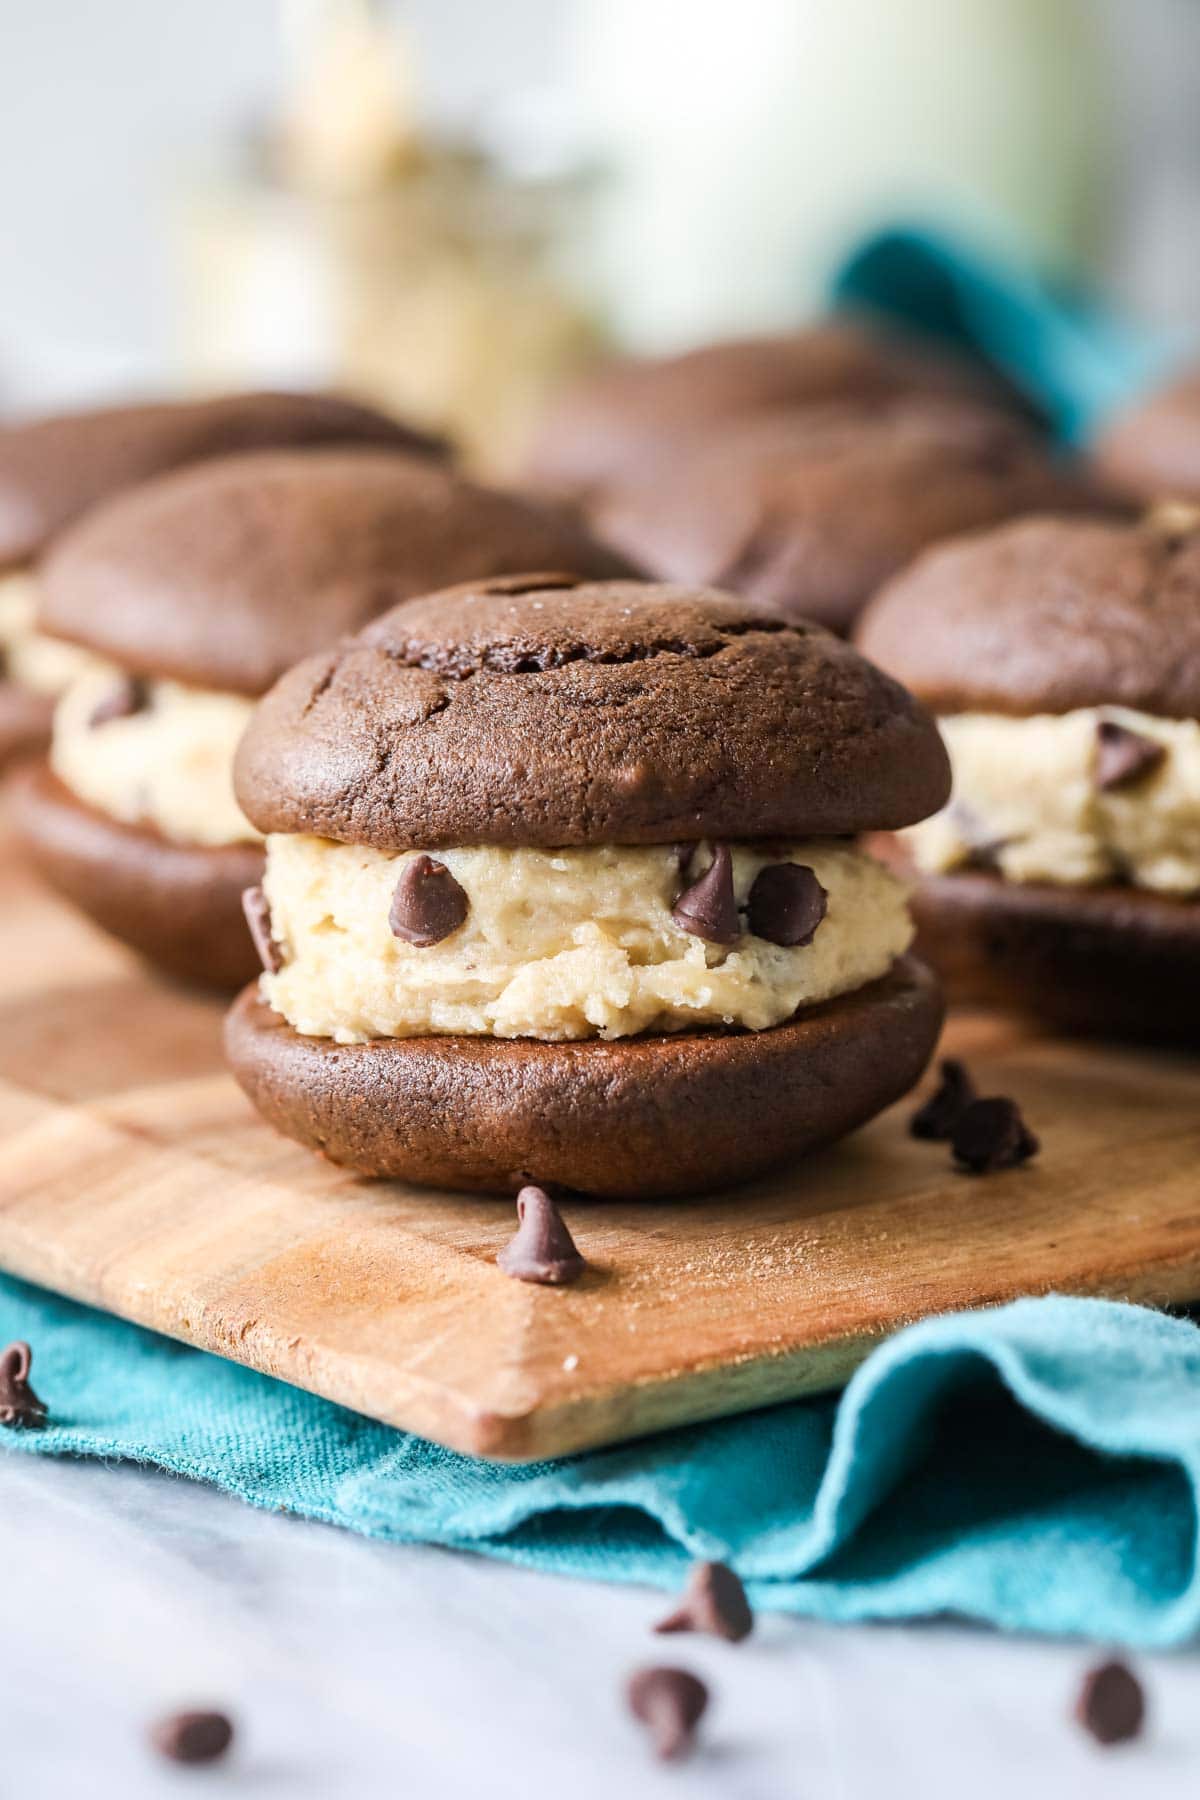
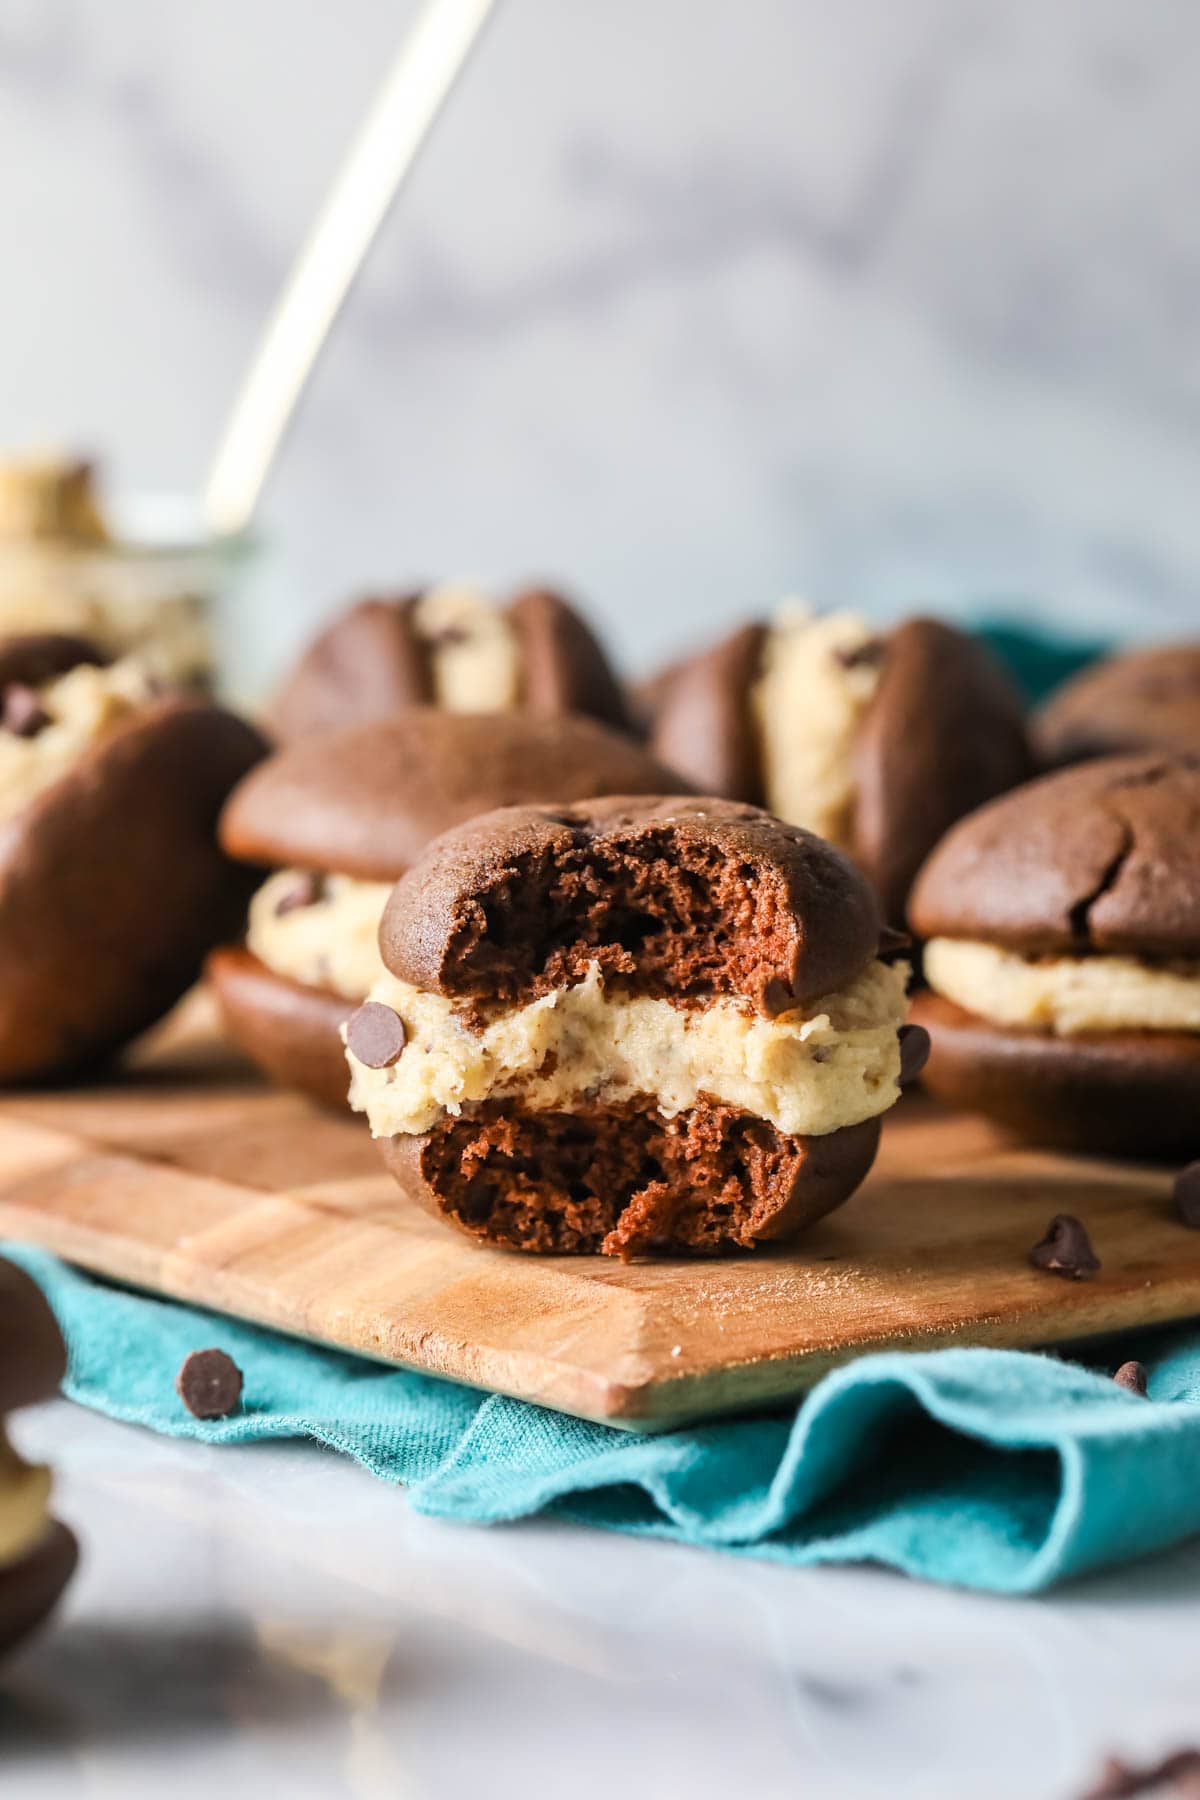
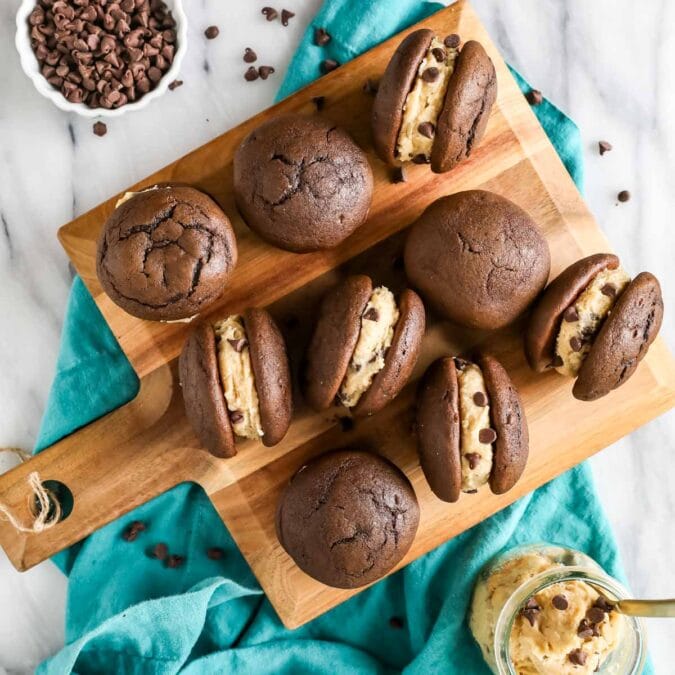
My Cookie Dough Whoopie Pies are made with a real edible cookie dough and soft, chocolatey cookies. They can be ready in under an hour and freeze beautifully!
Your New Favorite Whoopie Pies
You’ve probably had classic whoopie pies, but have you ever had cookie dough whoopie pies? Today’s recipe takes those soft, cakey, and chocolatey cookies and pairs them with a chocolate chip cookie dough filling. It’s an unusual match, but it works, and I just know you are going to go crazy for them!
If you’ve been a longtime follower, you may recognize this recipe–it’s one of my oldest ones! Today I’m updating it with just a few improvements:
- perfecting the cookie shells to be more chocolatey, soft, and moist
- using real cookie dough as the filling
Previously, this recipe used a more traditional whoopie pie filling that included shortening. I wanted to use something that really tasted like chocolate chip cookie dough, which typically doesn’t include shortening. My edible cookie dough was the perfect solution! We’re just adding a splash more milk to make it spreadable, but otherwise, it’s perfect here.
Let’s get started!
What You Need
Let’s go over a few of the important ingredients we’ll be using in today’s recipe:
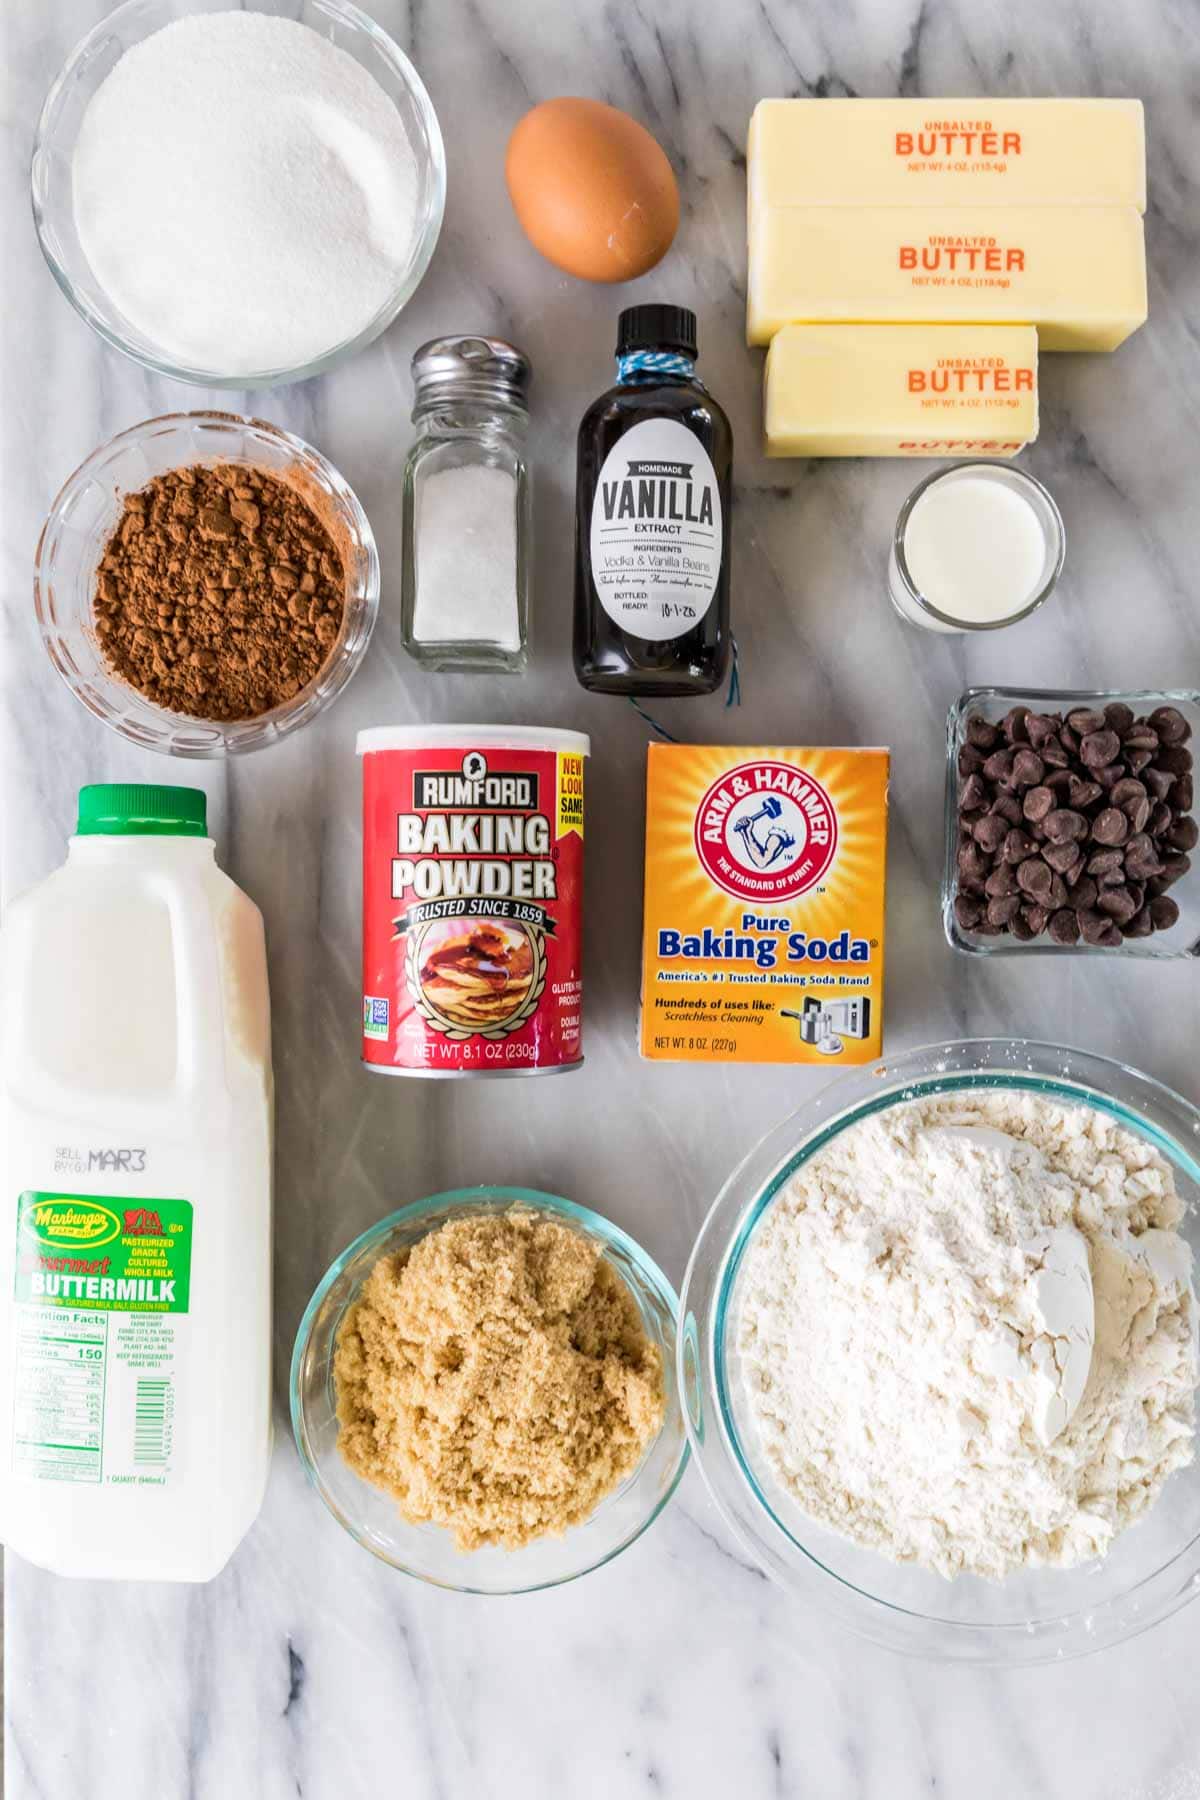
- Butter. You’ll need softened butter for both the filling and the cookies. Make sure you use unsalted butter since we are adding salt separately.
- Cocoa powder. I recommend natural cocoa powder here. Dutch process cocoa is not the same, not just because of the taste, but also because of its alkalinity. You can read more about this in my natural vs. Dutch process cocoa powder post!
- Buttermilk. Buttermilk adds flavor and tenderness to the chocolate cookies. If you don’t have any on hand, do NOT substitute regular milk; instead, use your milk to make my easy buttermilk substitute.
- Chocolate chips. I like a mix of regular and mini semisweet chips, but you can use all of one kind if that’s what you prefer!
SAM’S TIP: Since this cookie dough filling is eggless, there’s no need to worry about salmonella; however, raw flour can still cause food-borne illness. To eradicate the risk, I am including a step to heat treat the flour, as I do with my cookie dough dip and cookie dough pops. Make sure you let your flour cool completely after heat treating!
Remember, this is just an overview of the ingredients I used and why. For the full recipe please scroll down to the bottom of the post!
How to Make Cookie Dough Whoopie Pies
Chocolate Cookies
- Beat together the sugar, butter, egg, and vanilla until well combined and lightened in color, then stir in the buttermilk.
- Combine the dry ingredients in a separate bowl.
- Alternate adding the dry ingredients and very hot water with the mixer on low speed. Stir until smooth.
- Scoop the dough onto parchment lined baking sheets and bake for 5 minutes at 450F.
- Let the cookies cool on the baking sheet for 10 minutes before transferring to a cooling rack to cool completely.
SAM’S TIP: Your water should be very hot, if not boiling, to help the cocoa powder bloom (which intensifies its flavor). Just be careful not to splash yourself when adding it to the batter!
Cookie Dough Filling
- Heat treat your flour until it reaches 160F, then let it cool.
- Cream the butter, sugar, vanilla, and salt until smooth.
- Gradually add the flour and mix until combined.
- Drizzle in the milk until the dough is a spreadable consistency.
- Fold in the chocolate chips until incorporated.
Assembly
- Pair up cookies that are similarly shaped and sized for sandwiching.
- Pipe or spread the filling onto one cookie, then top with another.
- Repeat with remaining cookies until all whoopie pies have been assembled.
Frequently Asked Questions
Your whoopie pie can be stored in an airtight container at room temperature for 2 days. If you’d like to store them longer, you’ll need to place them in the fridge where they will keep for a week.
Personally, I think they taste best after chilling in the refrigerator overnight (but maybe that’s just because I’m used to enjoying them cold!).
Yes! The cookies can be made and stored in an airtight container up to 3 days in advance, and the filling can be made and stored in an airtight container in the fridge up to 3 days in advance.
If you do this, you might want to let your filling sit out to soften a bit before trying to spread/pipe it onto your chocolate cookies.
Definitely! Just make sure to wrap them well in plastic wrap before storing in an airtight bag or container. They will need to thaw overnight in the fridge before serving.
Looking for more whoopie pie variations? Try my pumpkin whoopie pies or peppermint bark whoopie pies!
Enjoy!
Let’s bake together! I’ll be walking you through all the steps in my written recipe below! If you try this recipe, be sure to tag me on Instagram, and you can also find me on YouTube and Facebook
Cookie Dough Whoopie Pies

Ingredients
For Chocolate Cookie Shells
- 1 cup (200 g) granulated sugar
- ⅓ cup (75 g) unsalted butter, softened (5 ⅓ Tablespoons)
- 1 large egg, room temperature preferred
- 1 ½ teaspoons vanilla extract
- ½ cup (118 ml) buttermilk
- 2 cups (250 g) all-purpose flour
- ½ cup (50 g) natural cocoa powder
- 1 teaspoon baking soda
- ¼ teaspoon baking powder
- ½ teaspoon salt
- ½ cup (118 ml) steaming hot water
For Cookie Dough Filling
- 1 ¾ cups (215 g) all-purpose flour
- 1 cup (226 g) unsalted butter, softened
- 1 ¼ cups (250 g) light brown sugar, firmly packed
- ¼ cup (50 g) granulated sugar
- 1 teaspoon vanilla extract
- ½ teaspoon salt
- 2-3 Tablespoons whole milk
- ½ cup (85 g) semisweet chocolate chips, I use a blend of mini and regular-sized
Instructions
- Arrange rack to center of oven and preheat oven to 450F (235C) and line several baking sheets with parchment paper. Set aside.
- In a large mixing bowl, combine sugar, butter, egg, and vanilla extract and beat until pale yellow and well-combined.1 cup (200 g) granulated sugar, ⅓ cup (75 g) unsalted butter, 1 large egg, 1 ½ teaspoons vanilla extract
- Add buttermilk and stir until combined.½ cup (118 ml) buttermilk
- In a separate bowl, whisk together flour, cocoa, baking soda, baking powder, and salt.2 cups (250 g) all-purpose flour, ½ cup (50 g) natural cocoa powder, 1 teaspoon baking soda, ¼ teaspoon baking powder, ½ teaspoon salt
- With mixer on low-speed, alternate adding the flour mixture and the hot water (be careful not to splash yourself!) to the butter/sugar mixture, beginning and ending with the flour mixture and stirring after each addition (I add the flour in 3 parts and the water in 2). Stir until batter is smooth and combined (it will be thin like a cake batter).½ cup (118 ml) steaming hot water
- Drop cooking batter by 1 ½ Tablespoon-sized scoops onto prepared baking sheet, spacing at least 2” apart.
- Bake for 5 minutes in center rack of oven then remove and allow to cool on baking sheet for at least 10 minutes before carefully removing to cooling rack to cool completely before filling.
Cookie Dough Filling
- Heat treat your flour: Place flour in heap in a microwave safe dish and heat in 10-second intervals until an instant read thermometer inserted into the heap registers at least 160F (72C). Allow flour to cool before proceeding.1 ¾ cups (215 g) all-purpose flour
- Combine butter, sugars, vanilla extract and salt and use an electric mixer to beat together until creamy and well-combined.1 cup (226 g) unsalted butter, 1 ¼ cups (250 g) light brown sugar, ¼ cup (50 g) granulated sugar, 1 teaspoon vanilla extract, ½ teaspoon salt
- Gradually add flour until completely combined.
- With mixer on low speed, slowly add milk until the dough reaches a spreadable consistency.2-3 Tablespoons whole milk
- Fold in chocolate chips.½ cup (85 g) semisweet chocolate chips
Assembly
- Pair off chocolate cookies of similar sizes.
- Scoop, spread, or pipe cookie dough filling onto the bottom of one cookie, then sandwich with another similar-sized cookie. Repeat until all cookies have been filled
Notes
Storing
Store in an airtight container at room temperature for up to 2 days or in the refrigerator for up to a week.Nutrition
Nutrition information is automatically calculated, so should only be used as an approximation.
Like this? Leave a comment below!


Hello,
Have you tried hot coffee instead of water? Would that work too? Thanks.
Hi Helen! I haven’t tried it, but that should work just fine. 🙂
Yummy recipe! Soooo delicious!
is there any recommendation on how to freeze them and how long they last?
maybe wrap in plastic?
Hi Abi! We actually cover this in the FAQ section of the post. They should last for a few months 😊
Mini chocolate chips are clearly visible in the photos yet appear nowhere in the recipe??
Hi Jill! I’m so sorry about the confusion! This is an older recipe that I need to clean up a bit. You can stir in 1/2 cup of mini chocolate chips at the end. 🙂
The filling has zero flavor. Dissappointing 🙁
Really? That’s very strange, did you make any substitutions?
Oh wow, Sam! These are incredible. And your photos … absolutely gorgeous!
Thank you so much, Lauren! 🙂
These look seriously amazing. It’s just not fair I don’t have one in front of me right now 🙂
Haha, thank you, Sues! 🙂
These are seriously making my mouth water, Sam! I love cookie dough anything. Pinned :). By the way, I love your photography with the little whoopie pie sitting on the roll of twine. Awesome prop use!
Thank you so much, Annie! 🙂
These look absolutely scrumptious, Sam! Beautiful photos!
Thanks so much, Marsha! 🙂
These look delicious! I don’t know how you resisted eating them to take photos. I would have been dying to devour one, haha. As usual your pictures look gorgeous. 🙂
Thank you, Hira! 🙂