These rich, fudgy Chocolate Cake Pops are the perfect one-bite dessert! My 100% from-scratch recipe uses just one cake pan and makes plenty to share. Recipe includes a how-to video!
Chocolate Cake Pops From Scratch
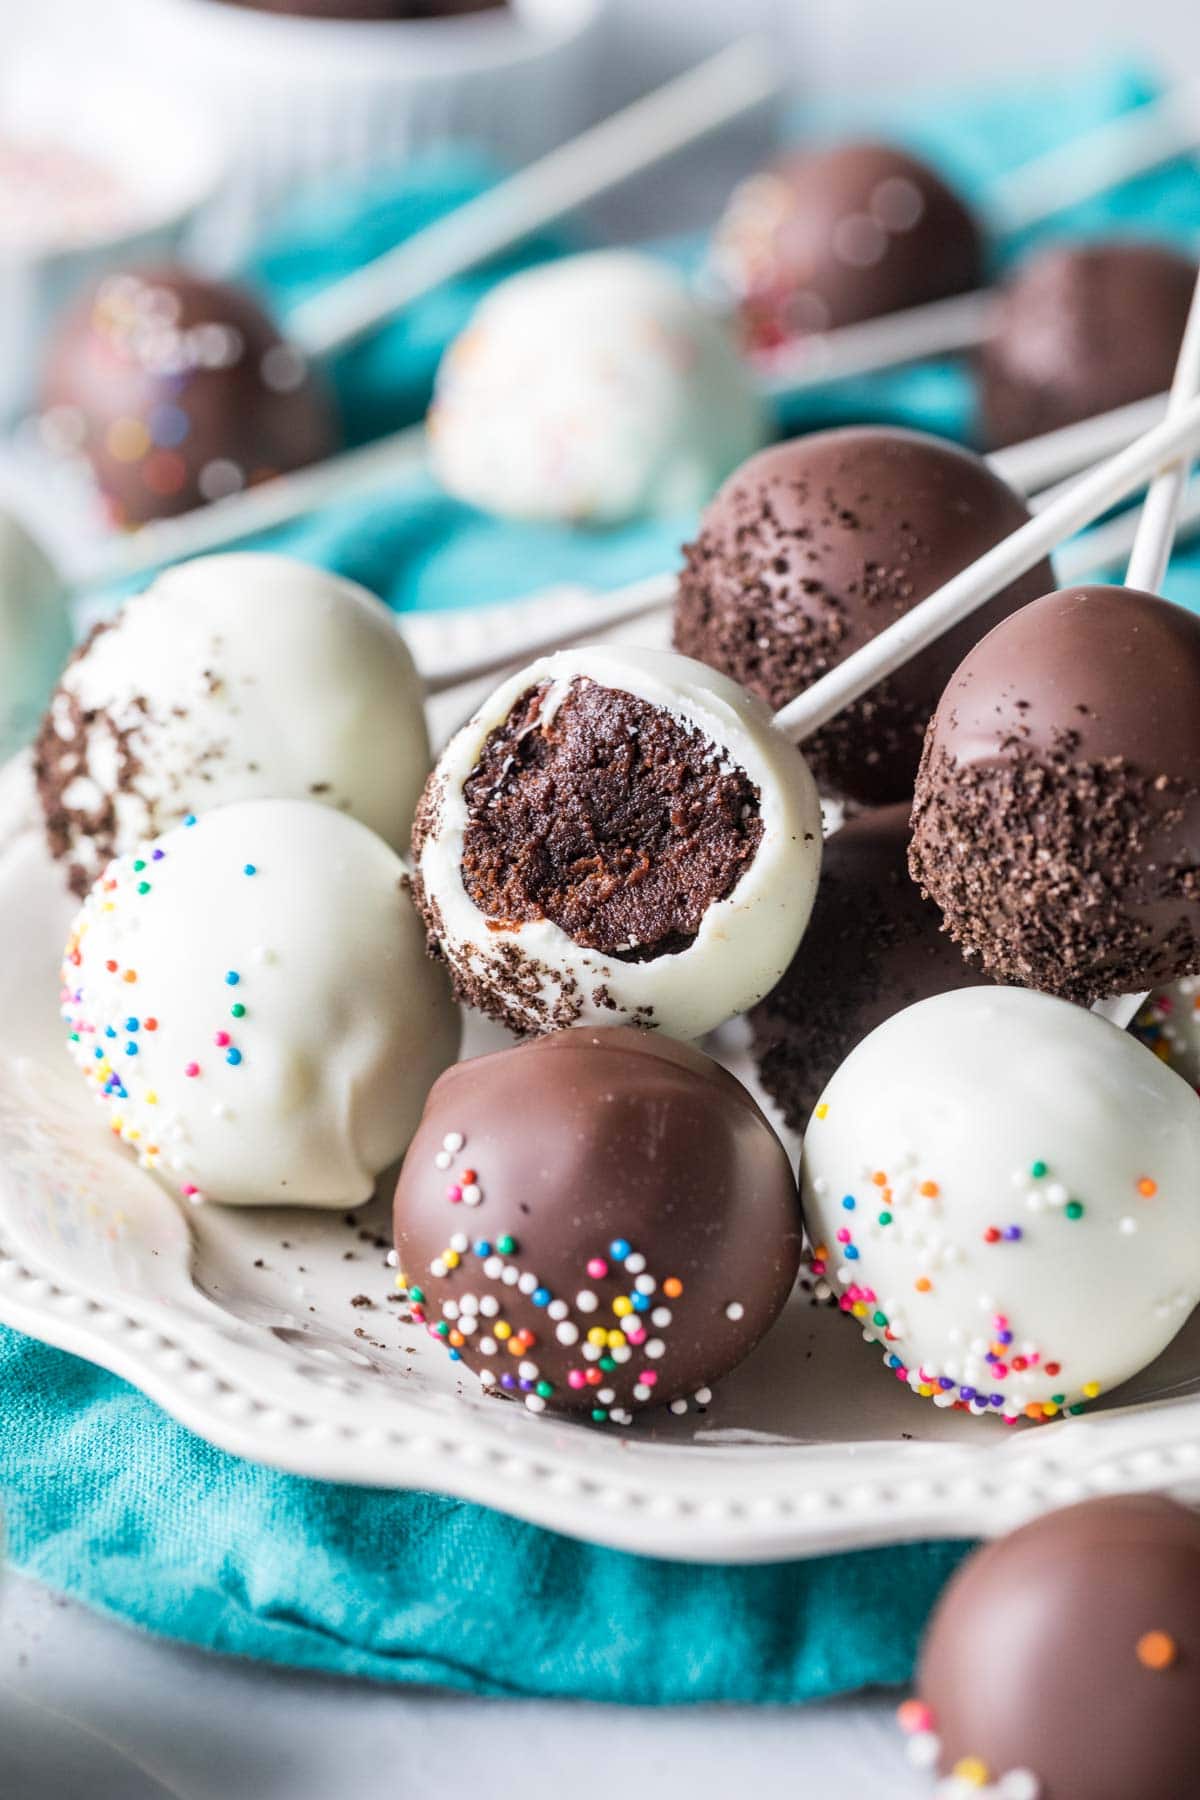
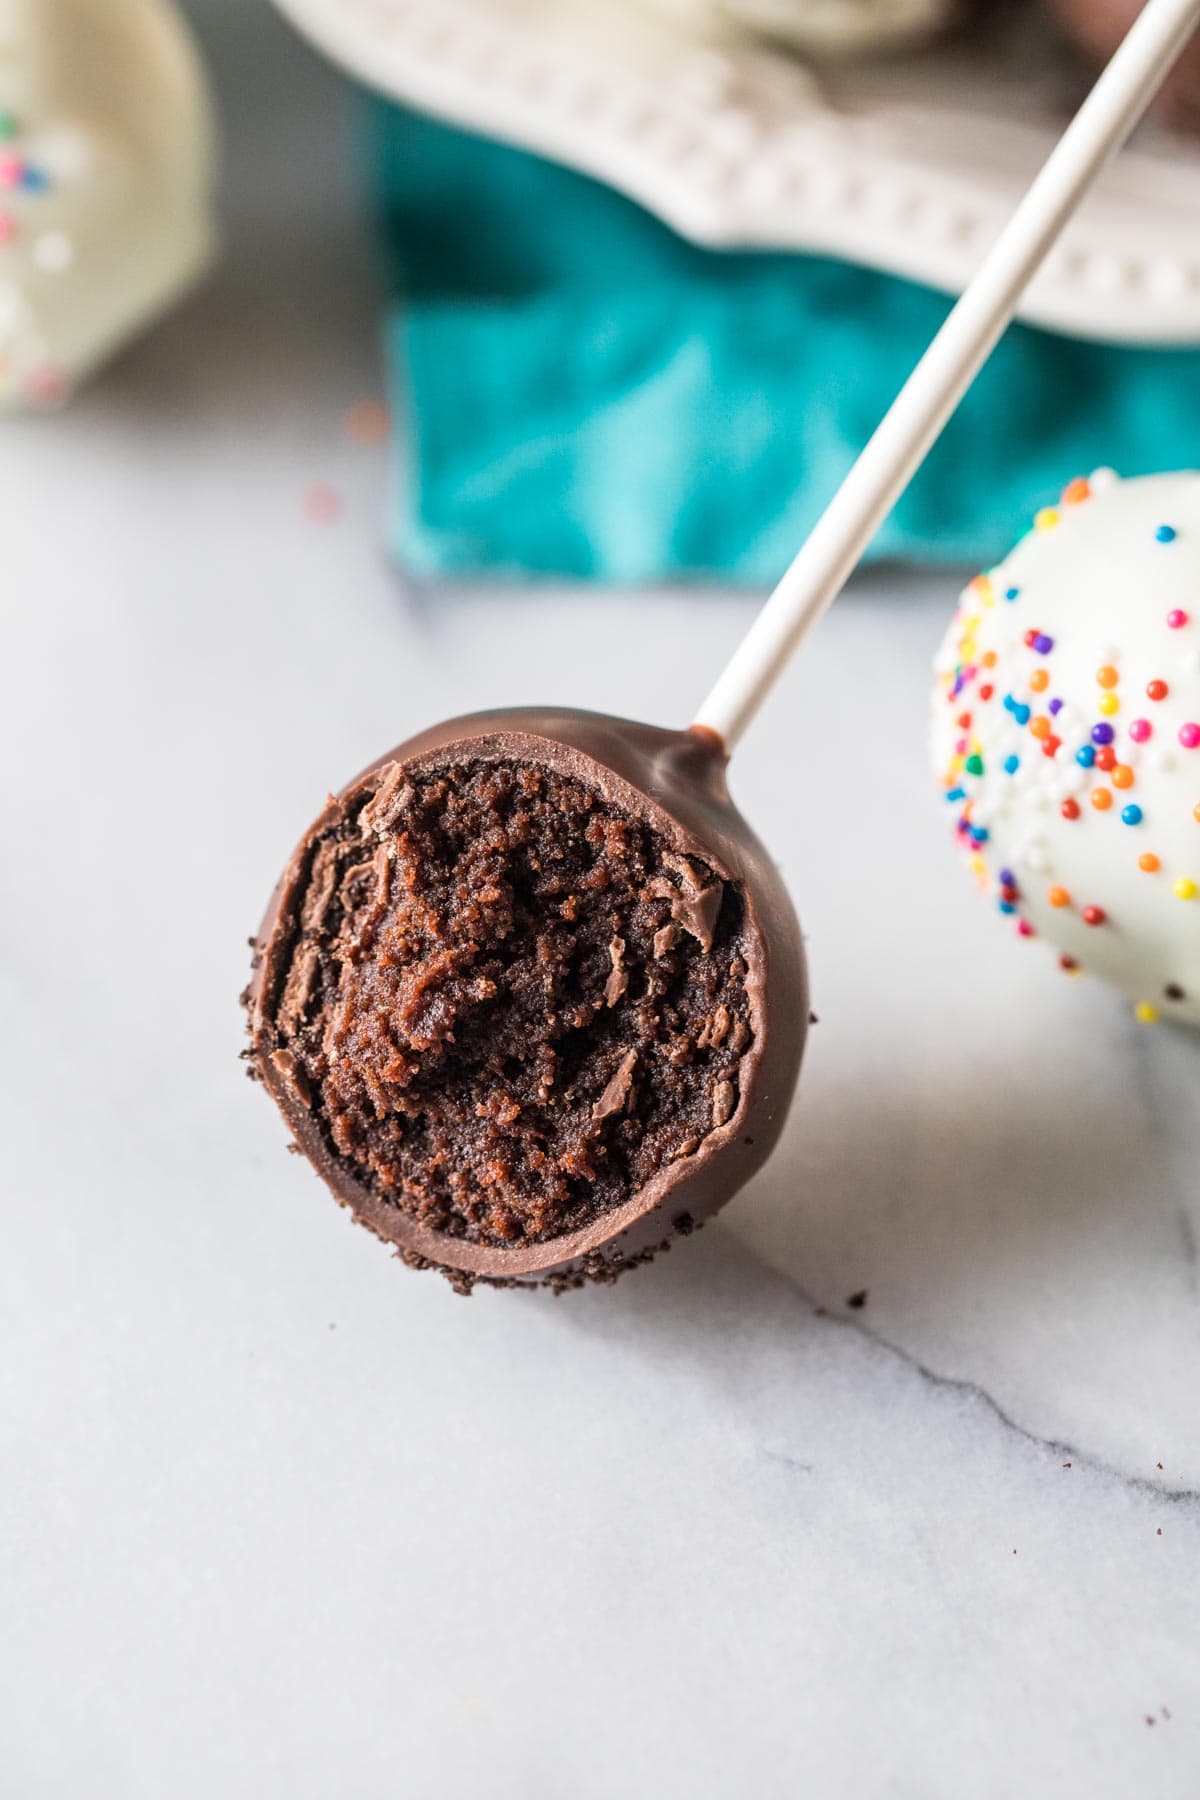
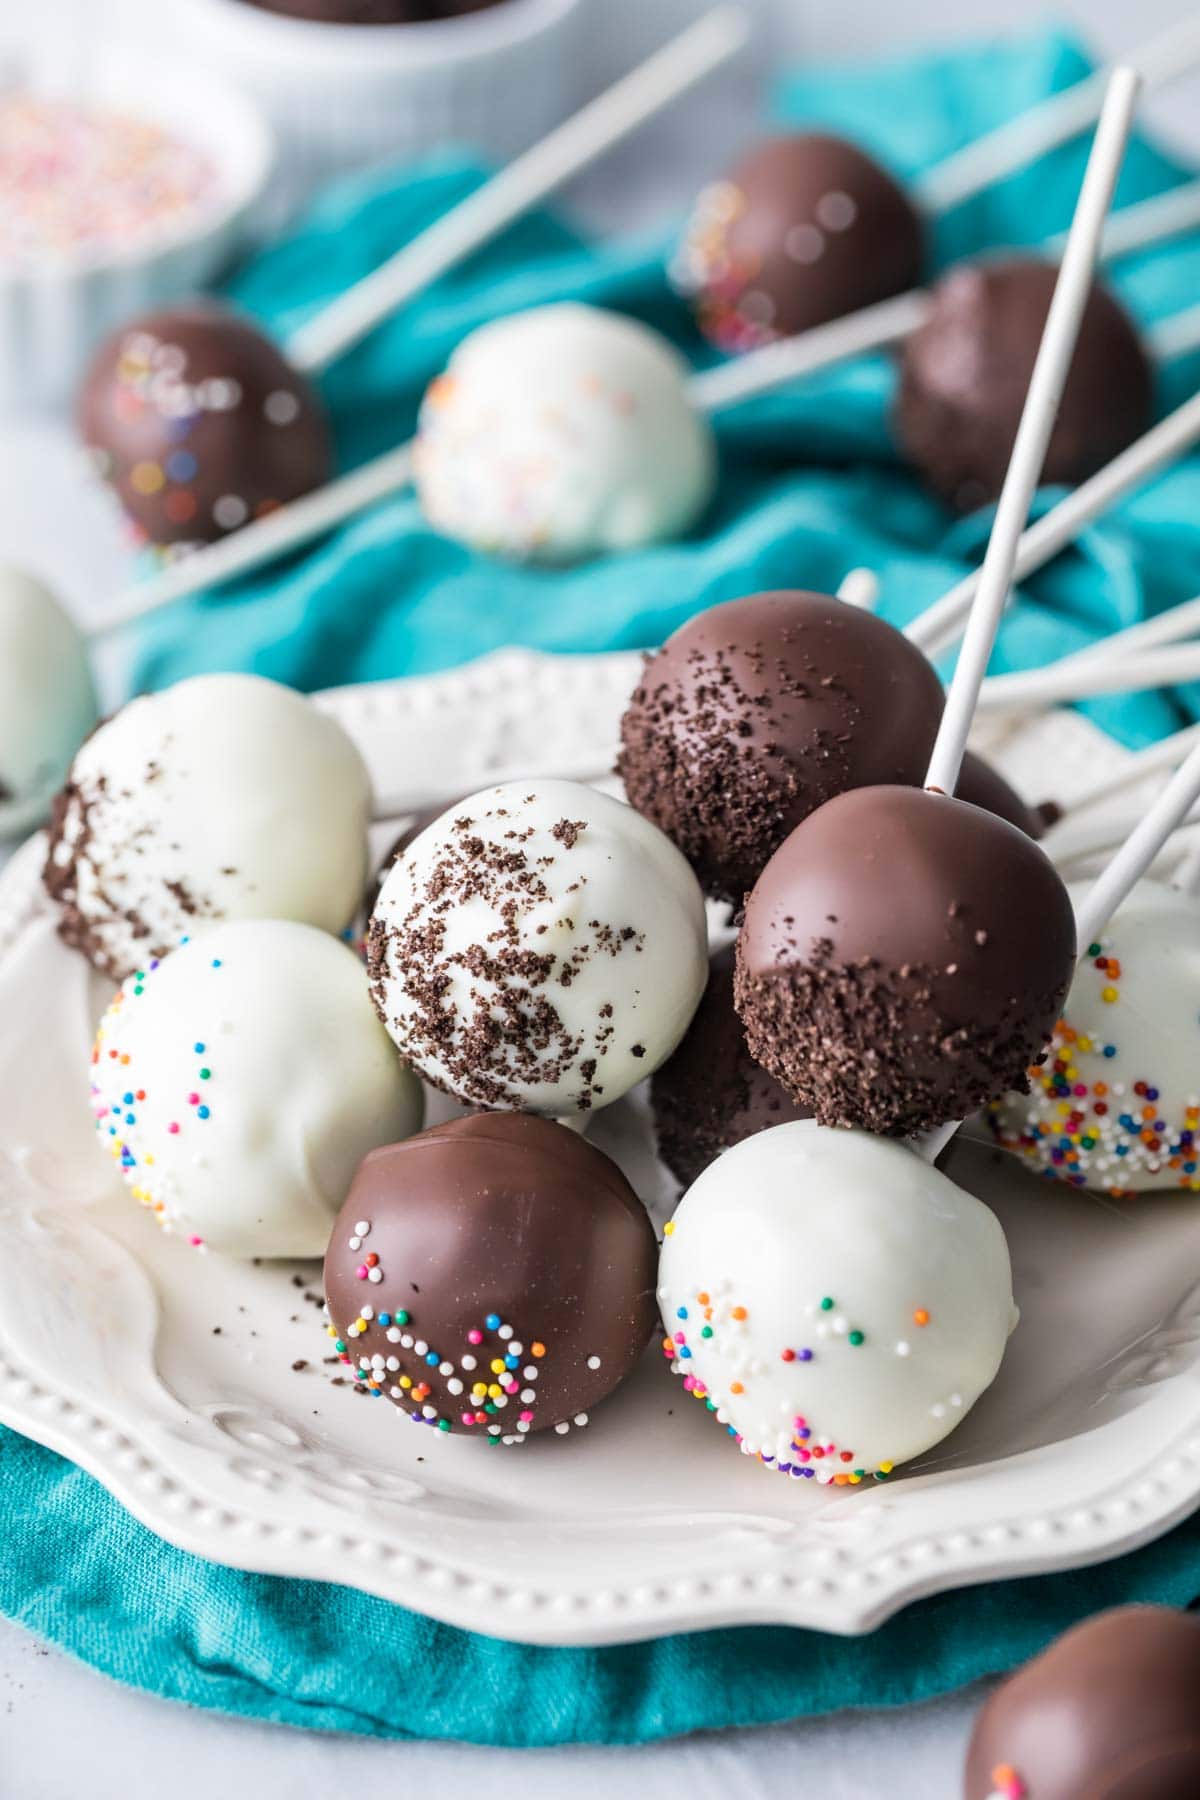
Introducing your newest chocolate fix: chocolate cake pops! These simple cake pops are rich, fudgy, and dangerously chocolatey. They are also 100% from-scratch, with not even a sprinkle of cake mix or teaspoon of canned frosting in sight. Don’t worry though, they’re just as easy as the shortcut version, but 10x more flavorful and irresistible. They taste like a bite-sized, more decadent version of my chocolate cake!
When I shared my classic cake pops a few months ago, many of you expressed interest in a chocolate version (because everything is better with chocolate, of course!). While I could have suggested simply halving my chocolate cake and tossing in some chocolate frosting, I really wanted to have a tested version, and that’s exactly what I’m sharing today.
Why try my recipe:
- Tastes just like a rich chocolate cake, but bite-sized, so you don’t feel as guilty 😉
- Bakes up in one cake pan, but can easily be doubled for more!
- Perfect for making in advance.
- Uses pantry staples instead of boxed mixes or pre-made icings.
What You Need
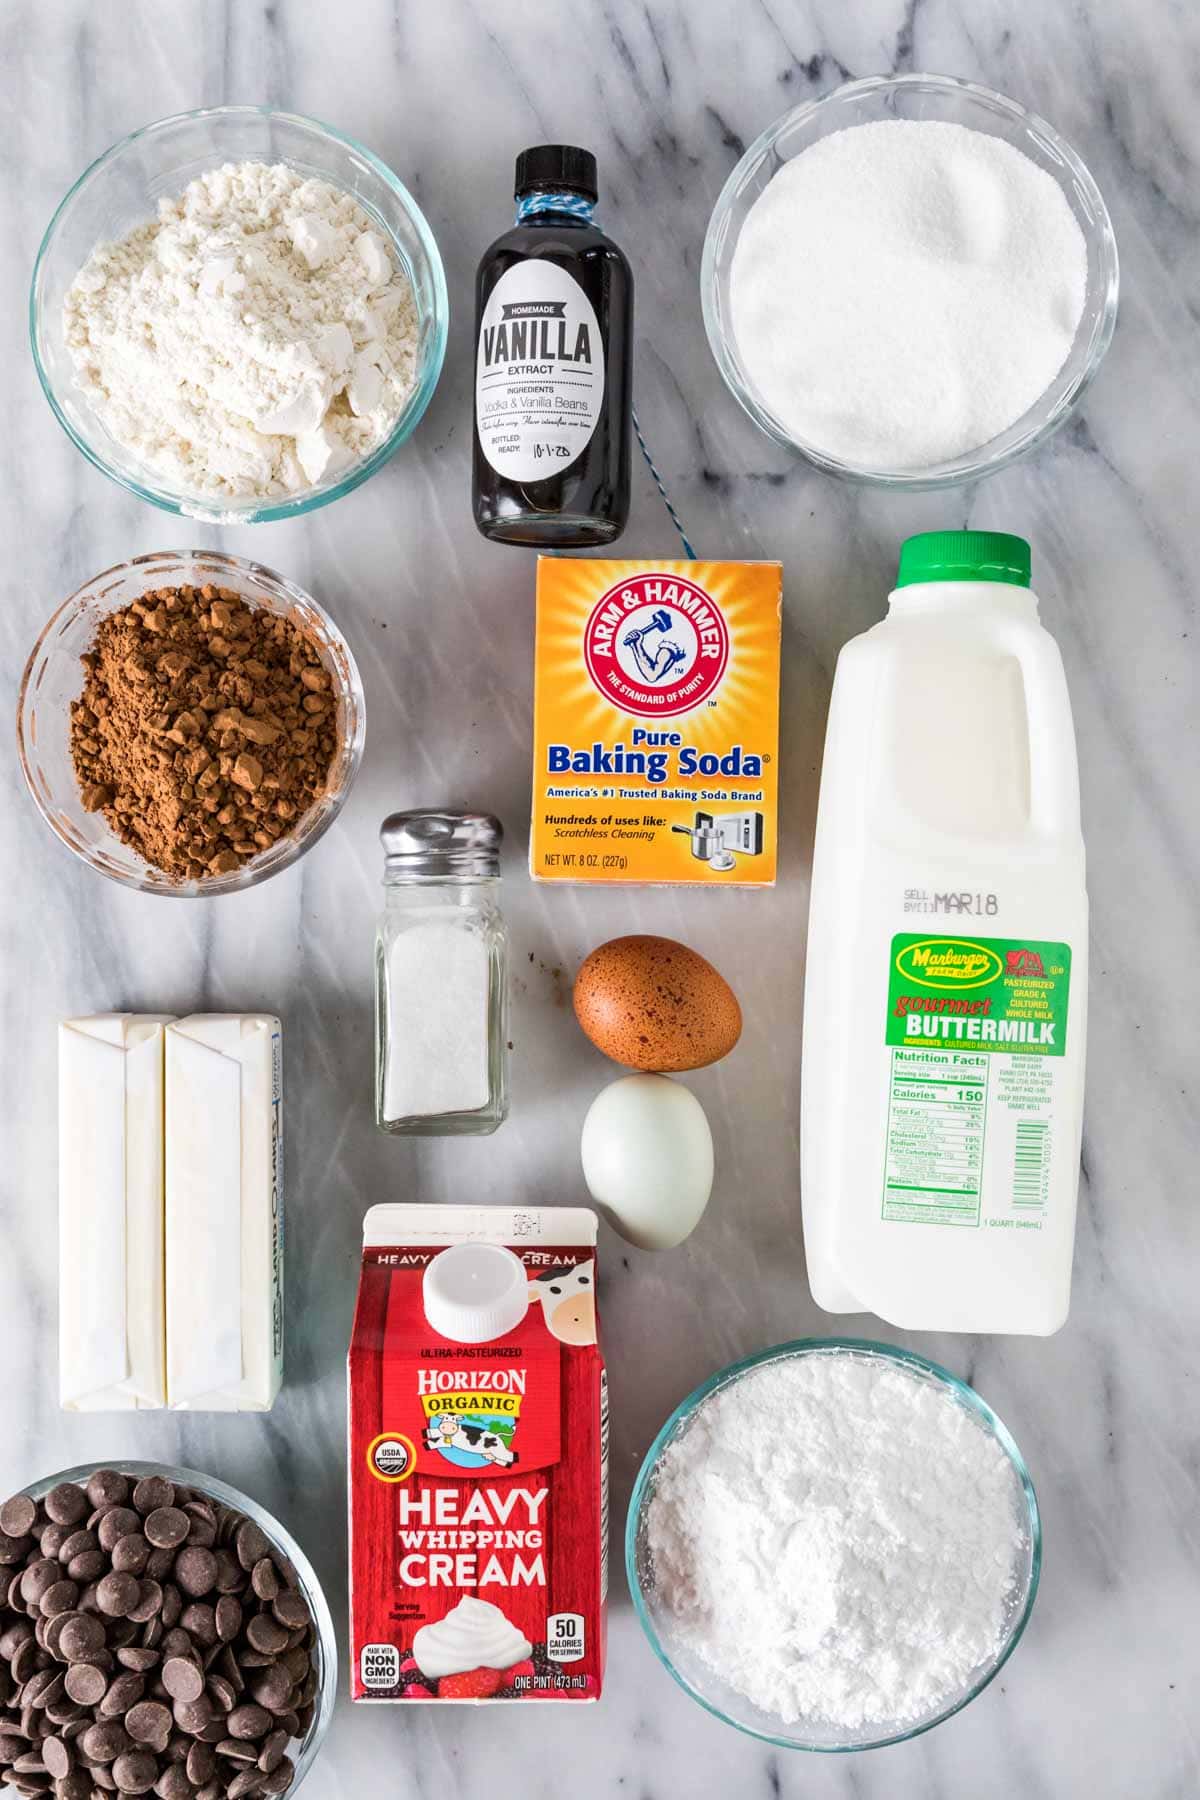
Here are the key ingredients that make these chocolate cake pops oh so fudgy and irresistible:
- Flour. While I use cake flour in my vanilla cake pops, I’m using regular all-purpose flour here.
- Natural cocoa powder. Because we are using baking soda as our leavening agent, it is very important that you do NOT substitute Dutch process cocoa! I talk about the differences between the two in my natural vs. dutch process cocoa post, if you’d like to learn why this is important.
- Very hot water. Make sure your water is steaming before you add it! Very hot liquid helps to “bloom” the cocoa powder and bring out its flavor, similar to steeping tea.
- Buttermilk. This adds moisture and flavor to our chocolate cake pops. If you don’t have any on hand, you can make my easy buttermilk substitute instead (it’s just 2 ingredients!).
- Egg + egg yolk. Adding an extra yolk increases the tenderness and richness of the cake.
SAM’S TIP: If you’d like, you can use very hot coffee instead of hot water; this will make your cake pops even more chocolatey and rich. I do this with my chocolate cake recipe and LOVE the results (and no, it won’t make the cake pops taste like coffee!).
Remember, this is just an overview of the ingredients I used and why. For the full recipe please scroll down to the bottom of the post!
How to Make Chocolate Cake Pops
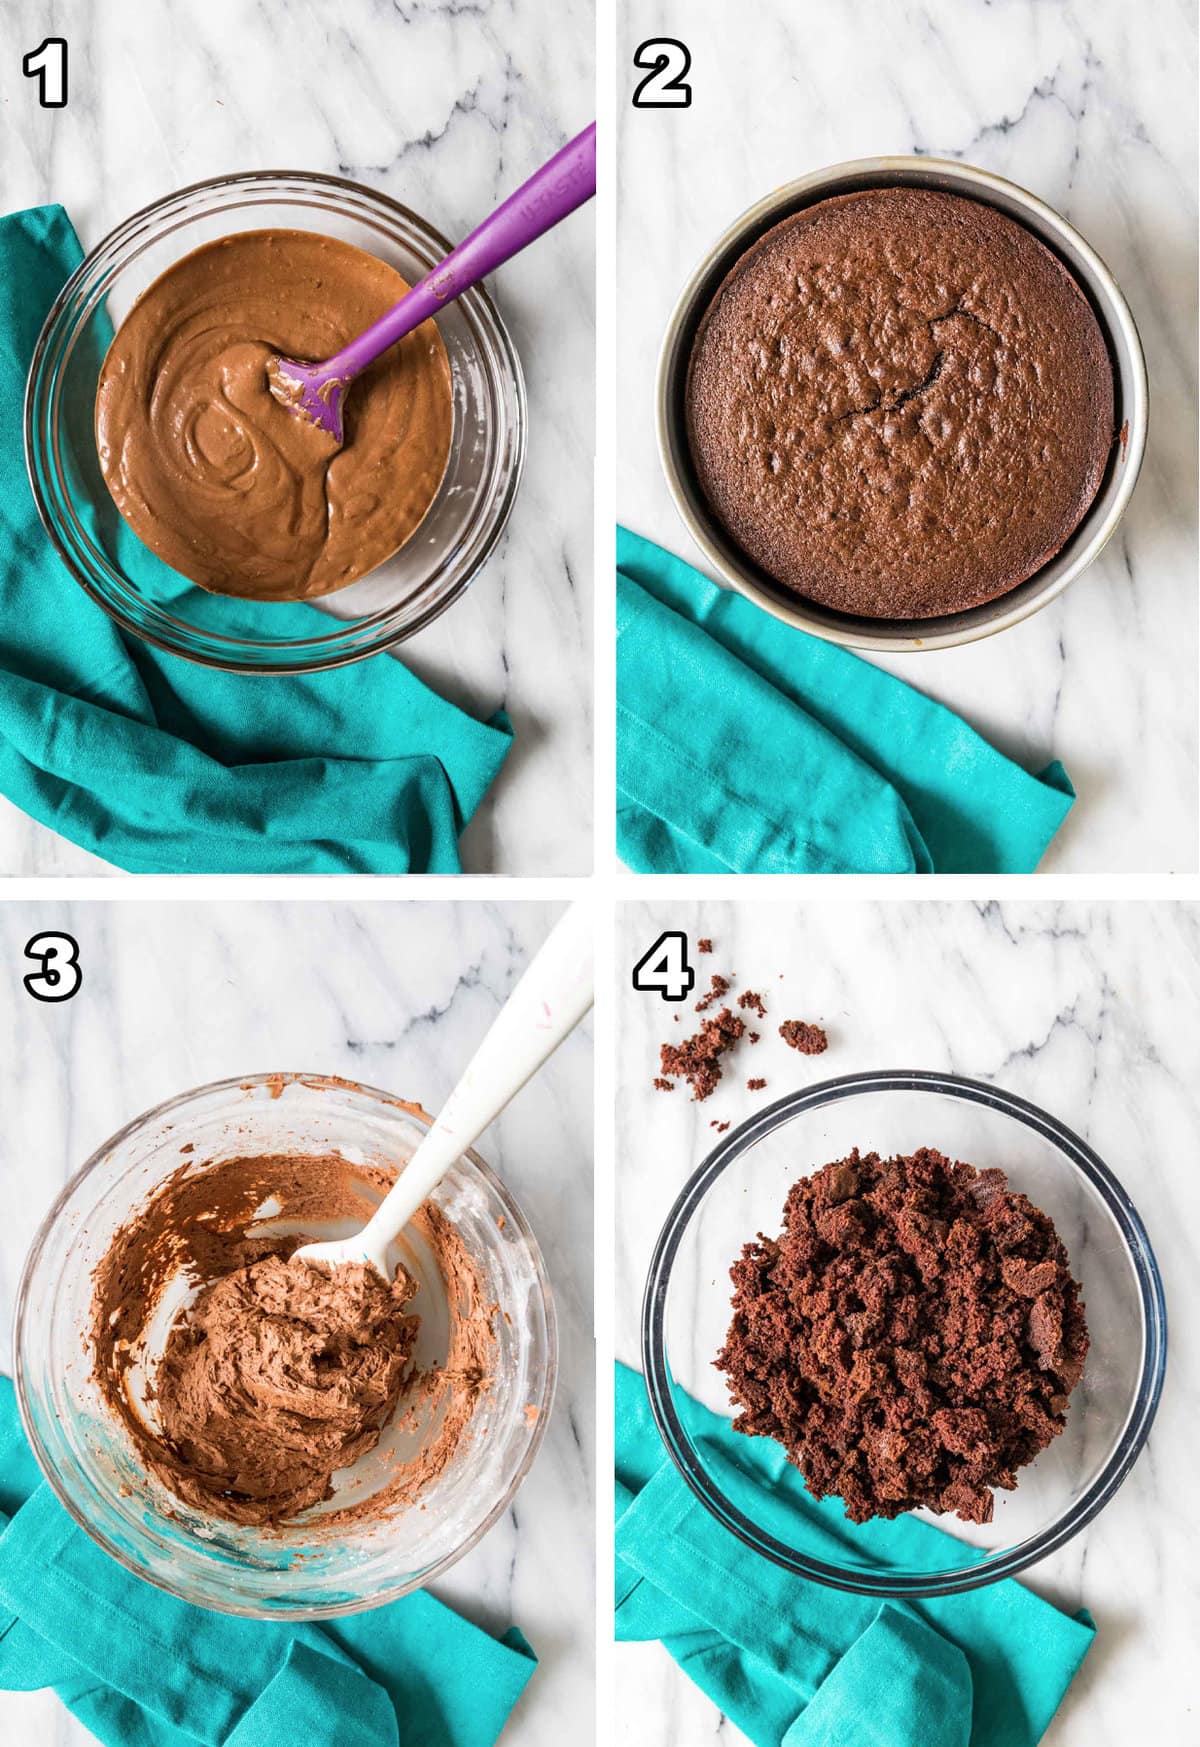
- Prepare cake batter – Combine the dry ingredients in a large bowl, then stir in the melted butter. Add the eggs one at a time, then stir in the buttermilk and vanilla. Gradually add the hot water and stir until cohesive. Pour into a greased/floured 8″ cake pan.
- Bake cake and allow to cool – Bake the cake for 30-35 minutes at 350F. Let the cake cool in its pan for 15 minutes, then transfer to a cooling rack to finish cooling.
- Prepare the frosting – Beat the butter, vanilla, and salt until creamy, then gradually stir in the powdered sugar and cocoa powder. Stir in the heavy cream and beat the frosting on medium/high for about 30 seconds.
- Crumble the cake – Crumble the cooled cake into pebble sized pieces, making sure not to mash it up.
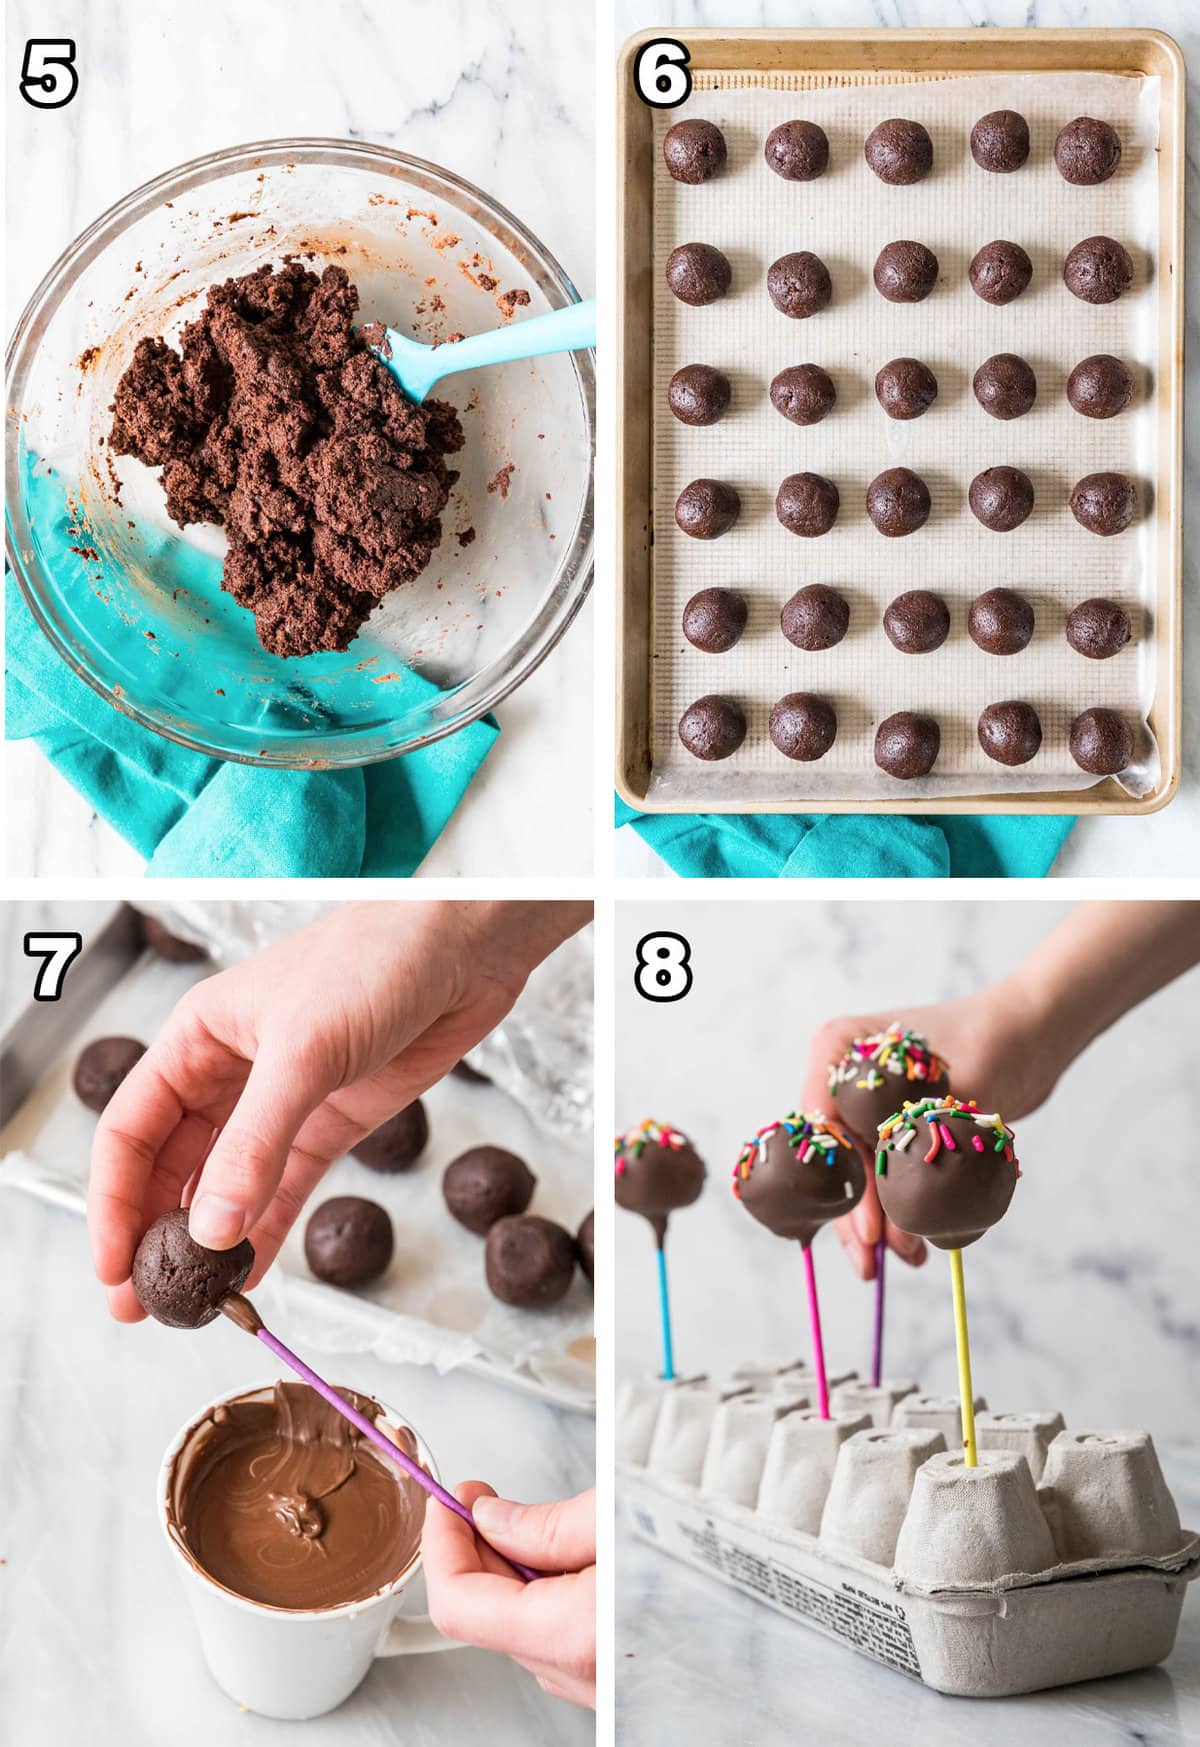
- Add the frosting – Add the frosting to the crumbled cake and mix on low until you have a smooth and cohesive dough.
- Roll into balls – Scoop and roll the dough into 1.5 tablespoon balls. Place on a wax paper lined baking sheet and let chill in the freezer for 30 minutes.
- Dip and decorate – Dip the tip of one cake stick into melted chocolate, then poke it halfway into a chilled cake ball. Flip the pop upside down and dip into chocolate, making sure to coat the cake ball entirely. Let the excess chocolate drip off before decorating with sprinkles or cookie crumbs.
- Let set before enjoying – Place the pops in a prepared upside down egg carton and let harden before enjoying.
SAM’S TIP: Don’t freeze your cake balls for longer than 30 minutes! This can cause the coating to crack when you add it. If you’d like to make the cake balls in advance, just cover them well and let them sit in the fridge for a few hours (or overnight) before dipping. After refrigerating, it does still often help to freeze for a short period of time before dipping.
Frequently Asked Questions
Store your chocolate cake pops in an airtight container either in the fridge or at room temperature. They’ll last longer in the fridge; up to 10 days. They can sit at room temperature for only 3 days. You can also freeze them for an on-the-go treat!
While you could use a higher quality chocolate, I much prefer to use melting wafers or almond bark for their ease. They are specifically designed to be melted and dipped, and their final finish is exactly what we’re looking for here.
Bonus tip: After melting your chocolate (see my post on how to melt chocolate in the microwave for tips!), pour it into a tall, heat-proof container or glass before dipping. This will make dipping SO much easier!
Yes, cake pops are great for making in advance! You can make the cake and crumble it one day, then make the frosting and assemble the next day, or assemble them entirely and just let them sit in the fridge until you need them.
You’ll notice today’s video is a little different! My lovely friend Jessica from Savory Experiments hosted me and my friend Amy from House of Nash Eats at her house and we did a group video together, so this was a special one-time production.
Which cake pop flavor would you like to see next? Let me know in the comments!
Enjoy!
Let’s bake together! I’ll be walking you through all the steps in my written recipe and video below! If you try this recipe, be sure to tag me on Instagram, and you can also find me on YouTube and Facebook

Chocolate Cake Pops

Ingredients
For the cake
- 1 cup (125 g) all-purpose flour
- 1 cup (200 g) granulated sugar
- ⅓ cup (33 g) natural cocoa powder
- ¾ teaspoon baking soda
- ½ teaspoon salt
- ½ cup (113 g) unsalted butter melted
- 1 large egg + 1 large egg yolk room temperature preferred
- ½ cup buttermilk
- 1 teaspoon vanilla extract
- ¼ cup very hot water must be steaming hot!
For the frosting
- ½ cup (113 g) unsalted butter softened
- 1 teaspoon vanilla extract
- ⅛ teaspoon salt
- 1 ½ cups (190 g) powdered sugar
- ⅓ cup (33 g) natural cocoa powder
- 2 Tablespoons heavy cream
Assembly
- 15 oz chocolate or white chocolate melting wafers or almond bark
- Sprinkles or Oreo cookie crumbs for decorating optional
Recommended Equipment
- Empty cardboard egg carton
Instructions
Cake
- Preheat oven to 350F (175C) and prepare one 8” round cake pan by lightly greasing with baking spray. Set aside.
- In a large mixing bowl, whisk together flour, sugar, cocoa powder, baking soda, and salt until combined,.1 cup (125 g) all-purpose flour, 1 cup (200 g) granulated sugar, ⅓ cup (33 g) natural cocoa powder, ¾ teaspoon baking soda, ½ teaspoon salt
- Add melted butter and stir until combined.½ cup (113 g) unsalted butter
- Add egg and egg yolk and stir well. Be sure to scrape sides and bottom of bowl periodically.1 large egg + 1 large egg yolk
- With mixer on low-speed, add vanilla and then buttermilk, stirring until combined.½ cup buttermilk, 1 teaspoon vanilla extract
- Add hot water, stirring until ingredients are well-combined and smooth. Batter will be thin, this is fine.¼ cup very hot water
- Pour batter into prepared pan and bake on 350F for 30-35 minutes, until a toothpick inserted in the center comes out with moist crumbs. Allow to cool for 15 minutes in pan before inverting onto a cooling rack to cool completely before assembling. Meanwhile, prepare frosting.
Frosting
- Place butter, vanilla, and salt in a large bowl and beat until smooth and creamy.½ cup (113 g) unsalted butter, 1 teaspoon vanilla extract, ⅛ teaspoon salt
- Gradually add powdered sugar and then cocoa powder until completely combined.1 ½ cups (190 g) powdered sugar, ⅓ cup (33 g) natural cocoa powder
- Slowly stir in heavy cream until frosting is smooth and creamy. Increase speed to medium/high and beat for 30 seconds.2 Tablespoons heavy cream
Assembly
- Once cake has cooled completely, use your hands to crumble the cake into a large bowl (don’t mash the cake, just break into pebble-sized pieces).
- Add frosting and use mixer on low-speed to stir together until mixture is mostly combined, it will be smooth and not piecey. If you pinch the dough together between thumb and forefinger it should hold together.
- Scoop dough by level 1 ½ Tablespoons and roll between your palms to make a smooth ball. Place on wax-paper lined baking sheet, not letting the cake pops touch, and repeat until you have rolled all the dough. Transfer to freezer and freeze for 30 minutes.
- When cake pops have nearly finished chilling, prepare chocolate by melting according to package directions (I like to pour the chocolate into a 1-cup measuring cup or coffee mug for dipping) and portion out any sprinkles you’d like to use.15 oz chocolate or white chocolate melting wafers or almond bark
- Flip two cardboard egg cartons upside-down and use a skewer to pierce a hole in the center of each cup. Make sure cake pop sticks will fit snugly in the hole.
- Remove cake balls from freezer. Take one cake pop stick and dip the very end in chocolate, then insert halfway into the cake pop.
- Turn the cake pop upside down and dip gently into the chocolate, covering the entire surface of the cake. Allow excess chocolate to drip back into the cup then insert the stick into your holder. Immediately add sprinkles/cookie crumbs, if using.Sprinkles or Oreo cookie crumbs for decorating
- Repeat until all cake pops have been dipped. Allow chocolate to harden before removing and enjoying or storing.
Notes
Storing
Nutrition
Nutritional information is based on third-party calculations and should be considered an estimate only. Actual nutritional content will vary based upon brands used, measuring methods, cooking method, portion sizes, and more.


Amy
Delicious. I have tried her White Cake, Chocolate Cake, vanilla cake pops, chocolate cake pops, Funfetti cake and meringue cookies. All are 5 stars. Next I will be trying her Angel Food cake!
Sam Merritt
Thank you so much, Amy! I’m so glad everything has been such a success. 🙂
erlapamillo
Love it easy recipe to follow and clear to understand.
Sam Merritt
I’m so glad you enjoyed them so much! 🙂
Mickey
Do you think I could use this for a bigger form? My grandson wants a chocolate cake with a baseball and bat on top. I was thinking about using the cake pop recipes to form the baseball and bat then covering in the melting wafer chocolate.
Sam
Hi Mickey! I haven’t tried putting it together in a larger shape, but I think it could work. It’s pretty mold-able. You can see the consistency in the video if that helps. 🙂
Connie
Hi Sam! Thank you so much for the cake pop recipes along with all your others!!!! These are a highly requested treat now and they are not as hard as I thought they’d be! Thank you for the easy to follow instructions, this are one of our favorites!!!!! I would like to try these in other flavors soon!
Emily @ Sugar Spun Run
We are so happy they are such a hit for you, Connie! Enjoy 🩷
Tess
Do you use oil when you melt the chocolate? Which kind is your favorite? the melt ones?
Sam
Hi Tess! I actually cover this in the post, just shortly above the recipe. 🙂
Yuliya
How would I go about freezing these? Put them in a box ? It’s ok if they are touching each other once frozenv
Sam
You could put them in a box or wrap each one individually and store in a freezer bag. 🙂
Yuliya
Awesome! Thank you, these came out great. Party is for Saturday and it’s only Tuesday so gonna give them a freeze in individual baggies! Than just thaw it out the night before in the fridge, is that the best way so they don’t taste like they been frozen before?
Sam
That is what I would do to thaw them. 🙂
Katie
These were a fail for me. Frosting and cake turned out yummy, but the cake pop shape did not hold up at all. I think I’ll try gradually adding frosting to the mix instead of all of it to see if that would help, since it did come out a bit wet. I’ll probably need to let the chocolate cool a bit longer than I did, too, to help keep its shape. Still a 5-star rating even though the structure didn’t turn out for me. It seems cake pops are a trial and error process.
Sam
I’m so bummed to hear that, Katie. I’d agree they can be a bit finicky but I’m disappointed to hear they didn’t turn out perfectly for you. I’m not sure if it will be helpful but I do include a step-by-step video in the recipe card that may help if you’d like to give them another try!
Anna
I am so exited on making this and I just want you to know I’ve been baking sense I was 5 and you made me inspired to follow my dreams and again I am so excited to make this thank you Sam for this recipe . THANKS
Sam
I’m so glad you’ve enjoyed everything so much, Anna! I hope you love these too! 🙂