
Scones
This post may contain affiliate links. As an Amazon Associate I earn from qualifying purchases. Please read my disclosure policy.

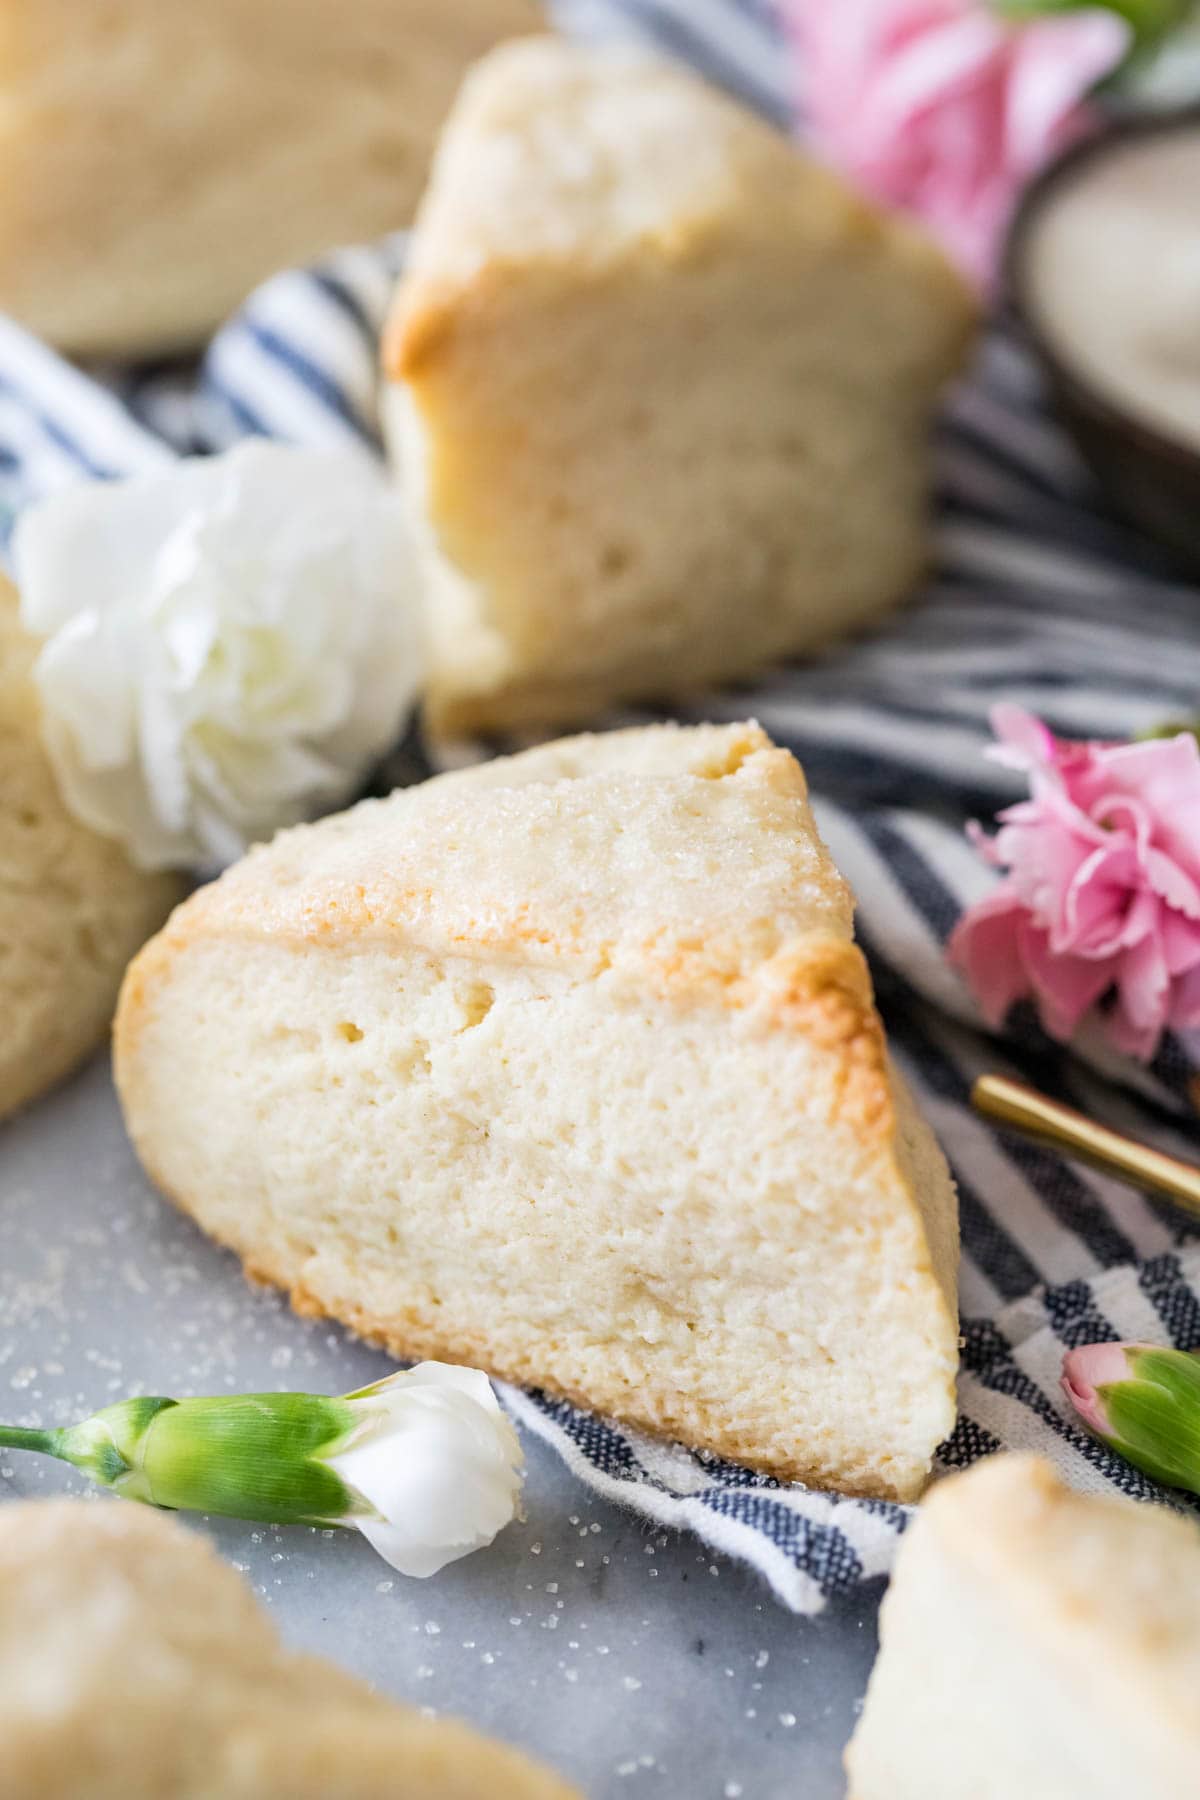
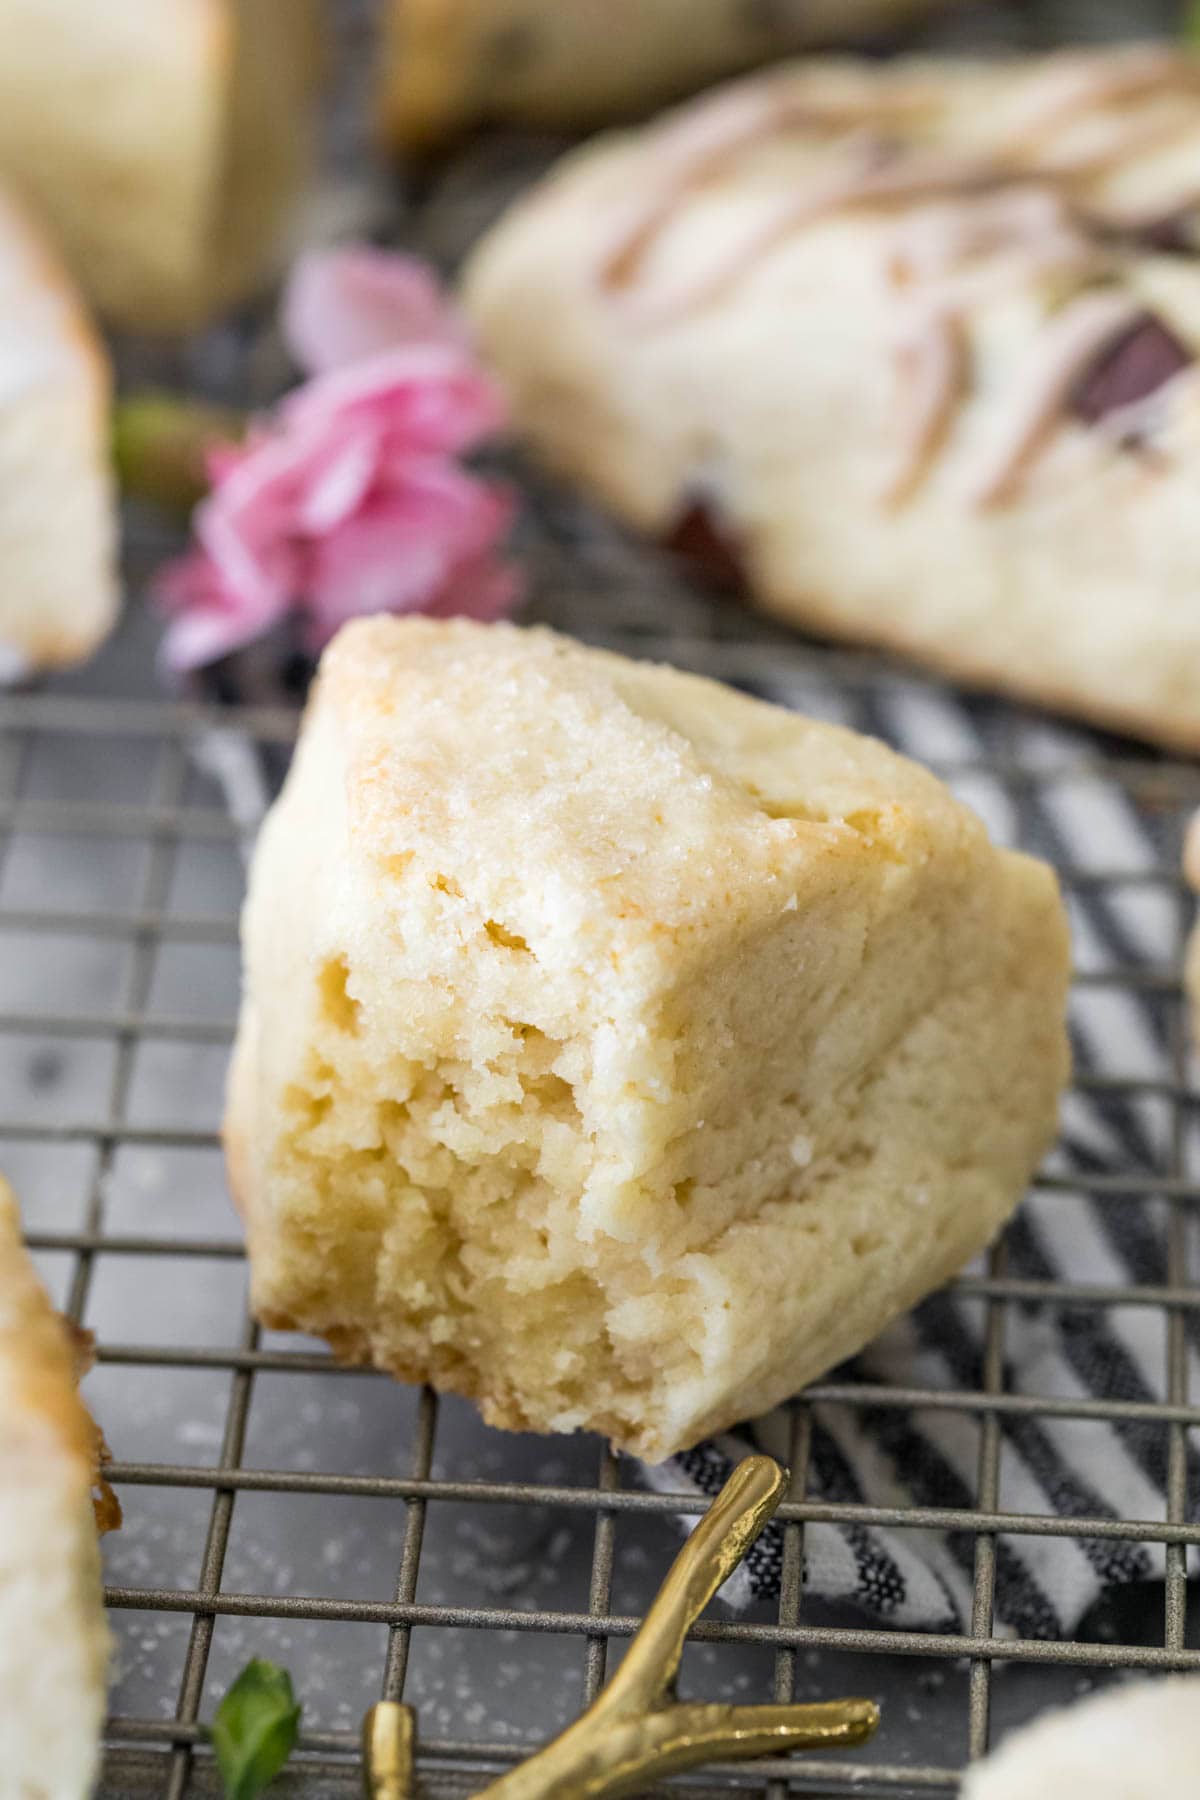
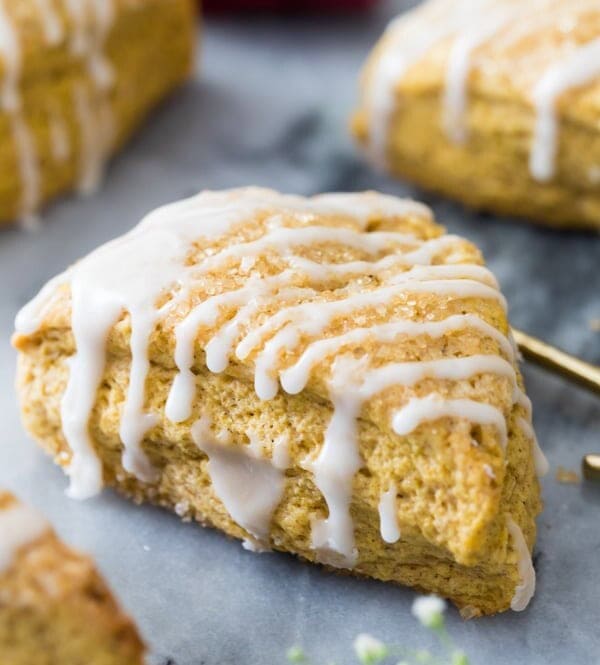
Look no further, you’ve found the best easy, foolproof recipe for tender, buttery, and perfect scones, ready in just 30 minutes! My recipe includes plenty of tips and tricks as well as a detailed video tutorial. Includes notes on how to add your favorite mix-ins like fruit, chocolate, or nuts, too!
A Simple, Classic Scones Recipe
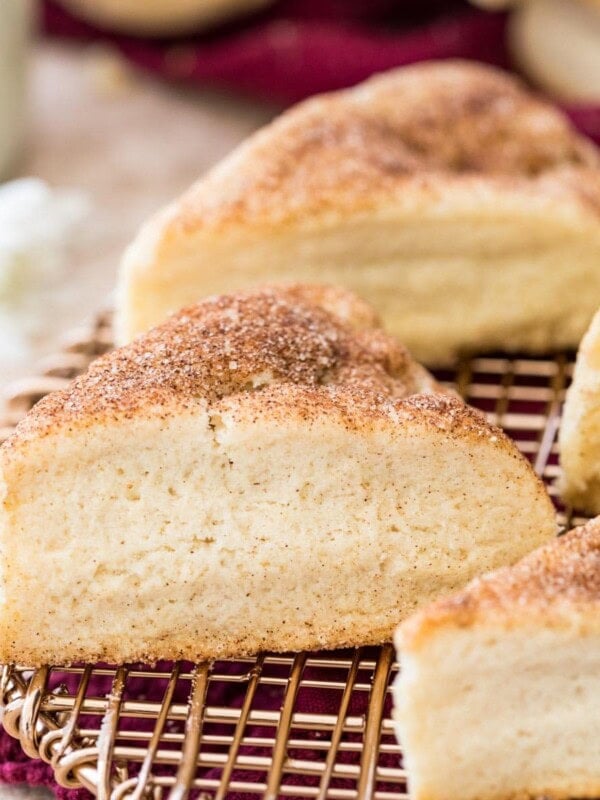
This quick and easy scone recipe makes flavorful, beautifully textured scones without any fuss. It comes together in minutes in a food processor (easy clean-up!) and yields professional, tea-party worthy results every time. They taste terrific plain, but can also be dressed up with add-ins or a sprinkle of sugar or a smear of jam.
If you’ve been too intimidated to make this wedge shaped treat in the past, you won’t be after trying my scone recipe. You’ve got this!
Why you’ll love this recipe:
- No pastry cutter needed! Instead we’ll use a food processor, which does all of the heavy lifting without overworking the dough. Note: I do also provide instructions for how to make them with a pastry cutter or grater, if you don’t have a food processor.
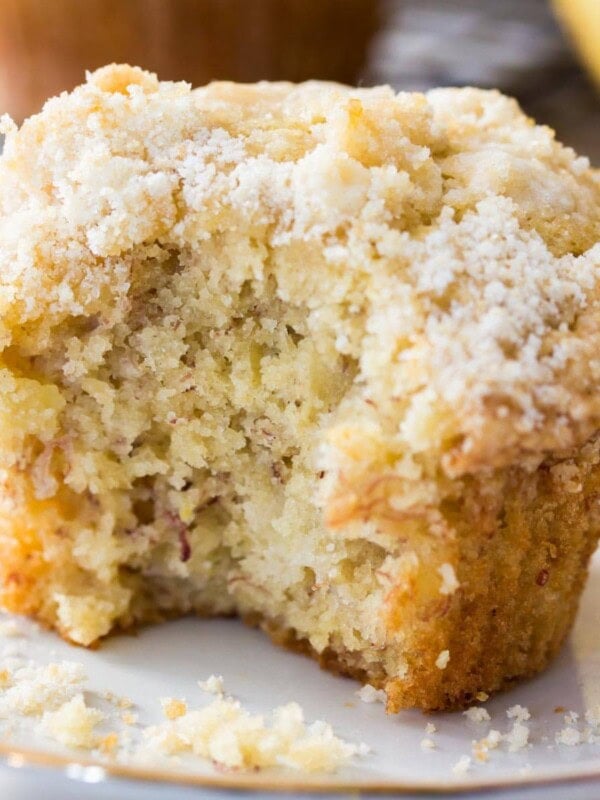
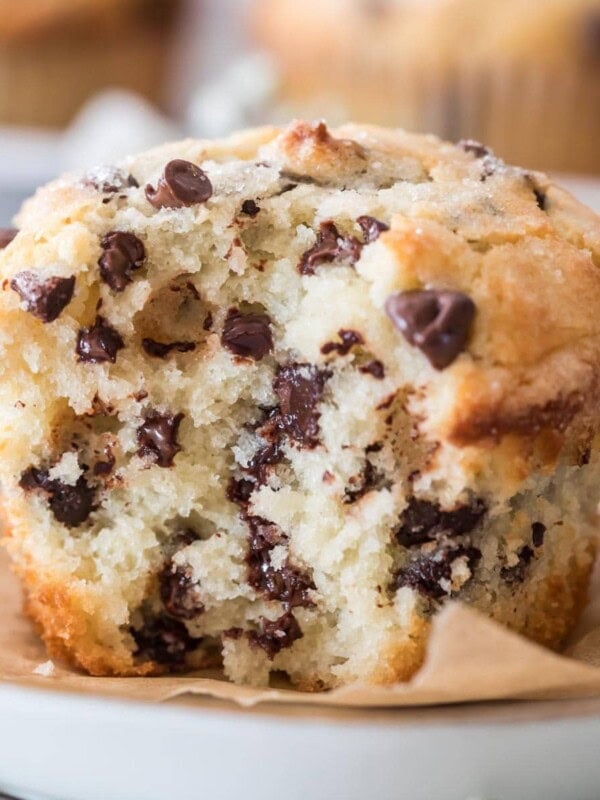
- Completely customizable. Frozen fruit (or fresh fruit, it’s just a bit messier), chocolate chips, dried fruit, nuts, or citrus zest are all great options. I’ve used this recipe for lots of different flavor variations such as my lemon poppy seed scones, chocolate scones, raspberry scones, and more! You can also omit the sugar and make a savory version–yum!
- No eggs. This is no accidental omission. I found that using eggs makes for less flaky and less melt-in-your-mouth results.
- Flaky, tender layers, thanks to a little laminating. This process is easy, and it’s great practice for when you want to try making biscuits or puff pastry 😉
What You Need
One of the best things about my scones recipe is that it uses basic ingredients that you probably already have on hand.
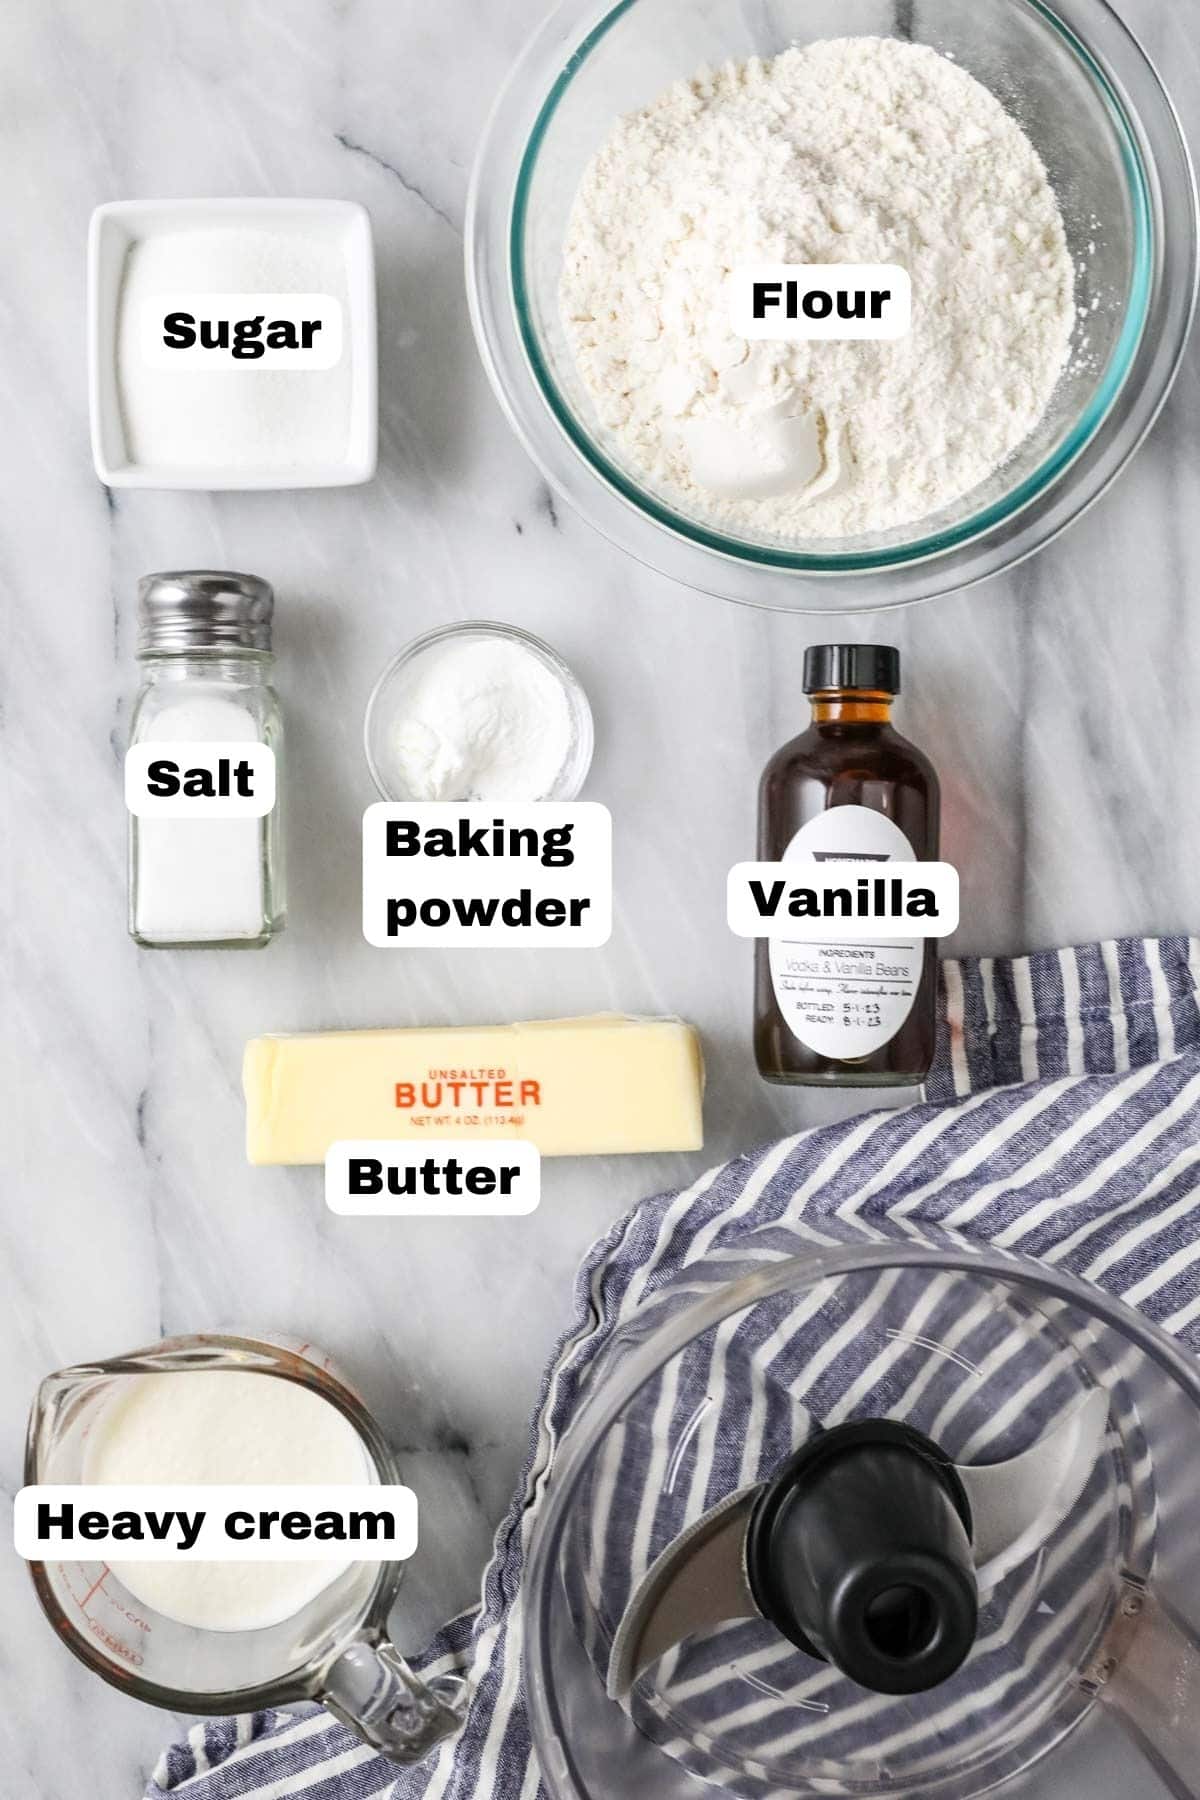
- Butter. Keep your butter as cold as possible, as cold butter pieces distributed throughout the dough makes for tender, flaky, and buttery layers! I like to freeze my butter for at least 15-30 minutes (or longer) before I begin.
- Flour. Do NOT use self-rising flour or your scones will become much too tall and tip over. Stick with regular, all-purpose flour (“plain flour” in the UK).
- Heavy cream. This helps bind everything together, much like an egg would, but the results are much more melt-in-your-mouth. Make sure to keep this nice and cold too!
- Sugar. A small amount adds sweetness, but not so much that you can’t add a vanilla glaze or sweet add-ins. I also add a splash of vanilla extract. You can omit or reduce these if you are making savory scones.
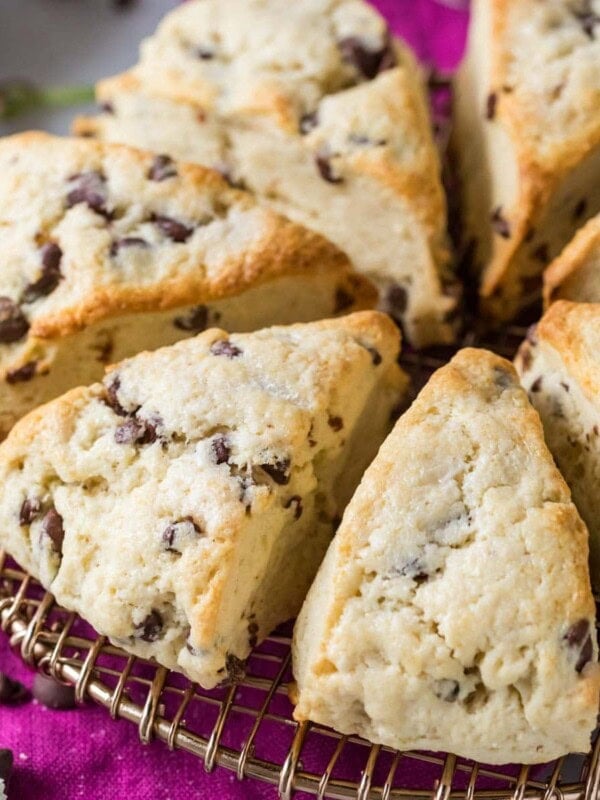
- Add-ins. These scones are great plain, but if you’d like, you can add chocolate chips, nuts, frozen fruit (fresh can get messy), etc. Cheddar cheese is a great addition for a savory version! Note that making this recipe with add-ins, especially moist add-ins like fruit, will result in a slightly longer bake time.
SAM’S TIP: If you can get your hands on it, I recommend using a high quality European butter in this scone recipe. It has a higher fat content and makes for especially delectable, tender results.
How to Make Scones

- Pulse the dry ingredients together in your food processor.
- Add the butter pieces and pulse until incorporated; the butter pieces should be no larger than a chocolate chip at this point.
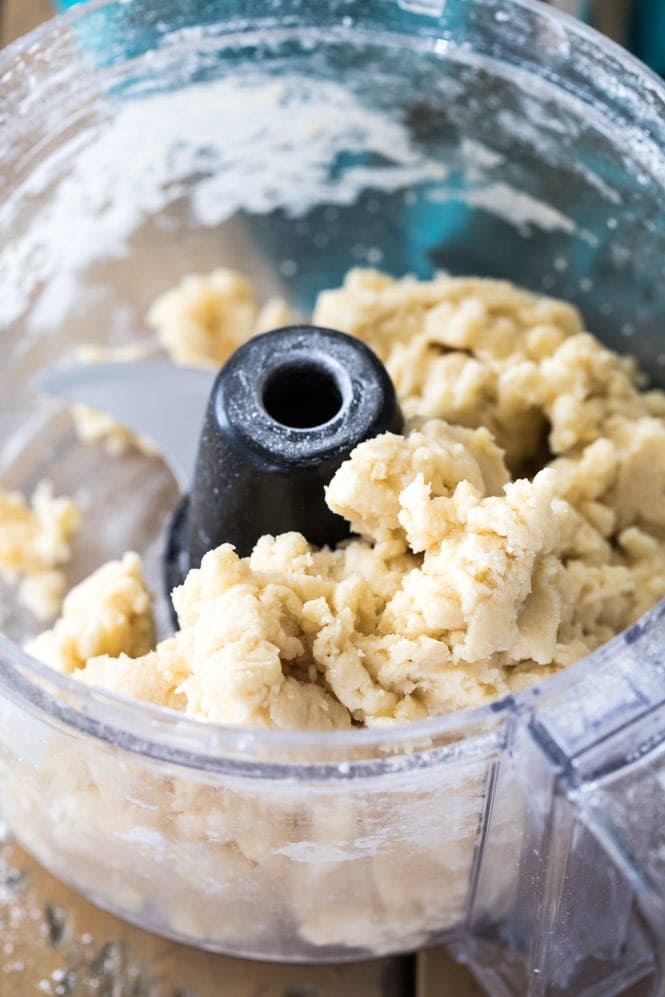
- Pour the cream and vanilla over the butter mixture.
- Pulse until your dough starts to clump together. You can test this by pinching some dough between your fingers–if it clings together, it’s ready!
It’s important to note that you should be pulsing the ingredients in brief spurts and not simply blending. Pulsing make sure everything gets evenly distributed. If you just blend everything, it won’t incorporate evenly and the batter will get too wet, too warm, and over-worked.
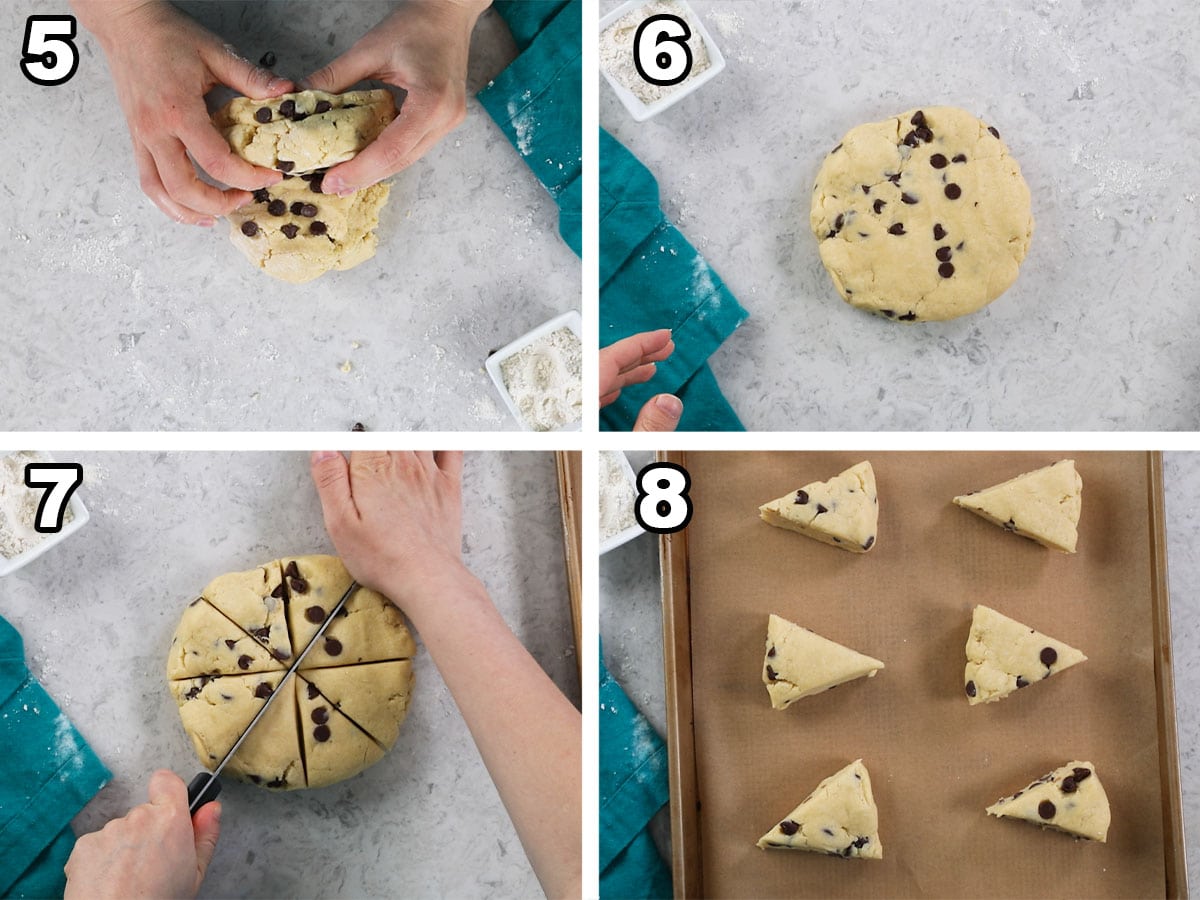
- Lamination: Turn your dough out onto a floured surface. Sprinkle any add-ins overtop, if using, and form it into a disc. Fold the dough over itself (add more add-ins here if desired), flatten, rotate 90 degrees, and repeat. Do this process about 5 times total.
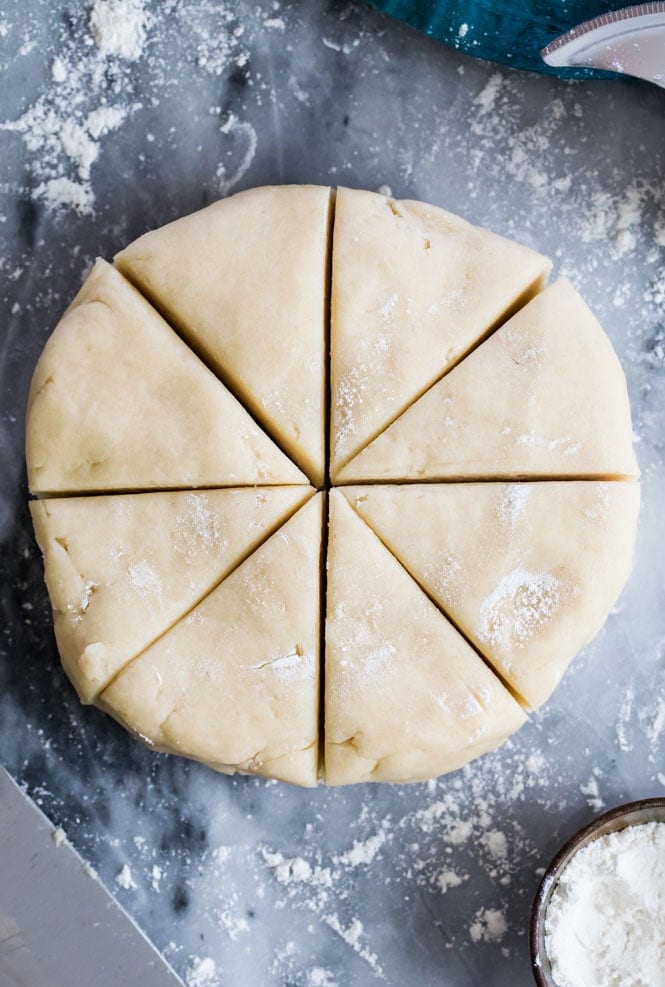
- Form your dough into a disc that is about 1″ thick and 6″ wide. Avoid over-handling your dough and don’t warm it up too much, or your scones could become flat and dense. The disc doesn’t need to be super smooth.
- Cut the disc into wedges, pressing straight down with a sharp knife–do NOT saw! If you do, then your scones may tip over in the oven or have messy edges.
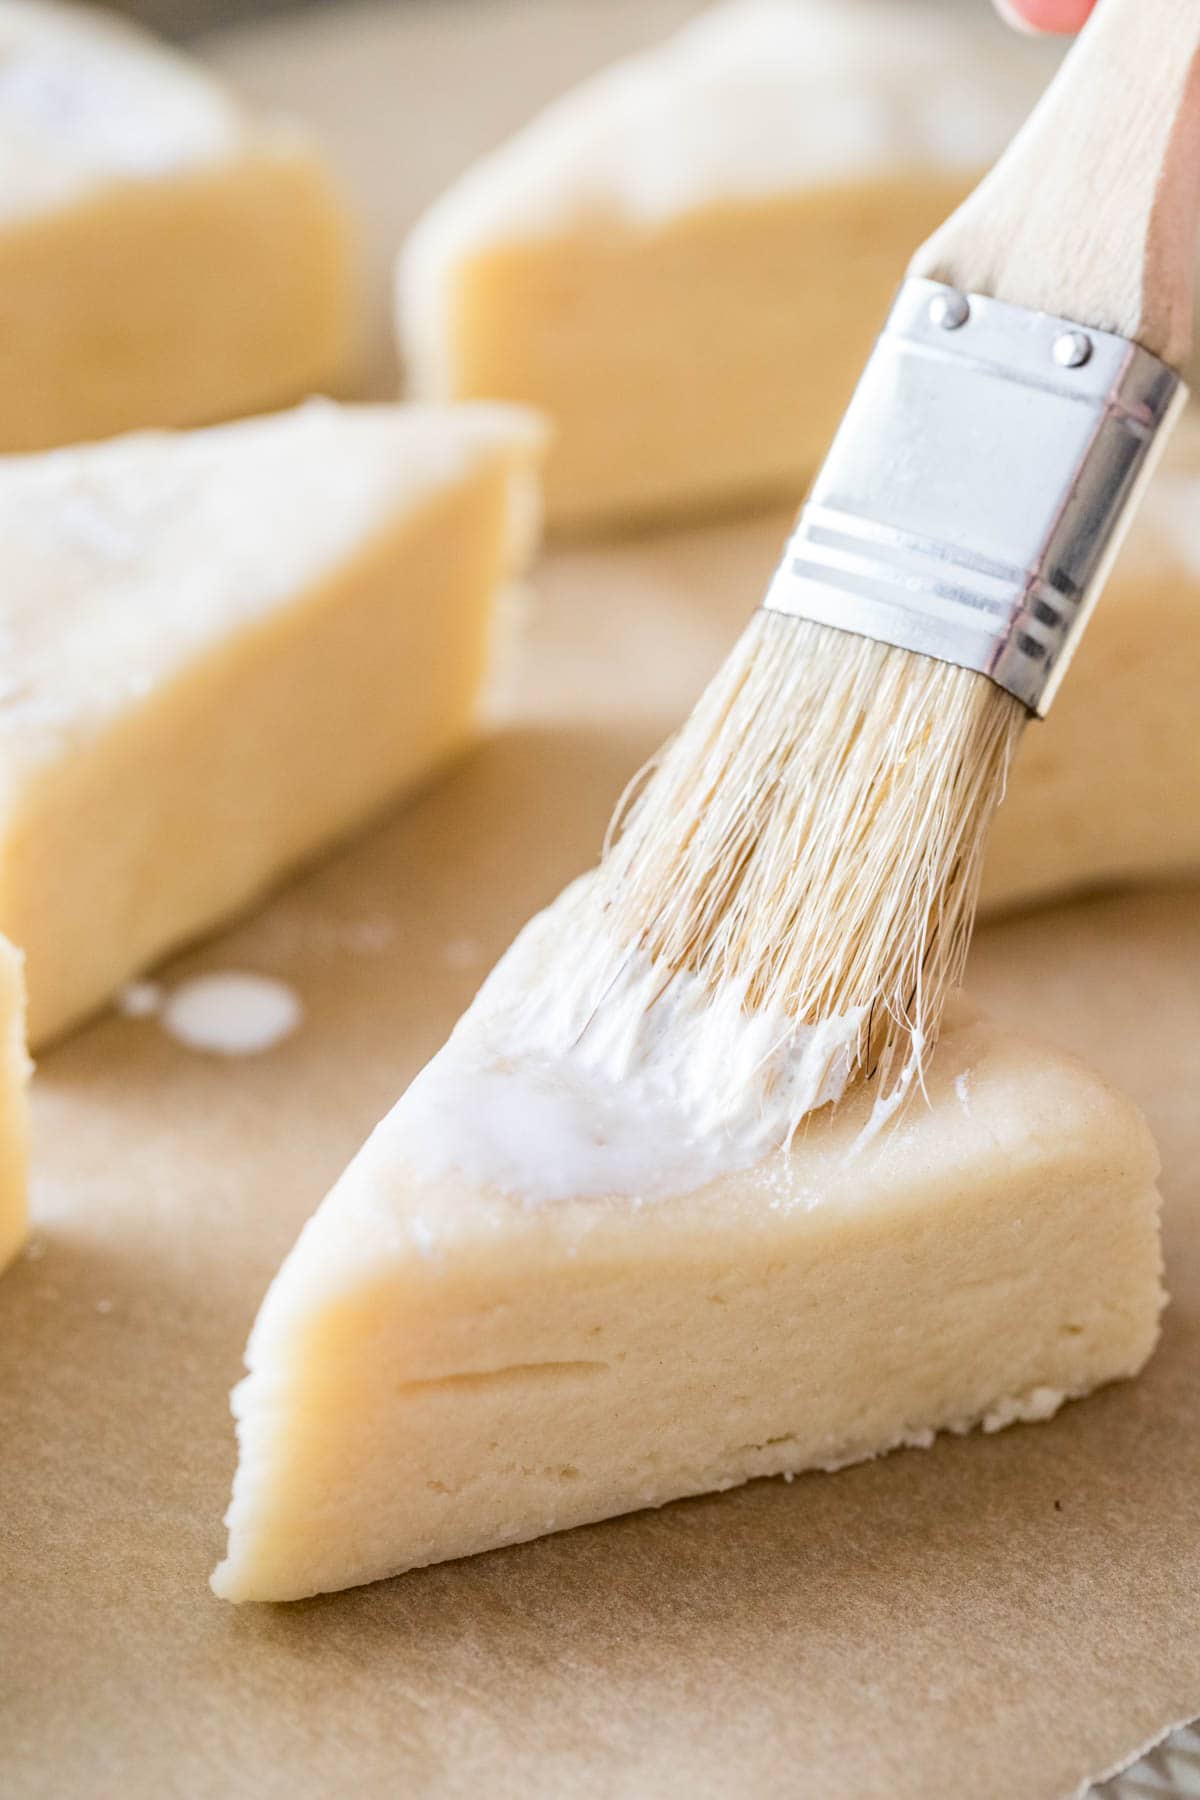
- Place the scones on your baking sheet, brush them with cream, and sprinkle with sugar. Bake until light golden brown and let cool slightly before enjoying.
SAM’S TIP: If your dough gets too warm during the lamination process, you can pop your scones in the freezer for 10-15 minutes before baking. It’s very important that your dough stays nice and cold!
Frequently Asked Questions
You can use a grater or a pastry cutter to cut the butter into the flour instead; however, your dough will be very dry and will require more effort to come together. I provide more detailed instructions for this in the recipe below.
Yes! To do this, prepare your dough as instructed, then wrap in cling wrap (or place in an airtight container) and store in the refrigerator for up to 3 days or in the freezer for up to 3 months.
If baking from the refrigerator, you can follow the recipe as written. If baking from frozen, the scones may need a few extra minutes in the oven. I always wait until just before baking before brushing them with cream and sprinkling with sugar.
Yes! To freeze baked scones, let them cool completely after baking. Once they’ve cooled, transfer them to an airtight container (I like to loosely wrap each scone in wax paper or parchment paper so they don’t stick together) and enjoy within 3 months.
This scones recipe is tasty enough to be served plain, but a little honey butter, strawberry sauce, or whipped cream on the side never hurts!
Enjoy!
Let’s bake together! Subscribe to my newsletter to be notified of all the newest recipes, and find my free recipe tutorials on YouTube 💜

Scones
Equipment
Ingredients
- 2 cups (250 g) all-purpose flour
- ¼ cup (50 g) granulated sugar
- 2 teaspoon baking powder
- ½ teaspoon salt
- ½ cup (113 g) very cold unsalted butter, I like to place my butter in the freezer 15 minutes before beginning to ensure it is cold
- ½ cup (120 ml) heavy cream
- ¼ teaspoon vanilla extract
- ½ cup add-ins, optional: frozen berries, chocolate chips, nuts, etc.
- Additional heavy cream for brushing over scones, optional
- Additional sugar for sprinkling over scones, optional
Instructions
- Preheat your oven to 375F (190C) and line a baking sheet with parchment paper. Set aside.
- Combine flour, sugar, baking powder, and salt in the basin of a food processor and pulse to combine.2 cups (250 g) all-purpose flour, ¼ cup (50 g) granulated sugar, 2 teaspoon baking powder, ½ teaspoon salt
- Cut butter into Tablespoon-sized pieces and scatter over flour mixture, pulse until butter is cut up into the flour mixture and butter pieces are no longer visible.½ cup (113 g) very cold unsalted butter
- Combine the cream and vanilla extract in a measuring cup and pour heavy cream over your flour mixture.½ cup (120 ml) heavy cream, ¼ teaspoon vanilla extract
- Pulse until dough begins to clump together.

- Transfer dough to a lightly floured surface and (handling lightly, as you don’t want to over-work this dough) add any add-ins at this point, gently working them into the dough. Fold the dough in half over itself and use your hands to gently flatten layers together. Rotate the dough 90 degrees and fold in half again, repeating this step 5 times and taking care to not overwork the dough.½ cup add-ins
- Form the dough into a smooth disk about 1″ thick by 6″ round.
- Cut the disk into 8 wedges, pressing the knife straight down with each cut.

- Transfer wedges to prepared baking sheet and place about 2" apart. Brush lightly with cream and sprinkle with sugar.Additional heavy cream for brushing over scones, Additional sugar for sprinkling over scones
- Bake on 375F (190C) for 14-16 minutes or until edges are just beginning to turn golden brown. Don’t over-bake your scones or they will be dry and tough.
- Allow scones to cool on baking sheet before serving and enjoying.
Notes
¹Food Processor
If you don’t have a food processor you can make the scones by whisking together the flour, sugar, baking powder and salt. Cut the butter into the dry ingredients with either a pastry cutter, box grater, or pair of knives. Whisk together heavy cream and vanilla and pour over and stir until well-combined. The dough will be very dry but will come together with some effort. If absolutely necessary you can add a bit more cream, a splash at a time.Storing
Scones are best enjoyed fresh, but you can store in an airtight container at room temperature for up to 3 days. See the FAQ section in the post for instructions on freezing scones (before or after baking).How to Make Lemon Scones
Add 1 Tbsp of fresh lemon zest into the dough with the butter Once scones have cooled, dip in a simple glaze made of 1 1/4 cup (160g) powdered sugar, 1 1/2 Tablespoons (20ml) lemon juice, 1 1/2 teaspoons of water, and 1/4 teaspoon of vanilla extract.Nutrition
Nutrition information is automatically calculated, so should only be used as an approximation.
Like this? Leave a comment below!
I originally published this recipe many years ago, but have just updated it as I thought it could use a new video and some updated tips and tutorial photos.


easiest recipe and delicious
hi love your recipes and commentary. recently has a diabetes diagnosis, therefore wondering I can sub whole wheat flour for the AP? I love scones so am wo during if the ratio would be 1:1 or half and half as I read this somewhere.
Hi Mary! Whole wheat flour is a bit “thirstier” than all purpose flour so it has the potential to dry out the scones. Without having tried it, I can’t say for sure how to do it. I think some other alterations would be needed. 🙁
This is my favorite scone recipe. You’re so detailed in your instructions, which helped immensely the first couple of time I made these scones. Thank you for such a yummy recipe!
We’re so happy to hear it, Lauri! Thanks for the review ❤️
I just fell in love with this recipe! Best base for strawberry shortcakes. Yum
I make bisquits all the time. But this is the first time to make scones. the process is very similar, and as I dont have a food processor, I just mix and finish by hand. the scones were light and very tasty. The grandkids loved them. we all did. No pics–they were all eaten very quickly
This is the second time I have made these. They are delicious! Both times the butter has melted out of the scone dough as it is baking! Leaving wedges of wedges with large holes. And they go from being lovely tall wedges to almost flat triangles. By the time they are due to come out of the oven the butter has crisped up the bottom edges which is actually pretty delicious! Anyway I just want to make beautiful scones that look more like yours! Tall beautiful wedges! The only difference to my approach is that I don’t have a food processor so I have been putting them together by hand. Help if you can!!💕💕💕
I’m so sorry this is happening, Melinda! It is likely caused by working it together by hand. The butter is probably being too warmed during the process. 🙁
I mix mine by hand also but after cutting them I put them in freezer for at least 20 min. Mine did the same as yours but doing the freezer, I got tall pillowy scones!! AMAZING RECIPE!! Thank you!!!
My wife has been pestering me to make some apple / cinnamon scones. I’m normally a biscuit guy but I told her I’d give it a shot. I tried several recipes till I settled on yours. I made the following modifications. I added 1 tsp. apple pie spice mix. I added about a third of a cup of grated apple and a quarter cup cinnamon bits. (I pressed the grated apple between paper towels) I pulsed in the add-in’s after the butter. I cut the scones in 8 wedges and placed them on a half sheet pan in the same round pattern with about a third of an inch between them. I brushed them with buttermilk and sprinkled some demera sugar on top. I started them at 425f for 8 minuets and then lowered the temp. to 375f. I cooked them for an additional 11 minuets till they reached 200f. My wife declared them ‘a keeper’
Love this recipe. I add a tablespoon of lemon juice and it seems to make them more tender.
I’ve used your scone recipe twice and both times I needed to add extra cream to bring the dough together in the food processor. I was also surprised by how little they rose. That being said they really are delicious.
These are so good and have made several times but I am wondering why only 1/2 cup cream as I have had to add at least a cup to get dough to come together. Am I doing something wrong?
Hi Joanne! I’m glad you’ve enjoyed them! Do they spread a lot with a cup of cream in them? Are you weighing your flour?
Mine don’t come together in the food processor like they do on her video. I spoon and level my flour carefully. I use a bit more than a 1/2 cup cream. Dough comes together by hand on my pastry mat with a little work. I make my disk and put in the freezer about 15 minutes before slicing and baking
Delicious! This recipe is super simple, and incredibly versatile, the scones were perfect! I added orange juice and zest to the dough, as well as to a glaze I made to go on top, and it was great!
Excellent New Year’s Day scones. The food processor made it so easy and almost fool-proof. I also liked that there was no egg in the dough.
We’re so happy you enjoyed the scones, Susie! Sounds like a delicious New Year’s Day tradition 😋
I’ve made many scones over the years but none were as authentic as this recipe. Made them plain with the sugar and cream topping and absolutely love them. Will be making for Christmas Eve with dried cranberry and pistachios…already know they’ll be a hit.
I’m having a tea party in a week. Want to make these tonight and will freeze them. Do I need to defrost before baking?
Hi Becky! You don’t have to thaw them to bake them, but just keep in mind it will take several more minutes to bake. 🙂
can I substitute whole milk or whole milk Greek yogurt for heavy cream? want to make healthier, less fat, other suggestions th as to won’t mess these up?
Hi Robin! Others have used milk instead of heavy cream with success. Hope this helps!
I’ve made these using your recipe about five times and they are always wonderful! I was wondering if I can use whole wheat flour as a substitute and if so, what adjustments to the recipe would I need to make?
Hi Stephanie! I haven’t tried whole wheat flour here. It’s a bit “thirstier” so may need alterations, but without having tried it myself, I can’t say for sure what they would be. Let me know how it goes if you try it. 🙂
wondering if gluten free flour will work and non dairy…gonna try. have to.
Hi Lea! Did you try the gluten free flour? I would love to know how it turned out. 🙂
wonderful recipe and so easy…takes very little time from start to serving. The only change I made was substituting 1/3 Cup kefir for the cream. I used a bowl and spoon instead of my food processor.
This will be my go to recipe from now on! Thank you.
Have you made this recipewith cheese?
Hi Karen! I have not made it with cheese but you would just want to follow the instructions in step 6 to do so. You shouldn’t have any issues. 🙂
I was intrigued when the recipe called for heavy cream. I added chopped walnuts, golden raisins, chopped dried cherries, and almond filling, topped off with toasted sliced almonds. WOW. It sounds like a lot of mix-ins but it gave them a nice texture and the perfect amount of sweet since I only used half the sugar. AMAZING!!
I’m so glad you enjoyed them so much, Maggie! 🙂