
Kitchen Tips: Make Your Own Sprinkles
This post may contain affiliate links. As an Amazon Associate I earn from qualifying purchases. Please read my disclosure policy.
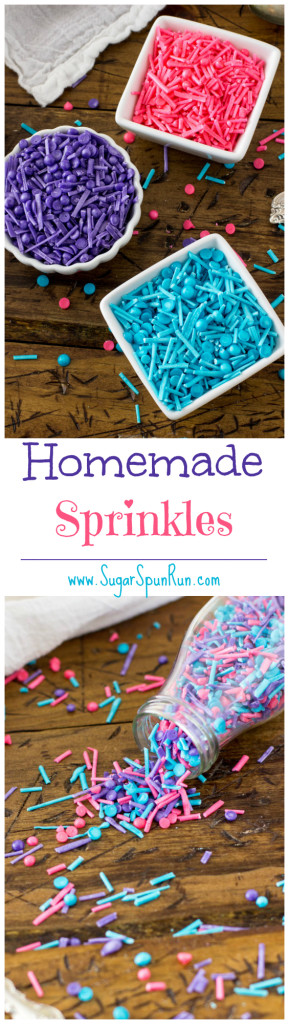
Learn to make your own sprinkles (or “jimmies” or “hundreds and thousands”) and never run out! Customize the color and sprinkle them over your favorite baked goods.
Every Thursday the local radio station asks people to call in and talk about their simple pleasures. I’ve never called in (as one of my simple pleasures in life is being able to text and actually speak on the phone as little as possible) but it always manages to elevate my mood a notch or two.
I am definitely a person whose day can be made by a simple pleasure, and I do mean simple.
I consider my day made if a squirrel or a chipmunk scurries across my path while I’m walking (fuzzy rodents make my heart melt), or if I find my believed-to-be-lost tube of Carmex in my pocket.
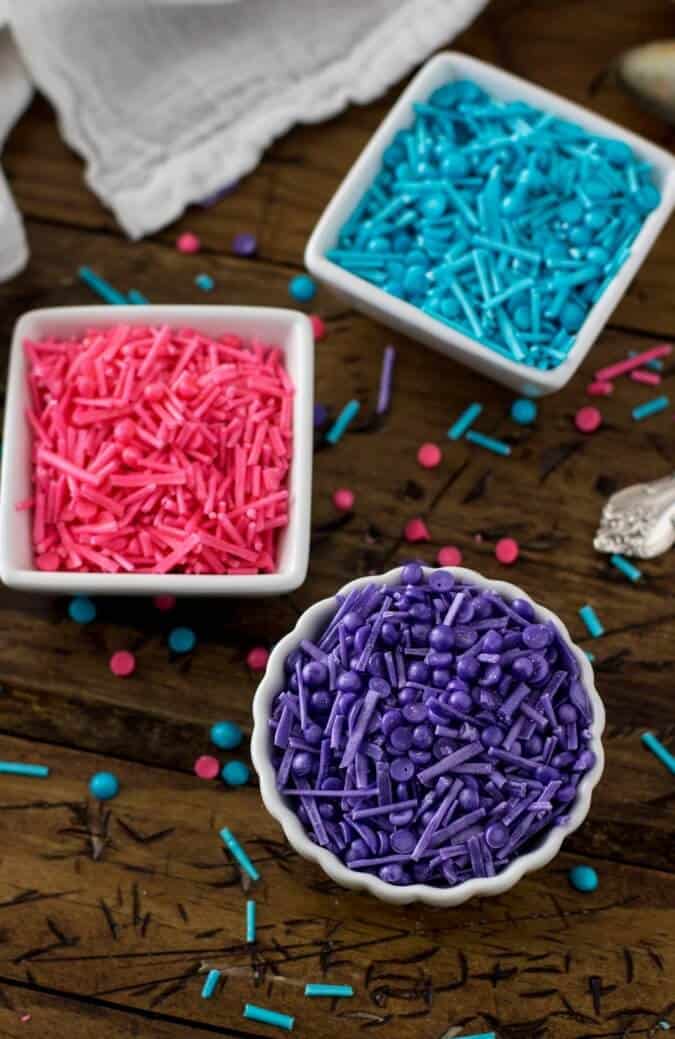
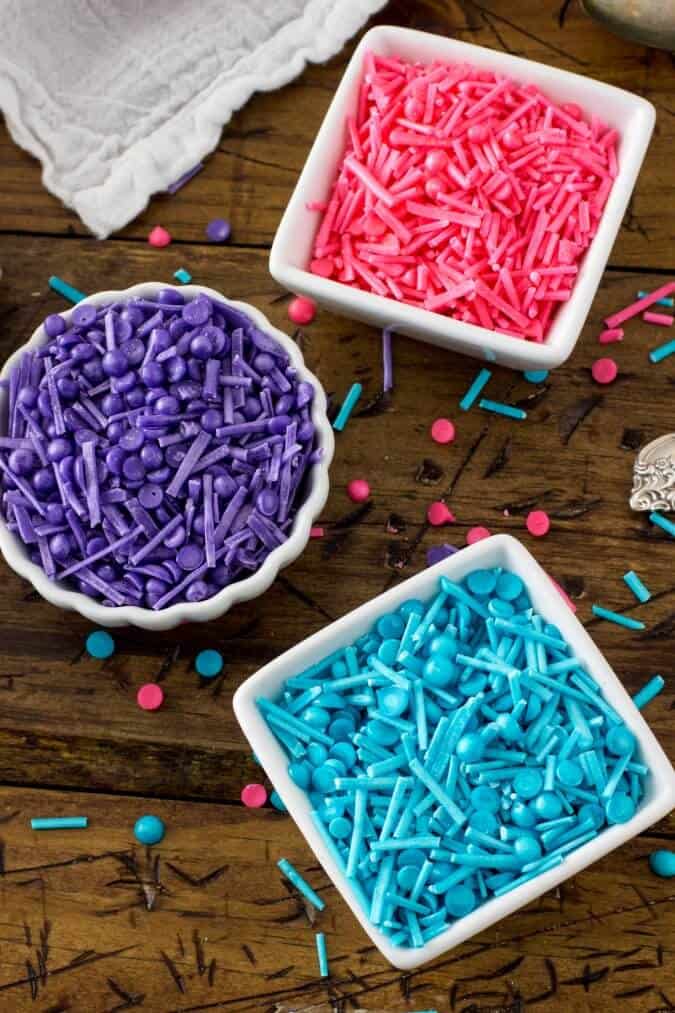
Another simple pleasure? Sprinkles. Lots & lots of them.
Whether it’s ice cream, or cupcakes, or a buttercream lathed cake, sprinkles always make things better (hence why I have so many Funfetti recipes on my blog).
This weekend I needed sprinkles for a recipe I was making, but I very specifically (and for no good reason at all) wanted particular colors that I didn’t have on hand. Fortunately, a quick look at the ingredients on my bin of (so-called “rainbow”) sprinkles made me realize that they’re actually made of some pretty basic ingredients, and I could probably tackle the recipe on my own.
So now, many attempts later, I have a simple, easy sprinkle recipe to share with you.
I took a lot of pictures to walk you through the steps, though they’re not difficult. The hardest part is waiting for the sprinkles to harden (I suggest waiting at least 12 hours, though yours may be done faster, or take longer).
So let’s begin.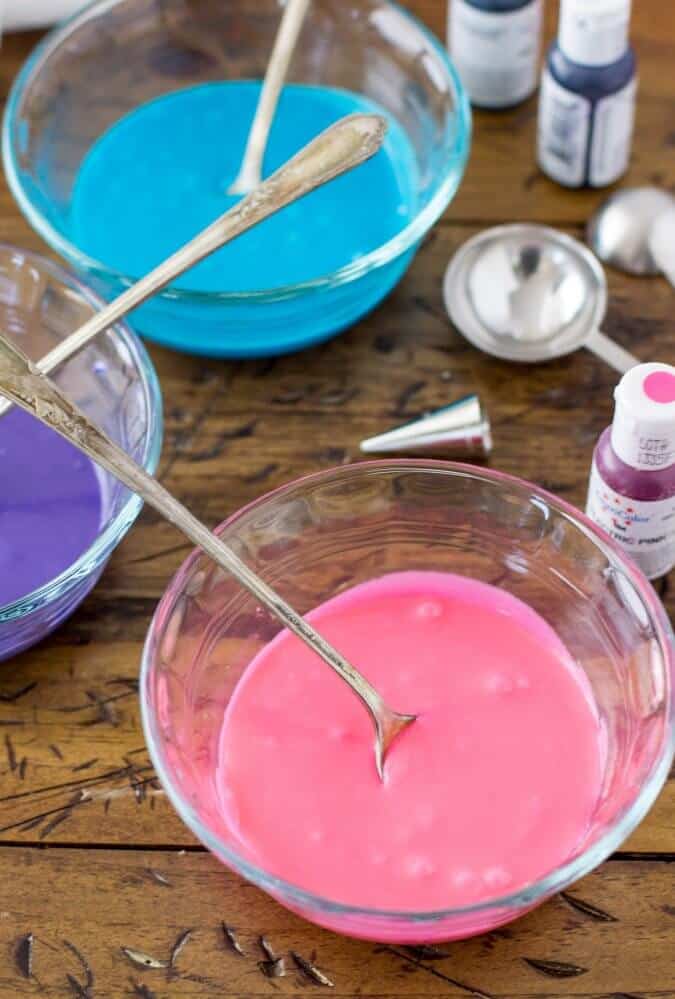
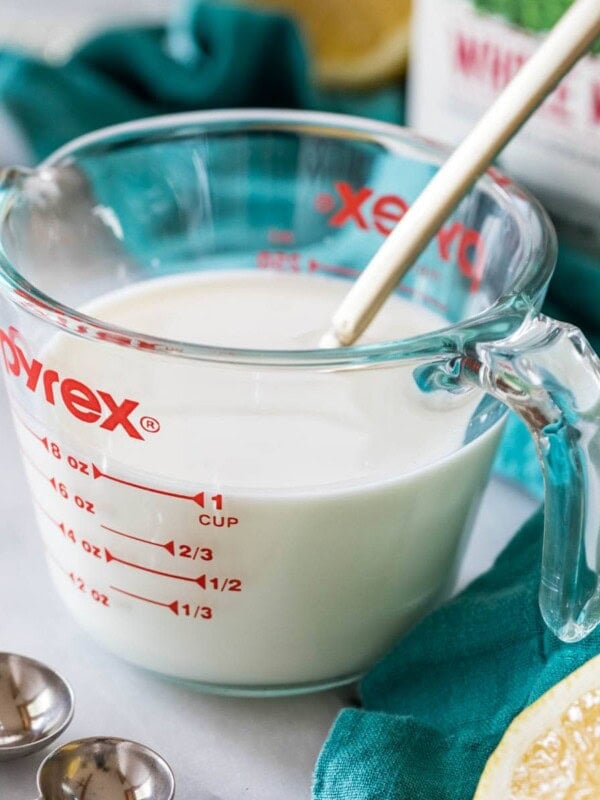
The first step is to combine your sugar, corn starch, water, corn syrup, and vanilla extract (or whatever extract you prefer!) in a medium-sized bowl following the recipe at the bottom of the post (don’t put all the sugar in at once, it becomes too difficult to stir). If you want, you can then divide the mixture into separate bowls and color each separately to have several different colors of sprinkles. I found that one batch makes about 1/2 – 2/3 cup sprinkles, so depending on how many sprinkles you want you may wish to do multiple batches rather than divide the one batch.
Add your food coloring of choice and stir well. I used a gel food coloring which gives a very deep, vibrant color. Just remember, the more food coloring you add, the more you will be able to taste it in the final product, I don’t recommend more than 1 1/2 chocolate-chip-sized drops (max!).
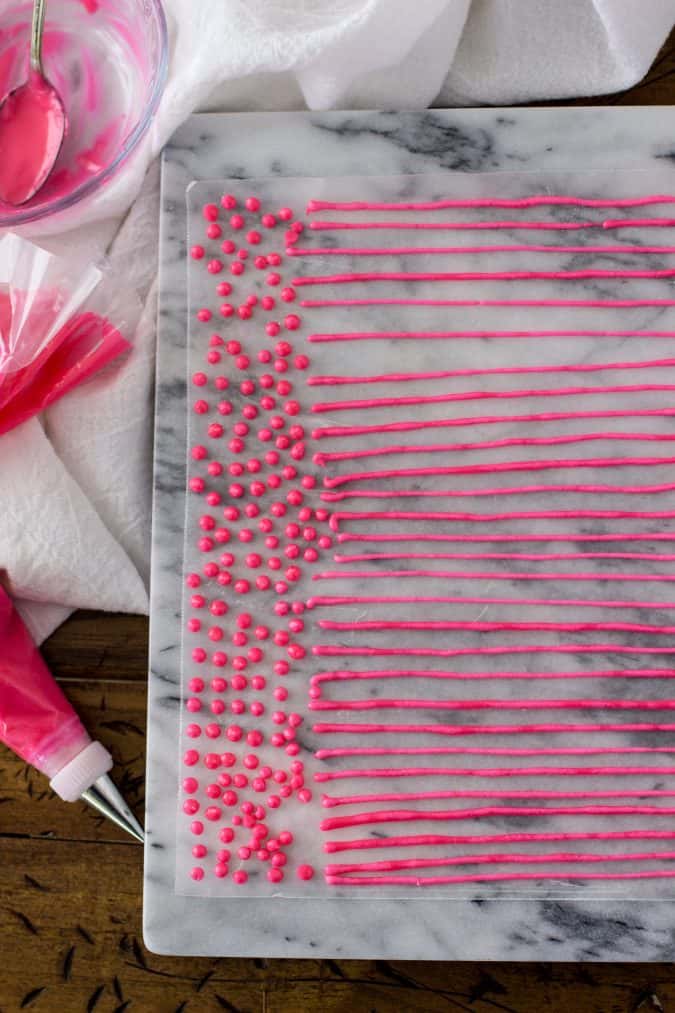
Next, transfer your mixture into a piping bag fitted with a #4 Wilton tip. If you don’t have this specific tip, you could also get away with using a similar size, or with cutting a small (sprinkle’s-width) hole in the tip of a ziploc bag and using that. Just be careful using a Ziploc bag, as the sprinkle mixture is thick and may cause the Ziploc bag to burst if squeezed too hard.
Line two cookie sheets with wax or parchment paper and draw long horizontal lines across the paper. As you’re making them, take note that they are the width that you desire. Try to keep your lines as straight as possible, but don’t stress if they’re a little wobbly (like mine are). When you break them up you won’t be able to tell!
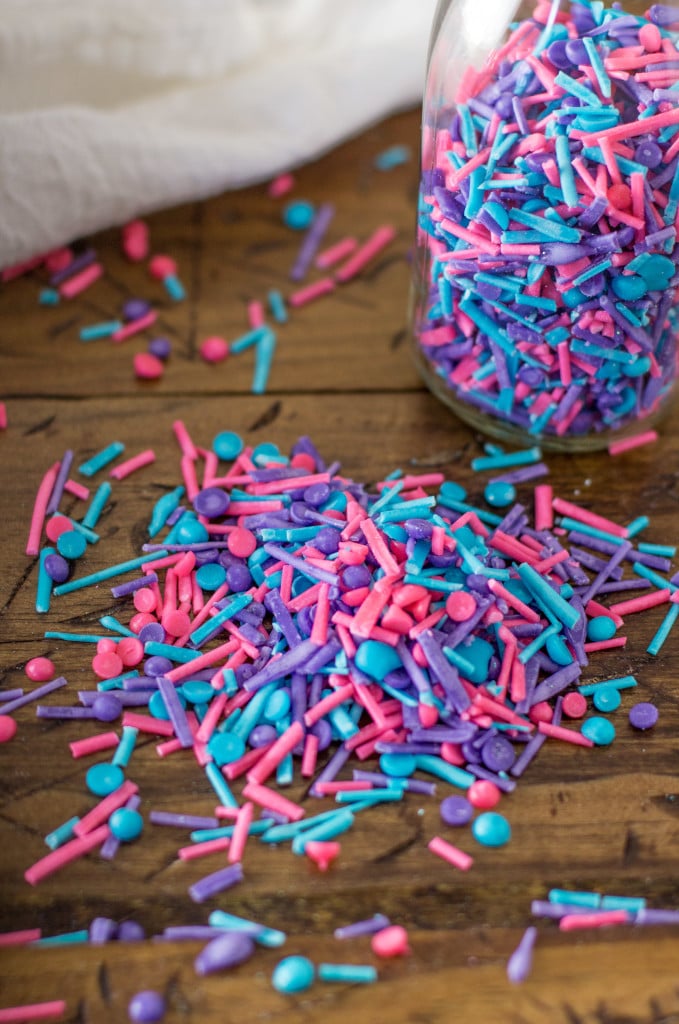
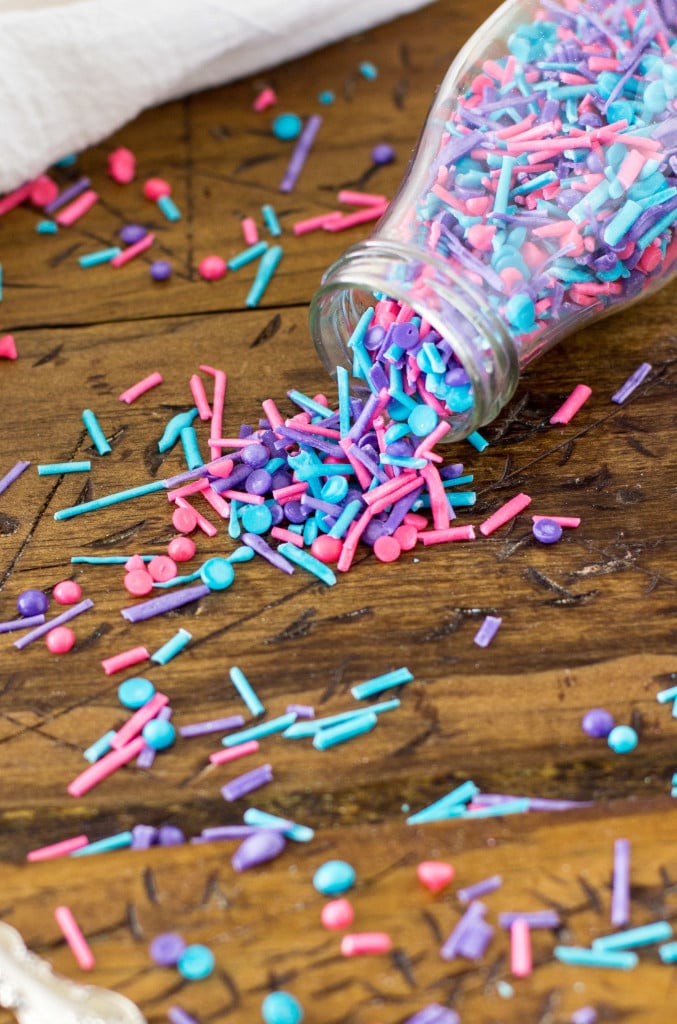
Also, as you can see here, I made some of my sprinkles into cute half-spheres by making small dots alongside the lines. I think it added some nice variety to the traditional sprinkle shapes.

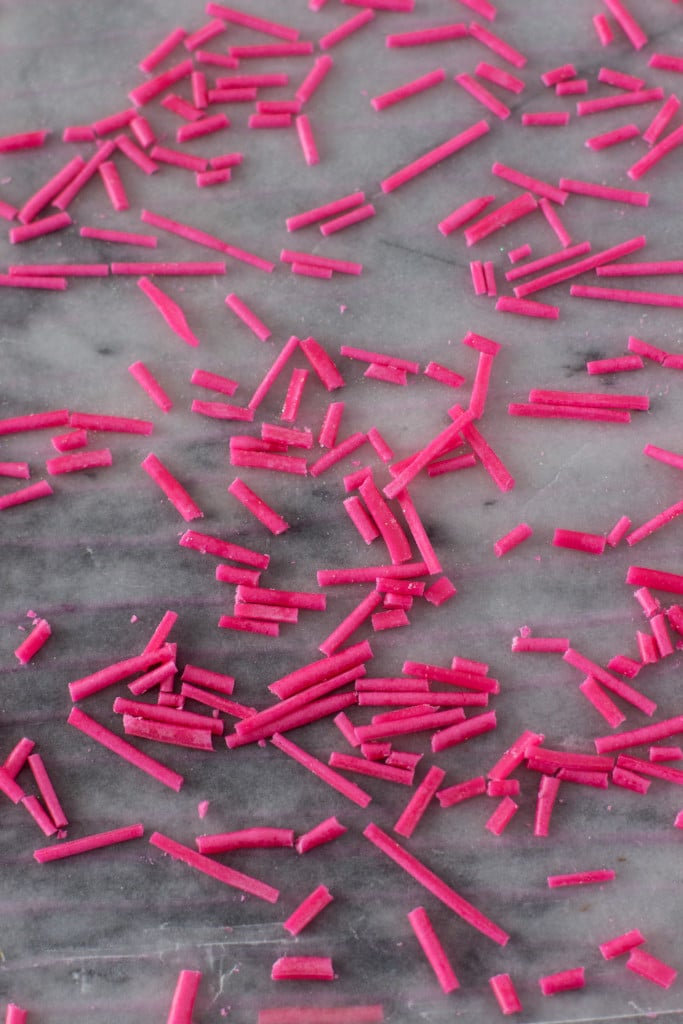
Now comes the hard part — waiting. You are going to have to wait at least 12 hours for these to dry and harden completely.
Once they’ve dried, peel off any dots that you’ve made and then use a large knife to cut down your rows to make your sprinkles! You decide how long or short you want them to be. The ends of my rows were a little sloppy, so if yours are too you can cut them off first and discard (or shamelessly eat all of them).
And that’s it! Combine your colors as you please and sprinkle away. These keep well in a sealed airtight container.
More Recipes You Might Enjoy:
Who knew you could make sprinkles from scratch?
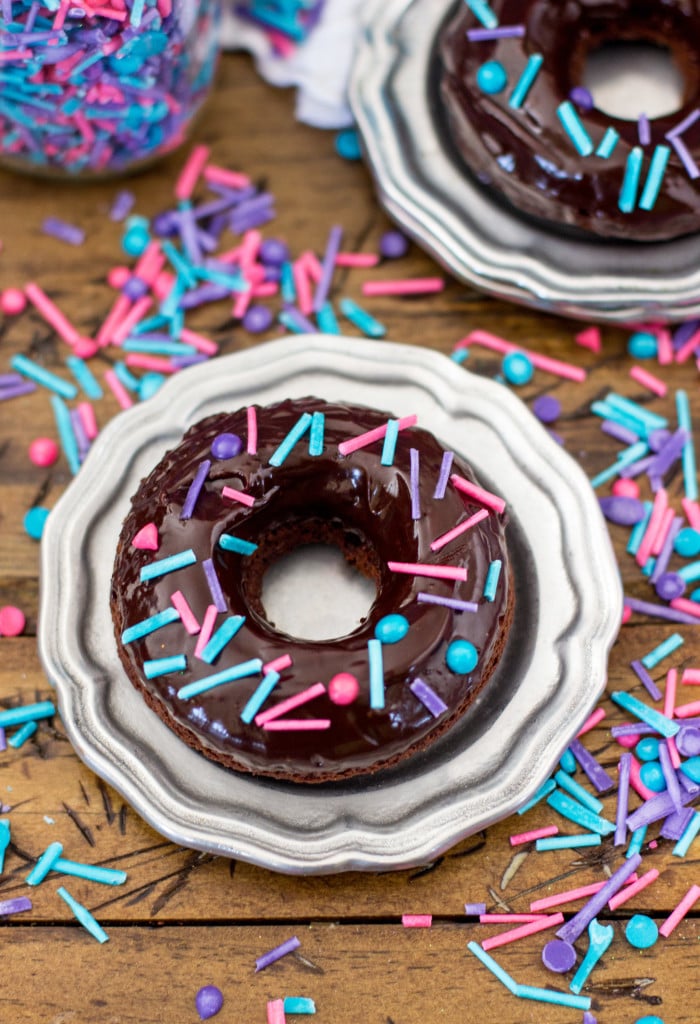
Scroll down below the recipe for a sneak peek at my next post where I used these sprinkles to their full advantage.
What’s your simple pleasure?
Make Your Own Sprinkles
Ingredients
- 1 ½ cups powdered sugar, divided
- 1 Tbsp cornstarch
- 1 ½ Tbsp water, not hot water
- 1 Tbsp light corn syrup
- ½ tsp vanilla extract, (or any flavor you prefer -- vanilla goes with pretty much anything, though)
- Gel food coloring
Instructions
- In medium-sized bowl, stir together 1 cup powdered sugar, cornstarch, water, corn syrup and vanilla extract until well-combined.1 ½ cups powdered sugar, 1 Tbsp cornstarch, 1 ½ Tbsp water, 1 Tbsp light corn syrup, ½ tsp vanilla extract
- Stir in the remaining ½ cup powdered sugar.
- Add food coloring and stir until well-combined and desired color is reached (remember, the more coloring you add the more you will be able to taste it in the final product).Gel food coloring
- Transfer mixture into a piping bag fitted with a #4 Wilton tip*.
- Line two cookie sheets with wax or parchment paper and, using your piping bag, draw long, sprinkle-width horizontal lines across the paper. If desired, also make small dots (about the size of a pencil eraser) along the sides of the wax paper for some variety in shape.
- Allow to set undisturbed for at least 12 hours to dry.
- Once dried, peel off any dots or shapes you have made and then use a knife to cut down your horizontal lines to make sprinkles.
- That's it! Sprinkle over your favorite treats! These keep well in an airtight container.
Notes
Nutrition
Nutrition information is automatically calculated, so should only be used as an approximation.
Like this? Leave a comment below!


How long do you think these are good for? Thinking of making ahead for my son’s birthday cake.
Will the sprinkles take a shorter time to set if I put them in the fridge or freezer? If so, how long might they take? And if not, what could I do to speed up the process? I also added a little more vanilla because they kinda tasted like powdered sugar.
Thanks for the recipe!
I’ve only let them air dry before so I’m not sure how they would work in the fridge or freezer, sorry Kendra!
This is a brilliant idea!
I like to use sprinkles when I bake. I like Jimmies especially since they don’t have a very hard texture and the chalky ones that do, since they add a bit of crunch. But when I make cookies, I think the best thing to use is the Jimmies because they don’t offset the texture or the cookie.
I am just wondering if the texture of these sprinkles is soft or super-hard?
Thanks!
They’re honestly very similar to the texture of storebought sprinkles. Not too soft and not too brittle 🙂
Hi Sam,
Can I use regular (liquid) food dye instead of gel food dye? Or won’t liquid food dye not set right? Thanks!
That shouldn’t be a problem! The colors just aren’t quite as vibrant with the liquid food dye.
Thank you! It’s a fabulous recipe. Tastier than a couple others I tried. I went a little crazy and made about 8 batches! Thankfully, I won’t have to do that for a while again. LOL
Do you have suggestions for making sparkling sprinkles?
I would mix in some “disco dust” or “luster dust” do the mixture before piping. I hope that helps!
Hi Sam. I just want to ask, how long I can left sprinkles in resealable jar? Weeks? Or years? Thank you
Hi Sam. I’m thinking about start my own business with cupcakes and only price for sprinkles is crazy!!! Thank you for perfect recipe . Before I’ll order everything I’m gonna make my own sprinkles. I love that idea already. I just want to say THANK YOU for saving me a lot! Money. Thank you 🙂
Yay, I’m glad the recipe is helpful to you!!! Best of luck with your business, Lucia!! <3
I can’t wait to try these. I have a hard time finding sprinkles in colors I need. I had a client that wanted specific sprinkles to cover a whole cake, and when I went to order them it was going to cost $40. Wow! The client had to change her plans because she didn’t want to invest that much. So it will be nice to make my own. Thank you!
I’m so glad you like the recipe, Crystal! I know sprinkles can get so pricey!
I made these using glucose (couldn’t find corn syrup at my local Coles or Woolworths in Australia) – just added a bit more water to get the right consistency. They’re great! Tough little so and so’s broke my old icing bag but it’s about time I replaced it anyway. I baked them onto some cookies and they keep their shape just like commercial sprinkles do. I’m stoked that I can now make customised sprinkles. =)
Hey Sam!
I’m making a chocolate cake covered with chocolate sprinkles but i dont have glucose/corn syrup
I do have honey though
Can u plz let me know if i can skip the syrup and use honey or anything else instead?
Also, im wondering if the sprinkles will set or be soft.
Thanks!
Hi Rutba! I’m sorry but I do not think honey would work, unfortunately I don’t know of any substitute to the corn syrup, I’m sorry! If you are able to make them with the corn syrup they will set and be hard.
I know this is obviously late but just in case anyone else is reading, I made these sprinkles with a thick honey I bought at the farmers market and the set just fine. Part of why I wanted to make my own sprinkles was to replace the corn syrup, dyes and meruinge powder found in most store bought versions. They came out just like the ones in the photo and I’m so thankful for this recipe!
So happy to hear they worked with the honey! Thanks, Emily!
What a great find! I had no idea you could make your own sprinkles. Makes me want to try it, and even take things one step further and give homemade sprinkles away as gifts! Thank you for sharing!
Thank you, Terri! I’m so glad you like the recipe, if you try it out I hope you love them!!
I can’t wait to try this! Have you ever made gold or silver ones and if so how did you do that?
I haven’t tried those colors yet, but I think it could be accomplished by using a grey food coloring (for silver) and a copper/orange food coloring (for gold) and then mixing that with a luster dust (disco dust) for a shimmery sheen. I hope that helps!
Do these act like the funfetti when added to a cake mixture?I’m after a recipe that is the same as funfetti
Thank you
Deb
Hi Deb,
Yes they do! I hope you enjoy them!
Hello! I tried yout recipe and it was like really hard to pipe but i read that was normal. Should the consistency of the mix be like really soft fondant? Or what consistency should it have? Thank you!! I really want to try it again and just need to know if the first time i did it correctly.
Hi Ana! I don’t have a ton of experience with fondant so it’s hard to say, if it was stiff as you piped it it should be fine. Once you let it sit and harden you should be able to tell if it was done correctly because they should be completely firm once dried and you should be able to cut them without the sprinkles shattering. If you could do that, you did it correctly 🙂