
Homemade Peppermint Marshmallows
This post may contain affiliate links. As an Amazon Associate I earn from qualifying purchases. Please read my disclosure policy.

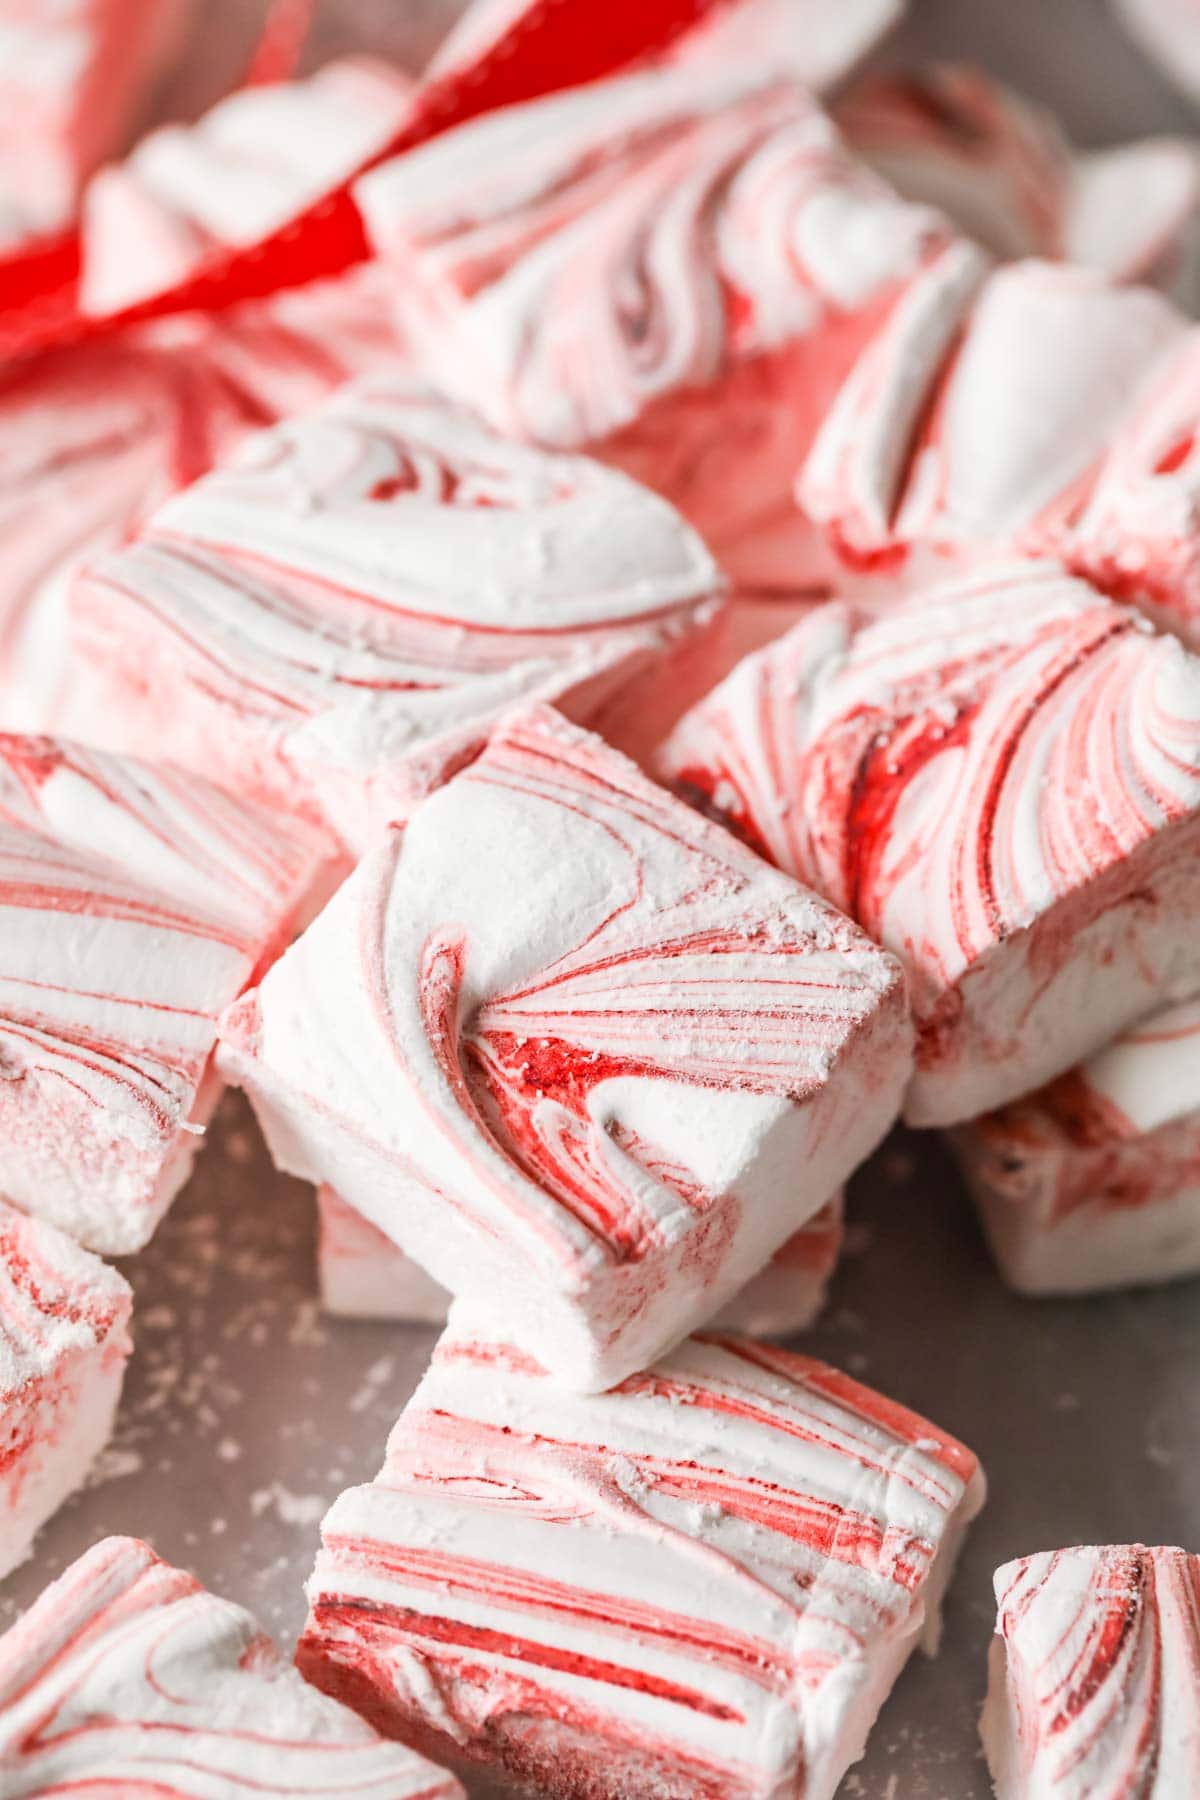
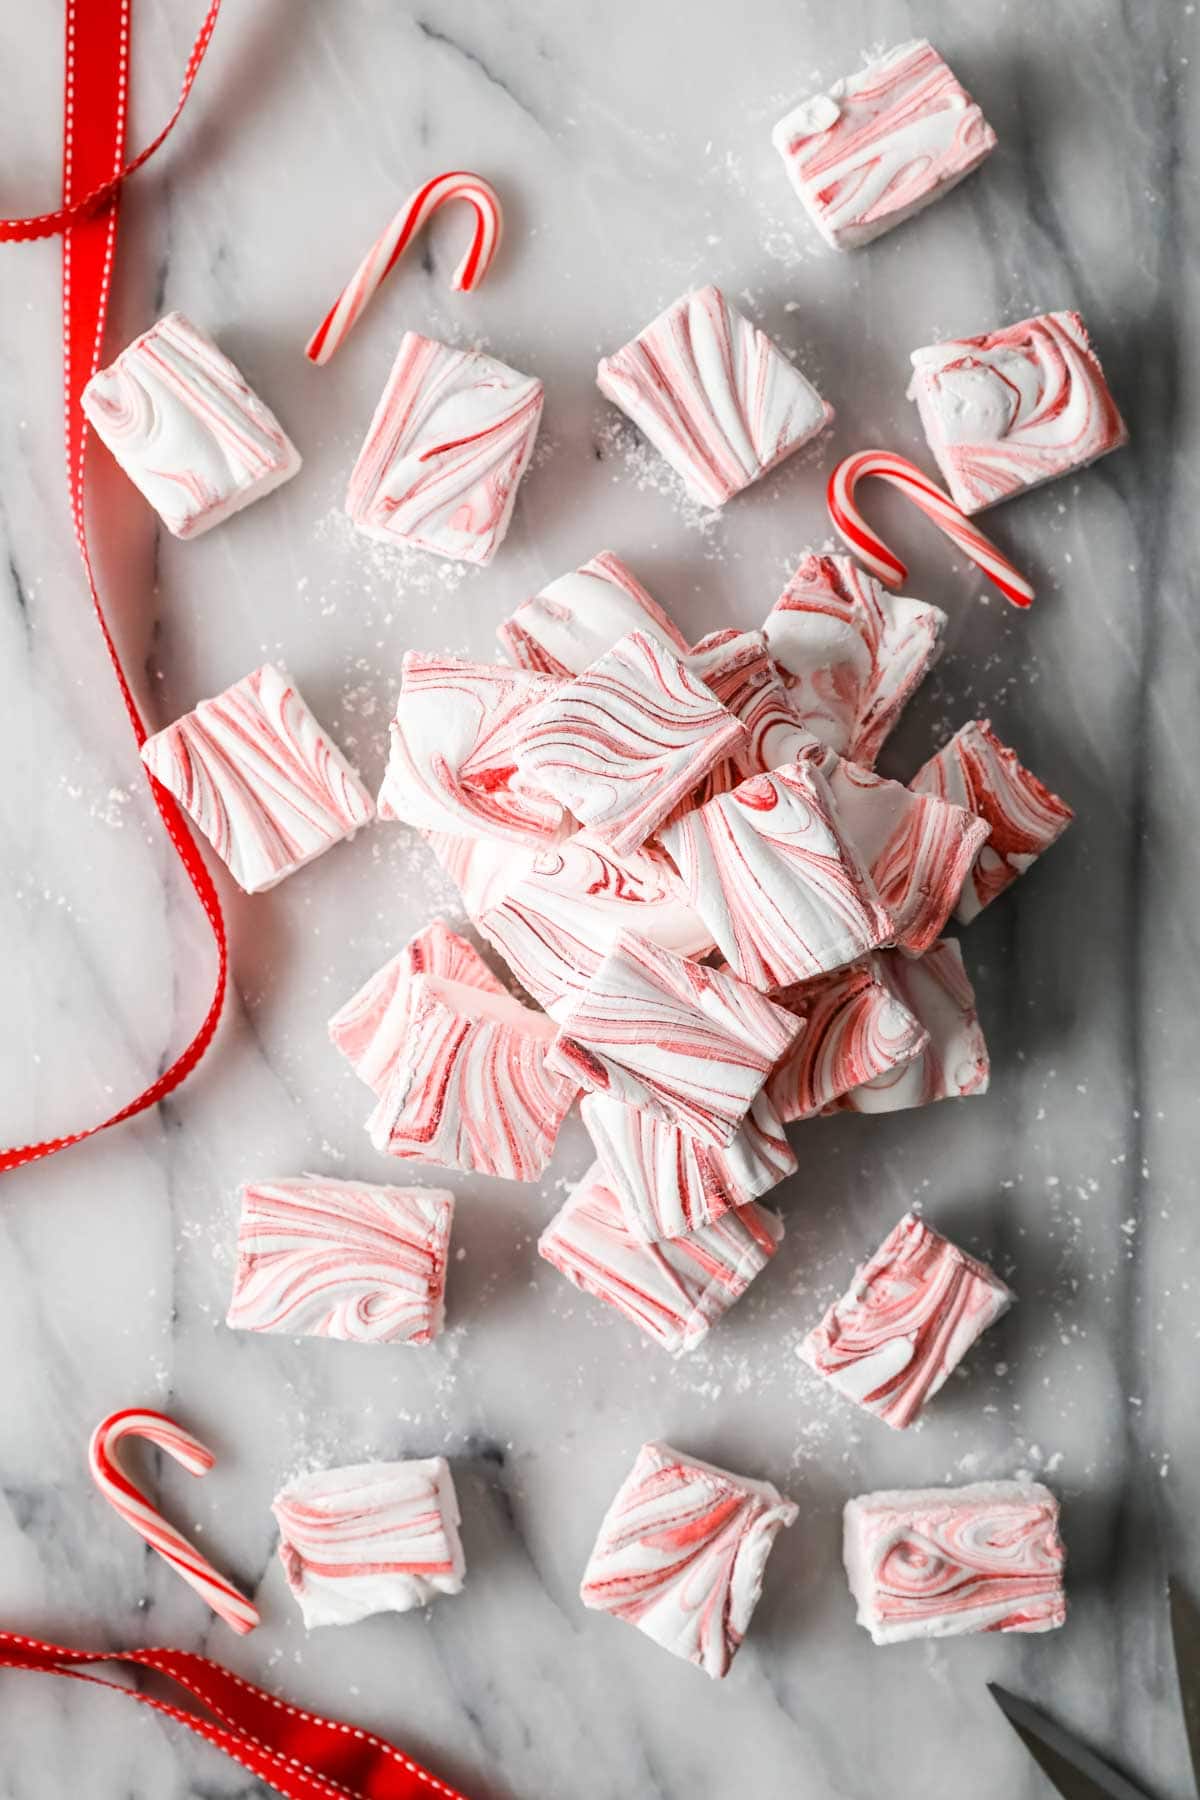
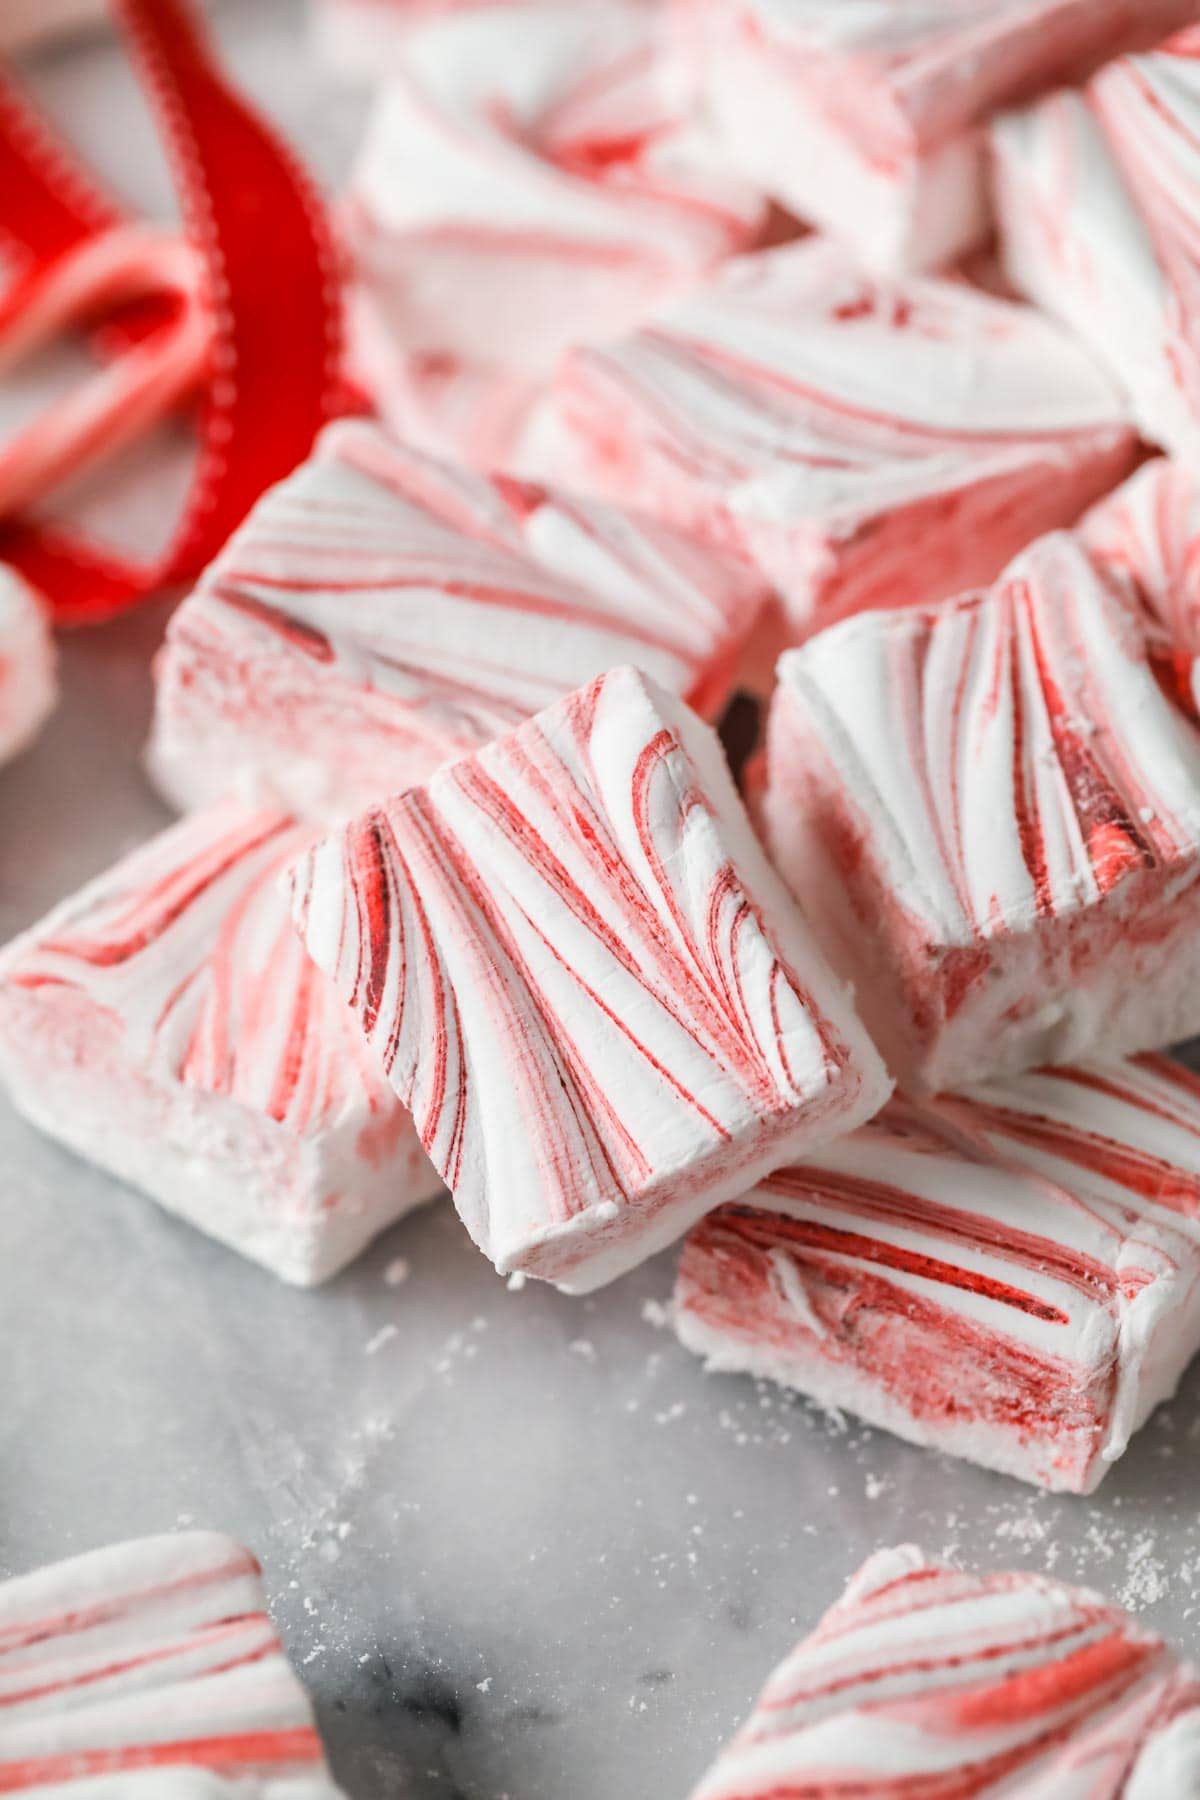
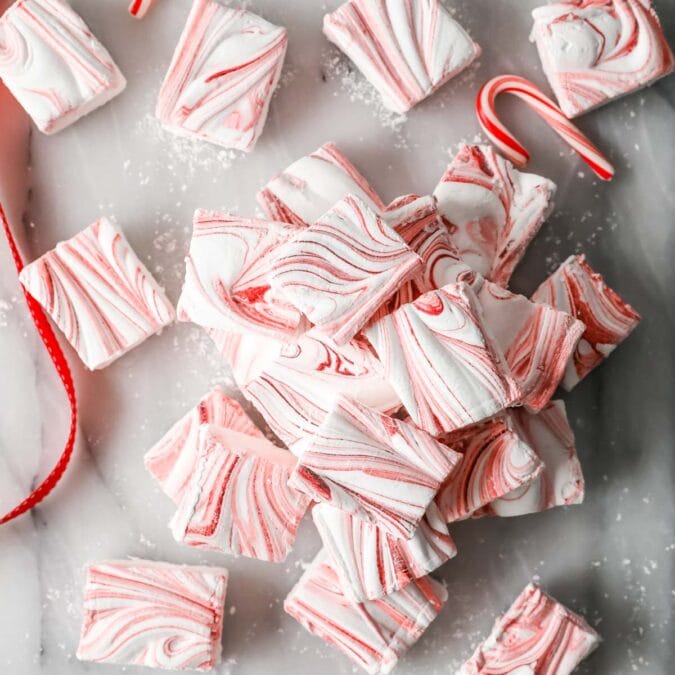
Soft, fluffy, and perfectly squishy, my peppermint marshmallows are perfectly flavored with peppermint and swirled red for heavenly holiday marshmallows.
Perfect Peppermint Marshmallows
Lighter than air, wonderfully squishy, melt-in-your mouth, and customizable in a million different ways, once you try homemade peppermint marshmallows you’ll never be satisfied with a store-bought marshmallow again. These are as tasty as they are delicious and would be perfect in a cup of hot chocolate or wrapped up in cellophane as a sweet Christmas gift!
Peppermint marshmallows fall into my candy category, and as with most candy recipes you will need a thermometer. For a long time I avoided any recipe that needed one, and I shudder to think of all the years I wasted not making candy because of this.
Just like a whisk, a mixer, or a cheese grater, a candy thermometer is a tool that will make your life easier. I link to my favorite one in the recipe card in case you’re in the market, they’re inexpensive and invaluable. Get yourself comfortable with it and use it for caramels, peanut brittle, and more.
Alright, let’s get to the recipe. I’ll warn you it is a bit of a messy one with the stickiness that comes with making peppermint marshmallows, and the sugar/cornstarch mixture is ornery and eager to dust your whole kitchen in a fine layer of powder. But it’s worth it.
What You Need
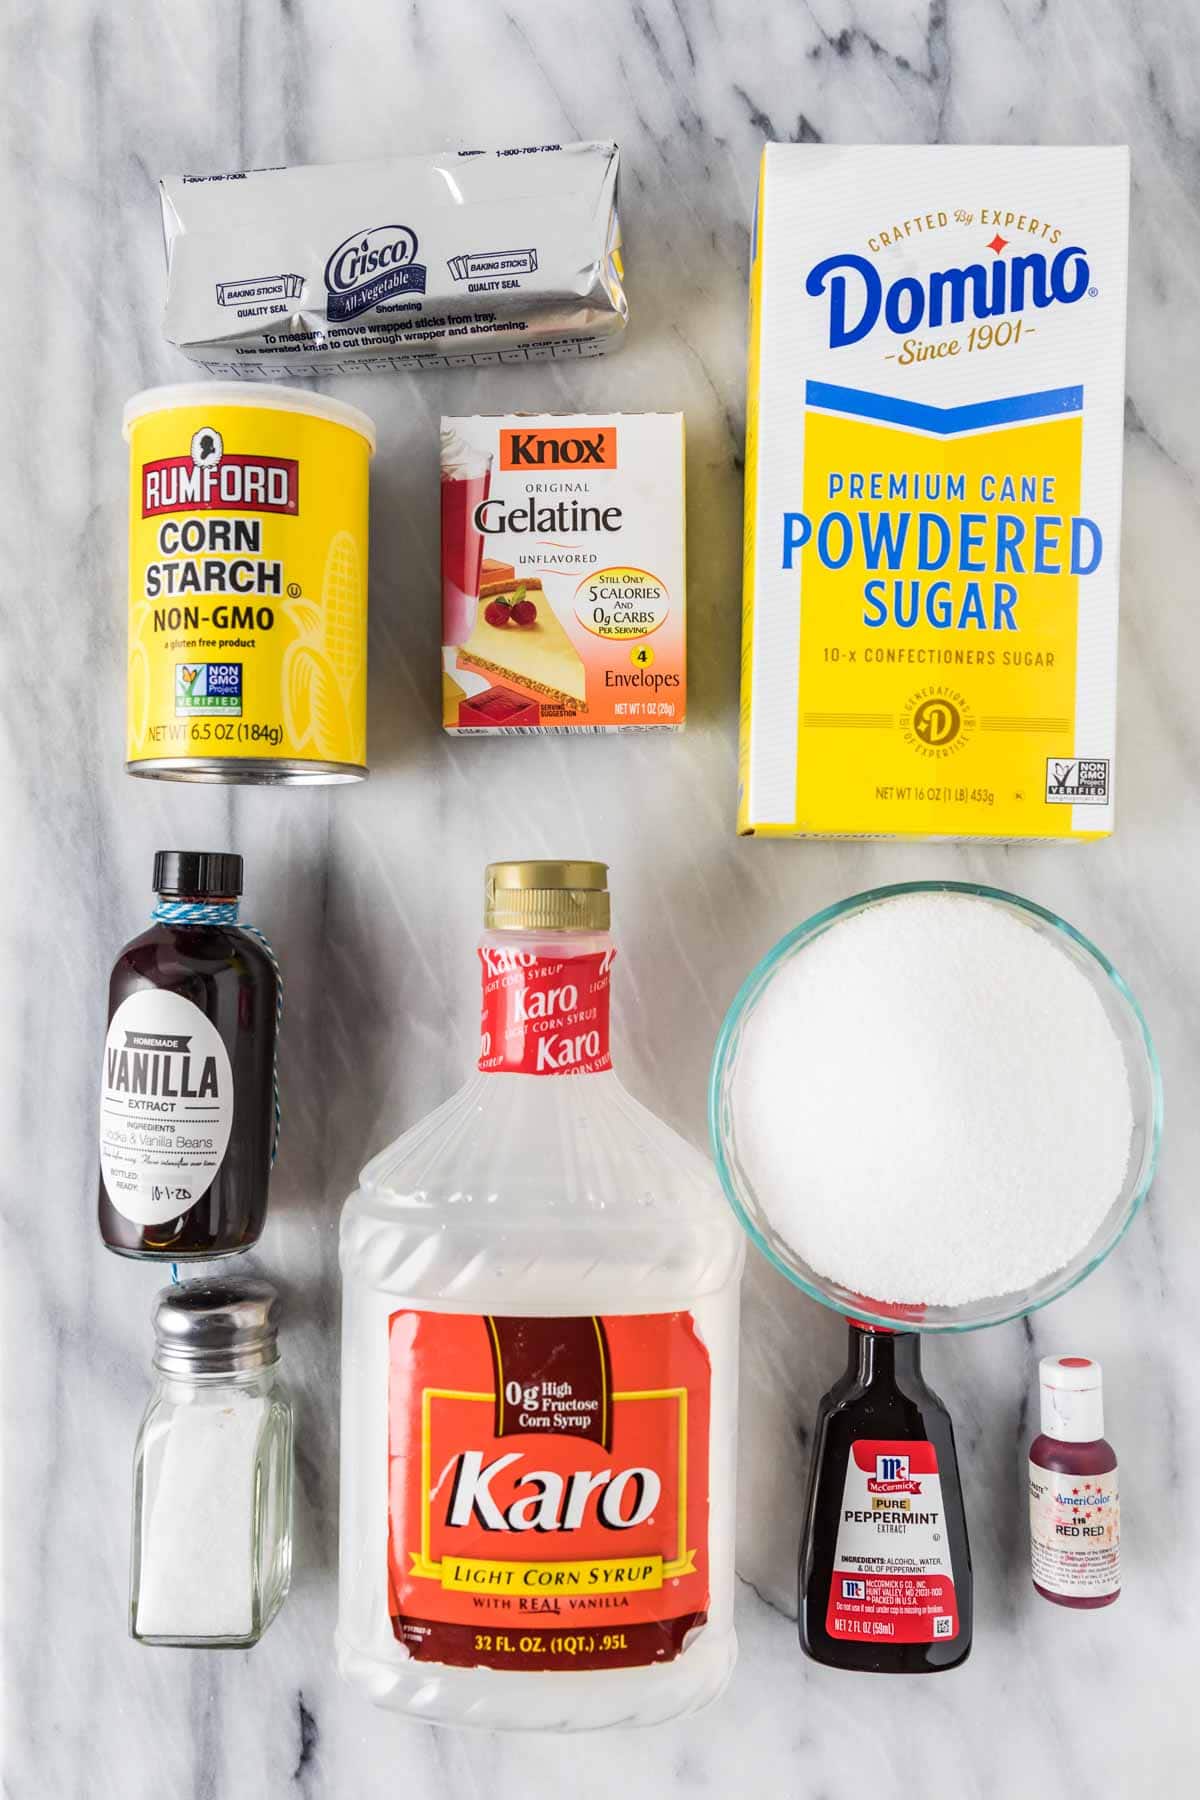
If you’ve made my homemade marshmallows already (or, maybe, even if you haven’t) none of these ingredients will surprise you. Let’s go over a few of them.
- Gelatin. This ingredient is a must, and unfortunately I don’t have any suggestions for substitutes. You should be able to find the packets right beside the Jell-O in your grocery store, they’re plain/unflavored.
- Corn Syrup. A staple in many candies (like my honeycomb candy), it bears repeating that this is not the same as high fructose corn syrup. This ingredient helps give the marshmallows their perfect texture and stabilizes them. If you live in a place where you can’t find corn syrup, glucose syrup will work instead.
- Sugar. The peppermint marshmallows themselves are made with granulated sugar, but you’ll need powdered sugar (AKA confectioner’s sugar) mixed with cornstarch for dusting the marshmallows, which keeps them from sticking to the pan and to each other.
- Peppermint extract. Not to be confused with mint extract, which has more of a spearmint flavor.
- Food coloring. This is optional, but it adds a nice color to the marshmallows and just screams peppermint/candy cane flavor. I recommend using gel food coloring, which is much more vibrant/potent than its liquid counterpart.
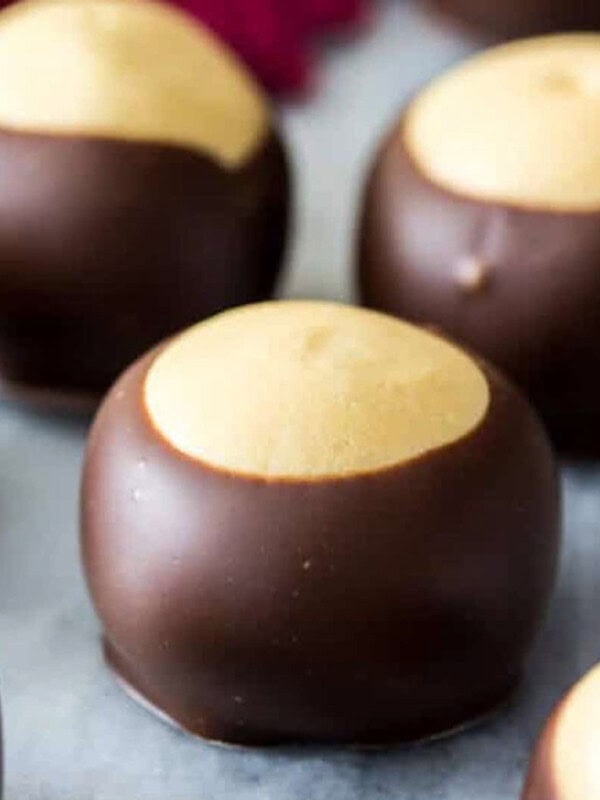
SAM’S TIP: Dress up your marshmallows even more! After preparing them, dip in melted chocolate or white chocolate. You can dip them halfway or all the way, just dust off as much excess cornstarch/sugar mixture as possible before doing so.
This is just an overview of the ingredients I used and why. For the full recipe please scroll down to the bottom of the post!
How to Make Peppermint Marshmallows
- Grease everything! Use shortening to grease your pan and spatula before you begin.
- Prepare gelatin. Whisk the gelatin with ice water in the bowl of a stand mixer.
- Cook. Cook the candy ingredients (minus the extracts and food coloring) until your candy thermometer reaches 242F.
- Whisk. Turn your mixer on and begin whisking your gelatin mixture while you slowly drizzle your sugar syrup into the gelatin until it’s incorporated. Slowly increase the speed of the mixer and beat on high speed until the marshmallow is thick, fluffy, glossy, and cooled.
- Flavor. Add your extracts here, then immediately pour into your greased pan.
- Swirl. Dot the marshmallow with drops of food coloring and use a knife to swirl over the surface until you’re satisfied with how the peppermint marshmallows look.
- Dust. Dust the surface with a mixture of cornstarch and powdered sugar, then let the marshmallows rest until they’re completely cooled before cutting and tossing your newly cut squares in more of that cornstarch/powdered sugar. Yes it’s messy, but it’s worth it!
SAM’S TIP: Once your mixture comes to a boil, take care to not stir. I know it can be tempting, but just put down the spoon and let the stove work its magic. Otherwise you risk causing gritty sugar crystals to form.
Frequently Asked Questions
I strongly recommend it and would not advise making my recipe without it. The corn syrup is key to preventing crystallization and gives the marshmallows their soft and squishy texture. It also helps give them a long shelf life.
You can store them in a cool, dry place for up to one month. They will keep even longer (several months) if stored in the refrigerator or freezer, just make sure however you store them you keep them in an airtight container. Note that frozen marshmallows are not always quite as soft when thawed after freezing.
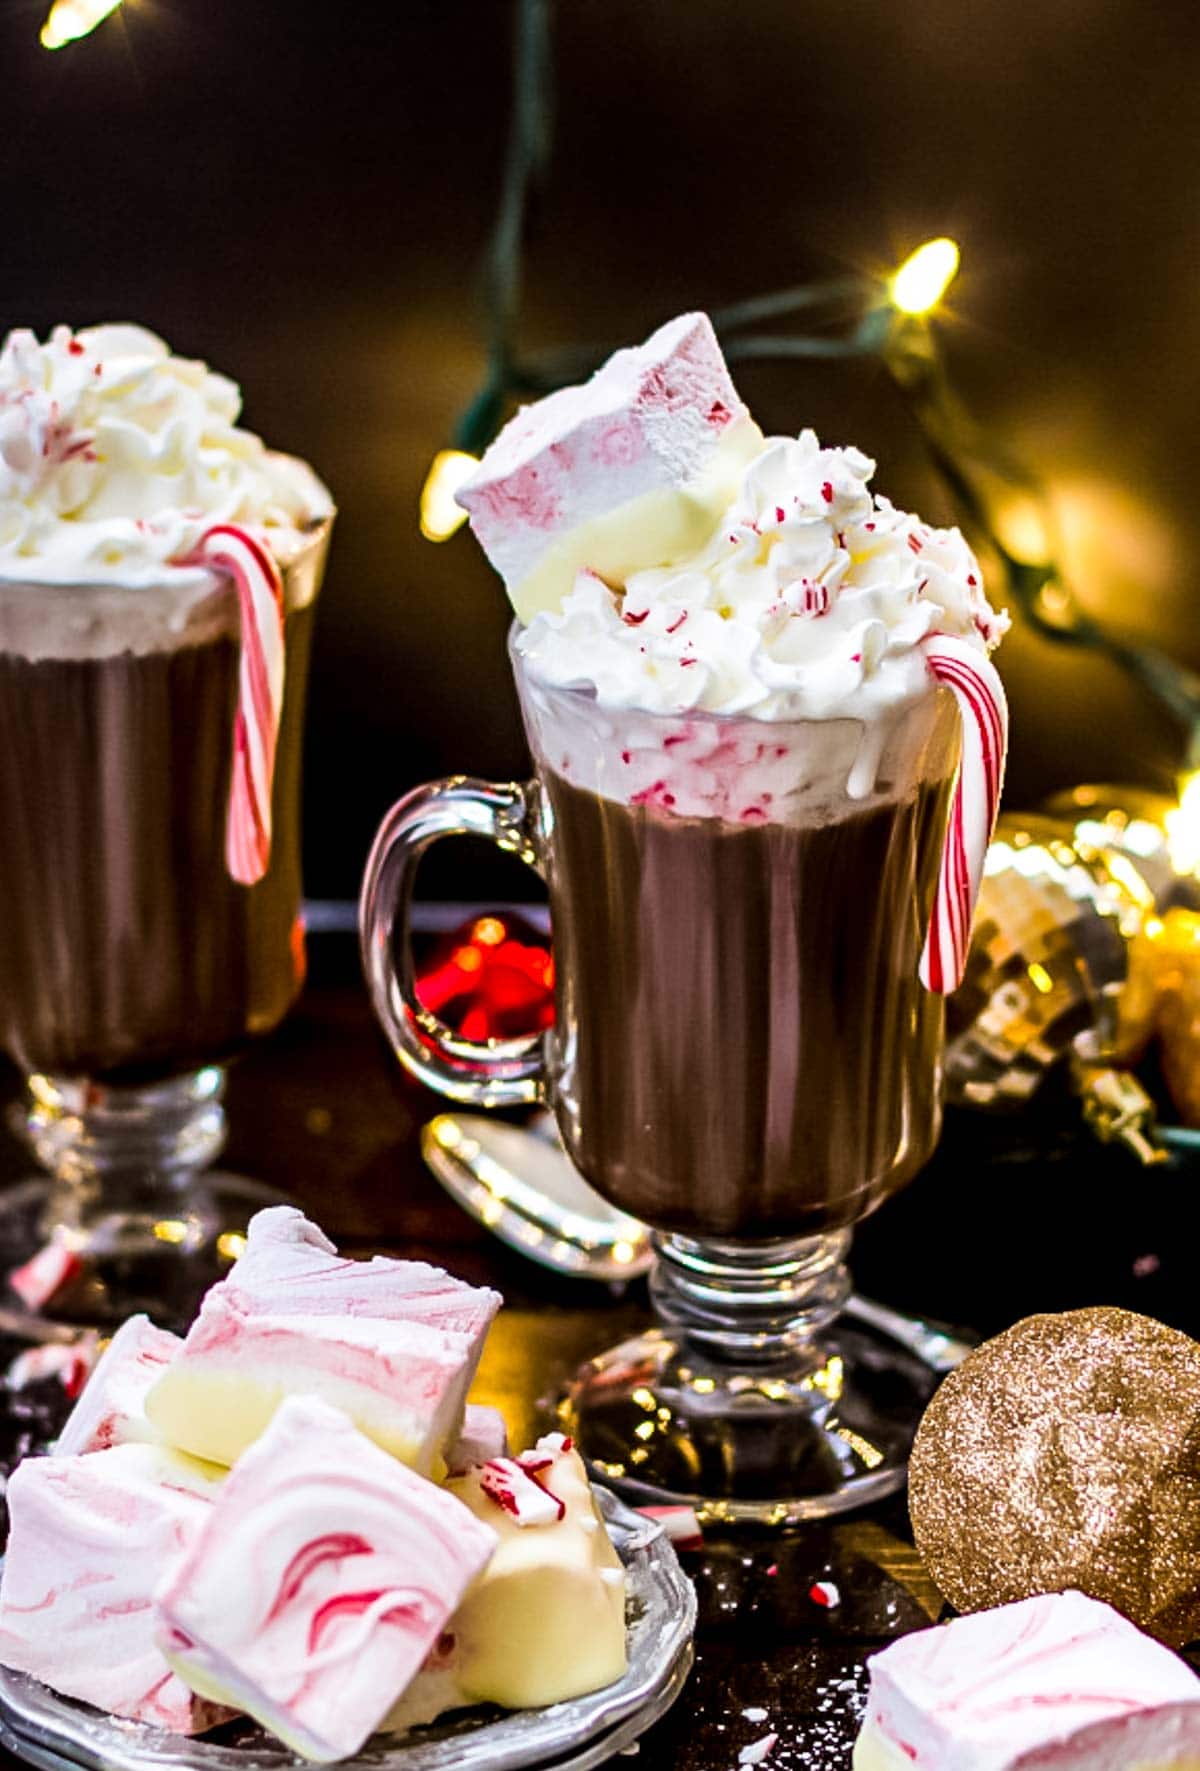
If you find yourself looking for more ways to use your candy thermometer, check out my sea foam or marshmallow frosting!
Enjoy!
Let’s bake together! I’ll be walking you through all the steps in my written recipe and video below! If you try this recipe, be sure to tag me on Instagram, and you can also find me on YouTube and Facebook
Peppermint Marshmallows
Equipment
- Stand Mixer recommended
- Medium-sized pot
- Sharp knife or kitchen shears
Ingredients
For Dusting
- Vegetable shortening , for greasing pan and utensils (I use Crisco)
- 1 cup (125 g) powdered sugar
- ½ cup (65 g) cornstarch
For Marshmallows
- ½ cup (118 ml) ice water
- 3 packets (21 g) gelatin, (0.75 oz)
- 2 cups (400 g) granulated sugar
- 1 cup (236 ml) light corn syrup, (or glucose syrup)
- ½ cup (118 ml) water (cool or room temperature)
- ¼ teaspoon salt
- ½ teaspoon (3 ml) vanilla extract, use clear vanilla for whiter marshmallows
- 1 teaspoon (5 ml) peppermint extract
- red food coloring, see note
- Additional powdered sugar as needed
Instructions
- Prepare a 13×9” (33x23cm) pan by lightly but thoroughly greasing the sides and bottom with vegetable shortening. Grease a rubber spatula as well and set it aside nearby.Vegetable shortening
- Prepare dusting powder by whisking together powdered sugar and cornstarch until well-combined. Set aside.1 cup (125 g) powdered sugar, ½ cup (65 g) cornstarch
- Pour ice water into the bowl of a stand mixer fitted with a whisk attachment and sprinkle the gelatin overtop. Briefly stir to combine.½ cup (118 ml) ice water, 3 packets (21 g) gelatin
- In a medium-sized, heavy-bottomed pot, combine your sugar, corn syrup, remaining ½ cup (118ml) water and salt and stir to combine.2 cups (400 g) granulated sugar, 1 cup (236 ml) light corn syrup, ½ cup (118 ml) water (cool or room temperature), ¼ teaspoon salt
- Turn your stovetop heat just a notch above medium and cook, stirring frequently, until sugar is dissolved. If you notice sugar crystals on the side of the pot, use a damp pastry brush to gently wash them down the sides of the pot back into the mixture.
- Continue to stir until mixture comes to a boil, then attach a candy thermometer to the pot (make sure the end of the thermometer is suspended in the middle of the mixture and that it is not touching the bottom of the pot!) and continue to cook without stirring until mixture reaches 242F (115C).
- Remove syrup from heat and turn stand mixer speed to low. With mixer on low speed, gradually drizzle the hot syrup into the gelatin mixture in a steady stream. Once all syrup has been added, gradually increase mixer speed to high.
- Beat on high-speed for at least 10 minutes/until mixture is fluffy, thick, glossy, and greatly increased in volume.
- Add peppermint extract and vanilla extract and stir until completely combined.½ teaspoon (3 ml) vanilla extract, 1 teaspoon (5 ml) peppermint extract
- Use your greased spatula to pour/spread marshmallow mixture into prepared pan. Immediately dot surface with several drops of red food coloring and use a knife to swirl the color through the marshmallow as desired (try to not scrape the bottom of the pan with your knife–this may scrape away the shortening/powder mixture and your marshmallows may stick to the pan).red food coloring
- Sift 2-3 Tablespoons of the dusting mixture (save remaining mixture, you’ll need it) over the surface of the marshmallows.
- Let marshmallows sit at room temperature until firm, at least several hours or overnight.
- Once firm, dust a cutting board generously with about a tablespoon of the dusting mixture and pour the remaining mixture in a bowl.
- Turn out the marshmallows onto a cutting board and use a greased knife or greased kitchen shears to cut into squares. Toss marshmallows one at a time in bowl with remaining dusting mixture then shake off excess and enjoy.Additional powdered sugar as needed
Notes
Mixer
If you don’t have a stand mixer, a powerful electric mixer will work, but it will take much longer and will be quite an arm workout. I don’t really recommend trying this by hand.Food Coloring
I like to use gel food coloring, as it has a much more vibrant color than its liquid counterpart (which can sometimes look pink!). I use Americolor “red red” or “super red” when making these marshmallows.Storing
Store marshmallows in an airtight container at room temperature for up to a month.Nutrition
Nutrition information is automatically calculated, so should only be used as an approximation.
Like this? Leave a comment below!


Haven’t tried these yet, but they look so pretty!
I hope you love them! 🙂
Hi!
Thanks for the recipe!
Just wanted to let you know that I don’t think it ever says in the recipe to coat the pan with the dusting mix? It says to use the shortening, but not to put the dusting mix after. I did anyways, but wanted to let you know.
Thanks again!!
I’m glad you enjoyed them, Andrea! You don’t need to dust the crisco in the pan. You will dust the tops of the marshmallows with a little bit and then again once cooled. 🙂
Hi Sam, not sure what I did wrong, it was fine until I added the syrup to the gelatin and then it began to smell bad and taste similar to the smell. Clueless as to why. The Gelatin package was new and had not expired the bowl was clean, the syrup did not burn. I’ll try again but any advice would be welcome.
Hi Gina! Honestly I personally think gelatin just has a bad/unpleasant smell, especially once heated. My sister thinks the same thing, but I’ve had other people tell me I’m crazy and they can’t smell it. I don’t enjoy the smell when I’m cooking it at all, but once I proceed with the recipe and finish it up, the smell disappears and the marshmallows are delicious. I wonder if you just don’t enjoy the smell of it either.
Hi Sam,
I have a question about the gelatine, is this powderd or sheets of gelatine.
In the netherlands it is more common to use the sheets.
I want to give this recipe a try. It looks amazing. Thank you.
Kind regards Anneke
Hi Anneke! I use the powdered gelatin here. I think the sheets will work as long as the amount is the same. 🙂
how deo you store these?
Hi Annie! Store them at room temperature in an air tight container. 🙂
Your marshmallows look fantastic, deary! Who would want a store-bought one after seeing these? I haven’t even tasted them but even I can tell they’re amazing! <3
Thank you so much, Beeta!!
I’ve been planning of making Christmas peppermint marshmallows, but I’m so happy I haven’t done that. Because that’s one whole fabulous recipe (and gift). White Chocolate is such an excellent addition. Well done, Sam!
If you try it out, let me know how you like it, Ben! And yes, I have to agree the white chocolate addition was perfection 🙂
Store bought marshmallows don’t hold a candle to homemade marshmallows. Like you I used to be intimidated by them. . .but they really are super easy to make. And look how lovely they look. When is the last time you have seen a red and white swirled marshmallow that looks this divine at the grocery store?
Right!? Thanks so much, Lynn! 🙂
Saw these on Instagram and I had to come check them out, Sam! These marshmallows are gorgeous! LOVING that swirl and the peppermint flavor! Perfect for this time of year! Cheers, girlie! <3
Ah thank you so much, Cheyanne! They really are so seasonally appropriate! <3
I’m so impressed! I’ve been wanting to try making homemade marshmallows but am a bit intimidated. These look amazing!
Don’t be intimidated, they’re really not that difficult! Thanks so much for stopping by, Madeline! 🙂
Magical! I love these Sam! I have always wanted to master homemade marshmallows because they look so much better. These peppermint ones look incredible, love your gorgeous photoshoot!
They’re really not difficult, I’m sure you won’t have a problem mastering them at all, Jess! Thank you!! 🙂
These are totally gorgeous! I love homemade marshmallows, and the peppermint swirl is so pretty! I bet they taste amazing in hot chocolate.
Thank you, Meghan! I was pretty happy with how the swirl came out, myself! 🙂
That pink and white swirl is stunning- would love these in hot chocolate!
Thank you, Medha! They go GREAT with hot chocolate!
Isn’t is so freeing when you figure out how to make something you never thought to make at home?? LOVE these marshmallows! So beautiful and the perfect, refreshing complement to hot cocoa.
Thank you so much, Lauren! And they’re really SO much better than storebought–unbelievably better!
These marshmallows look so pretty, and scrumptious! I’d love some of these in a lovely hot chocolate!
Thanks so much, Marsha!