
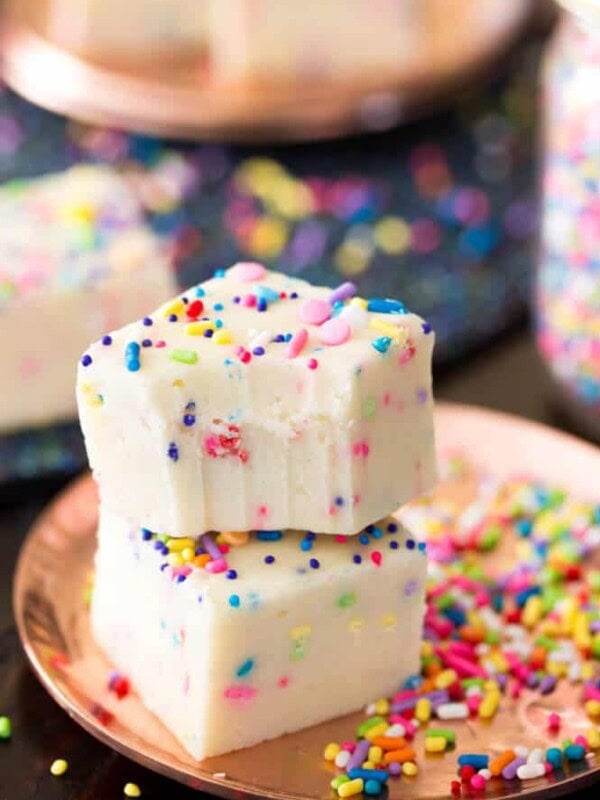
Funfetti Cookies
This post may contain affiliate links. As an Amazon Associate I earn from qualifying purchases. Please read my disclosure policy.
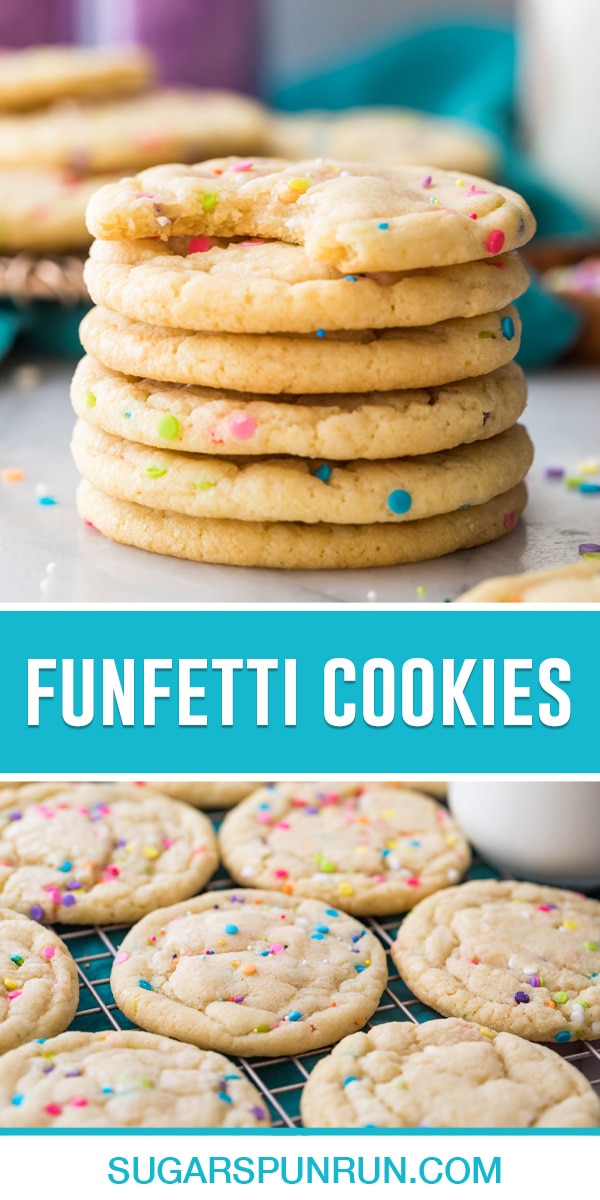
My soft, chewy, buttery, and sprinkle-packed Funfetti Cookies are made completely from scratch–no box cake mix required! This recipe can be prepped without a mixer in just 20 minutes. Recipe includes a how-to video!
100% From-Scratch Funfetti Cookies
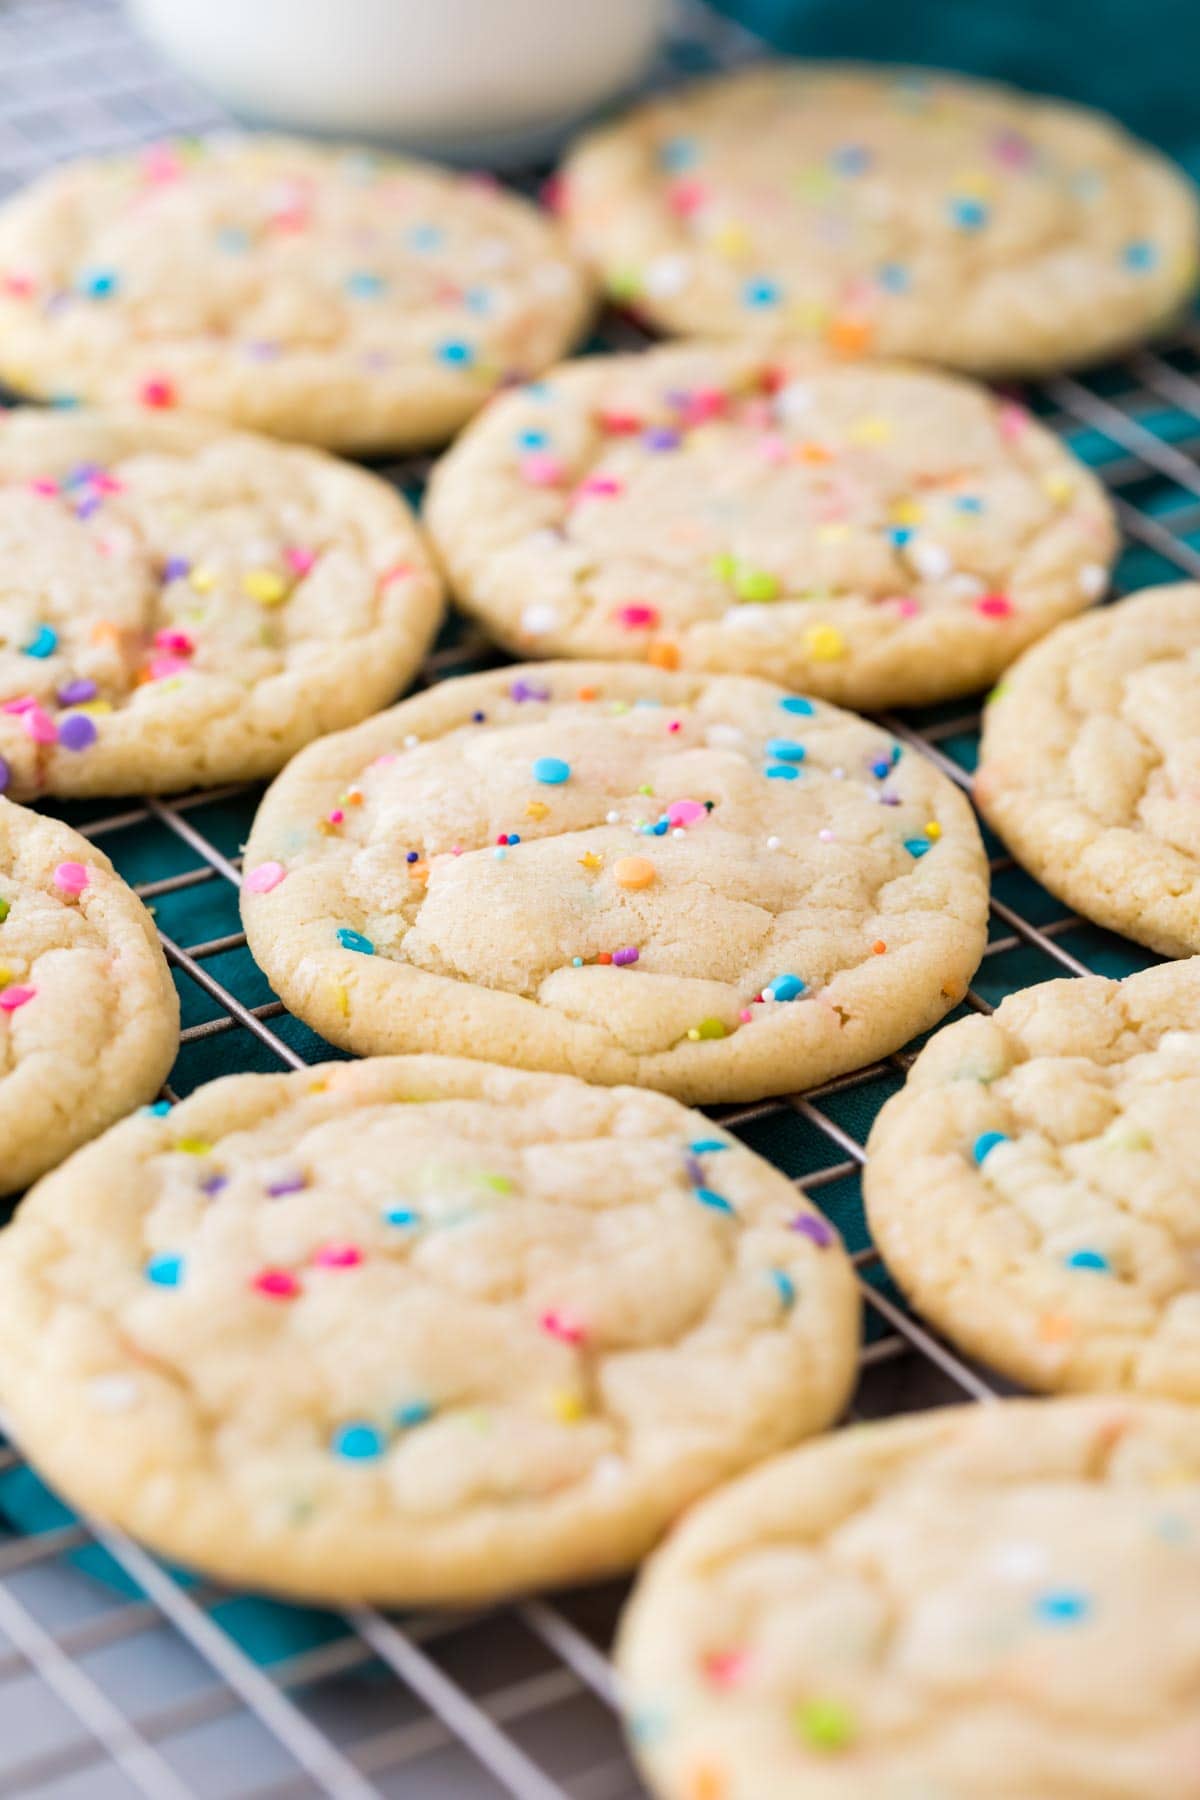
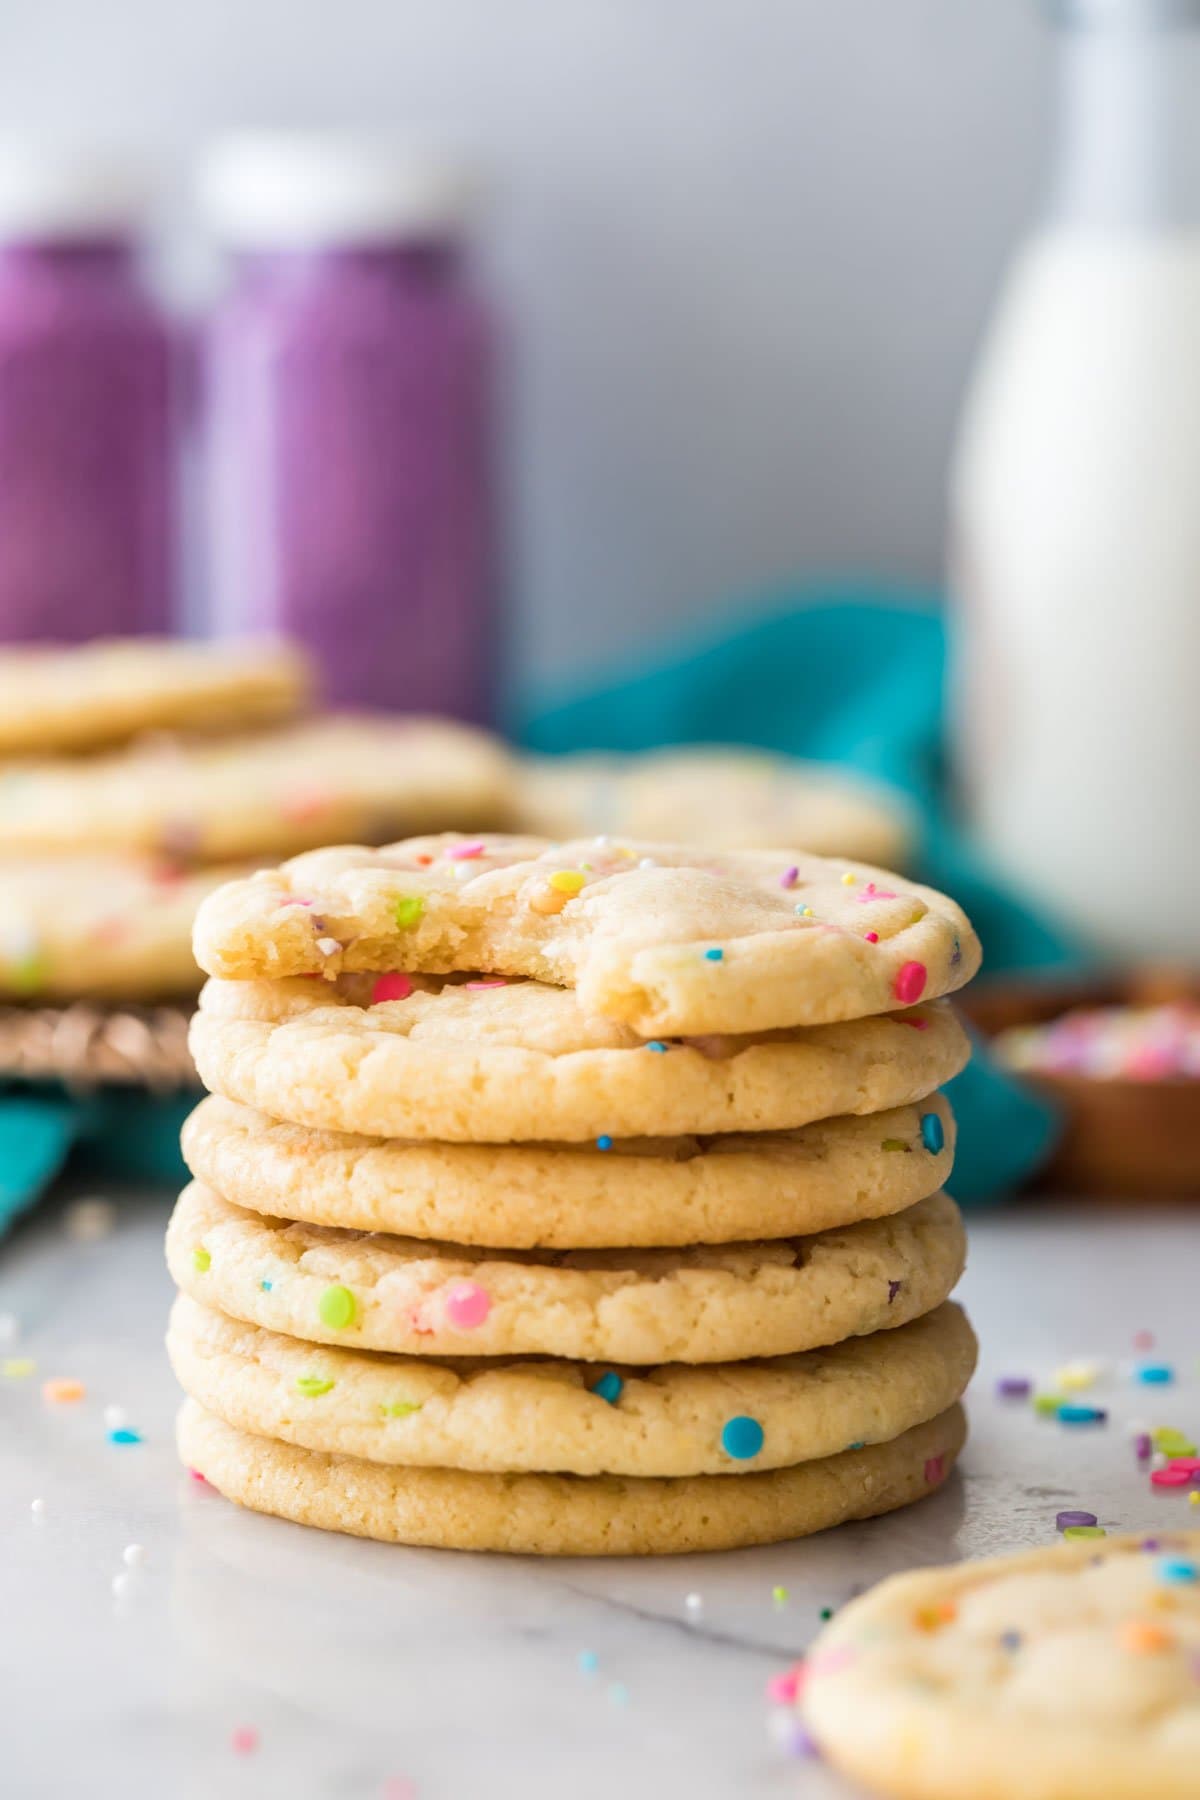
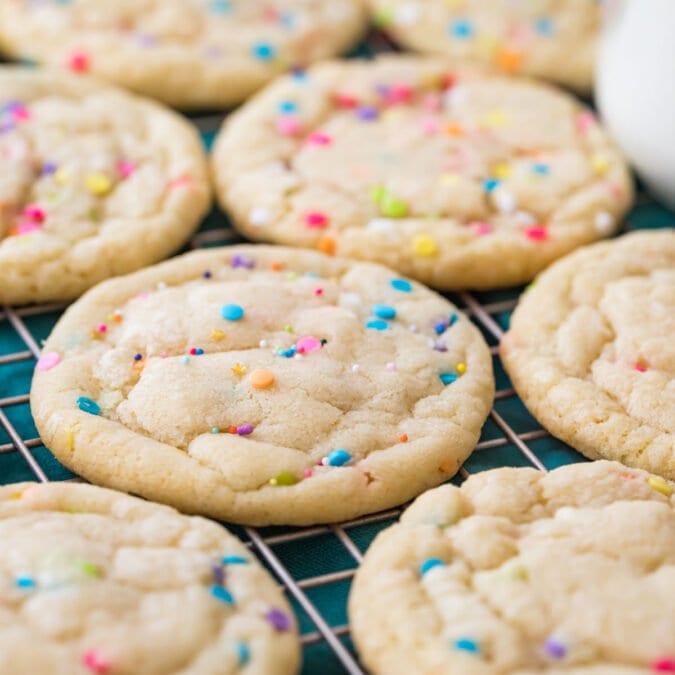
Like a funfetti cake in cookie form, my soft, chewy funfetti cookies are perfectly sweet and loaded with colorful sprinkles. They’re simple (sort of like drop sugar cookies) and so much fun to make! The sprinkles add a surprisingly addictive texture and lots of color, and the buttery, vanilla flavor comes 100% from scratch. You won’t even miss the cake mix!
My favorite thing about these funfetti cookies (besides the sprinkles!) is that they come together without a mixer. Using melted butter makes it easy to mix everything by hand and replaces the traditional creaming step. Of course, this means you will need to chill your cookie dough before scooping and baking–but they’re worth the wait!
Important Tips for Perfect Cookies:
- Make sure the butter isn’t too warm before adding the sugar. Butter that’s too warm will melt the sugar, leaving you with a greasy cookie dough and cookies that spread far too much.
- Let the dough chill! 30 minutes is the bare minimum, but 60 minutes is even better.
- Roll your cookie dough before placing it on the baking sheet for more uniform, round cookies.
- Remove the cookies from the oven while they still look slightly underdone. They’ll finish baking on the hot cookie sheet as they cool, leaving you with perfectly chewy funfetti cookies. Over-baking makes cookies that are tough, dry, and too-crisp, as opposed to soft, buttery, and chewy!
What You Need
This recipe uses pantry staples to make super buttery and soft funfetti cookies. Here are a few of the most important ones you’ll need:
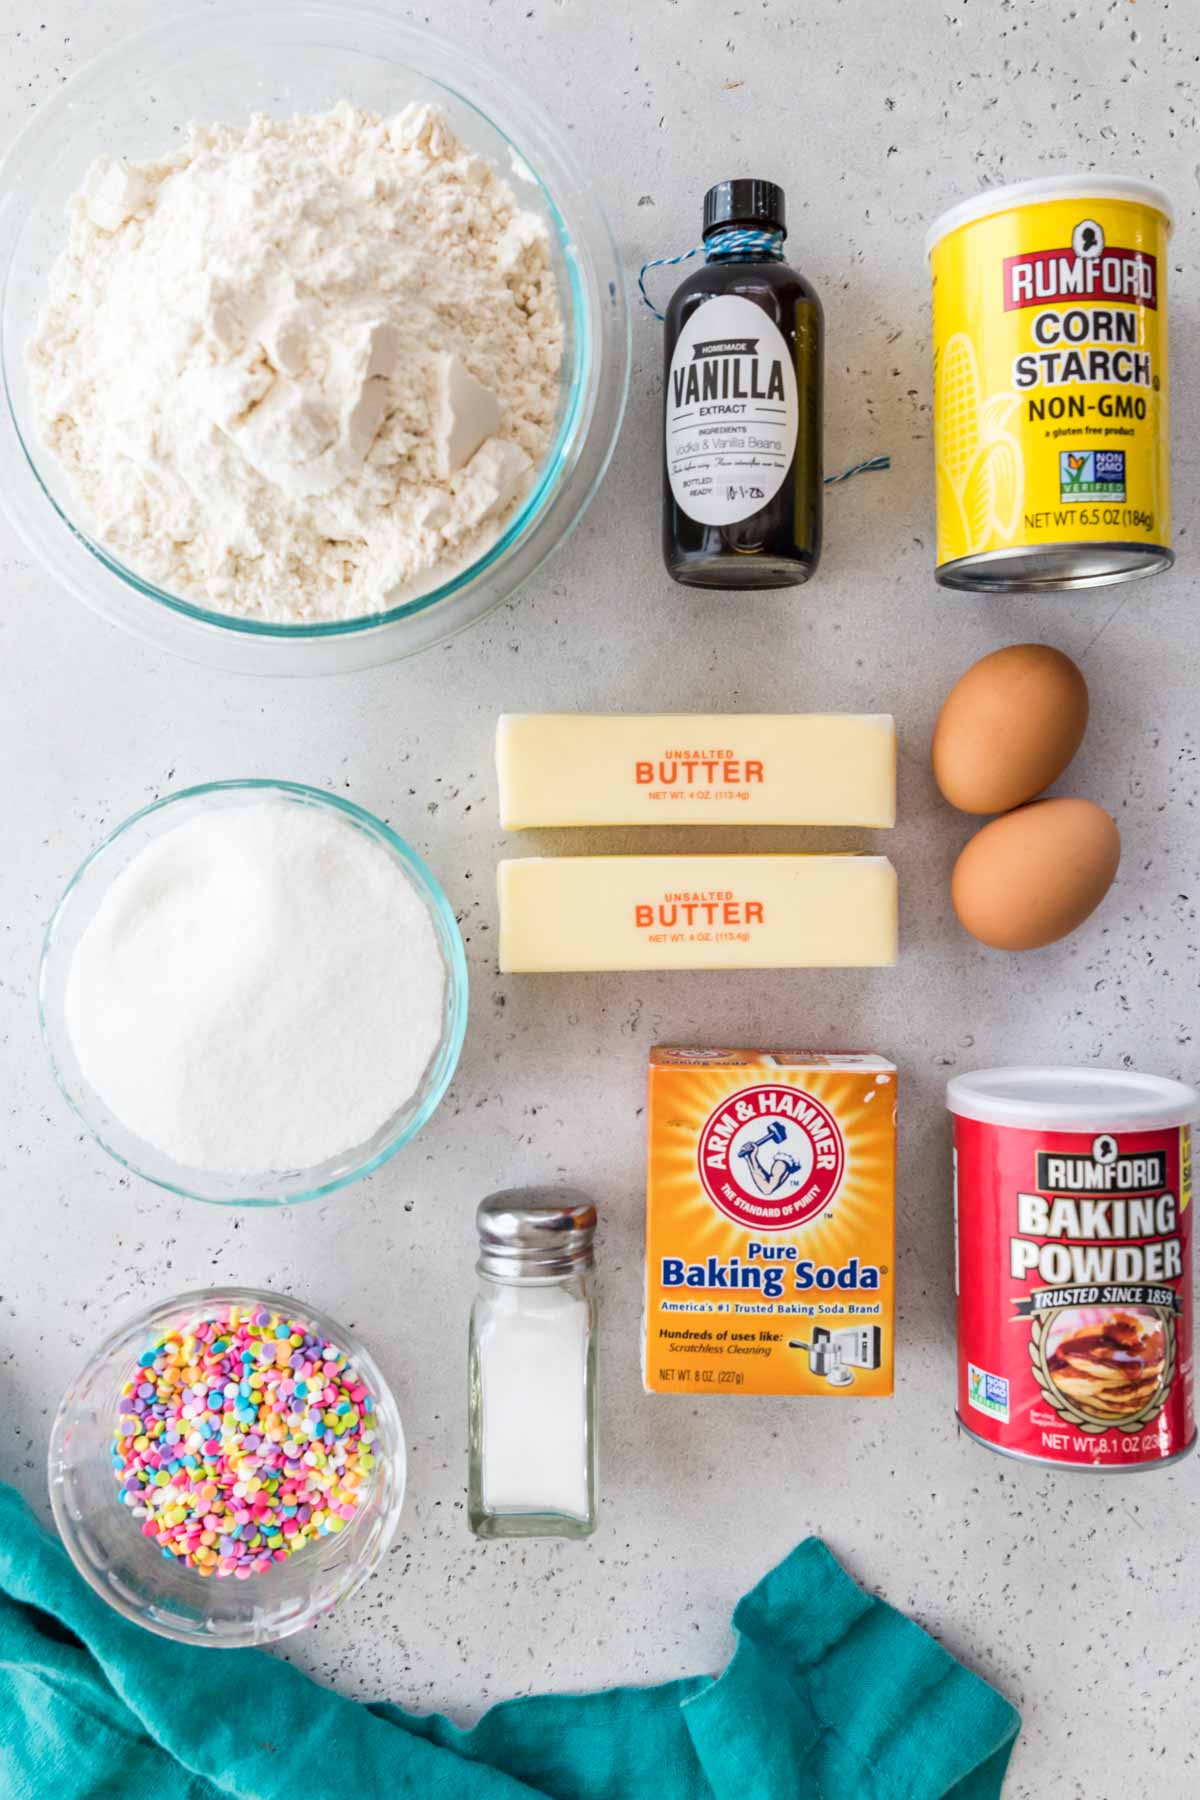
- Melted butter. Using melted butter ensures the cookies stay soft and chewy instead of cakey. It also gives them an incredible flavor (even better flavor if you use European butter!). I like to let my butter cool for about 10-15 minutes after melting to ensure that it’s no longer warm to the touch.
- Vanilla. A hefty pour of vanilla provides that cake mix flavor without all the additives. For even better flavor, use homemade vanilla extract!
- Cornstarch. Cornstarch helps these funfetti cookies hold their shape and stay soft. I use this in my funfetti Christmas cookies too, as well as many of my other cookie recipes. It’s one of my favorite secret ingredients!
- Sprinkles. Pretty much any kind will do–I use a mix of different types for a fun and whimsical look.
SAM’S TIP: Use unsalted butter! I have a separate post on why I like to use unsalted vs. salted butter, so I’ll be brief here, but essentially, you can better control the flavor of your cookies by adding the salt separately. It’s hard to know exactly how much salt is in each stick of salted butter (especially since there’s so many brands!), so using unsalted butter allows for precise and consistent results.
Remember, this is just an overview of the ingredients I used and why. For the full recipe please scroll down to the bottom of the post!
How to Make Funfetti Cookies
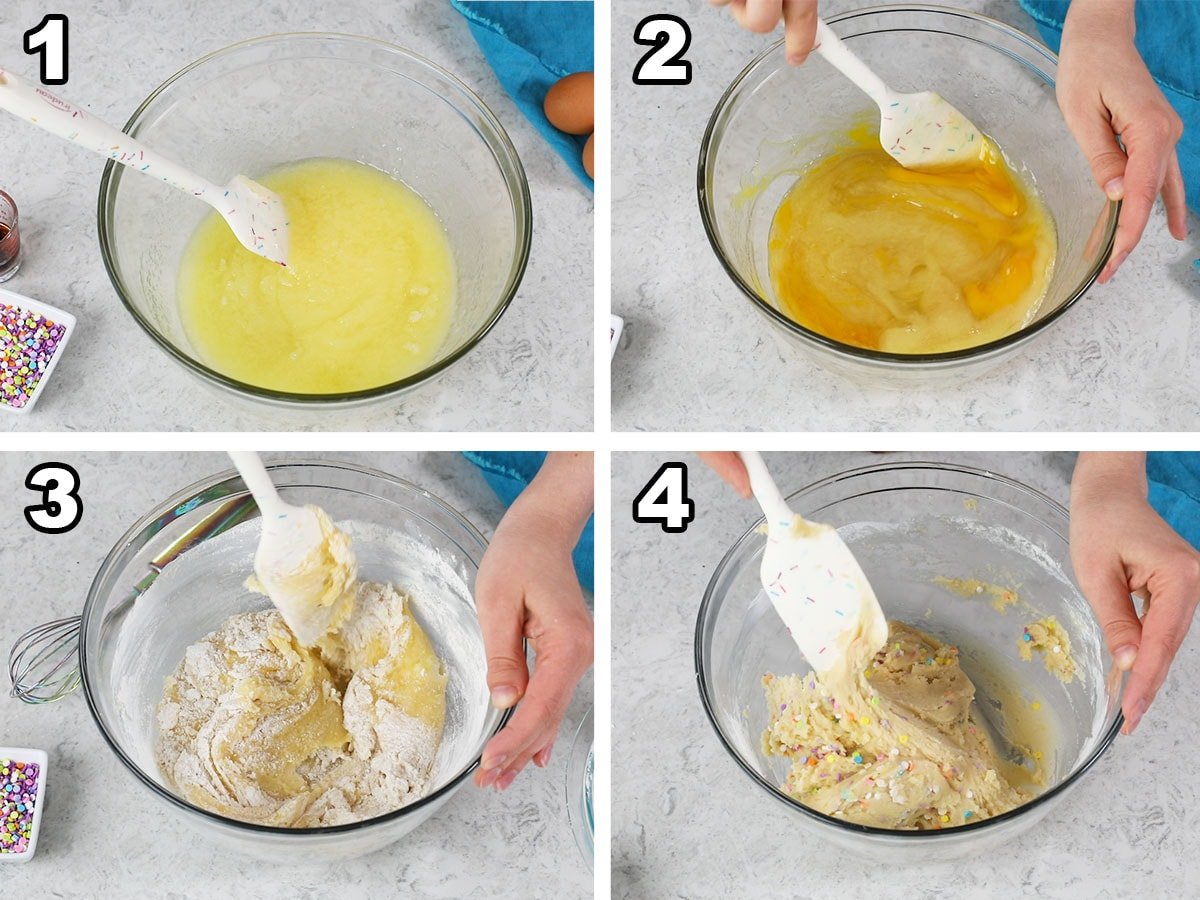
- Stir together the cooled melted butter and sugars.
- Add the eggs and vanilla and stir well.
- Combine the dry ingredients in a separate bowl, then gradually add them to the wet ingredients.
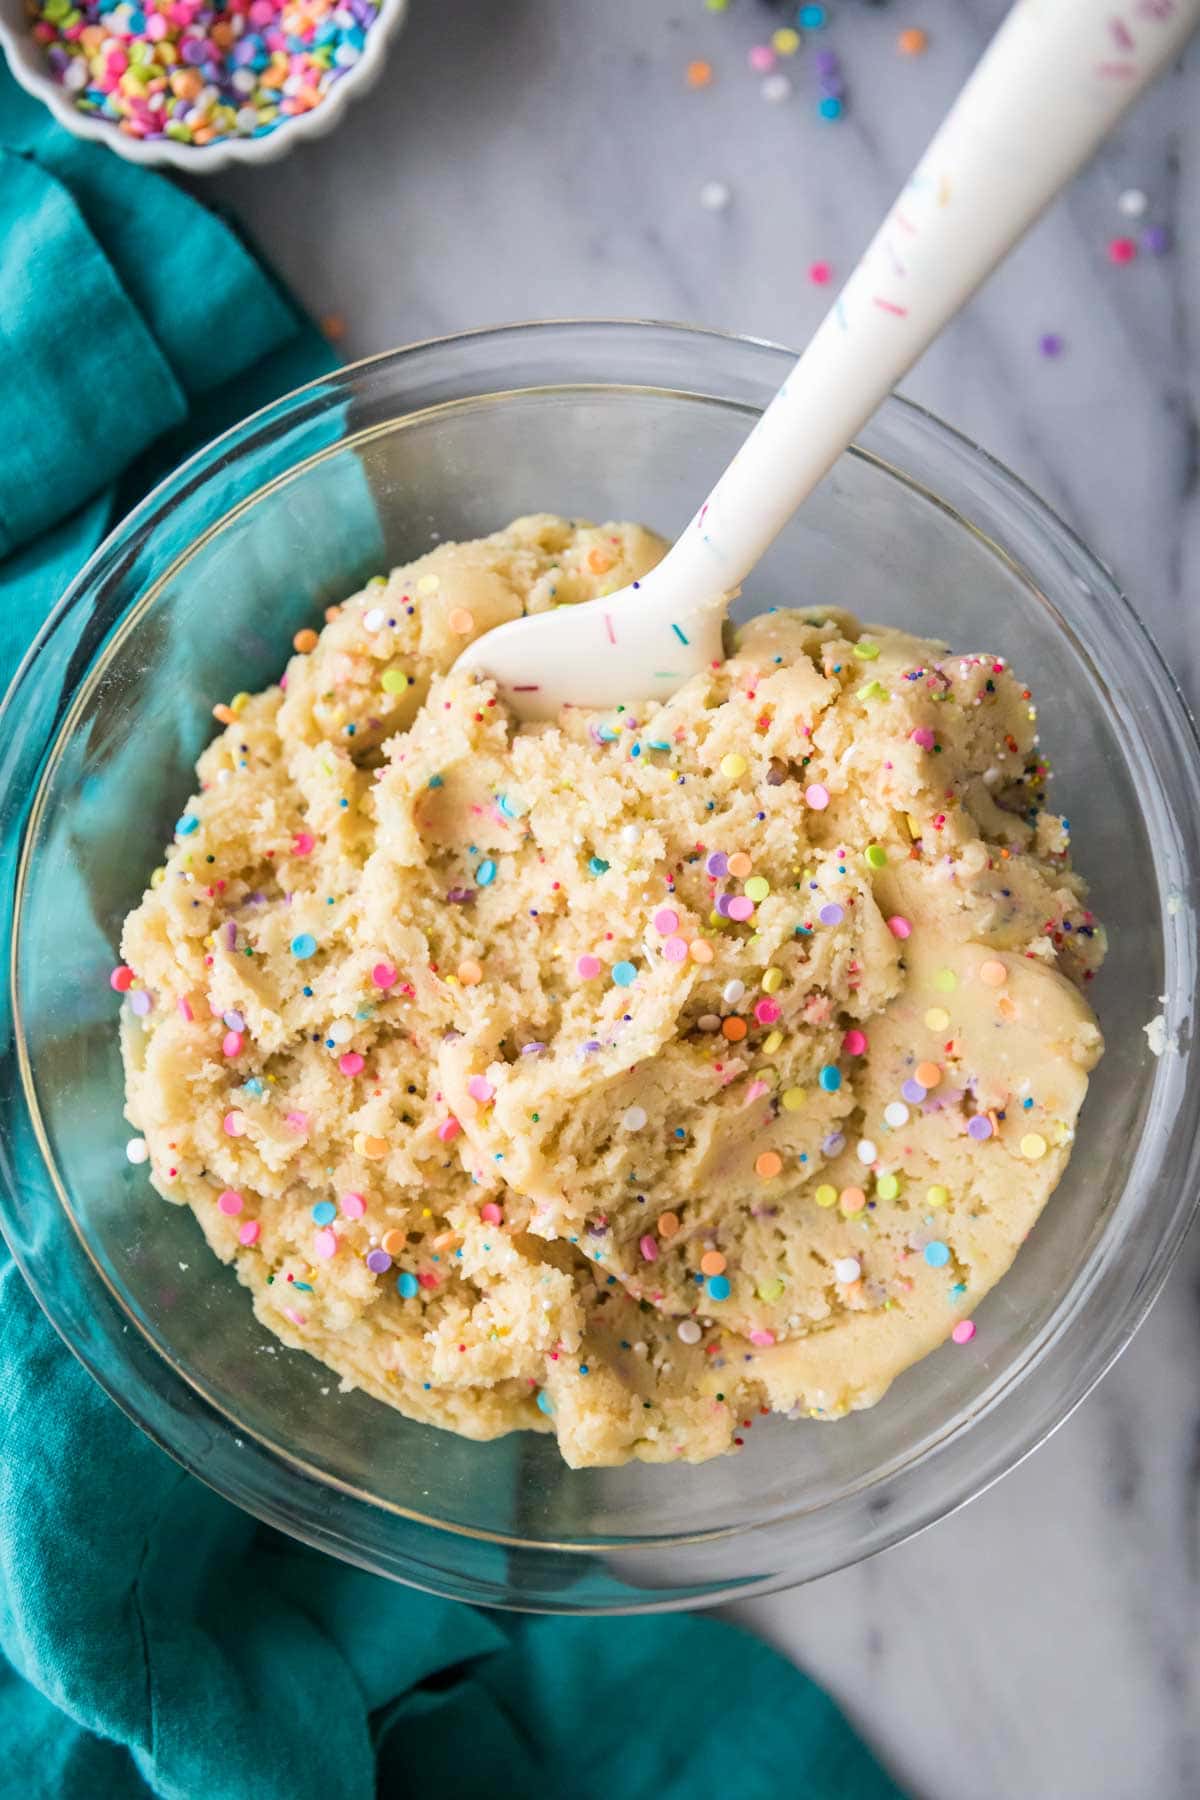
- Stir in the sprinkles, then cover the dough with plastic wrap and let it chill in the fridge.

- Scoop chilled dough and roll into smooth balls before placing them onto a parchment lined baking sheet.
- Bake for 10-12 minutes, then let the cookies cool completely on the baking sheet before enjoying.
SAM’S TIP: Don’t add all of your dry ingredients at once! If you do, you could end up with a dry, crumbly dough. Adding the flour gradually allows it to absorb properly and makes your dough much easier to work with.
Frequently Asked Questions
Funfetti simply refers to the well-loved boxed cake mix that’s loaded with colorful sprinkles. The final product has a buttery, vanilla flavor and lots of colorful sprinkles throughout, just like these funfetti cookies! You could also call these confetti cookies! I actually incorporate funfetti cake mix in a few of my recipes, like my funfetti cheesecake squares.
Yes! This is the only (very minor) downside to using melted butter, but it’s SO important. Chilling helps the flavor develop and prevents the funfetti cookies from spreading too much on the baking sheet.
It sounds like you may have accidentally over-measured your flour or over-baked your cookies. Remember to pull your cookies out when they still look a bit underdone, since they’ll finish cooking on the baking sheet. If you let your cookies bake completely in the oven, they’ll end up over-baked after cooling. I know it seems weird, I found this is the best way to get soft and chewy funfetti cookies.
I hope you have as much fun making (and eating!) these as I did!
Enjoy!
Let’s bake together! I’ll be walking you through all the steps in my written recipe and video below! If you try this recipe, be sure to tag me on Instagram, and you can also find me on YouTube and Facebook
Funfetti Cookies
Ingredients
- 1 cup (226 g) unsalted butter, melted and cooled until no longer warm to the touch
- 1 ⅔ cup (333 g) granulated sugar
- 2 large eggs, room temperature preferred
- 2 teaspoons vanilla extract
- 3 cups (375 g) all-purpose flour
- 1 Tablespoon cornstarch
- 1 teaspoon baking powder
- ¾ teaspoon baking soda
- 1 teaspoon table salt
- ⅓ cup sprinkles, nonpareils, quins, jimmies, or a mix
Instructions
- Combine melted, cooled butter with sugar and stir until combined.1 cup (226 g) unsalted butter, 1 ⅔ cup (333 g) granulated sugar
- Add eggs and vanilla extract, stir well.2 large eggs, 2 teaspoons vanilla extract
- In a separate bowl, whisk together flour, cornstarch, baking powder, baking soda, and salt until thoroughly combined.3 cups (375 g) all-purpose flour, 1 Tablespoon cornstarch, 1 teaspoon baking powder, ¾ teaspoon baking soda, 1 teaspoon table salt
- Gradually stir dry ingredients into wet until completely combined.
- Stir in sprinkles until well-distributed through the dough.⅓ cup sprinkles
- Cover bowl with plastic wrap and chill in the refrigerator for at least 30 minutes and up to 5 days (dough chilled longer than a few hours may need to sit at room temperature for a bit to become soft enough to scoop easily).
- When nearly ready to bake, preheat oven to 350F (175C) and line a baking sheet with parchment paper.
- Scoop dough by rounded 1 ½ Tablespoon-sized scoops and drop onto baking sheet (or roll the dough into smooth balls between your palms for rounder, more uniform cookies) spacing cookies at least 2” (5cm) apart.
- Transfer baking sheet to 350F (175C) preheated oven and bake cookies for 10-12 minutes. Cookies may look slightly underdone when they come out of the oven, this is fine and makes them nice and chewy as they continue to cook on the baking sheet as they cool. Let them cool completely on the baking sheet before removing as they’re fragile when warm!
Notes
Storing
Store in an airtight container at room temperature for up to 5 days.Nutrition
Nutrition information is automatically calculated, so should only be used as an approximation.
Like this? Leave a comment below!


I made these last night and they turned out pretty well. I spooned out about 2 tablespoons and spaced each dollop about 2 inches apart, but the cookies still ran together. The cookies taste great so I shared them with my office. Everyone seems to like them also. Thanks very much for the from scratch funfetti cookie recipe!
I’m glad to hear that you enjoyed them, Gregory!
I think I figured out why the cookies ran together. My oven seems to be about 25 degrees below the set temperature. I increased the temperature and used an oven thermometer to get the correct setting. The cookies puffed up and look great now. Thanks again.
If I chill the dough overnight, what should I do before or during the baking process to ensure that I get chewy cookies? Should I let the dough cool down before baking them, if so, for how long??
Hi Jenn! If you chill the dough I would make sure you just cover it in the fridge, you do not need to bring the cookies back to room temperature before baking. The dough may get pretty stiff after sitting in the fridge so you may need to let it sit at room temperature long enough just to be able to scoop it easily, but you can bake the chilled dough as instructed in the recipe. I hope you love them!
Can o freezer those cookies after baking it?
I wouldn’t recommend freezing after baking, though you can freeze the dough beforehand by wrapping tightly in cling wrap and storing in an airtight container. I hope that helps!
Can you store the rest of the cookie dough that is unused?
Yes, keep it refrigerated in an airtight container, but I wouldn’t store for more than a few days. You could also portion the dough, wrap it tightly, and freeze, and it would last even longer.
These look amazing! I am wanting to make them into an ice cream sandwich for my daughters rainbow birthday party, do you think they’d work ok in that way? Any suggestions?
I think these would work great for ice cream sandwiches! I hope you love them!
Literally just finished making these for my son’s lunches. So EASY and so TASTY! I hope they last long enough to make it through the week!
Love hearing this, so glad you enjoyed! Thanks for coming back to let me know how they turned out!
I just made these and they came out really puffy and like a dome, are they suppose to be like this? Yours look flat in your pictures.
Sounds like it may have been too much flour, try to measure the flour by spooning it into a measuring cup (rather than packing it in or scooping) and then level off using a straightedge like the back of a knife. I hope that helps!
I wanted to use spring(Easter) colored sprinkles. That’s all I have are sprinkles I can’t find any spring nonpareils. Would it be okay to just use all sprinkles? Thanks in advance!
That would definitely be fine! I hope you love the cookies! 🙂
These are so amazing. Seriously. And my 4 year old loves loves making them. Who wouldn’t with sprinkles!?!? Have made twice and won’t loose this recipie. Thank you.
Christina I am so happy to hear that you both love these cookies so much! Thank you so much for commenting to let me know how they turned out — they are definitely a favorite here, too! 🙂
can u use foil instead of parchment?
They may stick to the foil, I would just use an ungreased cookie sheet without the parchment paper.
I prefer parchment paper because it’s easier to clean up and it makes the cookies oh-so-slightly softer (the bottoms don’t brown as quickly) but you will still get great cookies just using the standard technique of a cookie sheet without any parchment paper. I hope you love them!
lol i just bit the bullet and went out and bought some. phenomenal recipe! love it!!
So glad you liked the recipe! And I think you’ll love using parchment paper, softer cookies and easier cleanup 🙂
I tried this recipe last night and they turned out soo good! I was concerned when I first took them out because they totally looked too soft inside. But I kept in mind what you said and let them be. This morning after they had cooled down completely and they were absolutely perfect! Thank you so much for sharing. I did mine with sprinkles and white chocolate chips. I also used soft butter and whipped it then added the sugar and eggs and stuff.
Will definitely be using this around valentine’s with fun festive colors.
I’m so glad that you enjoyed the recipe, Kennya! You are right these would be great for Valentine’s Day!! Thanks so much for coming back and commenting!
I tried this recipe last night and they turned out soon good! I was concerned when I first took them out because they totally looked too soft inside. But I kept in mind what you said and let them be. This morning after they had cooled down completely and they were absolutely perfect! Thank you so much for sharing. I did mine with sprinkles and white chocolate chips. I also used soft butter and whipped it then added the sugar and eggs and stuff.
Will definitely be using this around valentine’s with fun festive colors.
These were so so so so good! Made them for a birthday and everybody asked me for the recipe. Thank you so much for sharing!
I’m so happy to hear that everyone enjoyed them! Thank you for coming back and commenting to let me know how they turned out!! 🙂
These were perfect! Soft and chewy! Thanks!
Thanks, Jen, I’m so glad you loved them! 🙂
You weren’t kidding about the funfetti collection! But I can’t blame you–only a monster would get tired of sprinkles. They’re so cheerful and fun–funfetti desserts always make me smile!