
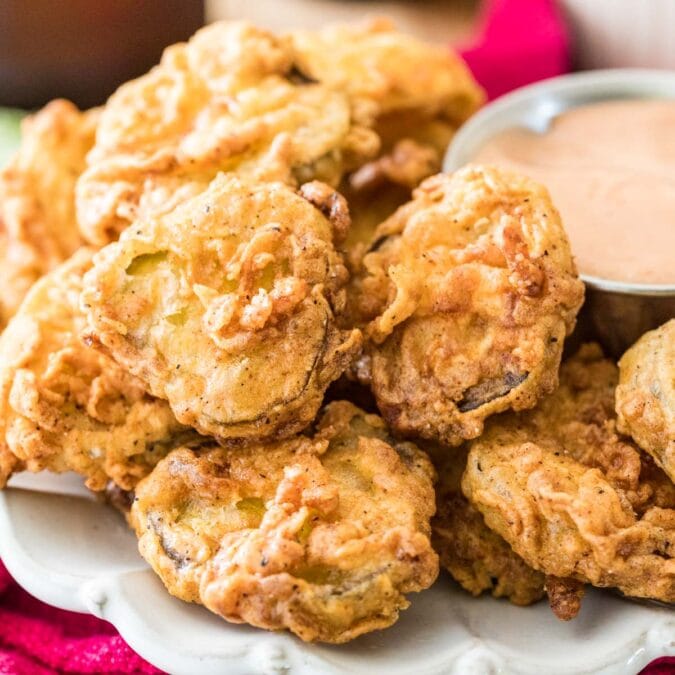
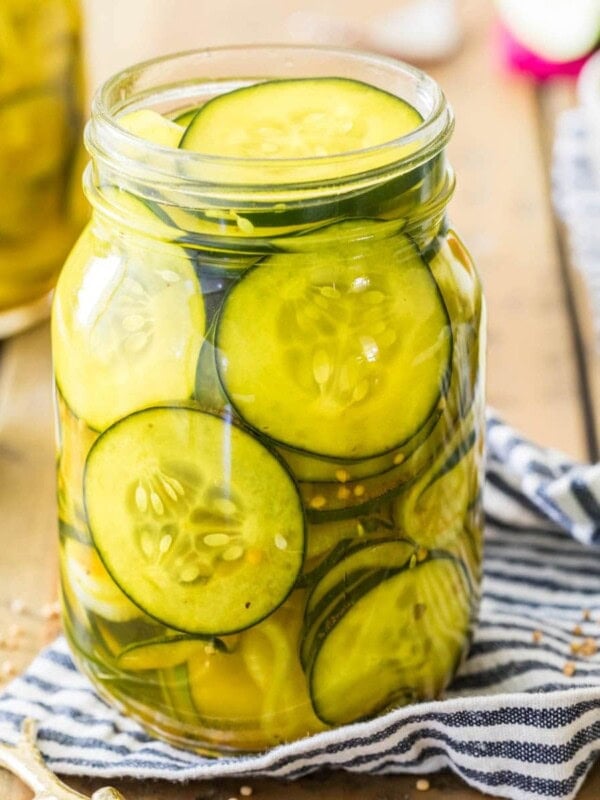
Fried Pickles
This post may contain affiliate links. As an Amazon Associate I earn from qualifying purchases. Please read my disclosure policy.

Today we’re making homemade Fried Pickles WITHOUT a deep fryer! My recipe makes a big batch of perfectly crisp, breaded dill pickle slices in just 20 minutes. Recipe includes a how-to video!

How to Make the BEST Fried Pickles
Did you know? Know that fried pickles are actually shockingly easy to make at home? That you don’t need to wait until the next time you’re bar-side or at a restaurant in order to indulge in them? That you can make them with basic kitchen ingredients and no deep fryer?
They’re made much the same way as many of my other fried recipes (like my kettle chips, homemade mozzarella sticks, and donut holes), simply and on the stovetop. All you need is a heavy-bottomed pot, some neutral cooking oil, and a thermometer (and yes, you do need the thermometer, but you should really have one in your kitchen for a hundred reasons besides just to make fried pickles)!
When testing this recipe I was moving along happily towards thinner, barely breaded pickles when I found a variation I liked even better. Today’s recipe features a crispy, more prominent batter (paired with a more thickly sliced dill pickle, so as not to overwhelm the taste), and they’re the absolute best fried pickles you’ll ever taste.
Why you’ll love my recipe:
- No deep fryer required!
- Includes tips for perfectly crispy (not soggy!) pickles.
- Takes just 20 minutes from start to finish.
- Uses a few basic ingredients you’ll already have on hand.
- Tastes great with ranch dressing or my zesty dipping sauce (included in the recipe).
What You Need
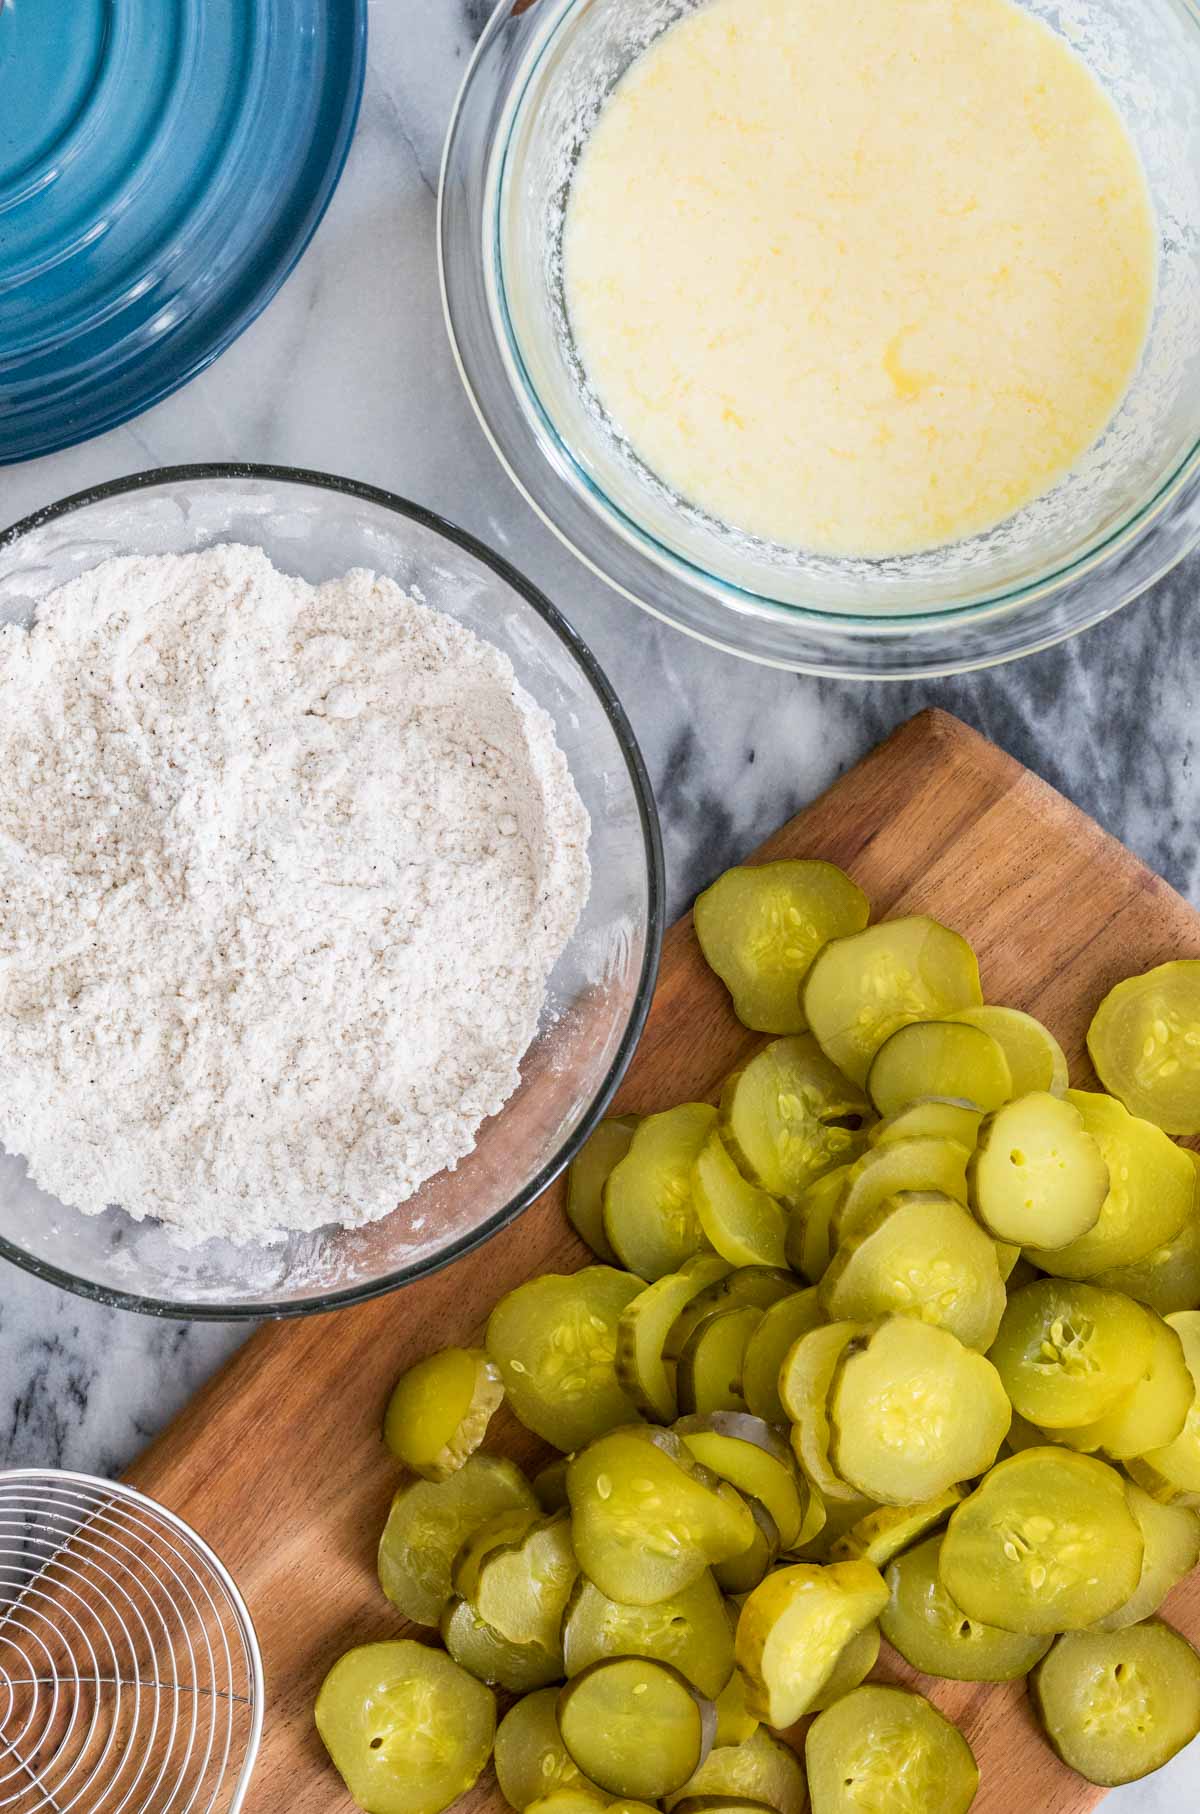
You only need a few ingredients to make fried pickles at home:
- Buttermilk. The tangy flavor of the buttermilk is the perfect complement to dill pickles. If you don’t have buttermilk on hand, you can use my easy buttermilk substitute, which just requires milk (preferably whole milk) and either a splash of lemon juice or vinegar.
- Whole Pickles. You can start with pre-sliced dill pickle chips, but I prefer to cut my own from whole kosher dill pickles. I find I have better control over the width of the pickle this way!
- Oil. Use a good, neutral frying oil, like vegetable, peanut, or canola. Olive oil is not recommended here.
- Spices. We’ll season our breading with salt, pepper, paprika, cayenne pepper, and garlic powder. Feel free to play around with adding some of your favorite spices.
SAM’S TIP: The thickness of your pickle slice matters! I found that the thin pickle slices I originally was going for became overwhelmed by this batter. When I tried them this way, it was kind of just like eating deep fried batter (tasty, but not what we’re aiming for!). Slices that were just shy of 1/4″ thick provided the perfect amount of pickle. This way you can actually taste the pickle and experience that satisfying pickle crunch in every bite. Any thicker and they became awkward, two-bite snacks!
Remember, this is just an overview of the ingredients I used and why. For the full recipe please scroll down to the bottom of the post!
Pickle-Frying Basics
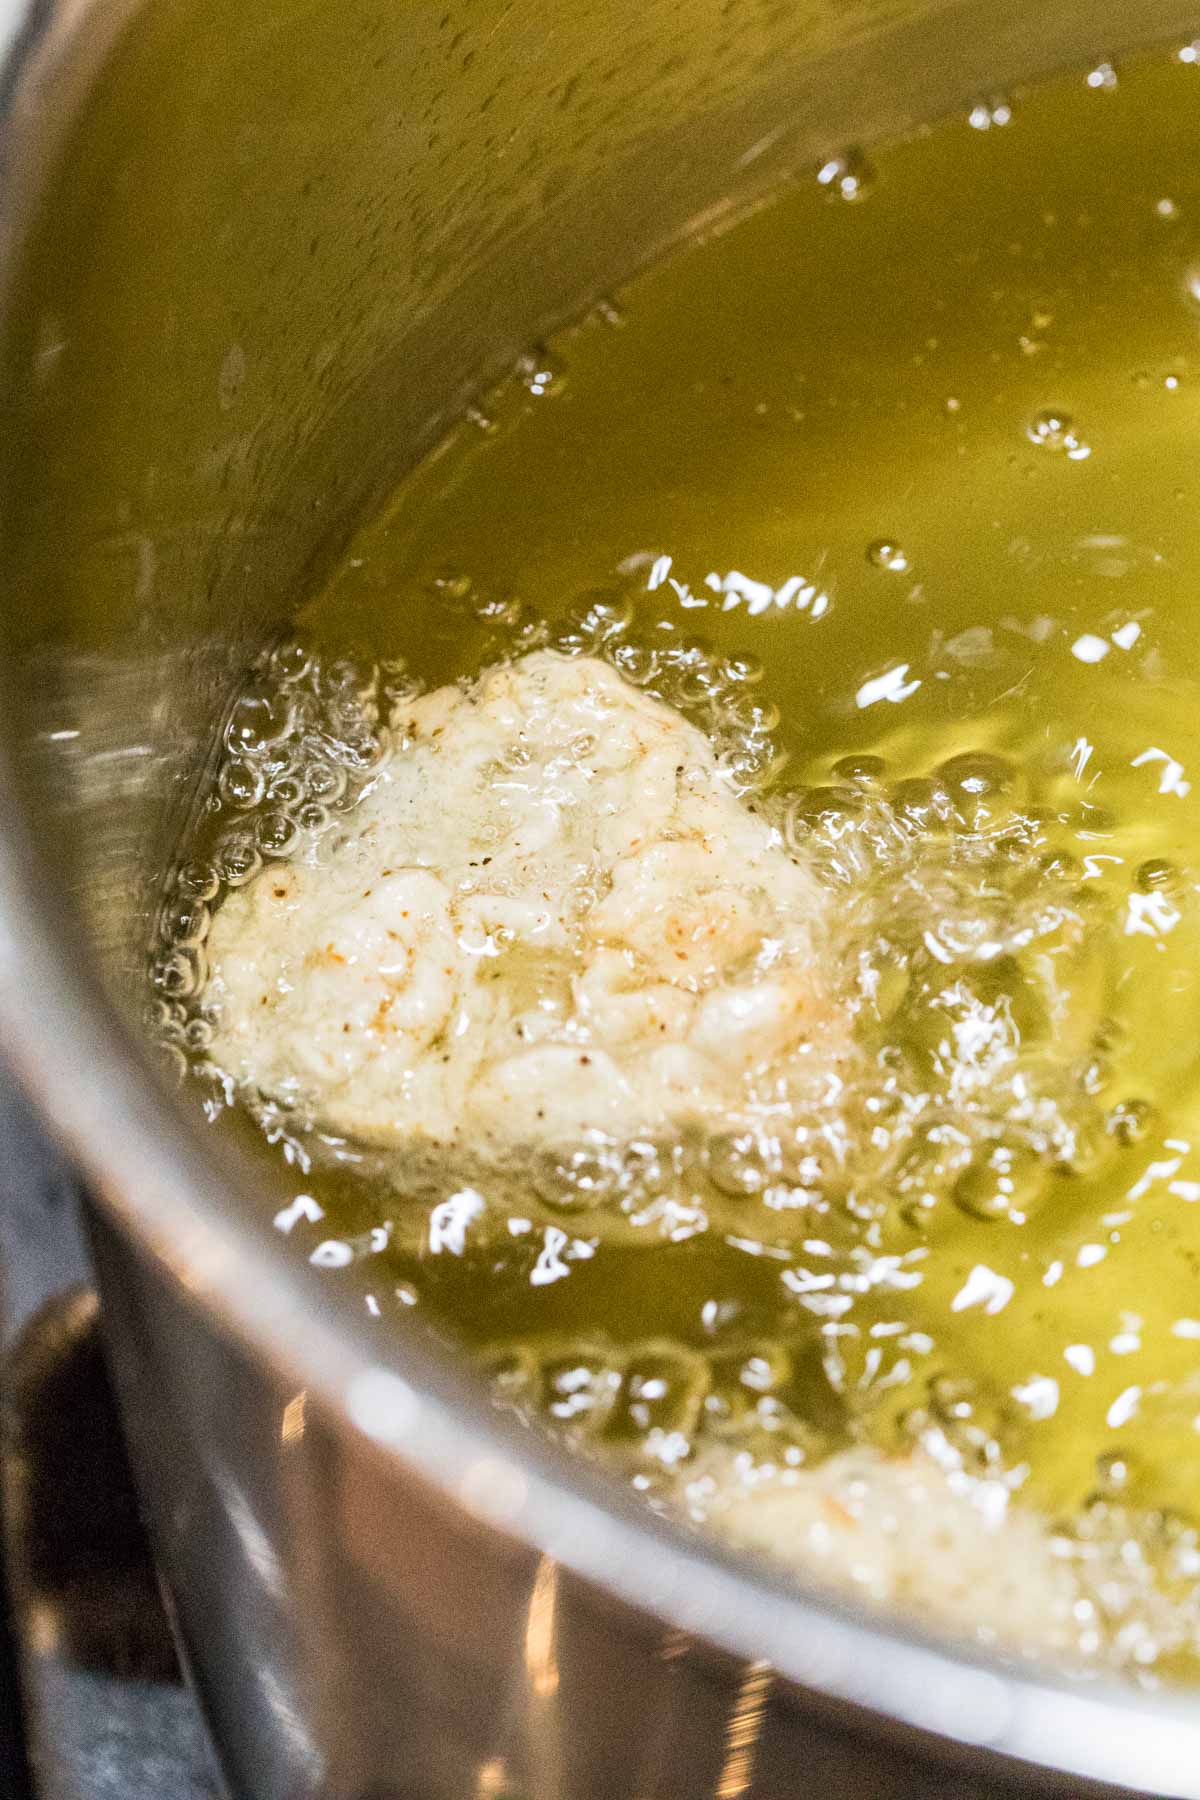
- Heat your oil to 375F. Use a thermometer and make sure it’s suspended about midway in the oil and not touching the bottom of the pan.
- Slice your dill pickles and make your breading and dipping mixtures while your oil is heating.
- Once your oil is hot, toss 3-4 pickle slices in your flour-based breading mixture, shake off the excess, dip in a buttermilk/egg mixture, and dip in flour mixture again.
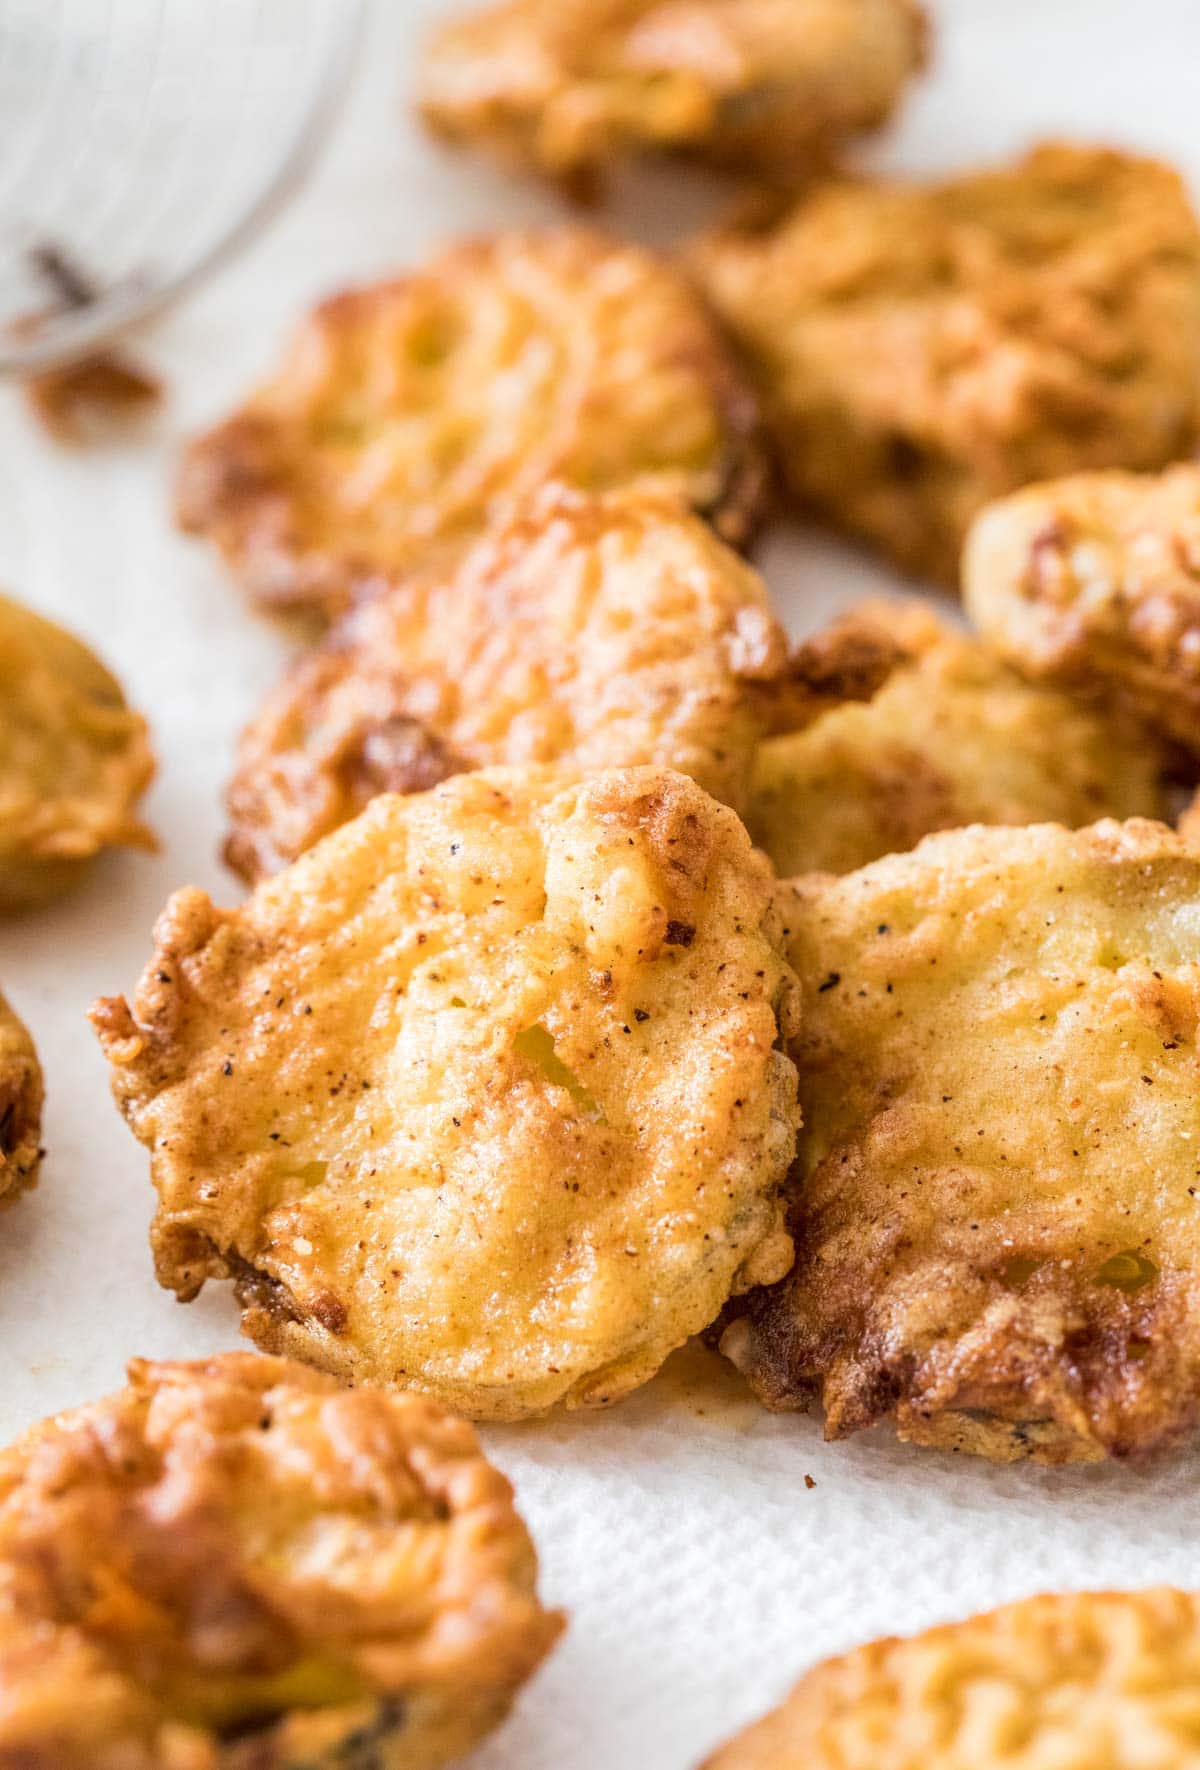
- (Carefully!) transfer to oil and fry until golden brown.
- Remove from oil using a strainer or slotted spoon, then repeat with your next batch of pickles. If you’ve made any of my fried recipes like my sour cream donuts or apple fritters recently, you know the drill — make sure your oil returns to temperature before adding the next round of pickles!
- Fried pickles are best enjoyed warm, and I love them dipped in my simple zesty dipping sauce (included in the printable recipe).
SAM’S TIP: Pickles tend to float while frying, so remember to flip them over during the cooking process so both sides get evenly golden!
Frequently Asked Questions
I personally haven’t tried this, so I can’t say for sure how it would go. I think it could end up being quite a mess, especially when working with slices as we are here. Reheating any (unlikely) leftovers in the air fryer would be fine though!
My biggest tip for making sure your pickles are crispy is to use a thermometer! By maintaining a constant temp of 375F, your pickles will come out crispy every time. To do this, I recommend working in batches of 3-4 pickles to prevent your oil temp from dropping too much (if it drops too low, your pickles will take a long time to cook and will become greasy). And remember to make sure your oil comes back to 375F before adding your next batch!
This might work if you froze your pickles in a single layer on a cookie sheet before placing in a ziploc or airtight container, but this is not something I’ve yet tested. If you try this, I’d love to hear how they turned out!
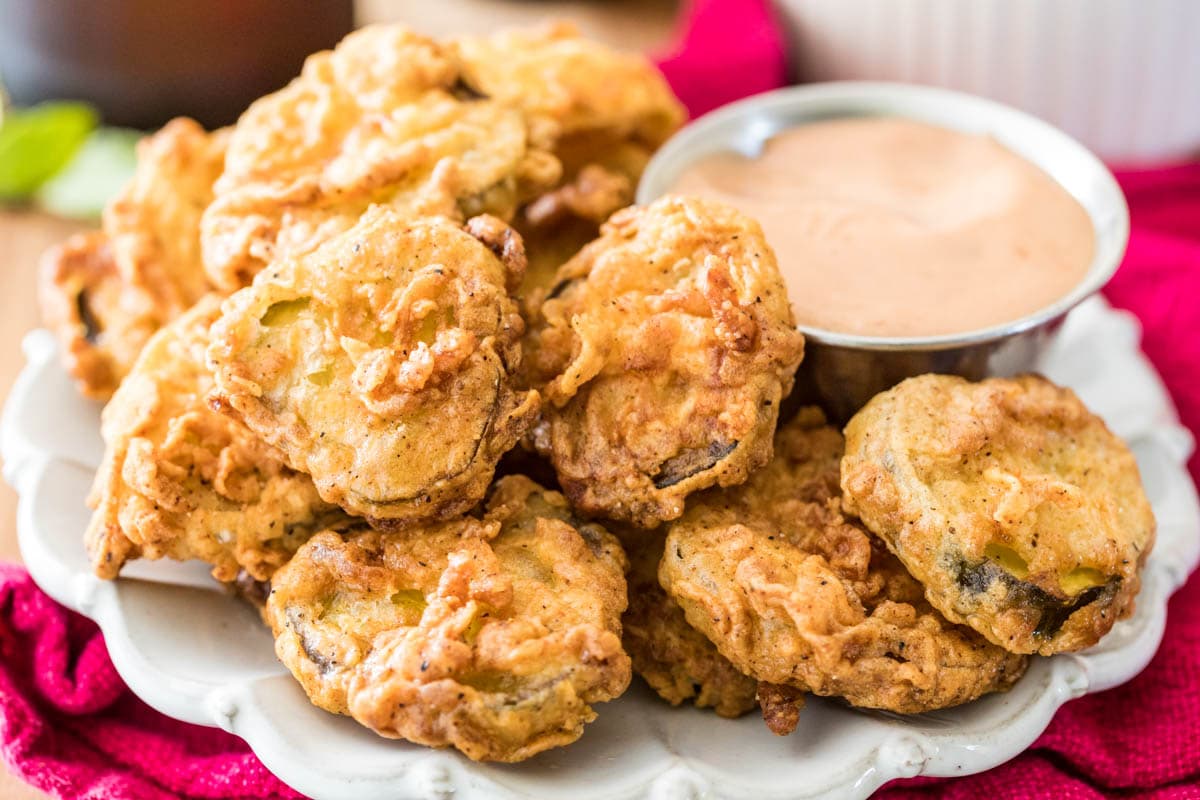
You can also dip these in my homemade BBQ sauce–yum!
Enjoy!
Let’s bake together! I’ll be walking you through all the steps in my written recipe and video below! If you try this recipe, be sure to tag me on Instagram, and you can also find me on YouTube and Facebook
Fried Pickles
Ingredients
- Vegetable oil, for frying
- 1 cup (125 g) all purpose flour
- ½ teaspoon Salt
- 1 teaspoon ground black pepper
- ¼ teaspoon paprika
- ¼ teaspoon cayenne pepper
- ¼ teaspoon garlic powder
- ½ cup (118 ml) buttermilk
- 1 large egg
- 3 kosher dill pickles, cut into slices just shy of ¼” thick and lightly patted dry (see note)
Dipping Sauce (optional, plain old Ranch dressing also works great for dipping!)
- 2 Tablespoons Ranch dressing
- 1 Tablespoon BBQ sauce
- 1 teaspoon ketchup
- 1 teaspoon mayonnaise
- Dash tabasco sauce
- Dash of ground black pepper
Instructions
- Fill a Dutch oven or heavy-bottomed saucepan 2-3" deep with oil for frying. Fix a frying thermometer to the edge (make sure it is in the oil but not touching the bottom of the pan) and set your heat to medium. Oil will need to reach 375F (190C) before you can begin frying, but this will take 10 minutes or so.Vegetable oil
- Meanwhile, prepare your breading mixture by whisking together flour, salt, pepper, paprika, cayenne pepper, and garlic powder. Set aside.1 cup (125 g) all purpose flour, ½ teaspoon Salt, 1 teaspoon ground black pepper, ¼ teaspoon paprika, ¼ teaspoon cayenne pepper, ¼ teaspoon garlic powder
- In a separate bowl, whisk together buttermilk and egg.½ cup (118 ml) buttermilk, 1 large egg
- Once oil has reached 375F (190C), prepare pickles for frying in batches of 3-4 slices3 kosher dill pickles
- Coat slices in flour mixture, gengly shake off excess, dredge in buttermilk/egg mixture, then coat with flour mixture again.
- Transfer (carefully!) to oil and fry 3-4 pickle slices at a time for 90 seconds on each side or until golden brown.
- Use a slotted spoon or strainer to remove from oil and transfer to a paper towel lined plate. Make sure oil returns to 375F (190C) before frying your next batch of pickles.
- Fried pickles are best enjoyed warm. If desired, serve with dipping sauce, which can be made by stirring together all of the dipping sauce ingredients until combined.2 Tablespoons Ranch dressing, 1 Tablespoon BBQ sauce, 1 teaspoon ketchup, 1 teaspoon mayonnaise, Dash tabasco sauce, Dash of ground black pepper
Notes
Pickles
Alternatively you can use 1 ½ cups of pre-sliced dill pickle chipsNutrition
Nutrition information is automatically calculated, so should only be used as an approximation.
Like this? Leave a comment below!


They were delicious for a crunch add 2 tlb of corn starch that makes it crunchy so good will be making again
These were actually easier to make than I anticipated … I used a 46 oz jar so maybe like 10 large pickles. I doubled the flour recipe and put half of it in a gallon sized bag to coat them initially. Then I doubled the buttermilk/egg, dipped the pickles in there and coated them again per the recipe. These were so good- even the dipping sauce was amazing!!!
Thank you so much for trying my recipe, Melanie! I’m so glad you enjoyed them so much! 🙂
I used coconut oil because it was the only kind I had and they were delicious! you could not taste the coconut oil. I also did not put as much pepper as was recommended and they still tasted good. I used jar pre sliced dill pickles.
I’m so glad you enjoyed them so much, Mckinley! 🙂
Horrible horrible recipe fried these fried pickles are not crunchy one bit absolutely disgusting
Sounds like your oil probably wasn’t the right temperature. 🙁
First time making these and my grandson his wife granddaughter as well loved this recipe
just made these for the first time ever and they are legit better than any I’ve ever gotten in a restaurant. making them at home is so much better, I wish I’d known how easy it was years ago. Will definitely be making them again!
I’m so glad you enjoyed them so much, Michelle! 🙂
AMEN and thank you for the recipe. It’s been years since I have made these and I lost my recipe when I moved. Again I thank you. have a great day.
very happy 😁, Michelle Lapp
We are so happy they hit the spot, Michelle! Enjoy 😊
Maybe it’s just me, but I felt the description/title was very misleading.
you’re still deep frying with all the oil, mess,waist, ect. you’re just not using a dedicated machine.
I thought you had a good alternative to deep frying, not just doing it the way before a machine helped.
You could air fry them! I’d bet it wouldn’t take 5 minutes to do so, in a pre-heated air fryer.
Perfect results!
I’m so glad you enjoyed them so much, Shena! 🙂
Fun! I tried two different kinds of pickle chips and quickly learned that the thinner ones cook better for this recipe. I patted both types dry, the thick ones held onto their water and weren’t as crispy at the end as the thin ones. The texture was awesome and I could have eaten my weight in these.
I’m so glad you enjoyed them so much, Brook! 🙂
I plan on trying your recipe when my daughter comes to visit. They are her favourite. My question is, how do I prevent the temperature from going higher than 375. And if it does will this affect the coating? I looked to see if anyone else had asked this question but no one seemed to run into this problem.
Claire
Hi Claire! You can’t really keep it from going over 375 all the time. The temperature will fluctuate a bit but you want to keep it as close to the 375 as possible. You will lose temperature when you add things, but it will come back. 🙂