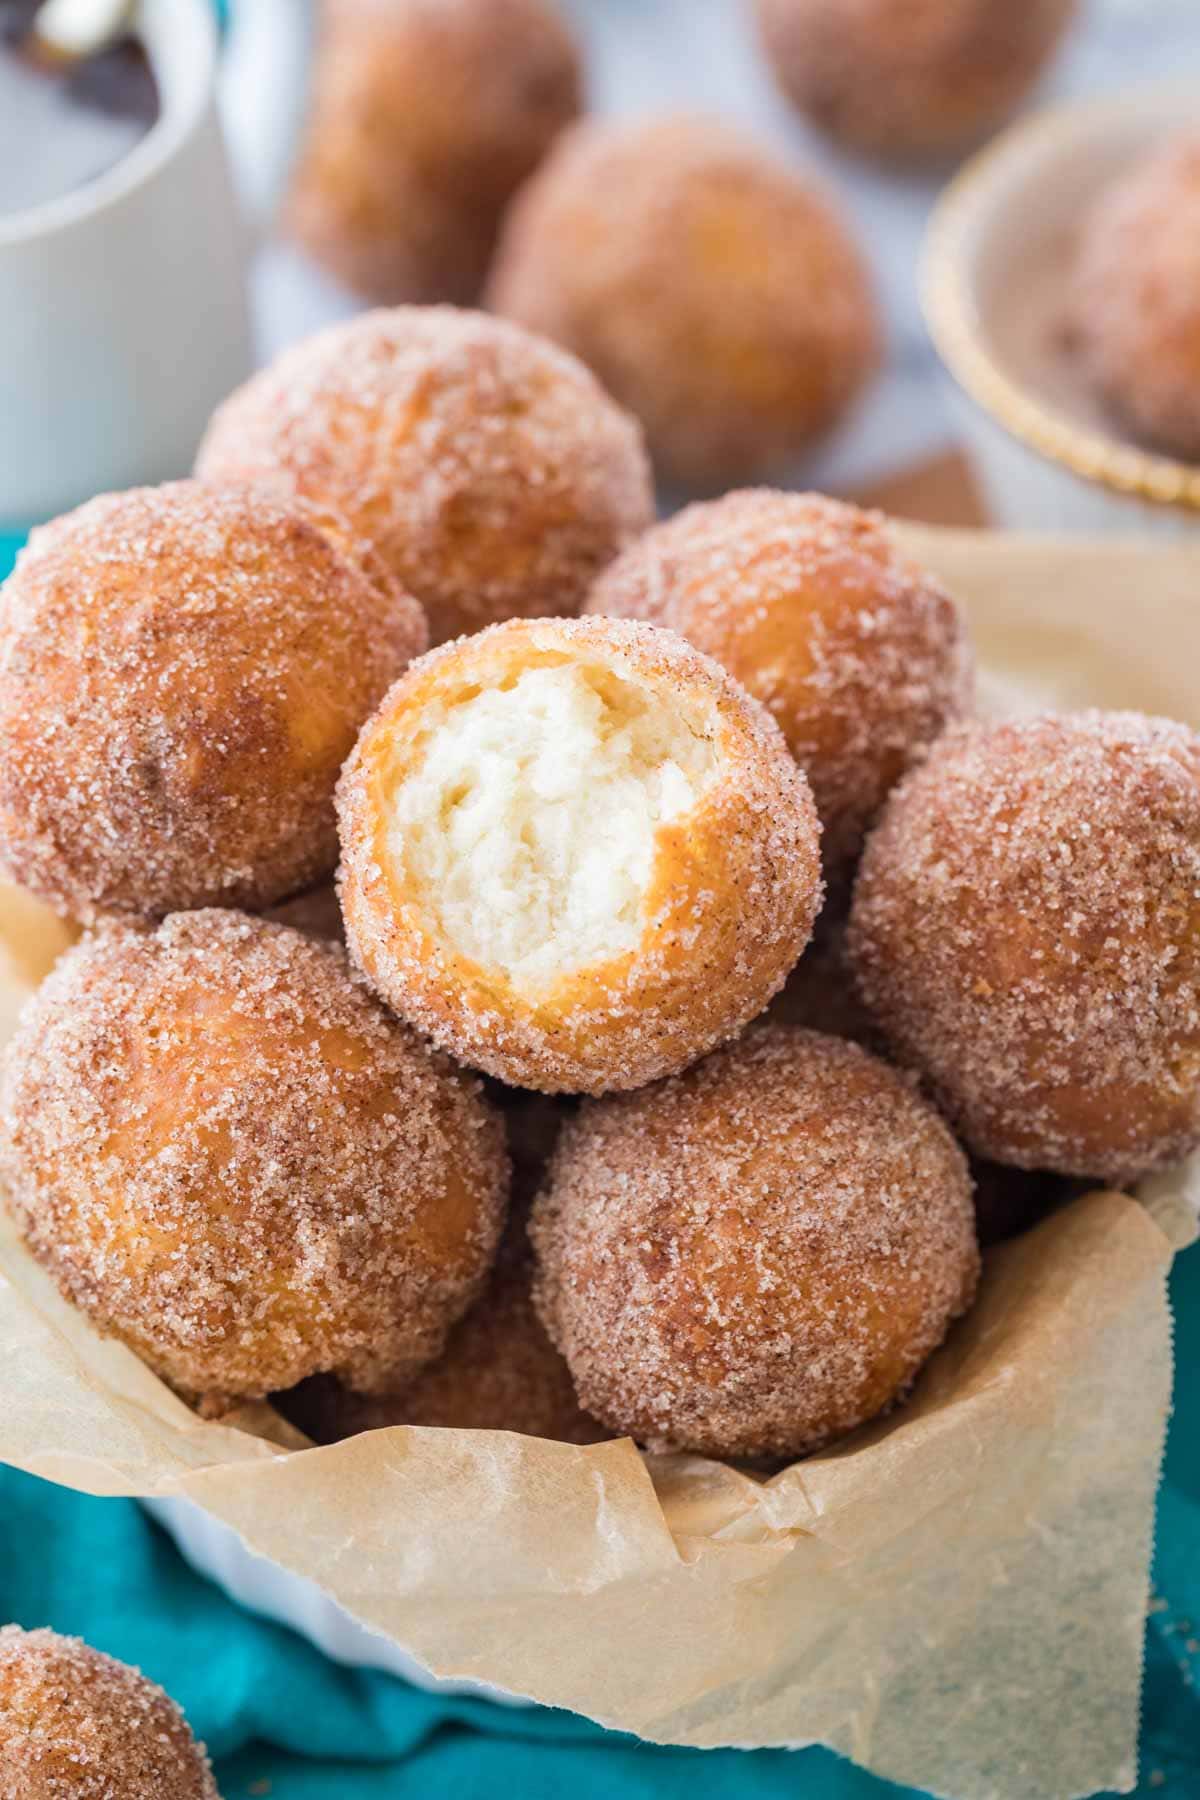
This is an easy, from-scratch, no-yeast donut hole recipe! They make a great quick & easy breakfast treat or snack! These take just minutes to whip up for the best fried donut holes you’ve ever tasted! Recipe includes a how-to video!
An Easy Donut Recipe Without Yeast!
Today I’m sharing my favorite donut recipe — and it’s made without yeast.
These simple donut holes are so quick and satisfying, you won’t even miss the yeast! They’re easy to make, with no proofing, kneading, or rising–simply mix, roll, and fry. I love rolling them in cinnamon sugar after frying, but they’re also great in confectioners sugar or just plain sugar too.
Preparation-wise, these are very similar to my cinnamon rolls without yeast; though I borrow a technique from my biscuits and cut in the butter with a grater. I suppose you could even go the way of my scones and use a food processor instead–but I digress!
Why this is the BEST donut hole recipe:
- Quick: Takes just 30 minutes to make.
- Flavorful: They truly melt in your mouth!
- Simple: Uses just a few pantry staples.
- Easy: No yeast makes prep a breeze!
If you’ve never fried anything before–don’t worry! I walk through all the steps in detail and I’m including a how-to video too. You’ve got this!
What You Need
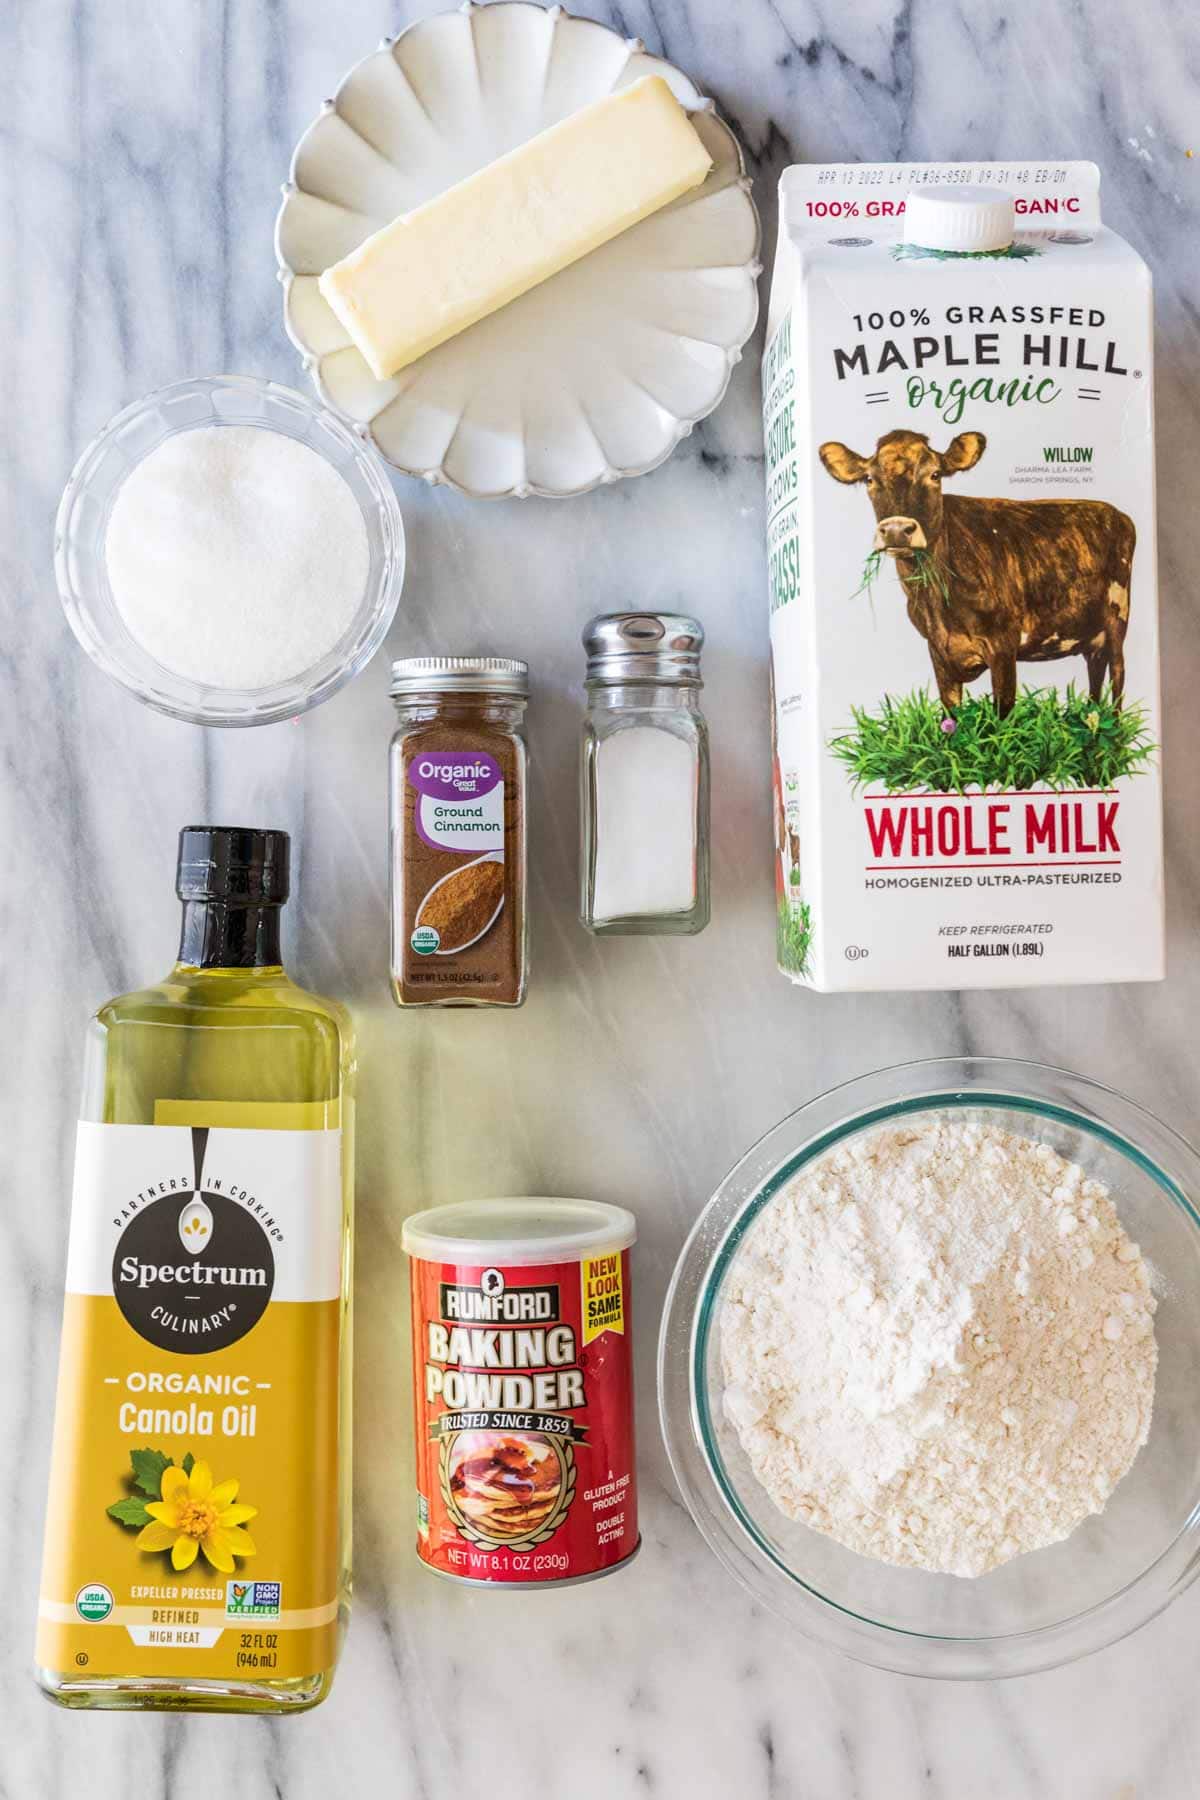
Just eight basic ingredients make these perfectly poppable fried donuts. Let’s go over a few:
- All-purpose flour. I do not recommend using self-rising or whole wheat flour. Make sure you know how to measure flour properly, or your donut holes could end up dense or dry.
- Milk. My preference is whole milk. You could use a non-dairy milk if you like, but your donuts might not be as tender.
- Butter. Use unsalted butter and make sure it’s VERY cold! I like to freeze my butter and grate it into my dry ingredients, but you can use a pastry cutter, fork, or two knives instead.
- Baking powder. Many of you have either asked if you can leave out the baking powder or substitute it with baking soda. This recipe needs baking powder and you cannot substitute baking powder with baking soda! I talk about this in detail in my baking powder vs. baking soda post if you’d like a full explanation.
- Oil. This is for frying. Vegetable or canola oil works well here.
SAM’S TIP: Oil temperature is critical for good results! Use a thermometer and monitor your oil temperature constantly; do not let the oil get too hot, and do not add your next batch of donuts until your oil comes back up to temperature!
Remember, this is just an overview of the ingredients I used and why. For the full recipe please scroll down to the bottom of the post!
How to Make Donuts Without Yeast
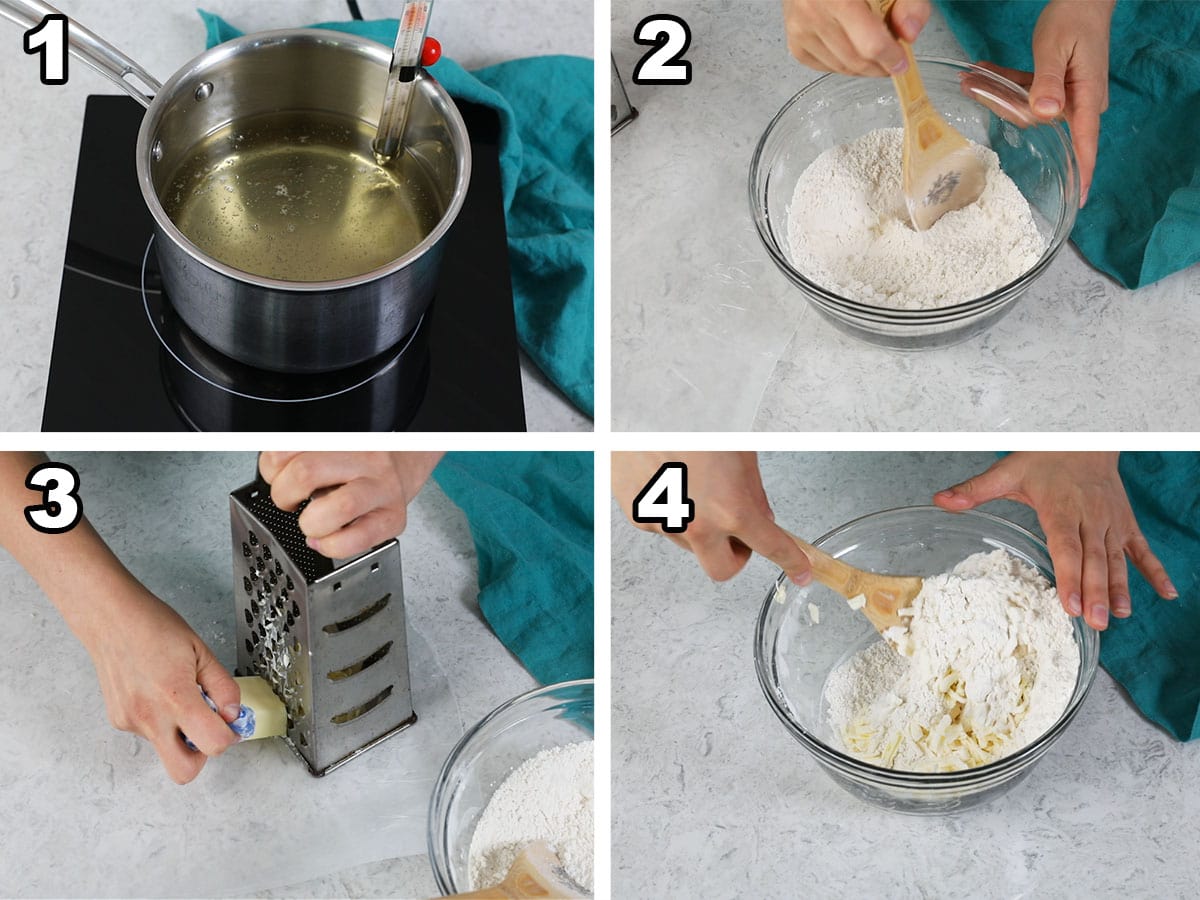
- Fill a heavy-bottomed pot with 2-3 inches of oil, attach a thermometer, and heat to 350F (but not too quickly! Set your stovetop to medium heat!).
- Combine the dry ingredients with a whisk.
- Grate very cold butter into the dry ingredients.
- Stir the butter into the dry ingredients until incorporated (large, discernible butter pieces will remain, this is fine!).
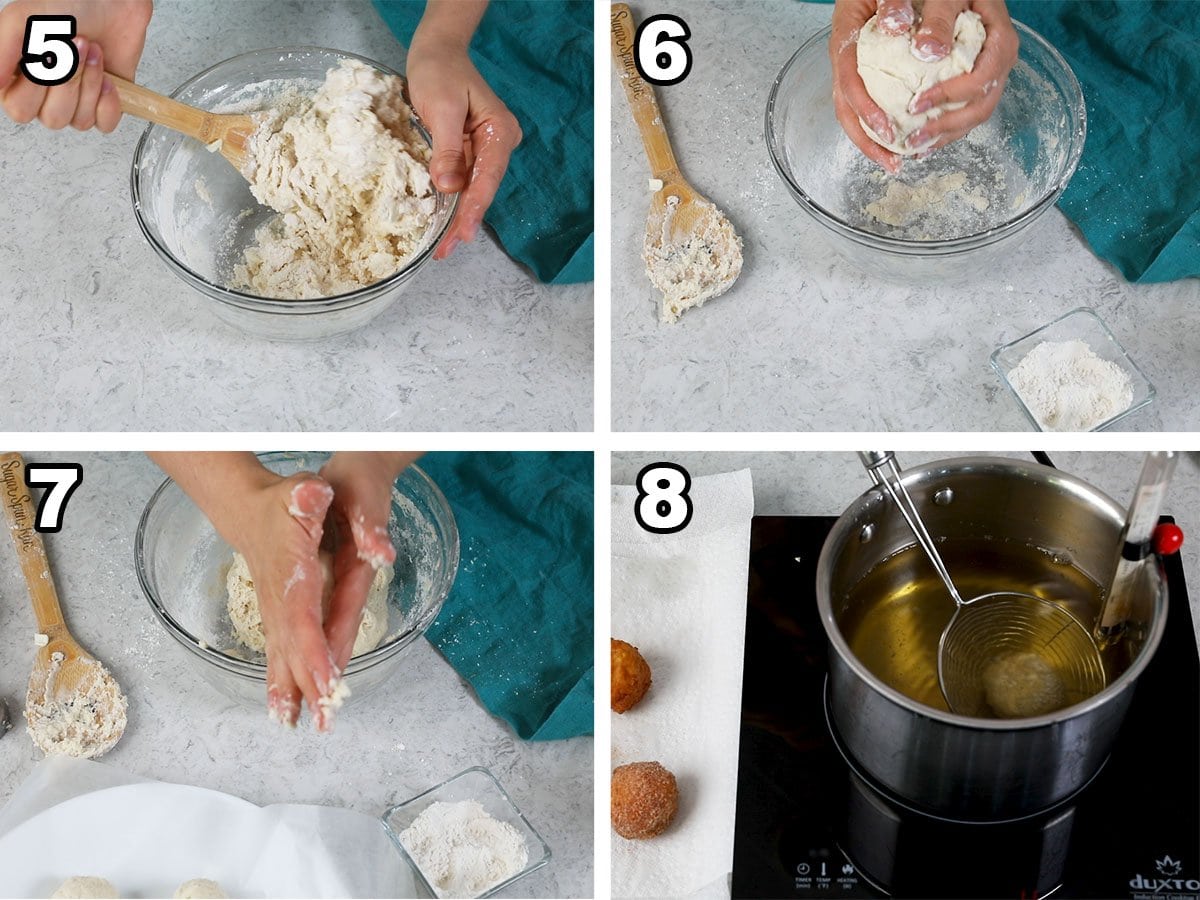
- Add the milk and stir until the dough comes together.
- Place dough on a well-floured surface and knead gently and briefly until it forms into a ball.
- Tightly roll the dough into smooth, 1.5 tablespoon sized donut balls.
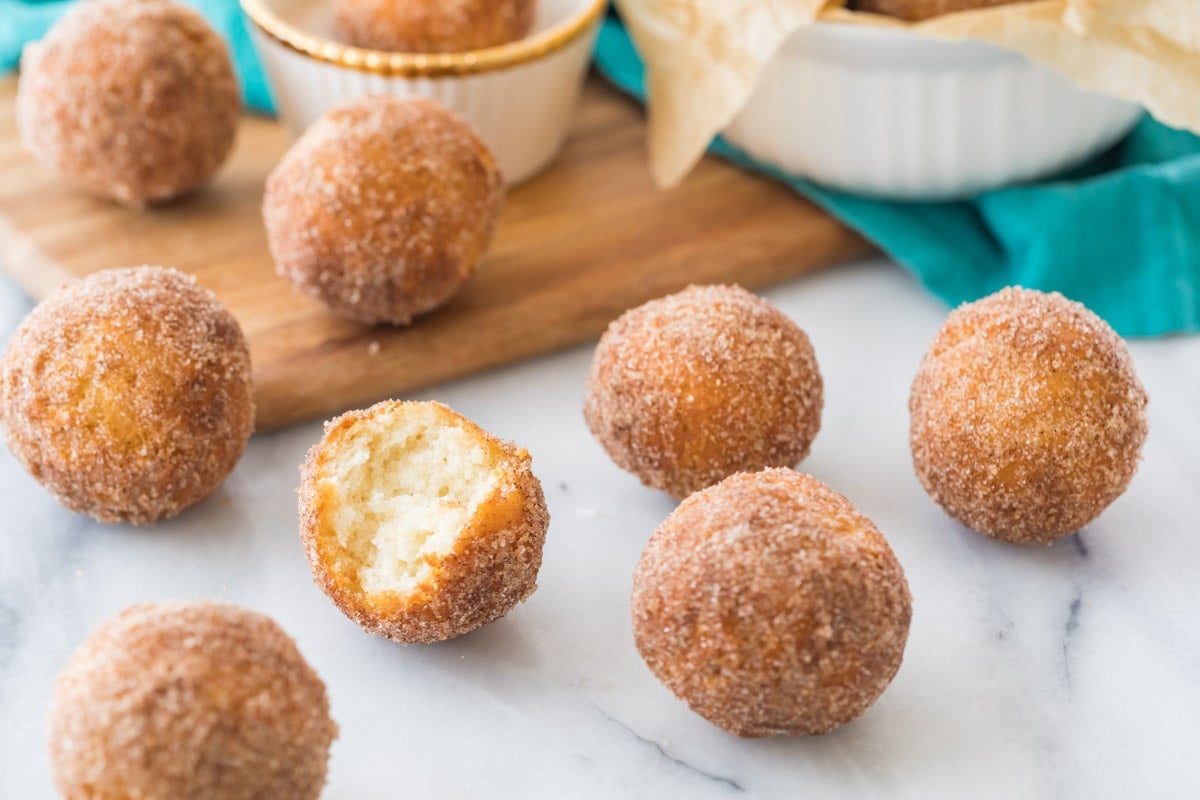
- Fry 2-3 donut balls at a time for about 90 seconds or until evenly golden. Let the first batch of donut holes cool for about a minute and then break into them to make sure they’re cooked through and also that they’re not overcooked! These will be your guide for how long your future donut holes will take.
SAM’S TIP: If the dough is too wet while you’re working it together on the counter, you can sprinkle in a bit more of flour. Make sure it’s well-combined and that you roll your donut holes into tight balls so they don’t disintegrate when introduced to the oil.
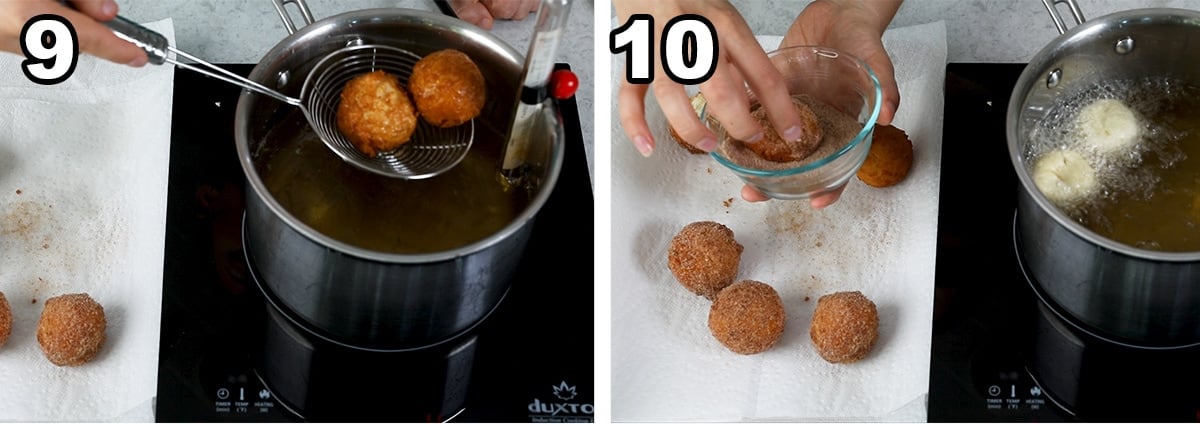
- Remove donuts to a paper towel lined plate and let cool for a few minutes.
- Roll through cinnamon sugar and enjoy!
Troubleshooting
Dough that is too sticky/wet:
If your dough is wet and sticky and difficult to work with, don’t be afraid to add more flour! Do this once you transfer the dough to your countertop and begin to work it together. Sprinkle the countertop with flour and the dough and gently work the flour into the dough until it’s no longer wet and is easy to manage.
If they disintegrate/fall apart in the oil:
This is most likely due to the dough being too shaggy. While it’s important to not over-work the dough (this would leave you with dense, dry donut holes rather than fluffy, melt-in-your-mouth ones), it should cling to itself and you should be able to roll the dough into tight balls that hold their shape. If any dry bits of flour remain, they’ll cause the dough balls to fall apart when they are being fried.
Fried donut holes that are raw/gooey inside
There are several factors that could cause this. If you’ve been monitoring your oil temp (you should be!) then you may simply need to cook the next batch a bit longer. I always use my first batch as a gauge to know exactly how long I’ll need in the oil (the recipe provides a time, but oil temperature can fluctuate quite a bit depending on the amount used and the number of donut holes added to the pot, and if yours are a bit larger or smaller than indicated you may need to adjust your time accordingly).
Note that this sometimes happens if your oil temperature is too high. The exterior of the donuts turns a deep golden quickly, making you think they’re finished cooking, but the interior hasn’t had time to cook through!
Dense/tough or greasy
Dense or tough means they simply were cooked too long or the dough was over-managed when it was being made.
Greasy is typically a result of frying in an oil temperature that is too low.
Frequently Asked Questions
I think this could work, since this recipe uses more of a dough than a batter. I haven’t tried it myself though and can’t say for sure how to do it. If you try it, I’d love for you to comment below and let me know how it went!
Yes! Just store your dough in an airtight container in the fridge. It will last this way for a few days.
Yes! You can just form your dough into a donut shape instead of a ball. I have several other yeast and yeast-free donut recipes if you prefer real donuts vs donut holes.
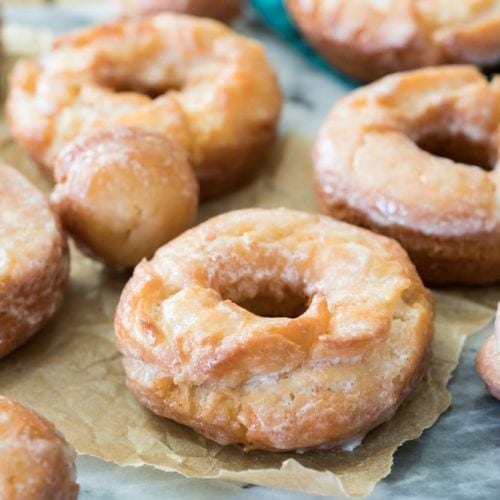
If you’re looking for a donut recipe with yeast, you NEED to check out my homemade donuts!
Enjoy!
Let’s bake together! I’ll be walking you through all the steps in my written recipe and video below! If you try this recipe, be sure to tag me on Instagram, and you can also find me on YouTube and Facebook

Donut Holes (Fried, No Yeast)
Ingredients
- Vegetable oil or canola oil for frying
- 2 cups (250 g) all-purpose flour
- 3 Tablespoons granulated sugar
- 1 Tablespoon baking powder
- 1 teaspoon salt
- 5 Tablespoons (70 g) unsalted butter (very cold, I like to place mine in the freezer 15 minutes before beginning)
- ¾ cups (175 ml) whole milk
For rolling
- ⅓ cup (67 g) granulated sugar
- 1 ½ teaspoons ground cinnamon
Recommended Equipment
Instructions
- I find my oil takes about 20 minutes or longer to come to temperature, so I typically start the oil just before I start my donuts. Fill a medium-sized, heavy-bottomed saucepan 2-3 inches (5-7cm) deep with your oil over medium heat. Use a candy or frying thermometer (make sure it isn't touching the bottom of the pot) to monitor your temperature and heat oil to 350F (175C). Monitor the heat pretty regularly and note that you may need to increase/decrease your stove temperature to keep it consistent.Vegetable oil or canola oil
- Combine flour, sugar, baking powder and salt in a large bowl and whisk until well-combined.2 cups (250 g) all-purpose flour, 3 Tablespoons granulated sugar, 1 Tablespoon baking powder, 1 teaspoon salt
- Use a box grater go grate the butter into small pieces and then add to the flour mixture and stir until well-incorporated (visible butter pieces will still remain). Note: If you do not have a box-grater, use a pastry cutter to cut the butter into the dry ingredients until the mixture resembles coarse crumbs, instead.5 Tablespoons (70 g) unsalted butter
- Add milk and gently stir until all ingredients are combined and the dough clings together.¾ cups (175 ml) whole milk
- Transfer dough onto a well-floured surface, and knead gently until it forms a cohesive ball. If dough is too sticky to manage, continue to work in flour until it is smooth and manageable (I’ve found on hot days or if my butter isn’t cold enough the dough can be quite sticky)
- Portion off approximately 1 ½ Tbsp-sized pieces of dough and roll into smooth, tight balls. Set aside.
- Prepare your cinnamon/sugar mixture for rolling by stirring together cinnamon and sugar in a small dish. Set aside.⅓ cup (67 g) granulated sugar, 1 ½ teaspoons ground cinnamon
- Prepare a large plate or baking sheet for your cooked donut holes by lining generously with paper towels.
- Once oil has reached 350F, very carefully fry your donut holes, only 2-3 at a time, carefully transferring them to the oil with a slotted spoon (don't drop them in or the oil may splash, lower them into the oil instead).
- Fry donut holes for approximately 90 seconds*, turning half way through so they become evenly golden brown.
- Remove carefully with a slotted spoon, and place donut holes on a paper towel laden plate. Allow them to sit for about a minute/until no longer too hot to touch, and then transfer them to your cinnamon/sugar dish, roll them in the mixture until fully covered. Make sure to allow your oil to return to 350F (175C) between batches.
- Repeat until all donut holes are cooked and have been rolled in cinnamon sugar.
Notes
*Verify that your donut holes are cooked!
For best results, fry only one donut hole the first time you try this, and gauge how thoroughly it is cooked. Time how long it takes for your first donut hole to turn golden, allow to cool for at least a minute, then use a knife to cut into it to check whether it is underdone, just right, or overdone, and then fry the rest of your donut holes accordingly. While these should take under 2 minutes under optimal conditions with a consistent oil temperature of 350F, it’s still important to check so that you don’t end up with a full batch donuts that are still gooey in the middle (or dry and crumbly!)!Storing
These donuts are best enjoyed warm/hot, and do not carry over well to the next day. However, you may store any leftovers in a paper-towel lined air tight container for up to a day.Nutrition
Nutritional information is based on third-party calculations and should be considered an estimate only. Actual nutritional content will vary based upon brands used, measuring methods, cooking method, portion sizes, and more.
Related Recipes
This recipe was originally published April of 2016. I’ve updated the post to be more helpful and include notes and a troubleshooting section, updated the photos, added a video, and while the recipe remains the same I’ve edited it to be easier to follow.





Sam
I’m so sorry this happened, Sam! This is so odd. If your oil temp was perfect the only other thing I could think was an ingredient was actually mismeasured or something was missed. Is that possible? Did you roll them in sugar afterwards? The dough itself isn’t very sweet, but the sugar coating really helps that. 🙂
Denise Poshard
I do make them larger than a small donut hole, though 🙂
Shaylynn
I made the dough before getting tipsy then stored in the fridge overnight, and prepped the sugar/oil and pan to be ready for use the second I woke up. It made an excellent hangover breakfast for my friends and I, and it was ready faster than if we had ordered online! Thank you very much for the recipe, I’ll be making them for some guests later tonight just for how fast/easy and tasty they are. My only recommendation for people trying this recipe is to do a few test donuts to see how they should look when fully cooked(as in no doughyness in the middle) Happy cookings y’all 🙂
Jennifer Richter
My Husband wanted donuts looked up recipes found this one, figured it should satisfy him and oh my it did the trick made recipe 100% as written and they were so good!!
Emily @ Sugar Spun Run
Wonderful! We’re so happy these turned out so well for you, Jennifer ❤️
Emily
I had a hard time getting them to cook all the way
Sam
I’m so sorry this happened! I would check the oil temperature. 🙂
Roberta Rose
Just made these and they are delicious! I have an electric deep fryer, but still used a candy thermometer to help keep the temp regulated. Followed the recipe exactly and the family loves them. They taste so much like the ones my mother made when I was a child. Brought back good memories!
Babooshka
This recipe was amazing worked wonder definitely will make again!
Kendra
They taste Great!!! Definitely will use the recipe again! Totes giving it five stars
⭐️ ⭐️ ⭐️ ⭐️ ⭐️
💖 love it so much!!
Jane
Is it okay to freeze the dough, for later use.
Sam
Hi Jane! I haven’t tried freezing the dough so I can’t say for sure how it would turn out. I think it could work though. Let me know how it goes if you try it. 🙂
Skimp
These are awsome, although they taste similar to a biscuit. Is that the texture/taste we are looking for?
Emily @ Sugar Spun Run
Hi Skimp! Since the recipe does not use yeast, the dough is very similar to a biscuit dough. Usually after frying it, it will taste more like a donut. We are happy you enjoyed it overall! 🙂
Kiwi
Would it work if I shaped these into little donuts? 😛
Sam
Other people have reported that they’ve done so with success! 🙂
Britt
Definitely! I’ve frozen the dough in a covered container with parchment. I personally like mine a bit dark. I feel it adds flavor and gives them a nice crisp outside, sorta like a fritter. Let me tell you. Fill these babies with Nutella and then freeze them then let them set to room temp. You will NOT be disappointed!
Kate
This is the first time I’ve ever made donuts or fried anything and they actually quite straight forward and turned out perfectly first go. Everyone enjoyed them. Now I’m inspired to try some different flavours!
Sienna
This was so good! Used many times!
Featherhead
Would this recipe work using an air-fryer instead of deep-frying?
Sam
I haven’t tried it so I can’t say for sure. Since it is more of a dough than a batter I think it could work.
grace
tried it, it became too dry and cracked. make sure to brush it with oil everytime you check.
grace
Final comment on Air Fryer version: actually even if it looks dry and cracked, it turned out great! its like a turnover dough when you use air fyer. its crusty but just enough, sooo yummy! and less oil definitely!
I will experiment on using tuna filling instead of cheese next time 💕. tip if you’re planning to use this recipe but baked in airfryer. make sure to brush it with oil every 10 mins or everytime you check it. I baked it in the air fryer for 30 mins. with 140-180 c settings.
Sam
Thank you for the feedback. 🙂
Gabriel Clune
I loved it
Until I got a mouthful of baking soda when I bit into the donut
If I’m doing something wrong tell me but I am not a fan
Sam
Oh no, Gabriel! The recipe calls for baking powder; 1 Tablespoon of baking soda would be quite an extreme amount and it’s not surprising you could taste it. I think if you try it again with baking powder you will have much better results! <3
Gabriel Clune
Soooo sorry for the bad review. They are delicious I’m still new to this so I thought baking powder and baking soda are the same thing I tried it again and they are delicious
Sam
I’m so glad they turned out. It’s nice to hear a good success story and I commend your efforts to try it again. Happy baking! 🙂
Yom
I got two dozen out of this recipe. I rolled half of then in cinnamon and sugar and the other half in sugar glaze. My wife got into them as soon as she came in the door.
Joe
These seemed a bit too crumbly. They fell apart. I assume I didn’t work the dough enough to develop the gluten. They also grow a lot, so be sure to make them 1/3 the size you want to end up with.
Zoe
Great recipe worked out perfect 👌
Sallykolone
Thank you Sam!!! It’s yummy and satisfying and want more hahaha. Thank you for sharing.
Sam
I’m so glad you enjoyed them so much! 🙂