
Pie Crust Recipe
This post may contain affiliate links. As an Amazon Associate I earn from qualifying purchases. Please read my disclosure policy.
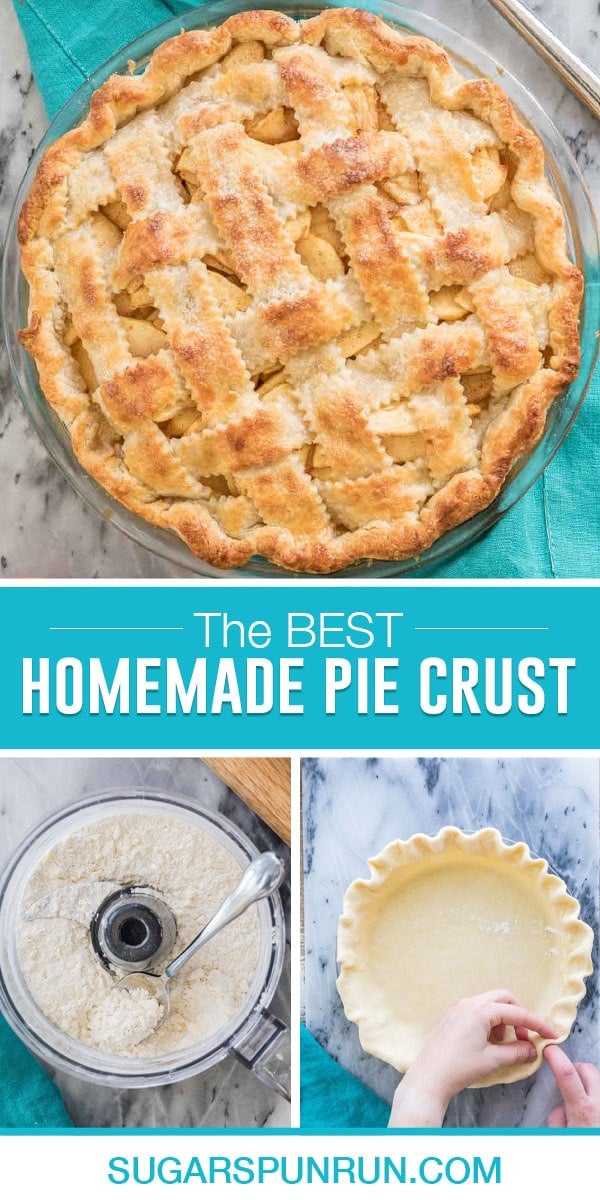
This is the only pie crust recipe you’ll ever need! Buttery, flaky, and foolproof, my easy homemade recipe is perfect every single time, thanks to a key secret ingredient. No messy pastry cutter needed! Recipe includes a video tutorial.
Why You NEED to Make This Pie Crust Recipe This Year
- It’s easy. No heavy lifting with this recipe as a food processor makes quick work of the dough, no pastry cutter needed (and I’ve include notes in case you don’t have a pastry cutter).
- It’s flavorful. And flaky, and buttery, and I could go on…. My secret ingredient (sour cream, trust me on this) adds beautiful depth of flavor to the pie, without revealing its origin to the taster. This pie crust is truly tasty enough to eat on its own.
- It makes enough. This recipe will fit easily in a 9″ or a 10″ pie plate. It makes enough that you won’t have to worry about fussing with a paper-thin, fragile sheet of pie dough. It folds under itself on the edge of the plate for a sturdy, substantial crust (which you’re going to want, once you taste it). I’ve been using this recipe for over a decade, but several years ago bumped up the ratios a bit to make sure I had plenty to work with, without it being too much excess to handle, either.
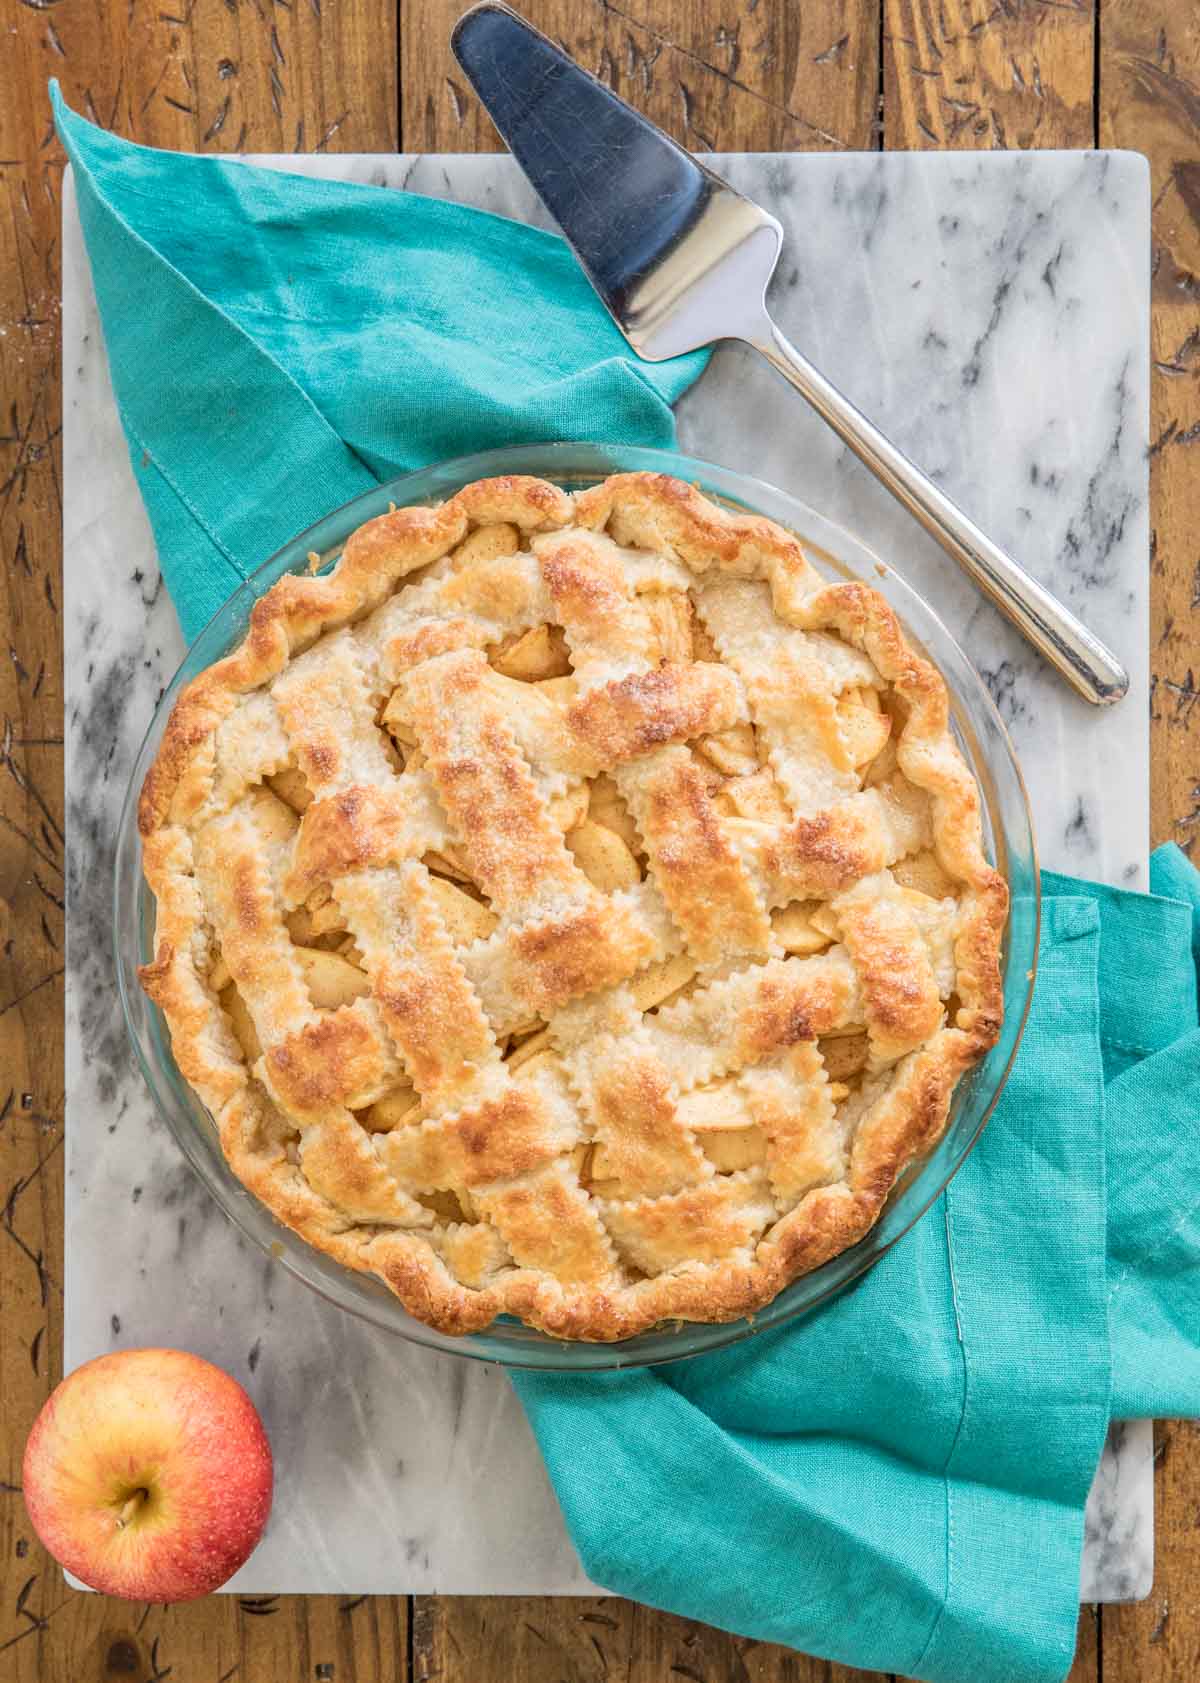
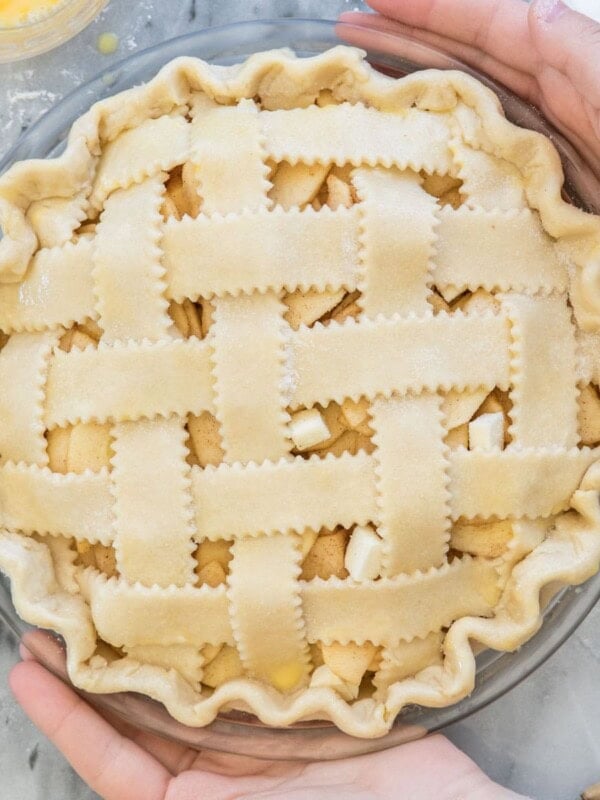
- Great for blind baking, too. Or making a lattice pie crust, or pie crust cookies, or just using anywhere you need a pie crust. Oh, and did I mention it doubles like a dream?
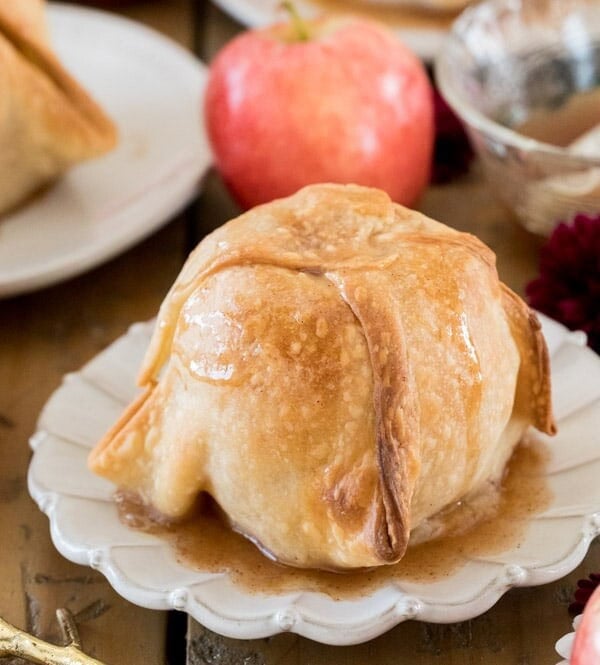
This shockingly simple pie dough works perfectly for blind baking (great for making apple pie or pecan pie), and can easily be doubled for two-crust pies or a lattice pie crust.
What You Need
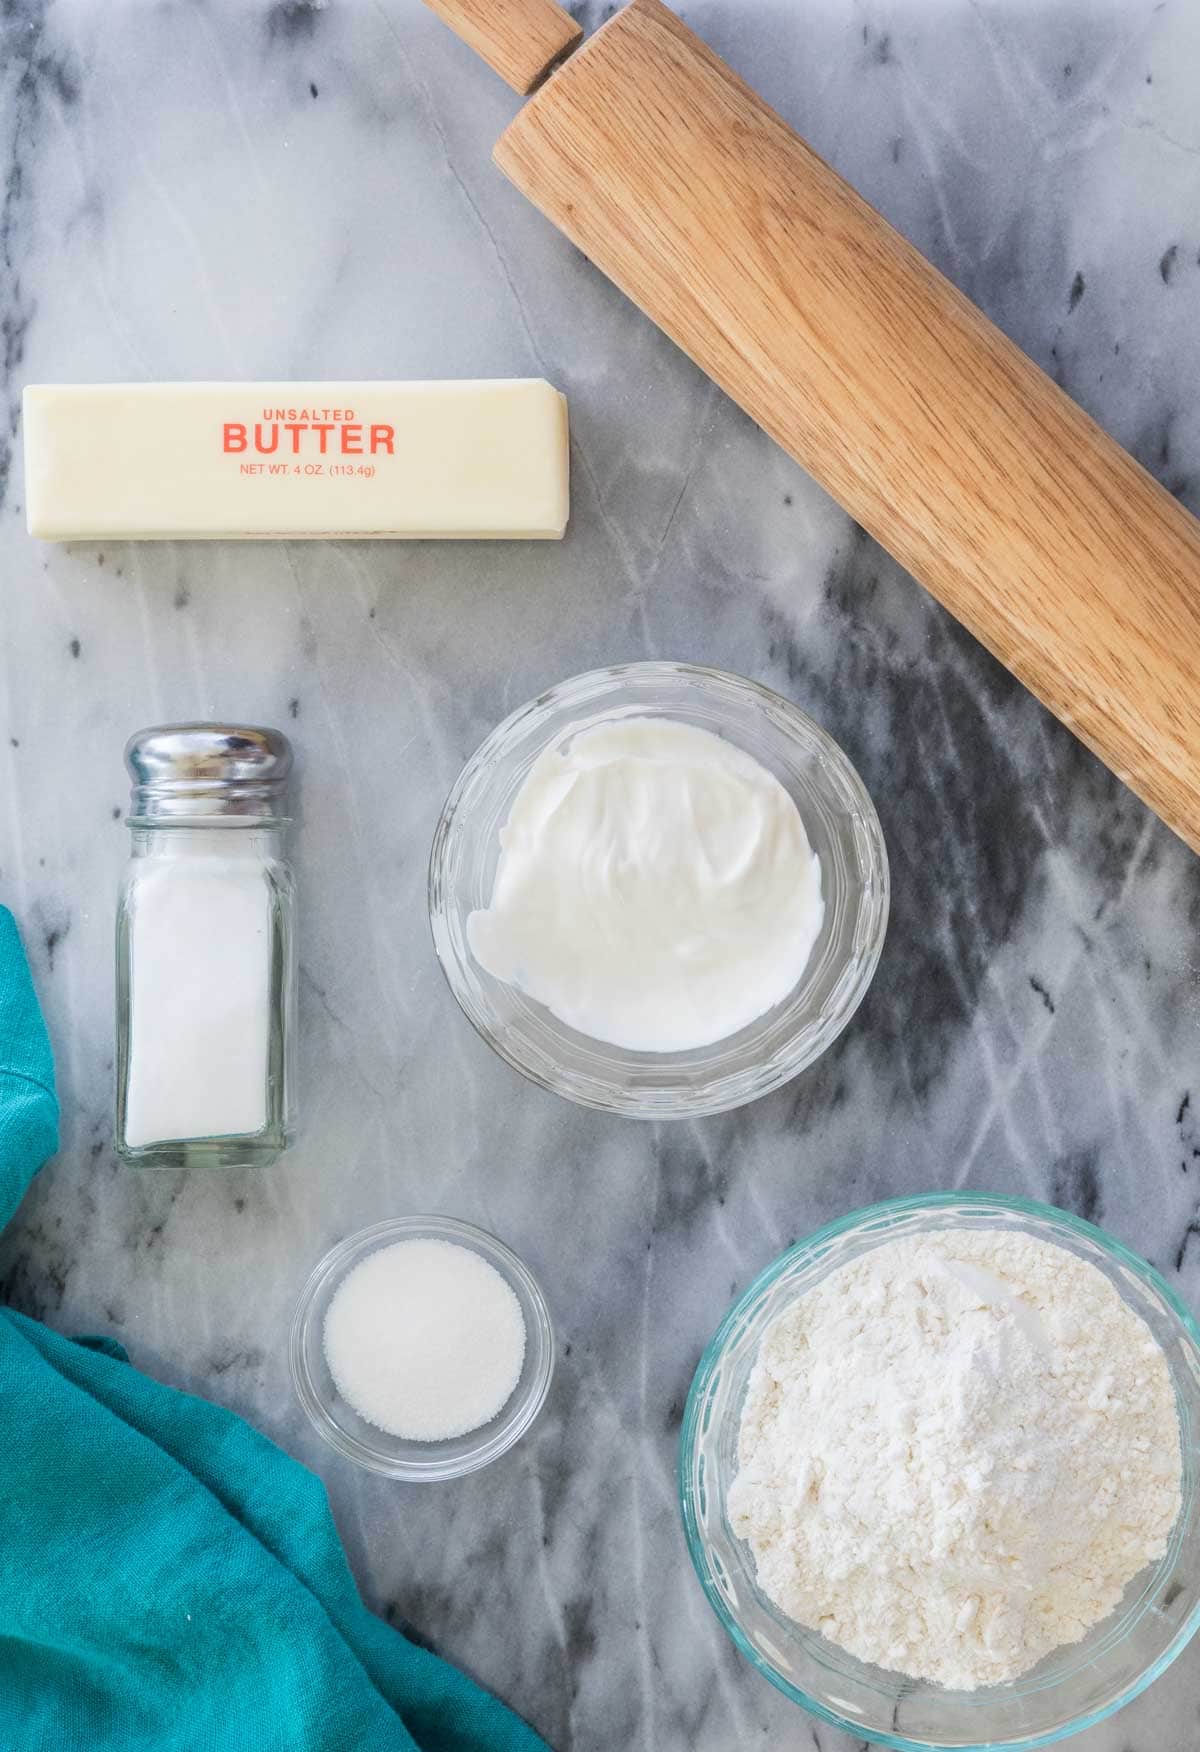
You don’t need anything fancy or complicated to make my homemade pie crust recipe–just five common ingredients you probably already have:
- Flour. Use all-purpose flour, and make sure you’re measuring your flour properly, or you may end up with a dry, crumbly crust.
- Sugar. The small bit of sugar in this recipe can be eliminated, but I like that it adds a subtle flavor to the end result.
- Salt. Just a little salt flavors this homemade pie crust without making it salty.
- Butter. Your butter should be very cold when you drop it into your dry ingredients. You can pop it in the freezer for a few minutes before you are ready to start making your crust to make sure it’s cold enough. Use unsalted butter since we are adding salt ourselves. For an even more flavorful crust, splurge for European-style butter.
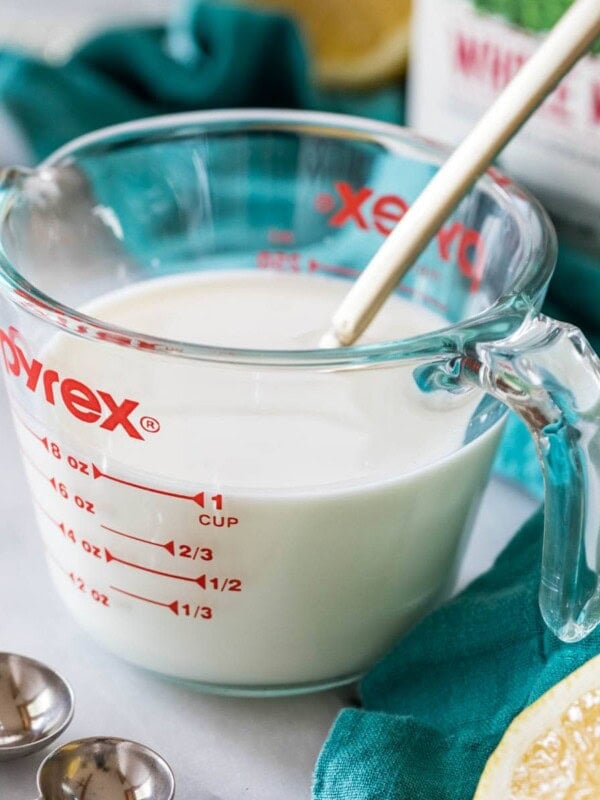
- Sour cream. Yep, sour cream! Sour cream is the secret ingredient in my pie crust recipe (and in my sour cream pound cake, among others!). Using sour cream takes a lot of the guesswork out of this recipe and there’s no fussing with various amounts of ice water. It gives this homemade pie crust a lovely depth of flavor that is not overwhelming or obvious, but does add an extra special subtle touch to the finished product. Mostly, though, I just love it because it makes this recipe so easy! If you don’t have sour cream, full-fat Greek yogurt will also work, but try to use sour cream if you can!
SAM’S TIP: That’s right, you don’t need ice water to make my pie crust recipe! I use an exact amount of sour cream instead. No more guessing how much ice water to use or worrying if your water is cold enough.
Remember, this is just an overview of the ingredients I used and why. For the full recipe please scroll down to the bottom of the post!
How to Make Homemade Pie Crust
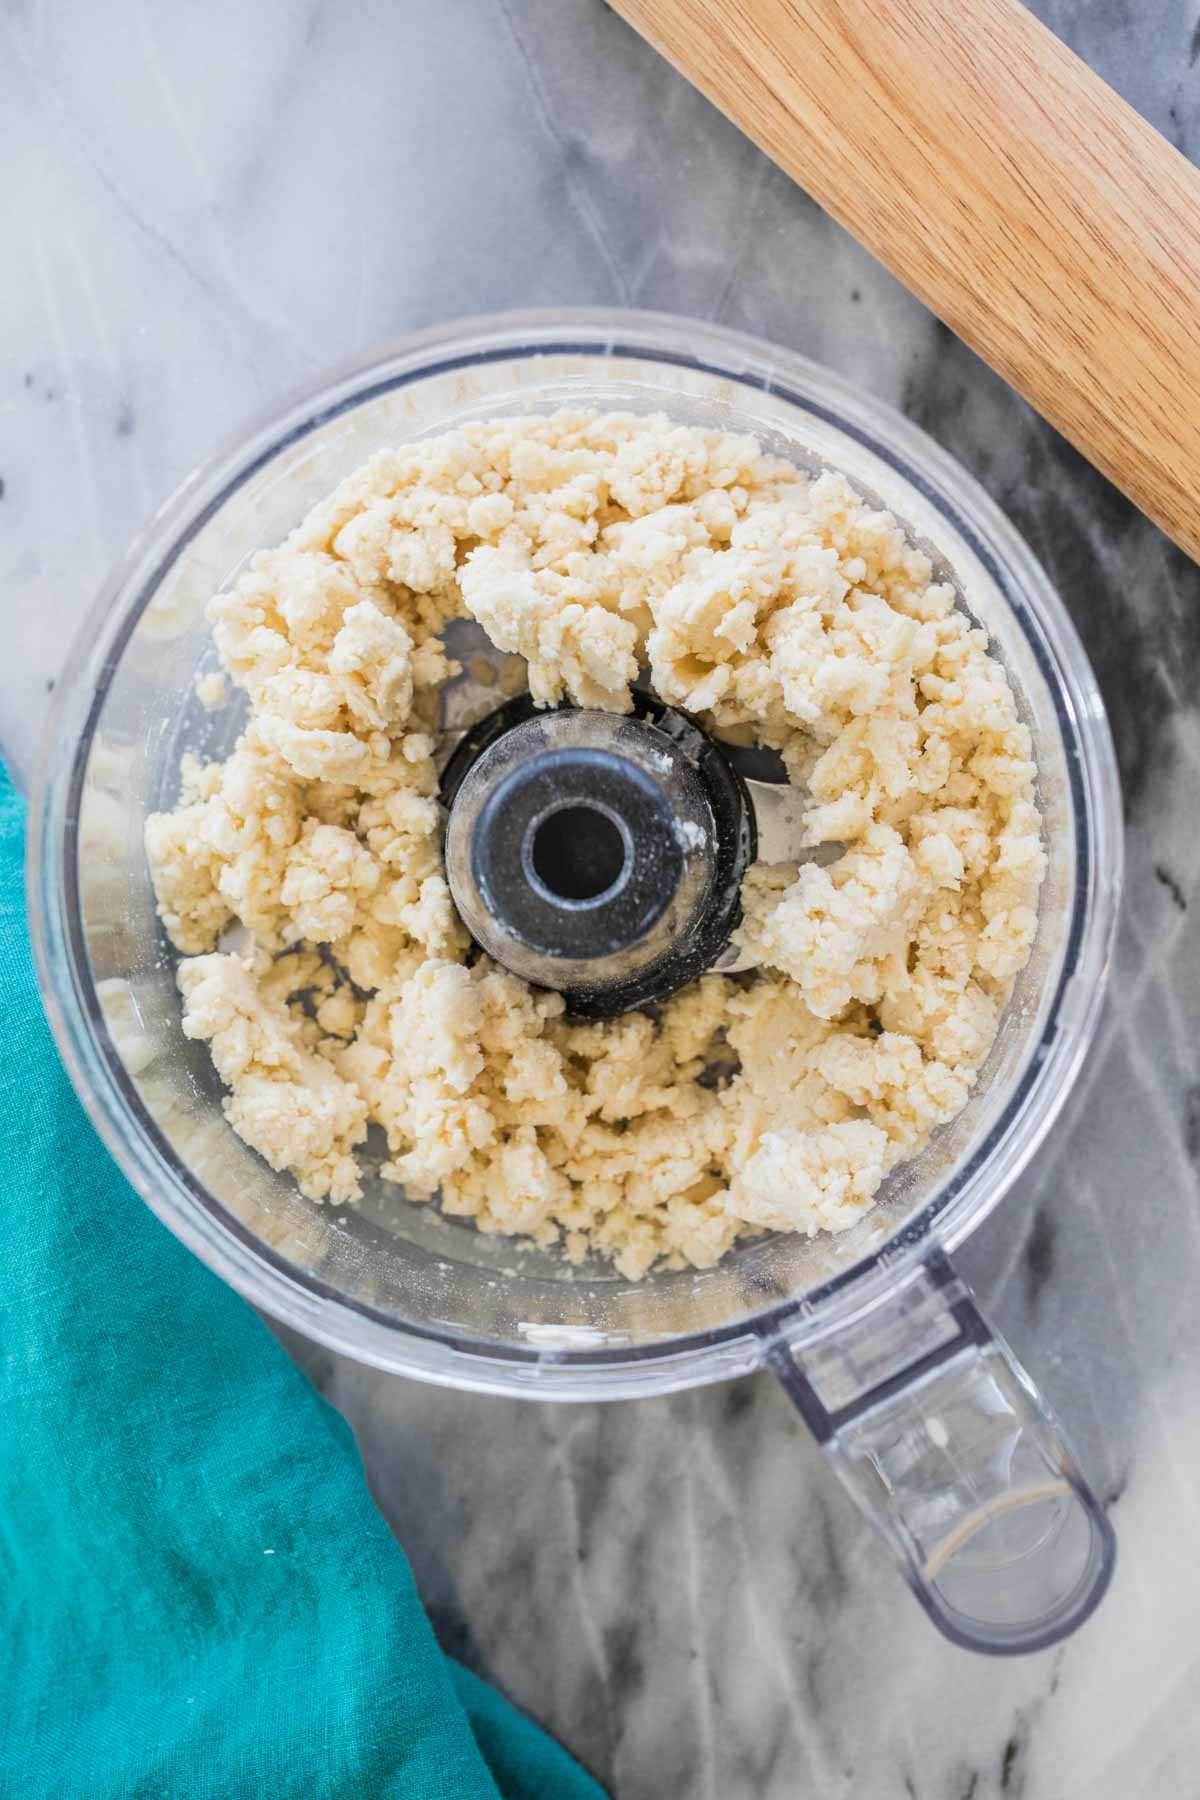
- Pulse dry ingredients together in the bowl of a food processor. Add cubed cold butter and pulse a few times until your mixture is combined and resembles coarse crumbs, but note that you should still have distinguishable pieces of butter remaining in the food processor, aim for chocolate-chip-sized bits!
- Add sour cream, and pulse a few more times until mixture is still crumbly but beginning to cling together.
- Transfer dough onto a clean surface and gently, quickly work into a ball before flattening into a disk. Wrap disk in plastic wrap and place in the fridge for 45-60 minutes.
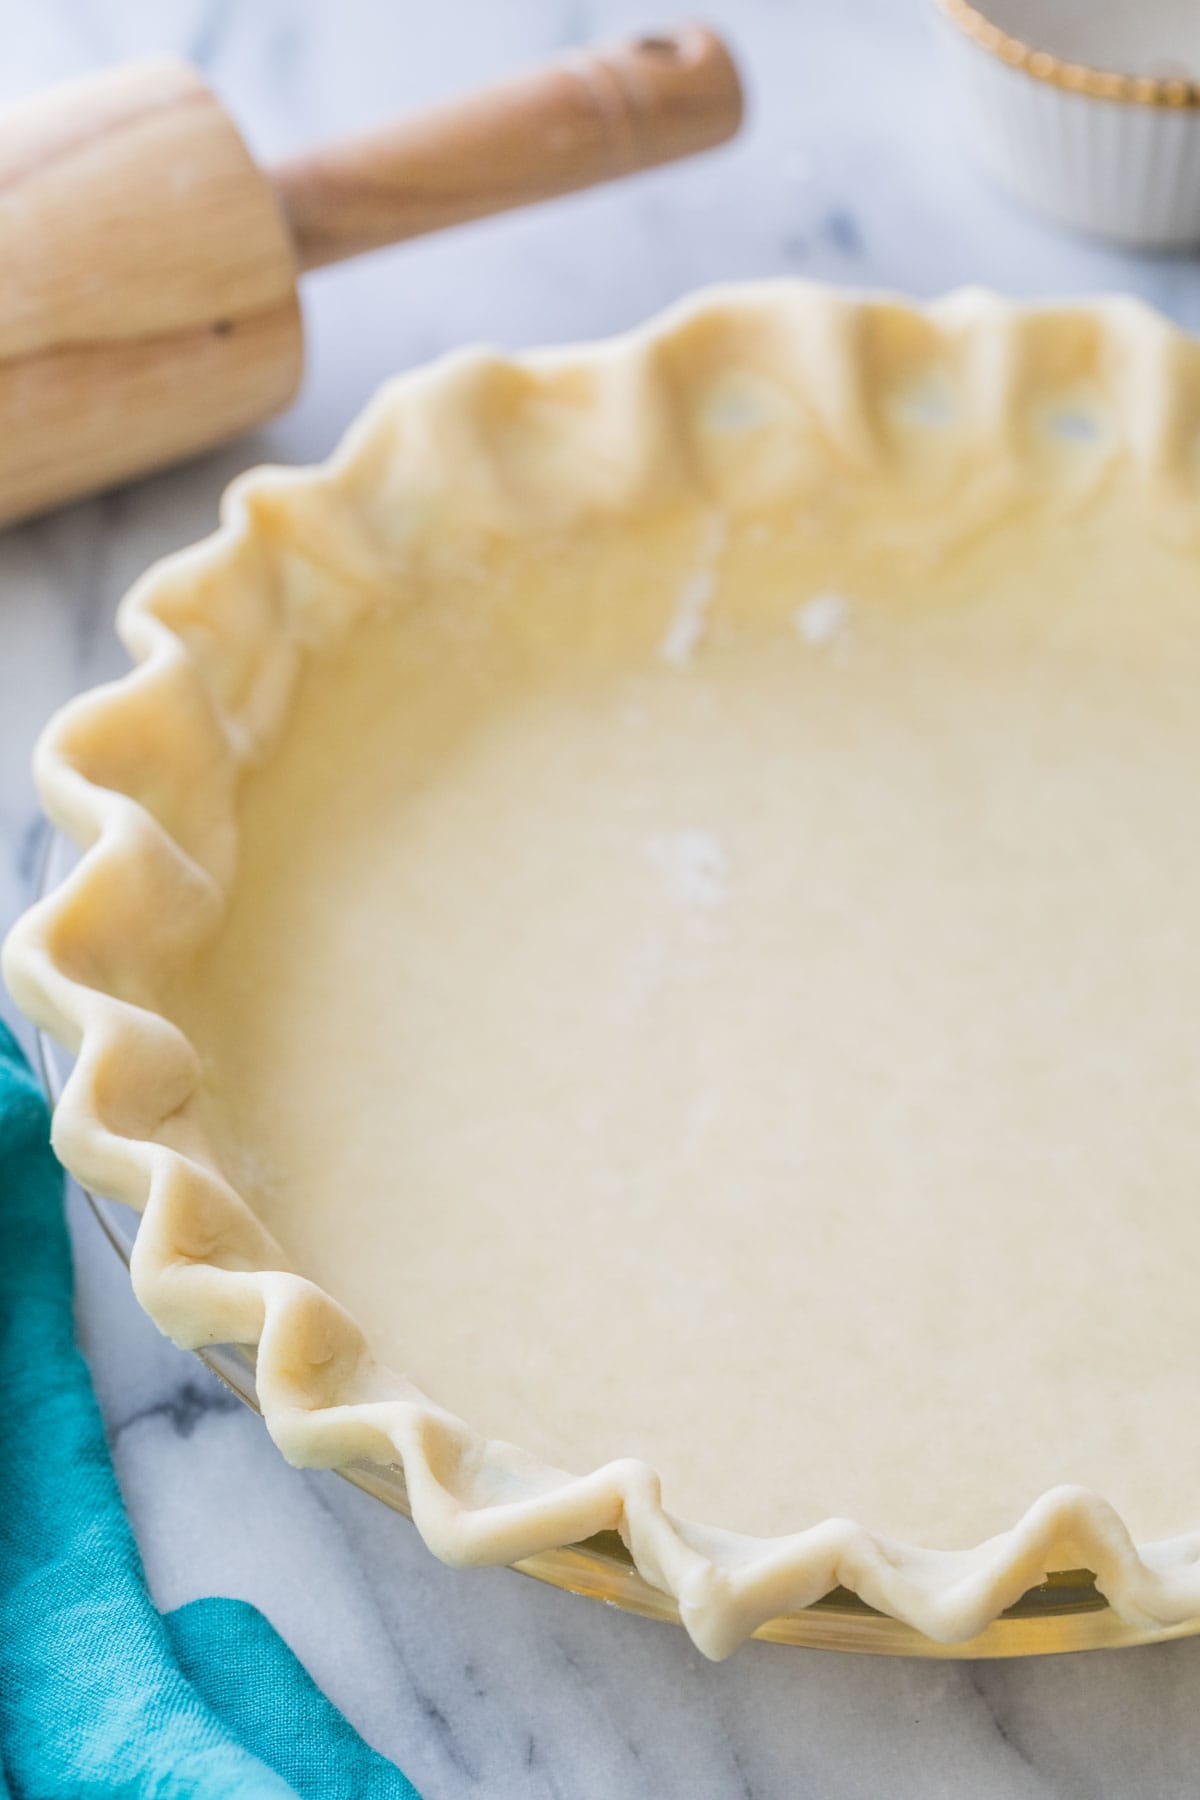
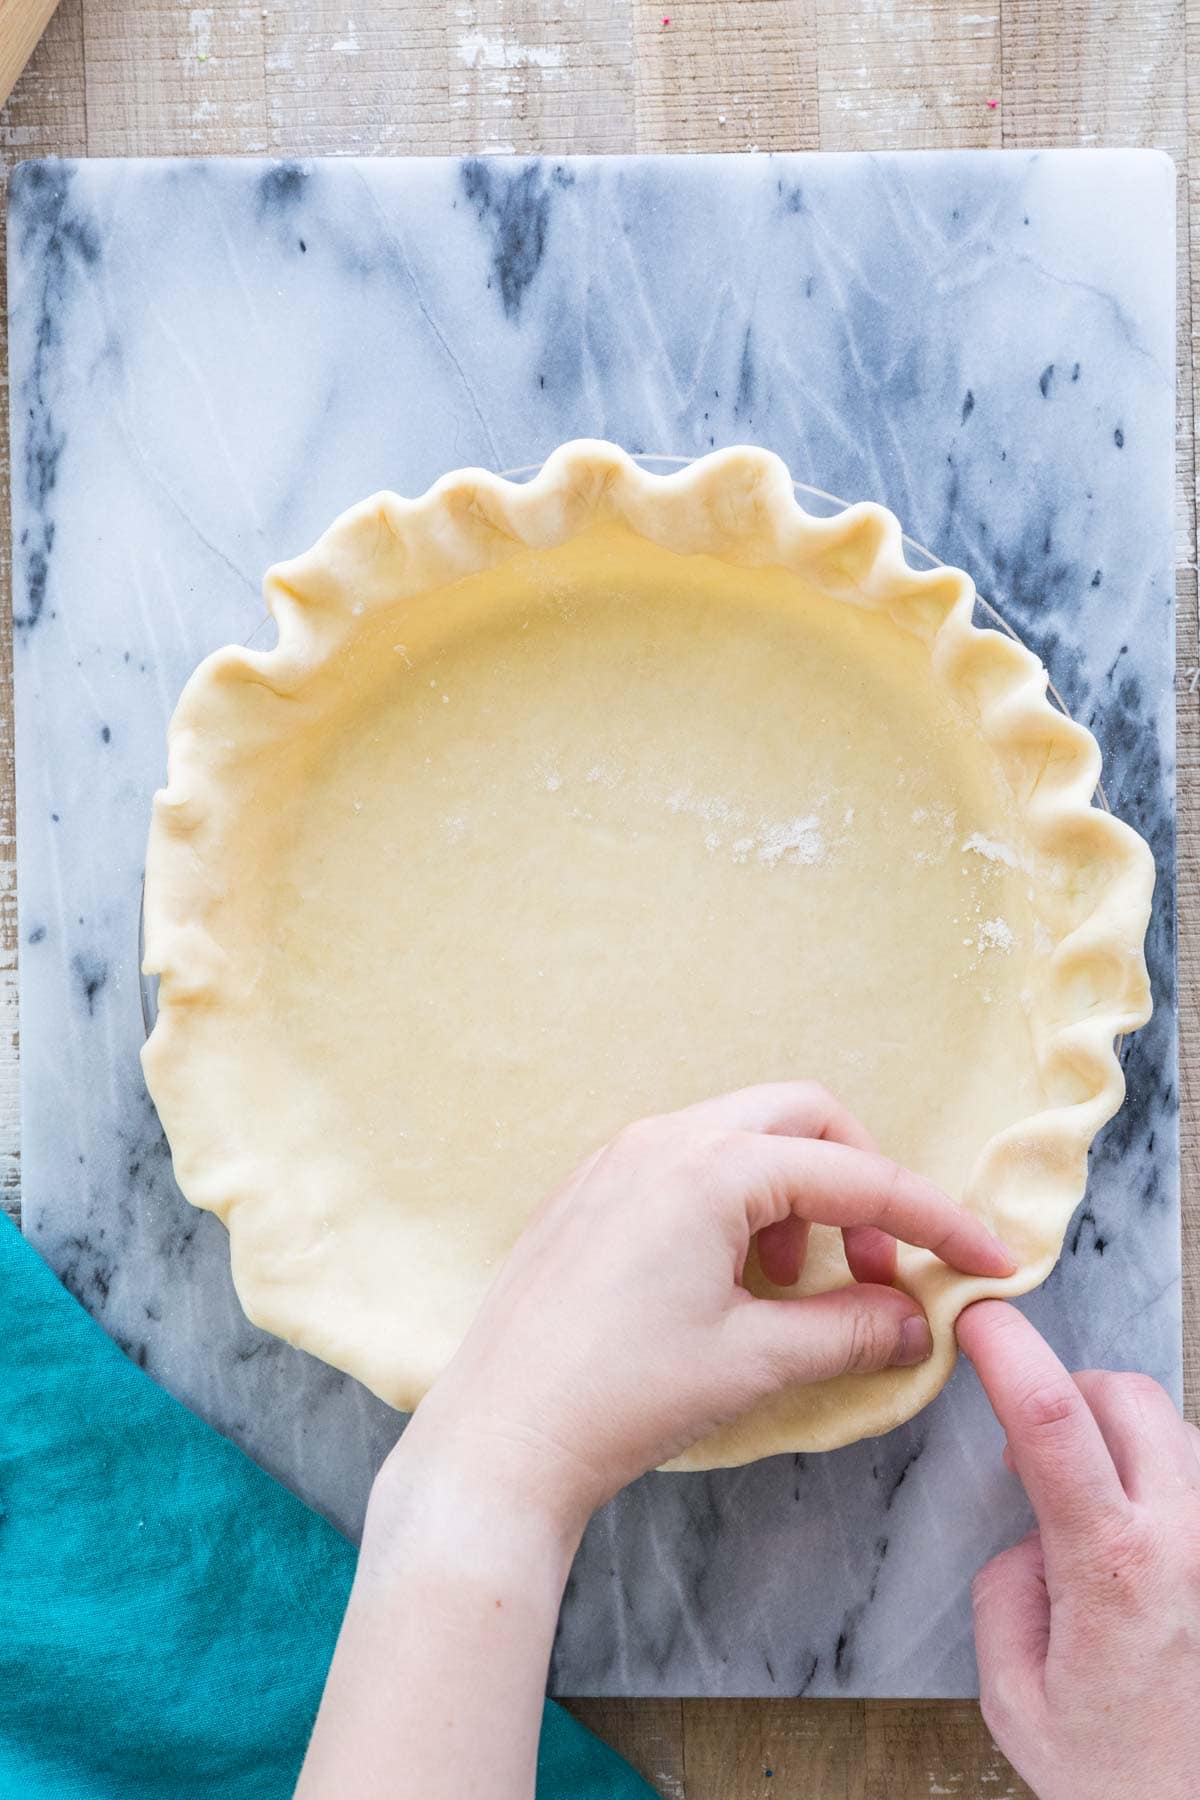
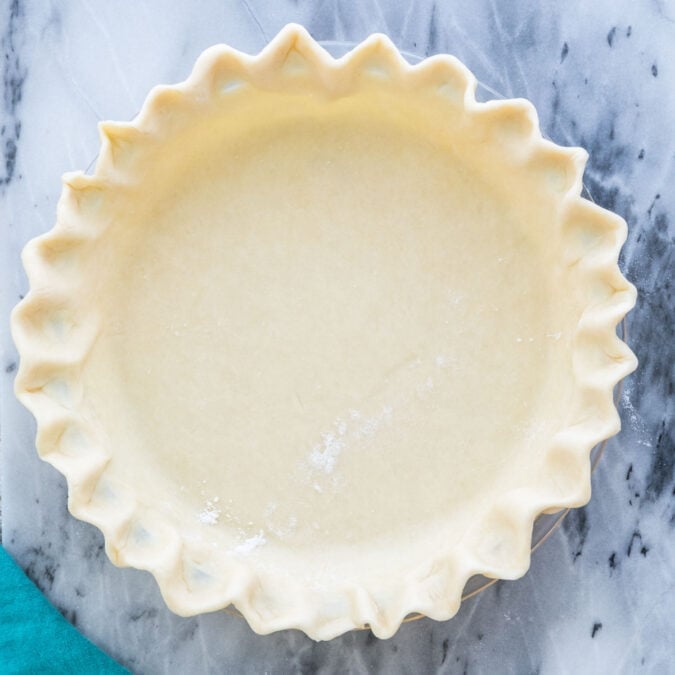
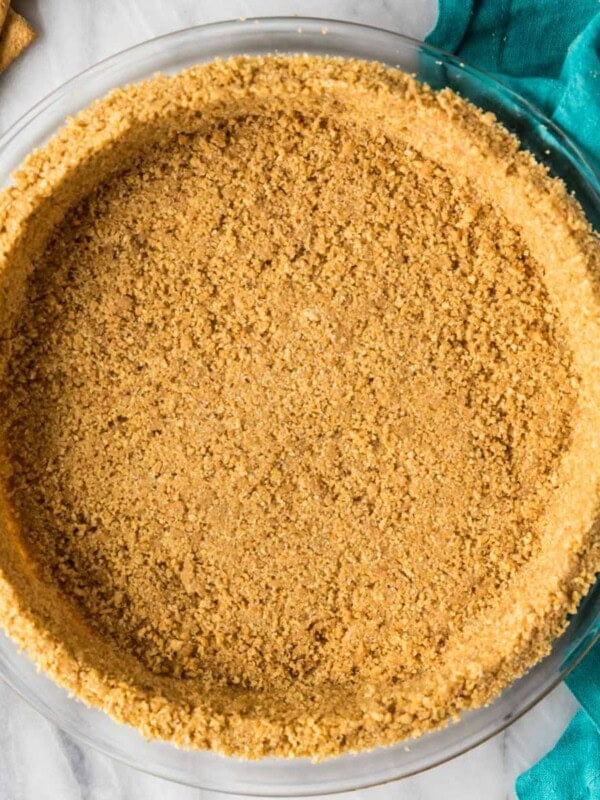
- Remove dough from fridge and roll out to a 12″ circle. Arrange in pie plate and crimp/flute the edges before blind baking or filling.
SAM’S TIP: Making a pumpkin pie or a chocolate pie? You’ll need a blind-baked crust! While I share some notes on blind-baking in this recipe, I will be sharing an entire post dedicated to blind-baking very soon. Stay tuned!
Tips for Success
While this recipe is designed to be straightforward, here are a few things you can do to guarantee your success:
- Make sure your ingredients are cold. This is so important, the butter should be ice cold (I place mine in the fridge for up to 30 minutes before beginning). Cold butter = flaky, tender pie crust. Warm butter could even leak out of the dough.
- Don’t overdo it. Don’t overwork the dough. The food processor is a boon to the pie making process but can quickly overdo it if you’re not careful. You want to have some pieces of butter remaining, go just until the dough will cling together. If it’s overdone, the crust could be too tough or it won’t be flaky.
- Pulse means pulse. Do not simply blend the dough nonstop. Pulse in 1-second intervals, otherwise you’ll end up with a wet, overworked dough.
- Don’t let it stick. As you roll your dough, it will warm and becomes prone to sticing to the counter surface. To avoid this, generously flour your surface before beginning and, periodically, turn the dough. If it sticks, slide a thin spatula to pry it free and add more flour beneath the crust.
- Move it carefully. This is a sturdy crust, but kitchens get warm, especially if your ovens are blazing cooking Thanksgiving side dishes and whatnot. Take care when transferring your dough, gently wrap it up around the rolling pin and use that to carry it to the pie plate and gently unroll it (I demonstrate this in the video).
- Chill the dough. Again, cold dough is key to perfect pie crust. However, if yours is cracking as you try to roll it, it may be too cold. Let it rest at room temperature for 5 minutes, then try again.

Frequently Asked Questions
If you don’t have a food processor, you can use a pastry blender, knife, or a grater to cut your butter into your dough.
I highly recommend investing in a food processor though–it will make your baking so much easier and less messy!
Yes! Just make sure your pie dough is tightly wrapped before freezing. It will keep for several months in the freezer. When you’re ready, let it thaw overnight in the fridge before using.
I know it seems like an unusual pastry ingredient, but I’ve found that sour cream yields an exceptionally tender, flaky, and shockingly flavorful (it’s delicious even on its own, or as pie crust cookies) crust. Plus, using sour cream means this pie crust recipe is much easier and less fussy to make than many traditional recipes. Worried about the flavor? Don’t! Sour cream adds flavor without making your crust taste like sour cream (no one will be able to tell what the secret ingredient actually is).
If you’re looking for pie crust alternatives, try my graham cracker crust or puff pastry.
Enjoy!
Let’s bake together! Subscribe to my newsletter and make sure to follow along on YouTube where I have over 500 free video tutorials! 💜
Pie Crust Recipe
Ingredients
- 1 ¼ cups (156 g) all-purpose flour
- 2 teaspoons granulated sugar, optional
- ¼ teaspoon table salt
- 8 Tablespoons (113 g) unsalted butter, very cold and cubed
- ¼ cup (60 g) sour cream
Instructions
- Note: This recipe makes ONE (1) pie crust. If you need a double crust, simply double all of the ingredients.1 ¼ cups (156 g) all-purpose flour, 2 teaspoons granulated sugar, ¼ teaspoon table salt
- Combine flour, sugar (if using), and salt in the canister of a food processor and pulse briefly to combine.
- Scatter butter pieces over the top of the flour mixture and pulse again until butter is mostly combined and mixture resembles coarse crumbs (there should still be discernible pieces of butter remaining in the mixture, some as large as a chocolate chip).8 Tablespoons (113 g) unsalted butter
- Add sour cream and pulse again until mixture just begins to cling together. The mixture may still seem dry, but if you pinch it between your thumb and forefinger and it clings together, you’re ready to move on — don't overdo it!¼ cup (60 g) sour cream
- Transfer dough to a clean surface and work into a ball (try not to over-handle the dough, you want it to stay as cold as possible to keep the butter from melting and your hands are very warm!). Flatten into a disk, wrap tightly in plastic wrap, and transfer to refrigerator to chill for at least 45-60 minutes before proceeding/using as desired.
- If arranging into a pie plate, remove the dough from the refrigerator once it has chilled and transfer to a clean, lightly floured surface. Use a rolling pin to roll into a 12” circle (add flour as needed and be sure to lift the pie dough and add flour beneath it while rolling to keep from sticking, if needed) and arrange into a pie plate, crimping or fluting the edges (I provide a visual on fluting the edges in my video above).
- Transfer to pie plate and use according to your pie filling recipe’s instructions, or see my detailed tutorial on how to blind bake pie crust.
Notes
Sour cream
Full-fat sour cream is your best bet for this recipe, but in a pinch you could substitute full-fat plain Greek yogurt.Making without a food processor
If you do not have a food processor you may use a pastry cutter, grater (freeze the butter for 20 minutes then grate it into the flour mixture), or even a knife to cut the butter into the flour mixture before stirring in the sour cream.Blind baking:
To blind bake this pie crust (that is, bake it completely without any filling so it can be cooled and filled with a filling that does not need to be baked), see my detailed tutorial on how to blind bake a pie crust.Lattice crust
I have a detailed tutorial on exactly how to do a lattice pie crust. You will need to double this recipe in order to do so.Making in advance:
This pie dough may be made up to 5 days in advance of rolling out and using. Store tightly wrapped in the refrigerator. If chilling for this long, you will likely need to let the dough soften on the counter at room temperature for 15 minutes or possibly longer to make it soft enough to roll without cracking.Freezing:
This pie dough may be frozen and will keep for several months in the freezer if tightly wrapped. To use, thaw overnight in the refrigerator and then use as desired.Nutrition
Nutrition information is automatically calculated, so should only be used as an approximation.
Like this? Leave a comment below!


Can you please give me a resipe for peach cobbler
I have do not have a peach cobbler recipe unfortunately.
Is this a single crust ? For a pie I would then need to doubt?
Yes it is for a single pie crust.
Can you double this recipe for double crust
Absolutely! ☺️
Love your recipes! Can I freeze a cooked crust? Let it thaw then fill it?
I think it would work, I have not tried it myself. I would just ensure it cools completely before freezing.
Could you use the low fat sour cream? Thanks!
Honestly, I am not sure, I have not tried it before. I *think* it would work but it may turn out to be too thin.
You could totally use low fat sour cream, Valerie. I’ve cooked & baked with the stuff for years. I’ve never gotten bad results from using it.
What don’t you use this pie crust for? I read you use it for fruit pies and cream pies, what do you use for chicken or beef pie? My Mom had different pie crust for different kinds of pies.
I use this crust for everything. (I used it here for my Turkey Pot Pie) You can leave out the sugar for savory pies but that is not necessary. ☺️
Can I use whole wheat flour instead of white? Would the amount be the same or a little less due to density? I’m looking forward to trying this. I typically buy crusts for convenience and because I don’t keep crisco on hand. yuck! lol Thanks!!
I would be afraid it would make the crust tough, but if you try it and it works, let me know how it turns out. ☺️
Could you tell me please, is all purpose flour plain or self raising UK flour. Many thanks
Hi Helen, it is plain. I hope you love the pie crust!
45-55 minutes seems like a long time to bake it! Does it get too brown? Do you check on it every once in awhile to make sure it’ not too brown? Most recipes say 15-20 minutes
Because you’re blind baking it filled with sugar, it takes much longer than it would if you were baking a pie dough in a pie plate with nothing in it. I do check on mine, since it’s covered with foil it tends to take the whole 45+ minutes for me but I would recommend checking it.
Hi Sam!
Love all of your recipes and YouTube channel! Can I possibly make this a few days ahead of time and store it in the fridge or freezer?
Thank you!
Yes it will be fine to make several days ahead of time and store in the refrigerator or freezer, but you may need to let it set at room temperature for a little while before you will be able to roll it.
This is by far the best and easiest pie crust I’ve ever made. I usually use store bought (gasp) crust. And after a full harvest of rhubarb decided to man up and make my own crust. Super easy and delicious!
And now you’ll never go back right?! Homemade is always so much better! I’m glad you enjoyed it Gabreile! 😃
I don’t have a food processor. Anything I can substitute to make this?
Made 2 practice crusts to compare flavor, flakiness, rolling & edge crimping to my usual go-to crust. This crust had high marks on everything prior to baking; rolling was a breeze & never had I made such a pretty edge! However, when crust was baked, my beautiful edge had “melted” into a former shadow of itself. Do you have suggestions for decorative edges that would look just as pretty after baking?
I’m about to use this recipe for Thanksgiving pies. “Melted edges” is the only comment that gave me second thoughts. Would love to hear from Sam if there’s a decorative edge she typically uses that she thinks works best. I usually do a traditional crimped edge on pie crusts, but if this recipe works better with something different, I’d love to know. 😉
Hi Susan. I use a fork to make the little lines in crust or do the traditional crimped edge.
This does look super easy and perfect!! Love that there’s sour cream in it 🙂
Thank you, Sues!! 🙂
I did make this before when I made your delicious apple pie recipe and I would agree that it was the easiest crust I ever made and very tasty at that!