
The Best Cheesecake Recipe
This post may contain affiliate links. As an Amazon Associate I earn from qualifying purchases. Please read my disclosure policy.
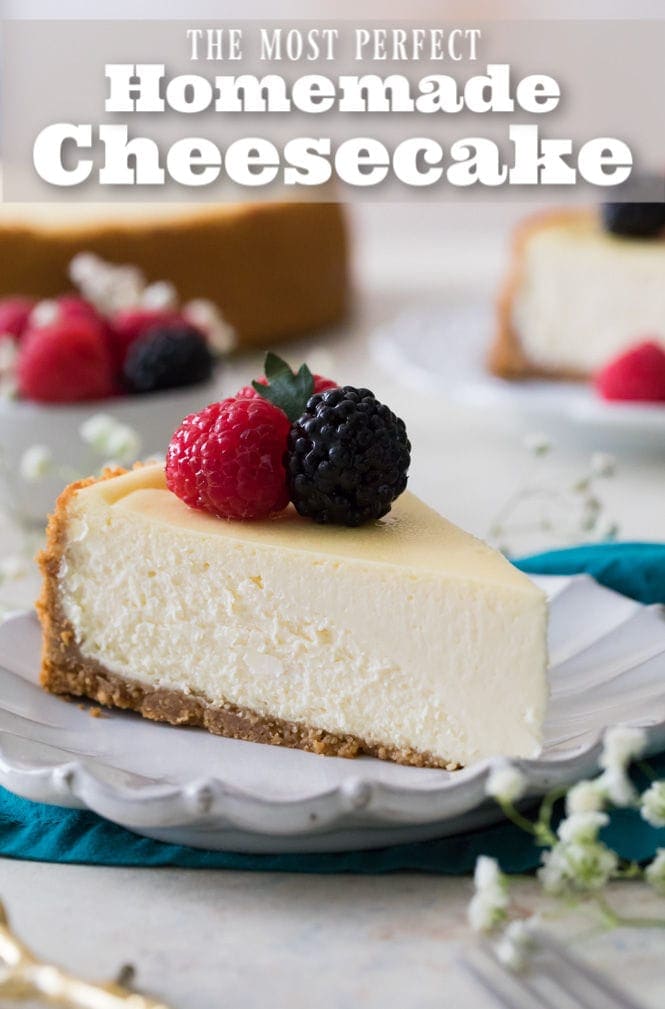
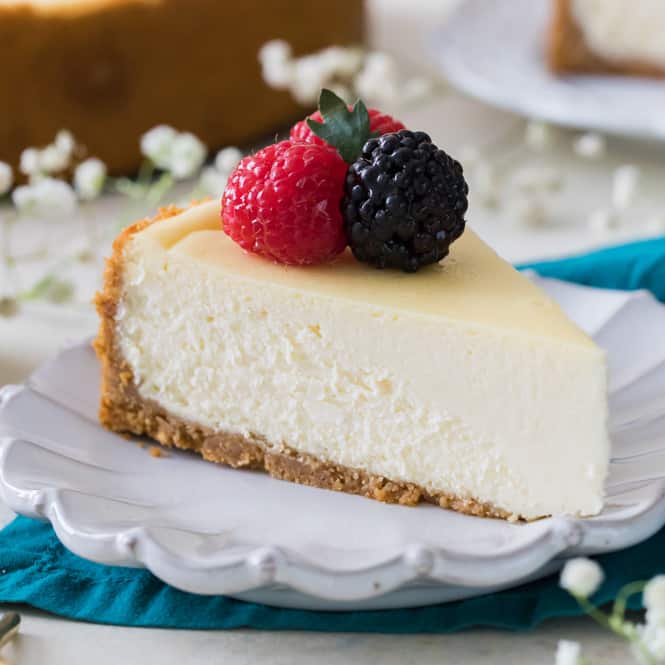
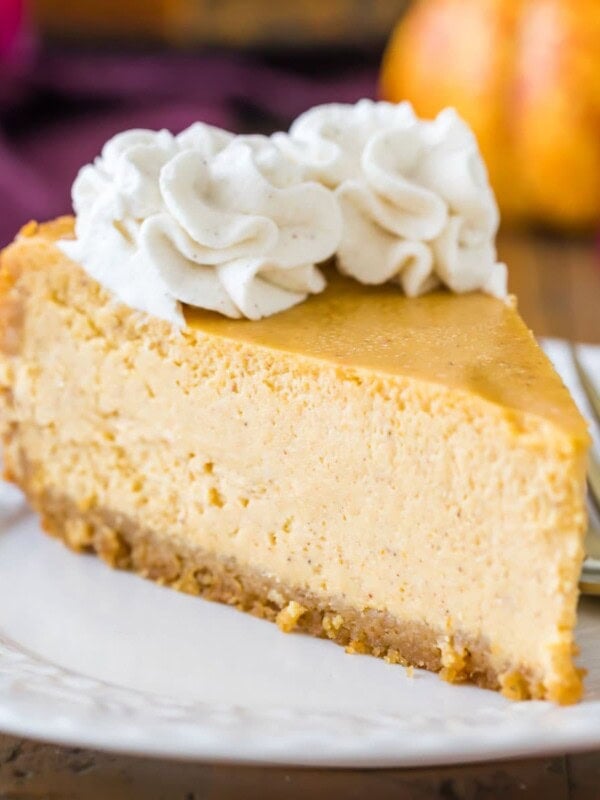
Today I’m so excited to show you how to make the best Cheesecake Recipe of your life. Simple, classic, and no water bath required!! The texture is smooth, rich, and creamy, served over a crisp homemade graham cracker crust.
I’ve included tons of detailed tips and important info in today’s post so you can make the perfect creamy cheesecake every time. For a visual how-to, be sure to check out my step-by-step video beneath the recipe!

The Perfect Cheesecake Recipe
This cheesecake recipe has been a long time coming.
For a recipe with so few ingredients (cream cheese, eggs, sugar, sour cream, vanilla & salt), it took a lot longer than you might think to develop the perfect version. I’ve shared a few cheesecake variations in the past, including my No-Bake Cheesecake, but getting a perfected classic version took lots of testing. Finally, here we are.
Oh, and we are skipping the water bath! I’ve always found them to be largely unnecessary with cheesecakes. Cook yours on a low temperature and follow my tips below and you’ll have a perfectly creamy and crack-less cheesecake without all the hassle of a water bath.
Other tested/perfected classics to try: my Pound Cake, Chocolate Cake, and Carrot Cake, (to name just a handful).

Must-Know Tips for Baking the Perfect Cheesecake (Without a Water Bath!)
Use room temperature ingredients
It’s important that your cream cheese comes to room temperature before you begin making your cheesecake. This will prevent any lumps and ensure a cheesecake with a smooth, creamy texture. However, to ensure that all of your ingredients blend together nicely and give you the desired result, they should all be at room temperature before you begin.
Take it easy on the eggs
Over-beating your eggs is one of the quickest ways to ruin a cheesecake. Over-beating can ruin the texture and can cause cracks. To prevent this, lightly scramble each egg before adding it into your batter. Keep your mixer on low speed and stir until just combined. Be sure to pause after each addition and scrape down the sides and bottom of your mixing bowl.

Don’t open the oven!
I know how tempting it can be to want to check on your perfect, beautiful cheesecake, but wait until it’s finished baking (or close to it) before opening the oven door! Yes, you will have to test for doneness at some point and there’s a real possibility it will need more time in the oven, but minimize opening the oven as much as possible.
Opening the oven door can drastically reduce the temperature of your oven, which will slow the baking process and might cause your cheesecake to sink or crack.
Free your crust!
Once your cheesecake is done baking, allow it to cool for 10 minutes on top of the stove. Then, run a knife around the inside of the springform pan to loosen the crust from the sides.
As your cheesecake cools, it may to shrink a bit. If the crust is stuck to the pan, your crust won’t give but your cheesecake will (leaving you with cracks). Free the crust from the sides so it can contract with your filling as needed.
Cool at room temperature before moving to the fridge
I always let my cheesecake come to room temperature before chilling. For bests results, let it cool as gradually as possible. I put mine on top of my oven (the warmest spot in my house) so it can gradually cool off as the oven does.
This pre-chilling cooling period can take an hour or two, but it’s worth it. An abrupt temperature change (moving the cheesecake directly from oven to fridge) is likely to make it crack.

How to Store Cheesecake
Cheesecake should always be stored chilled in the refrigerator. When I’m ready to store mine, I’ll usually replace the springform ring and then cover the top with foil.
Cheesecake shouldn’t be left out at room temperature for more than 4 hours (or less if it’s particularly hot/humid!).
Can I Freeze Cheesecake?
Yes, you can freeze your cheesecake! Fortunately, this cheesecake recipe actually freezes very well. To freeze, first allow your cheesecake to cool on the stovetop and in the fridge as instructed. Once it’s chilled, you can freeze by wrapping thoroughly in plastic wrap and then wrapping in foil. Cheesecake will keep in the freezer for several months.
To thaw, transfer to the fridge and let it thaw there overnight.
Here’s a great source for more information on freezing cheesecake, including suggestions if you’d like to freeze by the slice.

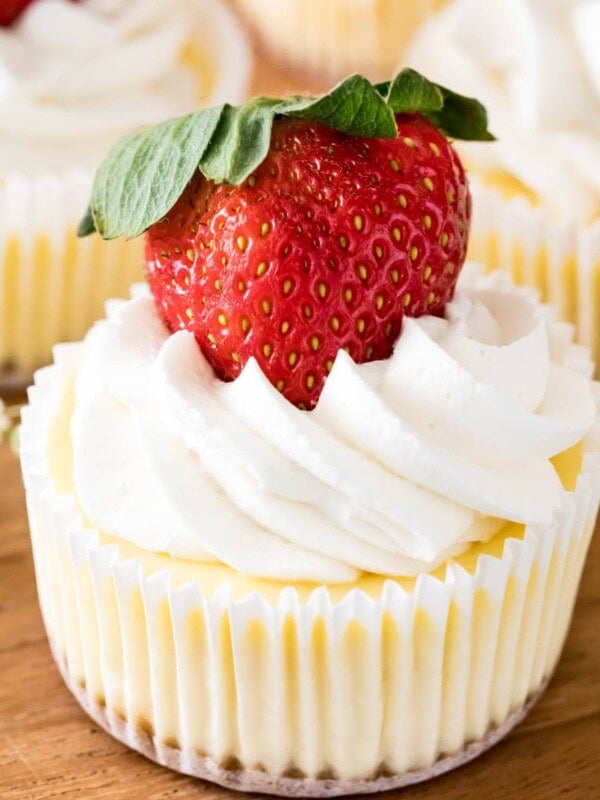
Other Cheesecake Variations You Might Like:
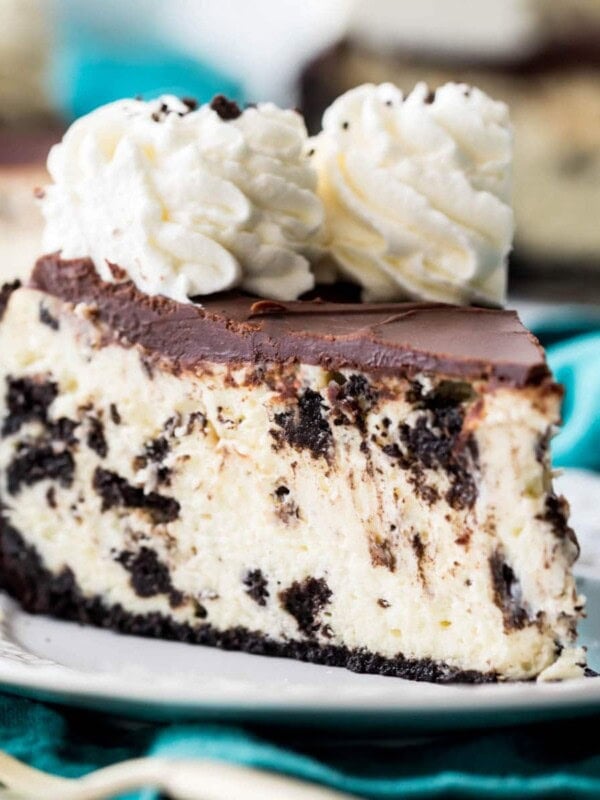
- Oreo Cheesecake
- Pumpkin Cheesecake
- Chocolate Cheesecake
- Or try something different and serve this cheesecake on an Oreo Crust!
Enjoy!
The BEST Cheesecake Recipe

Equipment
Ingredients
Graham Cracker Crust¹
- 1 ½ cups graham cracker crumbs, (170g)
- 2 Tablespoons sugar
- 1 Tablespoon brown sugar, (can substitute white)
- 7 Tablespoons butter, melted
Cheesecake
- 32 oz cream cheese², softened to room temperature (910g)
- 1 cup sugar, (200g)
- ⅔ cups sour cream, (160g)
- 1 ½ teaspoons vanilla extract
- ⅛ teaspoon salt
- 4 large eggs, room temperature, lightly beaten
Instructions
- Preheat oven to 325F (160C).
- Prepare Graham Cracker crust first by combining graham cracker crumbs, sugar, and brown sugar, and stirring well. Add melted butter and use a fork to combine ingredients well.1 ½ cups graham cracker crumbs, 2 Tablespoons sugar, 1 Tablespoon brown sugar, 7 Tablespoons butter
- Pour crumbs into a 9” Springform pan and press firmly into the bottom and up the sides of your pan. Set aside.
Cheesecake
- In the bowl of a stand mixer or in a large bowl (using a hand mixer) add cream cheese and stir until smooth and creamy (don’t over-beat or you’ll incorporate too much air).32 oz cream cheese²
- Add sugar and stir again until creamy.1 cup sugar
- Add sour cream, vanilla extract, and salt, and stir until well-combined. If using a stand mixer, make sure you pause periodically to scrape the sides and bottom of the bowl with a spatula so that all ingredients are evenly incorporated.⅔ cups sour cream, 1 ½ teaspoons vanilla extract, ⅛ teaspoon salt
- With mixer on low speed, gradually add lightly beaten eggs, one at a time, stirring just until each egg is just incorporated. Once all eggs have been added, use a spatula to scrape the sides and bottom of the bowl again and make sure all ingredients are well combined.4 large eggs
- Pour cheesecake batter into prepared springform pan. To insure against leaks, place pan on a cookie sheet that’s been lined with foil.
- Transfer to the center rack of your oven and bake on 325F (160C) for 50-60 minutes (or longer as needed, see note 3). Edges will likely have slightly puffed and may have just begun to turn a light golden brown and the center should spring back to the touch but will still be Jello-jiggly. Don't over-bake or the texture will suffer, which means we all suffer.
- Remove from oven and allow to cool on top of the oven⁴ for 10 minutes. Once 10 minutes has passed, use a knife to gently loosen the crust from the inside of the springform pan (this will help prevent cracks as your cheesecake cools and shrinks). Do not remove the ring of the springform pan.
- Allow cheesecake to cool another 1-2 hours or until near room temperature before transferring to refrigerator and allowing to cool overnight or at least 6 hours. I remove the ring of the springform pan just before serving then return it to the pan to store. Enjoy!
Notes
1) Graham cracker crust
For more details on making this crust or to use whole graham crackers, please see my Graham Cracker Crust Recipe.2) Cream cheese
Make sure that you use the brick-style cream cheese, not the spreadable version that is available in tubs.3)Bake time
Exact bake time can vary depending on your oven, whether you bake your cheesecake on a baking pan or not, the color of your springform pan (light or dark), and even the precise temperature of your ingredients. Because of this I recommend checking your cheesecake at 50 minutes and adding time as needed. However, it is not uncommon for the cheesecake to take as long as 75 minutes to bake, but it's better to check sooner.4) Cooling cheesecake
I recommend the top of the oven because it is usually the warmest place in my house (after it’s been on for over an hour). This will help to cool the cheesecake more gradually and will also help avoid cracks).Nutrition
Nutrition information is automatically calculated, so should only be used as an approximation.
Like this? Leave a comment below!


Best cheesecake ever, however, my crust didn’t turn out. I followed the recipe exactly, but I noticed when I pulled it out of the oven, all the butter in the crust had leaked out on the cookie sheet and my crust ended up being rock hard. Wish I knew where it went wrong.
I’m glad you enjoyed it overall, Sandy! The pan leaking is just a flaw in the pan. I’m not sure why the crust would be hard though. That’s very interesting.
Can I add fresh blueberries?
That should work just fine. I would stir them in at the end and make sure you don’t end up overfilling your pan. 🙂
Never made a cheesecake before. I ordered the springform pan from the Amazon link. The pan came with a pack of round parchment paper sheets. Do I need to use these? My guess is not based on recipe and comments.
Hi Chris! You don’t have to use them for the cheesecake. 🙂
I have this bookmarked as “THE ONLY cheesecake”. This is it. I made it for my fiancées birthday and he confirmed it was the best he’d ever had in his life, and I felt the same.
I used gingersnaps for the crust and made a dark cherry compote to go on top.
About to make it again for a friends 40th. Thank you for this recipe !!!
I am so glad everyone enjoyed it so much, Zoe! 🙂
I made this it’s amazing the most delicious cheese cake 🍰
Thank you so much, Evelyn! We’re so happy you think so 😊
Love this cheesecake!!….can you cut the recipe in half to make a smaller one and if so what size pan should I use?
Hi Kelly! You can just it in half. It will make slightly more than will fit into a 6 inch springform pan, so just be sure not to overfill the pan. 🙂
Until now, I was intimated by the thought of making cheesecake from scratch. This is, HANDS DOWN, the easiest dessert I’ve ever made. I did have to make a few substitutions. Due to national shortages, I substituted Neufchatel for the cream cheese and made mini cupcake servings as I did not have the fancy pan. I used cupcake liners, prebaked the crust for 4 minutes at 350, then the full cakes for 17. PERFECTION!!
We’re so glad you enjoyed them, Miss Moosie! Thanks for trying our recipe 😊
In the chilling phase of this cheesecake and I’m super excited to eat it! Bummed though because there is a HUGE crack in the middle of it that formed during the 10 minute testing phase on the oven. I never have cracks in my cheesecakes so I’m pretty sad, BUT this is my first time making THIS cheesecake, so it could be something that I missed. Fortunately I’m not serving to anyone but my hubby so it’s not a huge deal. I just wish it came out as pretty as hers in the video!
I hope you loved it, Danielle! There is a tips section in the post on how to avoid cracks. I have also found that if I get my crust a little higher up the sides of the pan it helps keep cracks from forming as well. 🙂
Second time making this cheesecake and…NO CRACKS!! I’m so excited!! I raised the crust on the sides as suggested, I also set the sour cream out for a little before using it (didn’t do that last time). My first one was delicious. This one delicious AND pretty 🤩!
Any tips on baking this in a smaller pan, say a 6 inch springform? I have a smaller family, and anything baked in a 9 inch pan usually results in waste. Do you think cutting the recipe in half would yield enough batter for a 6 inch cake?
Hi Bella! Cutting the recipe in half should work well for your pan; just make sure to not overfill it. Your bake time will be different too–probably 30 minutes–so keep an eye on it 🙂
Delicious and very easy to follow and make.
Thank you for sharing.
Thanks for your review! We’re so happy it turned out so well for you 😊
your very sweet just by reading the comments hope you have a good 2022
Thank you, Alieya 🥰 You too!!
Any thoughts on adding peanut butter to the batter to do a flavored cheesecake and using a pecan crust instead of graham crackers? Are these simple substitutes or would be complicated to incorporate into the recipe?
Hi Justin! the pecan crust would work just fine. I’m not sure on the adding peanut butter though. You’d have to make some other alterations. 🙂
Hi! Do I need to spray my pan before putting the crust down?
I have a nonstick pan and the butter in the crust helps keep it from sticking as well so I do not spray the pan. 🙂
I’m not sure what happened but I’m thinking that the problem was much has stove. I followed your recipe to the tea. It didn’t come out smooth at all. The flavor was excellent but not creamy. Any idea why?
We’re so sorry your cheesecake wasn’t as smooth and creamy as it should have been, Theresa 🙁 Typically if a cheesecake seems spongey or has a mealy texture it’s usually overcooked. It may have needed to come out of the oven a little sooner. We’re happy the flavor was still good though!
Do I cover when refrigerated after cooling?
Hi Debbie! It’s always best to cover it in the refrigerator so it doesn’t absorb any refrigerator odors. 🙂
My cheesecake is in the oven now, timer has gone off however its not cooked through. It’s still wet when doing an insertion test. It’s browning on the top. Has anyone else dealt with this and how long did you let the cheesecake bake?
Hi Tammy! You won’t be able to do a toothpick test on a cheesecake. I would recommend checking out the video for how to tell it is done baking. 🙂
Fantastic recipe! Creamy and delicious restaurant -quality cheesecake with no cracks. Thanks for sharing the recipe
Can you use a sugar substitute in this recipe?
We haven’t tried it ourselves, but others have done so successfully. If you do, let us know how it turns out for you!
I didn’t have a 9 inch pan so I made a recipe and a half used my 10 inch pan instead. How long do you think it will take to be ready to take out and cool on the stove top?
Hi Amy! Unfortunately I can’t really say for sure how long it would take. I would keep an eye on it so it doesn’t get over-baked. I hope you love it! 🙂
we used a 10″ pan too, and i used the 75 mins and it came out golden brown on edges, looks perfect, even raised above the pan! lol.