Learn how to make a sturdy and completely edible gingerbread house! My recipe includes a template to make one larger house or two smaller houses. Recipe includes a how-to video tutorial!

Why You Should Try This Gingerbread House This Season:
- Better than using a gingerbread cookie recipe. I have a great gingerbread cookie recipe, but that one, and most others out there, are not suitable for making a house as they’re designed to be soft and melt-in-your-mouth, making them not sturdy enough to hold up a house. This recipe is specifically engineered for building houses.
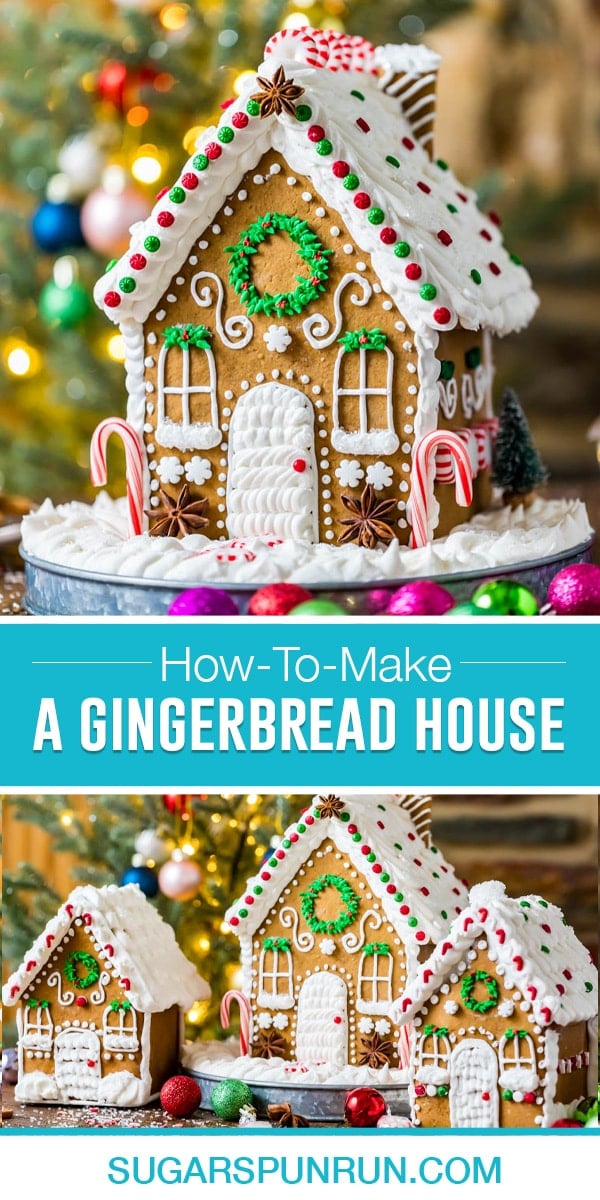
- Makes a solid, sturdy house. I carefully engineered this recipe to make a strong house. Once you assemble this, it’ll hold for, essentially, forever. I’m planning on using the one I made and photographed above as a Christmas decoration until the New Year (Zach is not happy about this 😂).
- The icing works about as well as cement. It is strong! Instead of a classic sugar cookie icing, we’re making my royal icing (which is equally great for decorating gingerbread houses and sugar cookies). It dries solid, you won’t have to worry about your house falling apart, and it’s totally edible (and quite tasty).
- Totally edible (and YOU control the ingredients). Every bit of this house is completely edible, and it tastes quite good (better than a kit from the store (and with fewer preservatives)!). My kids quickly devoured the houses they decorated.

I’m including templates (in the recipe card) to make either 1 larger gingerbread house (which I demonstrate in the video) or two smaller houses (shown above). This recipe will make enough to do either one of these.
Also, all parts of this recipe can be prepped in advance, so it’s great for having a gingerbread house decorating party! Let’s get started!
What You Need
Here are the ingredients you need to make the gingerbread house(s) and the icing. Don’t forget candies and sprinkles for decorating too!
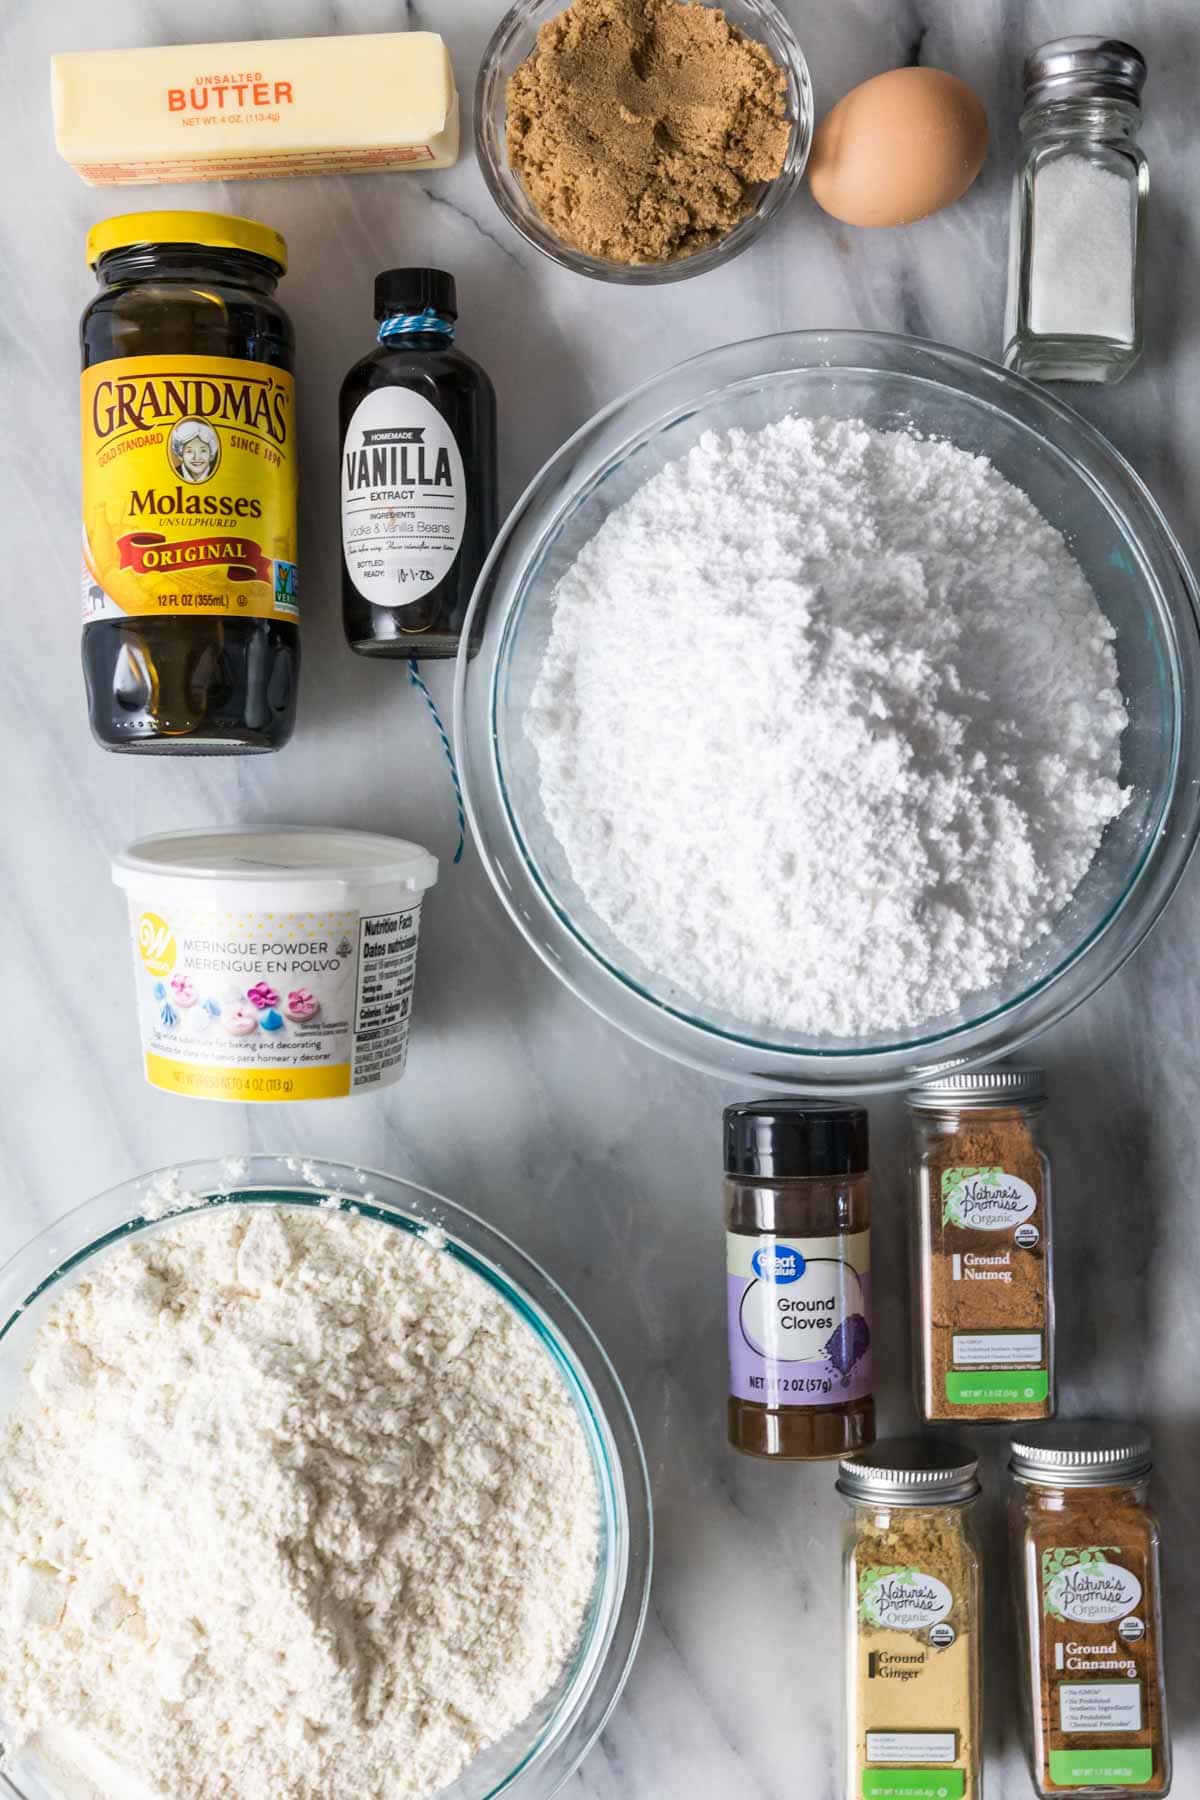
For the house
- Molasses. Molasses is a key ingredient in any gingerbread recipe. Stick with an unsulphured molasses like Grandma’s or Brer Rabbit brand. Do not use blackstrap molasses here!
- Butter. While vegetable shortening could be substituted, I wanted this recipe to be suitable for eating and butter is simply the better choice for that. If you only have salted butter on hand, reduce the salt that you add to ¼ teaspoon.
- Sugar. Light or dark brown sugar would be the best choice here. Use whichever you have on hand. Light brown sugar will yield a lighter-colored gingerbread house, while dark will give you a darker one with a richer flavor. You can’t go wrong either way, really.
- Flour. All-purpose flour is recommended. We use a lot of flour and it’s important that you add it gradually as the dough will become quite stiff. The dough should not be sticky when you go to roll it out (and it shouldn’t be if the directions are followed) but if for any reason yours is sticky/unmanageable, you can try adding a bit more flour.
- Spices. Including nutmeg, clove, cinnamon, and ginger. These are warm and cozy spices that are perfect for winter baking!
For the Icing
- Meringue powder. This stabilizes our royal icing (without using egg whites), making it sturdy and firm. Do NOT skip it, or you will have a mess on your hands.
- Vanilla extract. I use regular vanilla extract in my icing, but if you want yours to be pure white, use clear vanilla instead. You can use either type in the gingerbread dough (or leave it out entirely if you don’t plan on eating your gingerbread house! Vanilla is expensive, no sense using it you aren’t going to be eating it).
- Food coloring. If you plan to color your icing (optional), consider using gel food coloring. It’s much more potent than liquid food coloring, which means you won’t need nearly as much.
SAM’S TIP: You might end up with a little excess dough if you roll your pieces thinner than I did. If so, use some Christmas cookie cutters to cut out some shapes for decorating the house (gingerbread men, trees, stars, etc.).
This is just an overview of the ingredients I used and why. For the full recipe please scroll down to the bottom of the post!
How to Make a Gingerbread House
Make the Dough
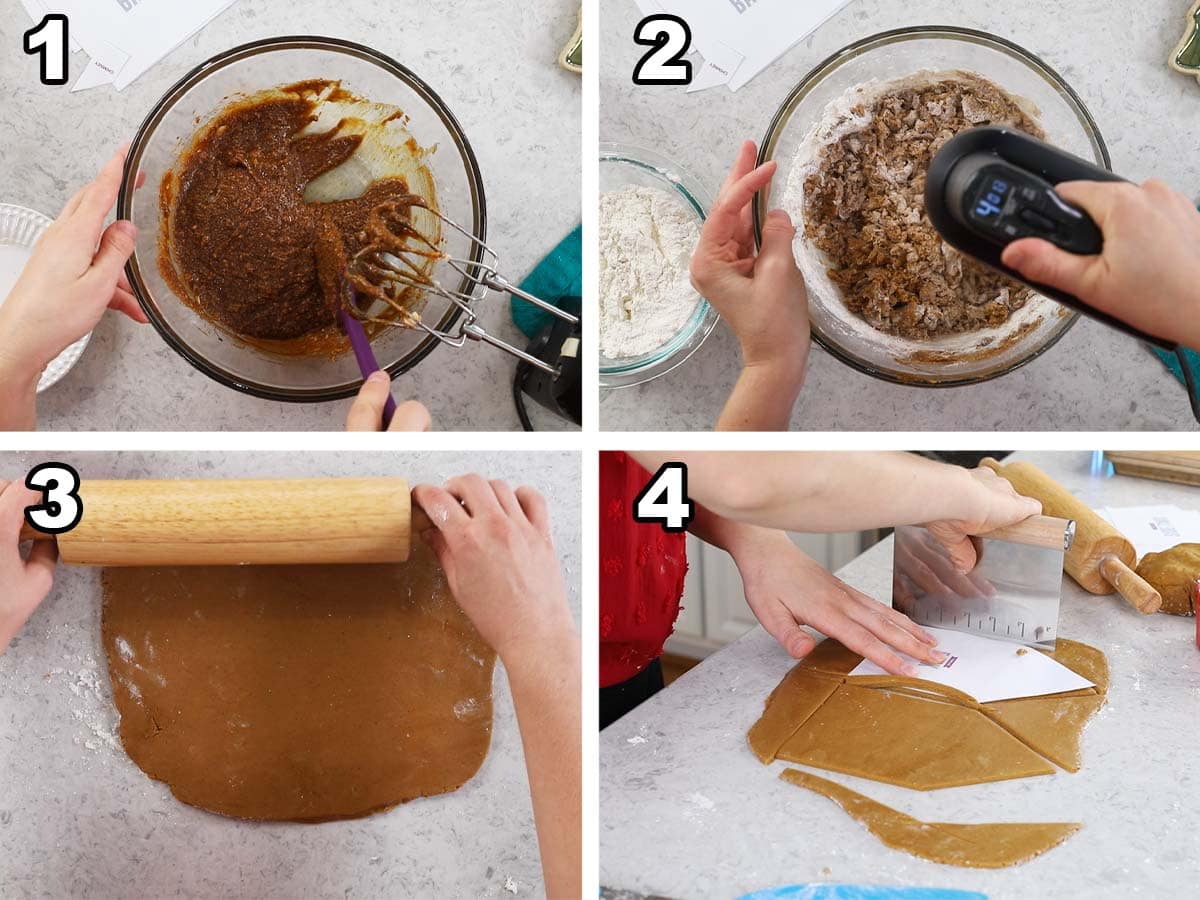
- Beat the butter, sugar, and molasses together with an electric mixer until combined, then stir in the egg, vanilla, spices, and salt. Don’t worry if the mixture separates a bit–this is totally normal!
- Add the flour gradually with the mixer on low speed. Keep mixing until the dough is smooth and cohesive. It will be stiff!
- Transfer the dough to a lightly floured surface and form into two discs. Roll one disc to ¼” thickness and set the other aside for now.
- Cut shapes out of the dough using the provided template. Use a knife or pizza cutter for clean edges.
Bake
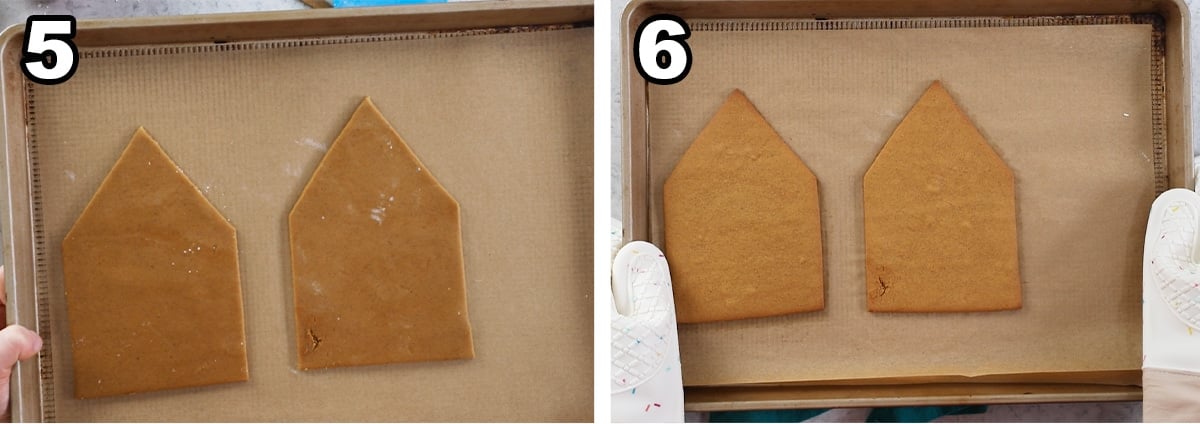
- Transfer the cut pieces to a parchment lined baking sheet, spacing 2″ apart. Repeat with the other disc of dough.
- Bake at 375F (190C) for for 13-14 minutes (check at 11 minutes if you are making the mini houses) or until the edges are just slightly darker around the edges. Note that the chimney will cook faster and will need to be removed early. Let the gingerbread house pieces cool completely before assembling.
SAM’S TIP: The fewer cuts/re-rolls of the dough you do, the better. The dough needs to be smooth and cohesive, otherwise air pockets can work in and form bubbles in your pieces after baking. Bubbles are most likely to happen when regrouping the dough and rerolling it out, but if you do a good job forming the scraps back together, it’s less likely to happen.
Icing/Assembly
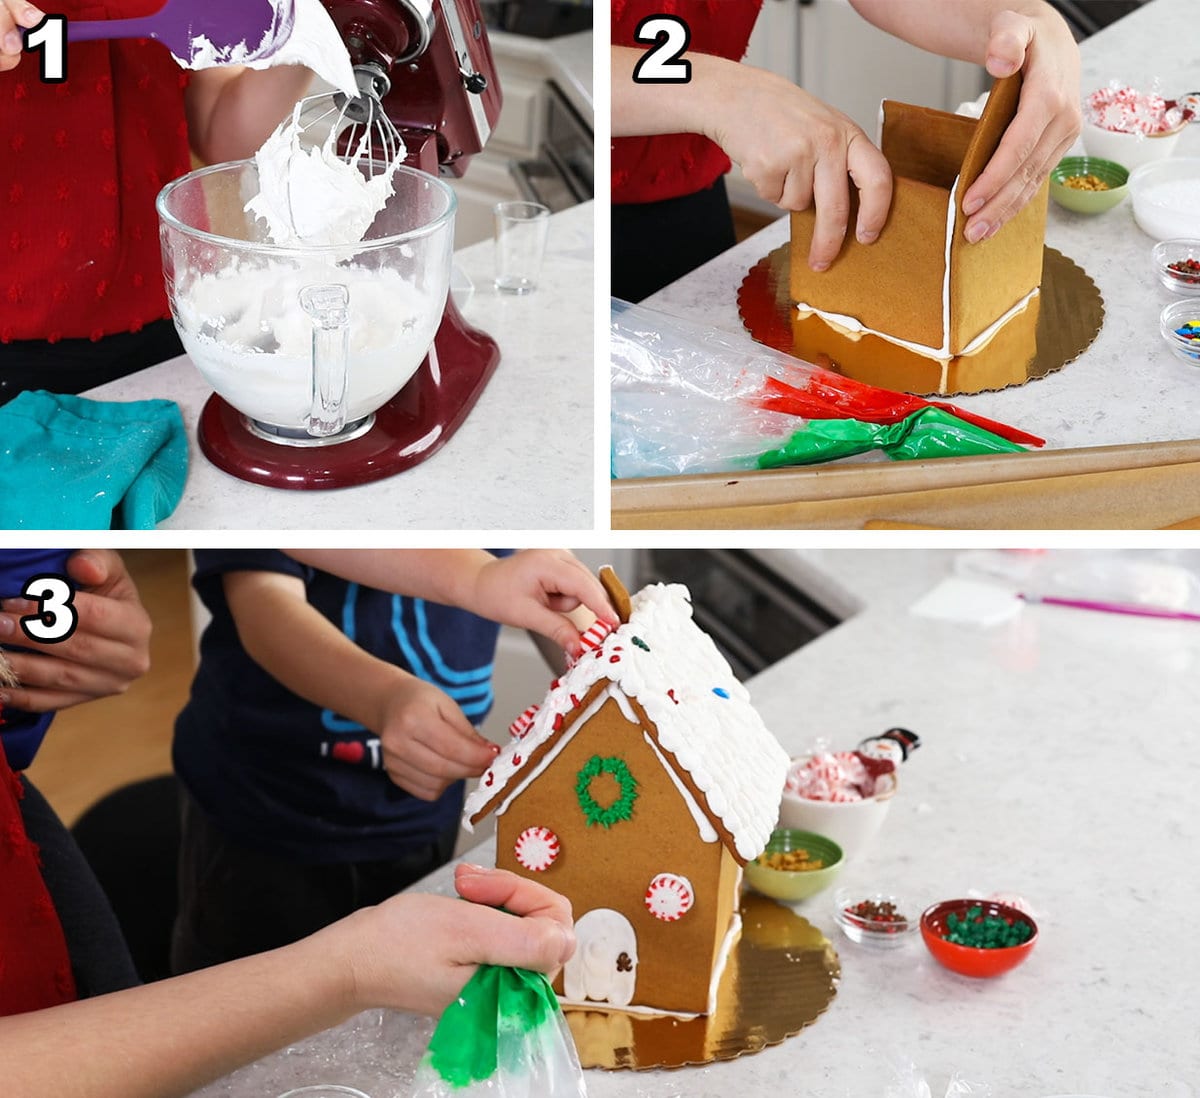
- Combine the sugar, meringue powder, and water in a stand mixer on low speed. Add the vanilla, then increase the mixer speed to high and beat until stiff peaks form. Color any icing as needed, then transfer to piping bags.
- Assemble the house by piping icing on the edges of your pieces and pressing together for several seconds until they hold. Do this until your house is fully assembled.
- Decorate with candies and icing, then let the house sit for several hours before moving so it can set up properly.
SAM’S TIP: I like to use a cake platter as the base for my house/houses. This allows me to use icing to cement the pieces down so they are even more stable. A plate or even a piece of cardboard would also work!

Frequently Asked Questions
There are a few things you can do to make sure your gingerbread house is nice and sturdy. First, roll your dough to the proper thickness (I recommend ¼” thick — too thin and the sides may not hold up to the weight of the roof. ). Next, make sure to wait until your gingerbread has cooled completely before attempting to assemble it. Using the proper icing (in this case, royal icing) will make a huge difference in how secure your gingerbread house is, since the icing is the glue that holds it together. And finally, securing your gingerbread house to a base (I recommend a cake plate) will help it stand tall for weeks.
Some people will also recommend you assemble your house and let it set before decorating. I’ve had success with decorating mine right away, but do what works best for you.
Yes, my gingerbread house recipe is anyway! It does not taste as good as my gingerbread men cookies, bit it’s still tasty and my kids will eagerly devour a whole house. Very eagerly.
You could, but I recommend using my gingerbread cookies instead. This gingerbread house recipe focuses on structure instead of flavor, and my gingerbread men recipe has a better flavor and a much softer, melt-in-your-mouth texture. If you made cookies out of this recipe, they would be tougher, less flavorful, and not as soft.

I can’t wait to see how your gingerbread houses look!
Enjoy!
Let’s bake together! Subscribe to my newsletter to be notified of all the newest recipes, and find my free recipe tutorials on YouTube 💜

Gingerbread House Recipe
Ingredients
For house
- ½ cup (113 g) unsalted butter softened
- ½ cup (100 g) dark brown sugar firmly packed
- ½ cup (120 ml) unsulphured molasses
- 1 large egg
- 2 teaspoons vanilla extract
- 1 ½ teaspoons ground ginger
- 1 ½ teaspoons ground cinnamon
- ¼ teaspoon ground cloves
- ¼ teaspoon ground nutmeg
- ½ teaspoon salt
- 4 cups (500 g) all-purpose flour
Royal icing
- 5 cups (625 g) powdered sugar
- 2 ½ Tablespoons (27 g) meringue powder
- 6 Tablespoons water
- 1 teaspoon vanilla extract
- Food coloring optional
- Candies sprinkles, peppermints etc. for decorating (optional)
Recommended Equipment
Instructions
- Before beginning, please select your gingerbread house template from the "Recommended Equipment" section above. Click the link and print the template you would like to use (you can make either 2 small houses or 1 large with this dough). Print and cut out the shapes. A heavier card stock paper works best/is easiest to use, but I've done this with regular printer paper, too.
- Preheat oven to 375F (190C) and line baking sheets with parchment paper. Set aside.
- Combine butter, sugar, and molasses in a large bowl using an electric mixer. Beat until creamy and well combined.½ cup (113 g) unsalted butter, ½ cup (100 g) dark brown sugar, ½ cup (120 ml) unsulphured molasses
- Stir in egg, vanilla extract, ginger, cinnamon, cloves, nutmeg and salt and stir until well combined. Mixture may look piecey/separated, this is fine.1 large egg, 2 teaspoons vanilla extract, 1 ½ teaspoons ground ginger, 1 ½ teaspoons ground cinnamon, ¼ teaspoon ground cloves, ¼ teaspoon ground nutmeg, ½ teaspoon salt
- Gradually add the flour to the wet ingredients, mixing on low speed until all ingredients are combined and dough is smooth and cohesive. Dough will be stiff.4 cups (500 g) all-purpose flour
- Drop dough onto a clean, lightly floured surface and divide into two discs. Working with one half at a time, use a rolling pin to roll to ¼” (.6cm) thickness.
- Use a pizza cutter, sharp knife, or any straight edge to cut shapes out of dough. Use a large spatula to carefully transfer pieces to prepared baking sheets, spacing pieces at least 2” (5cm) apart. If you have extra dough, cut out gingerbread men or trees for decorating!
- Bake in center rack of a 375F (190C) oven for 13-14 minutes (check at 11 minutes if making small houses). Pieces will be turning slightly darker around the edges when they are close to done. Note that house pieces will still be soft when warm, but will harden as they cool. Let cool completely before building your house. Chimney note: The chimney will cook much faster than the other house pieces, I bake mine on the same sheet as the other pieces but set a timer for 5-7 minutes and remove the chimney early, otherwise it will burn.
- Allow pieces to cool completely before assembling with royal icing.
For the icing
- In the clean, dry bowl of a stand mixer, combine sugar, meringue powder, and water. Use whisk attachment to mix on low speed until combined.5 cups (625 g) powdered sugar, 2 ½ Tablespoons (27 g) meringue powder, 6 Tablespoons water
- Once ingredients are combined, add vanilla extract and gradually increase mixer speed to high and beat until stiff peaks form (this will likely take 5 minutes or longer.) When icing is ready, it should look billowy and almost fluffy, not dense and pasty.1 teaspoon vanilla extract
- If coloring icing, separate into smaller bowl and mix in color until evenly incorporated.Food coloring
Assembly
- Transfer icing to a piping bag fitted with a medium round tip, or you can simply cut off the tip of the bag (you could also use a butter knife to spread along the edges). Assemble your house by lining the edges with icing and pressing two pieces together. Hold for several seconds until the pieces stay together. Repeat with each piece. It’s also helpful to have a base, like a cake platter, for the house, and to use the icing to cement the pieces to the base.
- Decorate with colored icing and various candies. Allow house to sit for several hours for house to be completely stable.Candies
Notes
Molasses
Use an unsulphured molasses (it should say this on the label). I generally use Brer Rabbit or Grandma’s brand. Do not use blackstrap molasses.Storing
Store your house at room temperature somewhere where everyone can see it! It will keep for several weeks, the gingerbread will get harder as it sits.Making in advance
Dough may be formed into a disc, tightly wrapped in plastic, and refrigerated for up to 5 days before rolling out and using. Dough will be firm, you may need to let it sit at room temperature for 20 minutes or longer before you can easily roll it without it cracking. The house pieces may be baked a week or longer before using. The icing can be prepared and stored at room temperature or in the refrigerator. Transfer it to an airtight container and smooth a piece of plastic wrap directly in contact with the surface of the icing before sealing your container. This icing will keep at least several days, but may need to be stirred again before using.Nutrition
Nutritional information is based on third-party calculations and should be considered an estimate only. Actual nutritional content will vary based upon brands used, measuring methods, cooking method, portion sizes, and more.





K
update to me previous comment – it doesn’t taste bad when it’s smothered in icing (I didn’t make the icing, I used Betty Crocker vanilla buttercream from the jar). again, I think my issue was the molasses I used (I think it was black strap).
also, it would be cool if you allowed photos submitted so people can share their gingerbread houses :).
K
It tasted bad :(. I was so disappointed as I like to eat at least some of the house. This tasted really strong maybe of molasses. I used dark molasses is that why? It turned out a really dark brown too. So sad.
Sam
If you used black strap molasses you are going to have a bad experience. 🙁
M. Keith
Tastes okay, but has air bubbles and is wobbly and not sturdy. We had to add about 1/2 cup of milk because it was very dry.
Sam
This is supposed to be a drier dough. Adding the milk likely caused your issues. Did your dough match the consistency of the dough in the video?
Ellen Bunker
I have never left a comment on a recipe before but this was the worst gingerbread recipe I have ever tasted and worked with by far. I feel bad even saying that but I also want to save others the investment of money & time. It was crumbly, even after I could see if was going to be too dry and only added 3 3/4 cup of flour and rolled it out on parchment paper. It was the most tasteless I have ever tasted too. I also cooked up funny with air bubbles forming. None of this has ever happened with any other recipes I have ever tried and we make them yearly. They were all pretty good.
Sam
I’m so sorry to hear this, Ellen! It definitely sounds like something was accidentally mis-measured or omitted. Are you measuring your flour properly? Did you make any substitutions (self rising flour?) or omissions? The air bubbles really have me thrown… you can see in the pics and video there definitely shouldn’t be any of those and I’m not sure how it could be that dry and still have air bubbles 🙁
Ellen Lydia Bunker
Thanks, Sam. Perhaps. I watched your video and yours looked like it worked well. Maybe I miss counted the cups of flour with my kiddos around 😉
S. Yoder
I had the exact same experience! I wish I were in the habit of reading comments, this would have saved me a lot of annoyance.
Kelly
Worse tasting gingerbread house recipe I ever tasted and I have had several none bad, but this one was awful
Sam
Hi Kelly! That’s a bummer to hear! Did you make any alterations to the recipe? In what way did it taste bad? That is definitely not an expected result.