
Cream Cheese Mints
This post may contain affiliate links. As an Amazon Associate I earn from qualifying purchases. Please read my disclosure policy.
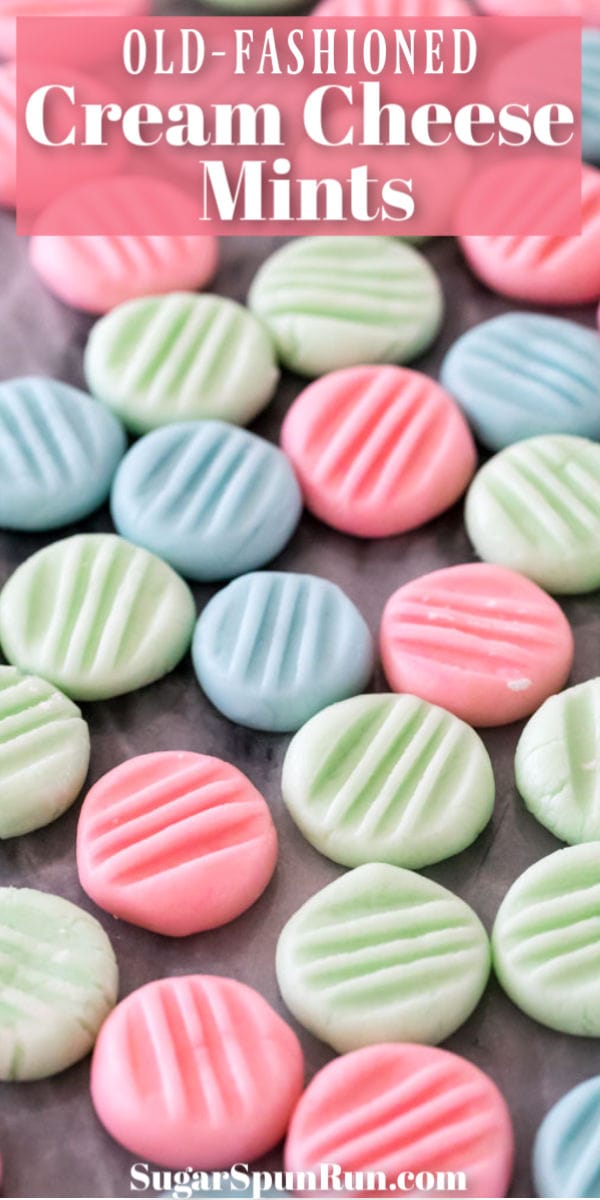
A simple recipe for old-fashioned Cream Cheese Mints! This is a variation of a recipe from my grandmother. They can be made in a matter of minutes and I include instructions for making them in molds for baby showers or bridal showers!
Old-Fashioned Cream Cheese Mints
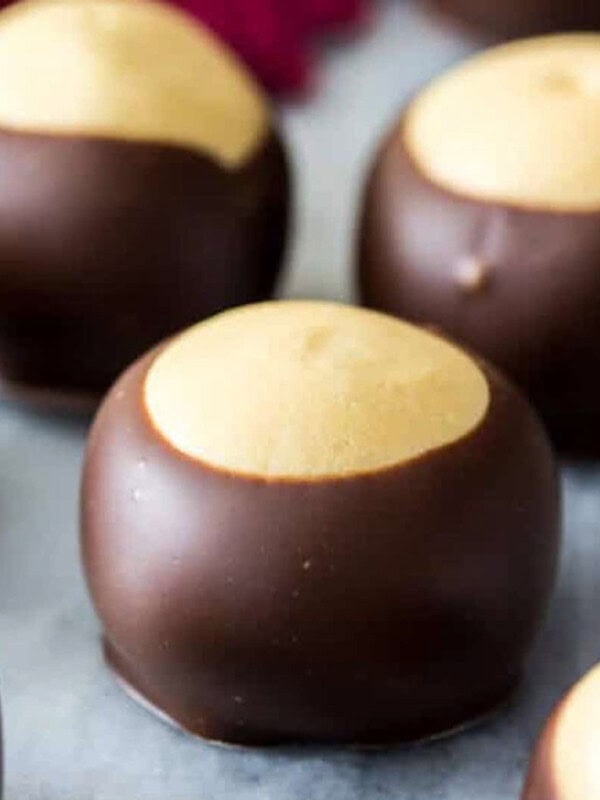
I’d bet you’ve had, or at least seen these cream cheese mints before.
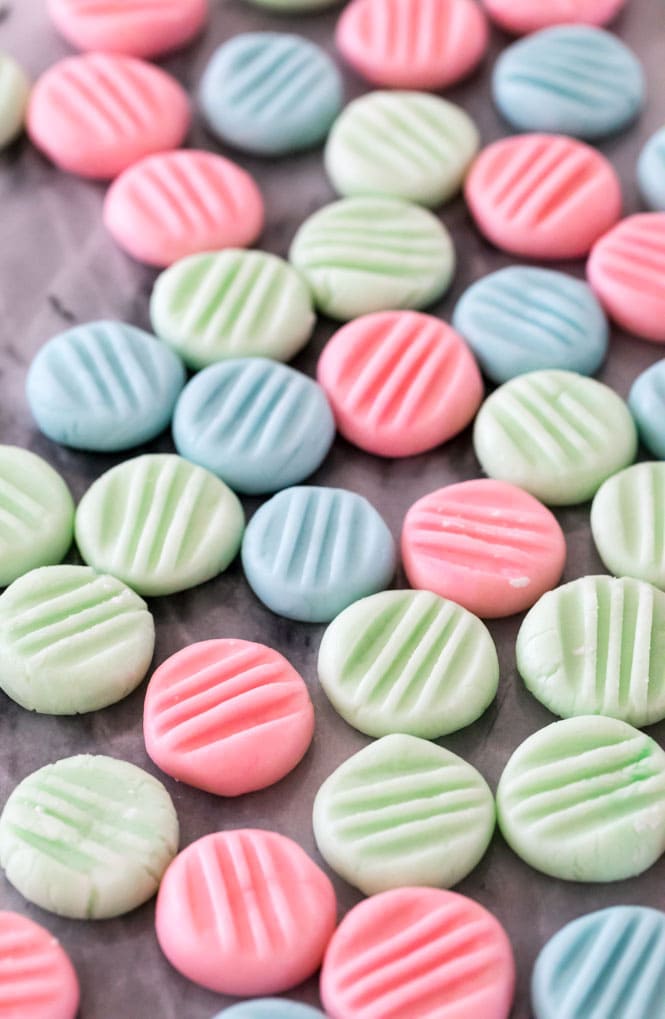
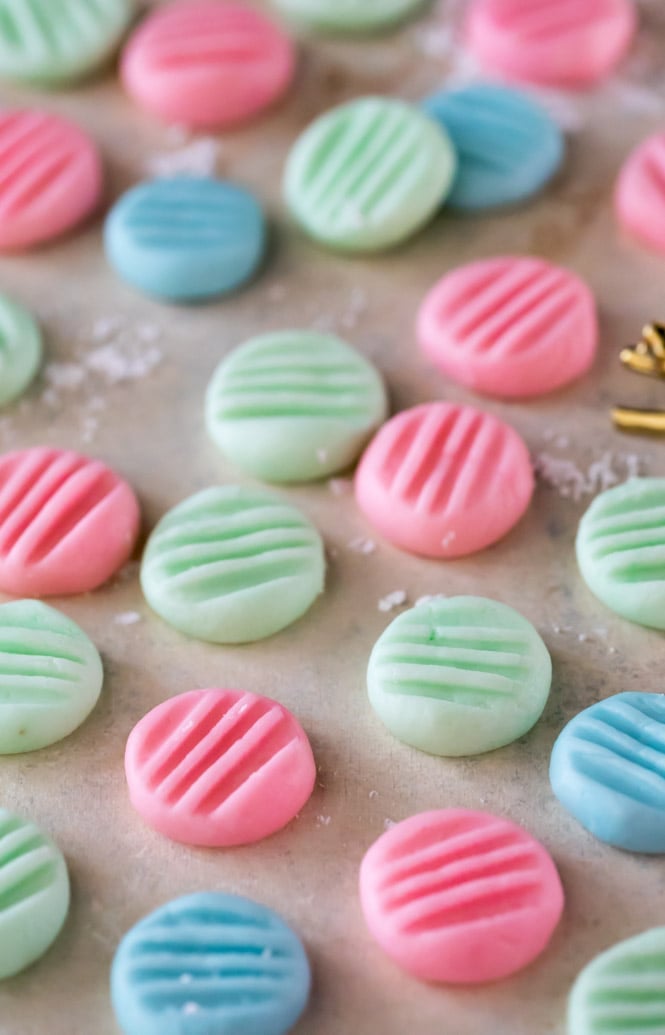
Sometimes formed into cute little discs (as seen here), and sometimes molded into pretty little flowers at bridal showers or rattles at baby showers, or made into just about any shape or color to suit any occasion (how about some green Christmas trees!?). In fact, they’re often referred to as “wedding mints” or “baby shower mints” because they’re so commonly seen at these events.
I wanted to share a sweet and simple candy recipe with you before Christmas, one that didn’t require a candy thermometer (like most of my candy recipes from last year did!), and these cream cheese mints were the perfect choice. You need only a handful of ingredients. The end result is firm on the outside and creamy on the inside. They just melt in your mouth, it’s a bit like eating a minty cream cheese frosting.
Have you ever made these before? If so, you already know how easy they are to make…
Ingredients for Cream Cheese Mints
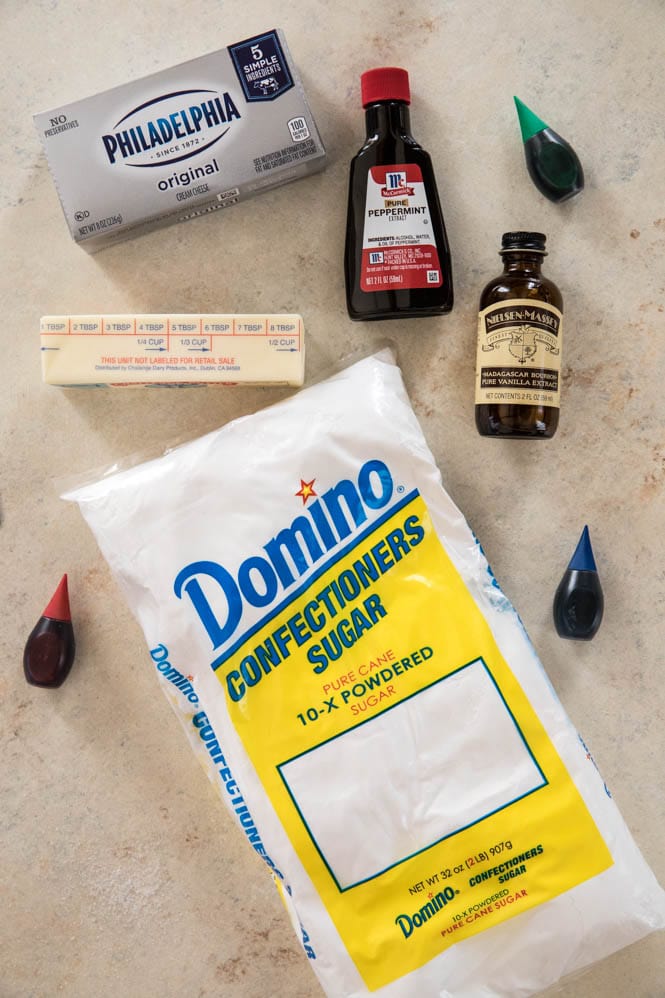
This is such a straightforward recipe. You only need 5 ingredients:
- Cream cheese. I think this one goes without saying. You’ll ideally want it to be softened a bit before using. I like to set mine out an hour before I begin making the mints. Make sure to use a brick-style cream cheese (like the one shown above) and not a spreadable type of cream cheese (that comes in a tub).
- Butter. Just a tablespoon for this recipe! It adds a nice creaminess to the texture.
- Powdered Sugar. This is what will make your mints hold their shape. You’ll be using a lot of powdered sugar, and it’s going to be quite an arm workout if you try to stir all of this in without an electric or stand mixer. The “dough” will need to be very stiff.
- Peppermint Extract. I much prefer this to “mint” extract, which I think makes these cream cheese mints taste like toothpaste. Start with just the 1/2 teaspoon indicated and then increase if desired/as needed. Not a fan of mint? you can play around with other flavors and extracts, too!
- Vanilla Extract. I find that this helps temper the mint flavor and adds an incredibly tasty but subtle depth of flavor. Just a tiny bit is needed — 1/8 teaspoon.
One last ingredient you might like to use is food coloring.
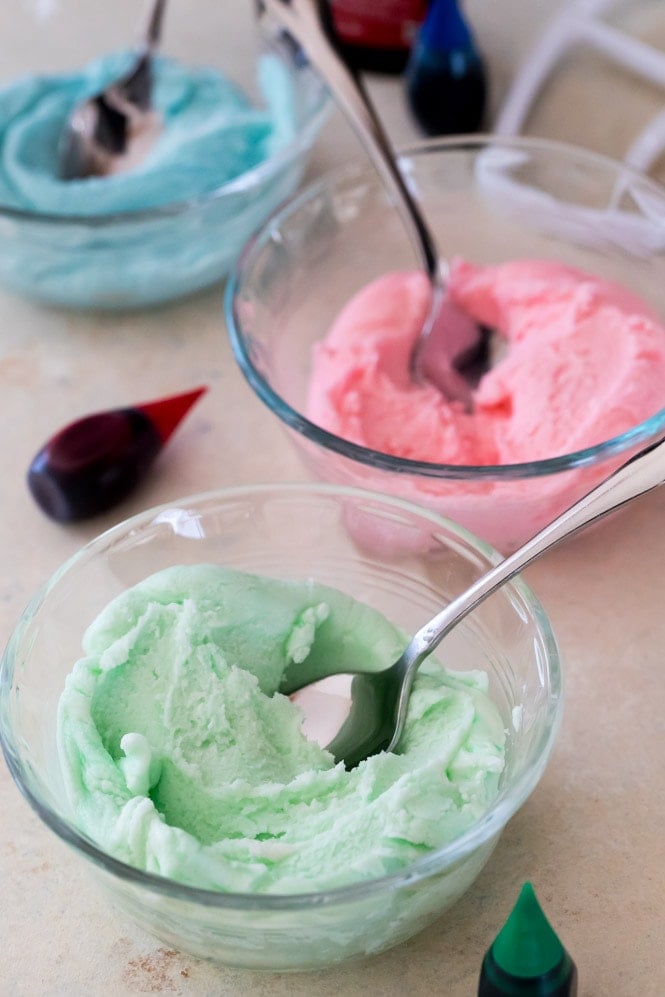
This is completely optional, but I like to divide my dough into different bowls and tint it with a bit of food coloring. While I’m generally a fan of gel food coloring, which yields vibrant colors, something about cream cheese mints calls for a more pastel look, so I used liquid food coloring today. Whichever you prefer is fine (and of course you can leave out the color entirely).
How to Make Cream Cheese Mints:
- Combine cream cheese and butter and beat with an electric mixer until smooth and creamy.
- Add about two cups of powdered sugar and stir until well-blended.
- Add extracts and stir well. I like to stir the extract in at this point to ensure that it is well-combined into the batter. If you wait until the end the dough can get so stiff that you end up with pockets of intense mint flavor in some places.
- Slowly, with mixer on low speed, add remaining powdered sugar. The dough should become very stiff. Pause periodically to scrape the sides and bottom of the bowl to ensure everything is very well-combined.
- This dough should be a very thick, stiff dough. If it’s not or if it’s still sticky, continue to add more powdered sugar until a play-dough like consistency is reached.
- If using food coloring: If using just one color you can use your electric mixer to beat the color into the dough. If you’d like to do several colors, divide the dough into as many bowls as you would like colors and color each individually, stirring well until color is well-incorporated.
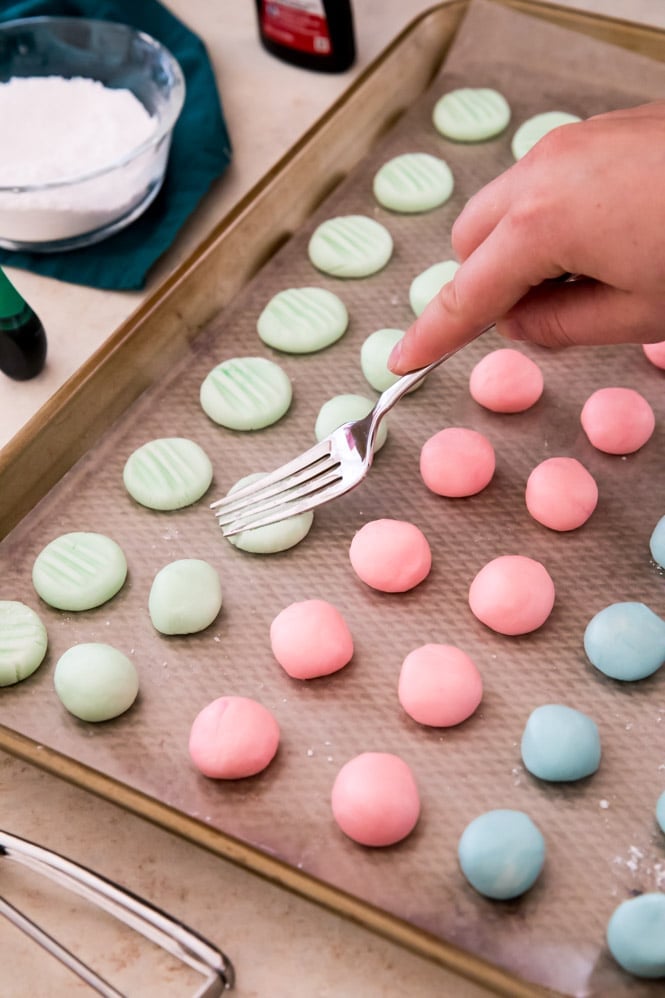
- Roll dough into teaspoon-sized balls and transfer to a wax paper-lined cookie sheet.
- Dip the tines of a fork in additional powdered sugar then gently but firmly press down into each mint.
- Let sit at room temperature to firm up for several hours, then transfer cream cheese mints to the refrigerator until ready to serve!
If you like these, make sure to also try my easy butter mint recipe!
Can I use these in a Mold?
Yes! Cream cheese mints are commonly seen at bridal showers and baby showers and are often formed into cute shapes in silicone molds. You can absolutely use this recipe with your molds.
To do so, roll a bit of the dough into a ball, roll that thoroughly through granulated (not powdered) sugar, and press it firmly into your mold. Invert the mold and pop out your adorably shaped cream cheese mint!
How to Store Cream Cheese Mints:
Once your mints are prepped and firm, store them in the refrigerator in an airtight container for up to two weeks or in the freezer (in an airtight container) for several months.
Enjoy!
More Easy Candy Recipes to Try:
Let’s bake together! Head on over to my YouTube channel where I’ve already uploaded over 200 recipe videos that you can watch for free!

Cream Cheese Mints
Ingredients
- 4 oz (113 g) cream cheese¹, softened
- 1 Tablespoon salted butter, softened
- 4 cups (500 g) powdered sugar, plus additional as needed and for imprinting mints
- 1/2 teaspoon peppermint extract
- 1/8 teaspoon vanilla extract
- Food coloring, optional
Instructions
- Combine cream cheese and butter in the bowl of a stand mixer (or in a large bowl and use an electric mixer) and beat until creamy and well-combined.4 oz (113 g) cream cheese¹, 1 Tablespoon salted butter
- With mixer on low-speed, gradually add 2 cups (250g) of sugar, stirring until completely incorporated.4 cups (500 g) powdered sugar
- Add peppermint and vanilla extract and stir well.1/2 teaspoon peppermint extract, 1/8 teaspoon vanilla extract
- With mixer on low-speed, gradually add remaining sugar. Stir until sugar is completely combined and pause occasionally to scrape sides and bottom of the bowl. Dough should be very stiff and not sticky (if it’s still sticky, add more powdered sugar until it has a play-dough-like consistency).
- If using food coloring: If using just one color you can use your electric mixer to beat the color into the dough. If you'd like to do several colors, divide the dough into as many bowls as you would like colors and color each individually, stirring well until color is well-incorporated.Food coloring
- Roll dough between your palms into teaspoon-sized portion until smooth. Transfer to wax-paper lined baking sheet. Dip the tines of a fork in powdered sugar and use that to gently but firmly press down on each mint.
- Allow mints to dry at room temperature for several hours (they should be dried through and if you squeeze them firmly they shouldn't squish or give) then transfer to an airtight container and store in the refrigerator until ready to serve. To help minimize any sticking, store mints in single layers with a sheet of wax paper between them.
Notes
To Make Into Molds
If you’d like you can make these mints into just about any shape you’d like using molds. To do so, roll a bit of the dough into a ball, roll that thoroughly through granulated (not powdered) sugar, and press it firmly into your mold. Invert the mold and pop out your adorably shaped cream cheese mint!Nutrition
Nutrition information is automatically calculated, so should only be used as an approximation.
Like this? Leave a comment below!


These are a family favorite! My grandmother used to make them for weddings and baby showers when I was little. She would have her whole kitchen table filled with beautiful flower-shaped mints. She has passed, and now it’s my turn to make them for events.
Mine aren’t as pretty as hers were, but they taste just as good 🙂 Thank you for sharing the recipe!
great
great for Easter I love them
Thank you for this – brought back childhood memories.
Your recipe is delicious thank you for sharing.My family wouldn’t let them dry they loved them so much
Thank you so much for trying my recipe, Shannon! I’m so glad they were such a hit! 🙂
Soft, sweet and just the perfect amount of mint! This recipe is so easy to make and brings back memories from when I was a kid.
Easy and yummy! Great recipe!