My Apple Turnovers recipe is made completely from scratch with a sweet apple filling folded inside my homemade flaky, buttery pie crust! They take less than an hour to make and taste SO much better than store-bought. Recipe includes a how-to video!
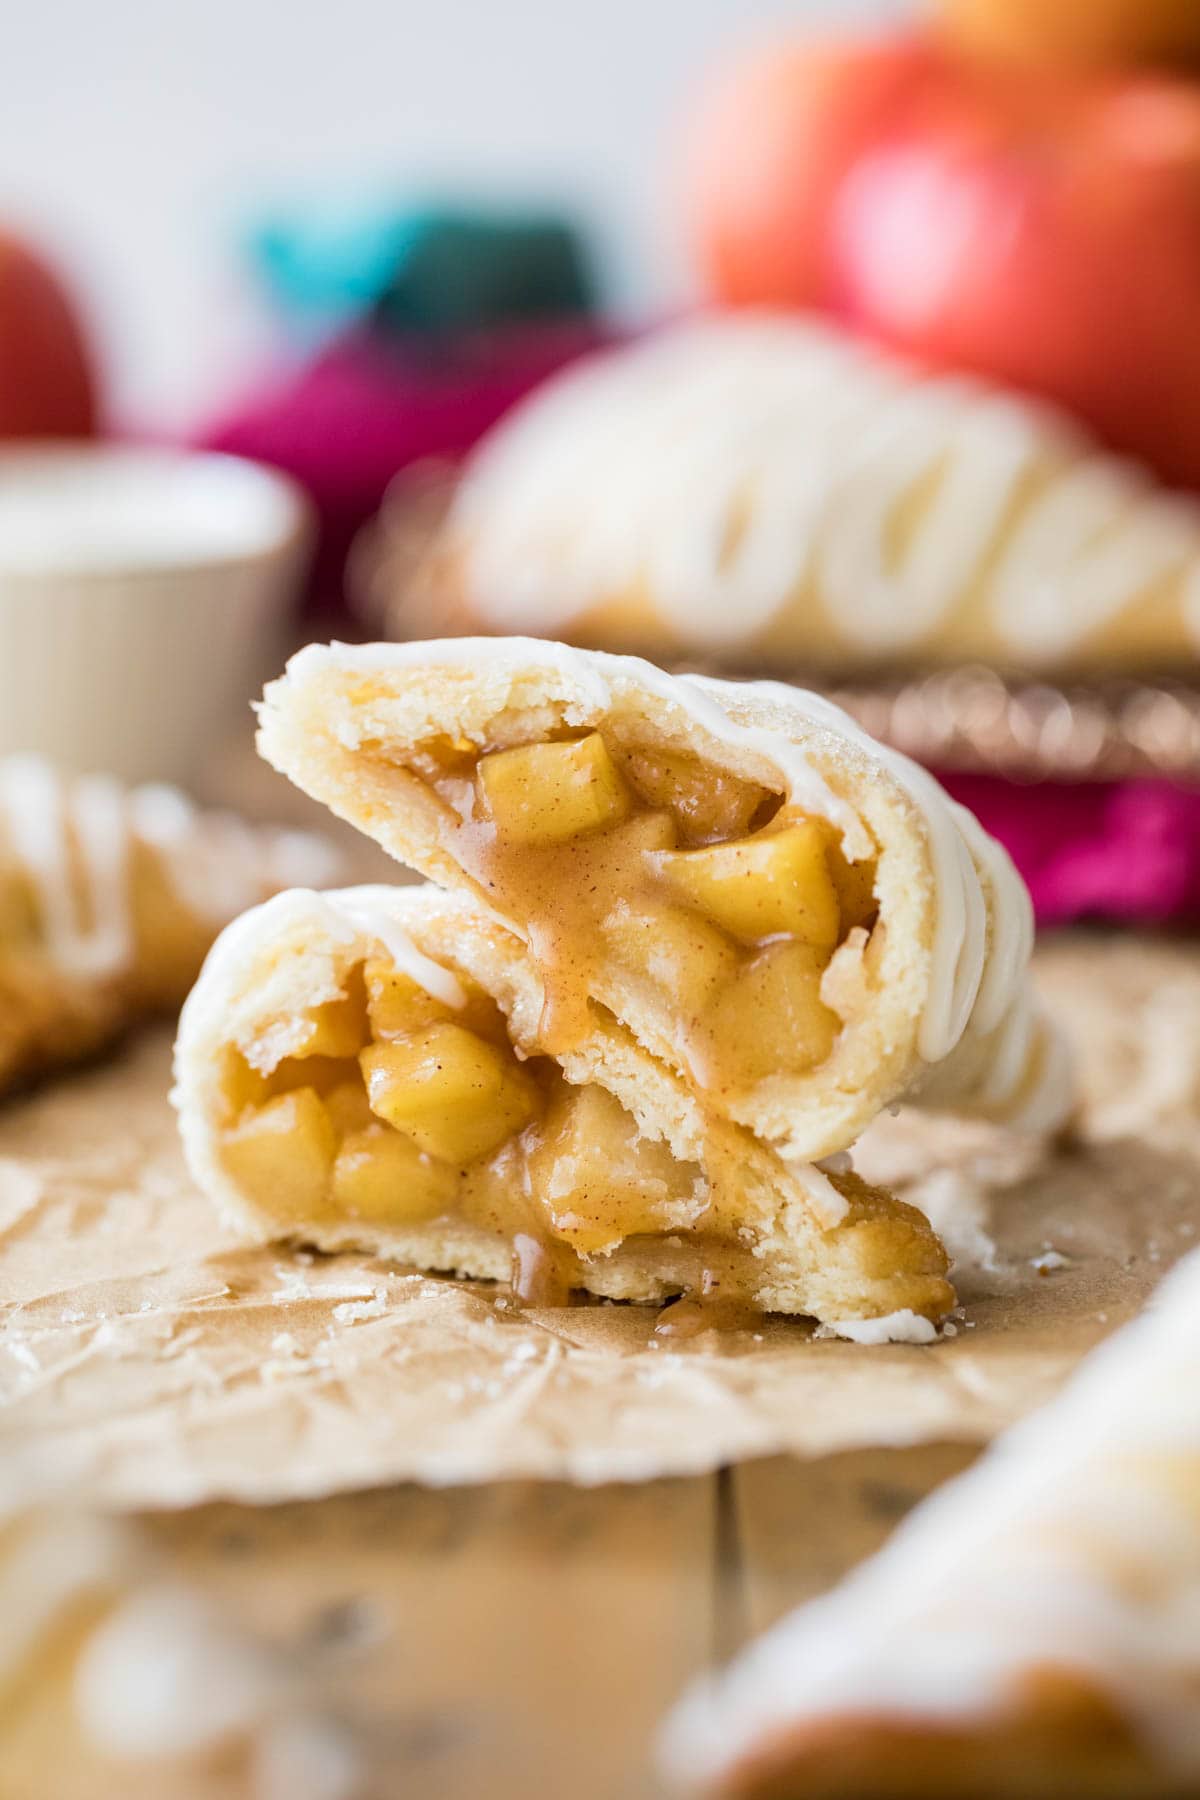
Apple Turnovers From Scratch
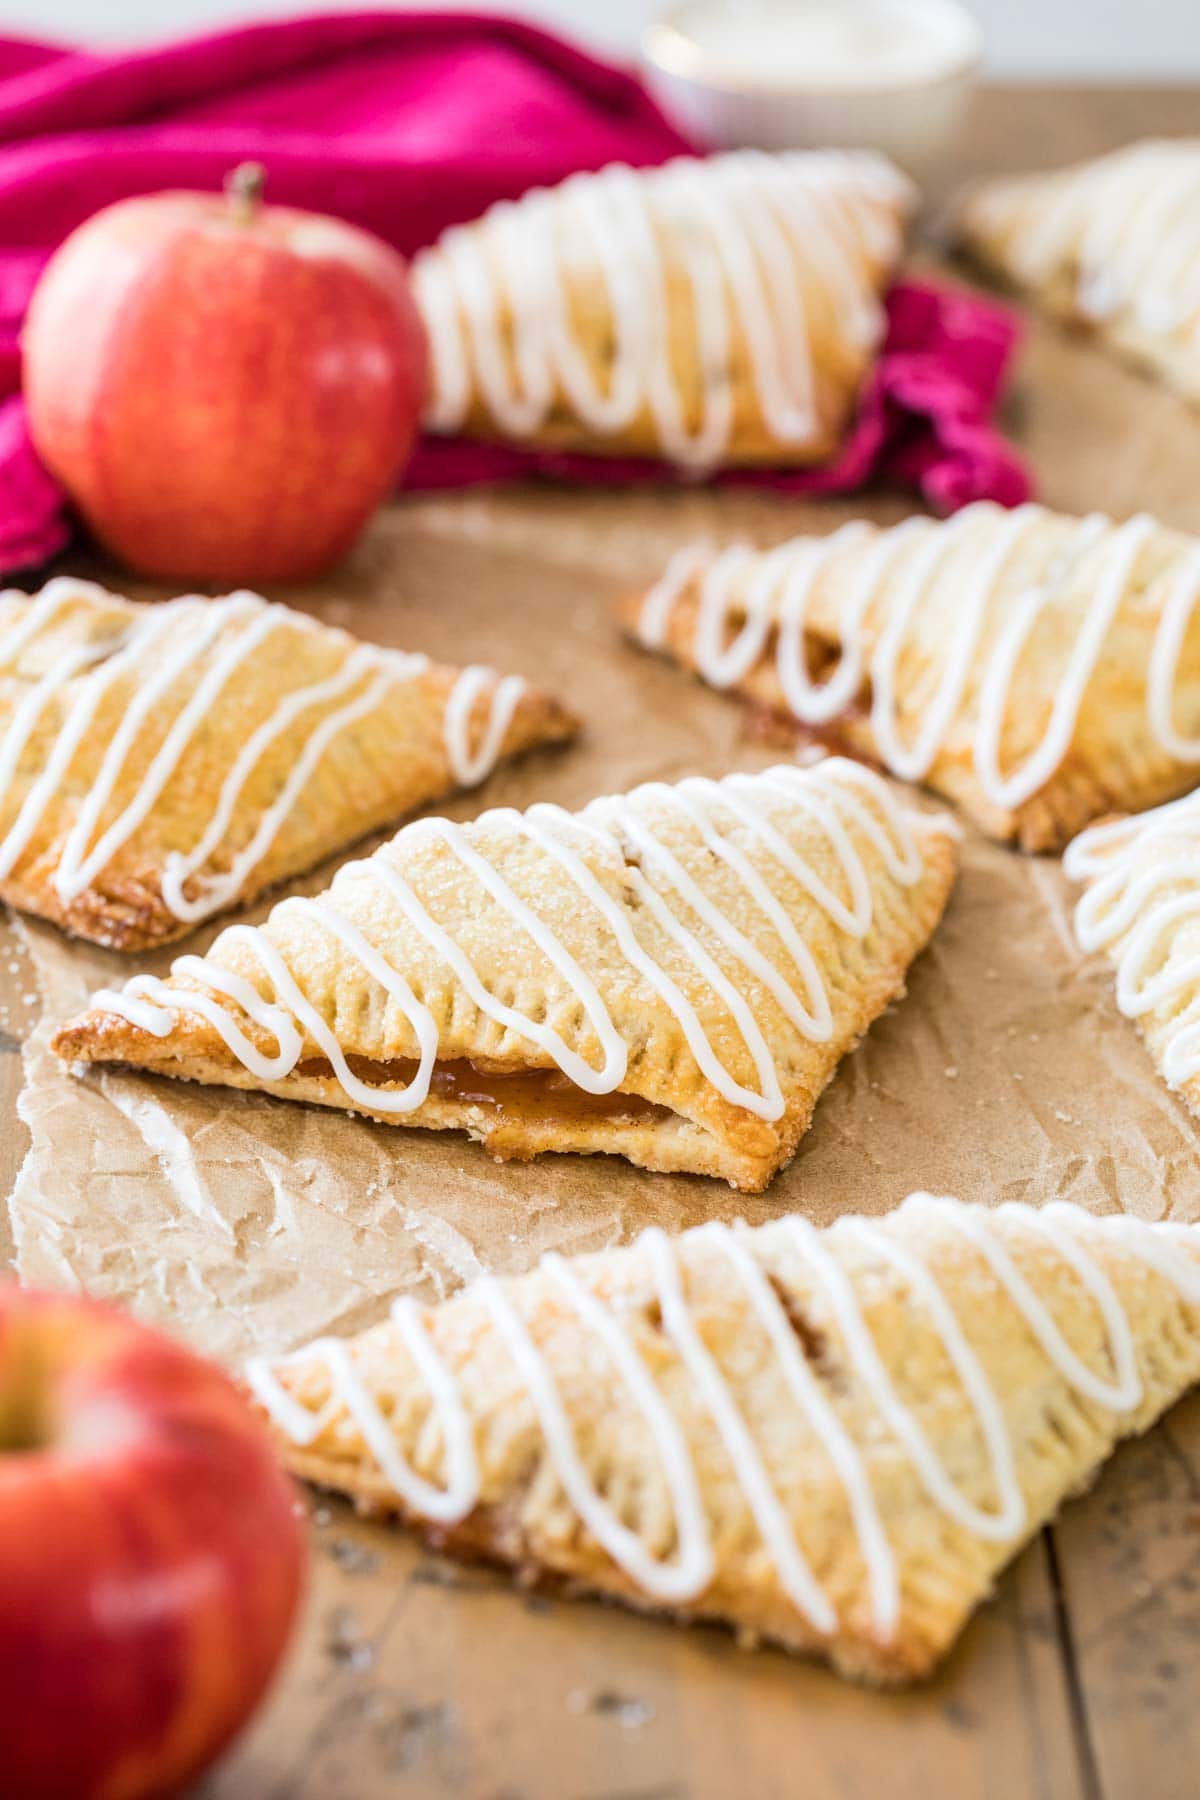
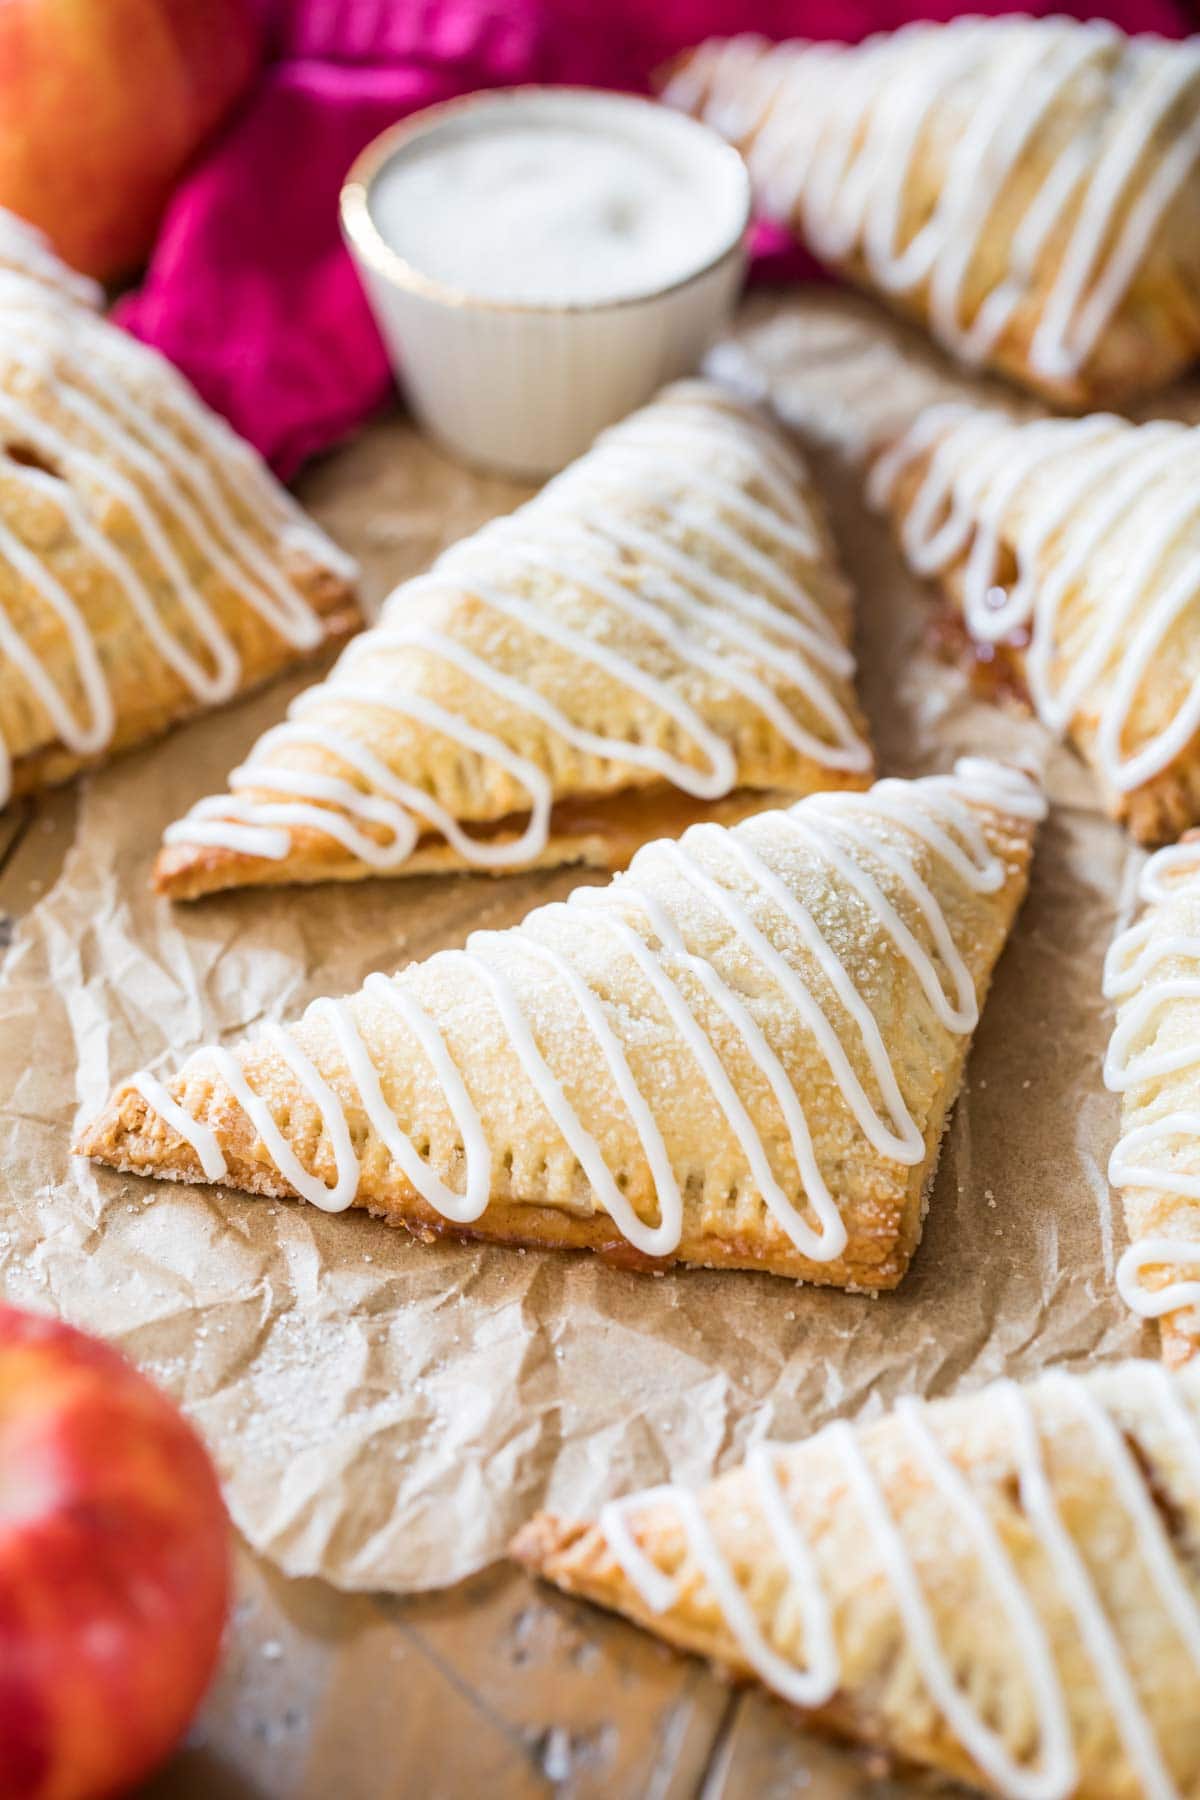
I’m re-sharing my homemade apple turnovers recipe just in time for the fall baking season. My version is made completely from scratch with my flaky (super easy) pie crust recipe and a homemade apple pie filling inside.
These are very similar to my hand pies and a great way to use up leftover apples from apple picking. With their buttery, flaky crust and sweet caramelized apple filling in every bite, what’s not to love?!
While I typically top my turnovers with an easy vanilla glaze, I also like to sprinkle them with coarse sugar for some added crunch and sparkle. If you’re less of a sugar fiend, you can just use the sugar or the glaze–but I highly recommend both!
Why you’ll love my recipe:
- Can be made with pie dough or my easy puff pastry.
- Takes less than an hour to make.
- Two topping options: coarse sugar or vanilla glaze (or both!).
- 100% from-scratch!
Ingredients
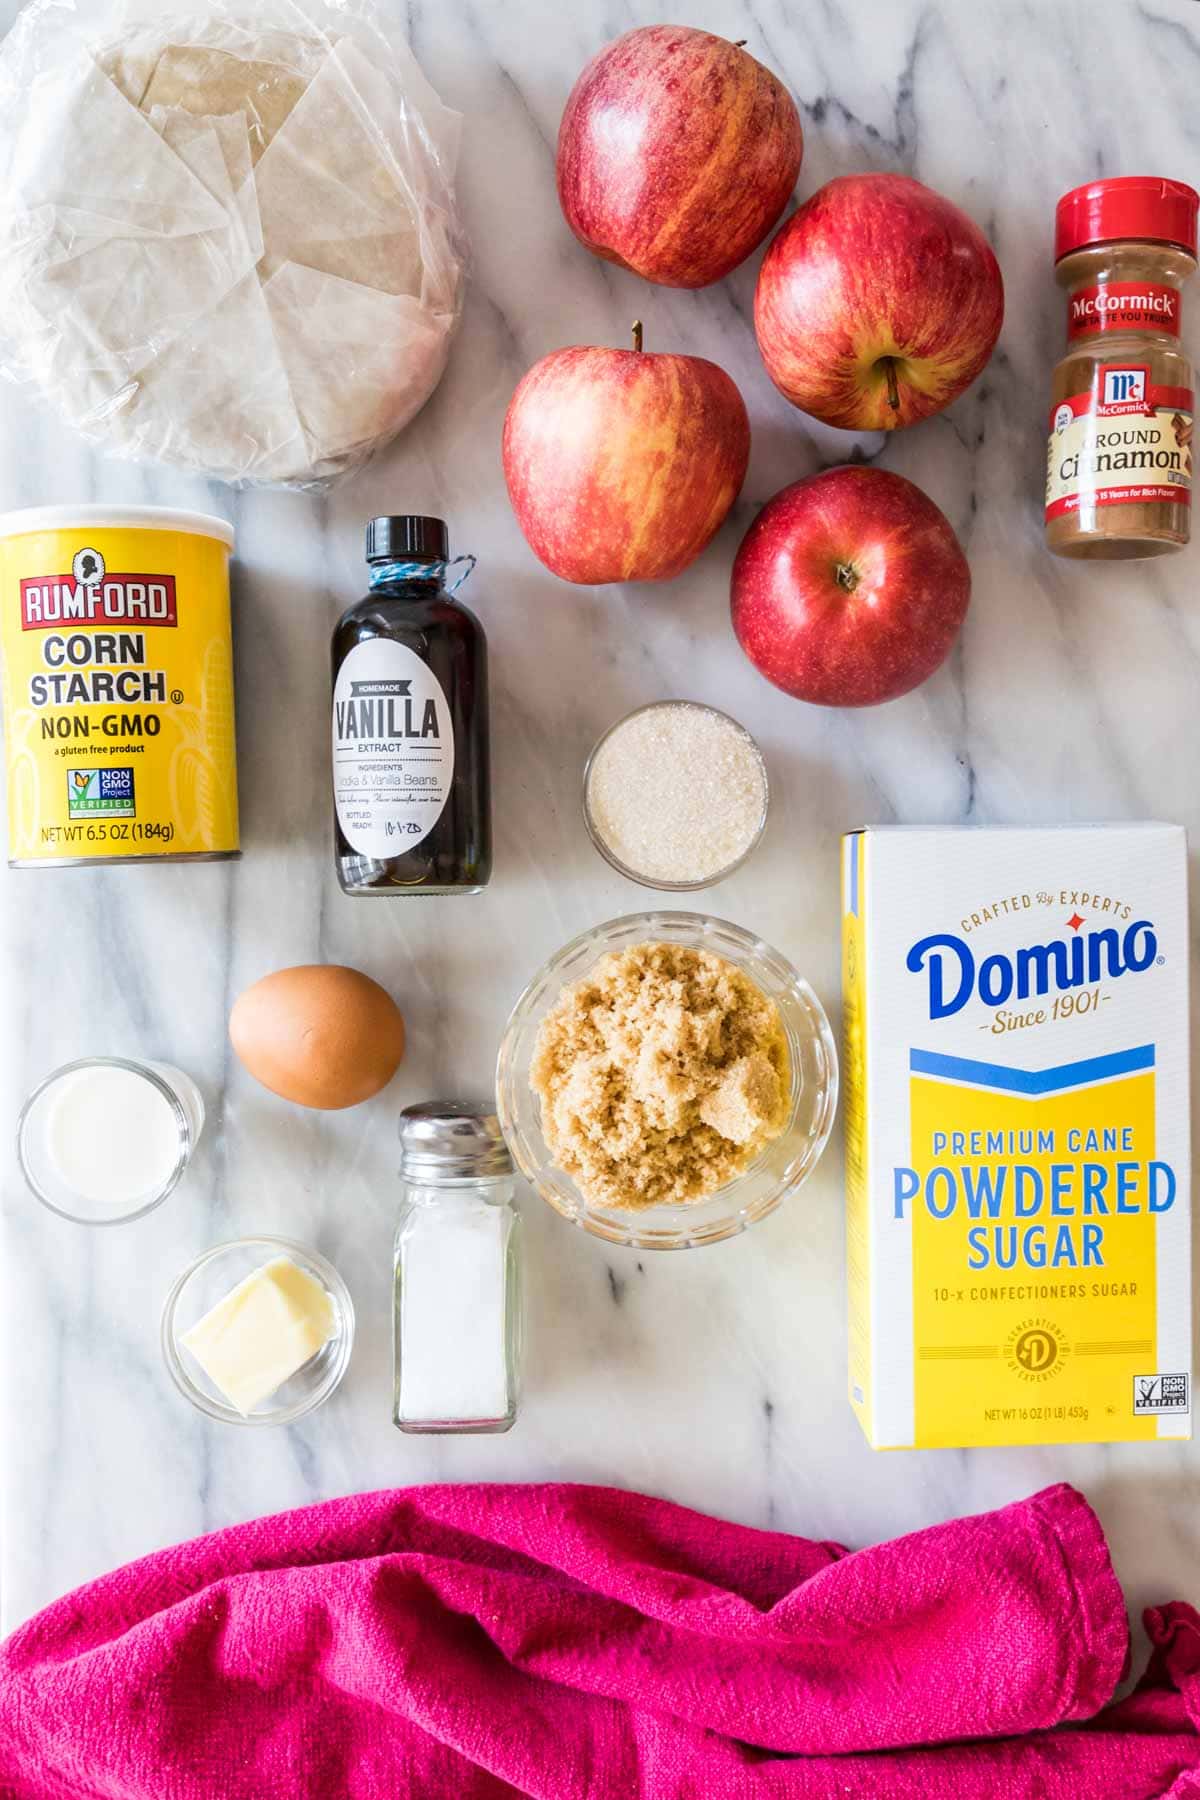
Just a few ingredients come together to make this easy apple turnover recipe. Most importantly, you’ll need:
- Apples. I recommend using a firm, fairly tart apple like Fuji, Gala (my favorites for apple butter or applesauce), or Granny Smith (a more tart option!). Be sure to peel & core the apples before cutting them into small pieces (less than ½″).
- Pie crust. You could use pre-made (store-bought) pie dough, but I really recommend making my homemade pie dough (linked in the recipe below). It’s very easy to make and produces perfectly flaky, flavorful results that I think makes my apple turnover recipe really special.
- Brown sugar. I like using light brown sugar for the apple filling. Dark brown sugar can be substituted, but it will make your turnovers richer and sweeter.
- Cornstarch. This helps to thicken our apple filling.
- Coarse sugar. This is optional, but I love sprinkling it on the turnovers before they go in the oven. It gives them a crisp, sparkly exterior!
SAM’S TIP: It will seem like a lot of (maybe even too many) apples when you first add them to your pan, but they’ll cook down to be just enough to fill your crust. Make sure to let the filling cool before adding it to your dough, otherwise you run the risk of melting your pastry dough.
Remember, this is just an overview of the ingredients I used and why. For the full recipe please scroll down to the bottom of the post!
How to Make Apple Turnovers
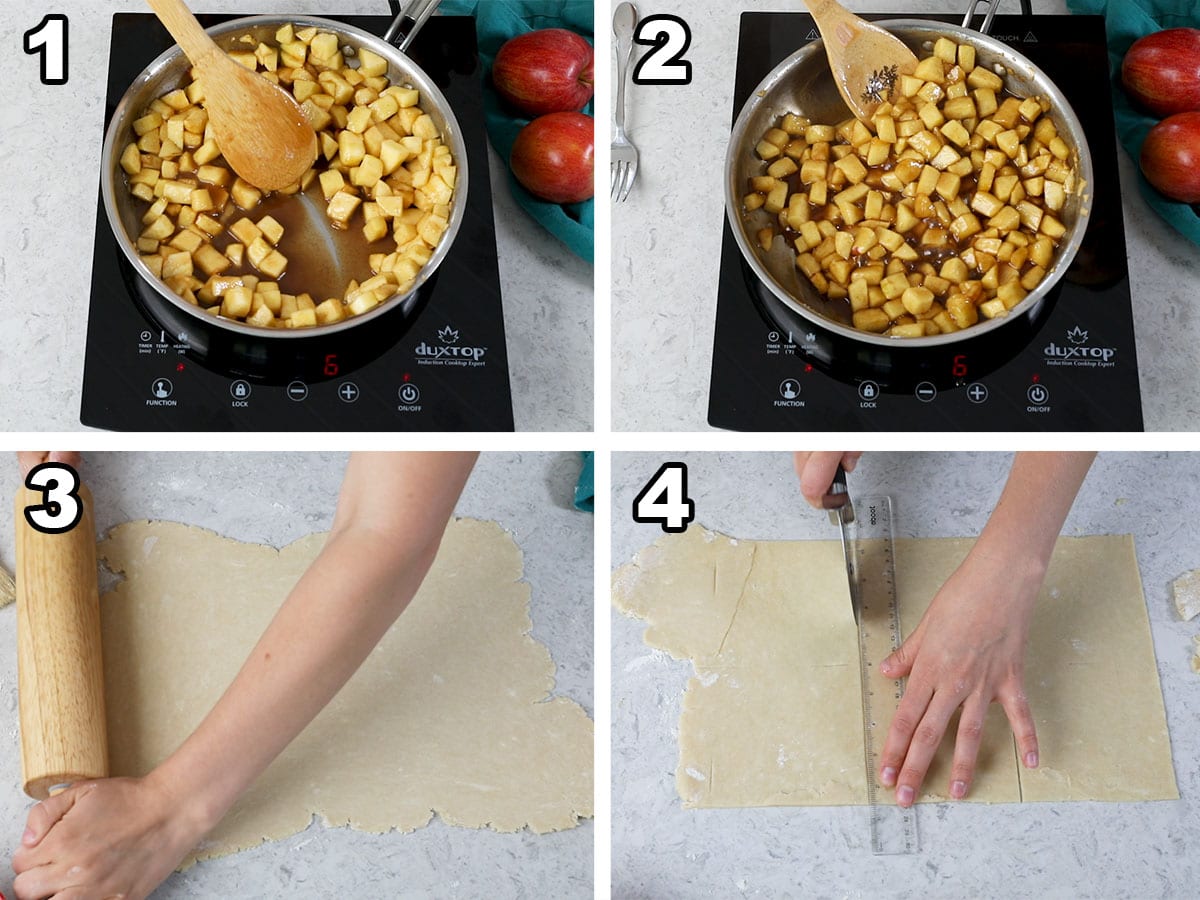
- Combine apple filling ingredients in a saucepan and cook, stirring frequently.
- Once the butter melts, increase the heat and let the mixture simmer for 5 minutes. The apples will become tender and the sauce will thicken.
- Remove apple mixture from heat and stir in vanilla, then set aside to cool while you roll out your pie dough.
- Cut the dough into squares (I like to use a ruler to make mine even, but maybe you’re better at eyeballing this than I am!).
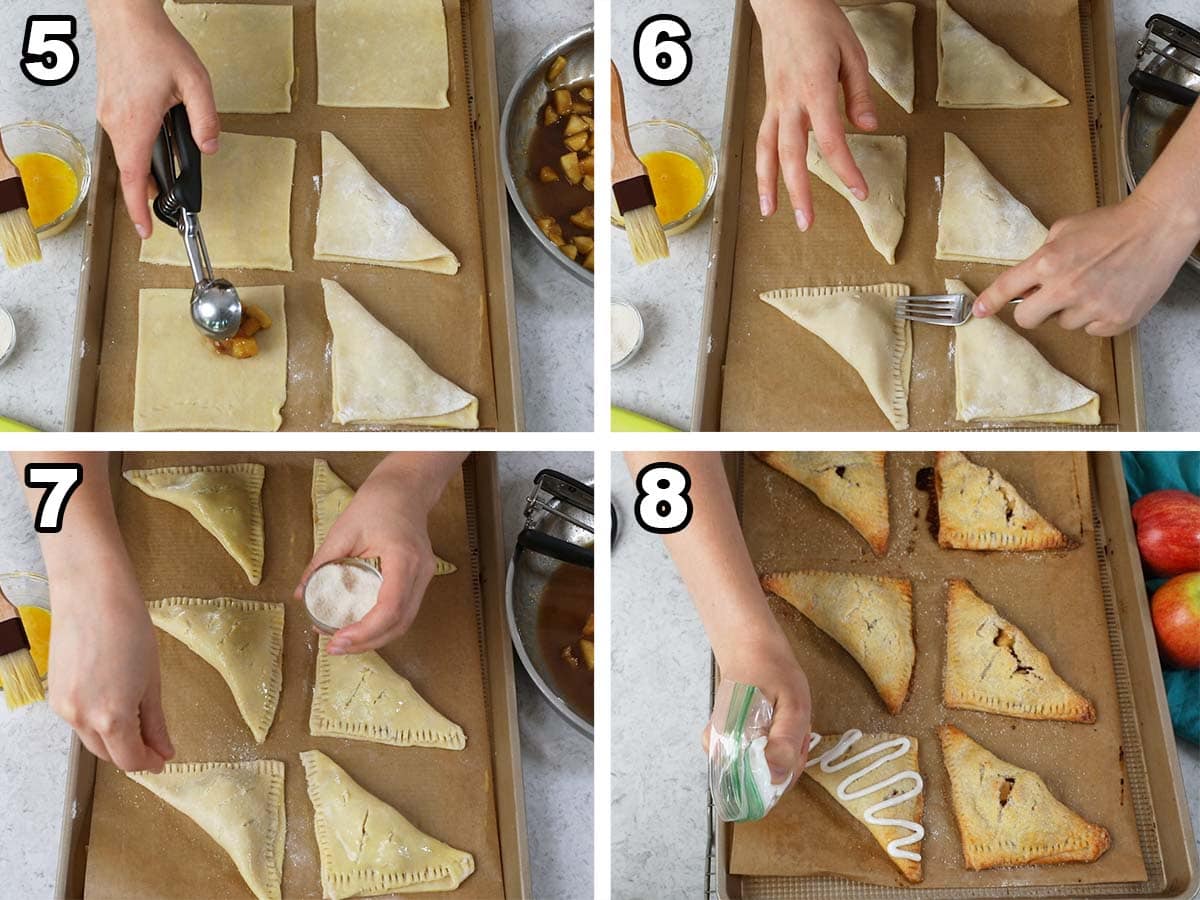
- Transfer the pastry squares to a parchment paper lined baking sheet and brush lightly with egg wash. Now scoop the cooled apple turnover filling onto prepared squares, placing them just off center.
- Fold the squares over the apple filling and use a fork to crimp the edges.
- Brush the tops of the turnovers with egg wash and vent with a sharp knife before sprinkling with sugar (if using, which you should!).
- Bake for 25 minutes and let cool completely before drizzling with glaze.
SAM’S TIP: If you do find that your dough becomes too soft to manage, just return it to the refrigerator for a few minutes and it should quickly become firm enough to manage. You can also do this with the assembled turnovers if they seem too soft or melty before you pop them in the oven (this can easily happen on a warm day!).
Frequently Asked Questions
Yes! These can be frozen before or after baking. If freezing before, I’d recommend freezing on a baking sheet first to firm up the exteriors before wrapping and storing in a ziploc bag or airtight container. When you’re ready to bake, you can do so from frozen; they’ll just need a few minutes longer in the oven.
Yes! You’ll need one batch of my homemade puff pastry or two sheets of store-bought puff pastry.
If you want to make them last longer, yes. They will keep for 2 days at room temperature (I recommend covering them) but will keep for 5 days if refrigerated. They are best when fresh though!
If you like this apple turnovers recipe, give my cherry turnovers and chocolate turnovers a try!
Enjoy!
Let’s bake together! I’ll be walking you through all the steps in my written recipe and video below! If you try this recipe, be sure to tag me on Instagram, and you can also find me on YouTube and Facebook
Apple Turnovers Recipe
Ingredients
- 2 batches pie crust dough I recommend using my easy pie crust linked here, it doubles well!
- 4 apples cored, peeled and diced into pieces no larger than ½” (see note)
- ⅔ cup (133 g) light brown sugar firmly packed
- 2 Tablespoons (30 g) unsalted butter
- 2 teaspoons cornstarch
- ½ teaspoon ground cinnamon
- ½ teaspoon vanilla extract
- ⅛ teaspoon salt
- 1 large egg + 1 teaspoon water for egg wash
- 2 Tablespoons coarse sugar for sprinkling, optional
Vanilla Glaze
- 1 cup (125 g) powdered sugar
- 1-2 Tablespoons milk
- ¼ teaspoon vanilla extract
Instructions
- Preheat oven to 400F (205C) and line two baking sheets with parchment paper. Set aside.
- Begin preparing apple filling by combining chopped apples, brown sugar, butter, cornstarch, cinnamon, and salt in a medium-sized saucepan over medium-low heat.4 apples, ⅔ cup (133 g) light brown sugar, 2 Tablespoons (30 g) unsalted butter, 2 teaspoons cornstarch, ½ teaspoon ground cinnamon, ⅛ teaspoon salt
- Cook, stirring frequently, until butter is melted. Increase heat to medium and continue to cook, bringing mixture to a simmer. Simmer for 5 minutes, stirring occasionally. Mixture should thicken slightly.
- Remove from heat and stir in vanilla extract. Allow mixture to cool before filling pie dough.½ teaspoon vanilla extract
- Prepare turnover dough: Divide pie crust in half and roll out one half onto a clean, lightly floured surface. Roll into a rectangle between ⅛”-¼” thick.2 batches pie crust dough
- Using a pizza cutter or sharp knife, neatly cut dough into 4 ½” squares and transfer to a parchment paper lined baking sheet. Repeat with remaining half of dough (note: you will need to gather the scraps and re-roll them out to make all 10 turnovers).
- Prepare egg wash by whisking together egg and water. Use a pastry brush to lightly brush the surface of each pastry square with egg wash.1 large egg + 1 teaspoon water
- Portion about 1½ Tablespoons of filling just off center of each square. Gently fold over one corner to touch the other to envelope the apple filling. Use the tines of a fork to press and seal the turnovers. Repeat with remaining turnovers.
- Brush the outside of each turnover lightly with egg wash and sprinkle with coarse sugar (or regular granulated sugar), if desired. Use a sharp knife to cut 2-3 small slits to vent.2 Tablespoons coarse sugar
- Transfer to center rack of 400F (205C) oven and bake for 25 minutes, until pastry is beginning to turn golden brown.
- Allow to cool before topping with icing (if desired).
Vanilla Glaze
- Whisk together powdered sugar, 1 Tablespoon of milk, and vanilla extract. If mixture is too dry, add additional milk, a splash at a time, until mixture ribbons off the spoon.1 cup (125 g) powdered sugar, 1-2 Tablespoons milk, ¼ teaspoon vanilla extract
- Drizzle glaze over cooled turnovers, and enjoy.
Notes
Apples
I recommend using a tart, firm apple like Gala, Fuji, or Granny Smith, but just about any apple will work here! You’ll need about 1.75lbs/795 grams of apples before peeling/coring/dicing). After dicing you should have about 3 cups/350g of apples.Storing
Store in an airtight container at room temperature for up to 2 days, in the refrigerator in an airtight container for up to 5 days, or tightly wrap and freeze for up to several months.Nutrition
Nutritional information is based on third-party calculations and should be considered an estimate only. Actual nutritional content will vary based upon brands used, measuring methods, cooking method, portion sizes, and more.
This recipe was originally published October of 2017. I’ve made small edits to the flow of the recipe to make it easier to follow and have added new photos, a new video, and new text that I hope is helpful!

Tracy K Heath
Soooo very good