
Star-Spangled Cookies
This post may contain affiliate links. As an Amazon Associate I earn from qualifying purchases. Please read my disclosure policy.
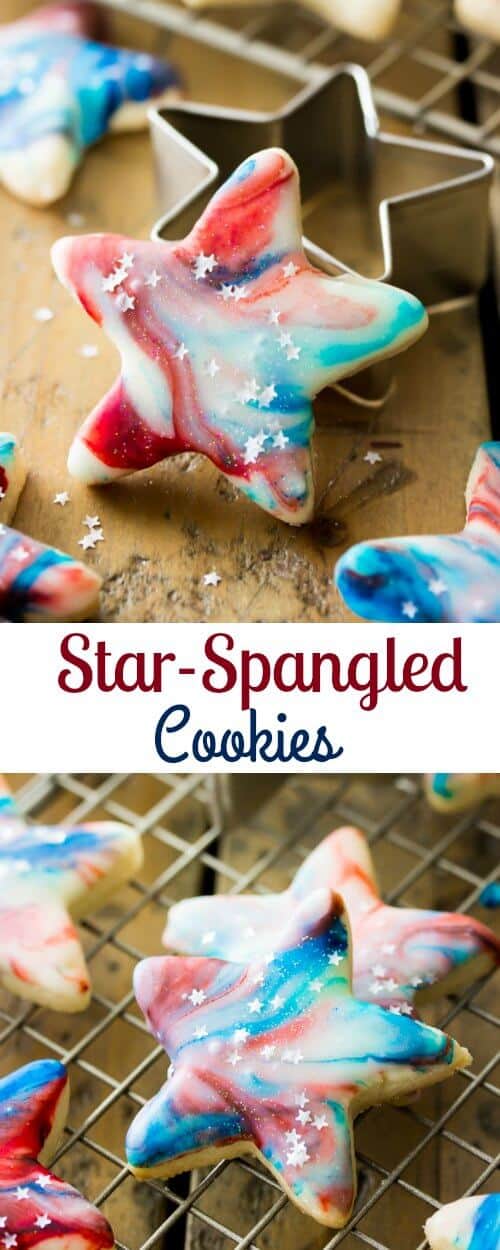
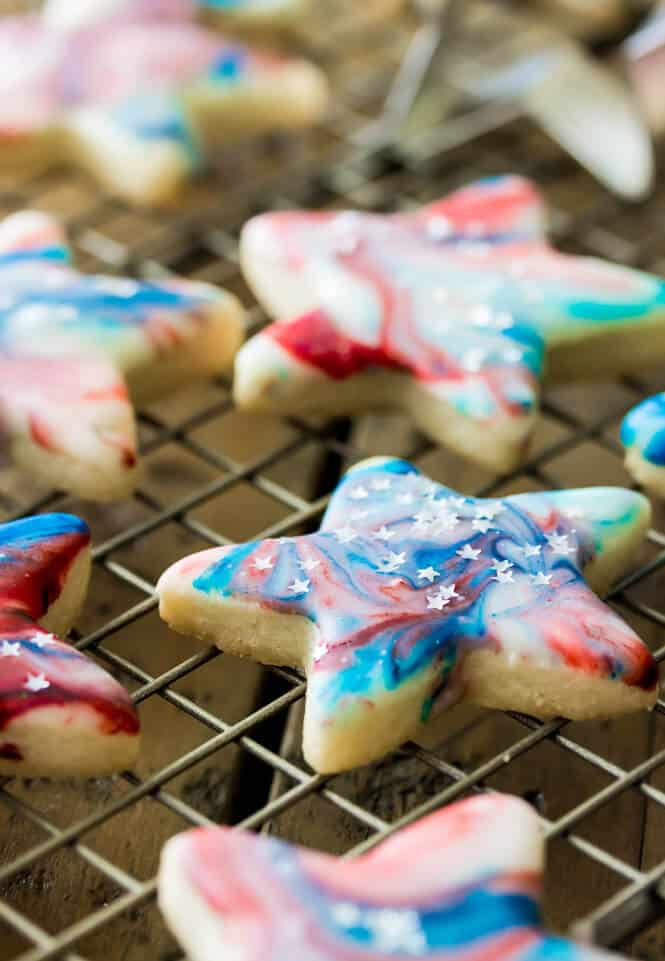
Festive red white and blue star-spangled cookies that are perfect as a patriotic Memorial Day or 4th of July celebration dessert. Recipe includes a quick video showing how easy it is to decorate these cookies!
The Most Patriotic Cookie
I made these pretty, red white and blue marbled cookies over Memorial Day Weekend. I know, obviously it would have been best if I could’ve gotten them to you before Memorial Day, but I’m late to everything and I thought that they at least still would be worth sharing for the Fourth of July.
If you’re a regular follower (thank you!), you might recognize these cookies and their technique from my marble heart cookies or my galaxy cookies. I hesitated to even share them, but with how popular those recipes have been in the past, I thought some festive, patriotic tweaking was in order.
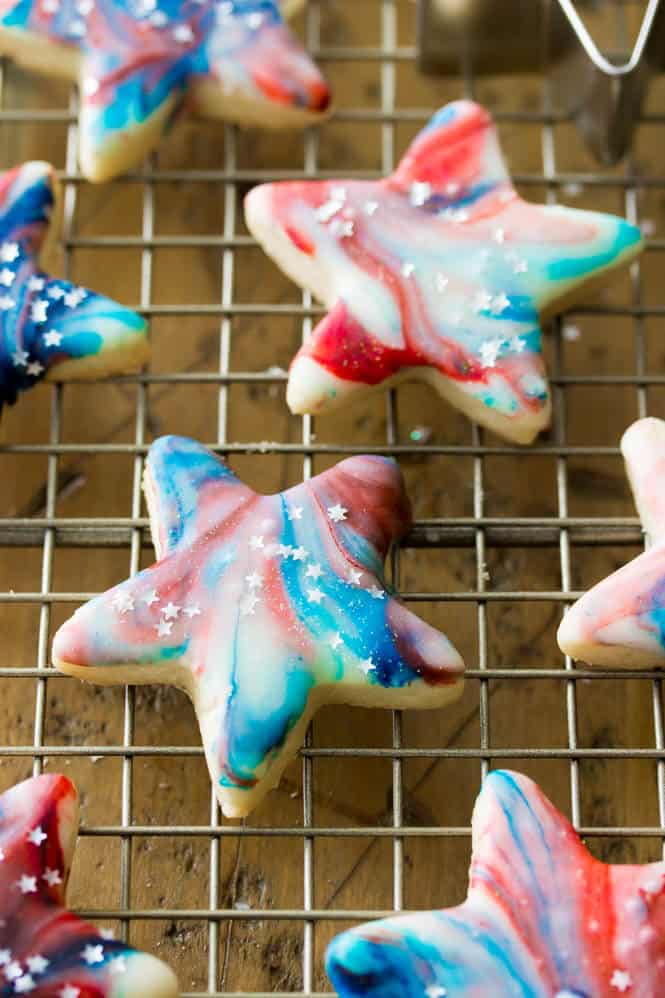
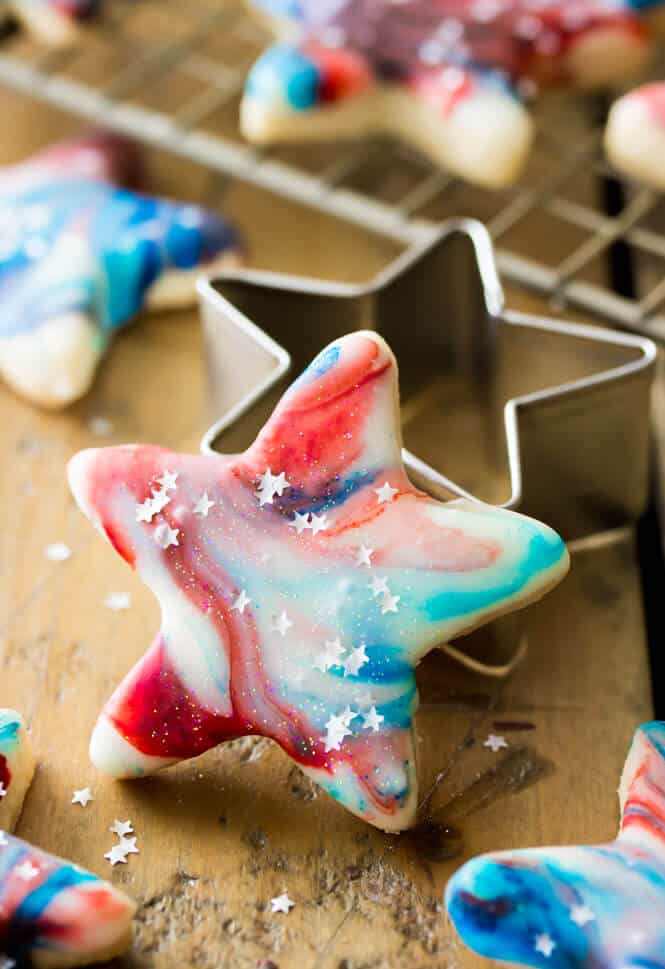
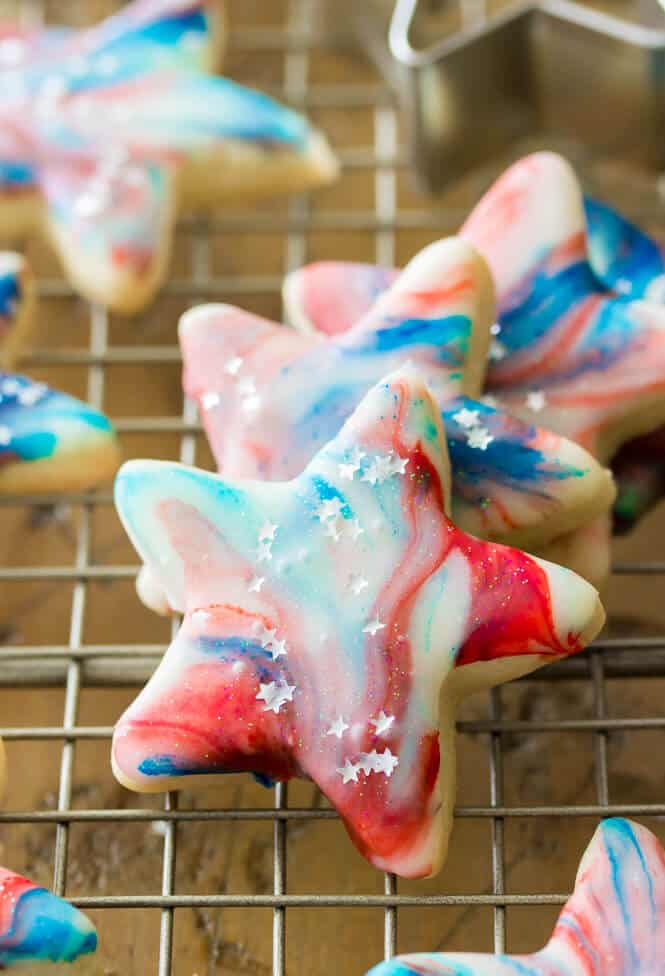
And just look at them! I (oh-so-humbly) declare that they are the most gorgeous, beautiful Fourth of July cookies I’ve ever seen. With their whorls of red, blue and white (don’t they look a little watercolor-esque to you?), their silver star spangles, and a light sprinkle of luster dust glitter, how perfect would these be for your next 4th of July party!?
Despite the fact that they look intricate and complicated, the marbling process is actually insanely simple and hard to mess up. I’ve included a few tips below, links to all of the tools that I use in my own kitchen (below the recipe) and a step-by-step video showing you exactly how easy these are to make.
Some Notes on Food Coloring
I highly, highly recommend using gel food coloring for these. With standard liquid dyes, red coloring tends to appear as more of a pinkish shade when combined with the white glaze, and we want this to be a bright, vibrant, distinct red. When using gel, a little goes a long way, and the color comes out much more vibrantly. I personally love using Americolor brand gels.
Take care when you’re swirling your dyes together that you don’t over-mix them, otherwise you’ll end up with some purple-y hues in your cookies. It’s not the worst thing that can happen, but the goal is to stick to red white and blue.
Another note, please don’t overdo it on the dye. Remember, these are red, white and blue, so we want the white glaze to shine through as well. Too much dye will also make these cookies taste like food coloring rather than the soft, buttery, vanilla-glazed sugar cookies that we’re aiming for.
With those notes in mind, this marble/swirl glaze technique is really, really easy to pull off. When I shared my Galaxy cookies, I shared a lot of step-by-step photos that I hoped would be useful. You can refer back to those, but this time, instead of step-by-step photos, I included a video right below the recipe so that you can see exactly how the glaze technique is done.
Enjoy!
More Recipes You Might Like:
Be sure to check out my video at the bottom of the recipe where I’ll walk you through the decorating steps! If you enjoy watching, make sure to subscribe to my YouTube channel where I’ve already uploaded over 150 recipe videos that you can watch for free!
Star-Spangled Cookies
Ingredients
- 1 cup (226 g) unsalted butter, softened
- ¾ cups (150 g) sugar
- 1 teaspoon vanilla extract
- ½ teaspoon salt
- 1 large egg yolk
- 2 ¼ cups (295 g) all-purpose flour
Marble Icing Glaze
- 3 cups (415 g) powdered sugar, sifted
- 3 Tablespoons light corn syrup
- 3-4 Tablespoons milk
- ½ teaspoon vanilla extract
- ¼ teaspoon almond (or other, preferred) extract, optional
- gel food coloring, I used Americolor "red red" and "electric blue"
- silver star sprinkles, There's an Amazon link for these just below the recipe, though I was able to find them cheaper at my local cake shop!
- luster dust/disco dust, Optional, there is also an Amazon link for this below the recipe
Instructions
Cookies
- Preheat oven to 350F.
- In KitchenAid mixer or with electric hand-mixer beat your butter until well-creamed.1 cup (226 g) unsalted butter
- Add sugar to the mixing bowl and beat with the butter until well combined (about 30 seconds).¾ cups (150 g) sugar
- Stir in vanilla extract and salt, stirring until well-combined, and scrape down the sides of the bowl using a rubber spatula to ensure ingredients are well-incorporated.1 teaspoon vanilla extract, ½ teaspoon salt
- Add egg yolk and beat until combined1 large egg yolk
- With mixer on medium-low speed, gradually add flour until well-incorporated (you will definitely need to scrape down the sides and the bottom of the bowl several times for this, as the mixture is fairly dry and crumbs tend to settle at the bottom of the bowl).2 ¼ cups (295 g) all-purpose flour
- Transfer dough to clean surface and use your hands to form it into a cohesive ball.
- Flatten into a disk (about 1" thick), cover with clear wrap, and chill for 15 minutes.
- Once dough has chilled, transfer it to a clean, lightly floured surface and use a lightly floured rolling pin to roll out to about ¼" thickness.
- Lightly flour your cookie cutters and cut out your shapes, transferring them to ungreased cookie sheet.
- Once you have cut out all of the shapes that you can, be sure to re-combine the scraps and roll out and cut out again to get the maximum number of cookies from your dough.
- Bake on 350F for 10-12 minutes (longer if you are using larger cookie cutter) and allow cookies to cool completely before dipping.
Marble Icing Glaze
- In a large bowl, combine sifted powdered sugar, 3 Tbsp milk, and light corn syrup. Whisk until smooth. If mixture is too dry, add additional milk, one teaspoon at a time until mixture can be stirred.3 cups (415 g) powdered sugar, 3 Tablespoons light corn syrup, 3-4 Tablespoons milk
- Stir in extracts.½ teaspoon vanilla extract, ¼ teaspoon almond (or other, preferred) extract
- Glaze should be thick, to test that it is the right consistency drop a few droplets on top of a test cookie. If the glaze remains stiff, it needs to be thinned. If it runs off the cookie, it is too thin and needs more powdered sugar. If it settles down smoothly, it is just right.
- Divide glaze into four small bowls.
- Working with one bowl at a time, use a toothpick (a different toothpick for each color) and dip it into the food coloring bottle and then into the glaze. You want a small dot of food coloring (see video).gel food coloring
- Drag a toothpick through the food coloring and glaze until it is prettily swirled/marbled.
- Holding your cookie at the base, dip the surface of each cookie into the glaze (take a look at your first cookie -- are you satisfied with the pattern? Adjust whorls with additional food coloring as needed).
- Once the first bowl runs out or the colors become too muddled together from dipping, move onto your next bowl of food coloring (you will probably need to stir first before adding your coloring, as the surface may have begun to harden).
- Repeat steps 5-7 until all cookies have been dipped. Allow them to harden at least 30 minutes (may take longer) for glaze to set. Enjoy!silver star sprinkles, luster dust/disco dust
- Store uneaten cookies in an airtight container at room temperature.
Nutrition
Nutrition information is automatically calculated, so should only be used as an approximation.
Like this? Leave a comment below!
Recommended Kitchen Tools:
I originally shared this recipe for Star Spangled Cookies 06/01/2017. Post updated and new video added 06/14/2019.


I made cookies and they are so cute and easy to make.
I am so glad you enjoyed them so much, Claudia! 🙂
I don’t have any light corn syrup. Will the icing still work without out? Or is there a possible sub? Thanks!!
Glucose syrup is the only substitute I can think of that should work instead.
CAn you substitute fresh lemon juice for the milk
I think that could work. Enjoy!
Are there any yummy extracts you recommend besides almond? I’m making them for co-workers, and afraid to use almonds if someone is allergic!
You can just use vanilla and that works well, but I’ve also experimented with coconut (might also be an allergy issue though) and lemon extract and they’ve come out great. Pretty much any extract you like would work well.
I made these this week for a family get together, they are so delicious and fun to make. My husband took the leftovers to work and they were a hit. Thank you for sharing the recipe.
I am so happy to hear this, Patty! Thank you for letting me know how they turned out for you and for commenting <3
Can I freeze the dough once the cookies are cut out to insure that the cookies will keep their shape? Or will the cookies keep their shape with me having to freeze the dough?
Hi Sarah! These cookies will keep their shape without being frozen. Hope you love them!
I made these cookies for the Veterans at our local Veteran’s Hospital. They were definitely a hit and so appreciated. Thank you so much for sharing!
Carol, I am so honored that you made these cookies, thank you for letting me know that they were appreciated, and thank you for coming back to comment and let me know how they turned out. Have a wonderful day! 🙂
Hi, Sam,
My husband is a participant in one of your studies at your former employer, which is how I came to your blog. I’ve enjoyed trying some of your yummy recipes, most recently chocolate chip muffins. Happy taste buds indeed, even for the taste-impaired spouse.
As in this gorgeous recipe, you often mention getting supplies at a cake shop. Can you please tell me its name? Thanks!
Hi Darla!! Yes, I remember you of course! I’m so glad to hear you both loved the muffins!
There’s a really small cake shop in my town called “Christy Marie’s Cake and Candy Supplies”, it’s just a small family owned shop but they do have a website: https://www.christymaries.com/ where they list some of their inventory.
However, all of these supplies should be available at just about any cake shop, including Michaels, and also on Amazon (though beware that often the decorations seem to be more expensive on Amazon, unfortunately!).
I hope that helps, please let me know if you have any questions! Also, I’m still doing some part time work at my old job while they seek a replacement for my position, so perhaps I’ll still see you in the future!
I made these cookies this past weekend and they were a huge hit! My boyfriend is lactose intolerant so I’m usually looking for recipes that I can make as is or tweek a little to make them dairy free. In this case I substituted coconut oil and almond milk respectively. The taste was still very good, (if a little less buttery). The icing hardened well and behaved in the same way as it would have if I used milk (based on the video). The only problem I had was how the dough behaved with coconut oil. It was either incredibly hard (right after putting it in the fridge) or very sticky while I was rolling and cutting. At the end of the day though they ended up tasting great and looking super cute!
Thanks for this fund recipe. I hope this review is useful to anyone who needs to cut out the dairy for any reason!
These notes are extremely helpful, Madeleine! Thank you so much for sharing, and I’m sure others will find this useful in the future.
So glad you enjoyed the cookies, and thank you again for sharing your tips for making them dairy free!
Do you add the dust once it’s set or when the icing is still wet? Thanks!
While the icing is still wet 🙂
Quick question: can I substitute agave nectar with the light corn syrup? (also, thanks for not putting a huge article before the recipe)
Hi David! I have found that agave syrup is much thinner than corn syrup so I would use less. It should still work though. 🙂
First off we had fun dipping the cookies my husband and daughter came in and started dipping cookies they are very creative. I had an issue with air bubbles in my glaze.have you ever had this issue.
Sometimes I have small air bubbles but never anything significant, you can try using a toothpick to burst the bubble immediately after dipping. I hope that helps, and I’m glad you enjoyed the creative process! 🙂
Are the star sprinkles or luster dust hard (on the teeth when you bite into the cookie)?
No, very easy to bite through, in fact you likely won’t even notice them, the stars are almost papery and delicate in texture. I hope that helps!
Will the glaze set/harden/dry so that these can be stacked on top of each other without making a mess?
Definitely, but they may need to set a few hours or overnight to harden completely.
Add some meringue powder to the mixture.
These are perfect for 4th of July!! And it’s never too late for red, white, and blue!
Thank you, Jordan!!
These cookies are gorgeous! Thanks for sharing the recipe, Sam!
Thank you so much, Deb!! I’m glad you like them, thank you for commenting! 🙂
Where is the video?
It’s just above the recipe 🙂
I don’t see a video. Is it still available?
It’s right above the recipe, is it not showing up for you?