
Sourdough Bread Recipe
This post may contain affiliate links. As an Amazon Associate I earn from qualifying purchases. Please read my disclosure policy.
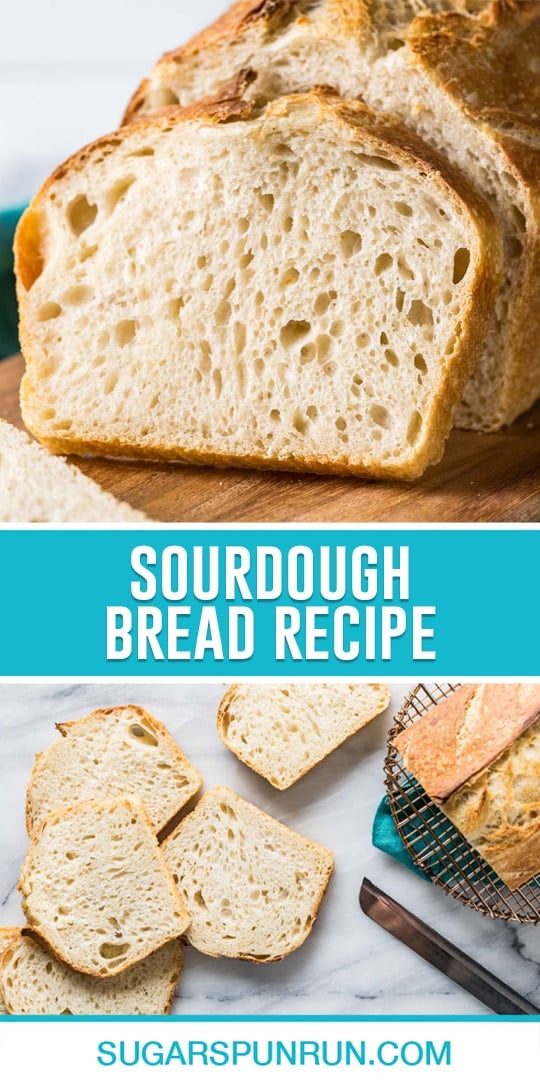
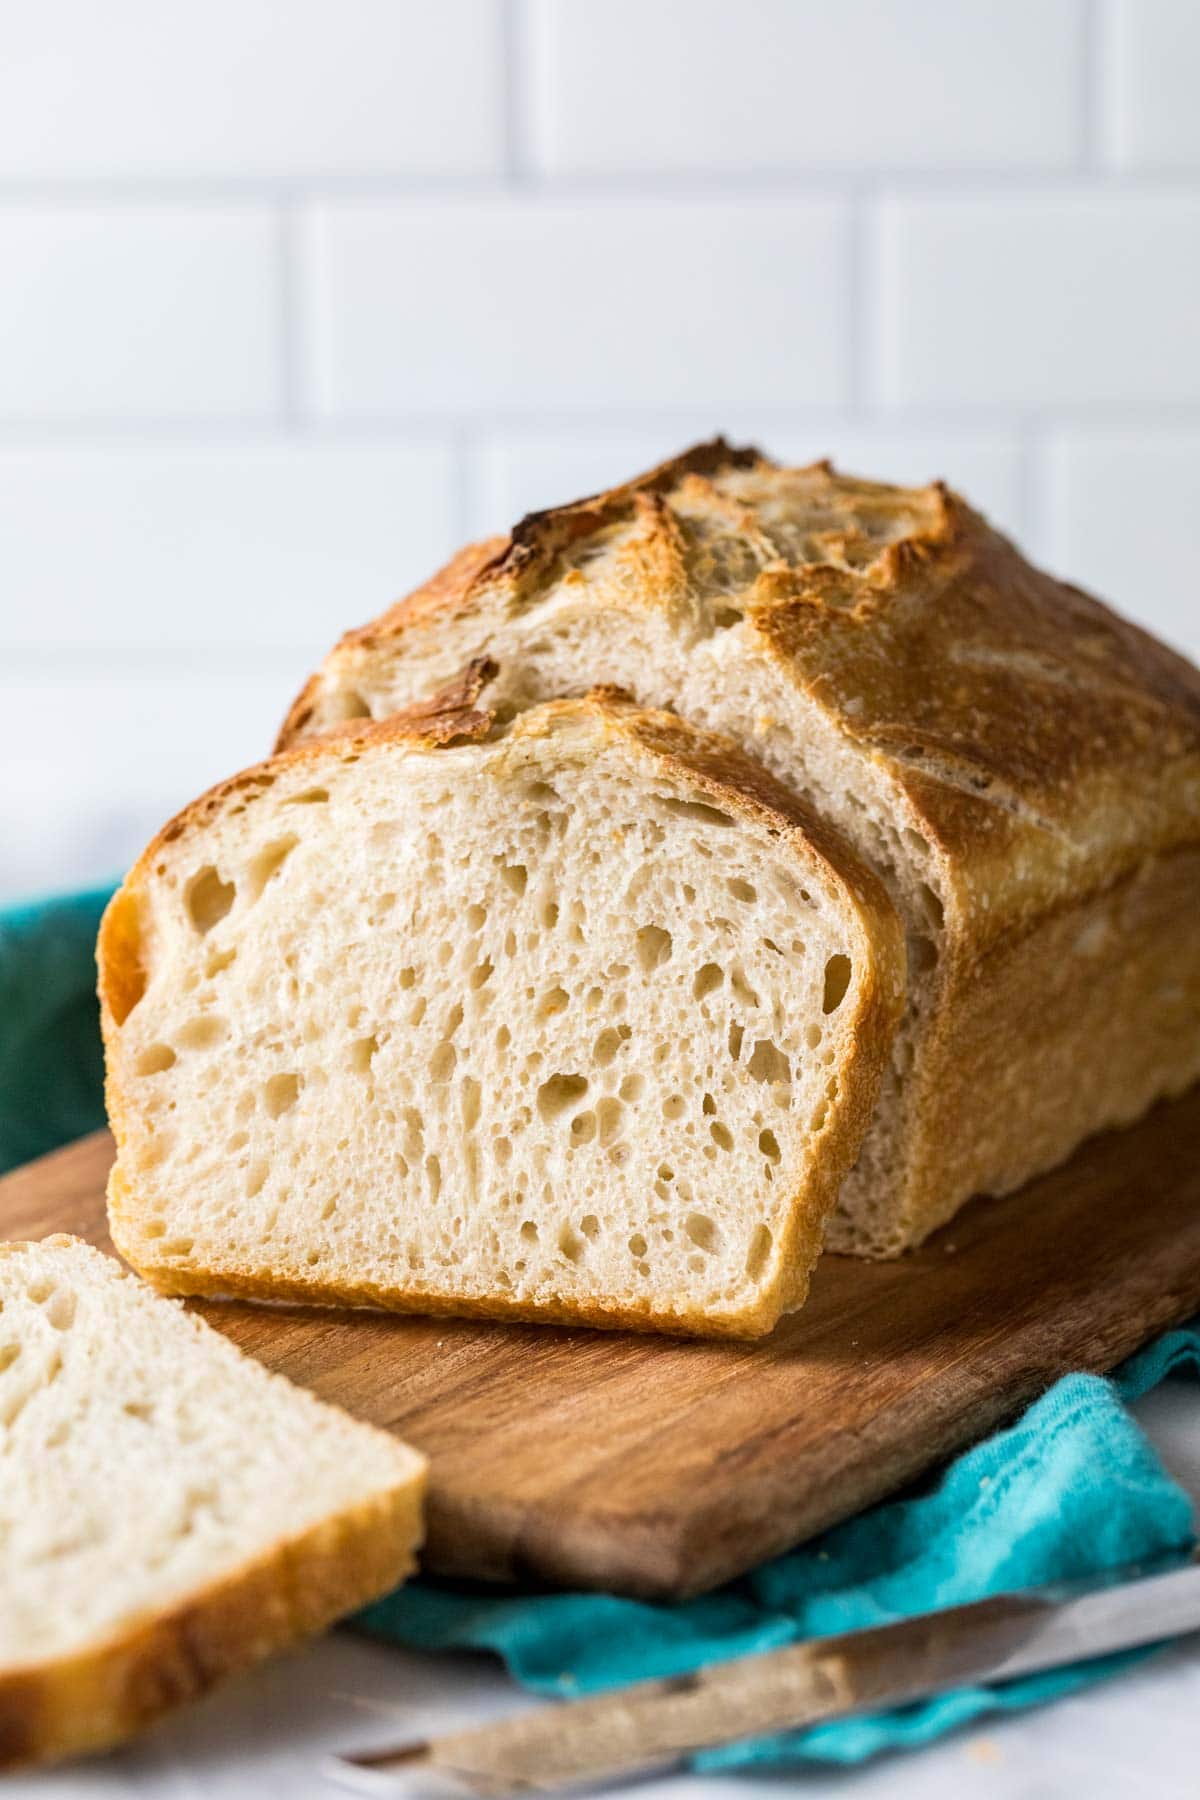
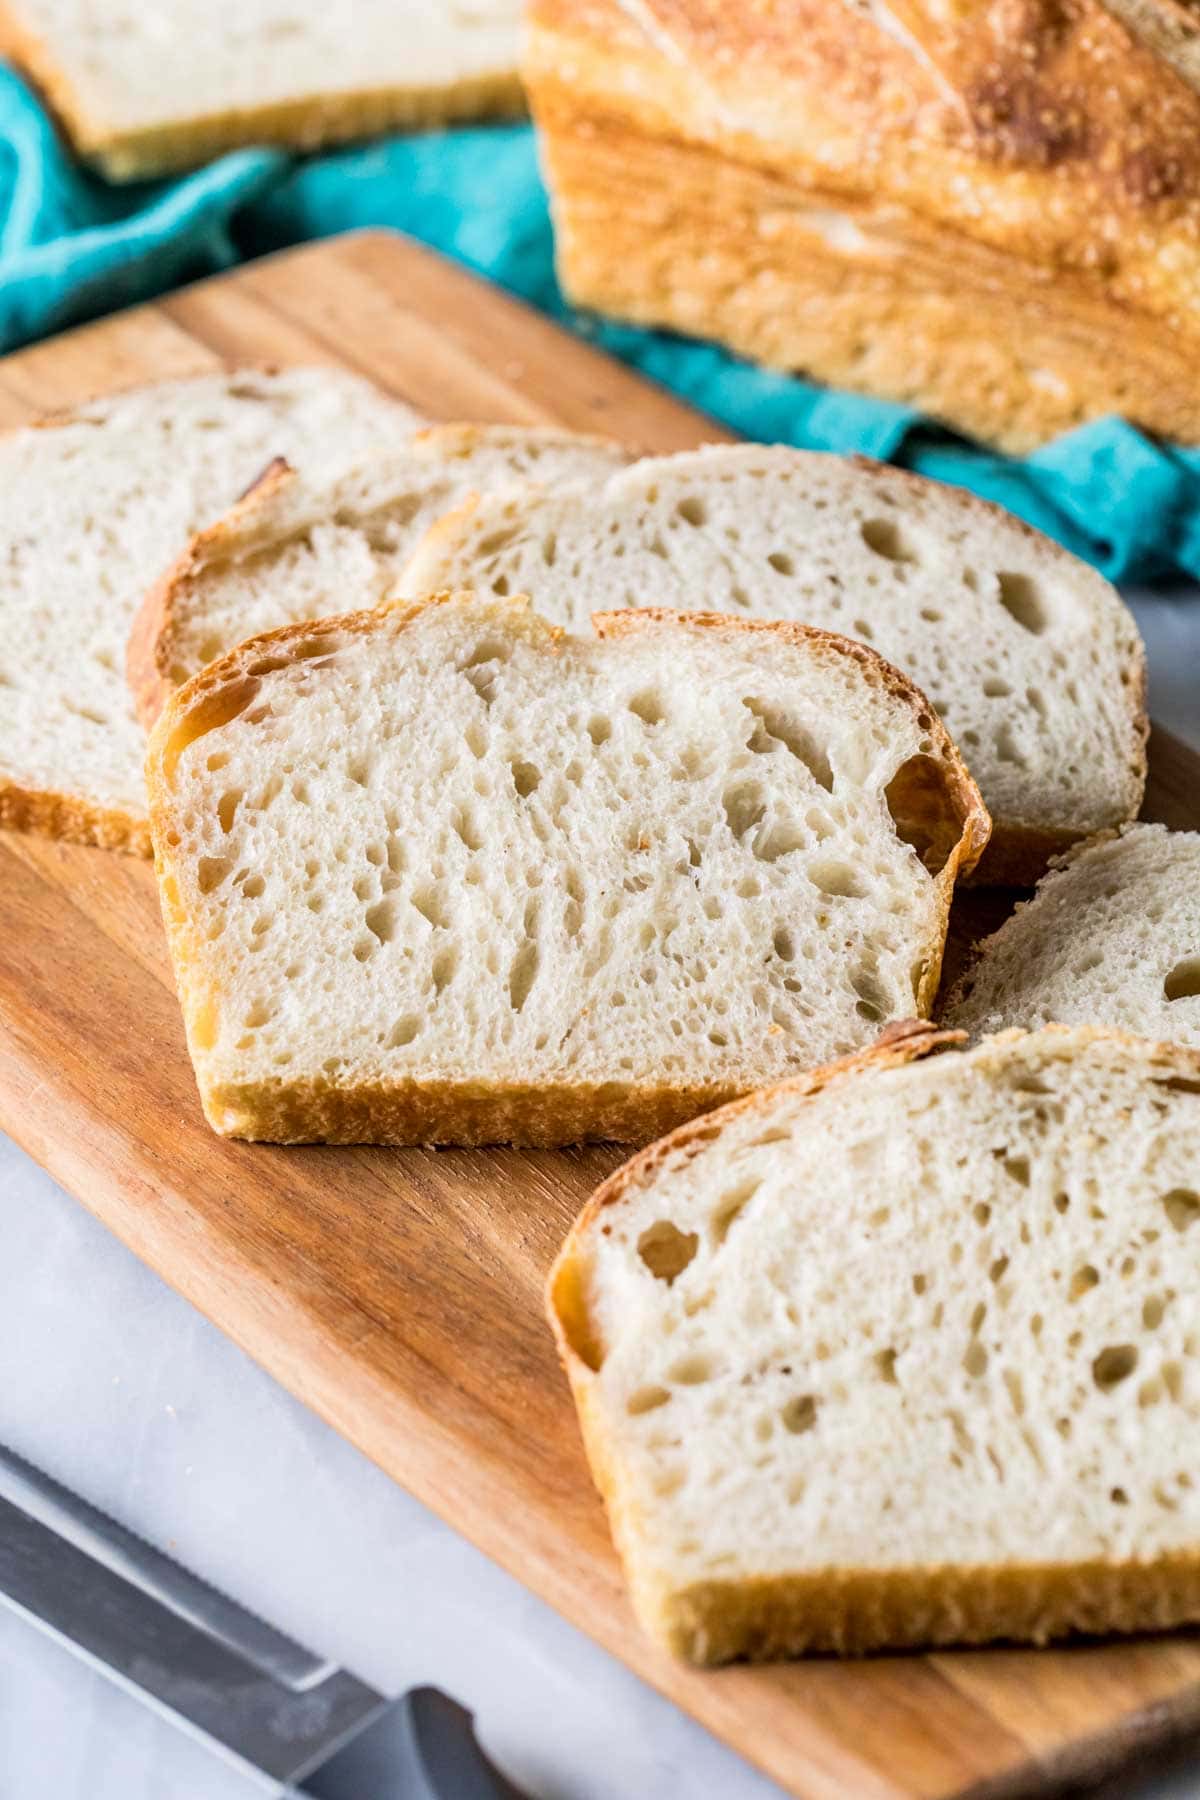
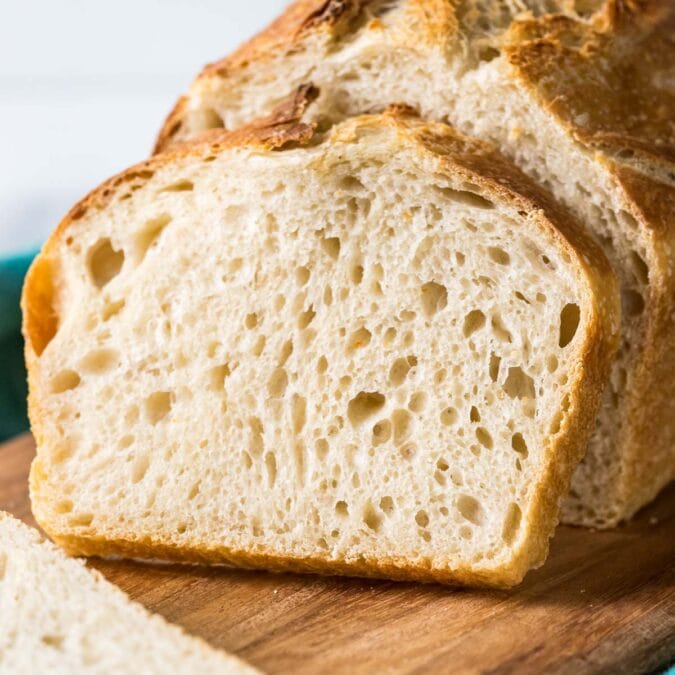
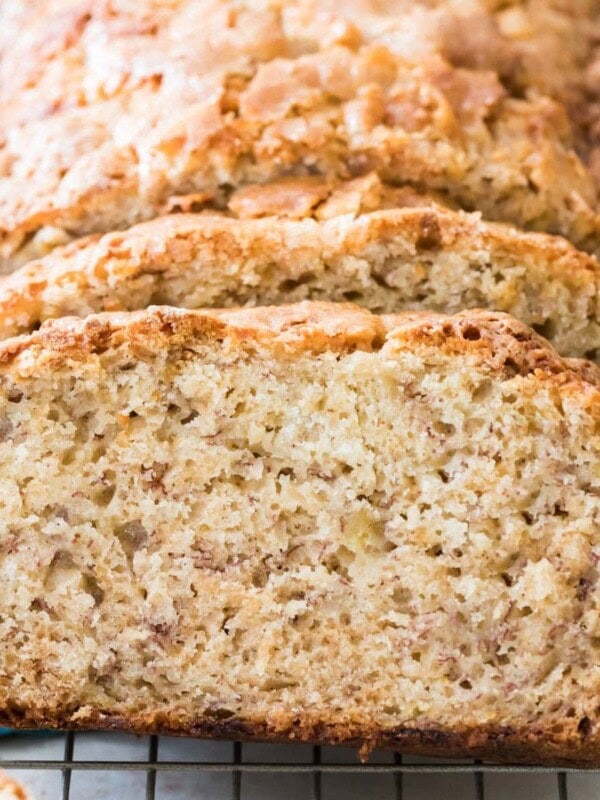
My easy sourdough bread recipe yields a hearty, flavorful bread with a soft springy interior and a thick, crusty exterior. No extra equipment (banneton and Dutch oven not required), uses just 5 simple ingredients, and is perfect for enjoying on its own or using for sandwiches! My version is both beginner friendly and adored by sourdough enthusiasts. I’ll be walking you in detail through every step and include a video tutorial so you can learn how to make perfect sourdough bread like a pro.
Homemade Sourdough Bread is Easier Than You Think!
It probably goes without saying that many of the recipes on my website are frequent flyers on my weekly meal rotation, but I’m not sure if there’s a single thing I make as often as this sourdough bread recipe. This easy sourdough bread is the only bread we eat in my household anymore. I make 2-3 loaves a week and keep a stockpile in my freezer at all times (handy for making sourdough homemade croutons and breadcrumbs)! And once you try it… well, I think you will, too.
Making sourdough bread at home is shockingly easy, especially if you use my sourdough starter recipe. It is time consuming and you must have patience, but the work itself is very approachable and I wanted to share a version that was easy to follow. There’s no kneading, no mixer, no fancy equipment — you don’t even need a Dutch oven, just a pair of bread pans! It’s perfect for beginners and advanced sourdough bakers alike.
Ingredients
Just 5 simple ingredients (and that’s counting the water)… Let’s talk about them:
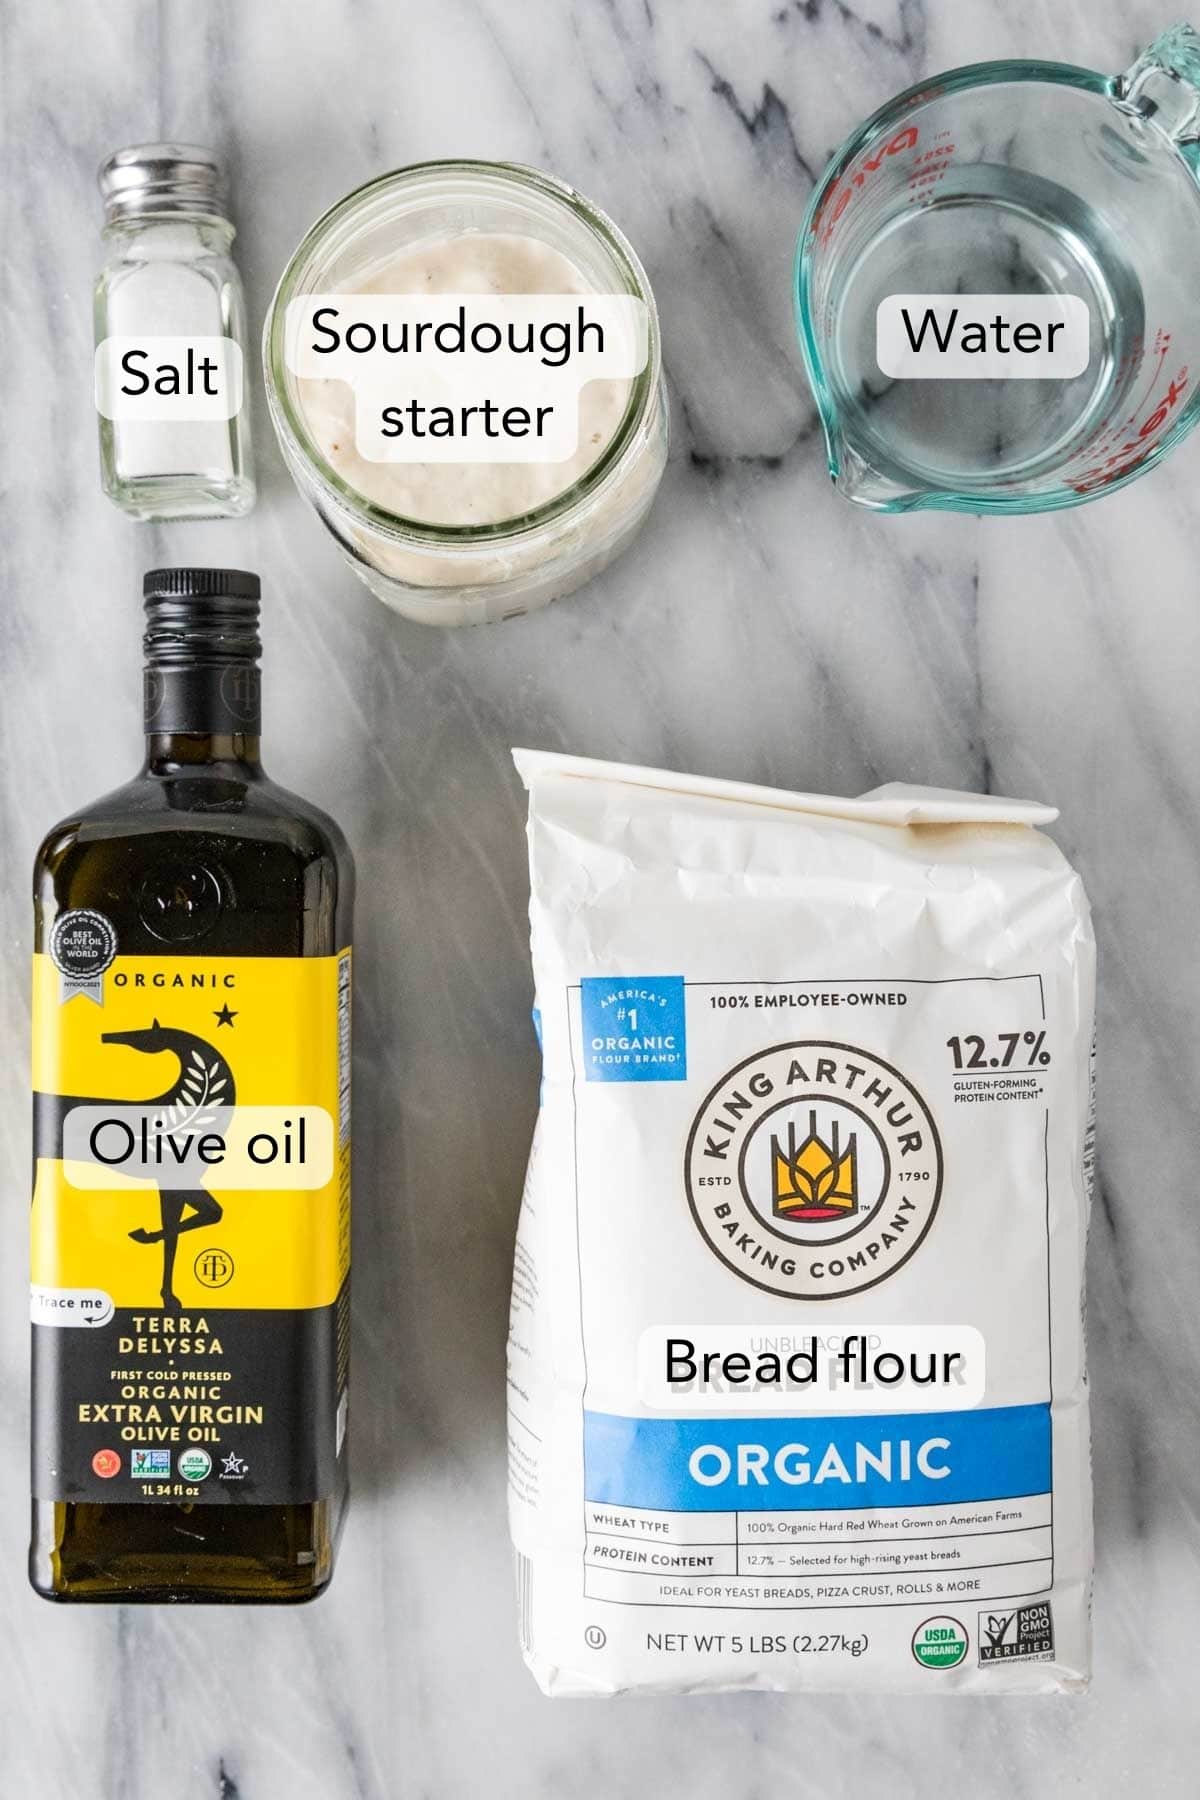
- Sourdough starter. I recommend making your own by using my sourdough starter (this does take over a week to prepare, but it’s worth it!). We rely on the starter for home-grown yeast with this recipe, instead of using a store-bought yeast.
- Bread flour. I prefer bread flour to all-purpose for my sourdough bread recipe. Bread flour has a higher protein content and produces a better-crumbed sourdough bread (it’s chewier!) in my opinion. If you don’t have it, all-purpose is not as great but will be “fine”, but do try the recipe at least once with bread flour.
- Olive oil. A bit of olive oil helps make the bread perfectly chewy and soft. I also find it keeps my sourdough softer longer.
- Salt. Salt is critical for flavor (unsurprisingly) but it also plays some other important roles in sourdough bread. It helps balance the acidity from our starter, strengthens the gluten in the dough (important for shape and texture), and it even helps extend the shelf life of the bread by acting as a natural preservative. Don’t let anyone tell you it’s going to hinder your yeast, it won’t (or at least won’t to any noticeable degree and your sourdough would be worse off without it).
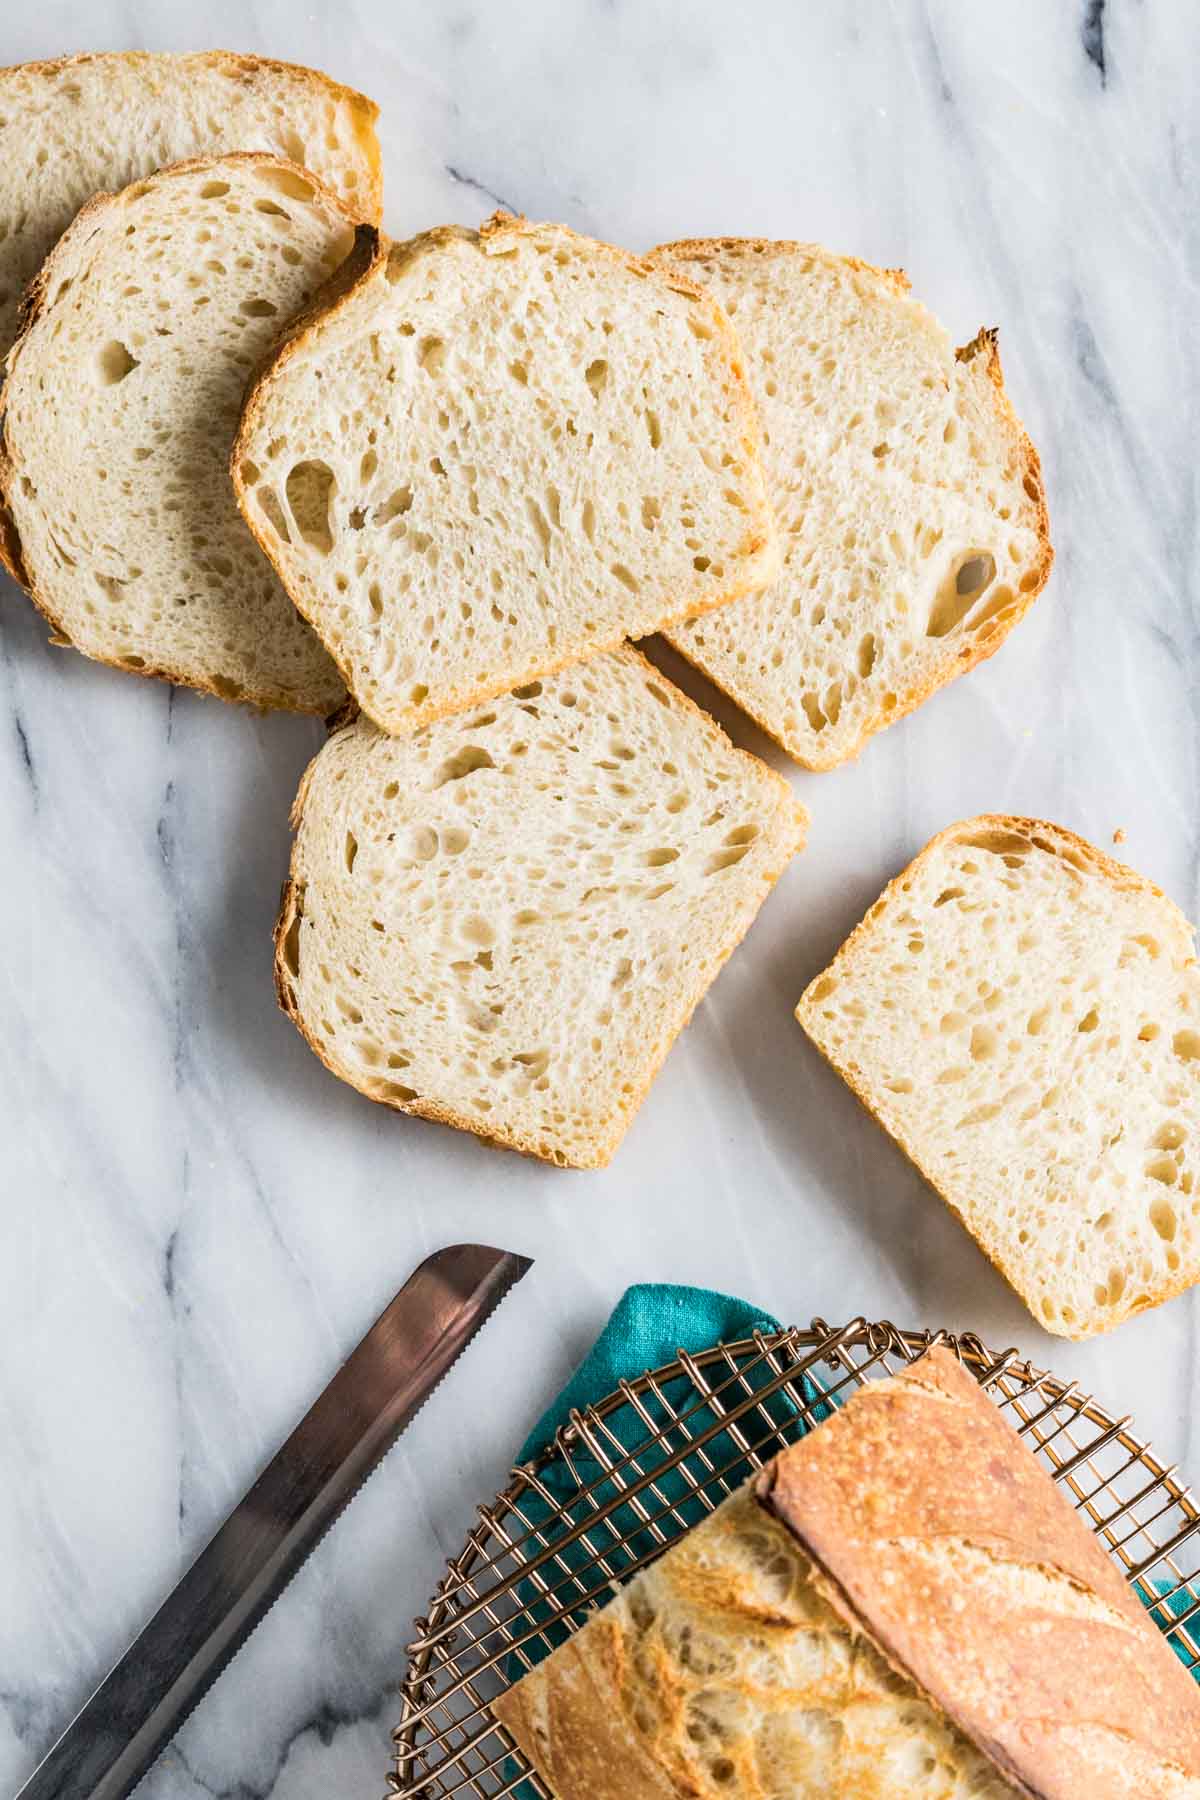
- Water. The water called for in my recipe will yield a sourdough loaf that is about 70% hydration. I love this hydration level; it produces a crumb that’s neither too dense nor too open, that’s not too sour but is still flavorful, and that is easy to shape and extremely versatile — we use it for everything from dipping in chicken pot pie soup to eating sandwiches (I love to use it for a mean short rib grilled cheese). Once you’re comfortable baking a bread at this hydration level, you can experiment with increasing the water if you’d like. More water usually yields a bread with a more open crumb, a more tangy flavor, and a crumb that’s less suitable for sandwiches but good for dipping.
Once you’re comfortable with making a basic sourdough bread recipe, it can be fun to experiment with adding inclusions (like cheese!) or branch out to other recipes that rely on starter. On my website I highly recommend jalapeno cheddar sourdough bread or sourdough pizza dough.
My sourdough bread recipe is written first weights because I find it’s the easiest and most reliable way to make it (just like with my macaron recipe); however, I have included cup measurements in the recipe card as well.
How to Make Sourdough Bread
Make the Dough
The first 4 steps in my sourdough bread recipe are the “autolyse” period (or sometimes called an “inclusive autolyse” because we are incorporating all of our ingredients at this point). This step helps boost fermentation, improves the texture (more open crumb!) and flavor, and makes the dough easier to work with.
Note that I do, quite intentionally, include salt in this first step. Some bakers argue that salt will inhibit the yeast growth and negatively impact the crumb. Not so! With the duration of this autolyse and the composition of this particular sourdough bread recipe adding salt at this stage does not make a difference. Leaving it out for this step only makes it more difficult to incorporate later and increases your likelihood of accidentally forgetting to add it altogether (which would be a shame!).
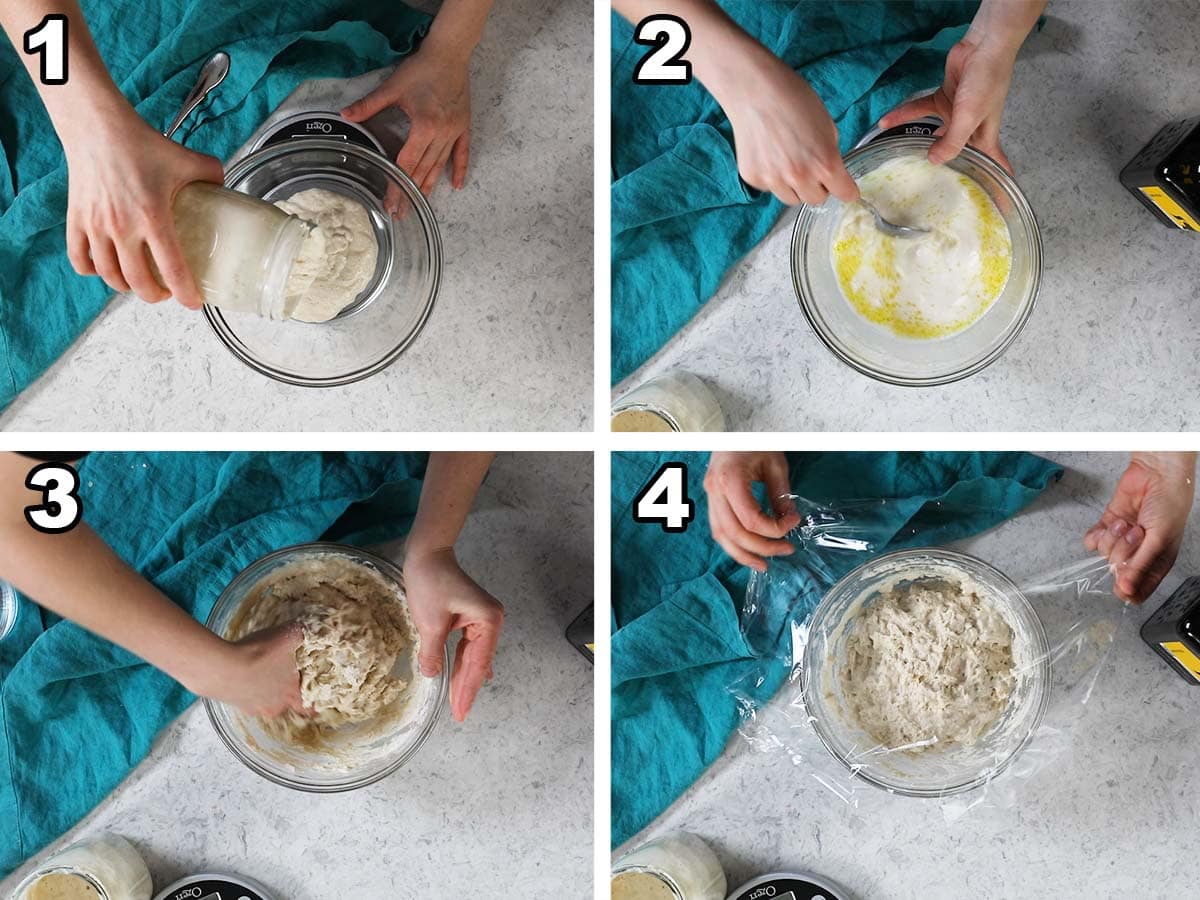
- Combine your active, bubbly sourdough starter with warm water and olive oil in a large mixing bowl. The stater being warm and bubbly is critical for this.
- Add the bread flour and sprinkle the salt over the flour.
- Stir until mostly combined (your dough will still look shaggy). Do not over-mix!
- Cover and let sit at room temperature for one hour.
Stretch and Fold Your Sourdough
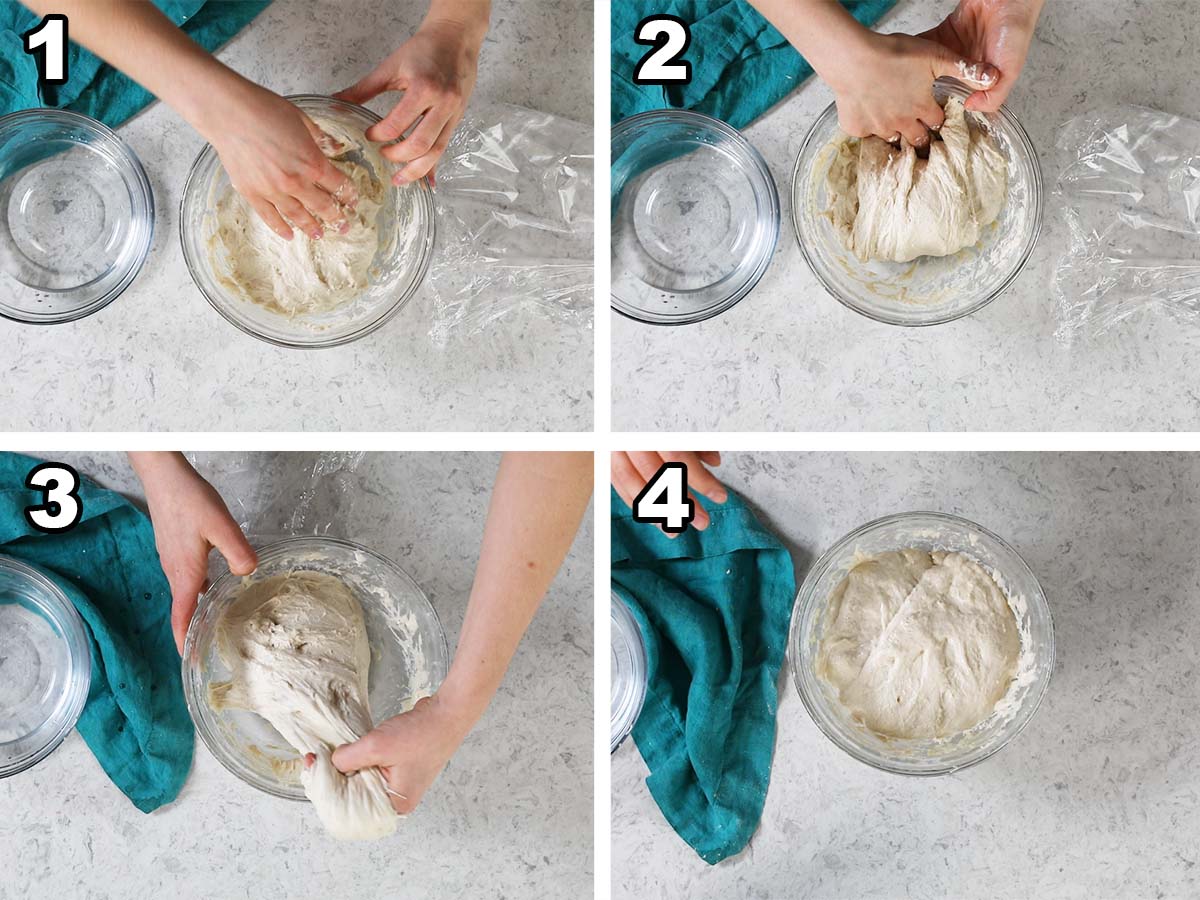
- Form your dough into a ball using your hands, the run your hands under cool water (helps prevent the dough from sticking to you while you’re handling it).
- Stretch the top of the dough up and over the bottom, then turn the dough 90 degrees and repeat. I demonstrate this in the video below if you need a better visual.
- Repeat the stretch and fold process a total of four times, then cover and place in a warm place to rise for 30 minutes.
- Let your dough rise until increased in size by 80%, repeating the stretch and fold process every 30 minutes.
SAM’S TIP: Resting the sourdough in a warm place helps speed up the process. Some good options in your kitchen usually include the top of the refrigerator, a proofing oven, or just your (turned off) oven with the light on. Note that sometimes the inside of your oven can get pretty hot even with just the light on… if yours does I recommend cracking the oven door.
Shape the Dough
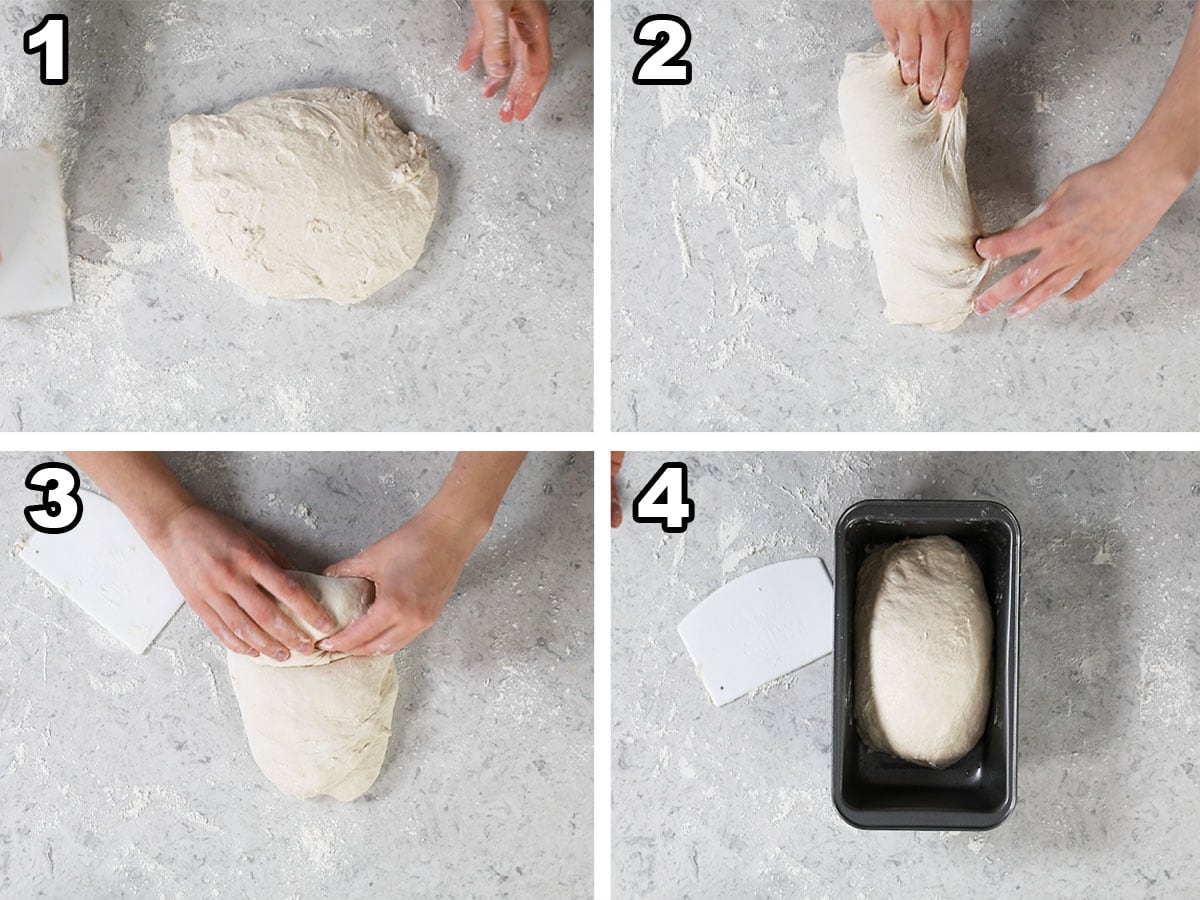
- Deflate and form your dough into a rectangular shape on a lightly floured surface.
- Lift the right side of the dough, fold it over to the center, then repeat with the left side (like folding a paper in thirds).
- Roll into a tight log starting with the short end of the rectangle, then tuck the ends under.
- Place in a greased bread pan, cover, and place in the fridge to rest overnight.
SAM’S TIP: I strongly recommend proofing your dough in the refrigerator overnight rather than baking right away. Proofing overnight will help develop the flavor, help the bread rise better, and encourage more fermentation. That being said, I don’t like to let my dough sit in the fridge for longer than 48 hours (absolute max) before baking. Letting it sit too long can cause over-proofing and can compromise the final texture of your sourdough bread. I also don’t freeze my dough before baking, so I can’t advise on that.
Baking
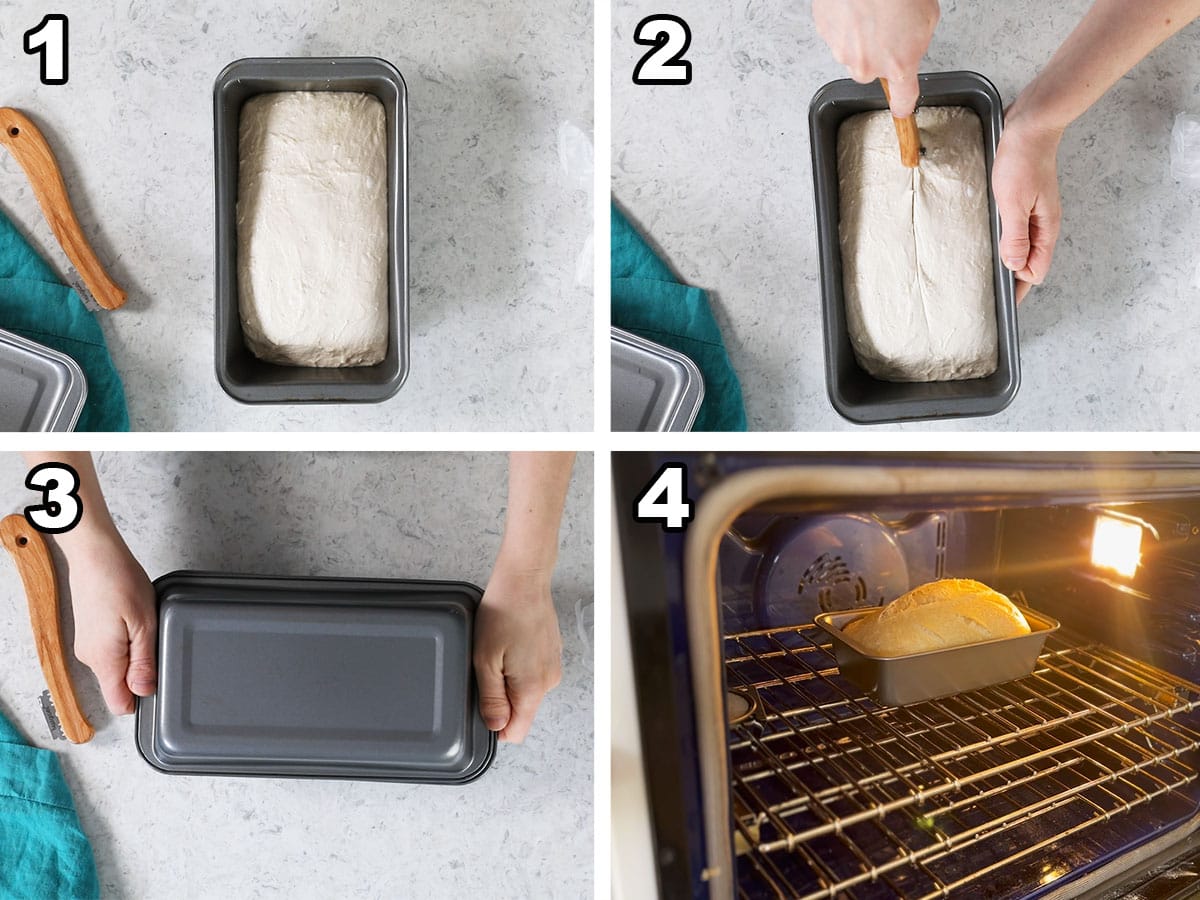
- Let the dough rest at room temperature while your oven preheats.
- Score the bread about 1/4″ deep down the center.
- Cover with another bread pan or an aluminum foil tent.
- Bake at 450F for 30 minutes, then remove the cover and bake for 20-23 minutes or until the bread reaches an internal temperature of 206F (97C).
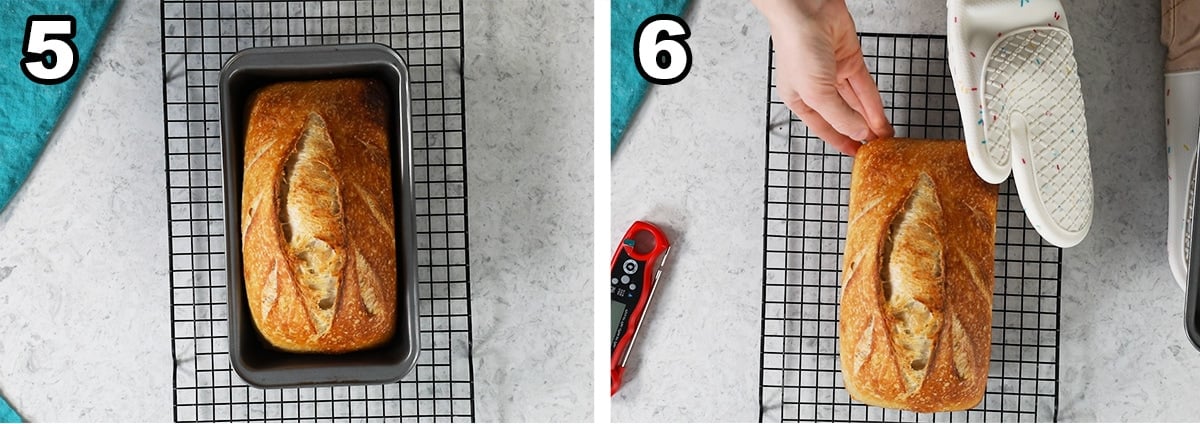
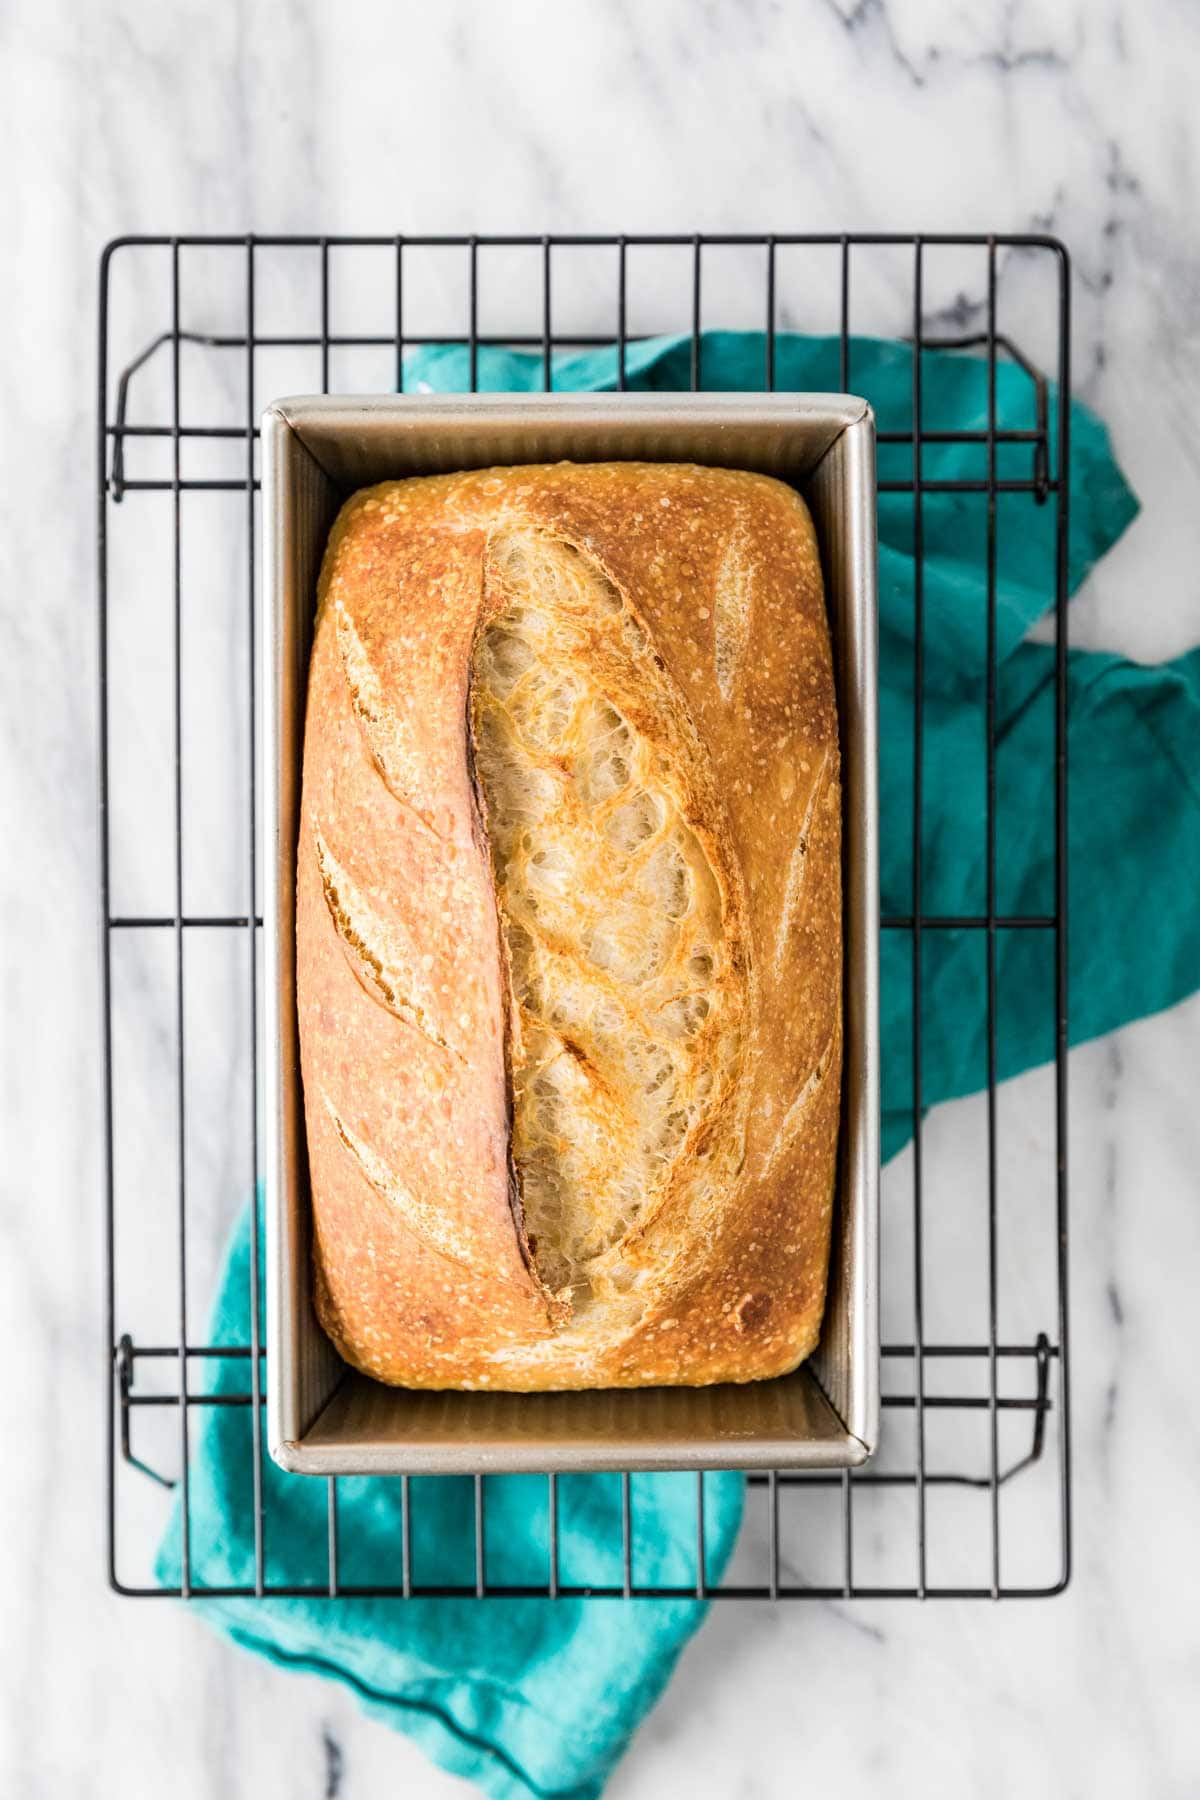
- Let the bread cool in its pan for 10-15 minutes.
- Remove the bread from the pan (carefully, it’s still hot!) and place on a cooling rack. Don’t let it sit in the bread pan too long, or your sourdough bread could end up soggy from the steam that it releases in the pan that can’t escape. Once removing to a cooling rack, allow the bread cool completely (or at least almost completely) before slicing.
SAM’S TIP: Resist the urge to cut into the bread while it’s still hot (I know, so hard, so tempting!). Cutting into it too soon can negatively affect the crumb of the bread. As the dough cools, it is actually finishing cooking. Cutting into it too soon lets steam escape too fast while simultaneously trapping moisture inside. This can make the center gummy and ruin the texture, so have a little patience!
Frequently Asked Questions
Sourdough is definitely one of the more nutritious types of bread. It’s prebiotic-rich, made by fermenting dough with wild yeast and bacteria (sounds not-so appetizing but in reality is delicious) and is more digestible than your standard white bread. It also has a lower glycemic index and less gluten than normal bread. If you’re going to be indulging in bread, this is arguably a better option than standard white bread.
While a traditional sourdough bread recipe is obviously not gluten free, sourdough bread is sometimes tolerated by people who are gluten sensitive (but not people with Celiac Disease). This is because some of the gluten is consumed during the fermentation process, which makes the bread more easily digestible.
Yes, of course! I wanted to share an easy sourdough bread recipe that can be made with basic kitchen equipment, but you can just as well use a Dutch oven. Follow the written recipe through the rolling and tucking step, then place the dough in a lightly floured banneton (I use my Kitchenaid mixer bowl lined with a lightly floured kitchen towel, because I don’t actually have a banneton). Cover and let it rise overnight (or for two nights) in the fridge.
The next day, carefully turn out your dough onto a large piece of parchment paper and carefully lower this into a 4.5qt Dutch oven (a larger one would work, but your bread will be flatter and will likely cook faster). Allow the dough to sit uncovered while the oven preheats, then score, cover with a lid, and follow recipe instructions for baking.
You can preheat your Dutch oven (as I do in my artisan bread recipe) to make it nice and hot before adding your dough if you’d like, but honestly I rarely do this step with this recipe.
Some of my favorite things to serve with sourdough bread:


I know that there are many sourdough bread recipes out there and so many different ways to make it, but this is my personal favorite version that I’ve carefully developed over the past few years. I can’t wait to hear how you like it (let me know in the comments!), I hope you’ll always want to keep a loaf in your house, too! 🩷
Enjoy!
If you try this recipe, be sure to tag me on Instagram, and you can also find me on YouTube and Facebook
Sourdough Bread Recipe
Equipment
- Bread lame (optional, or use sharp knife)
Ingredients
- ⅔ cup (150 g) active starter, bubbly, active, fed
- 1 ⅓ cups (315 g) warm water, 90F
- 1 ½ Tablespoons (18 g) olive oil
- 3 ⅔ cups (450 g) bread flour
- 2 teaspoons (13 g) table salt
- Oil or butter for greasing pan
- Additional flour for dusting work surface
Instructions
Make the dough
- In a large mixing bowl, combine sourdough starter, water, and olive oil. Stir until combined.⅔ cup (150 g) active starter, 1 ⅓ cups (315 g) warm water, 1 ½ Tablespoons (18 g) olive oil
- Add bread flour and sprinkle the salt overtop. Use your (clean) hands or a wooden spoon to stir together until dough is mostly combined. It will still be a bit shaggy and should not be cohesive (don’t over-mix) but no dry patches of flour should remain.3 ⅔ cups (450 g) bread flour, 2 teaspoons (13 g) table salt
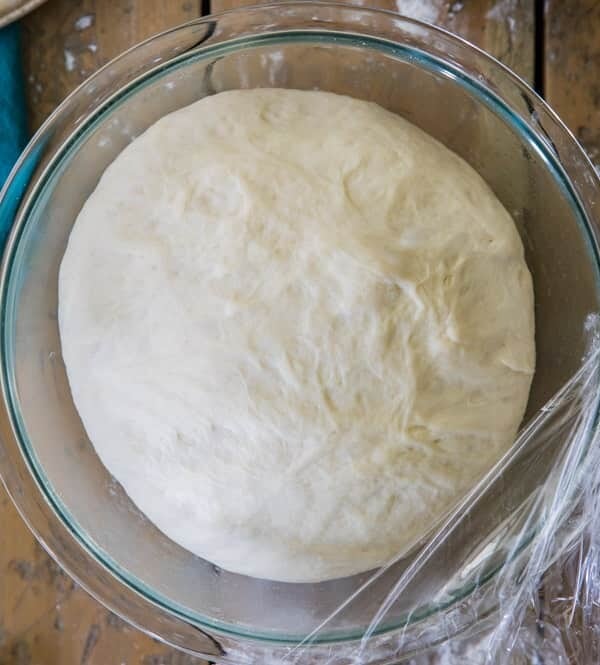
- Cover bowl with plastic wrap and let sit undisturbed for one hour (this is the “autolyse” period).
Stretch & Fold
- Form dough into a ball with your hands.
- Run your hands under cool water (prevents sticking!) and grasp the top of the dough and stretch it over the bottom. Turn the dough 90 degrees and repeat. Turn 90 degrees and repeat again, then once more (four total stretch & folds).
- Allow dough to rest, covered, in a warm place for 30 minutes.
- Repeat step 2 above every 30 minutes as dough rises.
- Allow dough to rise (stretching and folding every 30 minutes as indicated) until dough has increased in size about 80% (how long this takes depends on the temperature of your kitchen, typically mine is ready within 4-6 hours).
Forming the Dough
- Lightly grease a 9×5 loaf pan with olive oil or butter.Oil or butter for greasing pan
- When dough has risen sufficiently, turn it out onto a clean, lightly floured surface.Additional flour for dusting work surface
- Use your hands to gently deflate the dough and pat it into a rectangular shape. Lift the right side of the dough and fold it into the center (almost as if you were closing a book). Then, lift the left side of the dough and fold it over the first fold (use a bench scraper if the dough is sticking to your counter).
- Starting with a skinny end, tightly roll the dough, as if you were rolling up a cinnamon roll. Tuck the ends under and carefully transfer to prepared bread pan (See Notes if you would like to bake in a Dutch oven). Don’t worry if the bread doesn’t fill the pan right now.
- Cover pan tightly with plastic wrap and transfer to the refrigerator to rest overnight/for 12-48 hours.
Baking
- Remove the sourdough from the refrigerator and preheat your oven to 450F (230C). Allow the dough to rest (covered or uncovered) in a warm place while the oven preheats, for at least 30-35 minutes, before proceeding. (if the center of the dough hasn't risen to above the lip of the pan, I will sometimes let the bread rest at room temperature until it does, 1-2 hours).
- Once oven has preheated, uncover bread (if still covered), and make a clean slice (about ¼” deep) down the center with a sharp knife or bread lame (to score it) then cover with another 9×5 pan (if you don’t have a second pan, you can make a makeshift lid using aluminum foil; tent it as high as the bread pan is deep).
- Transfer to center rack of preheated oven. Bake, covered, for 30 minutes then remove the lid and continue to bake another 20-23 minutes/until golden brown and the center of bread reaches 206-208F (97C) when temped with an internal read thermometer.
- Allow bread to cool in pan for 10-15 minutes before gently turning it out onto a cooling rack (careful, the pan will still be hot!) to cool for at least an hour or two before cutting into it.
Notes
Cleaning note
Never wash sourdough starter or any of the sourdough dough down your sink, it can block it in a hurry. Instead use a bowl scraper to scrape any excess scraps of dough out and straight into the trash can.How to bake in a Dutch oven.
After shaping the dough, place it in a lightly floured banneton or a bowl lined with a floured kitchen towel (I like to use my stand mixer bowl!) Cover and refrigerate overnight. The next day, gently turn the dough out onto a sheet of parchment paper and lower into a 4.5qt Dutch oven (a larger one works but will yield a flatter loaf and may need to bake a bit less time). Allow to rest uncovered while your oven preheats (or for up to an hour) then score, cover with lid, and bake as directed.To bake the same day:
Follow recipe through step 4 under the “Forming the Dough” section. Immediately after transferring dough to pan, preheat oven to 450F (230C). Allow dough to rest uncovered while oven preheats, at least 30 minutes. Once oven is preheated, follow directions in recipe starting with step 2 under the “Baking” section. Note that bread will not be as flavorful or nutritious & texture will not be as great if it is not allowed to sit in the fridge overnight.Storing & Freezing
Store in an airtight container at room temperature for up to a week. You may also freeze this bread. Freeze the whole loaf by wrapping tightly in plastic wrap and then wrapping in foil. When ready to thaw, keep covered completely and defrost at room temperature before unwrapping. We prefer to freeze pre-sliced: Cut bread into slices and storing in a plastic Ziploc bag (remove as much air as you can before freezing). If you struggle with freezer burn or plan to freeze the bread longer than a few weeks, you can individually wrap each slice in plastic wrap before closing in the plastic bag.Nutrition
Nutrition information is automatically calculated, so should only be used as an approximation.
Like this? Leave a comment below!


I have a strange question, can you refrigerate the dough after the autolyse period then bring it to room temp the next day to finish?
Hi Gale! I have never personally tried it, but I would say it could probably work. If you do try it, I would love to know how it goes. 🙂
I followed this recipe/video to the T except I added some fresh herbs and chopped pistachios to my dough. I used tinfoil as I didn’t have another bread pan to cover while baking. I also only used 50g of starter as that’s all I had left. My dough seemed a little more firm than what was shown in the video so I was a bit concerned. However, the bread came out amazing. The timing direction as far as baking was perfect. My thermometer read 206 when the bread was done. Great recipe and thanks for the awesome video! Will be reusing this recipe going forward.
WHAT!! I Love this! This was my first time making sourdough bread, and it turned out amazing. (My starter is on day 8, and I’m so happy that it was strong/mature enough!) Thank you for this easy recipe! The video was so happy as well. This will definitely be my go-to sourdough recipe!❤️
Hello, can I use all purpose flour for this recipe?
Hi Faith! You can use all purpose flour but I really recommend bread flour over all purpose for this recipe. Bread flour has a higher protein content and produces a better-crumbed sourdough bread, in my opinion. 🙂
I made your starter recipe , took me 2 weeks to get it right and now I can share it. Is it ok to double this recipe??? I made one loaf yesterday will cook it today. Looks like it will be perfect. I used 2 pans to make it a dutch oven. My first time making a starter and also this bread. Thank you very much, your video is great!
Hi Alvine! I make 2 loaves regularly, but I make it in 2 separate bowls. 🙂
I just want you know how much I appreciate your time spent teaching us (I read all that your write). A friend gave me a starter. It now sits in my refrig, looking separated. Safe to assume I stir, allow to come to room temp, then proceed. I own a bread machine and usually use packages pre-made. Can I just use all your ingredients and put into bread machine and press start?
Hi Charlotte! The separation is normal. That layer is going to be more sour. You can either mix it in or pour it off. It’s really your call here. I’m not sure how it would work in a bread machine. I’ve never used one.
Hi Sam!
Wondering if you’ve tried folding in garlic or other things into this delicious recipe? If so please share your thoughts. I’m guessing this would work during the final roll up before the refrigerator rest?
Thanks for the advice!
Scotty 😊
Hi Scotty! I have done it with cheese. I think garlic could work just fine. You will want to do it as you stretch and fold the dough and over time it will all get worked in. 🙂
hi first time making this recipe. I do enjoy adding jalapeño peepers an cheese to my bread dough. at what time would you recommend doing this? Thank you for explaining this recipe steps so well in your video. Can’t wait ti eat it.
Hi Carol! I would recommend adding it in during the stretch and fold process. This way it will get all worked in by the time you get all of the stretching and folding done. 🙂
Going from your starter recipe of 80grams starter, 80 grams water, and 80grams bread flour, how much do I feed the starter in the morning to make this bread recipe and do I discard before feeding or just add to it?
Hi Jena! I feed it as normal and then feed it again after I’m done. 🙂
I finally found a sour dough recipe that works!
Hi, my sister gave me a starter that I stored in my refrigerator. Must I bring it to room temp before feeding it? Thanks, in advance, for the information!
Hi Marianne! You will want it to come to room temperature before feeding it. 🙂
This is my go to recipe for baking sourdough bread. Easy clear instructions. Turns out beautifully every time!
Hi
Is it ok to put some of the flour – as whole wheat flour.?
If yes – what about the water amount?
I can’t say for sure how it will turn out. Whole wheat flour is “thirstier” so other adjustments may be required, but without having done it myself I can’t say exactly what to do.
I’ve made two good loaves with this recipe, but I always have trouble with my dough being too sticky. It’s really difficult to make into a rectangle and roll up prior to refrigerating. Am I over-proofing? Or what?
Hi Alex! This is a pretty sticky dough. You can see how it looks in the video. If it’s completely unmanageable you may just need a little more flour. I’m glad you enjoyed it though! 🙂
Your recipe is incorrect you state one loaf and then ask the preparer to prepare 2 loaf pans. Come on!!!!
Hi Donna! You can see step #2 under the baking instructions on why you need a second pan and what to do if you don’t have one. It’s ideal to have two loaf pans but not an absolute necessity. You don’t get two loaves out of this, but you do end up using 2 loaf pans. I hope this helps. 🙂
Sam, The bread was terrific! Thanks for sharing the recipe. I’m going to try your same recipe for a round loaf. Delicious! Donna
I’m making this recipe for a 2nd time. When I went to re-read the directions I saw that this actually makes 2 loaves? I made it into one banneton the first time I made it. It seemed to raise beautifully and looked decent so I’m confused. If I split this into 2 loaves will it make 2 smaller loaves or will they raise up and be nice sized loaves? I do prefer a bigger loaf for my family, it just fits better.
Hi Joy! This only makes one loaf, although you do end up using 2 loaf pans if you have them. 🙂
This was my first time making sourdough bread. Your recipe was very easy to follow! My bread came out so good, my family loved it! I will definitely be making it again! Thank you so much for sharing it.
I have mixed feelings about this recipe. does it make tasty bread, yes. However, the crust is always burnt. I have to keep it covered longer and cook it longer and my crust is still dark. I appreciate the internal temperature guide. I never make it quite to that temperature because it is getting too dark.
Hi Wendy! Are you baking in the center rack and is your oven running true to temperature? I’m concerned it may be running hotter than it is saying.
Everything else cooks right in my oven and yes, I put it on the center rack.
Hi.. trying your recipe today.. thankyou. What do I do with the left over starter. Do I feed it or cover it and put back in fridge. There is only like 1/3 cup left..
Hi Jean! I would feed it and then I typically give it an hour or so to rise a little bit and then place in the refrigerator. 🙂