
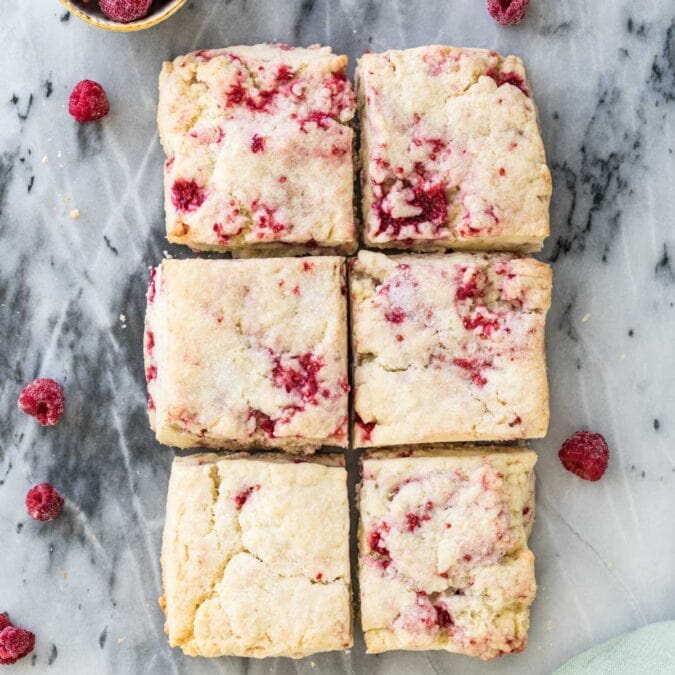
Raspberry Scones
This post may contain affiliate links. As an Amazon Associate I earn from qualifying purchases. Please read my disclosure policy.

These tender, buttery raspberry scones are bursting with the taste of sweet raspberries and can be ready in just under 30 minutes! Recipe includes a how-to video!
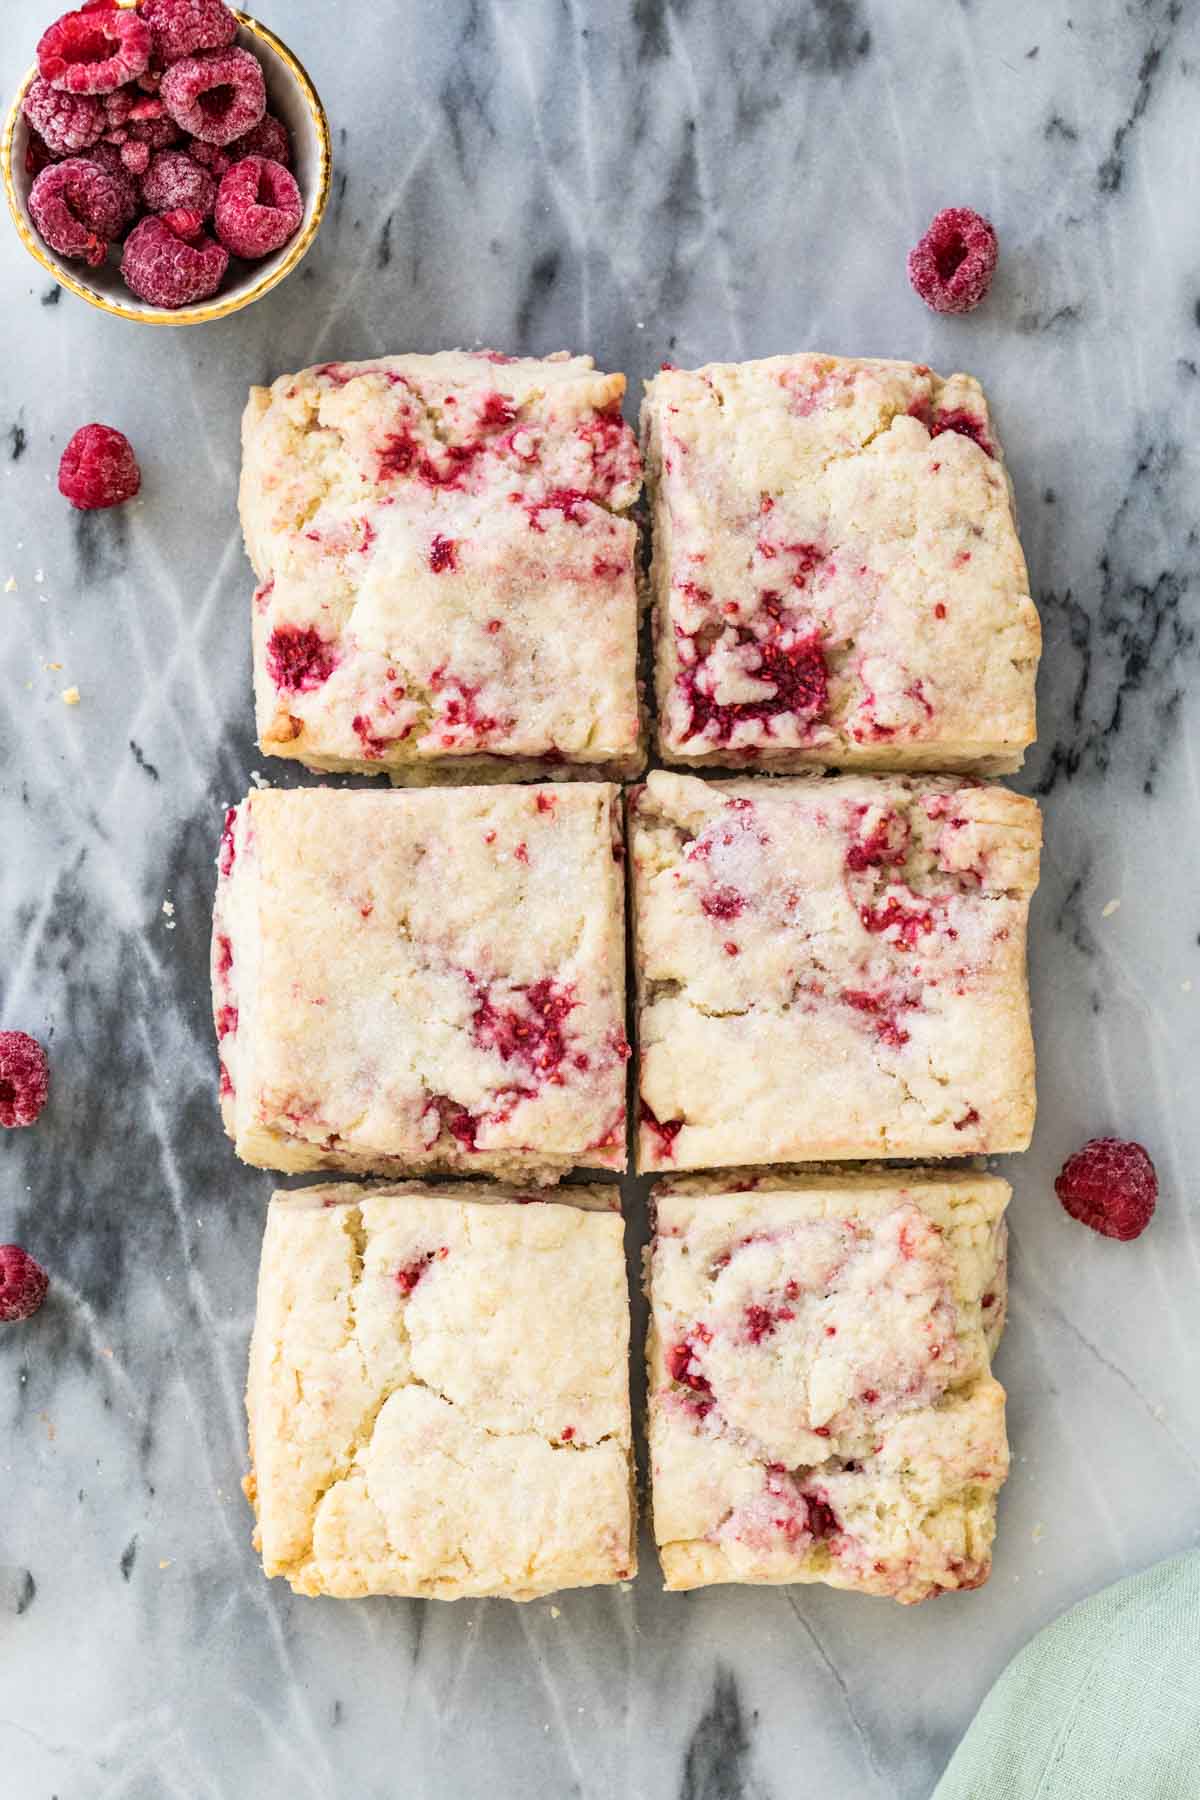
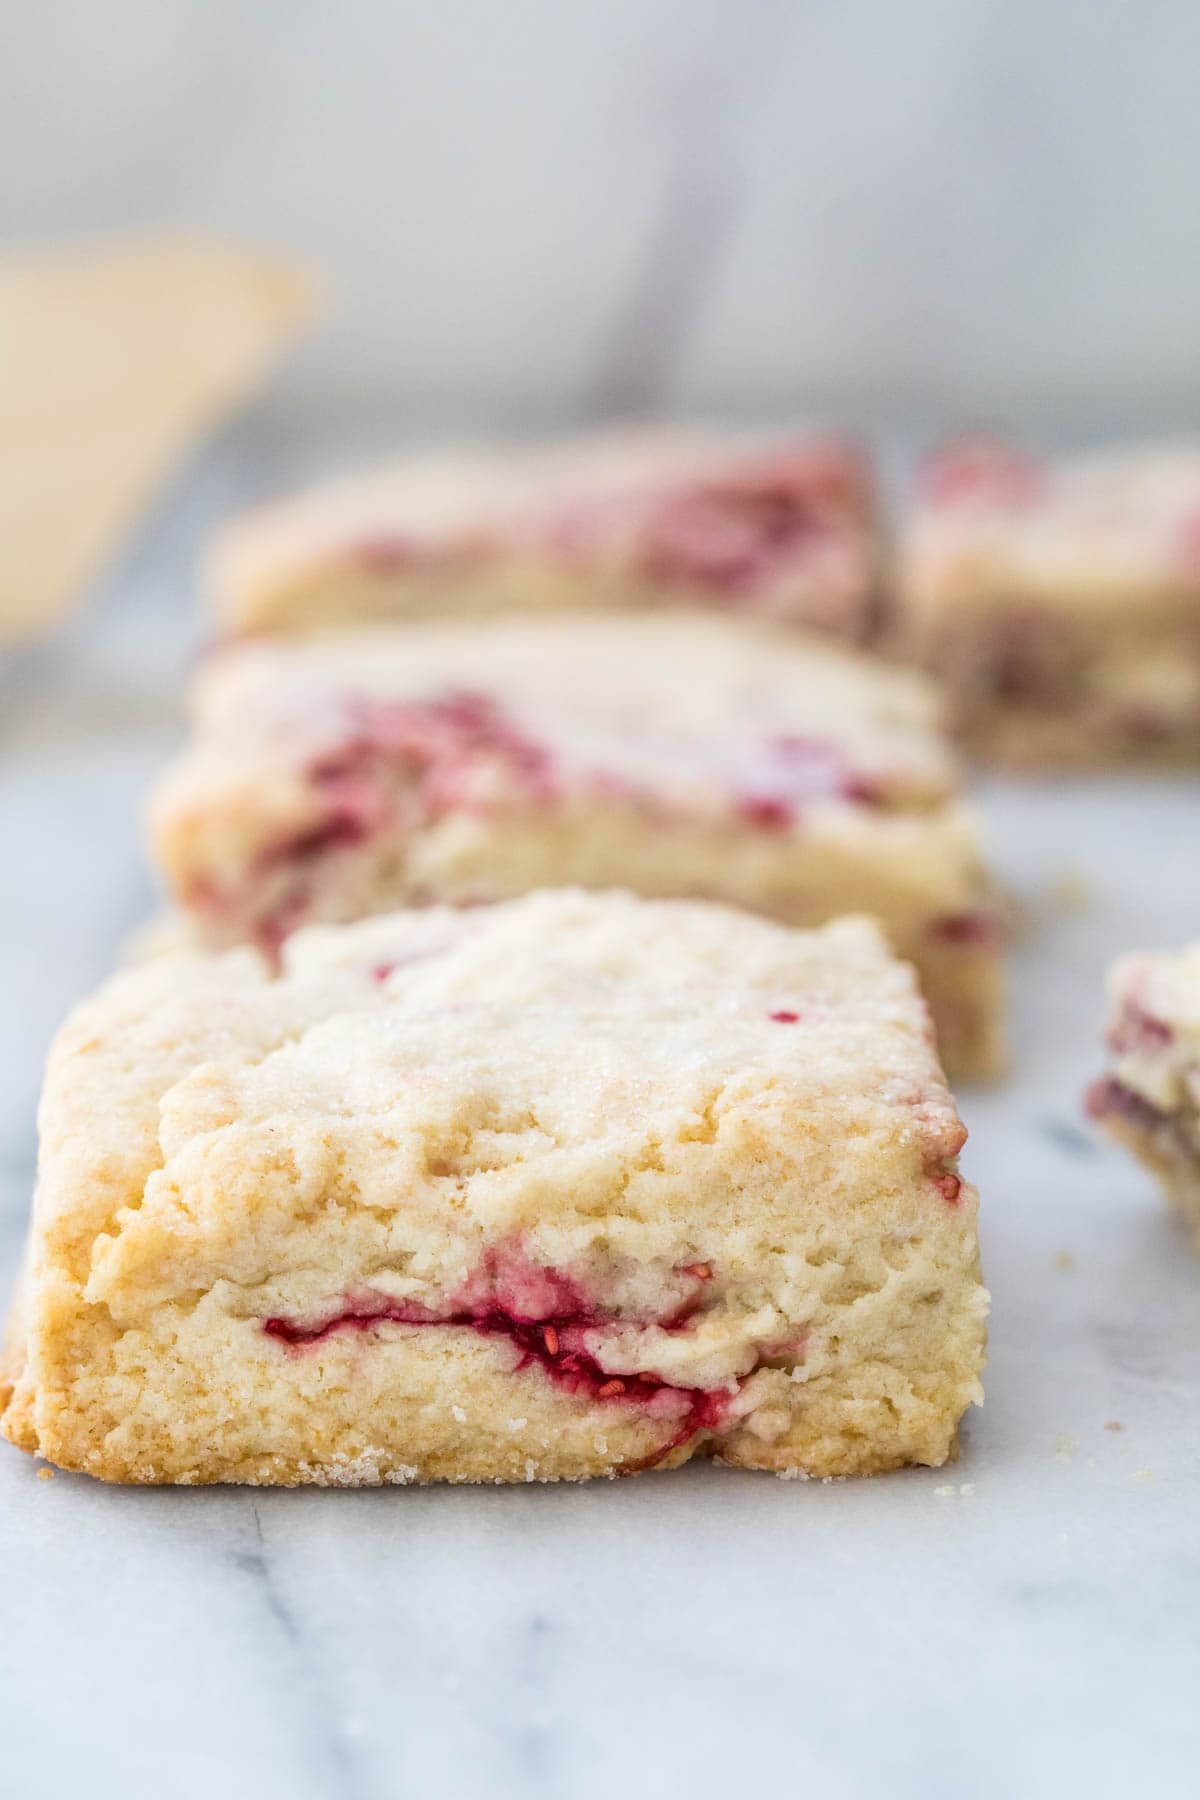
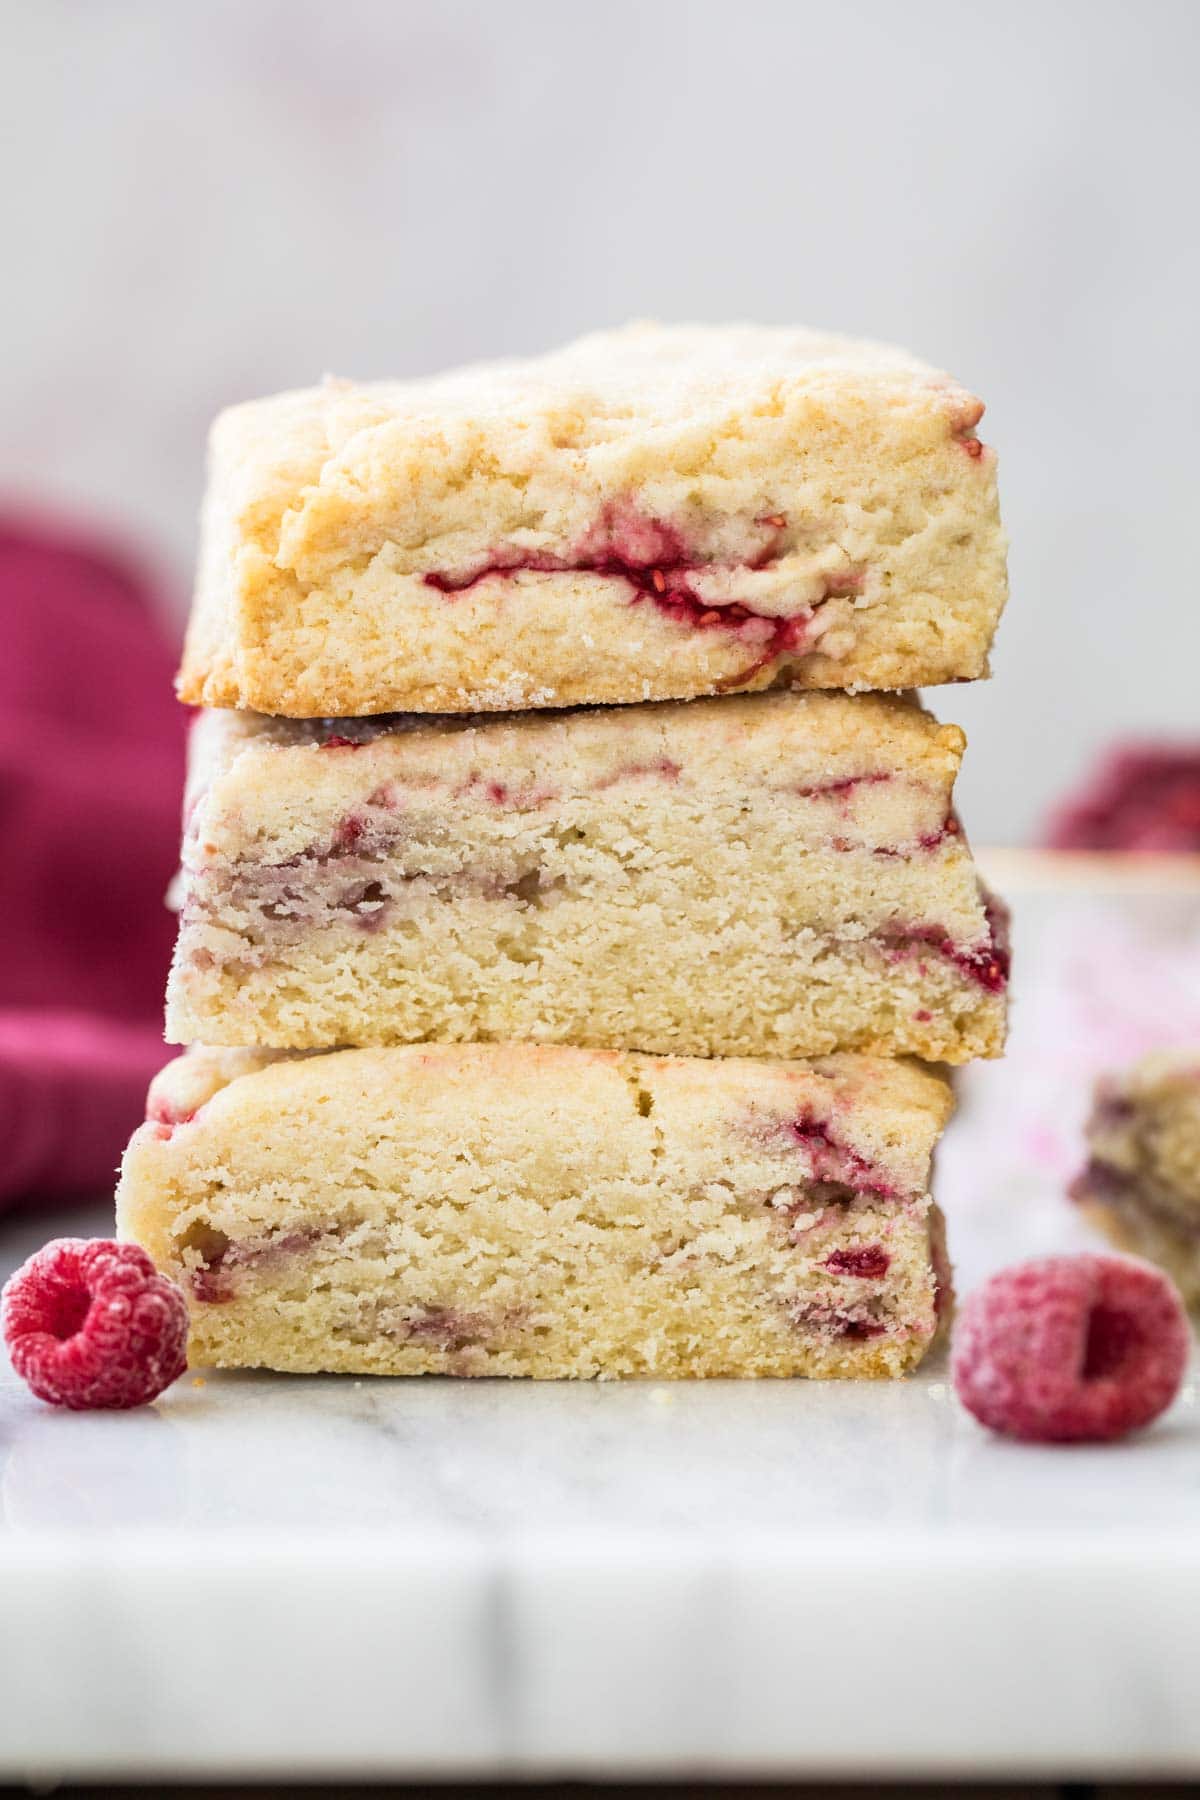
There’s a lot to love about these raspberry scones. They’re tender, buttery, and have just the right amount of sweetness. Bursting with tart, juicy raspberries and topped with a dusting of sugar… they’re the slightly sweetened cousin to my biscuit recipe, and they’re absolutely addictive. My recipe makes six large scones (though of course you can cut into smaller portions) and it’s always impossible for me to eat just one.
Raspberry scones can be ready in under 30 minutes, use basic, pantry staples, and frozen raspberries take a lot of mess and hassle out of the work. I also use a food processor to make things extra quick and easy (and include recipe notes case you don’t have one!).
Those of you who have tried my classic scones will recognize most of the ingredients and process used here, and I think you’ll appreciate how simple the recipe is. Let’s get to it!
What You Need
If you check your cabinets and fridge, you’ll likely already have most of the ingredients you need to make raspberry scones. Let’s go over what you’ll need and why!
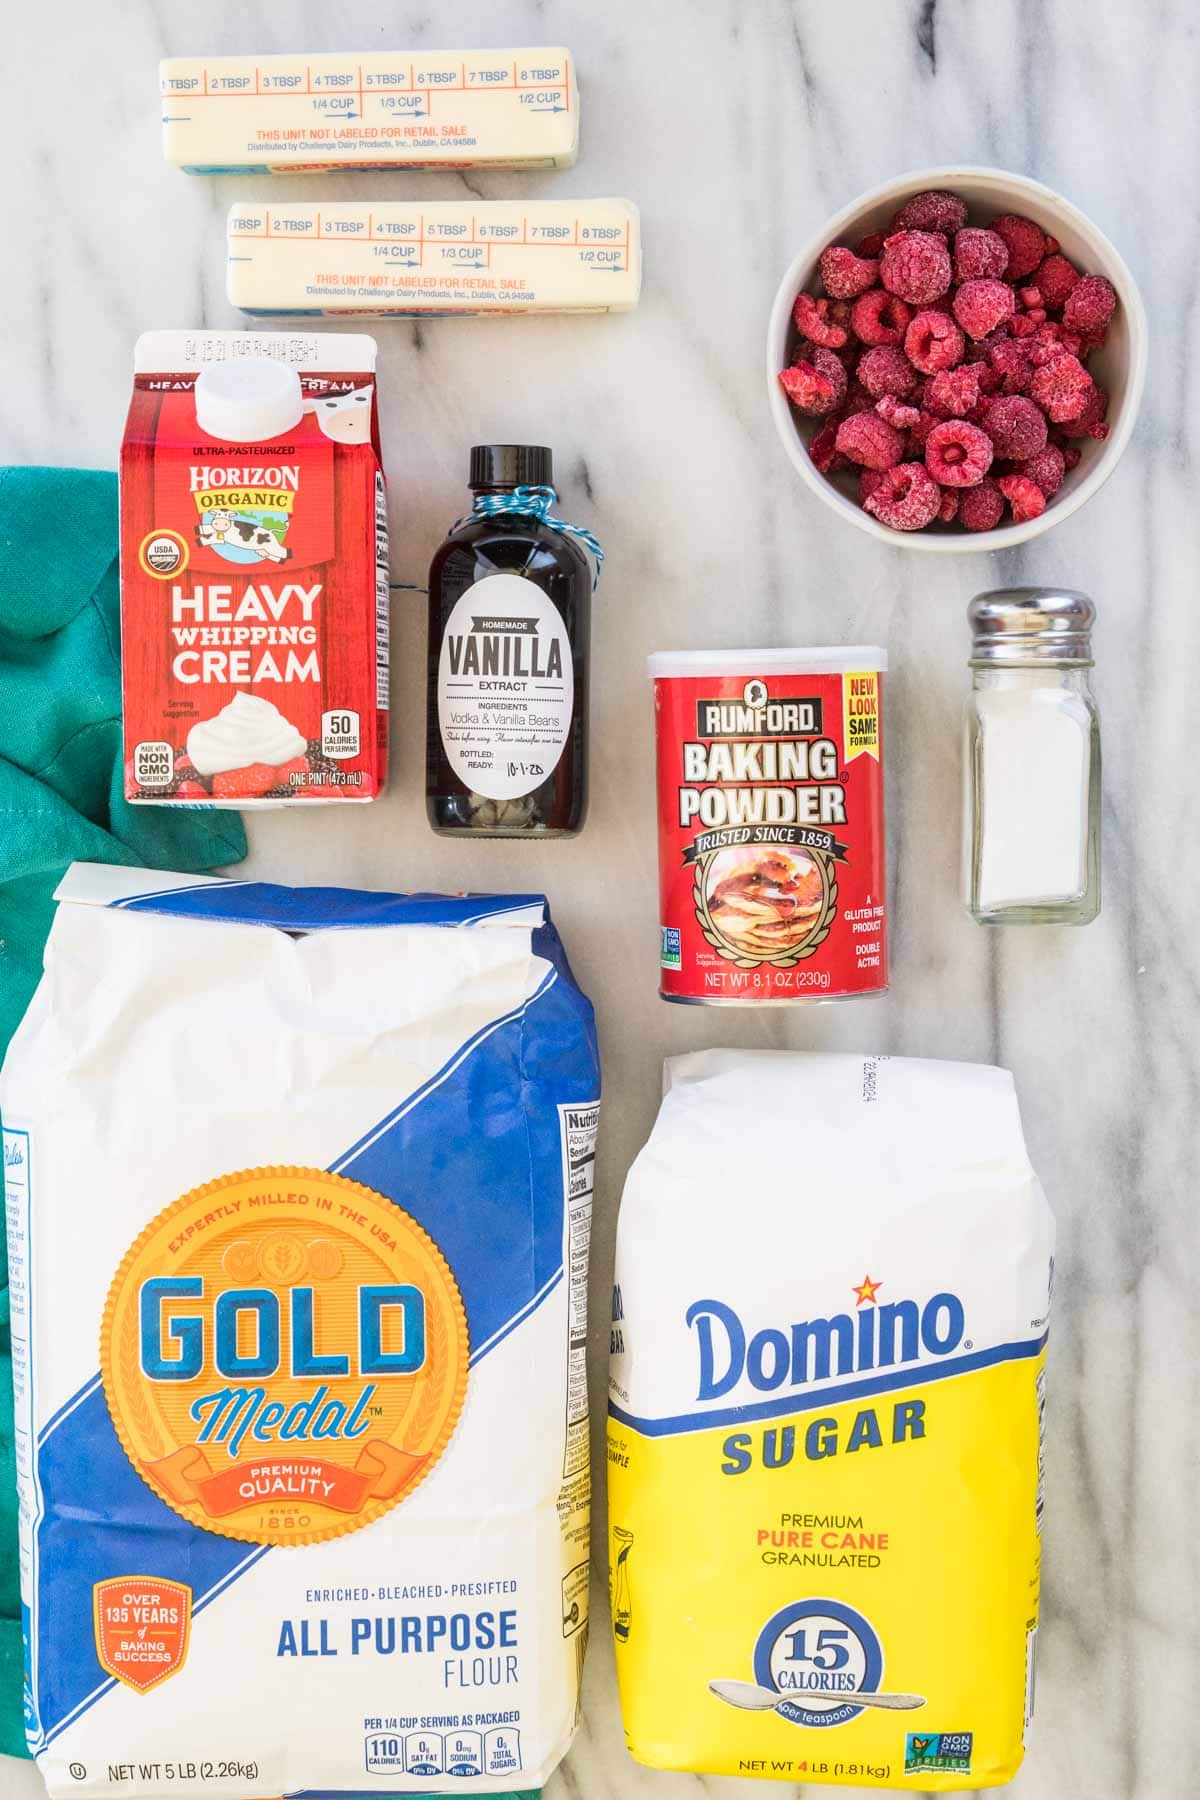
- All-purpose flour. Other flours will not give the raspberry scones the right texture. All-purpose flour yields scones that are tender but don’t fall apart.
- Granulated sugar. This lends sweetness to the scones. An extra sprinkling on top is the perfect way to top them off!
- Salt. Using a little salt balances out the sweetness of the sugar without overpowering the other flavors and making the scones taste salty.
- Baking powder. This help give the scones some lift (and yes, that 1 Tablespoon measurement is correct and not a typo!). I recommend using an aluminum-free brand (like the Rumford I use, pictured above). Baking powder made with aluminum may react with the raspberries and turn your scones blue!
- Butter. Your butter needs to be cold for this recipe (I like to pop it in the freezer for about 15 minutes before I begin). Butter that’s too warm can leave you with messy, flat scones.
- Heavy whipping cream. Heavy cream gives the scones a light and tender texture.
- Vanilla extract. There’s not a lot of vanilla extract in these scones, but the little bit that is gives the scones a nice depth of flavor. Feel free to add a bit of lemon zest (about a Tablespoon or two) in with the butter or a drop of lemon extract with the vanilla extract for a fresh hint of citrus flavor!
- Frozen raspberries. Use frozen raspberries to make your life (or just this recipe) simple to make. They are easier to incorporate into the dough because you don’t have to worry about smushing them or breaking them apart. You can use fresh raspberries, but it will take more time and effort to make it work, and you also introduce more moisture into the raspberry scones, which can make the end result a bit messier. Of course you can also freeze your fresh raspberries for an hour or so to make things easier for yourself!
Remember, this is just an overview of the ingredients I used and why. For the full recipe please scroll down to the bottom of the post!
How To Make Raspberry Scones
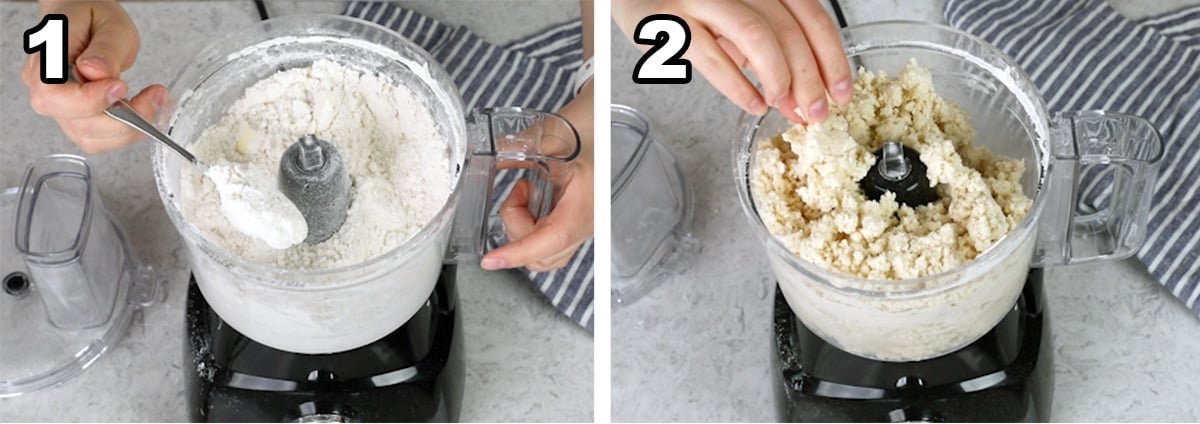
- Pulse together your dry ingredients then scatter (cold) butter pieces over the top and pulse until the butter is cut into the mixture. It will be dry and resemble coarse crumbs with pebbly bits of butter still remaining.
- Add heavy cream and vanilla extract and pulse again until the mixture is beginning to clump together (don’t over-do it!). The dough should hold together if pinched between your thumb and forefinger.
Laminating Raspberry Scone Dough
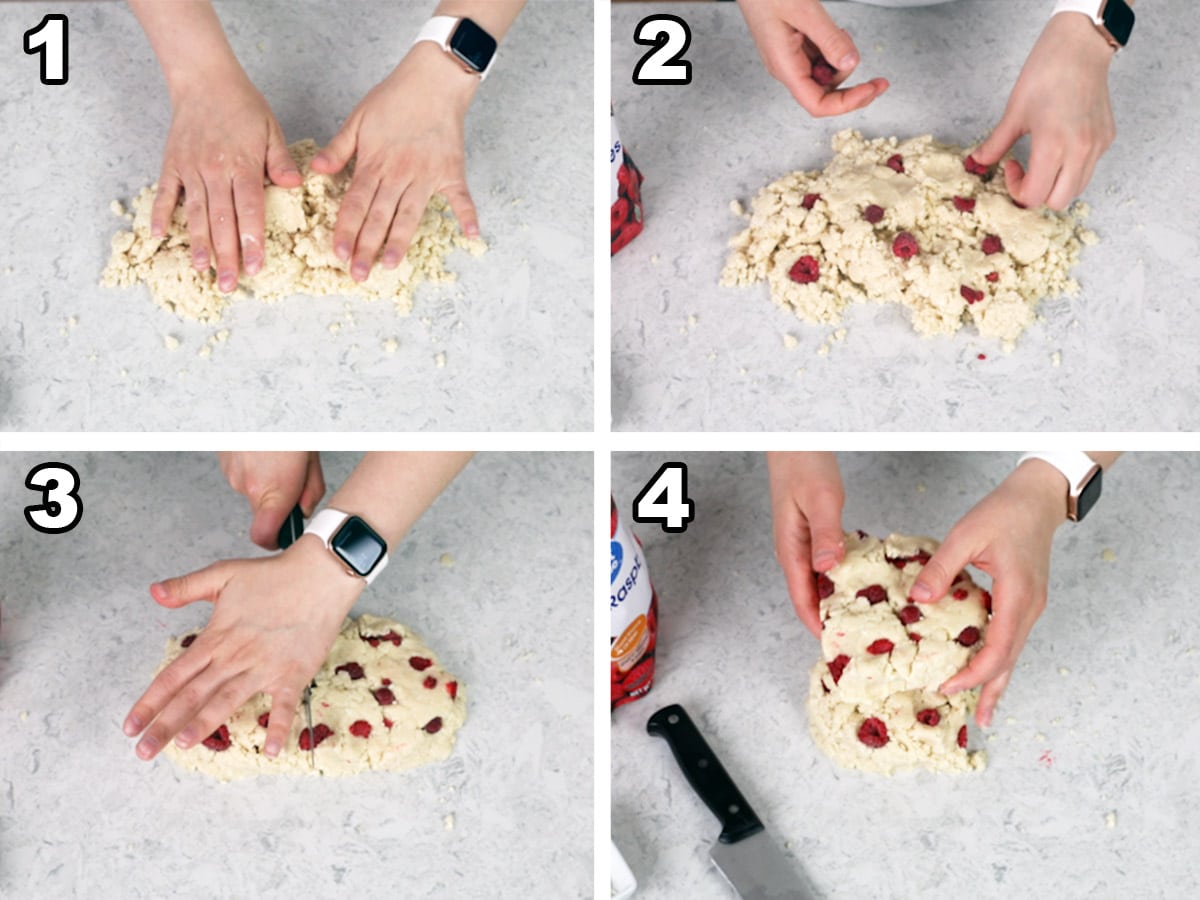
“Laminating” simply refers to the process of folding butter into the dough. I have used a different technique for laminating in the past (seen in my puff pastry, pie crust, and in other scone recipes), but for today’s recipe I tried something slightly different. But cutting and stacking the dough after each turn (rather than folding it over itself), I found the raspberry scones had more distinct layers and were less likely to topple over on themselves in the oven. Here’s how it’s done:
- Transfer the dough to a clean and lightly floured surface and use your hands to loosely work it together (it could be quite crumbly still!)
- Press the frozen raspberries into the dough (you can use fresh raspberries but they will be harder to work into the dough).
- Form the dough into a rectangle (well, as rectangular of a shape as is possible anyway) and use a knife to cut it in half. Anytime you’re cutting scone dough, always press straight down, never saw through it or your edges won’t be as clean and your scones could topple over in the oven!
- Time to laminate! Place one half of dough over the other and firmly press the two together until you once again have a rectangle that’s same size as the first! Repeat this process of laminating the dough 3-4 more times.
Baking
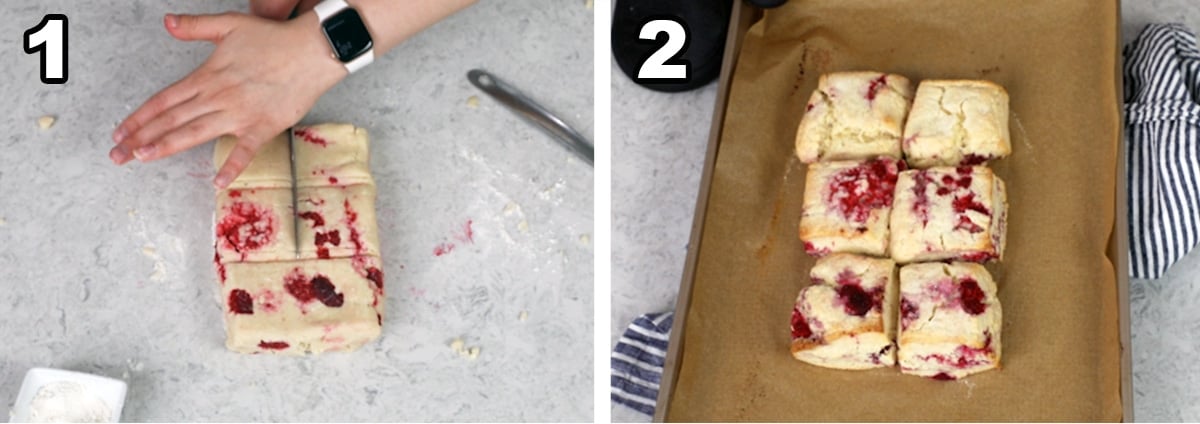
- Without sawing, cut the dough into 6 evenly sized squares (or even-ish sized) and place 1-2 inches apart on a parchment paper lined baking sheet. I would’ve done better to space them a bit more in the photos above; if you keep them that close together just be aware that you’ll need more time in the oven than is indicated.
- Bake raspberry scones until the centers are done and edges are beginning to turn light golden brown and enjoy while they are warm, but not hot!
Frequently Asked Questions
If you don’t eat all of them within 2 days, you can wrap each individual scone in plastic wrap and and place in an airtight container or a ziplock bag.
Frozen raspberries are definitely preferable, but can use fresh raspberries. They will be a bit harder to press into the dough without breaking or smushing them, but you can do it with some patience and a gentle touch.
If your baking powder contains aluminum it may turn your scones blue or green when it reacts to the acidity of the raspberries, and may even leave them with a metallic taste. Opt for an aluminum-free baking powder (I use Rumford brand) to prevent this!
Flat scones are so disappointing when you are expecting them to have some height! There are several reasons this might have happened:
First, check the date on your baking powder; if it is old and expired then it will not work properly. Second, consider if you might have over-worked the dough. Handle it only as much as is necessary. Finally, make sure your ingredients were as cold as possible before you begin. If the butter became too warm and started to melt, this could cause your scones to be flat.
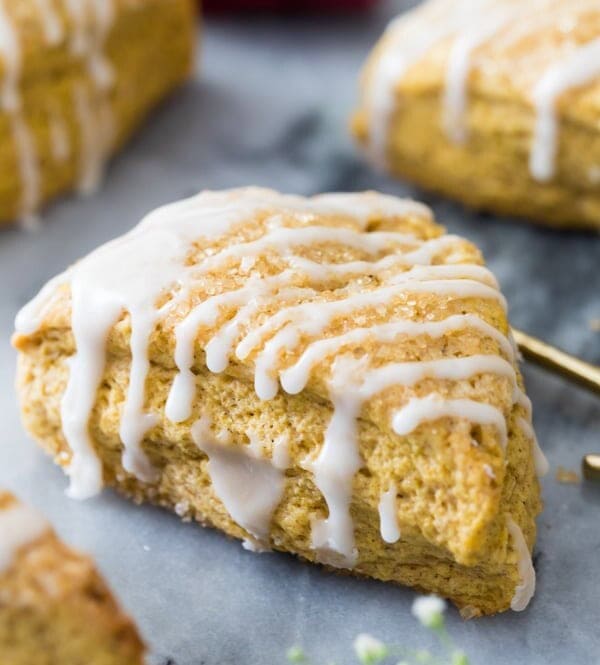
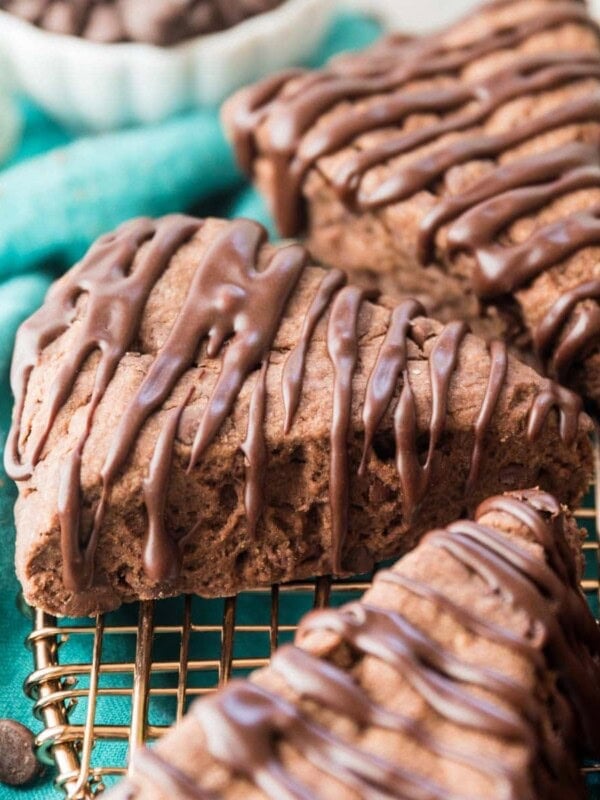
More Scone Recipes To Try:

Enjoy!
Let’s bake together! Make sure to check out the how-to VIDEO in the recipe card!
Raspberry Scones
Equipment
Ingredients
- 3 cups (375 g) all-purpose flour
- 6 Tablespoons (75 g) granulated sugar
- 1 Tablespoon baking powder
- ½ teaspoon salt
- 12 Tablespoons (170 g) cold unsalted butter
- ¾ cup (175 ml) cold heavy cream, plus additional for brushing over scones (brushing is optional)
- ¼ teaspoon vanilla extract
- ½ heaping cup frozen raspberries, do not thaw
- Coarse sugar for sprinkling, optional
Instructions
- Preheat oven to 375F (190C) and line a baking sheet with parchment paper (alternatively bake scones directly on ungreased baking sheet). Set aside.
- Add flour, sugar, baking powder and salt in the basin of a food processor fitted with a chopping/mixing blade and pulse briefly to combine.3 cups (375 g) all-purpose flour, 6 Tablespoons (75 g) granulated sugar, 1 Tablespoon baking powder, ½ teaspoon salt
- Cut butter into 12 pieces and scatter over the top of the flour mixture. Pulse again until butter is cut into pebble-sized pieces into the flour.12 Tablespoons (170 g) cold unsalted butter
- Measure out cold cream and add vanilla extract. Stir gently to combine, then pour mixture evenly over the surface of the flour/butter. Pulse again until mixture begins to clump together (it may still be a bit crumbly, this is fine, and better than overworking the dough!).¾ cup (175 ml) cold heavy cream, ¼ teaspoon vanilla extract
- Transfer to a clean, lightly floured surface and scatter frozen raspberries over the top. Work dough and raspberries together into a cohesive rectangle.½ heaping cup frozen raspberries
- Use a knife to cut the dough in half and place the first half directly over the second. Press down to work the dough back into a cohesive, rectangular square (we are “laminating” the dough to help encourage light flaky layers, much like with biscuits). Repeat this process 3-4 more times until you have a rectangle that is approximately 8×5” (20x12cm).
- Using a sharp knife, cut into six even squares, pressing straight down with the knife and never sawing (which can cause lopsided scones).
- Space scones 1-2” apart on baking sheet and, if desired, lightly brush tops with additional heavy cream and sprinkle with coarse sugar.Coarse sugar for sprinkling
- Transfer to oven and bake for 15-17 minutes or until scones are cooked through and light golden brown on the edges. Allow to cool on baking sheet before enjoying!
Notes
Butter
The colder your butter the better, and the lighter more tender, and flakier your scones will be! I like to place mine in the freezer 15-30 minutes before I begin.Food Processor
If you do not have a food processor you can either grate the butter into the flour mixture or cut it in with a pastry cutter instead. After combining it with the flour, stir in the heavy cream and vanilla extract. The dough will seem dry, but it should ultimately come together but requires a bit more manual work (and you do run the risk of over-handling the dough and making it too warm).Storing
Scones are best enjoyed fresh and warm! If you have any leftovers they will keep for 24-48 hours in an airtight container at room temperature. Leftover raspberry scones may also be frozen for several months.Nutrition
Nutrition information is automatically calculated, so should only be used as an approximation.
Like this? Leave a comment below!


Amazing recipe! The texture is awesome! Thank you for sharing!!!
So glad you enjoyed them, Jackie! Thanks for the review 🩷
This was one of the best scone recipes I’ve ever made, it was like a scone cake texture, not at all dry. My husband absolutely loved it! now I’m going to go back and try and make different flavored scones with this recipe, I did use stevia in place of regular sugar and it still came out wonderful. I’m making it again today.
We’re so happy you enjoyed them, Tanya!
Wonderful flavor and texture. The layering is genius! My food processor is a tad too small so flour everywhere and didn’t mix fully; will scale this down next time. Thank you for this recipe!
I’m so glad you enjoyed it so much, Margie! 🙂
Hi Sam! Love your recipes! What are your thoughts about doubling this or any scone recipe? Thank you!
I think this recipe will double just fine. You just have to be careful to not over-work your dough. 🙂
I love your baking style. Your recipes are always perfect. Never too light or too dense, never too sweet or not sweet enough, texture is always spot on and always enough salt! So many recipes lack salt and are lacking in that extra depth of flavor. Thanks for sharing all your recipes. So many of them are my go-to’s.
I have a secret tip when I make my scones that you might find helpful and would be especially helpful with the raspberries in this recipe. I avoid a floury mess in my kitchen as much as possible, so when it’s time to work with the dough, I lay two long strips of plastic wrap layered over each other about 4” creating a large plastic sheet that will be approx 2.5 ft x 2.5 ft. I dump the crumbly dough in the middle and fold over the edges of the plastic wrap to cover the dough and begin pressing the dough together, so no messy hands! Where you use paper towel, I use plastic wrap. If that makes sense lol! Since I placed the dough over plastic wrap, it also protects the counter from being messy. This hack eliminates the need for flour on the counter and no messy hands! I also use that same plastic wrap to wrap my dough and pop it in the freezer or fridge as I like to chill my dough. Sorry for the novel but it’s an awesome hack for an easy and mess free scone making experience lol! It’s even easier if you make a disk. I pull the sides of the plastic wrap together and twist making a sack to form a ball with the dough and then flatten it, bam. Done!
Thank you so much, Glenda! I really appreciate it! I love the idea for the mess free folding I will definitely have to give it a try. It sounds so easy.
I made these without a food processor, and they were harder to come together as you’d advised it might be. I watched the video afterwards (I should have watched it first!!) Next time I will use my food processor and I’m sure they will be easier work with. They still turned out absolutely delicious! I love how you give really helpful hints throughout the video and in your recipes. I have been baking for years and some things I didn’t know (like how to keep biscuits from coming out lopsided, and using a paper towel to press the dough down). I think I’ve found my new favourite website and will be trying your other recipes next!
I’m so glad you enjoyed them so much, Ella! 🙂
Hi I’m not sure where a good place was to ask this, do you have a savory scone recipe?
Hi Jennifer! I don’t have a particular savory scone recipe, but you could use my regular scone recipe, reduce the sugar a bit and add your favorite savory additions. 🙂
These are the best I have made and I think the laminating rather than folding
was the reason. Thanks
I’m so glad to hear this, Susan! Thank you for trying my recipe! 🙂
Can I use a scone pan to make these
Hi Patti! It should work, but we haven’t tried it ourselves to say for sure. You could also just cut the scones into triangles instead of squares and bake as directed, if you’re going for a triangle shape. Enjoy! 😊
Hi, Sam!
I want to send a batch to my sweetheart – do you suppose they’d travel well? And have you any tips or tricks for mailing baked goods in general? Thank you!
Hi Grace! I would assume these would ship well in an air tight container. Unfortunately I don’t have many tips for shipping as I don’t do it too often. 🙁
Sam, can you use whole milk instead of cream? I’m lactose intolerant so don’t have a substitute for heavy cream, but can use lactose free whole milk. Let me know what you think?
That should work fine here. You may need a little bit less because the milk is thinner. 🙂
Sam
I have made the Lemon Poppy Seed, the mini chocolate chips and the pumpkin and they all turned out great. Is there a reason why some of them you suggest grating the butter while others you slice? Seems the ones that are grated are flakier. My wife and I were wondering. Thanks for all the wonderful recipes, thanks to you have become a Ninja in the kitchen.
Russell
Hi Russell! In my older recipes I always grated the butter. I had a lot of complaints that the dough simply wouldn’t come together so I switched to using the food processor which has the same effect. You could grate the butter in the newer ones that use the food processor if you’d like. 🙂
Easier yet is to put the cream in the freezer to get it ultra cold. Melt the butter, then pour it into the chilled cream. It will immediately form fat globular- then pour into the dry ingredients. Easy peasy!
Granted, you have an extra pot/measuring cup to wash from heating the butter, but…
My husband and sister loved these as is; just a tad too much extract for me but doesn’t interfere with my consumption!
I’m glad everyone enjoyed them! 🙂
These are delicious, of course, but we’re way too much trouble to make. I would change Step 4 to say “continue to work dough with a spatula until it is beginning to form a ball.” Then you can remove it from the bowl and fold in the berries. I dumped it out too early and now my counter looks like a brutal murder scene, and the scones are a horrible color. Fortunately, the taste trumps everything for me, and I know how to do it right with the rest of the berries. Oh, and I had to make an extra trip to the store to get the berries, because when I went to get them, I got distracted by ice cream and forgot the berries! (Typical man, I know)
Bottom line, I have a big batch of wonderful scones!
I’m glad you enjoyed them! 🙂
Hi Sam! I have a ton of fresh raspberries in my fridge. Can I use them instead of frozen? Thanks!
Hi Liz! That should work fine here, it’s just a little more challenging to work them in. 🙂
Just take your fresh raspberries and put in freezer for an hour and proceed with recipe. They will be perfect! Sams does a ton of trial/error before she posts and if you tweak they will be outstanding as all her recipes are.
These were so good! I did have to add some more heavy cream because the dough was to crumbly. Everyone in my family loved it!
I am so glad that they were a hit, Rachel. Thanks for trying my recipe and for commenting. Enjoy! 🙂
would it be possible to add white chocolate chips to this recipe?
Hi Andie! I think that will work just fine. I would add them with the raspberries. 🙂
Sam,
When you were ill the last time I emailed you about the honey and lemon. I did not say raspberries and lemon. 🙂
I hope you are on the mend.
No matter whether the recipe is old or new, you have used my favorite fruit combo with the combining of raspberries and lemon. The only thing in the world better with raspberries would be dark chocolate. This recipe will be going into my Sam file. I have 2 food fills on my note.
Pinterest and Sugar Spun Run. Closing with a feel better Samantha prayer and a hug. Fondly, Pat
Haha! Sorry Pat, I’m easily confused 😉
I’m feeling much better than I did earlier in the week, thank you! Thanks so much for the kind words, and I agree with you about the raspberries and dark chocolate (SO divine!). I am so honored to have my own file on your note!
Thanks again, Pat, your comment has made me feel even better 🙂
Oh my goodness this recipes rocks. I have been researching scones now for the past 3 years. Sam your recipe is absolutely amazing. My hobby is baking and everyone of your recipe are simply the best ever. I love all your recipes. This scone with the raspberries is refreshing as can be. The most delicious scone full of flavor. What a talent you have. Thank you for all your incredible recipes. This one hit it out of the park for sure❤
I’m so glad you enjoy them so much, Lynette! 🙂